Installing Tiny Core Linux on the virtual machine
Start the virtual machine that you created and follow these steps:
Choose the installation option shown in the following screen capture:

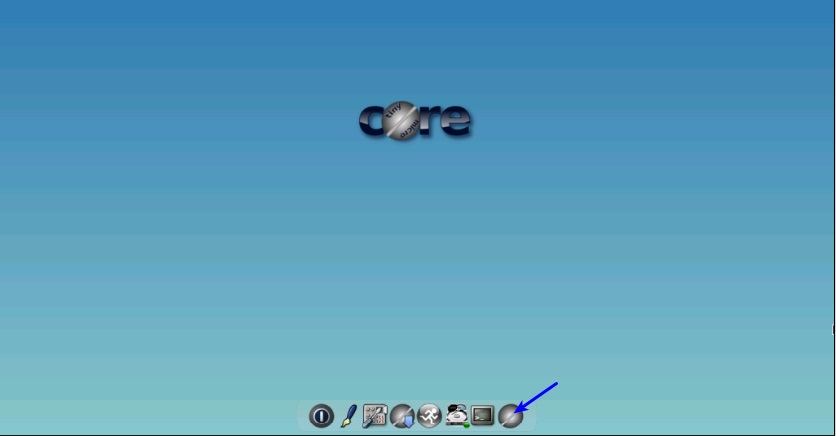
Run the Tiny Core installer by clicking TC_Install:
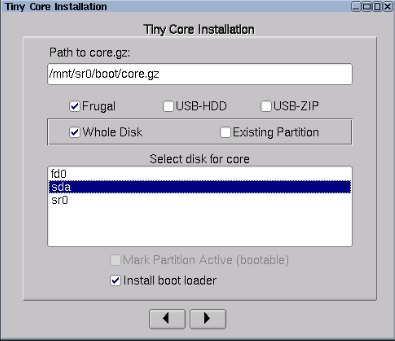
Start the Tiny Core installation and follow these panels to install it on an empty hard drive:
Leave the pre-filled path as core.gz (default path).
Select the check box Whole Disk and select sda as the core disk.
Any user files and extensions are stored outside the base operating system.
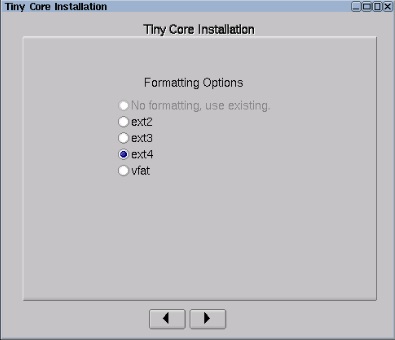
Format the new partition. It is recommended that you select the ext4 option to support the Linux permissions.
If you want to use additional boot codes, such as screen resolution or keyboard mapping, enter them now.
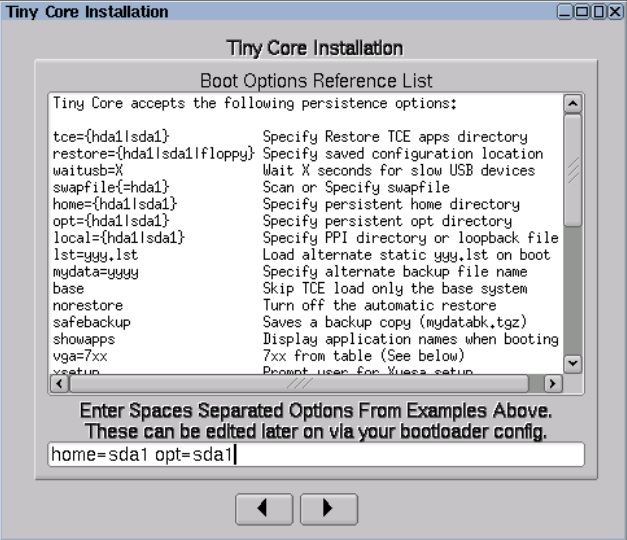
Set the location of the persistent home directory home=sda1.
Set the location of the persistent opt directory opt=sda1.
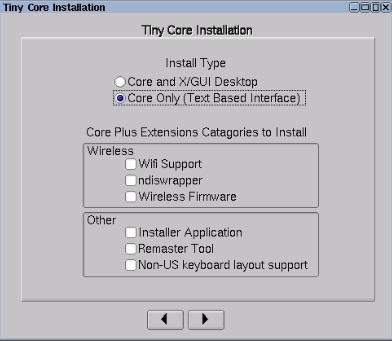
Select the Core Only (Text Based Interface) option to have a virtual machine with only the CLI.
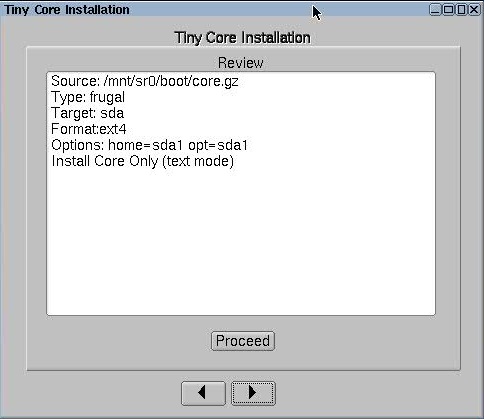
If everything is OK, click Proceed.
The time required varies depending on the size of your hard drive.
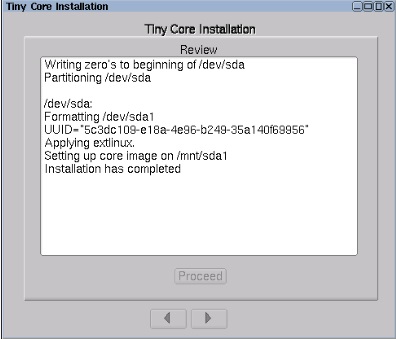
Tiny Core Linux is now installed.
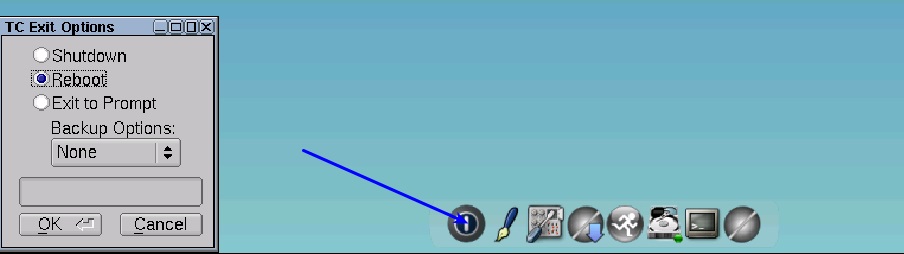
Restart the machine by clicking Exit, selecting Reboot, and clicking OK.
By choosing to reboot, you ensure the data persistence. Do not use Shutdown at this stage.