The CPM Dashboard and Menu
Before using the procedures in this chapter, install the IBM BigFix Server, BigFix Console, and at least one BigFix Agent. In addition, install the CPM for Mac server, deploy the CPM for Mac clients, and update their pattern files updated.
Open the BigFix Console using the shortcut on your desktop, or your preferred method. When prompted, log in as a Master Console Operator.
Tips for Navigating the CPM Console
- Use one of the following methods to access the CPM Console:
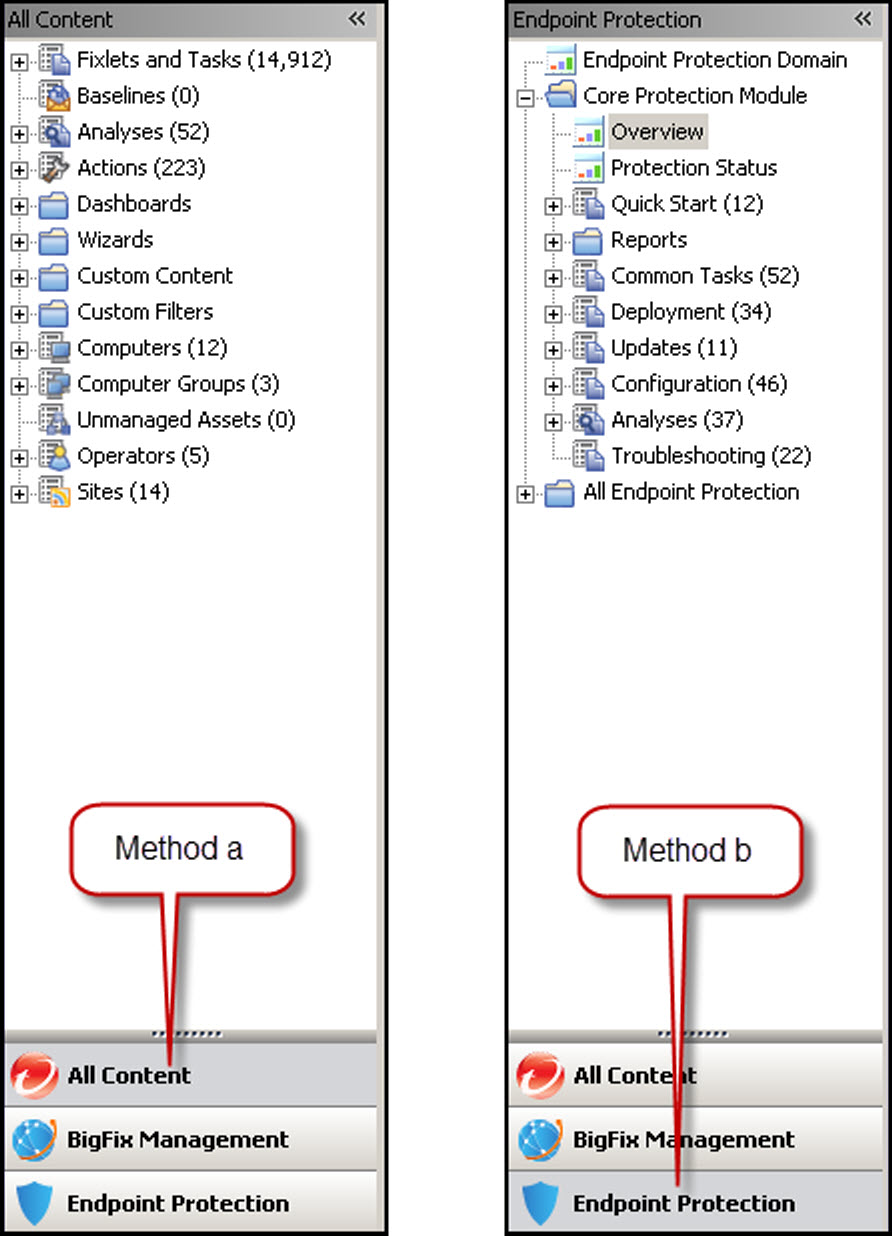
- All Contents Menu Method
- Select the All Contents menu item at the bottom left of the BigFix Console window.
- In the navigation tree, go to Fixlets and Tasks > All > By Site > Trend Micro Core Protection Module.
- Select tasks by clicking one of the following folders: By Source Severity, By Category, By Source, or By Source Release Date.
- Endpoint Protection Menu Method
- Select the Endpoint Protection menu item at the bottom left of the BigFix Console window.
- In the navigation tree, select Core Protection Module.
- Click one of the following categories: Overview, Protection Status, Quick Start, Reports, Common Tasks, Deployments, Updates, Configuration, Analyses, or Troubleshooting.
Note: This guide mainly uses the second method. - All Contents Menu Method
- Display the CPM Console Dashboard by clicking the Endpoint Protection menu item, the Core Protection Module folder in the tree, and the Overview subcategory.
- Click a category, such as Updates.
- Find any task, including custom tasks, in the right-upper pane. Tasks can be sorted alphabetically by clicking the Name column heading. Click a Task to open it and view its description.
- Navigate back, forward, refresh the console data, or control how much data displays from the button above the navigation tree.
- When working on a specific task, you can use the buttons above the Description window to Take Action, Edit, Copy, Export, Hide Locally or Globally, and (sometimes) Remove.
- Target certain computers when the Task is open by clicking one of the sub-tabs that appears: Description (default), Details, Applicable Computers, and Action History.
- Run the Task by clicking the link that appears below the Action window.
- Add or remove display columns by right-clicking any column header and then selecting or clearing from the menu that appears.
- Bundle configuration settings into a Task, attach it to selected endpoints, and schedule it to run automatically.
- To configure components:
- Use the Endpoint Protection > Core Protection Module > Configuration > [component to be configured] to make your security and firewall configurations. For example, you can access the tasks for setting up the behavior of client scans.
- Select the task in the list on the right or click the Create [task name] button.
Note: Windows opened by clicking the create-a-task button can be closed by clicking the
X in the upper-right corner.