Configuring the Default Scan Settings
About this task
Whenever you run the default on-demand scan, the settings applied are those that you configured for the default On-Demand Scan Settings. The relationship between these is shown in the following figure.
Procedure
- From the console menu, click Endpoint Protection on the bottom left pane.
- From the upper left navigation pane, go to . The On-Demand Scan
Settings Wizard appears.
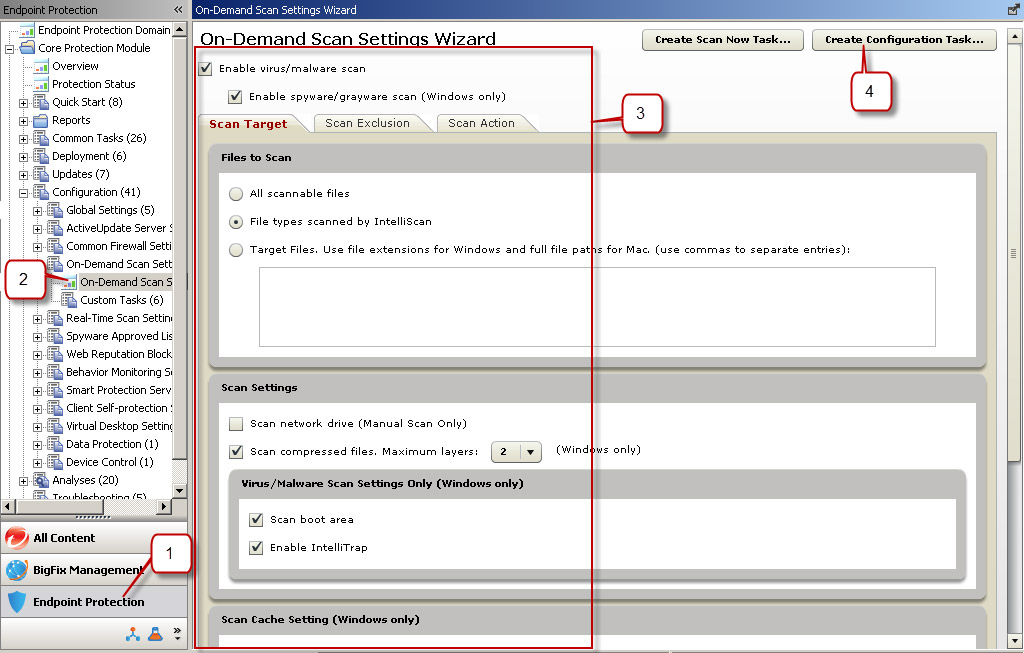
- Make your configurations choices. Options are detailed in Exempting Programs from Spyware Detection.
- Click the Create Configuration Task... button. The Create Task window opens.
- Since this is the default Start Scan Now Task, keep the existing name and click OK to also accept the default Actions and Relevance. The Task is set to be relevant to all CPM clients.
- Click OK. At the prompt, type your private key password, and click OK.
- Wait a few minutes and the Applicable Computers tab displays.
- Click the link in the Action pane to configure the settings.
- In the Take Action window | Target tab, select the applicable computers and click OK.
- Click OK. At the prompt, type your private key password and click OK.
- In the Action | Summary window that opens, monitor the "Status" and "Count" of the Action to confirm that it is "Running" and then "Completed".
- Close any open windows to return to the console view.
Starting a Scan of Relevant Endpoints
About this task
From the tree, go to .