Configuring and Deploying Global Settings
About this task
Global settings apply to all On-Demand and Real-Time scans. You can think of them as a superset, or background, against which all scan policies and associated Tasks are applied. Global settings also apply to both virus/malware and spyware/grayware.
Set your global configurations before creating any on-demand or real-time scans, then create and deploy a Task. You can also create multiple Global Settings Tasks, which are saved in the Dashboard. For example if you want to apply different scan policies to different endpoints according to location. In this case, you need to be mindful about keeping each global setting aligned with its corresponding scan policy and its location.
Configuring Global Settings
Procedure
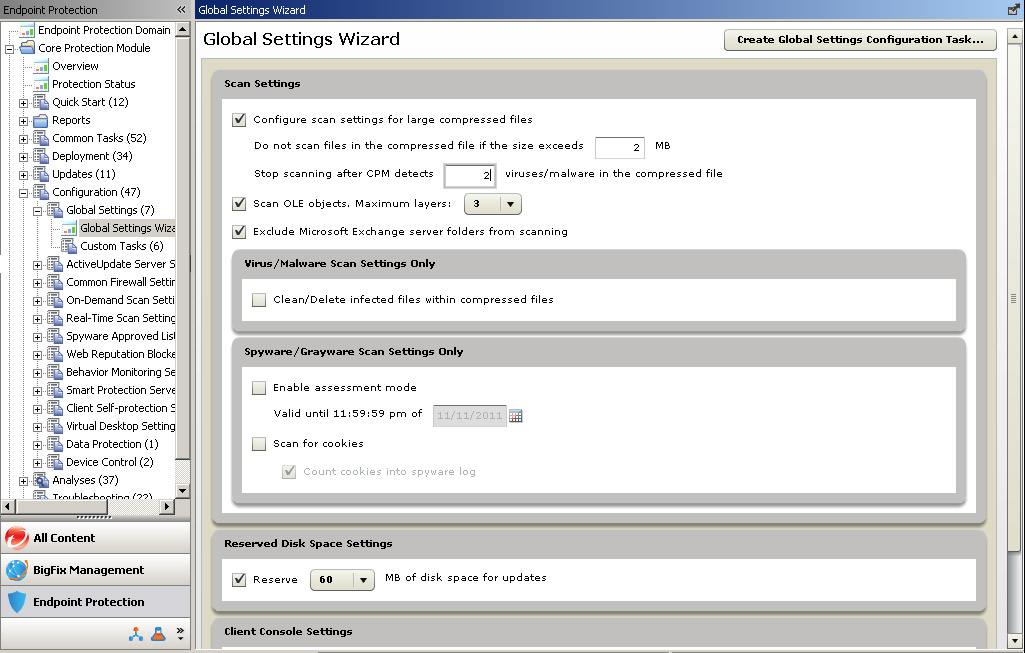
- From the upper left navigation pane, go to . The Global Scan Settings Wizard appears.
Deploying the Global Settings
Procedure
- From the console menu, click Endpoint Protection on the bottom left pane.
- From the upper left navigation pane, go to .
- Deploy the Global Settings by clicking the [task name] in the task list in the right pane.
- In the window that opens, under Actions, click the link to deploy the configuration.
- In the Take Action window that opens, select the relevant computers to which to deploy this Task. Click OK to deploy the configuration.
- Check the Action History tab to see which CPM clients received the update or, if using multiple Tasks to deploy different sets of Global Settings, which settings are in effect for a given endpoint.