Using the CPM Dashboard and Menu

About this task

Open the CPM Console by clicking the Windows™ Start button, then All Programs > IBM BigFix > IBM BigFix Console. When prompted, log in as a Master Console Operator.

Tips for Navigating the Console

About this task

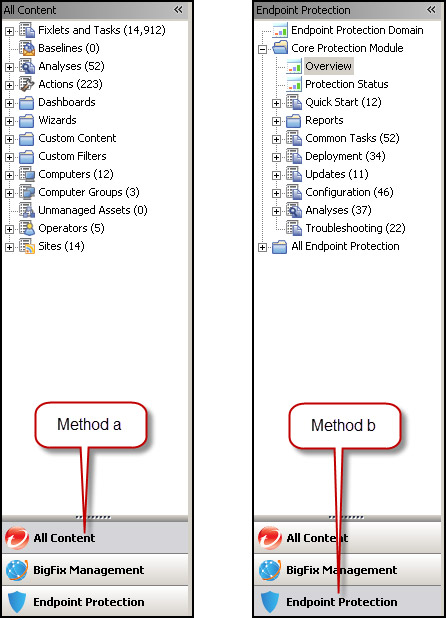
When you open the console, you will notice that there are two systems of navigation: the All Content or Endpoint Protection menus that access different folder trees. Both are shown in the following figure.

Procedure

  1. Use one of the following paths to access the CPM console:
    1. Select the All Contents menu item at the bottom left of the console window. In navigation tree, go to Fixlets and Tasks > All > By Site > Trend Micro Core Protection Module. Select tasks by clicking one of the following folders: By Source Severity, By Category, By Source, By Source Release Date.
    2. Select the Endpoint Protection menu item at the bottom left of the console window. In the navigation tree, select Core Protection Module and click on one of the following categories: Overview, Protection Status, Quick Start Reports Common Tasks Deployments Updates, Configuration Analyses Troubleshooting.
      Note: This manual mainly uses method b.


  2. Display the CPM Console Dashboard by clicking the Endpoint Protection menu item, the Core Protection Module folder in the tree and the Overview subcategory.
  3. Click a category, such as Updates.
  4. Find any task, including custom tasks, in the right upper pane. Tasks can be sorted alphabetically by clicking the Name column heading. Click a Task to open it and view the description.
  5. Navigate back, forward, refresh the console data, or control how much data displays from the button above the navigation tree.
  6. When working on a specific task, you can use the buttons above the Description window to Take Action, Edit, Copy, Export, Hide Locally or Globally, and (sometimes) Remove
  7. Target certain computers when the Task is open by clicking one of the sub-tabs that appears: Description (default), Details, Applicable Computers, and Action History.
  8. Run the Task by clicking the link that appears below the Action window.
  9. Add or remove display columns by right-clicking any column header and then selecting or de-selecting from the pop-up menu that appears.
  10. Bundle configuration settings into a Task, attach it to selected endpoints, and schedule it to run automatically.
  11. To configure components:
    1. Use the Endpoint Protection > Core Protection Module > Configuration > [component to be configured] to make your security and firewall configurations. For example, you can access the tasks for setting up the behavior of client scans.
    2. Select the task in the list on the right or click the Create [task name] button.
    Note: Windows by clicking the create-a-task button can be closed by clicking the X in the upper right corner.