Creating Custom Content
Use the Custom Content Wizard screen to create custom content.
The WebUI application allows operators with the appropriate permissions to create new Fixlet
content within the WebUI. The operator can create custom content by filling the required fields in
the custom content creation wizard. The below listed fields in the custom content creation wizard
are mandatory to create custom content:
- Name: Enter a desired name for the custom content.
- Relevance: Enter the required relevance.
- Action: Enter the action script.
- Site: Enter the site to which you want to deploy the custom content.
Note: Though all the fields are not mandatory, it is recommended to enter the details in
non-mandatory fields.
Creating Custom Content
- To get to the custom content creation page in the global navigation, click Apps > select Custom from the drop-down, and then click Create Custom Content button.
- On the Create Custom Content Wizard screen, enter the name, add the task description, relevance,
and actionscript accordingly.
- Add Task Descriptions
- Add task descriptions using the Rich Text Format (RTF) or HTML editors; the Use HTML Editor/Use Rich Text Editor link toggles between them. The two editors are not kept in sync. In other words, changes made in one will not be replicated when you switch to the other. Click Save to save the contents of the active editor; any changes made in the other editor will be lost.
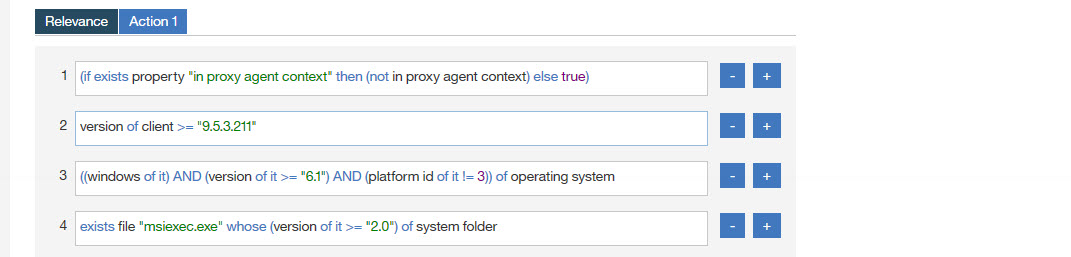
- Add Task Relevance
- Click the boxed + and – controls to insert or
remove a clause. An asterisk next to a tab name indicates that a
change was made on that tab. Changes made on this page to Relevance
created in the BigFix console using the Conditional Relevance option
will subsequently appear in the console as Relevance clauses.
For more information about adding Relevance, see the BigFix Console Operators Guide.
- Add Task Actions
- Use the editor on the Custom Content Wizard page to modify an action. A
bolded tab name marks the default action. Actions cannot be added or removed using this editor.

- Add Task Properties
- Use the property fields on the Custom Content Wizard page to add or change
property information. Add information appropriate to the task, for example, Common Vulnerabilities
and Exposures (CVE) ID for patch-related tasks.
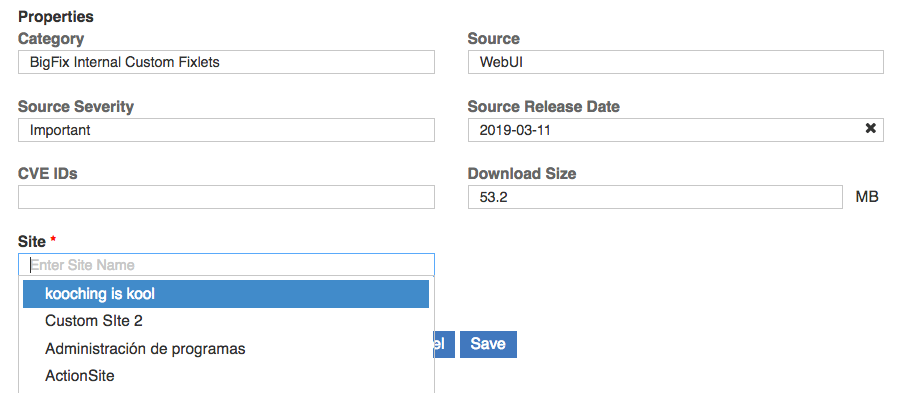
- Category - Type of task, for example, patch or software distribution.
- Download size - Used when a file is distributed with the task (as for software, or a patch).
- Source - Source of associated file, for example, a patch from Microsoft.
- Source Release Date - Date a piece of software or patch was released.
- Source Severity - Describes the level of risk associated with the problem fixed by a patch.
- CVE IDs - The CVE ID system number of a patch.
- Site – Custom content is saved to the selected site.Important: Non-Master Operators can only save to their operator site and to the custom content sites that they have write permission.Important: Master Operators can only save to custom site and the master action site.