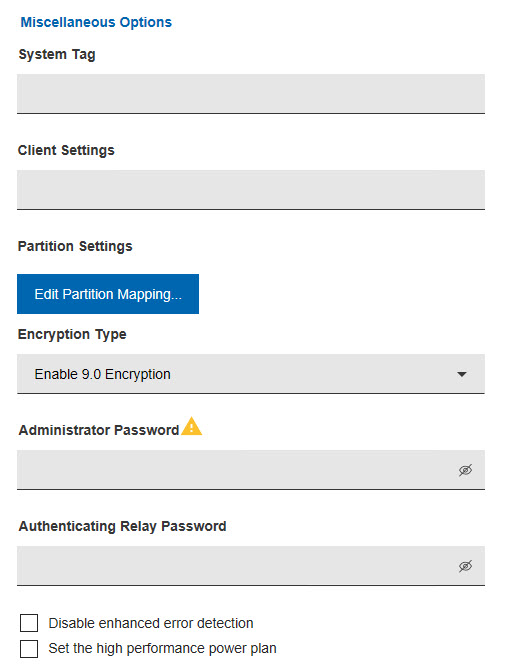
Miscellaneous Options
In the Deploy Image to Computer dashboard, you can specify a set of options to customize the deployment for your specific environment.
Use the Miscellaneous Options section of the dashboard to specify environment-specific options to be used for the deployment.
SystemTag and
the specified value is created under the key
HKEY_LOCAL_MACHINE\SOFTWARE\BigFix\EnterpriseClient\ImageInfoHKEY_LOCAL_MACHINE\SOFTWARE\Wow6432Node\BigFix\EnterpriseClient\ImageInfoSystemTag registry key and its value as relevance to apply your action and reset
that key as the first step of your action to prevent it from being run twice.You can specify Client Settings to
list named variables that are assigned to the deployed computer.
The values you assign can be used either as labels to identify computers
with specific roles or as filters in Fixlet actions and in Fixlet
relevance to exclude an action on a target. You must specify the variables
in a NAME:VALUE format. If you specify multiple variables,
each one must be separated by a vertical bar |
After a deployment, you can display these values in the BigFix console by selecting the specified
computer, and clicking Edit Computer Settings
. The settings are listed under Custom
Settings.
Examples of how you can use the client settings field to configure the target after a deployment are available on the BigFix wiki.
A complete list of available client configuration (custom) settings, and a description of how to use them is available at this link: Configuration Settings.
Select Enable Administrator to enable the Administrator account on the target system during the deployment process of captured images.
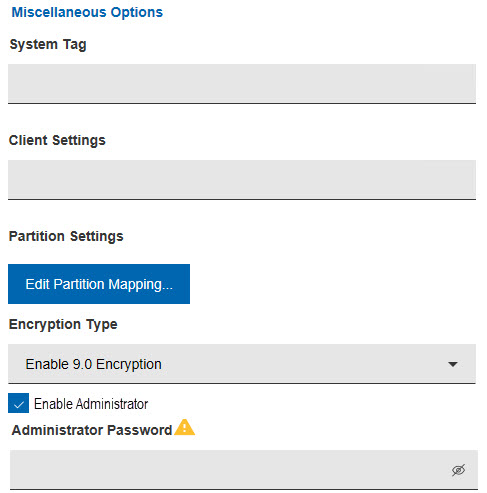
When you deploy images created from installation media (ISO), the Administrator user is always enabled and you must always supply the corresponding password. For further information about enabling users, see Migrate User Settings.
Setting Secure Password Transfer
If you are using BigFix version 9.0 or later on the server and clients, You can enable the encryption method by selecting Enable 9.0 Encryption in the Encryption type field. This selection requires no further actions.
Relay Password
This password is used to connect the BigFix clients to their authenticating relays in the new operating system. You can leave it empty, if the BigFix clients are not connected to authenticating relays.
If the BigFix client is connected to an authenticated relay but its password is not provided, it cannot reconnect to its relay in the new operating system.
Enhanced error detection
OS Deployment modifies the boot sequence of target machines to monitor and track operations performed during capture, reimage, and bare metal deployments. This is done by hooking the master boot record (MBR) to detect and handle boot errors and other exceptions such as system crashes, startup failures, and infinite loops.
You can choose to prevent the modification of the boot sequence during these operations by checking Disable enhanced error detection.
Disabling error detection prevents changes to the boot sequence to avoid interference with specific target settings or company policies. Checking this option does not affect the deployment process flow and result. You must select this option when you deploy images to UEFI targets with the Secure Boot option enabled.
High performance power plan
This option is available only for Windows 10/11 and, if selected, sets the high performance power plan on the target computer. This will also prevent the standby during the deployment on laptops when the lid is closed on AC. MDT Bundle later than Version 3.10.16 is required.
Mapping partitions
Click Edit Partition Mapping to choose the partition layout for the deployment. This option is enabled only for captured images with more than one partition.
In the Partition Editor, the partitions contained in the WIM image are associated with the partitions that are present on the target computer. You map the captured partitions into existing partitions and decide which target partitions to overwrite and which ones to keep.
You can maintain partitions previously created on the physical disk. These are kept even after creating the new associations.
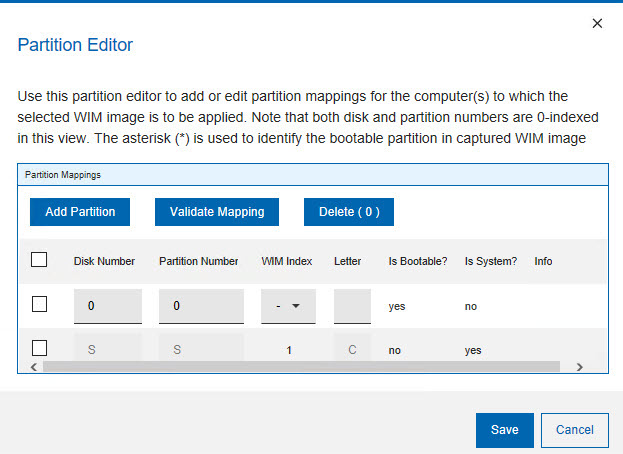
The WIM Index column identifies the partitions of the captured image, that you map to the partitions of the target machine, which are identified by Disk number and Partition Number in the corresponding columns.
The Info column displays additional information on the partition, for example, whether it is a recovery partition.
The asterisk (*) in the WIM index column indicates that this partition in the captured image was marked as bootable at capture time. If you delete this partition, the system partition is automatically set as bootable.

During the reimaging process, regardless of how you map the system and boot partitions, if the number of partitions in the captured image is greater than the partitions present on the target machine, the validation fails. Because the reimage process does not re-partition the target machine, you must ensure that the number of mapped partitions is not greater than the partitions defined on the target, or both the validation step and the reimaging process fail.
If the number of partitions you configure for the target is less than the actual number of partitions present on the target, the results of the validation depend on how the partitions in the image are mapped to the target disk and partition.
It is strongly recommended to reimage ensuring that the number of partitions mapped from the captured image are equal to the number of actual partitions on the target.
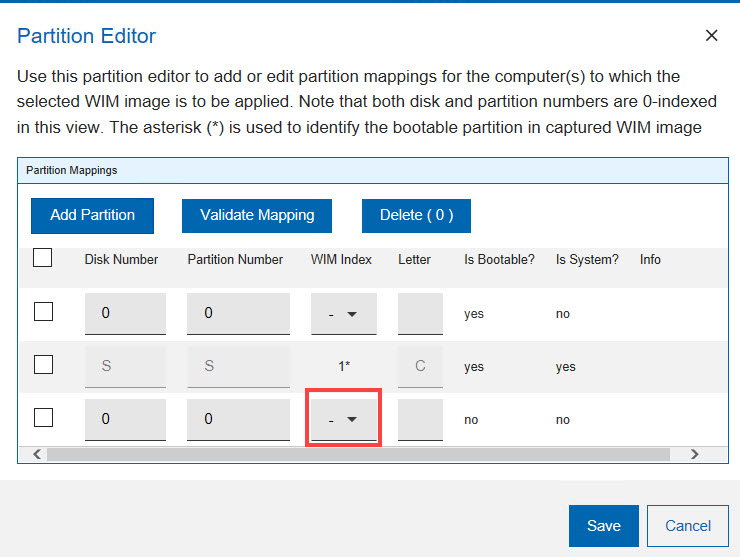
If the target of a reimage is a UEFI machine, a separate boot partition is always available at run time, regardless of how the bootable and system partitions are mapped in the WIM.
When you are done, click Validate Mapping to validate your associations.