Tableau Workbooks
Tableau Desktop and Tableau Server are powerful tools that help you present the valuable data that BigFix generates in a meaningful and ingestible way. This chapter describes how to add an existing Tableau Workbook to your BigFix Insights implementation.
Before you begin
- Purchase appropriate licenses for Tableau. You need a Creator license to run the tasks listed in this topic.
- Tableau Desktop and Tableau Server must be at version 2019.2 or greater to support the featured utilized within the provided Workbooks
- Install the Tableau Server with access to the BigFix Insights database.
- Install the Tableau Desktop with access to the BigFix Insights database.
- Setup BigFix Insights.
- Add a datasource to BigFix Insights.
- Run an ETL and ensure that it is successful.
About this task
- Patch Rhythm
- Device Inventory
- Operating System Migrations
- Deployment Progress
Procedure
-
Within BigFix, take
action on the appropriate Fixlet(s) located in the Insights' external site.
These Fixlets download the necessary
.sqland.twbfiles to your desired location.- BigFix Insights – Tableau - PatchRhythm
- BigFix Insights – Tableau - DeviceInventory
- BigFix Insights – Tableau - Operating SystemMigrations
- BigFix Insights – Tableau - DeploymentProgress
- Open Microsoft SQL Server Management Studio (SSMS) and connect to the BigFix Insights database.
-
Build the required Stored Procedures. You can build the required Stored
Procedures as described below:
-
Open the Tableau Workbooks. Open one of the .twb files in
Tableau Desktop. The authentication dialog for the SQL server is
displayed:
If another dialog box is displayed, there is also an Edit connection link on that dialog box as well.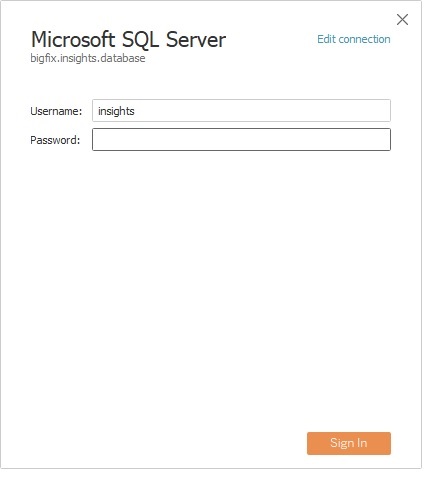
Now you need to edit the connection settings for the Workbook to function correctly.
-
Click Edit connection on the top right
corner.
The following dialog is displayed.

-
Click Edit connection on the top right
corner.
-
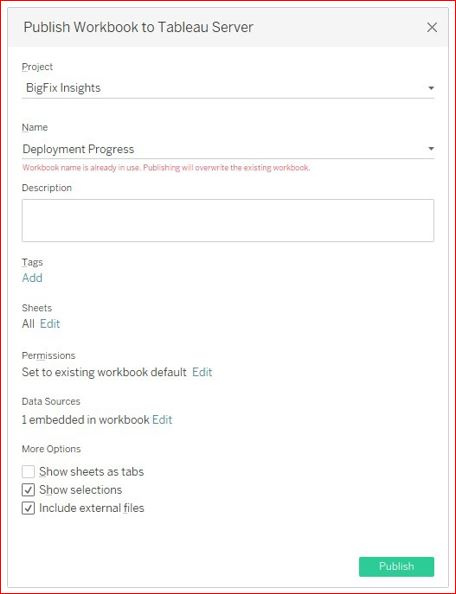
Execute the following steps to publish your workbook:
-
The Publish Workbook to Tableau Server dialog is displayed:
-
The Publish Workbook to Tableau Server dialog is displayed:
Using the Stored Procedure samples
About this task
Procedure
-
All of the Stored Procedures require a time zone attribute. This
allows your reports to be displayed in the time zone of your choice.
Attribute Name = time zone and Attribute Value = Pacific Standard Time. Choose your desired time zone from the list of available time zones supported by your version of Microsoft SQL Server. If a time zone is not provided, the reports defaults to UTC time zone.
-
The default severity order for the Patch Rhythm report is the number of
relevant patches per severity in descending order, then by the name of the
severity in alphabetical order. You could customize the sort order by
creating one or more custom attributes.
Attribute Name = Critical and Attribute Value = 1 and Category = severity_order_by. The Category is required by all applicable entries in the custom attributes table to let the Stored Procedure determine which entries to read. Critical identifies the severity provided by BigFix to assign this sort order value. The 1 represents the value the Stored Procedure will use to perform the sort. The lower the value, the higher the severity that shows up in your list of severities. You can assign the same value to multiple severities. The Stored Procedure then drops down to sorting alphabetically for those severities.
-
The Patch Rhythm report also supports renaming severities from the default
name. A vendor may label their severities one way, where another vendor
labels their severities in another. This custom attribute allows you to fix
the issue.
Attribute Name = n/a, Attribute Value = N/A and Catetory = severity_rename. The category is required by all applicable entries in the custom attributes table to let the Stored Procedure determine which entries to read. In this example, change the label n/a to N/A for readability purposes. If this entry is not added to the custom attributes table, then you would see two rows representing n/a and N/A as separate severities. Adding this custom attribute combines these two values into a single row.
-
The Device Inventory report supports shortening long operating system
names.
Attribute Name = Win10 10.0.18362.592 (1903), Attribute Value = Win10 (1903) and Category = os_shortener. The Category is required by all applicable entries in the custom attributes table to let the Stored Procedure determine which entries to read.
-
The Device Inventory report also support grouping operating systems into
appropriate Families.
Attribute Name = Win10 (1903), Attribute Value = Windows, and Category = os_families. The Category is required by all applicable entries in the custom attributes table to let the Stored Procedure determine which entries to read. Based on this entry, the Stored Procedure assigns the shortened operating system name to a Windows grouping. You would repeat this entry for Linux, Mac OS X, and/or any other operating systems your BigFix environment supports.
- The Operating System Migrations report also utilizes the os_shortener and os_families custom attributes.
-
The Operating System Migrations report includes the support for defining
supported and non-supported operating systems. By default, this Stored
Procedure looks at the Fixlets for unsupported operating systems and check
applicability to determine if an operating system is supported by the vendor
or not. Currently, these Fixlets are only associated with Microsoft
operating system. You can define your own vendor support status utilizing
the following custom attribute.
Attribute Name = Win7, Attribute Value = 0, and and Category = os_vendor_support. The Category is required by all applicable entries in the custom attributes table to let the Stored Procedure determine which entries to read. If your operating system matches Win7, then this report displays Win7 as not supported by the vendor. This example assumes you have [os_families]Win7 defined. The day Windows 7 was listed as end-of-life, BigFix did not have a matching unsupported Fixlet so that the Stored Procedure could mark all Windows 7 devices as not supported. Adding this custom attribute allowed the report to display all Windows 7 devices as not supported. Currently, BigFix does include the unsupported Fixlet for Windows 7, so this custom attribute for that purpose is no longer necessary. If you set the Attribute value to 1, then the operating system is marked as supported, even if there is an existing unsupported Fixlet that is applicable. This would be used if you have purchased extended support from Microsoft for Windows 7.
- The Deployment Progress report also utilizes the os_shortener and os_families Category entries.
-
The Deployment Progress report includes the support for identifying which
one of the 30+ Action Result Statuses are deemed Success, Pending, or
Failure. If you do not predefine these statuses, then the Action Result is
labeled as [unknown].
To view the complete list of all possible Action Result statuses and their descriptions, view the action_state_strings table in the BigFix Insights database. All IDs less than 0 are automatically defined as Failure.
- Attribute Name = Success, Attribute Value = 0|3|5|17, and Category = action_result_status. These Action Result Status Id’s are defined by HCL as Success in this Stored Procedure. You should see four different IDs delimited by a pipe character, “|”. You can modify these IDs as you see fit. Each Id represents the status a device has reported back to the BigFix server during an Action Deployment.
- Attribute Name = Pending, Attribute Value = 1|2|6|7|8|9|10|11|12|13|14|15|16|19|20|21|22|24|25|27|28|29|30|33|34|35|36|37, and Category = action_result_status. These Action Result Status IDs are defined by HCL as Pending in this Stored Procedure.
- Attribute Name = Failure, Attribute Value = 4|18|23|26|31|32, and Category = action_result_status. These Action Result Status IDs are defined by HCL as Failure in this Stored Procedure.