Adding and editing custom attributes
This topic describes how to create, edit and delete custom attributes.
About this task
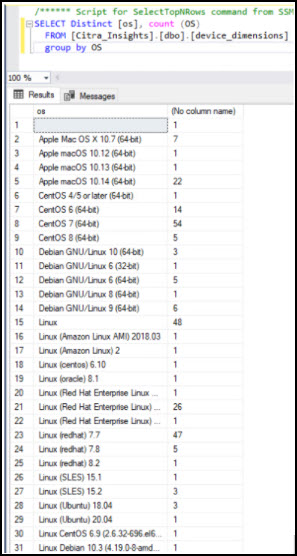
Use Case: BigFix provides the literal interpretation of the operating system as installed on systems. This is reported through the operating system API and depending on the OS the resulting string may differ slightly. See the following screenshot.
Consider the desire was to provide a rollup count for all given Linux distributions vs the count by individual Linux distributions. This is one of the many use cases that leveraging Custom Attributes can assist with. Observe the data represented below (notice there are 2 queries). The first query shows the contents of the custom_attributes table. Notice that the table has been populated with various distributions. The second query demonstrates leveraging the table to normalize and group the data accordingly. Using the two pieces together now enables the primary use case of rolling up operating system for all Linux Distributions.
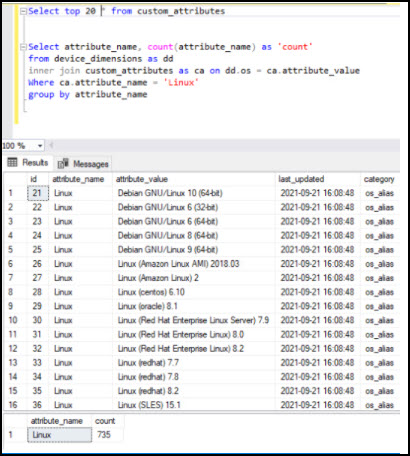
In short, the custom attributes table in combination with the specified query can be used together to normalize data for grouping in this use case. Custom_Attributes are leveraged within several of the BigFix published sample reports.
Assigning permissions to custom attributes
About this task
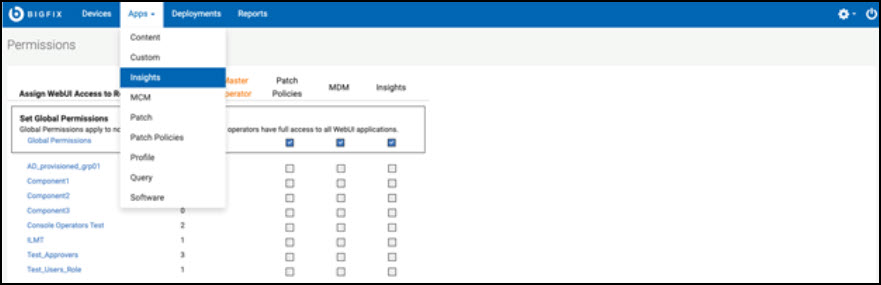
- Log in to WebUI as a Master Operator.Note: Master Operator permissions are required to assign permissions.
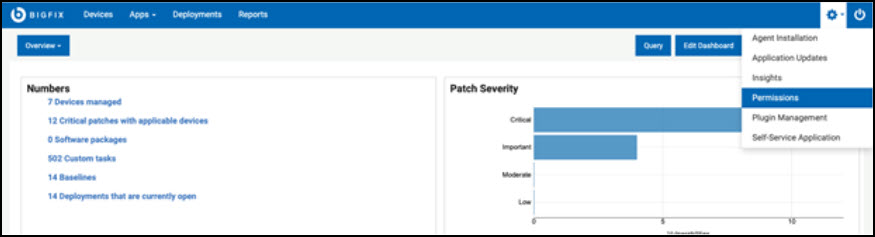
- Navigate to Settings gear and click
Permissions.
- Assign the desired roles access to the Insights app.
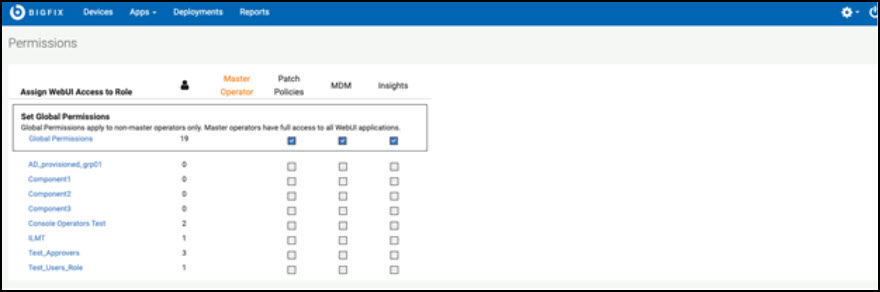
- Once a user has been granted access to the Insights app, the user will see
the Insights app in the WebUI/Apps dropdown.
Adding custom attributes
About this task
- Log in to WebUI.
- Click Apps tab and
click Insights.
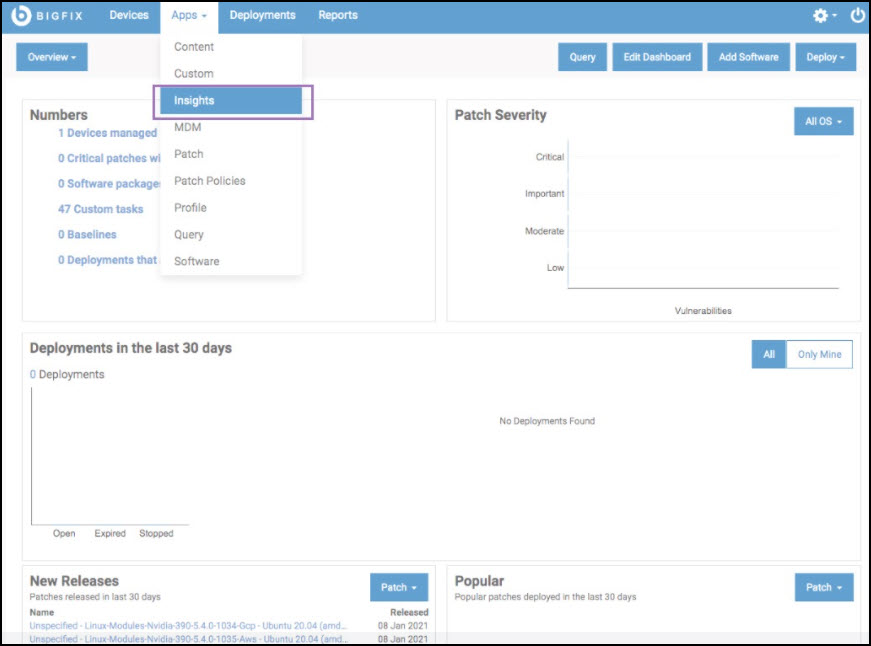
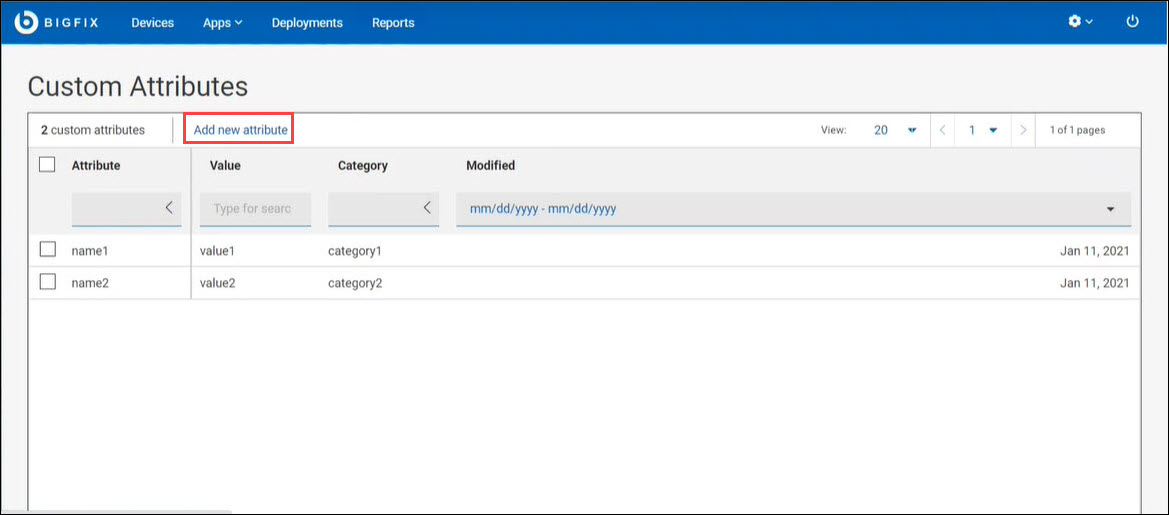
Data grid view enables you to quickly view the list of custom attributes, value, and category. Every attribute gives an option to search or filter. You can add, remove, and resize columns.
- Click Add new attribute in the Custom
Attributes page.
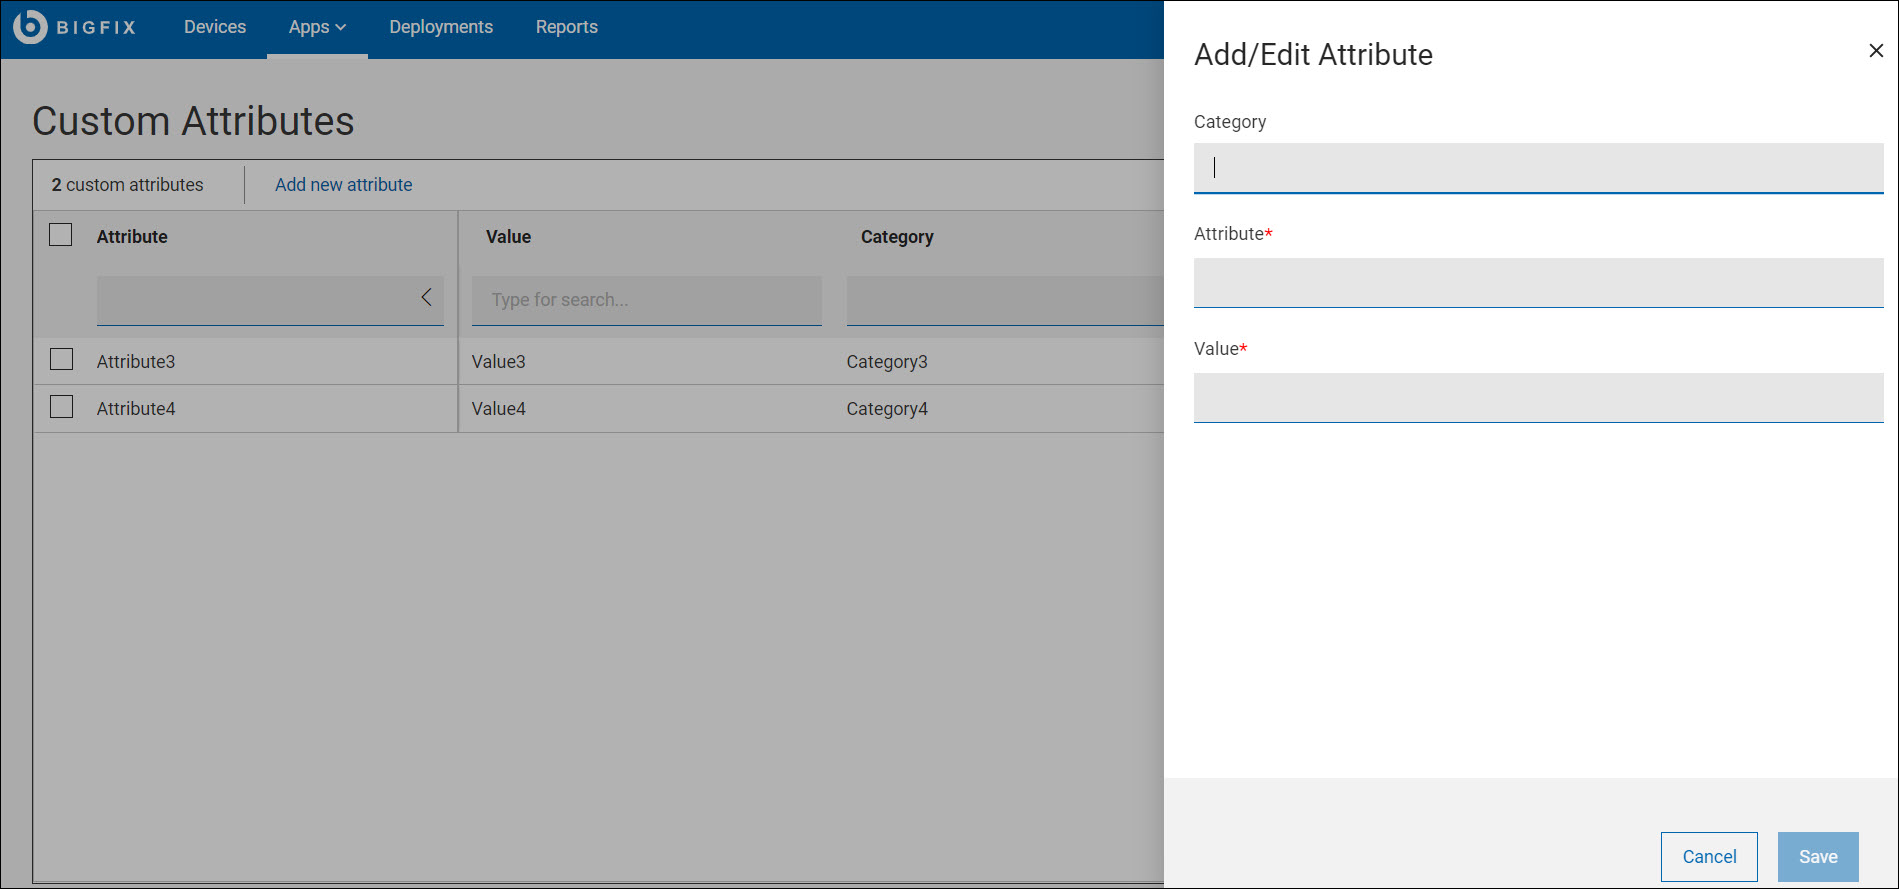
- Enter the Category Name, Attribute
Name, and Value in the Add/edit
Attribute slide out window and
click Save.
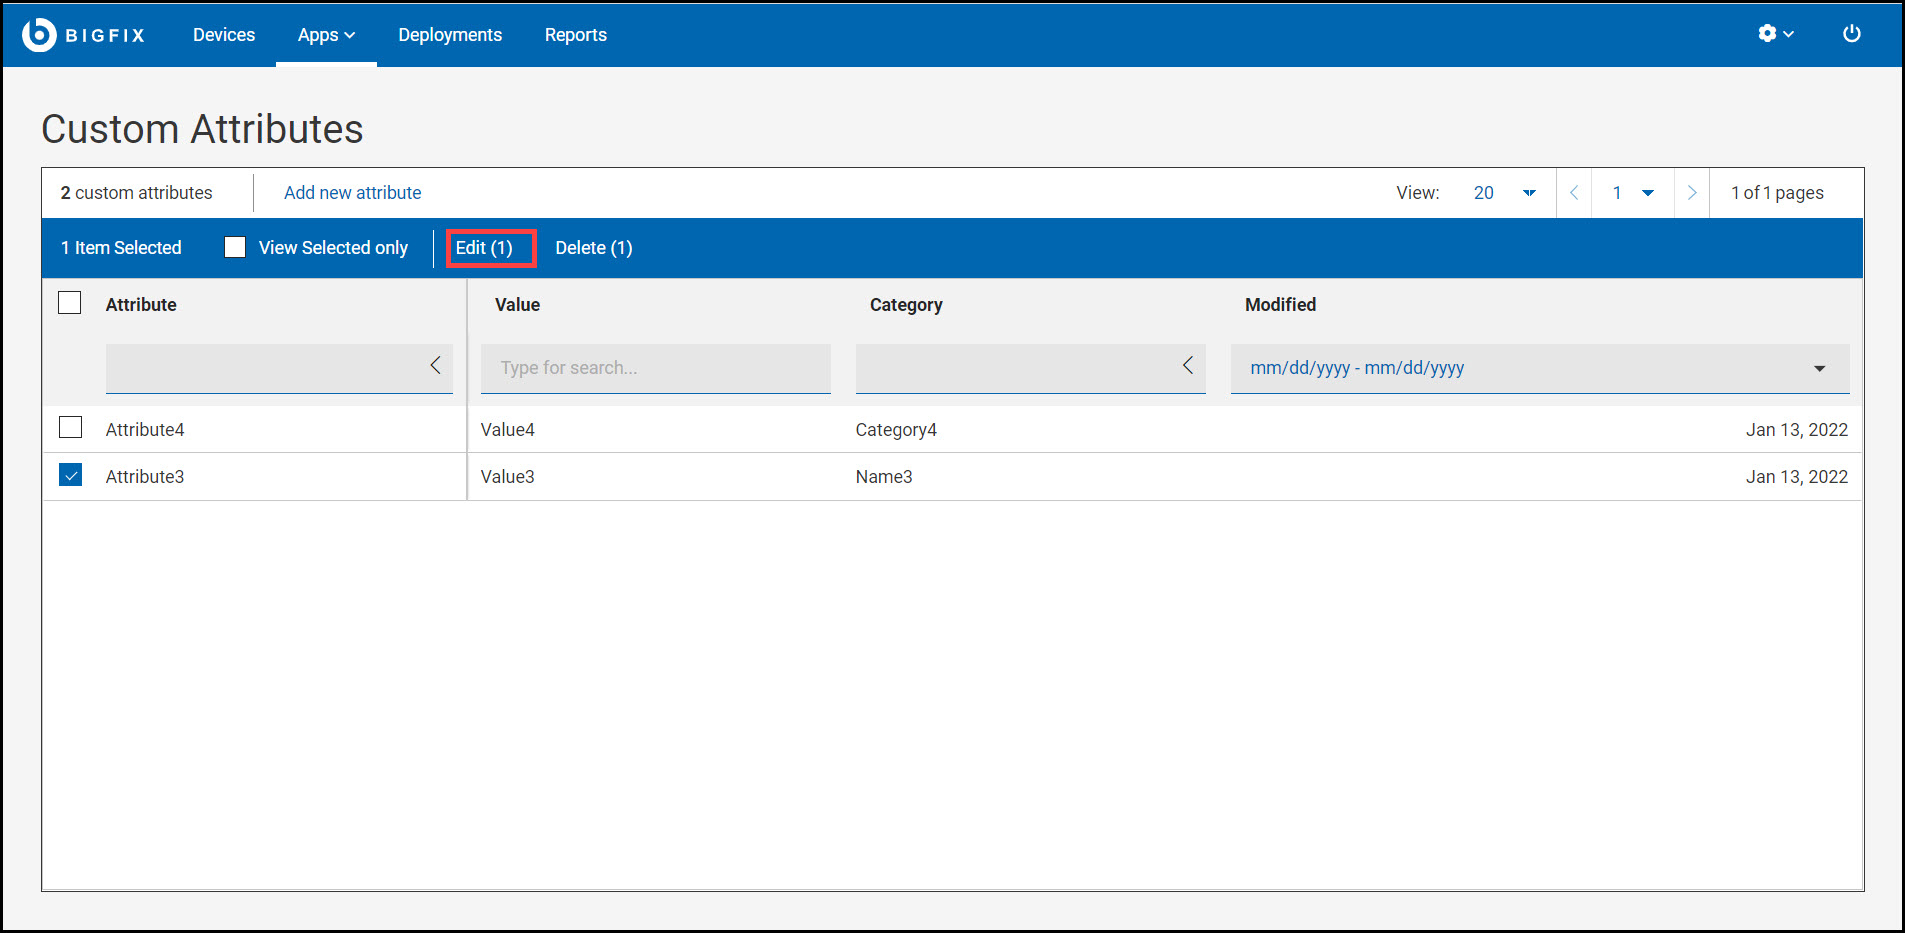
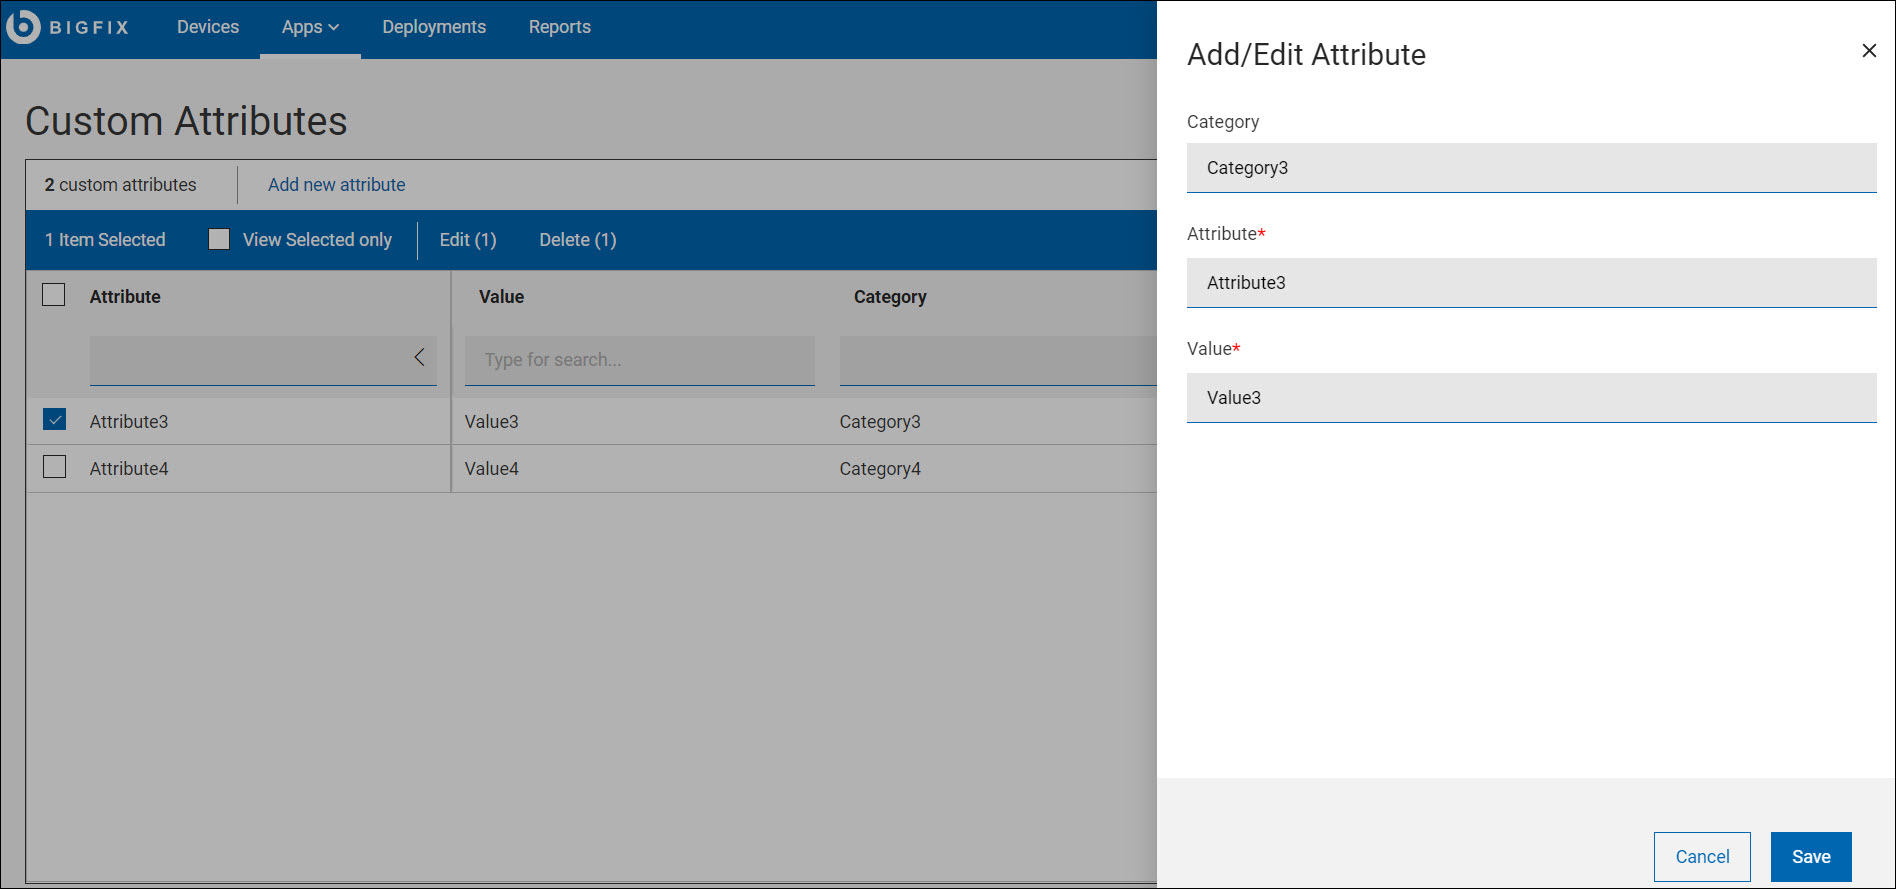
Editing custom attributes
About this task
- Navigate to the Custom Attributes page in WebUI.
- Search or select the attribute from the list that you want to edit and click
the edit icon.
- Edit the Category, Attribute,
and Value and click
Save.
Deleting custom attributes
About this task
- Navigate to the Custom Attributes page in the WebUI.
- Select/search the attribute(s) from the list that you want to delete and
click Delete.
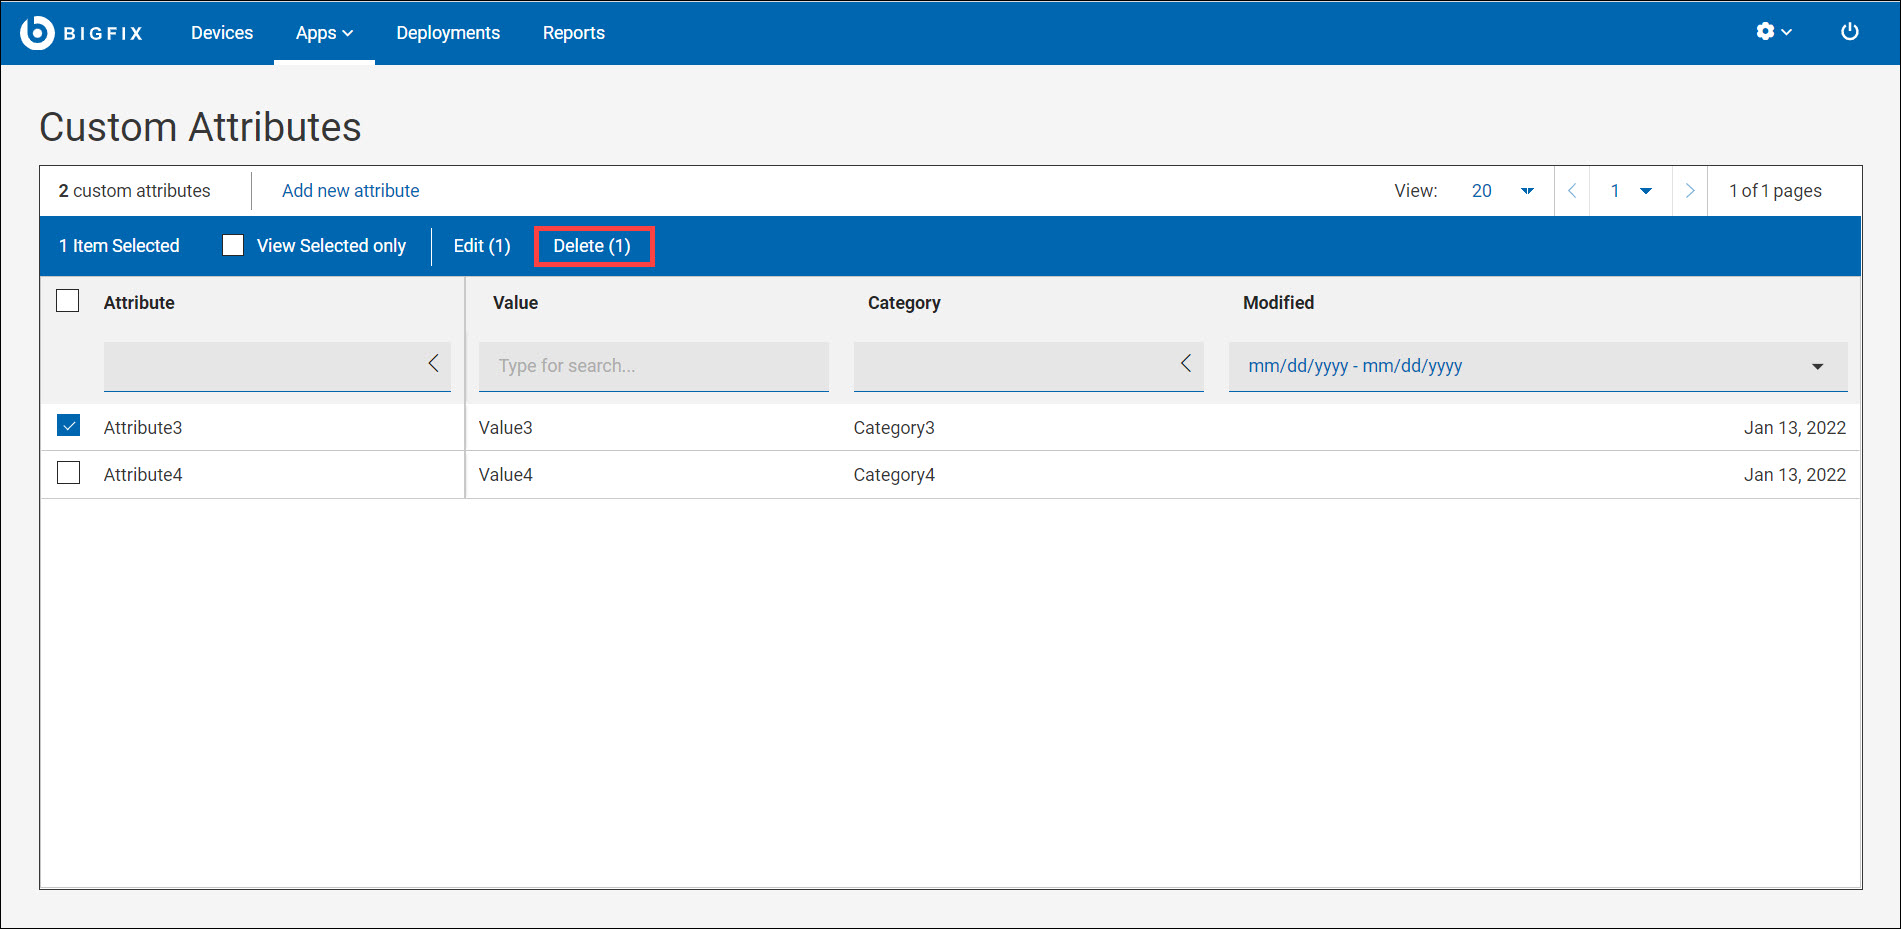
- Once clicked, you will be prompted to confirm your deletion.