Configure an open source scan in AppScan on Cloud
Procedure
To scan your application:
-
Download and set up either:
- A supported plugin.
Complete information about supported plugins is listed on the AppScan on Cloud Plugins & APIs page and the Plugins and integrations documentation page.
- AppScan Go!, the client utility graphical user interface.
- The Static Analyzer Command Line Utility, as described in Setting up the Static Analyzer Command Line Utility.
- A supported plugin.
-
Scan or generate an IRX file for
your application, or identify source code files to scan.
Note: When you scan code or generate an IRX file, you might receive a message about updating to the latest Static Analyzer Command Line Utility. See Command Line Utility (CLI) support.
- If you have not yet done so: Create an application for your scans.
- Use the Create scan wizard to start configuring your scan. Start the wizard from Application > Application > Scans > Create scan > SCA Software Composition Analysis > Create scan.
-
Upload file tab: Drag-and-drop the
.irxfile to scan into the dialog box, or click the box to browse for the file.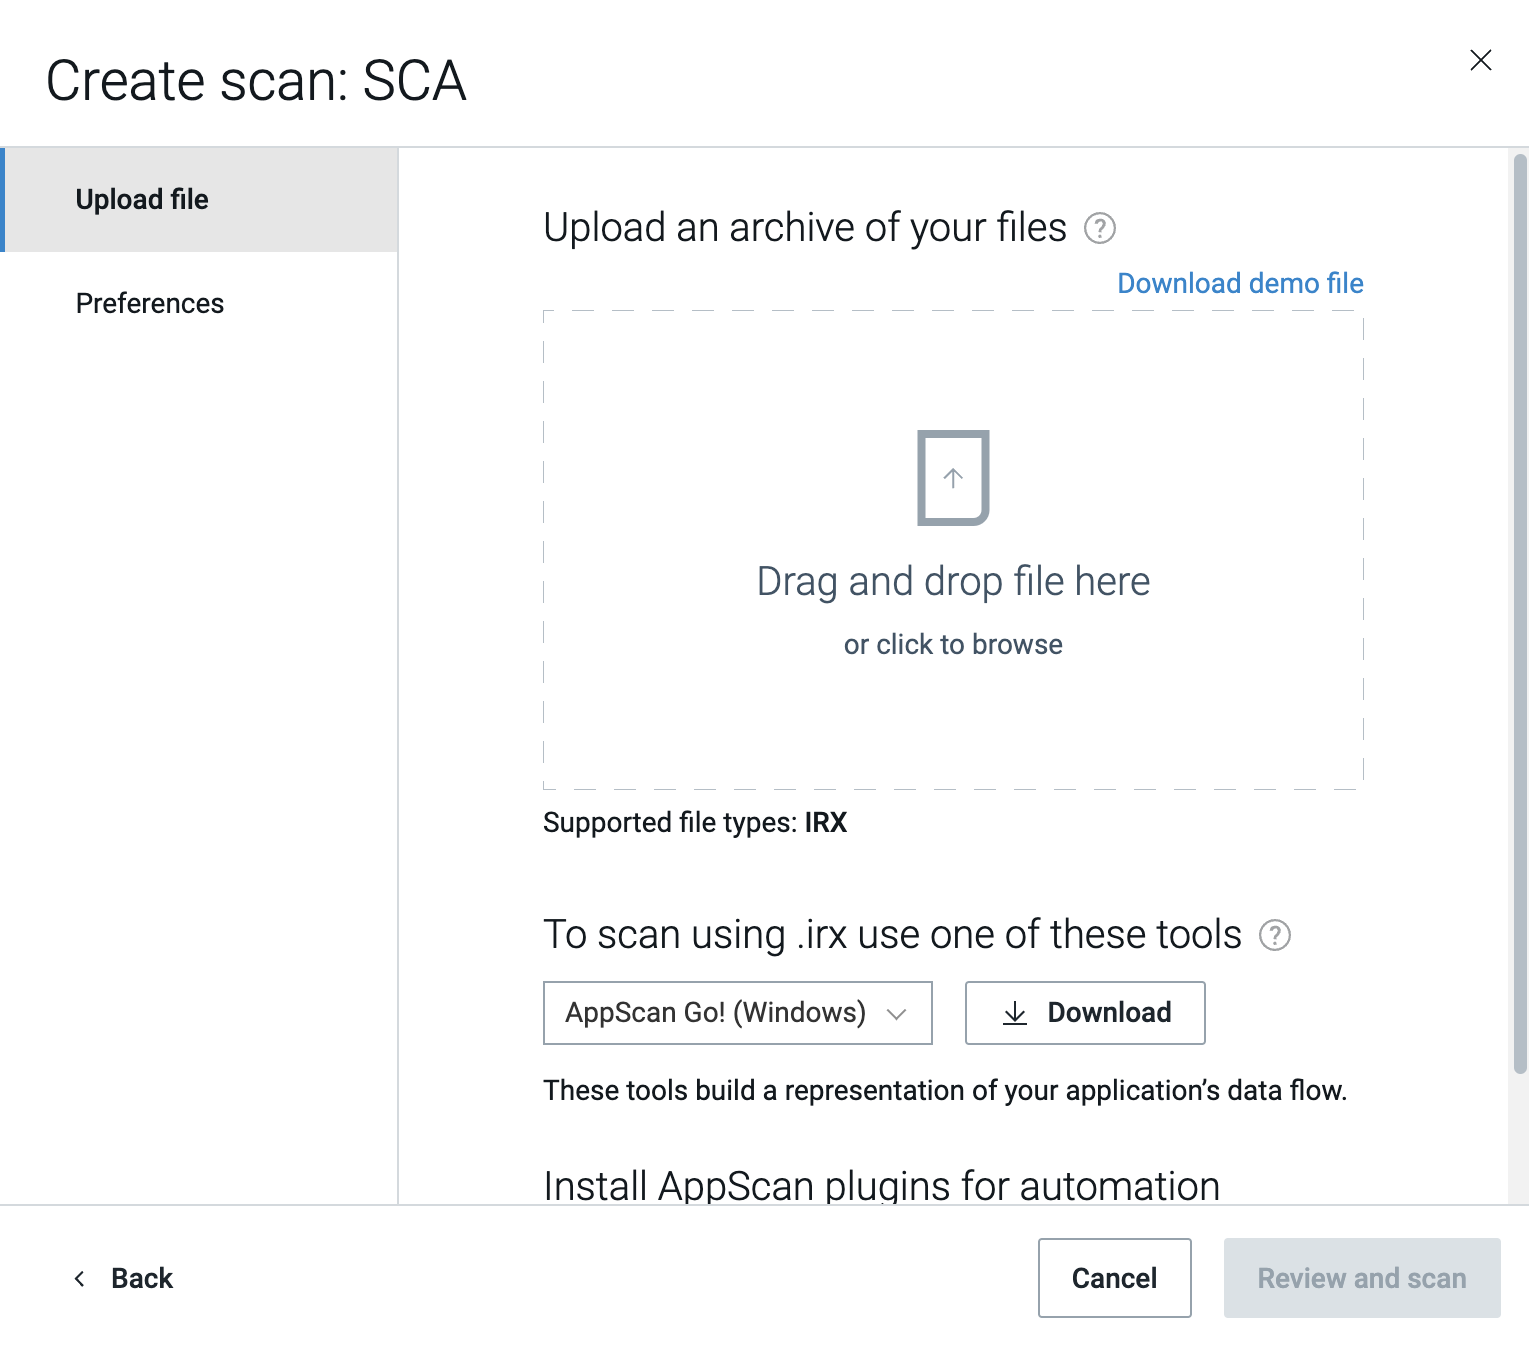
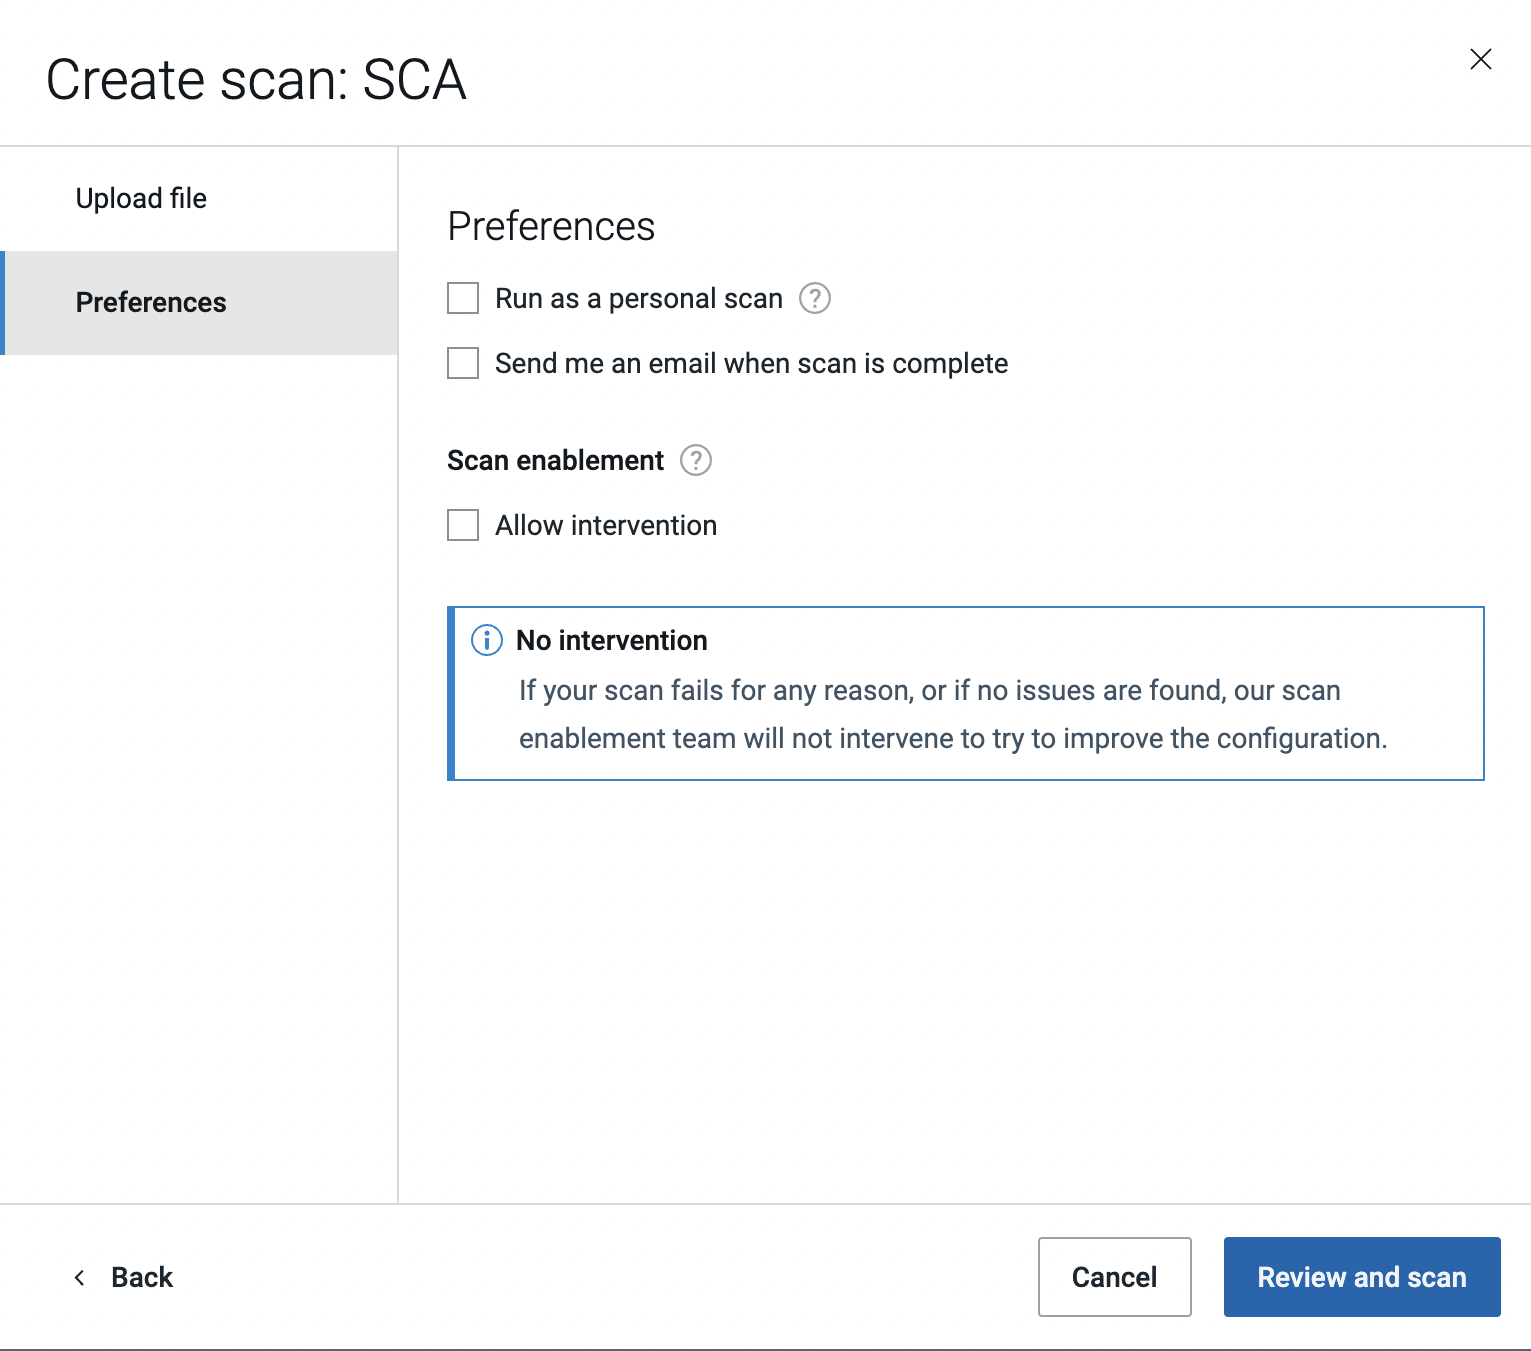
-
Preferences tab: You can opt to run your scan as a personal scan whose security
issues will not be added to the issues for the application as a whole. You can
also select the default option that sends you an email when the scan completes,
or choose to allow intervention by our scan enablement
team.
- Click Review and Scan to proceed to the summary dialog.
- Edit the default name that was given to the scan. Optional.
- Click Scan Now.