Deploying an IAST agent on Azure App Service
Use the IAST agent to monitor applications that run on Azure App Service.
Deploying a .NET Framework IAST agent on Azure
About this task
Procedure
- Start a .NET IAST session and download the agent NuGet as described here.
- Open Visual Studio and select Menu > Tools > Options > NuGet Package Manager > Package Source.
- Select the folder containing the IAST agent NuGet.
- Click the + sign to add a new NuGet source and then give it a name.
- In the Solution Explorer, right-click on the project you want IAST to monitor and select Manage NuGet Packages.
- In the Search field, type com.HCL.AppScan.IAST.agent and select the first package listed in the results.
- Click Install.
-
.NET core only: Set the environment variable with these steps:
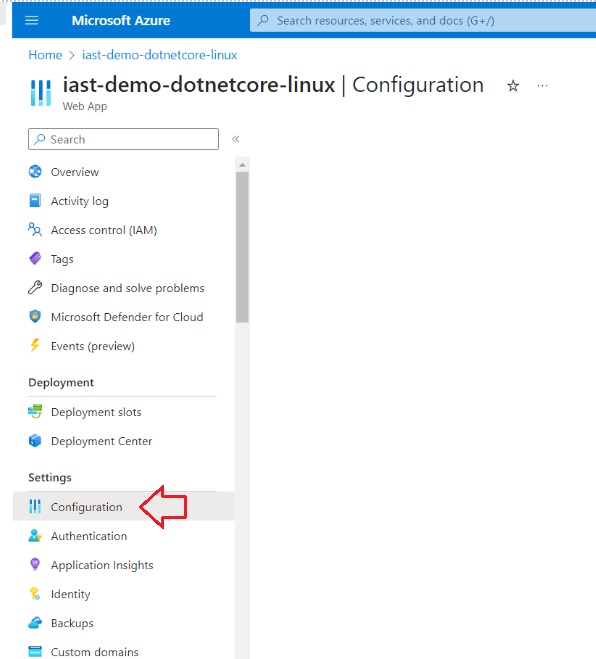
- In the Azure portal go to Settings > Configuration.
- In the Application Settings tab, click the + sign to
add a new setting.
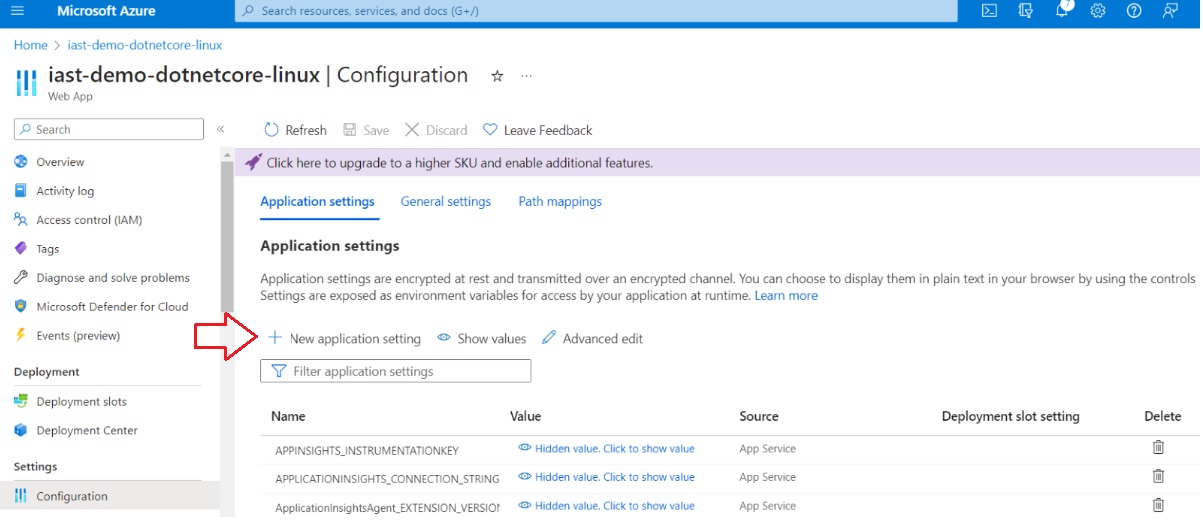
- In the Add/Edit application setting dialog that opens, enter the following
name and value:
Name ASPNETCORE_HOSTINGSTARTUPASSEMBLIES Value SecagentCore - Click OK.
- In the Azure portal go to Settings > Configuration.
-
Deploy your application to Azure App Services.
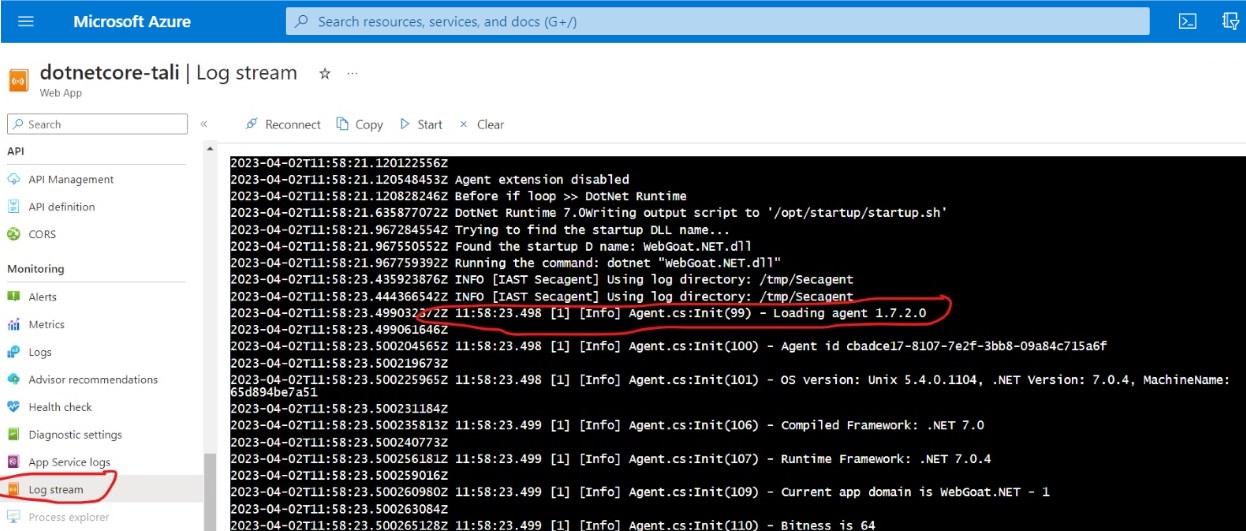
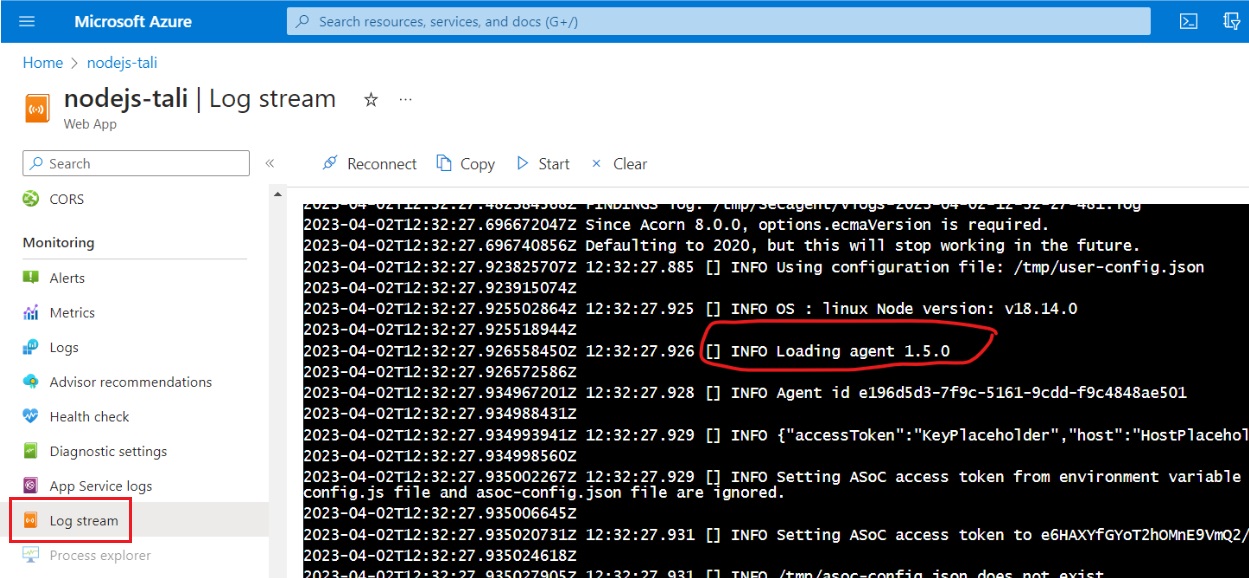
The agent is now installed. You can verify this by checking the log stream to see IAST agent print.
As you use or test your application (run functional tests, run a DAST scan, or explore the application manually), the IAST agent monitors requests as they are sent, and reports on security issues it finds.
Deploying a Node.js IAST agent on Azure
Procedure
- If you have not yet done so, create an application for your scans.
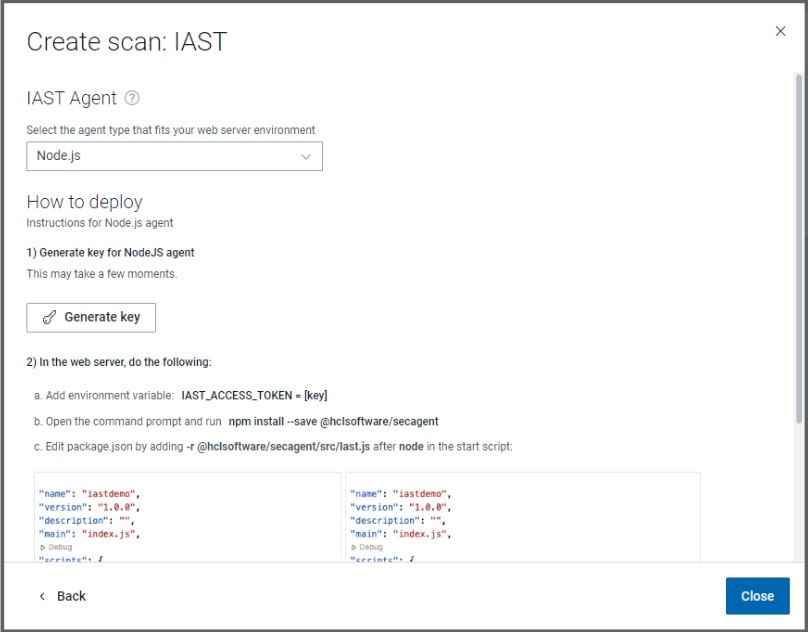
- In the Application view, click Create Scan to open the wizard, then select Interactive (IAST).
-
Select Node.jsand click Generate key. This will generate a unique key
that will connect your application with the IAST session in ASoC.
-
In your workspace, install the IAST agent from npm with the command:
This will addnpm install --save @hclsoftware/secagent@hclsoftware/secagentto the dependencies in thepackage.jsonfile of your application:
-
By default, Azure App Services use the start script in your
package.jsonas the run command. Edit the start script to set the agent key from step three above as environment variable and to run the IAST agent from step four as a required package.For example, if the original command was: Edit it to
this:
Edit it to
this: Example where key is 123456789:
-
Deploy your application to Azure App Services.
The agent is now installed. You can verify this by checking the log stream to see IAST agent print.
As you use or test your application (run functional tests, run a DAST scan, or explore the application manually), the IAST agent monitors requests as they are sent, and reports on security issues it finds.