AWS CloudFormation deployment of EKS cluster
You can use an already deployed EKS cluster that you have on your Amazon Web Services account to deploy HCL Workload Automation. In that case, you can skip the deployment of this template and follow this guide.
- EKS cluster creation
- This template creates a new EKS cluster with any number of nodes into an existing Virtual Private Cloud. It also enables the EBS CSI driver addon into the cluster, which provides the Persistence Volumes claimed by each container.
-
- Pre-requisites
- You must satisfy the following pre-requisites to successfully deploy
this template:
- An available Virtual Private Cloud to host the EKS cluster. You must also define a security group to the cluster and provide it as input to the template. DUBBIO
- You must have the necessary permissions to create IAM roles on your account. If you do not have the necessary permissions, you must ask your administrator to create all the specified roles mentioned from now on.
- Users or roles running this template must have the right
policies to perform the actions to create an EKS Cluster
from AWS Web user interface or eksctl. This
is an example of a set of policies assigned to a user or
role to enable them to run the template:
{ "Version": "2012-10-17", "Statement": [ { "Sid": "AllowUsersToListandGetEveryResource", "Effect": "Allow", "Action": [ "iam:List*", "iam:Get*" ], "Resource": "*" }, { "Sid": "AllowUsersToChangeOwnPasswordCreateDeleteEnambleVMFADevice", "Effect": "Allow", "Action": [ "iam:ChangePassword", "iam:CreateVirtualMFADevice", "iam:DeleteVirtualMFADevice", "iam:EnableMFADevice" ], "Resource": [ "arn:aws:iam::<your_account_id>:mfa/${aws:username}", "arn:aws:iam::<your_account_id>:user/${aws:username}" ] }, { "Sid": "AllowAsPowerUserIfMFAisActivated", "Effect": "Allow", "Action": [ "ec2:*", "s3:*", "eks:*", "ecs:*", "ecr:*", "rds:*", "autoscaling:DescribeAutoScalingGroups", "autoscaling:UpdateAutoScalingGroup", "elasticloadbalancing:*", "kms:*", "ssm:Get*", "ssm:List*", "ses:Get*", "ses:List*", "cloudformation:*", "route53:listHostedZones", "route53domains:Get*", "route53domains:List*", "route53:List*", "route53:GetHostedZone*", "iam:CreateUser", "iam:PassRole", "iam:*InstanceProfile*", "SNS:*", "SQS:*", "acm:ListCertificates", "acm:DescribeCertificate", "autoscaling:Describe*", "cloudwatch:Describe*", "cloudwatch:Get*", "cloudwatch:List*", "logs:Get*", "logs:List*", "logs:Describe*", "logs:TestMetricFilter", "logs:FilterLogEvents", "elasticfilesystem:Describe*", "elasticfilesystem:List*", "aws-portal:View*", "cur:Describe*", "ce:List*", "ce:Get*", "pricing:Describe*", "pricing:Get*", "aws-marketplace:View*", "aws-marketplace:List*", "aws-marketplace:Describe*" ], "Resource": "*", "Condition": { "Bool": { "aws:MultiFactorAuthPresent": "true" } } }, { "Sid": "AllowUsertoCreateServiceLinkedRole", "Action": "iam:CreateServiceLinkedRole", "Effect": "Allow", "Resource": "*", "Condition": { "StringLike": { "iam:AWSServiceName": [ "rds.amazonaws.com", "rds.application-autoscaling.amazonaws.com", "eks.amazonaws.com", "eks-nodegroup.amazonaws.com" ] } } }, { "Sid": "RestrictStdTagModifications", "Effect": "Deny", "Action": [ "ec2:DeleteTags", "ec2:CreateTags" ], "Resource": [ "*" ], "Condition": { "ForAnyValue:StringEquals": { "aws:TagKeys": [ "AutoState", "TeamTimeZone", "RunSchedule", "StopTime", "StartTime" ] } } } ] } - Create two IAM roles: ControlPlanRole e
NodeGroupRole. You must then provide the ARN code
of the roles as input to the template. The recommended
policies to be assigned to the roles are:
- ControlPlanRole: assign two existing AWS managed policies to this role:
- AmazonEKSClusterPolicy
- AmazonEKSServicePolicy
{
    "Version": "2012-10-17",
    "Statement": [
        {
            "Action": [
                "ec2:DescribeAccountAttributes",
                "ec2:DescribeAddresses",
                "ec2:DescribeInternetGateways"
            ],
            "Resource": "*",
            "Effect": "Allow"
        }
    ]
}
Figure 1. Control plane policies 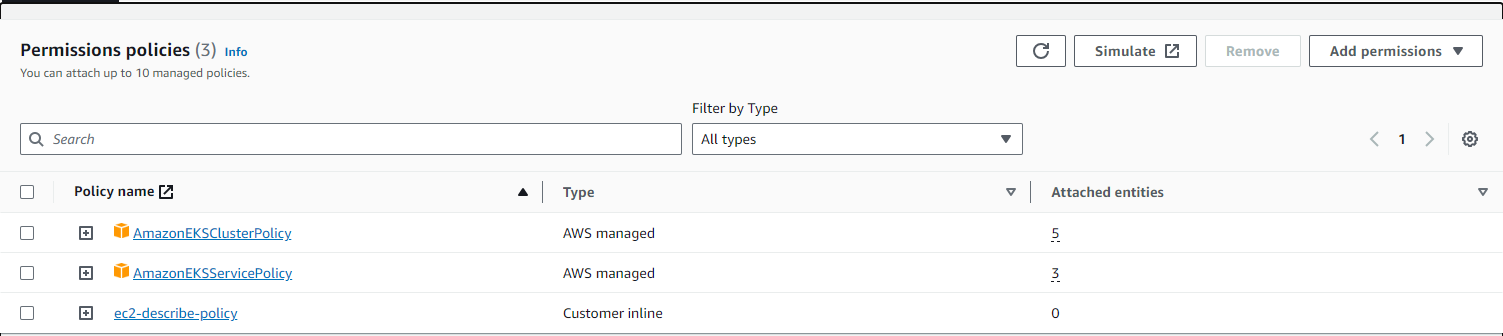
- NodeGroupRole: assign six existing AWS managed policies to this role:
- AmazonEBSCSIDriverPolicy
- AmazonEC2ContainerRegistryReadOnly
- AmazonEKS_CNI_Policy
- AmazonEKSWorkerNodePolicy
- AmazonElasticFileSystemReadOnlyAccess
- CloudWatchAgentServerPolicy
{
    "Version": "2012-10-17",
    "Statement": [
        {
            "Action": [
                "cloudformation:SignalResource"
            ],
            "Resource": "*",
            "Effect": "Allow"
        }
    ]
}
Figure 2. Node group policies 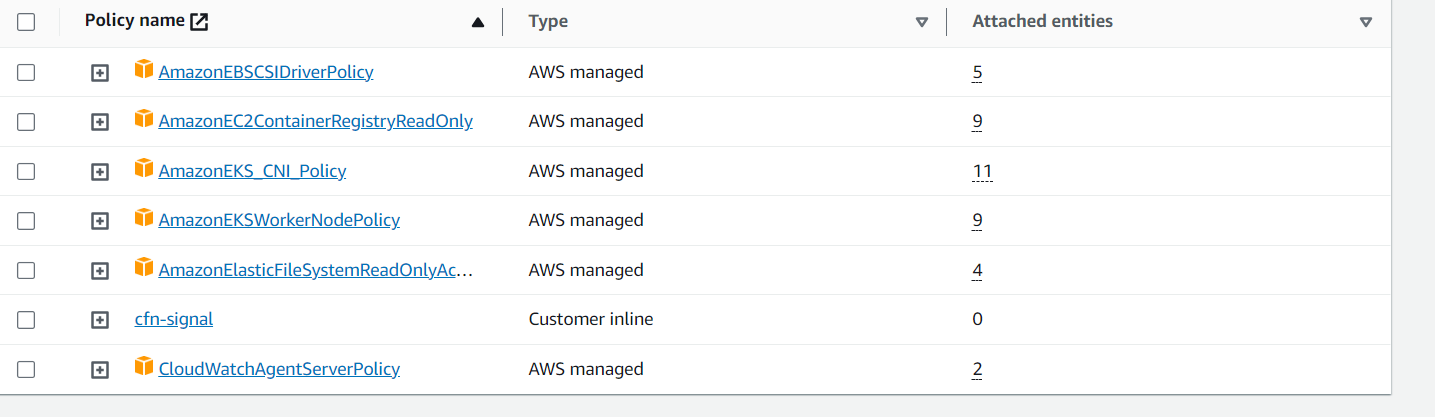
- ControlPlanRole: assign two existing AWS managed policies to this role:
- Running the template
- After making sure that all the pre-requisites are met, the first template can be run from your AWS CloudFormation user interface. Make sure you specify the ARN for ControlPlaneRole and NodeGroupRole when you are deplyoing this template.
Download the template here:
Note: This link brings you to the stack creation page. Click Next to start the download.