How to use in-line editing
The HCL Compass inline editing feature enables you to edit records directly in a query result set.
About this task
You can select the Assign action to start editing records in the result set view, and individually assign them to different owners and iterations.
Using this feature, you can:
- Perform any Modify, Change State and Record Script Alias action.
- Save or cancel the records individually, or save or cancel them all at once.
- Edit child records in the result set.
- Finish editing a record in a form after editing it in the result set.
- The buttons Save All, Save All and Exit and Exit replace the toolbar items Previous, Next, Refresh, Edit Query, Export, Printable Version and CustomizeColumns.
- A save column is displayed before the Information column.
- The Information column displays the status of the editing session using different icons.
- The multi-record update feature is disabled; however, the create query from selection feature remains enabled.
To perform inline editing:
Procedure
-
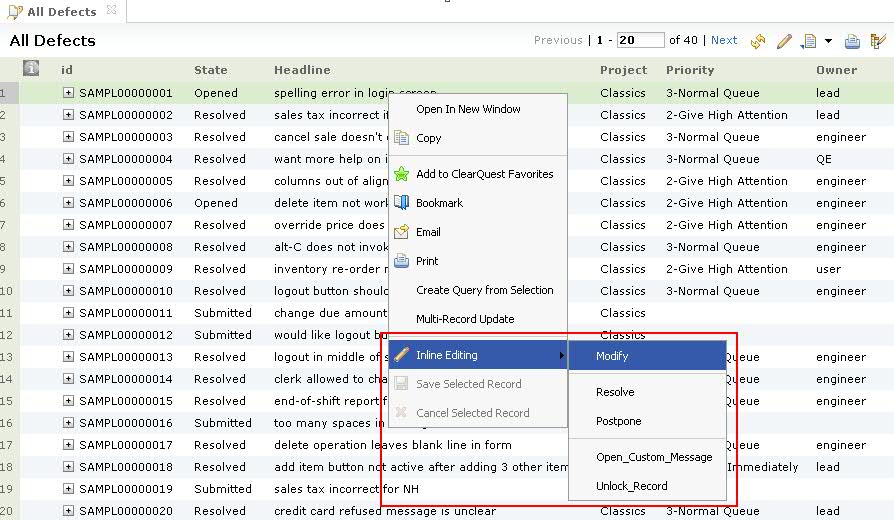
Select an action. In the result set, right-click the record that you want to edit. In the
context menu, select the Inline Editing item to display a submenu that shows all permitted
Modify, Change State and Record Script Alias actions for the selected record.
Note that for each record, the actions can be different.
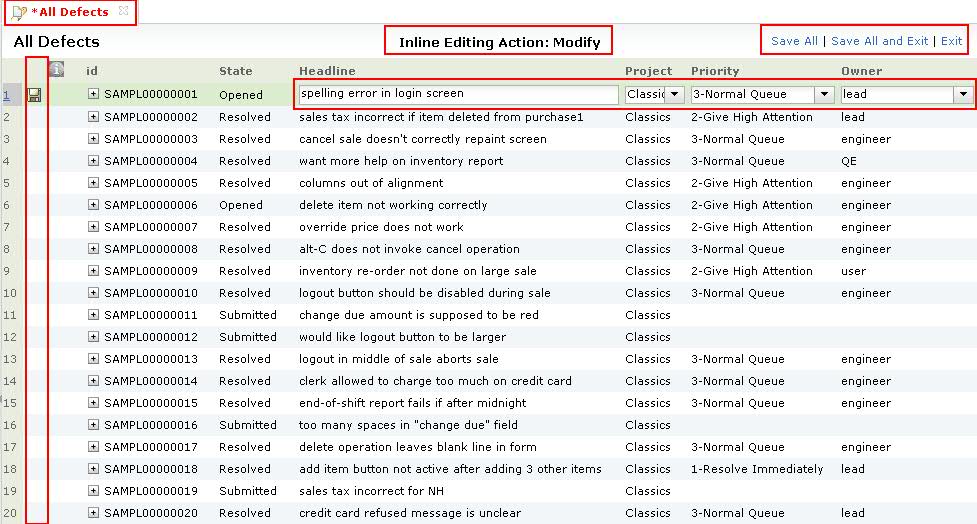
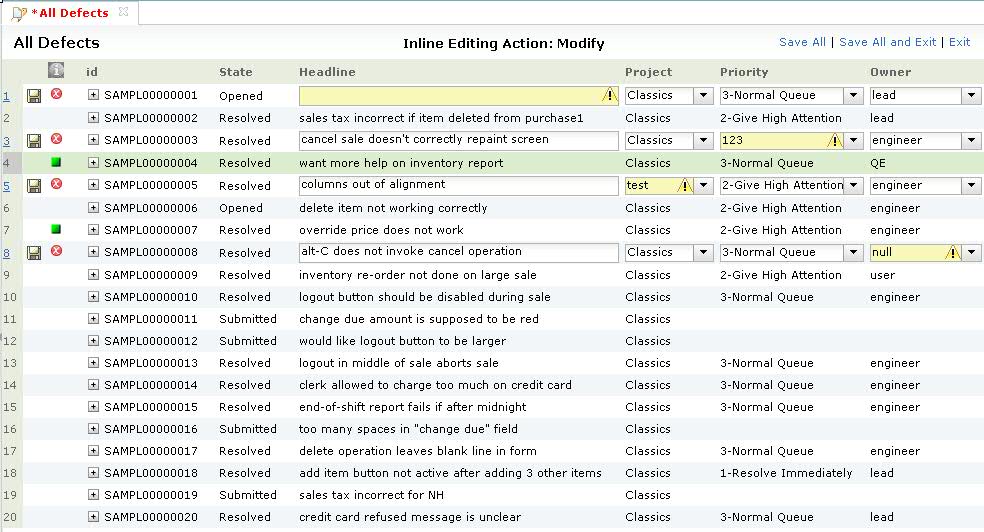
After you select an action, the result set enters inline editing mode. This action becomes the action used to edit any row in the result set. The action cannot be changed until exiting inline editing mode. The result set toolbar is replaced by an inline editing status bar. This status bar contains three buttons and a status that shows the default action for editing, for example, “Inline Editing Action: Modify”. The result set tab becomes red and an asterisk appears before the text to indicate that the result set is in inline editing mode and that there are unsaved records.
The selected record is now editable. A save column is displayed before the Information column. A Save button is displayed in the save column of any unsaved row. The row index is underlined to show that it is now a clickable hot-spot that opens the record in a form, allowing you to make more changes to the record.
The result set remains in inline editing mode until you click Save All and Exit or Exit. While the result set is in inline editing mode, you cannot choose another default action. When you right-click any record in the result set, the Inline Editing item on the context menu is disabled.
-
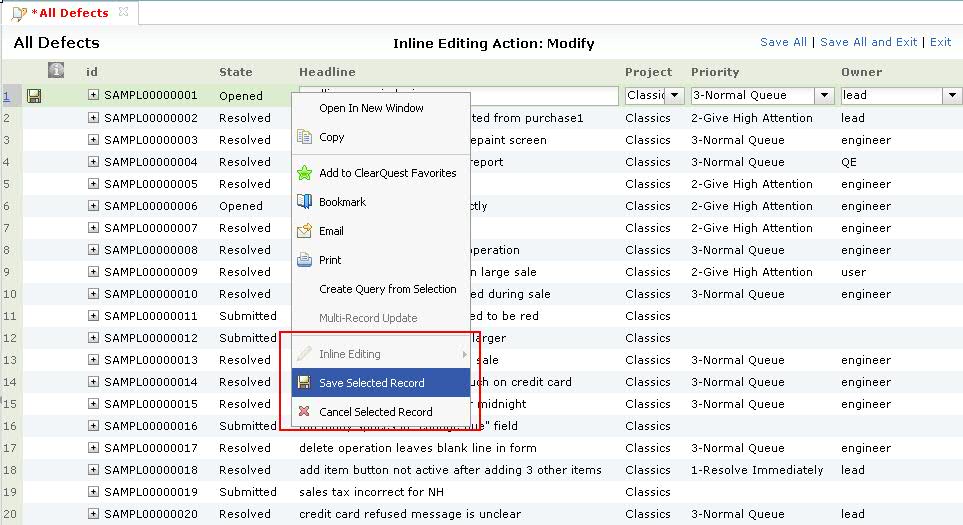
Save the records.
When you right-click a record that you are editing, the context menu enables Save Selected Record and Cancel Selected Record.
Click Exit to revert changes to any unsaved records and exit inline editing mode. If there are unsaved changes, a dialog displays a warning that all changes will be lost. To cancel a single record, right-click the record, click Cancel Selected Record. The Save button in the save column disappears. The result set remains in inline editing mode.
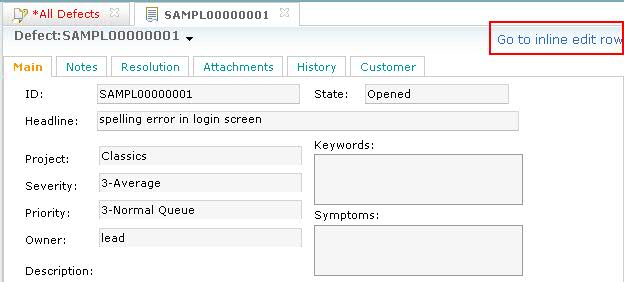
If you open a record form first, then start editing the record in a result set, all the toolbar items in the form are replaced by a link “Go to inline edit row”. Clicking on it takes you to the row that is being edited in the result set. After saving or canceling the record on the result set, the form returns to its normal state with the toolbar visible again.
When you finish editing records, click Save All to save all the changes to the unsaved records. Click any real field in any row to continue editing records. Click Save All and Exit to save all unsaved records and exit inline editing mode.
To save a single record, click the Save button in the save column of the row. The record can also be saved by right-clicking the record and choosing Save Selected Record. The result set remains in inline editing mode.
If there are any problems saving a record, the record stays editable and an X inside a red circle displays in the Information column. If a field has invalid values, the background color of the cell changes to yellow and a yellow warning triangle will display in the right side. Correct the errors and save the record again.
Results
Monitoring the status of inline editing sessions
After saving records, a green square indicates that the record was saved successfully. An X inside a red circle indicates the save failed on that record. Hover your pointer over the failure icon to read the error messages. You can also select the error message text and then use copy and paste to save the message.
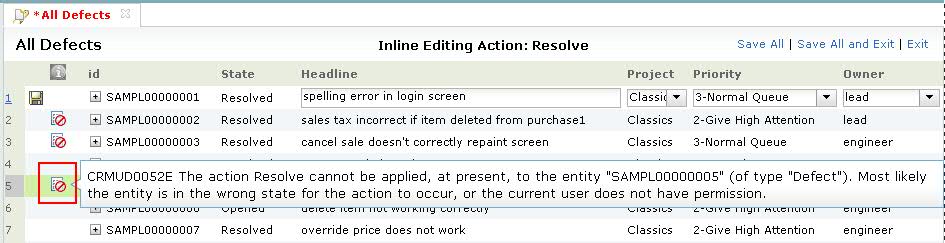
A slash inside a red circle indicates the row could not be edited. This can happen for several reasons, such as and inline editing action was not applicable to the record, the record was already being edited, or the record was part of a multirecord update. Hovering over the icon displays the associated error message.
Disabling inline editing
The inline editing feature is compatible with all feature levels. It is enabled by default and it can be disabled for an entire dbset or for any user database.
The ALLOW_INLINE_EDIT master property can be used to control whether inline editing is disabled. The master property can contain a default value that applies to all user databases, and it can contain a value specific to a user database that overrides the default value. When this master property is not set, the inline editing is enabled for all user databases by default.
Synopsis

installutil setmasterproperty dbset_name [-user_db_name user_db_name] cq_login cq_password master_property new_value

Options and arguments

dbset_name

Name of the database set or connection that contains the database to be configured for inline editing.

-user_db_name user_db_name

Specifies the user database to which the property applies. Default: the property applies to all user databases.

cq_login

Rational ClearQuest login name of the administrative user. This user must have Super User privileges and be marked for Rational ClearQuest authentication.

cq_password

Rational ClearQuest password for the administrative user. To specify a null password enter an empty set of double quotes.

master_property

Specifies the name of the master property to set.

new_value

Specifies the value for the master property.


Examples of disabling inline editing

    Disable the feature for the SAMPL database only:

    installutil setmasterproperty dbset_name -user_db_name SAMPL cq_login cq_password ALLOW_INLINE_EDIT 0
    Remove the setting for the SAMPL database:

    installutil setmasterproperty dbset_name -user_db_name SAMPL cq_login cq_password ALLOW_INLINE_EDIT “”
    Disable the feature for all databases, then enable it for two specific databases:

    installutil setmasterproperty dbset_name cq_login cq_password ALLOW_INLINE_EDIT 0

    installutil setmasterproperty dbset_name -user_db_name SAMPL cq_login cq_password ALLOW_INLINE_EDIT 1

    installutil setmasterproperty dbset_name -user_db_name BTEST cq_login cq_password ALLOW_INLINE_EDIT 1
    Remove the setting for all databases, including two specific databases:

    installutil setmasterproperty dbset_name cq_login cq_password ALLOW_INLINE_EDIT “”

    installutil setmasterproperty dbset_name -user_db_name SAMPL cq_login cq_password ALLOW_INLINE_EDIT “”

    installutil setmasterproperty dbset_name -user_db_name BTEST cq_login cq_password ALLOW_INLINE_EDIT “”
- The inline editing does not work on SQL-based query or full-text search result sets.
- Delete, Duplicate and Unduplicate actions are not supported.
- Push Button, Option Button, List View, Attachment, History, Parent/Child controls are not supported.
- If there are multiple controls for one field, the first control on the form is used for inline editing.
Troubleshooting
| Issues | Solution |
|---|---|
| If you resize the column width then start inline editing, the column width reverts. | Resize the column width again during inline editing. |
| The unique key is shown in the first real field column if the child record type does not have the same field as the first real field column of the query. The unique key is read-only during inline editing, although it is editable in the form. | Use the record form to edit unique key fields. |
| If a query displays the same field more than once, when editing a record in the result set during inline editing, all the same display fields are blank except for the last one. | Remove the duplicate display fields in the query. |
| If you select an action to start inline editing but do not have permission to perform that action, there will be no icon in the Information column. | You can add a custom message to the access control script to display a message such as, “You don't have permissions.” |