Creating a new connector using the Ingest service
You start the process of integrating your custom database tables into the Ingest service by creating a new connector.
Before you begin
- In the tutorial, a connector with the name
auth.xfieldsis created. You can use a custom connector name that best reflects your own customization scenario. - Replace “auth” or “live" in the code depending on whether you are customizing an auth or live connector/pipeline in which you are connecting to authoring or live environment database.
About this task
http://hostname/IP:30800/swagger-ui/index.html?url=/v3/api-docs&validatorUrl=#/Create%20Connector%20Configuration/createConnector-
This lesson uses a connector name of
auth.xfields. Connector descriptors are created using the Ingest API and are stored in ZooKeeper. -
In the NiFi user interface, the dataflow pipelines correspond to the connectors. Some of the pipelines have a large number of top level NiFi process groups connected together to form pipelines/connectors (for example, the
auth.reindexfull reindexing connector). Top level process groups often contain other nested process groups. You can continue to click on the process groups to drill down into the process groups that contain NiFi processors that perform the granular ETL tasks for the ingestion pipeline. -
It is often easier to locate specific process groups or processors in NiFi using the Search tool located at the top right side of the NiFi status bar. You can copy process group names from a connector descriptor (fetch using the Ingest API, e.g.:
GET
                                    http://INGEST_HOST:INGEST_PORT/connectors/auth.reindex
), or from Full reindexing connector.
Procedure
Complete the following steps to create the connector:
- From within the Swagger user interface, go to the API.
- Click on Try it out.
-
For the API body, use the following JSON code.
{ "name": "auth.xfields", "description": "This is the connector used for the custom fields to ingest", "pipes": [ { "name": "_Template-DatabasePagingETL", "properties": [ { "name": "Database Driver Location(s)", "value": "${AUTH_JDBC_DRIVER_LOCATION}", "scope": { "name": "Database Connection Pool", "type": "CONTROLLER_SERVICE" } }, { "name": "Database Driver Class Name ", "value": "${AUTH_JDBC_DRIVER_CLASSNAME}", "scope": { "name": "Database Connection Pool", "type": "CONTROLLER_SERVICE" } }, { "name": "Database Connection URL", "value": "${AUTH_JDBC_URL}", "scope": { "name": "Database Connection Pool", "type": "CONTROLLER_SERVICE" } }, { "name": "Database User", "value": "${AUTH_JDBC_USER_NAME}", "scope": { "name": "Database Connection Pool", "type": "CONTROLLER_SERVICE" } }, { "name": "Password", "value": "${AUTH_JDBC_USER_PASSWORD}", "scope": { "name": "Database Connection Pool", "type": "CONTROLLER_SERVICE" } } ] }, { "name": "Terminal", "label": "Terminal" } ] } - Click on Execute.
-
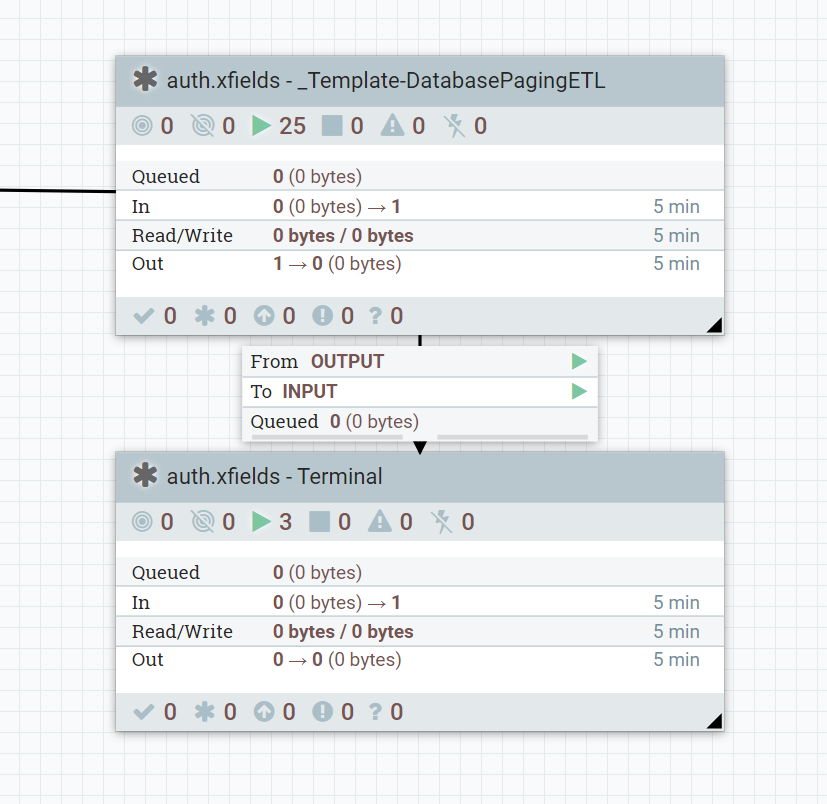
Verify that your new connector has been created.
Open the NiFi user interface. You should see your new process group on the far right side of the NiFi canvas. You can also search for “auth.xfields” using the Search tool in the upper right side of the NiFi status bar, to quickly locate your connector/pipeline.