After you create your custom connector in the Ingest service, you configure it to
connect to the database server.
Procedure
-
Update the Ingest SQL in the
auth.xfields-_Template-DatabasePagingETL process
group.
-
Use the following link to access the NiFi user interface:
http://hostname/IP:30600/nifi/
-
Locate and double-click on
the
auth.xfields-_Template-DatabasePagingETL
process group.
-
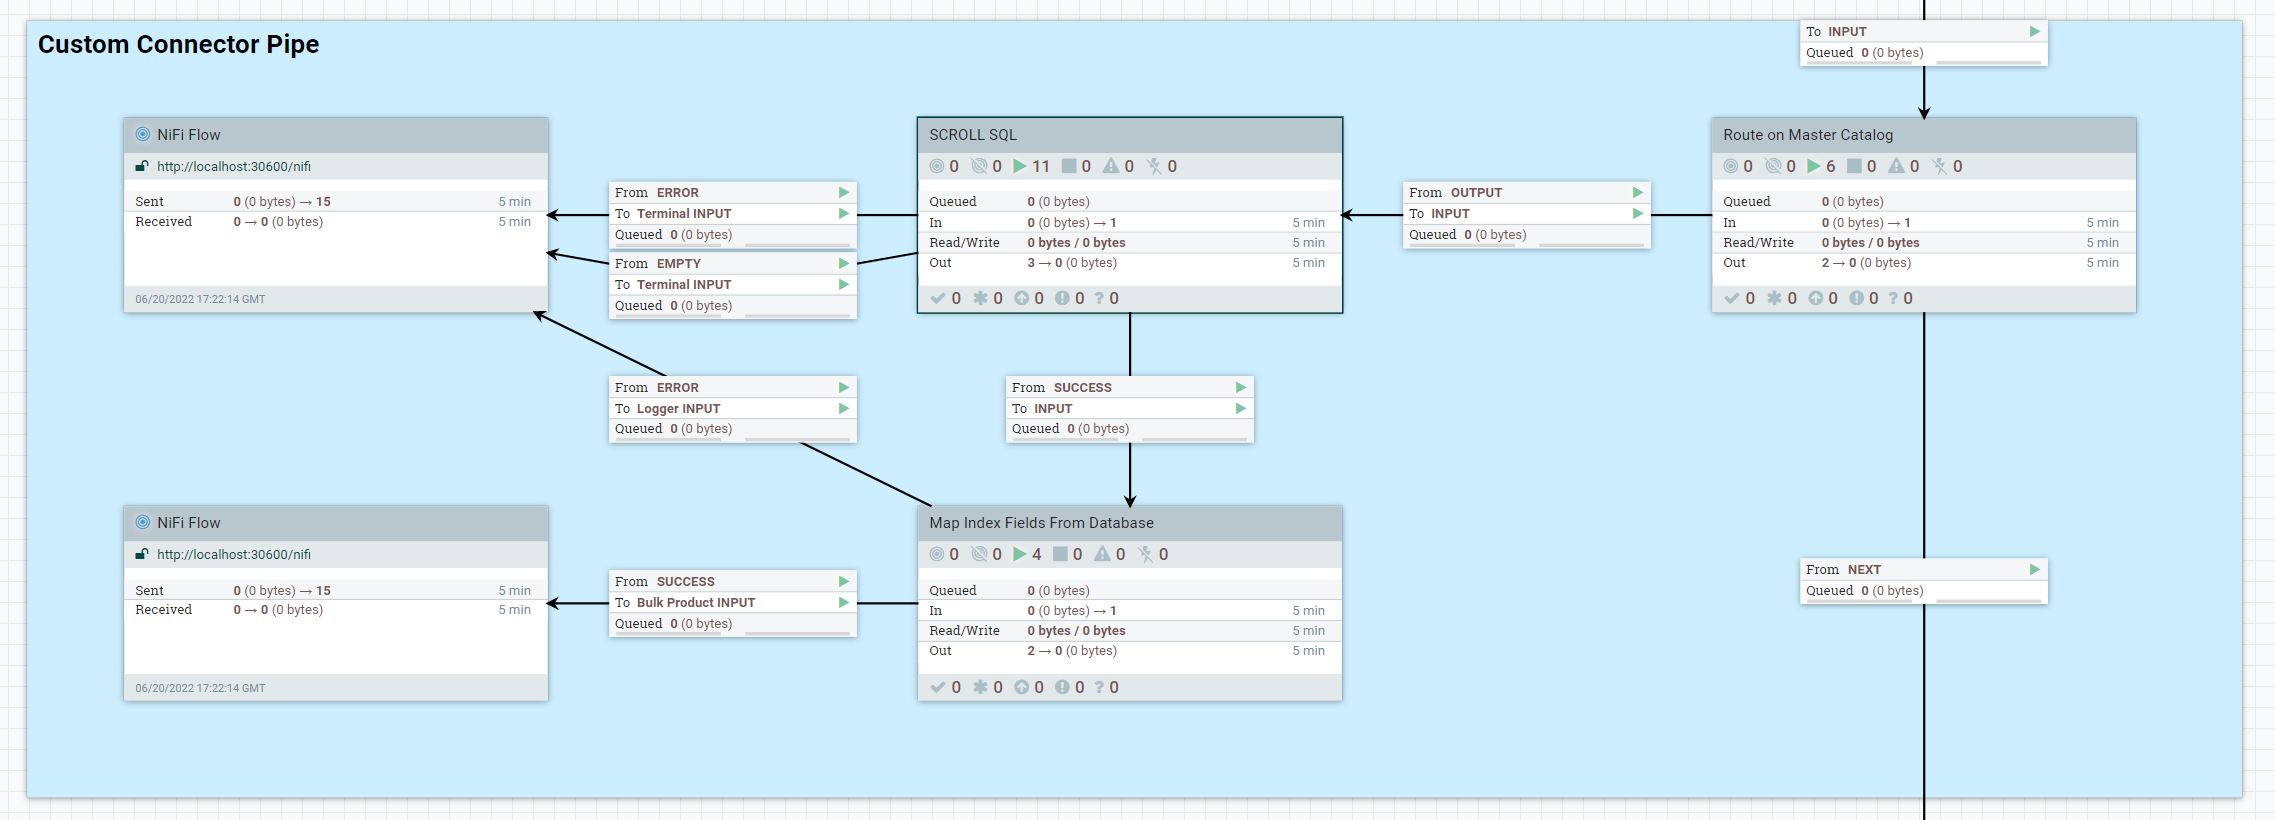
Double-click on the
Custom Connector Pipe Process
Group. Once that opens, locate and double-click on the SCROLL
SQL process group. Locate and right-click on
the Define Custom SQL processor and stop the
processor.
-
Double-click on the
Define Custom SQL processor to
modify its settings.
-
Select the Properties tab and update the
ingest.database.sql property with the your
custom SQL code, depending on the custom fields that you would like to
include from a catalog table (such as CATGROUP.FIELD1).
For example,
SELECT field1, field2,catentry_id FROM catentry ${paging.prefix} ${param.offset} ${paging.link} ${param.pageSize} ${paging.suffix}
-
Once the SQL field is updated, click Apply.
-
Right-click the processor and click Start.
-
Update the properties of the
Custom Connector Pipe processor
for the Java processgroup.
-
In the
Custom Connector Pipe process group,
double-click on the Map Index Fields From
Database process group.
-
Locate the
Transform Document - Map Index Fields From
                                Database
process group and stop the processor.
-
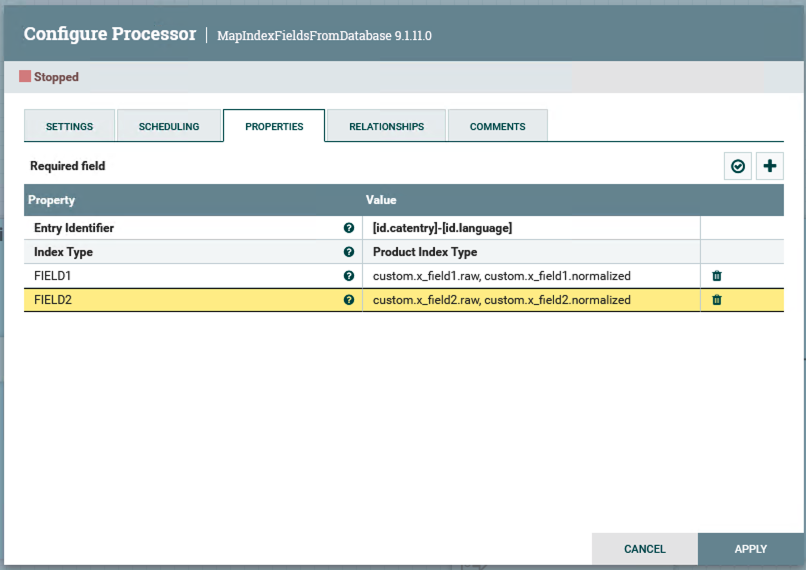
Note the following mandatory properties.
- Entry Identifier
- The
_id key used for the output document
that will later be sent to Elasticsearch. This identifier
can be expressed using flowfile and registry variables, as
well as using the index field name in the search response,
surrounded by square brackets.
- By default the Entry Identifier value is set to
[id.catentry]-[id.language]. Change
this value to
${param.storeId}-${param.langId}-${param.catalogId}-[id.catentry].
- In order to process this identifier, locate the processor and add the additional property
CATENTRY_ID = id.catentry to it.
- Index Type
- The type of search index in Elasticsearch, for example
Product or Category.
This value should not be changed for this tutorial.
-
Define the mapping of custom database table fields to corresponding
index fields. Set the Property Name to the
database table field name and set the Property
Value to the corresponding search index field path. The
property value can be a multi-valued comma separated list to allow the
same database table field to be mapped to more than one search index
field name. For example:
Name:   FIELD1
Value:  custom.x_field1.raw, custom.x_field1.normalized
Note: Re-use the existing index schema mapping
where possible, to simplify the customization logic.
-
Click Apply.
-
Start the processor by right-clicking on it and
selecting Start.
Results
The new connector is now properly configured. In the next
lesson, you integrate it into an existing NiFi pipeline.