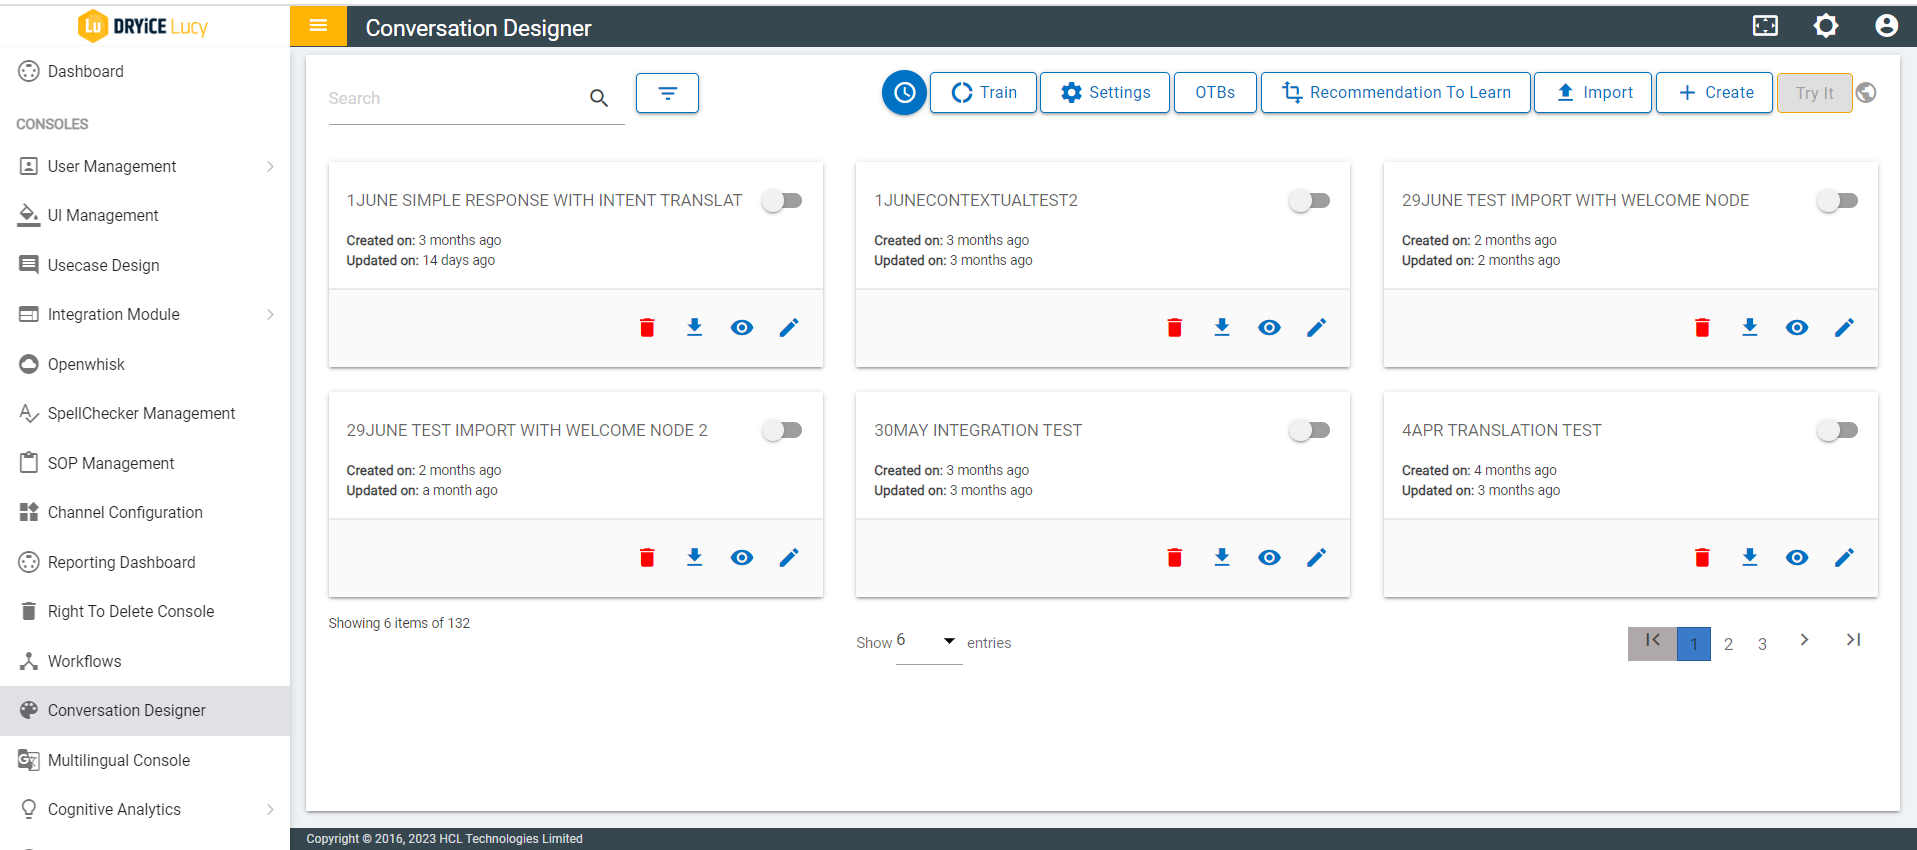
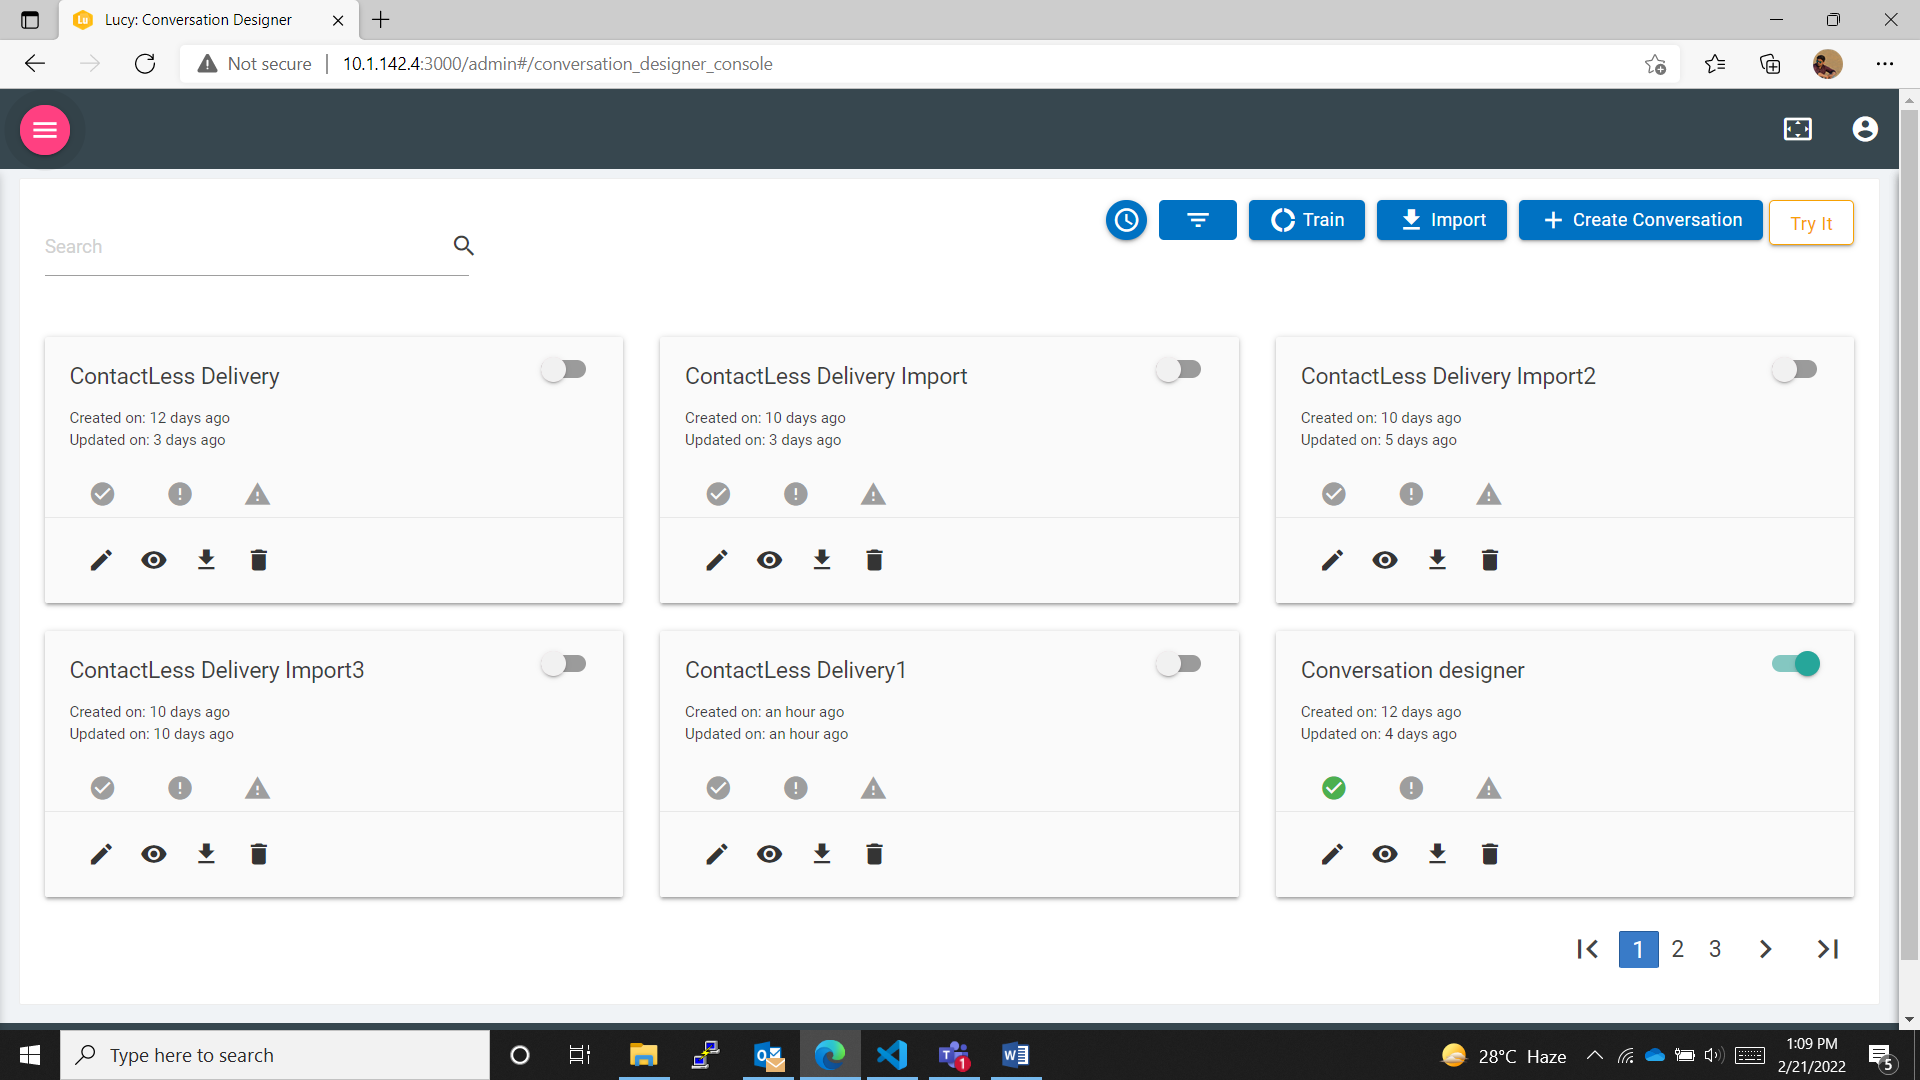
Functional Buttons on List Page
On the list page, there is a collection of buttons along with a search bar at the top part of the list page. This section provides details of these buttons and their respective functionalities and also how they are useful to the user.
- Create Button: This allows the user to go to the conversation creation page and create the conversation flow as required.
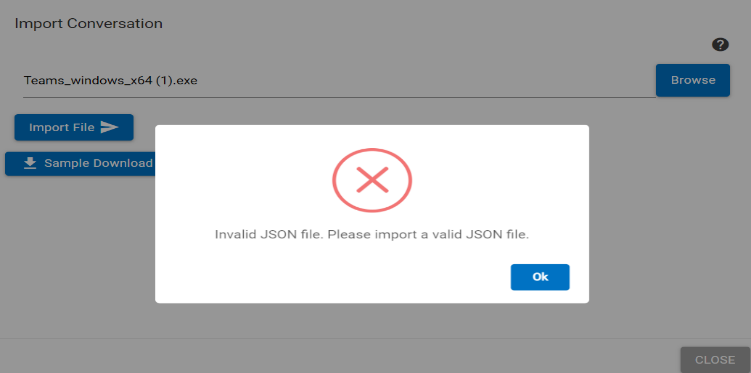
- Import Button: The user can import a JSON file in which the conversation is stored. The user browses the file and clicks on Import File. Once the imported JSON file passes all the validation put on place to make an error free conversation flow, a new conversation is created by the imported JSON file after we click the Import File button. The newly created conversation is listed among the conversation card list in the list page along with the other conversations.
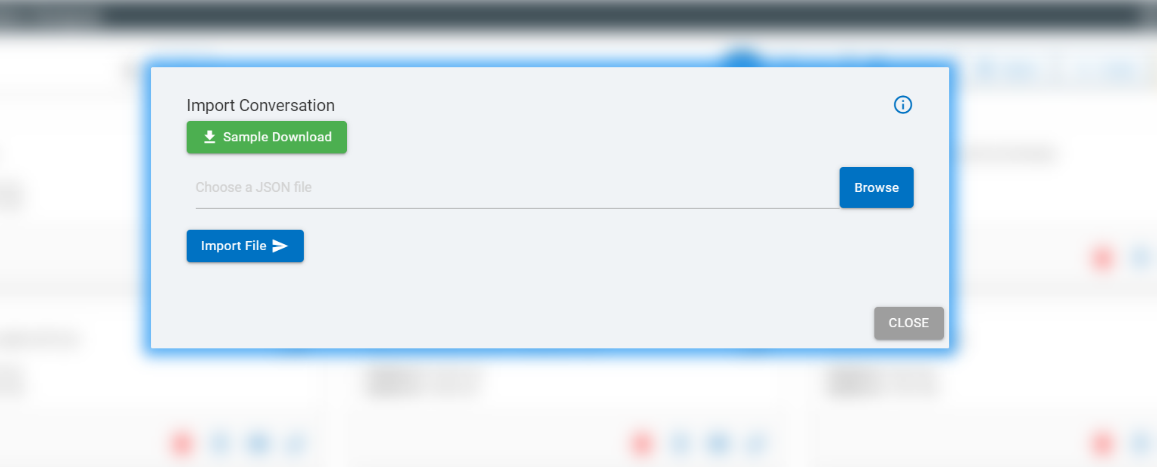
- The end user can download the sample file. This file helps the user to gather some ideas about the JSON file that is intended to be imported.

- To import the JSON file for creating a conversation, there are few validations to be done on JSON file so that the console can create an error free conversation with the imported JSON file. These validations are as follows:
- The user can only import JSON files. No files other than JSON can be imported.
- Conversation names must be unique.
- There can be a maximum of 10 BigFix AEX and 10 User type responses, 9 Simple Responses, 10 User category responses and 1 Jump To node in a branch.
- Users can add either OTB flow Snippet or other responses.
- Conversation must have name(string), flow (object with default key of type array), and active of Boolean type.
- Every response must have type, value, dialog_node (unique).
- User option response, Jump to conversation, OTB flow snippet must not have output connections.
- If output connections are not there in any other responses, except the previously mentioned three responses, then that response is considered as the last response of that branch.
- If Jump To is present, then it must be the last node of the conversation.
- If the user option response is there, then the input connection should be coming from node should be Simple response/Integration Trigger/NLP2SQL/Adaptive card with option.
- While importing a conversation the validation for every node should be kept in mind, these are:
- Validation of user response:
- Utterance length should be greater than 1.
- Conversation must start with this node.
- It always shows the first utterance only.
- Only one User Response per conversation is allowed.
- The first User Response cannot be deleted.
- Validation on Simple response (Without Option):
- Will Not be the first node
- Can be the last node
- The input connection should be from start node, contextual node, or user option node.
- Validation on Simple response (With Option):
- It cannot be the first node.
- The input connection should be from start node, contextual node, or user option node.
- The output connections will only go to user option node.
- It must have intent/entity/ take any input.
- Every intent/entity must have a single variation/synonym.
- Intent/entity/variation/ synonym cannot be of length 1.
- If Option is turned false, the below user option and flow gets disconnected.
- If a person cancels, then the form should appear as is.
- If deleted, is deleted with Simple response and option (and all flow gets disconnected).
- Validation On User Option response:
- This response type only appears after Simple response (with option) /Integration Trigger/NLP2SQL/Adaptive card (with option) as entity/intent based/ Take any input.
- Will automatically come as soon as Simple response (with option) /Integration Trigger (with option)/NLP2SQL/Adaptive card is saved.
- Validation On Integration Trigger:
- “Save” button is only visible if an integration is selected.
- It cannot be the first node.
- It Can be the last node.
- Parameters can be added.
- Only input connection from start node, user option node or contextual node
- Parameter can only be added when an integration is selected.
- Validation on Integration Trigger (With Option)
- It cannot be the first node.
- It must have intent/entity/Take Any input.
- Every intent/entity must have a single variation/synonym.
- Intent/entity/variation/ synonym cannot be of length 1.
- If Option is turned false, the below user option gets deleted, and flow gets disconnected.
- If deleted, it is deleted with Integration Trigger (with Option) (and all flow gets disconnected)
- Validation On OTB Flow Snippet
- If the conversation section has node or series of node the response type ‘User Response’, ‘Simple Response’, ‘User Option Response’, ‘Integration Trigger’ then, if end user tries to add OTB Flow snippets, a confirmation is required by the end user stating if he wants to add OTB Flow Snippets then the existing conversation is removed.
- If the conversation section has OTB Flow snippets as a part of it, one more OTB Flow snippet cannot be added.
- If the conversation section has OTB Flow snippets as a part of it, and user try to add any other response type (other than OTB flow snippets) then a confirmation is asked from end user that OTB Flow snippet response type is removed if this response type you want to add.
- “Save” button is only visible, if an OTB is selected.
- Validation On Contextual Node
- It cannot be the first node.
- It automatically adds a contextual user response once it is saved.
- Validation On Jump to Node
- It cannot be dragged.
- It cannot be the first node.
- After this node, no node can be added next.
- Validation On Agent Assist Node
- This node can be last node
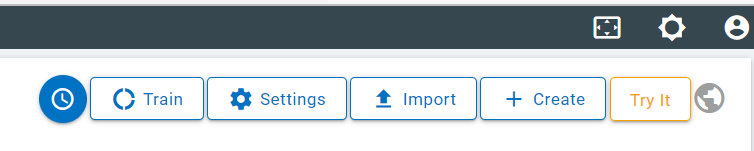
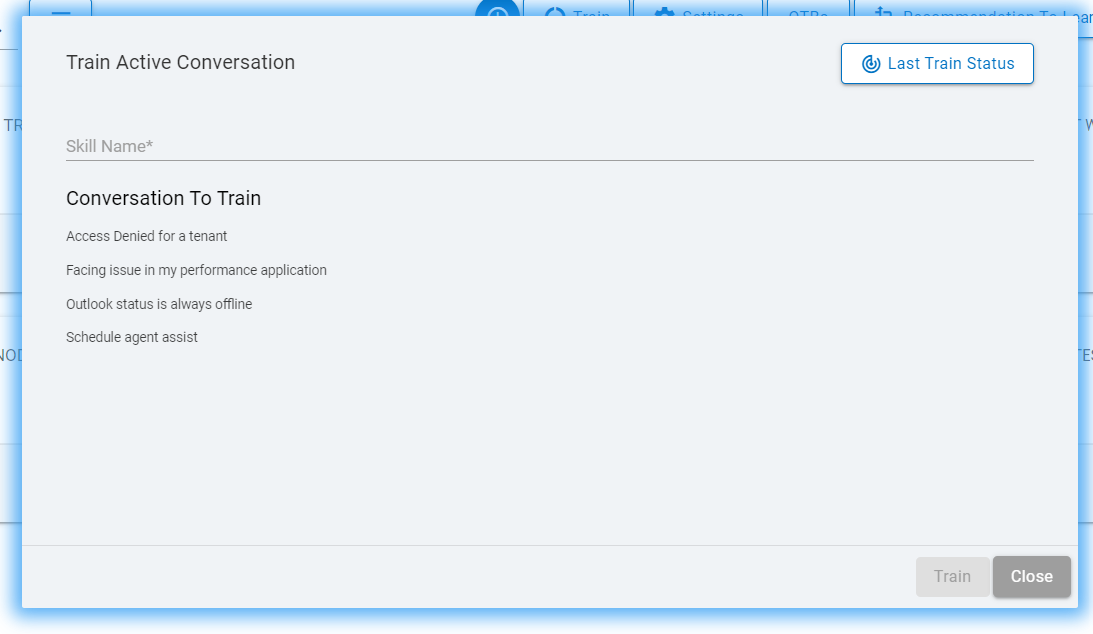
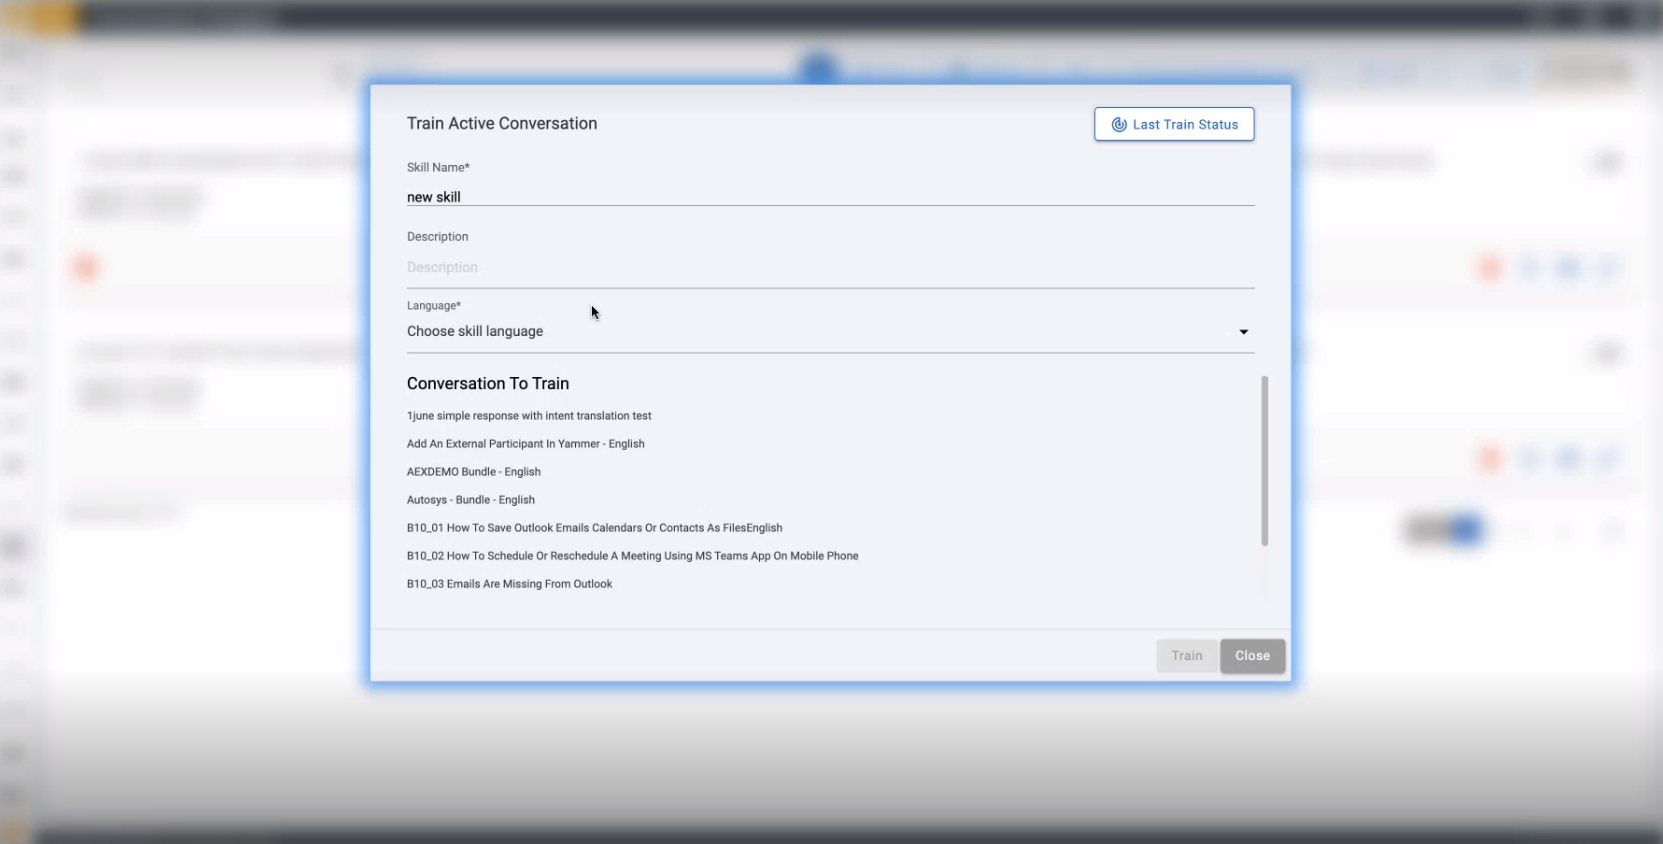
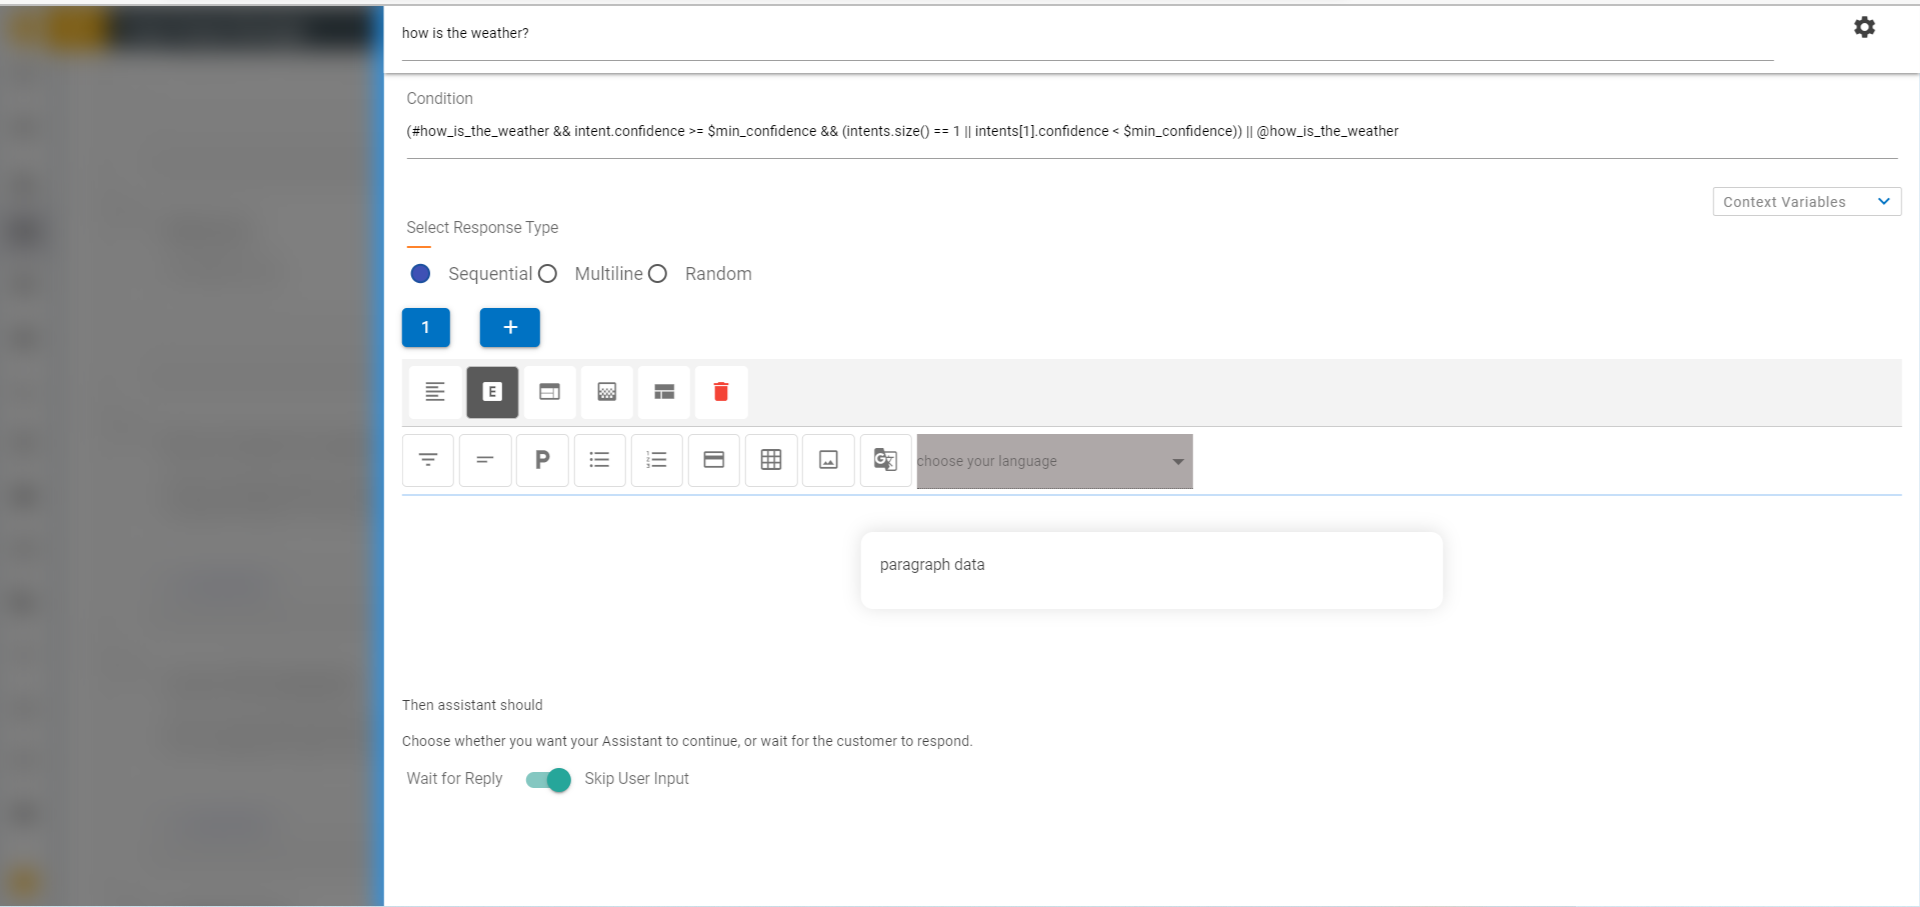
Train Button: This button allows the user to train selected conversations to create a skill in the UCD console. In this pop-up modal, users can give skill name, provide description, and choose skill language from dropdown.

- In the Conversation to Train section, the list of the conversations that are selected to be trained are listed out. The Train button at the footer of the modal is only enabled after the user inputs Skill Name and selects Skill language. On successful completion of training, the user can see the skill present in the UCD console.
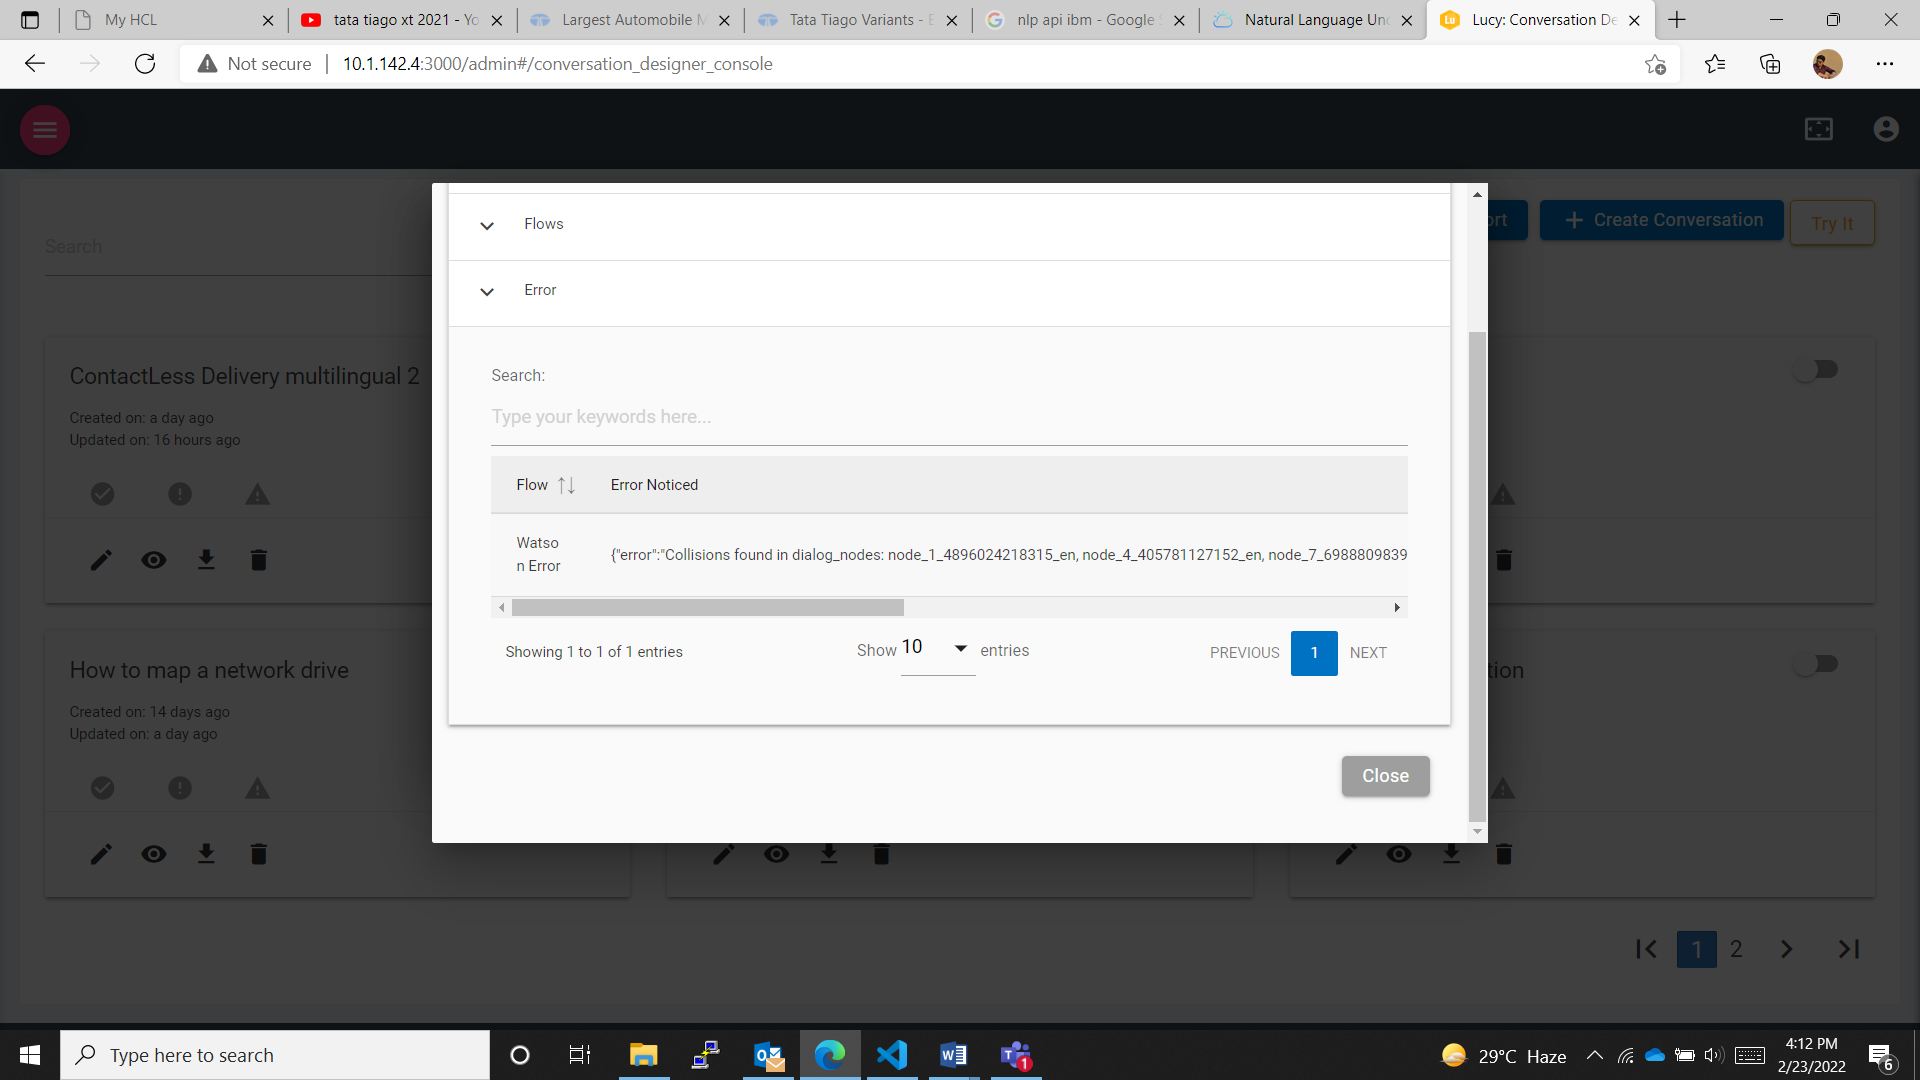
Last Train Status: The Last Train Status button allows the user to check the status of the last trained skill. This modal contains two collapsible menus, i.e., Multilingual Languages and Flows if the training was successful without any errors and a skill is created successfully on the UCD console. If the training was not completed successfully, there is a third collapsible menu along with these two, namely Errors menu. Detailed description about all these three collapsible menus is described further along in this document.
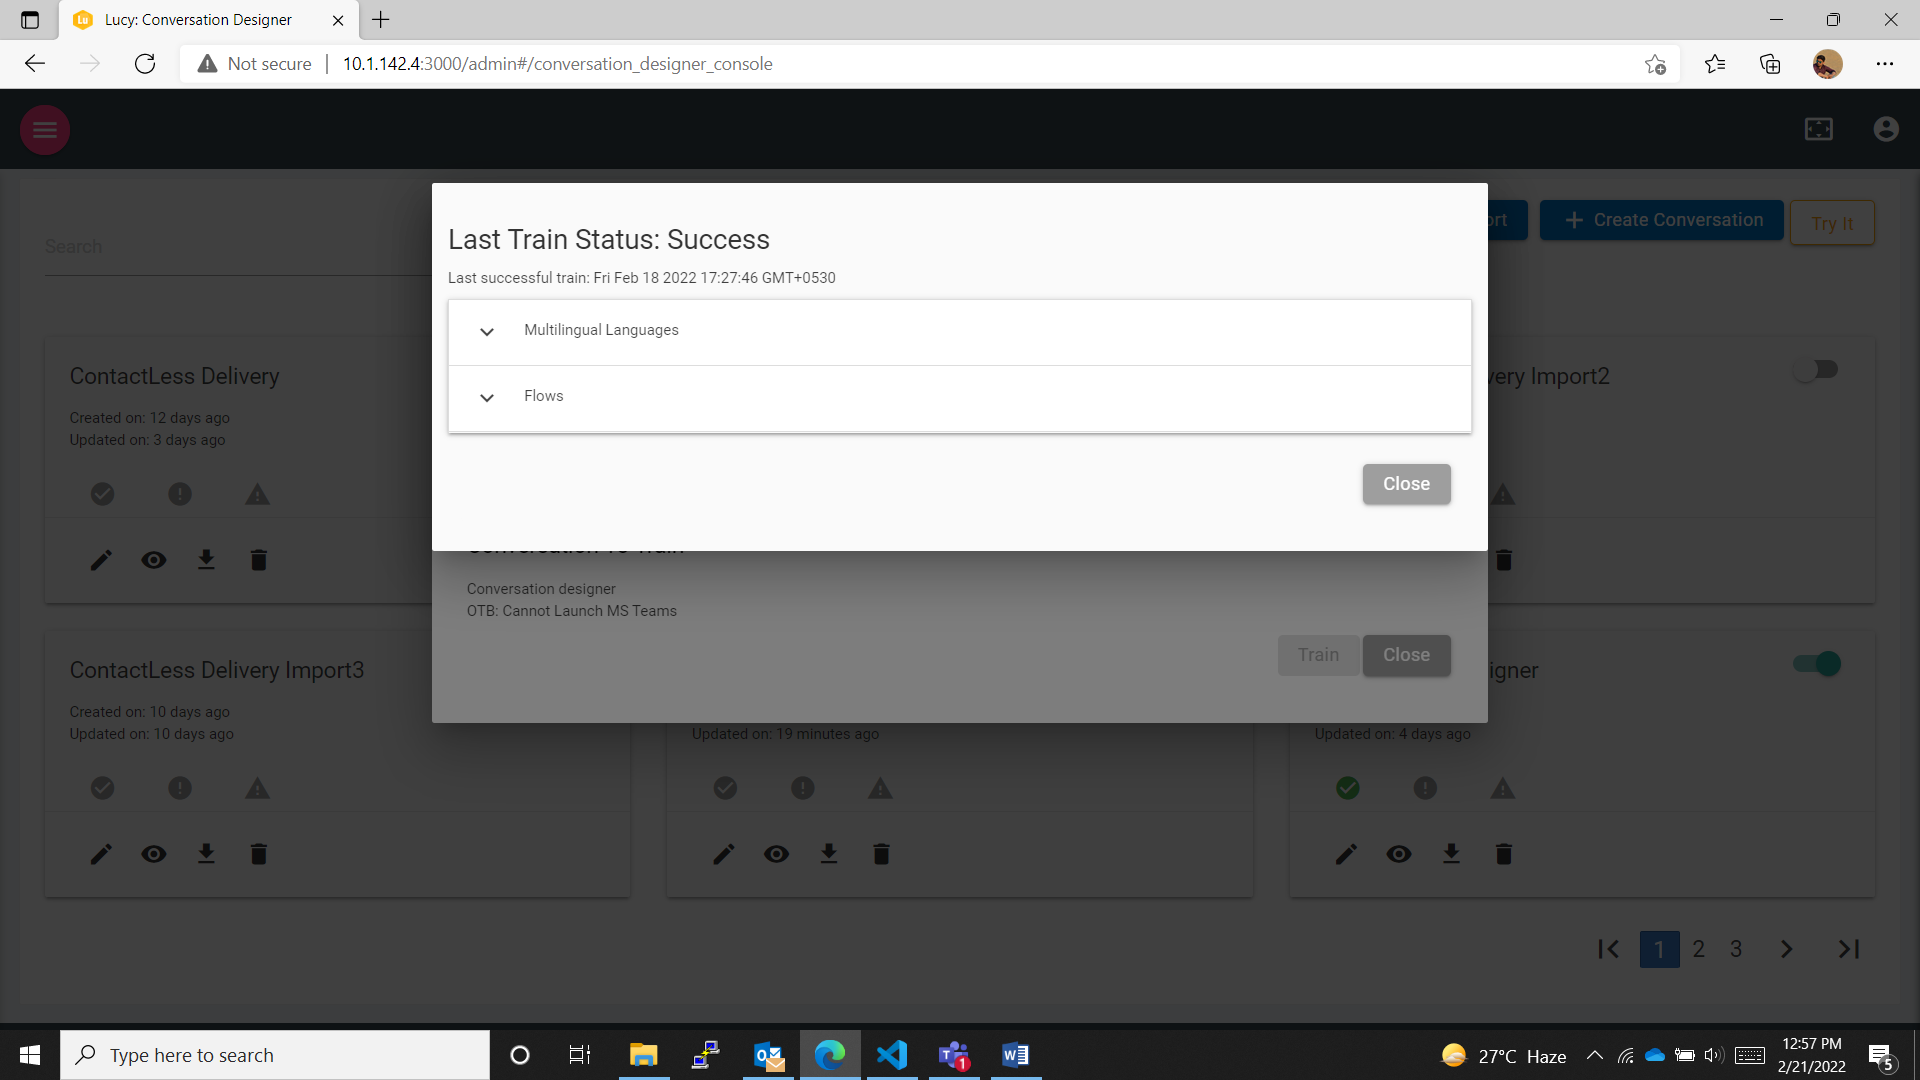
- Multilingual Languages: This collapsible menu lists out all the languages in which the skill was trained the last time
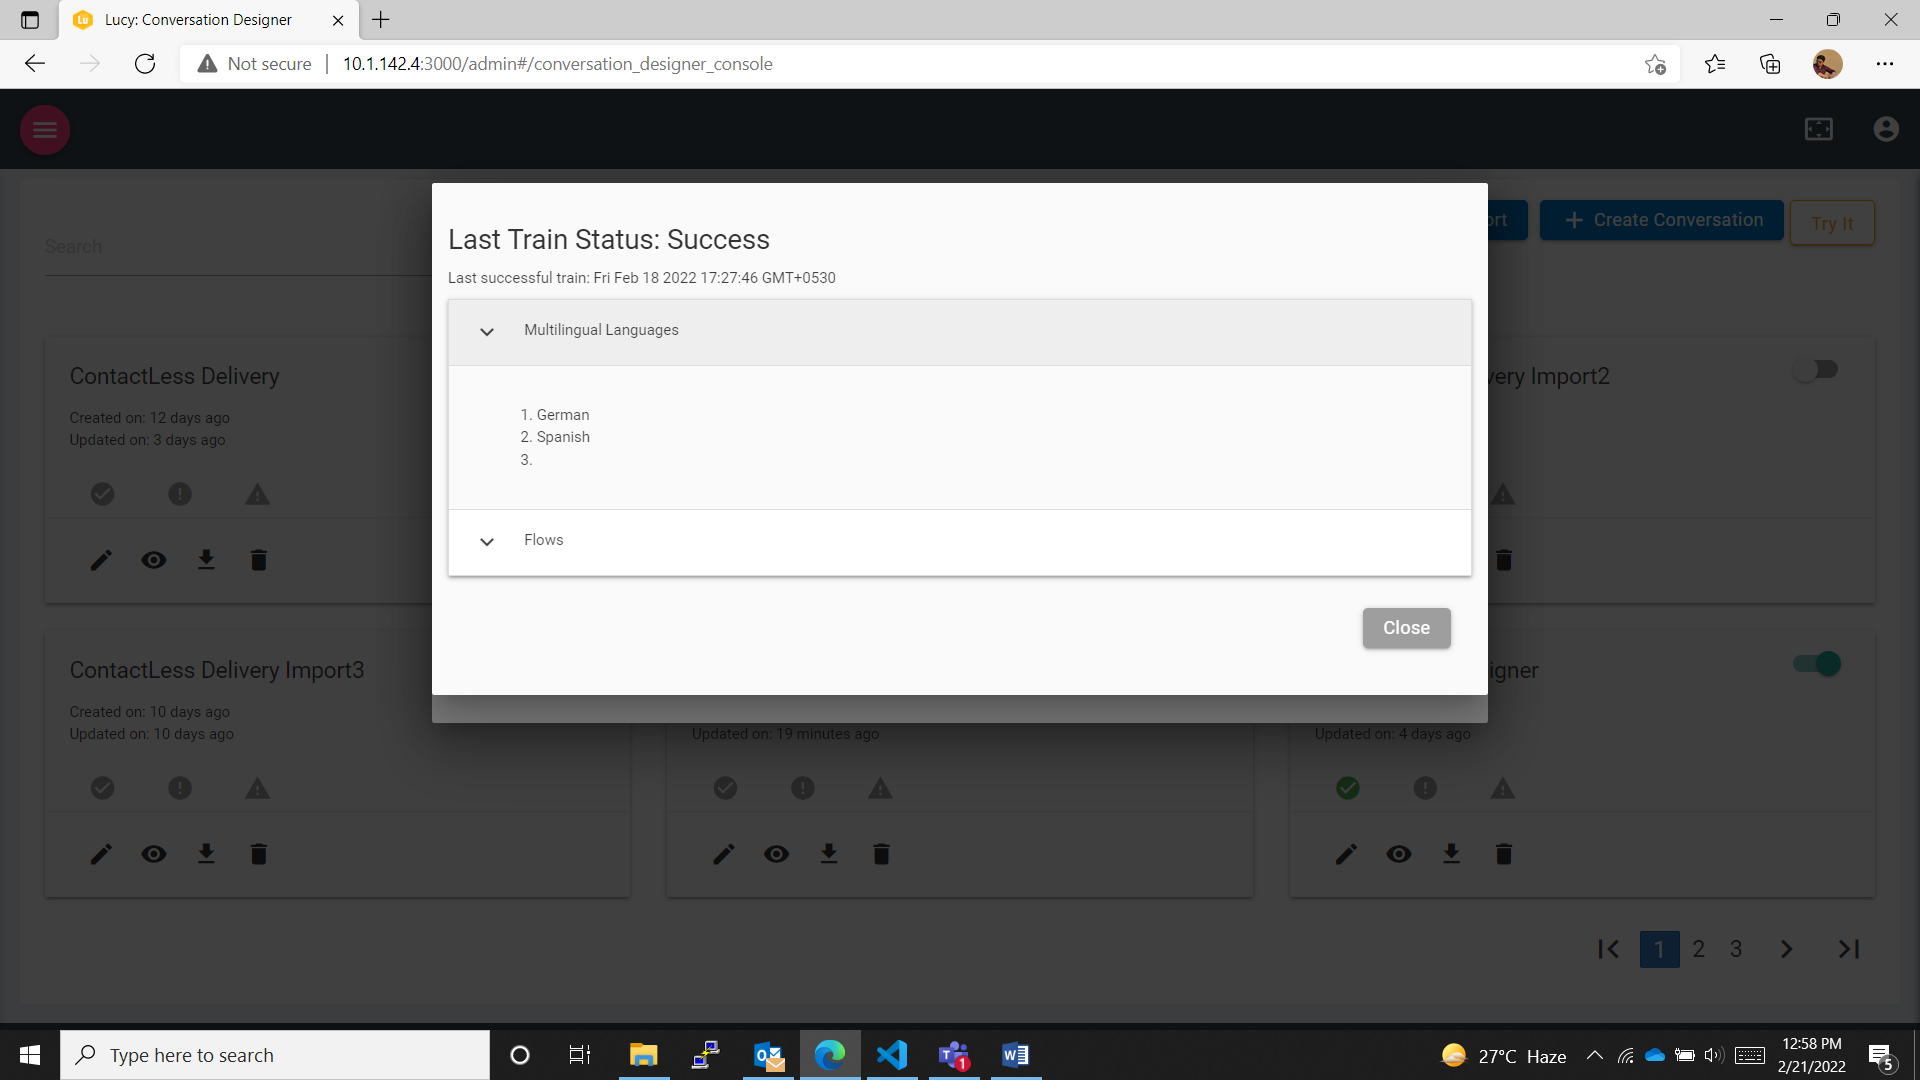
- Flows: This collapsible menu lists out all the flows that were trained the last time the skill was trained.
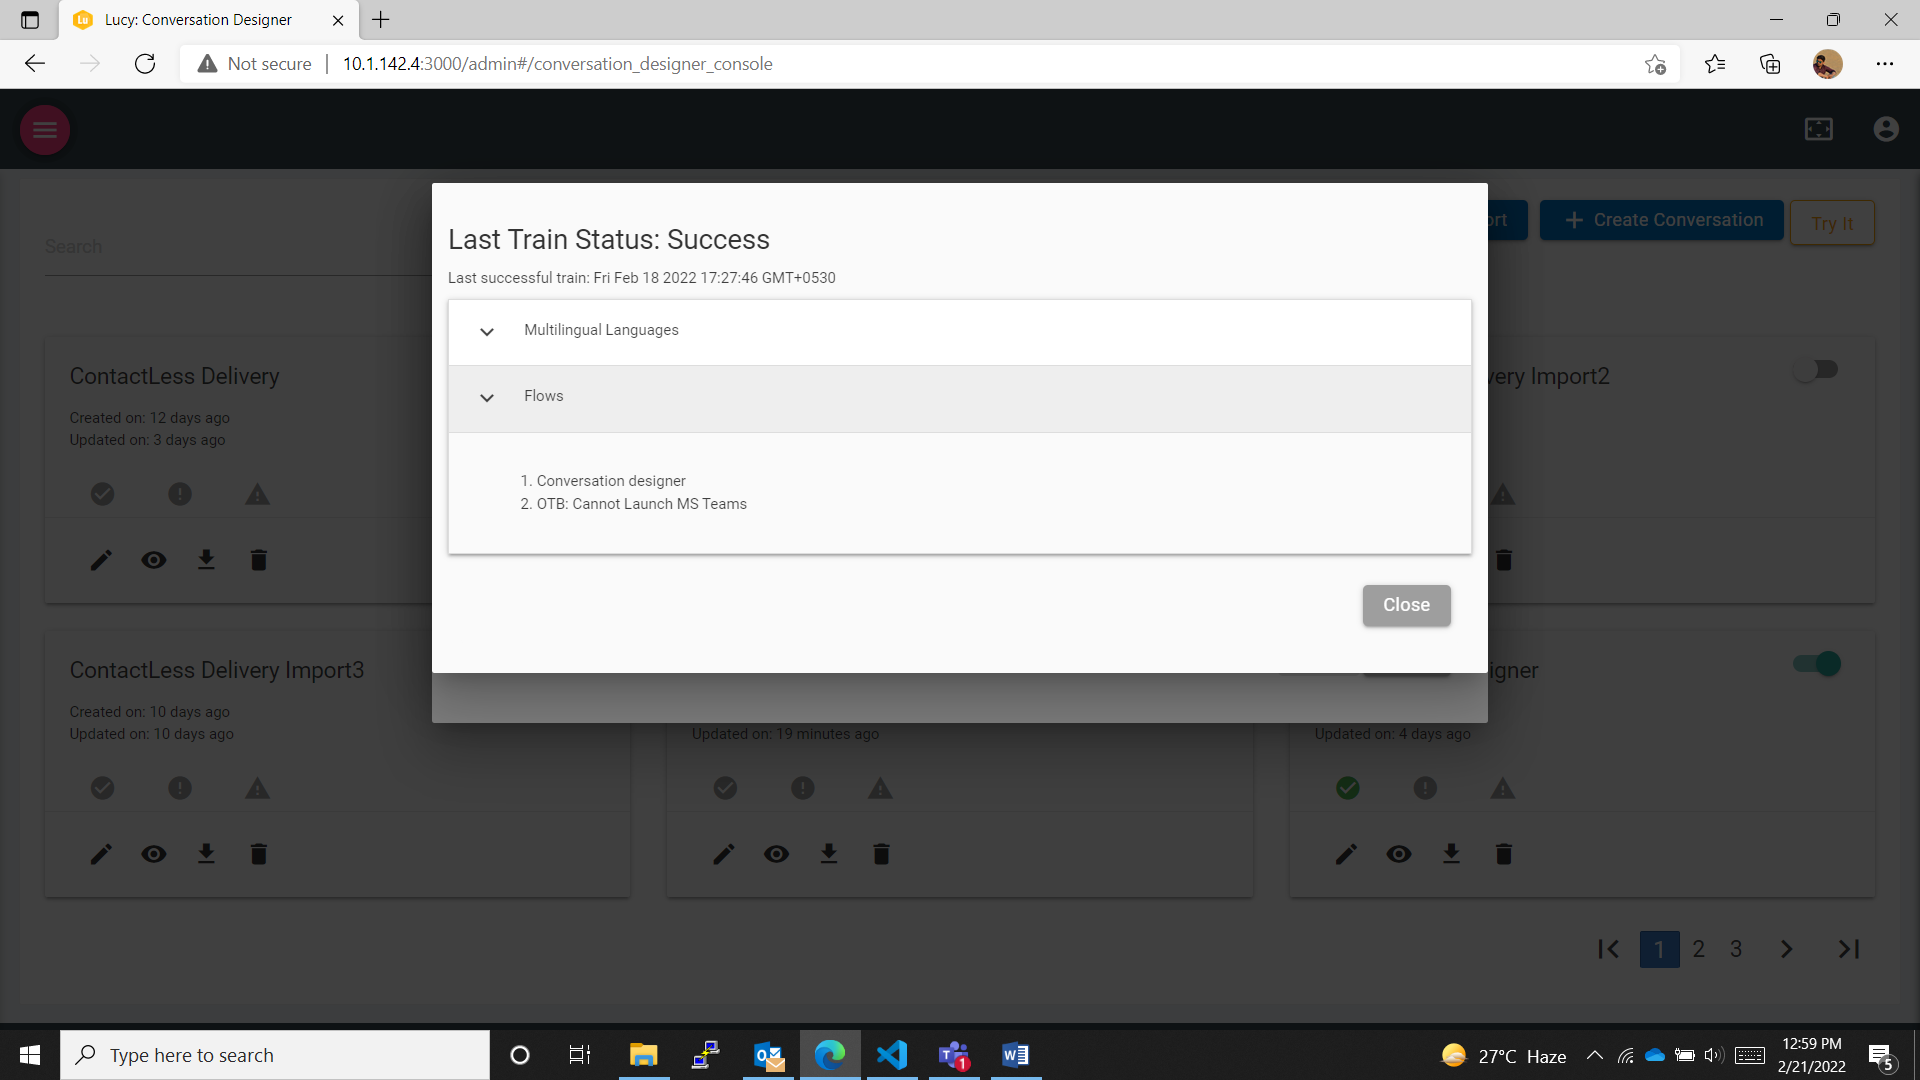
- Errors: This collapsible menu lists all the errors that were caught during the last time a skill was trained.
- For the Train button to perform efficiently, the validations that are in place are:
- Consecutive nodes cannot be of same group. To be simpler, node number one and node number are two consecutive nodes, and they cannot belong to the same group of nodes, such as either BigFix AEX, User or Others.
- The first and last node type is checked. It has already been described in this document which nodes can be first node and which are allowed to be last node.
- This button is active only when at least one conversation is active.
- No, two same user response /OTB (question) can be trained and will throw a duplicity error.
- Train button on modal gets enabled only when skill name and skill language are filled. Both name and language are the key.
- There should not be Jump To loop in the conversation that are selected for training
- Train button is enabled only when there is a conversation and the conversation is enabled for training, otherwise the button remains disabled.
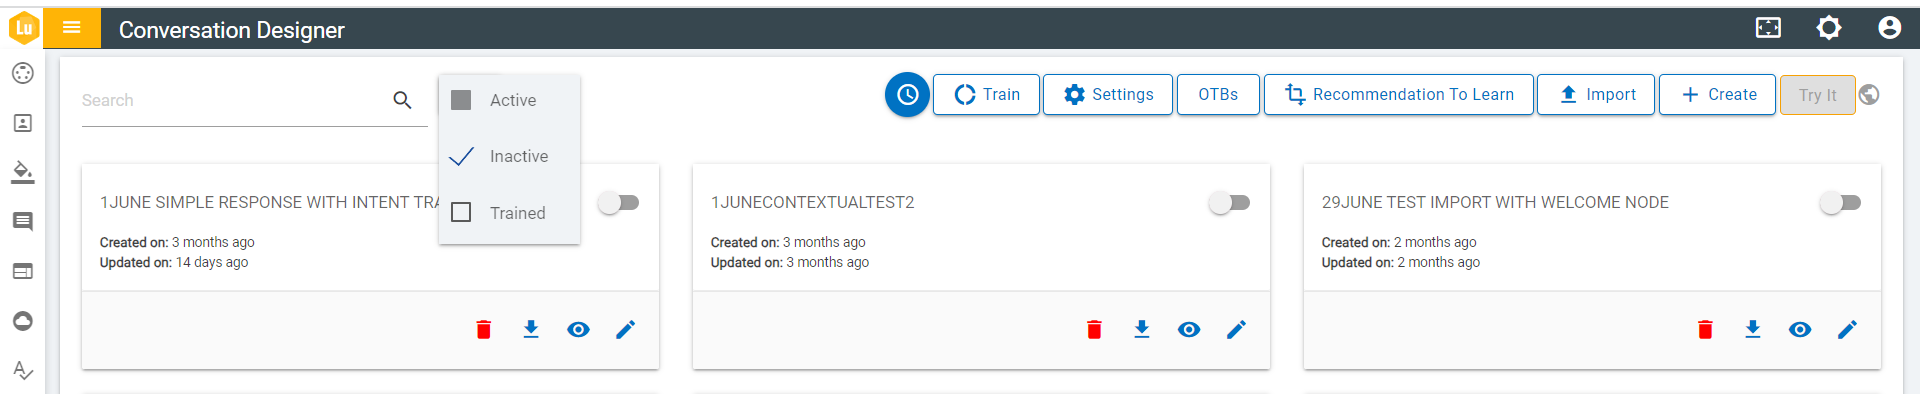
Filter: Filter allows the user to filter the conversation cards from the list depending upon the type of cards that the user requires, such as, Active, Inactive or anything else.

]
- The Filter button opens a dropdown of multiple checkboxes to filter among the listed conversation flows.
.png)
- Selecting the labeled checkbox filters the intended conversations from the conversation list. Such as, selecting Inactive lists out the inactive conversation from the list of the conversation, and so on.
Last Trained Time: The last trained time icon shows the time when skill was trained last. This button is only visible in the list page after a skill has been trained at least once.

Settings button: This button opens a modal that allows the user to set system specific settings for the conversation designer. Currently, the user can enable the Autosave functionality and can set the time interval for auto saving the updated conversation.

After enabling Autosave, the user can set the interval. After setting the interval the user can save the settings using the save button. This Autosave is only effective in the Update page of an existing conversation and not the Create page.
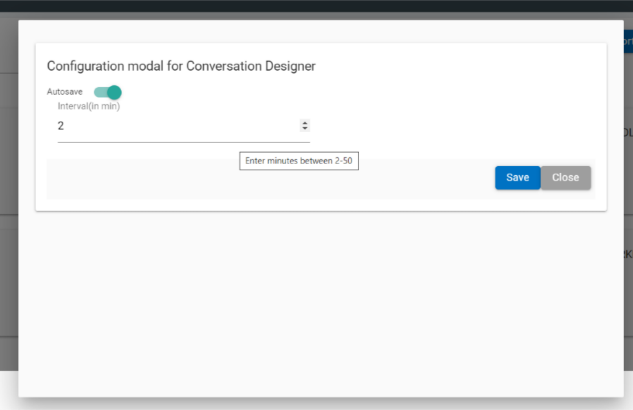
Validations on AutoSave:
- This functionality is only effective on the edit page
- Time intervals are only counted while the user is on the Conversation Designer page. If the user minimizes the tab or changes the tab, time interval is not considered. Time interval accounts for the time only when the user is making changes on the edit page.
- The minimum time interval can be 2 minutes; the maximum can be 15 minutes.
- After the progress is saved automatically a toast notification for the same is visible on the Edit page.
- The changes are browser specific and user specific.
Train Button: If the user wants to train the existing skill, we only need to select the skill name from autocomplete.
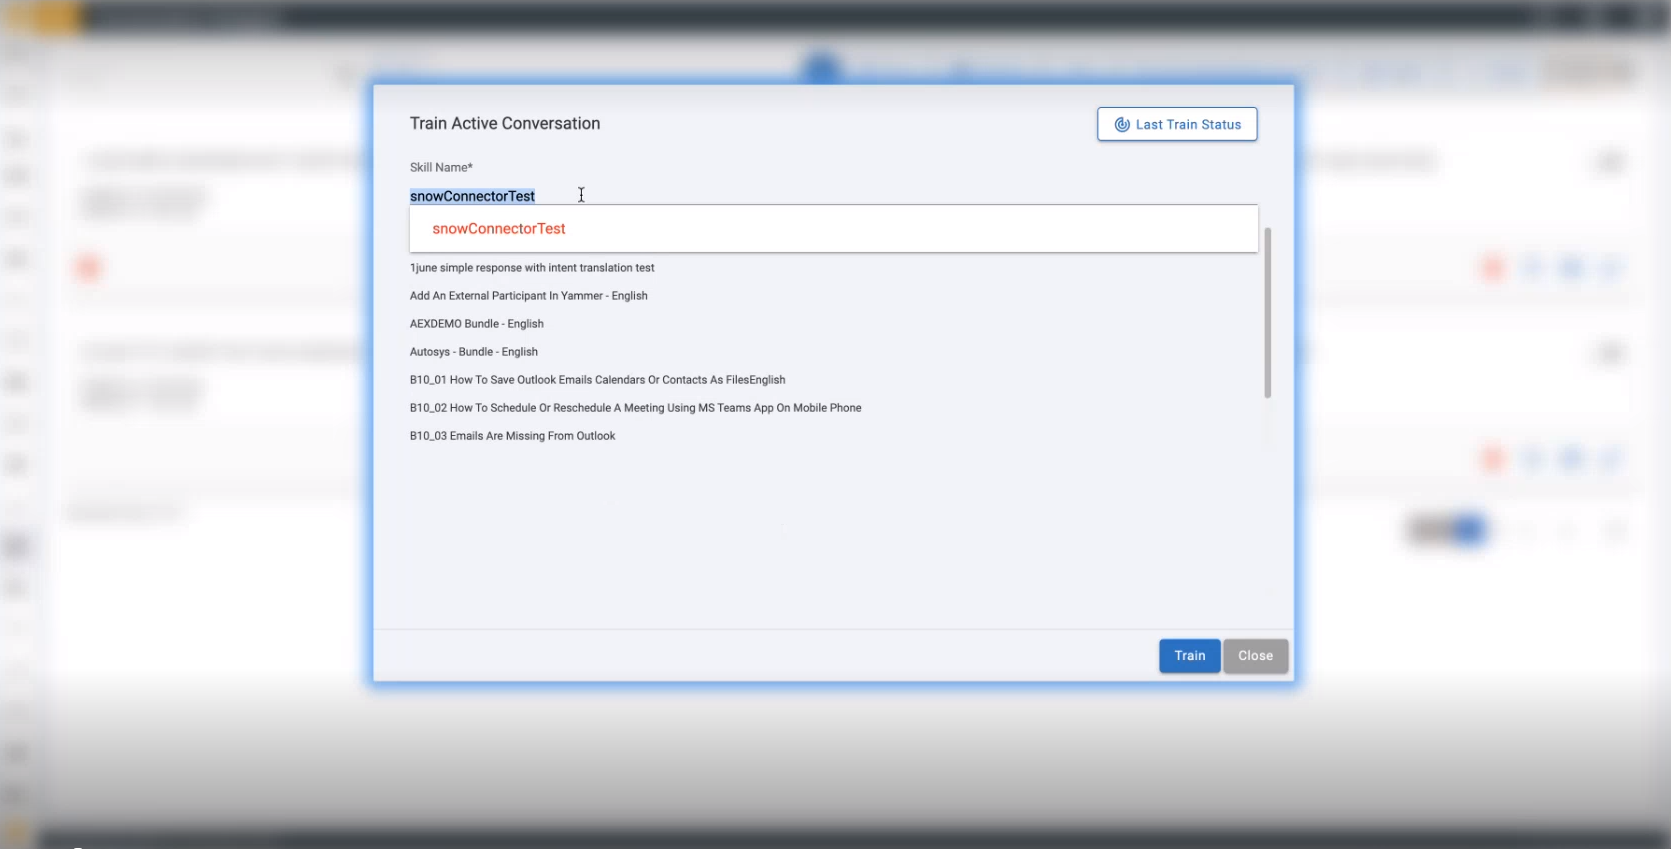
If the user wants to create a new skill in UCD, if the skill does not exist, we need to give the skill name, description (optional), and language.
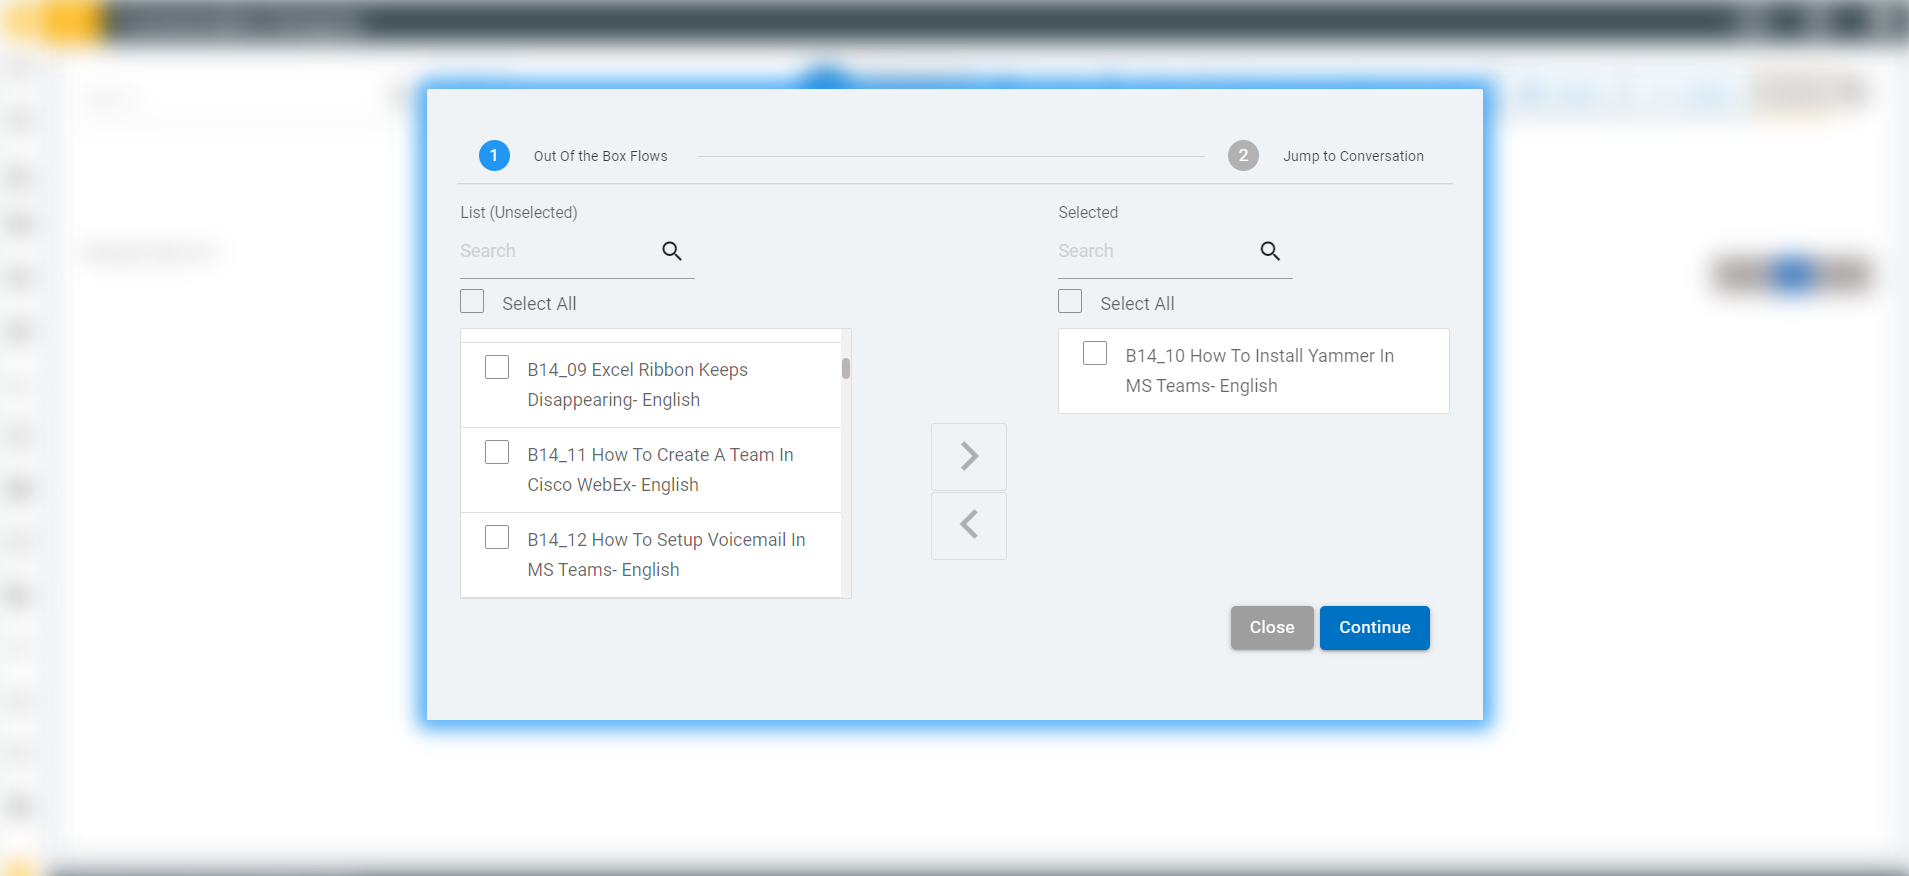
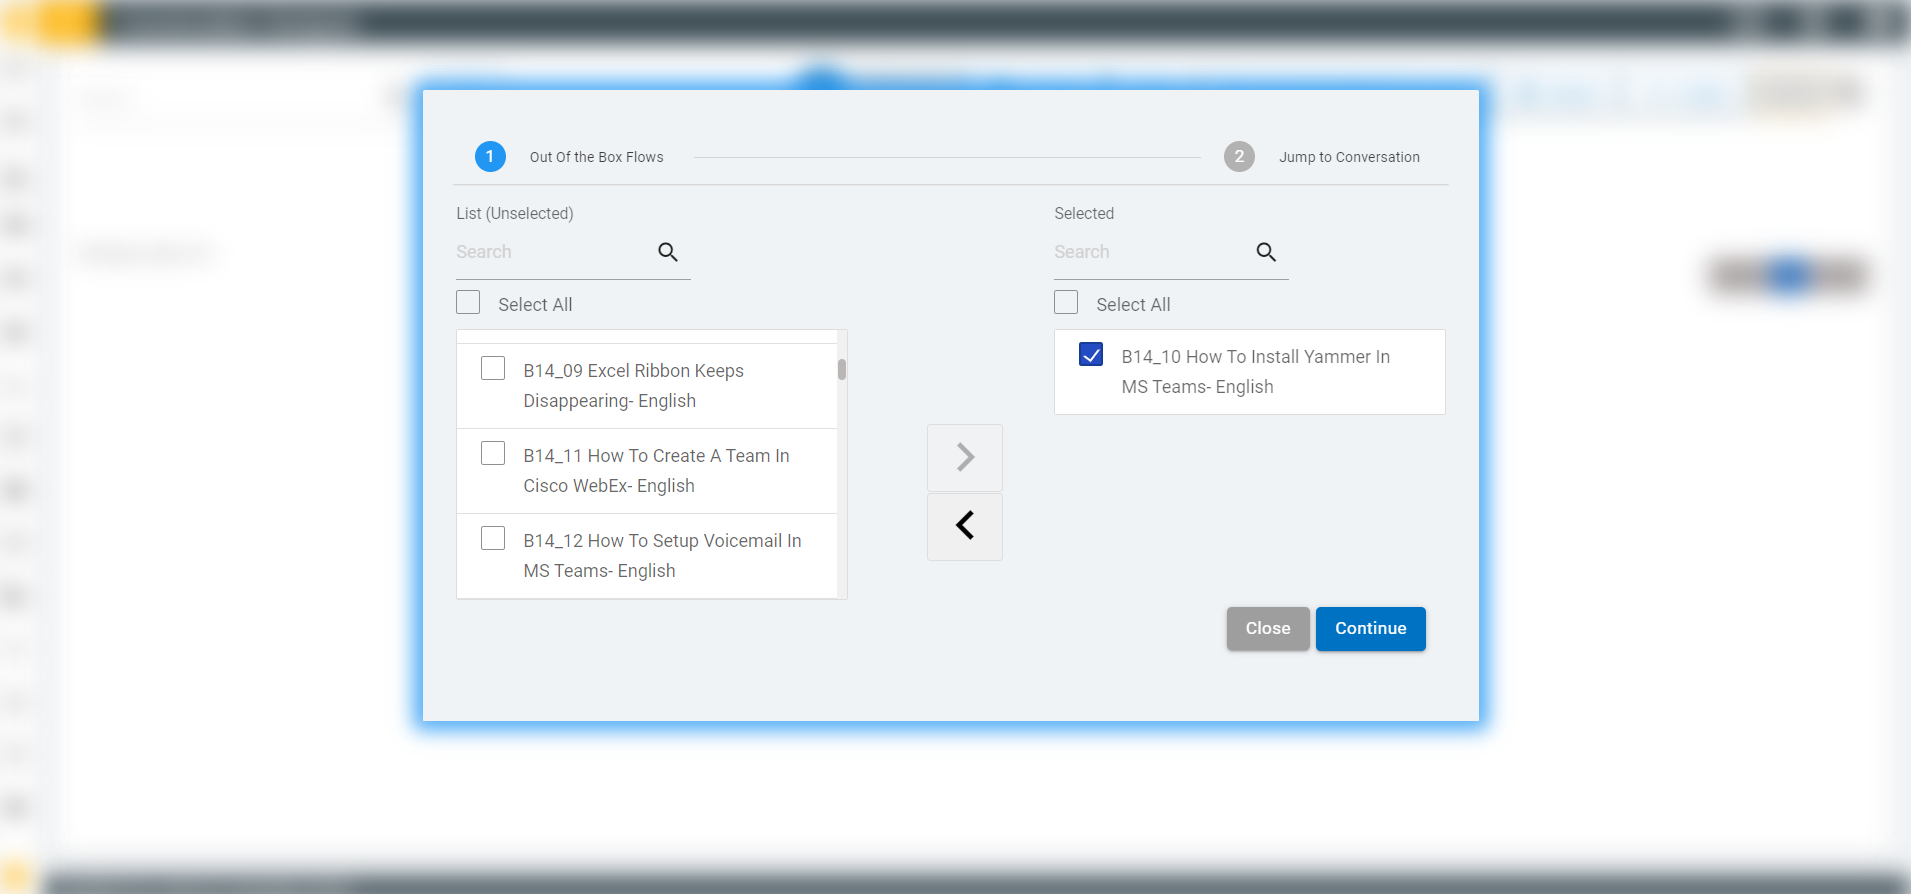
OTB Button: The OTB button allows the user to create conversations. An OTB conversation is a conversation that is created in bulk, where each OTB is an individual conversation in the UCD console.
- Click on the OTBs button in conversation designer.

Conversation designer lists out all the OTBs that are present, as shown in the figure below.
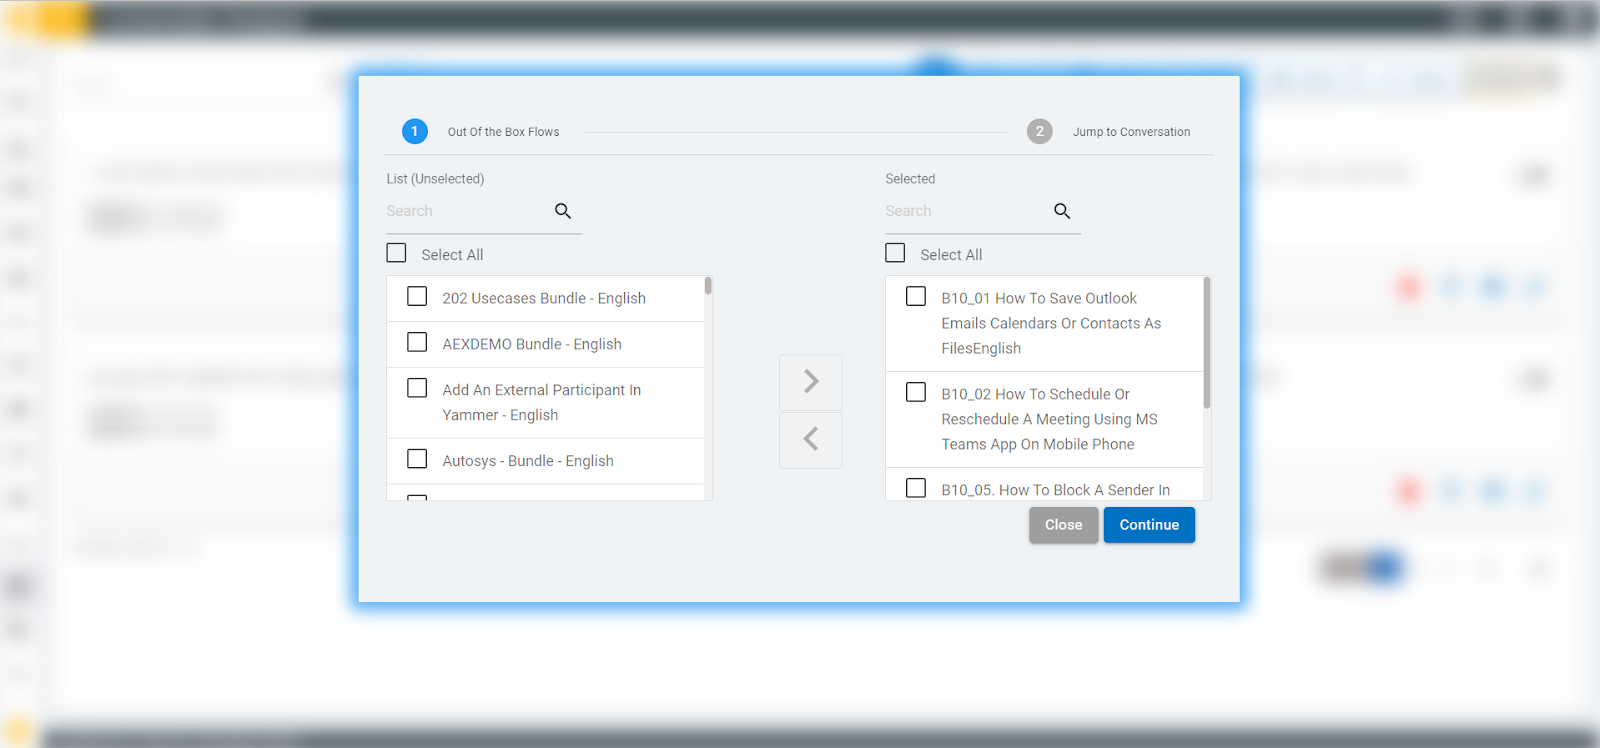
There are two sections in the OTBs.
- Unselected List: In this section, the conversation for OTBs has not been created.
- Selected List: In this section, the conversation for OTBs has been created.
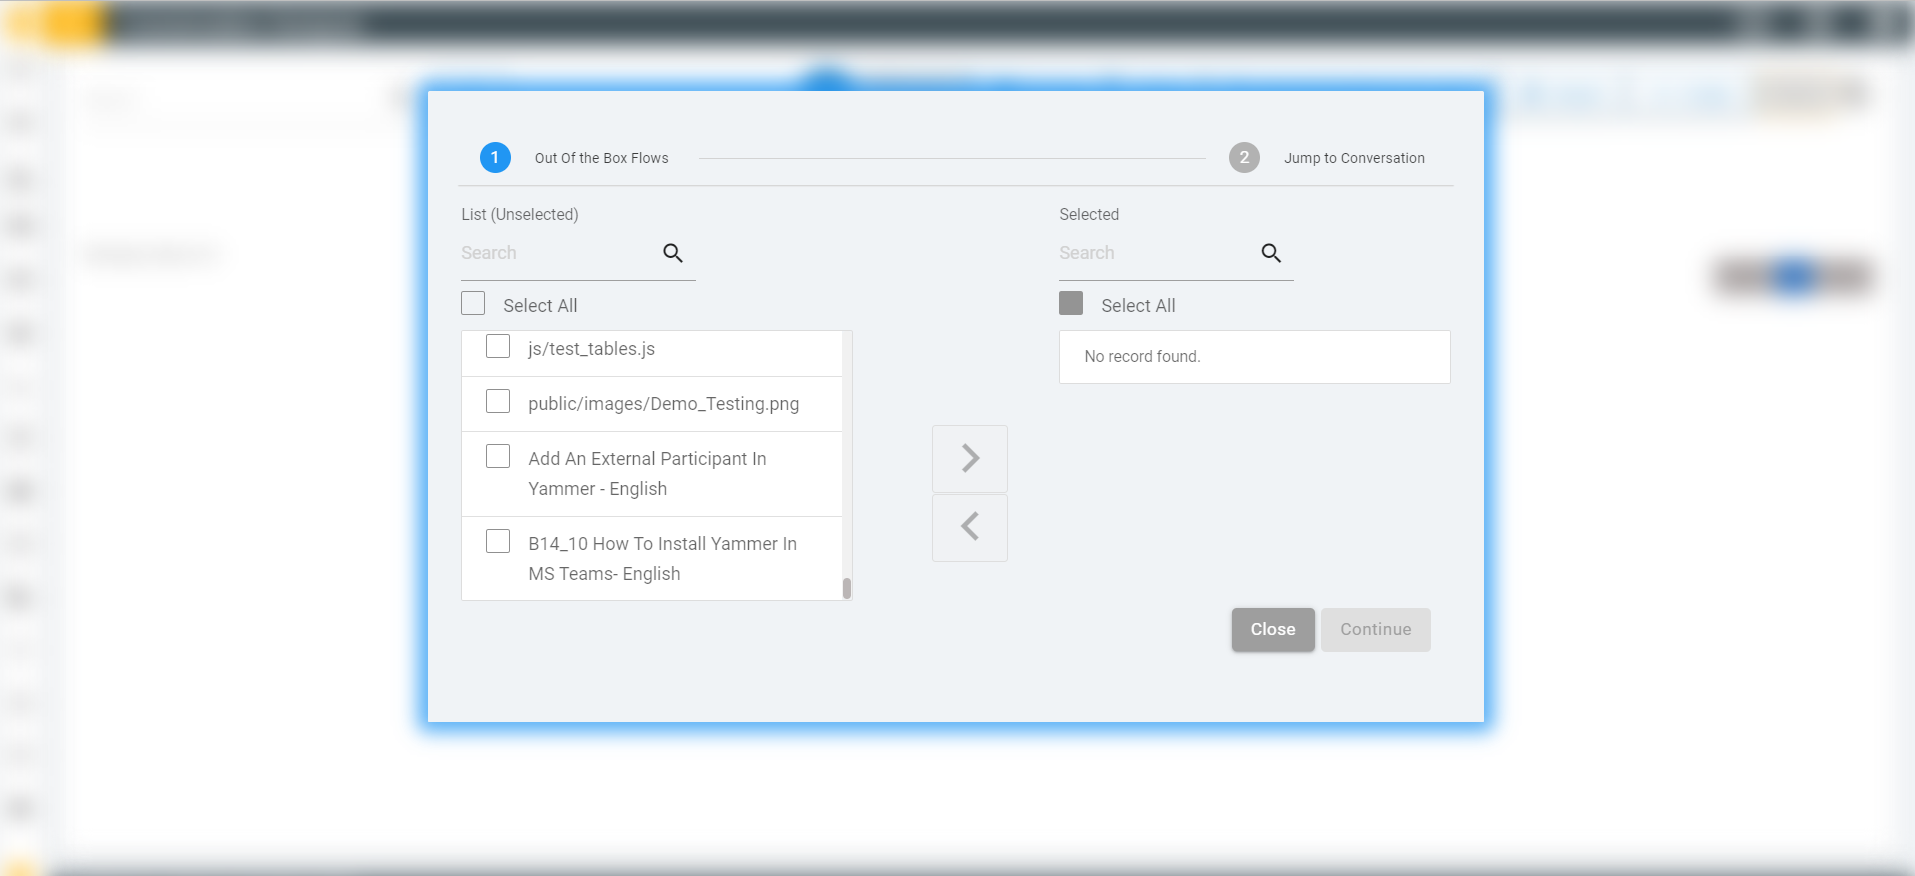
- (If the user shifts the conversation from unselected to selected and the conversation is still not created, the user has to click on the Continue button, to create the conversation; if Selected is auto-populated, then the conversation was created when the user clicked for the first time).
- To create an OTB conversation, search for a particular OTB in the "Search bar" and click on the check box for the OTB under the unselected list.
- Click on the shift to right icon as shown below.
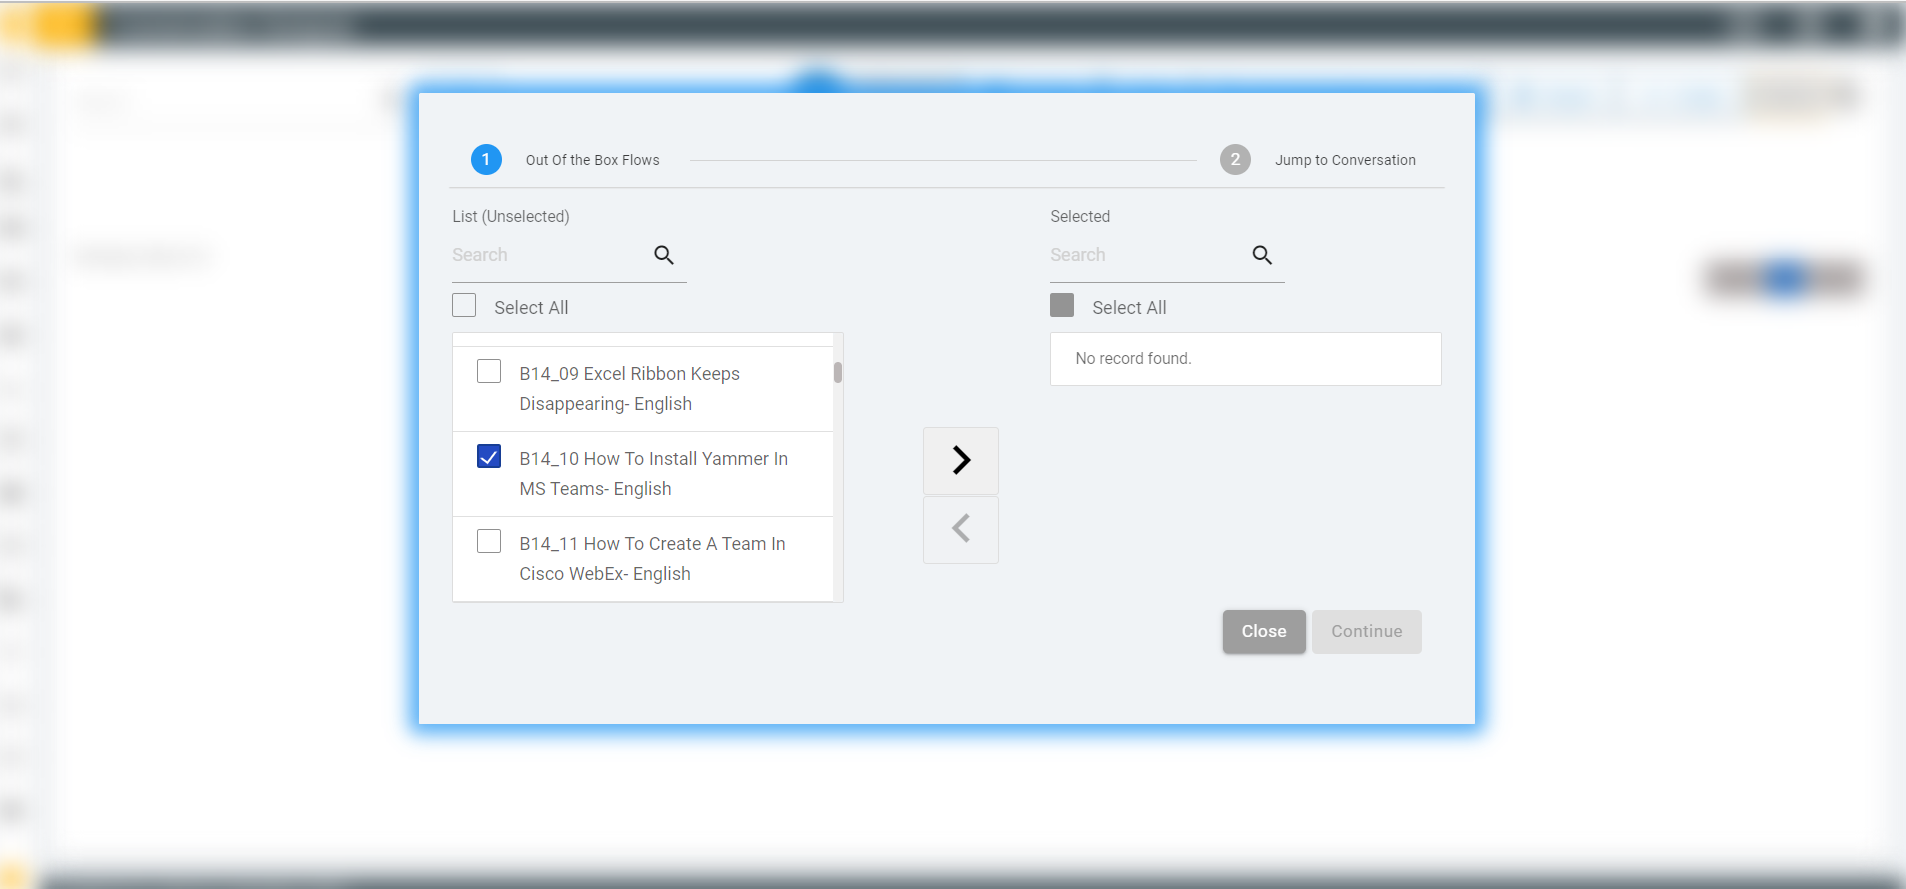
- Click on the shift-to-right icon, to move OTB from unselected list to the selected list and delete it from the unselected list.
- Click on the Continue button.
- Click on the continue button and ‘Jump to Conversation’ page (this is optional) appears.
- In UCD all the leaf nodes of the OTB move to the conversation
mentioned.
- After filling the Jump to Conversation, click on Continue.
Figure 23. Figure 114 – Jump to Conversation 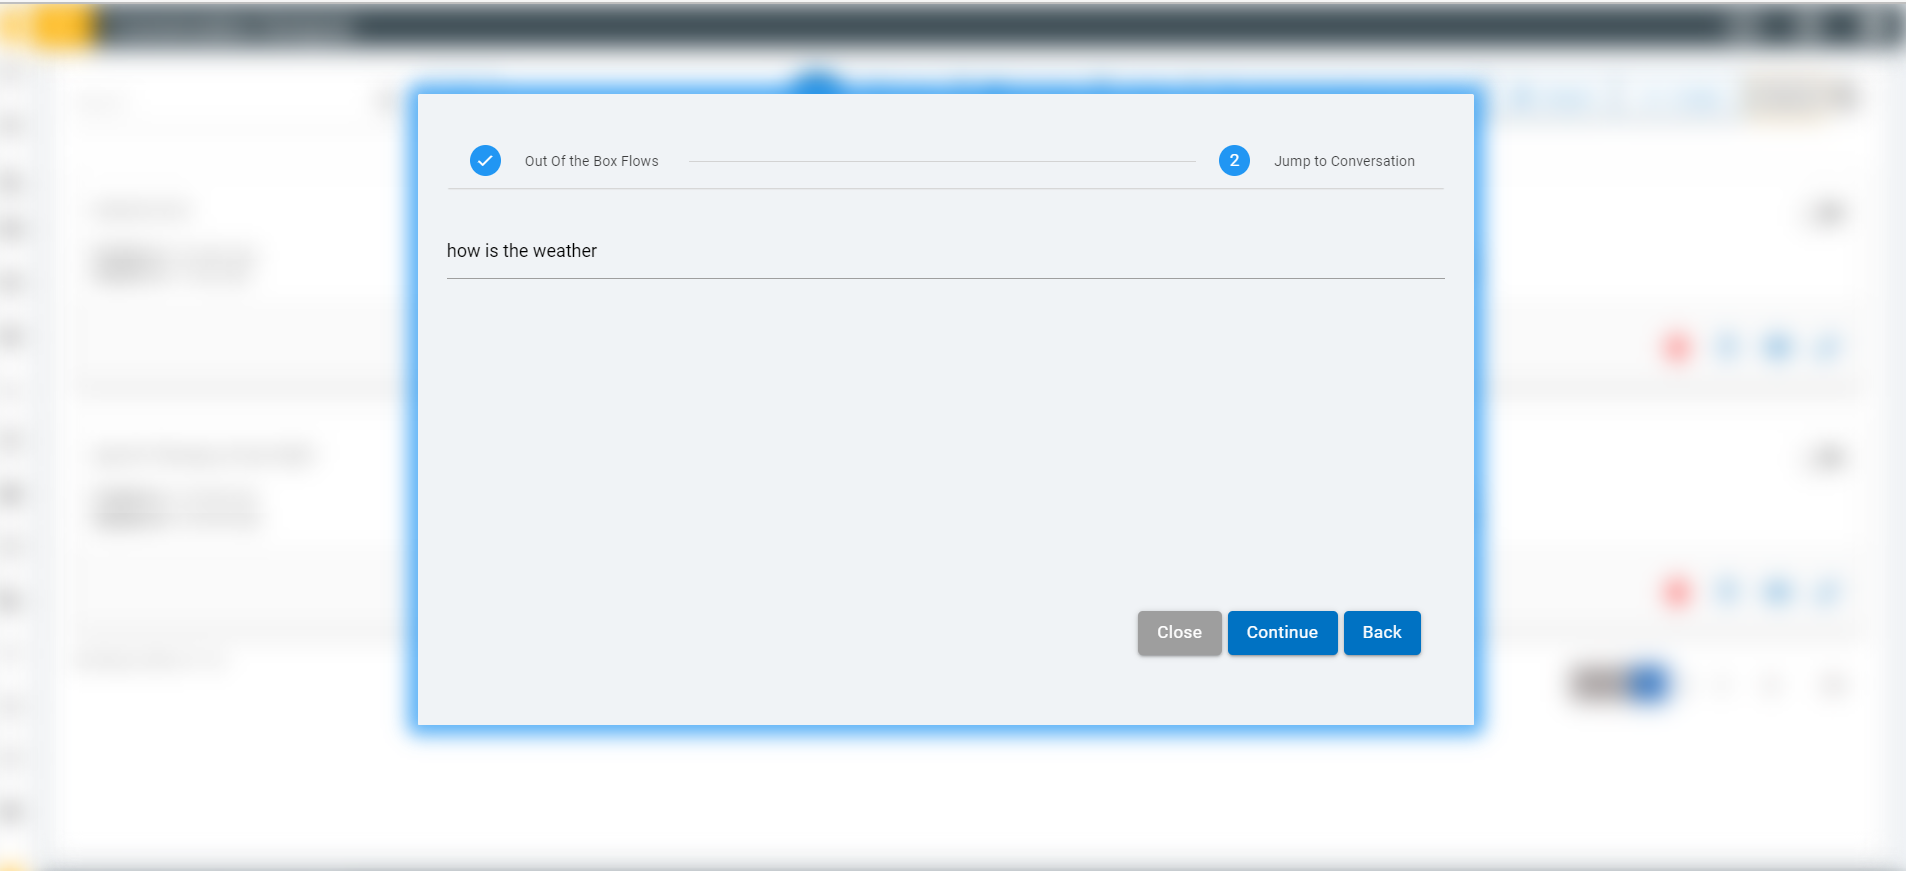
A conversation for an OTB with the same name as other OTBs in Conversation Designer is created.
Figure 24. Figure 115 – Success Message 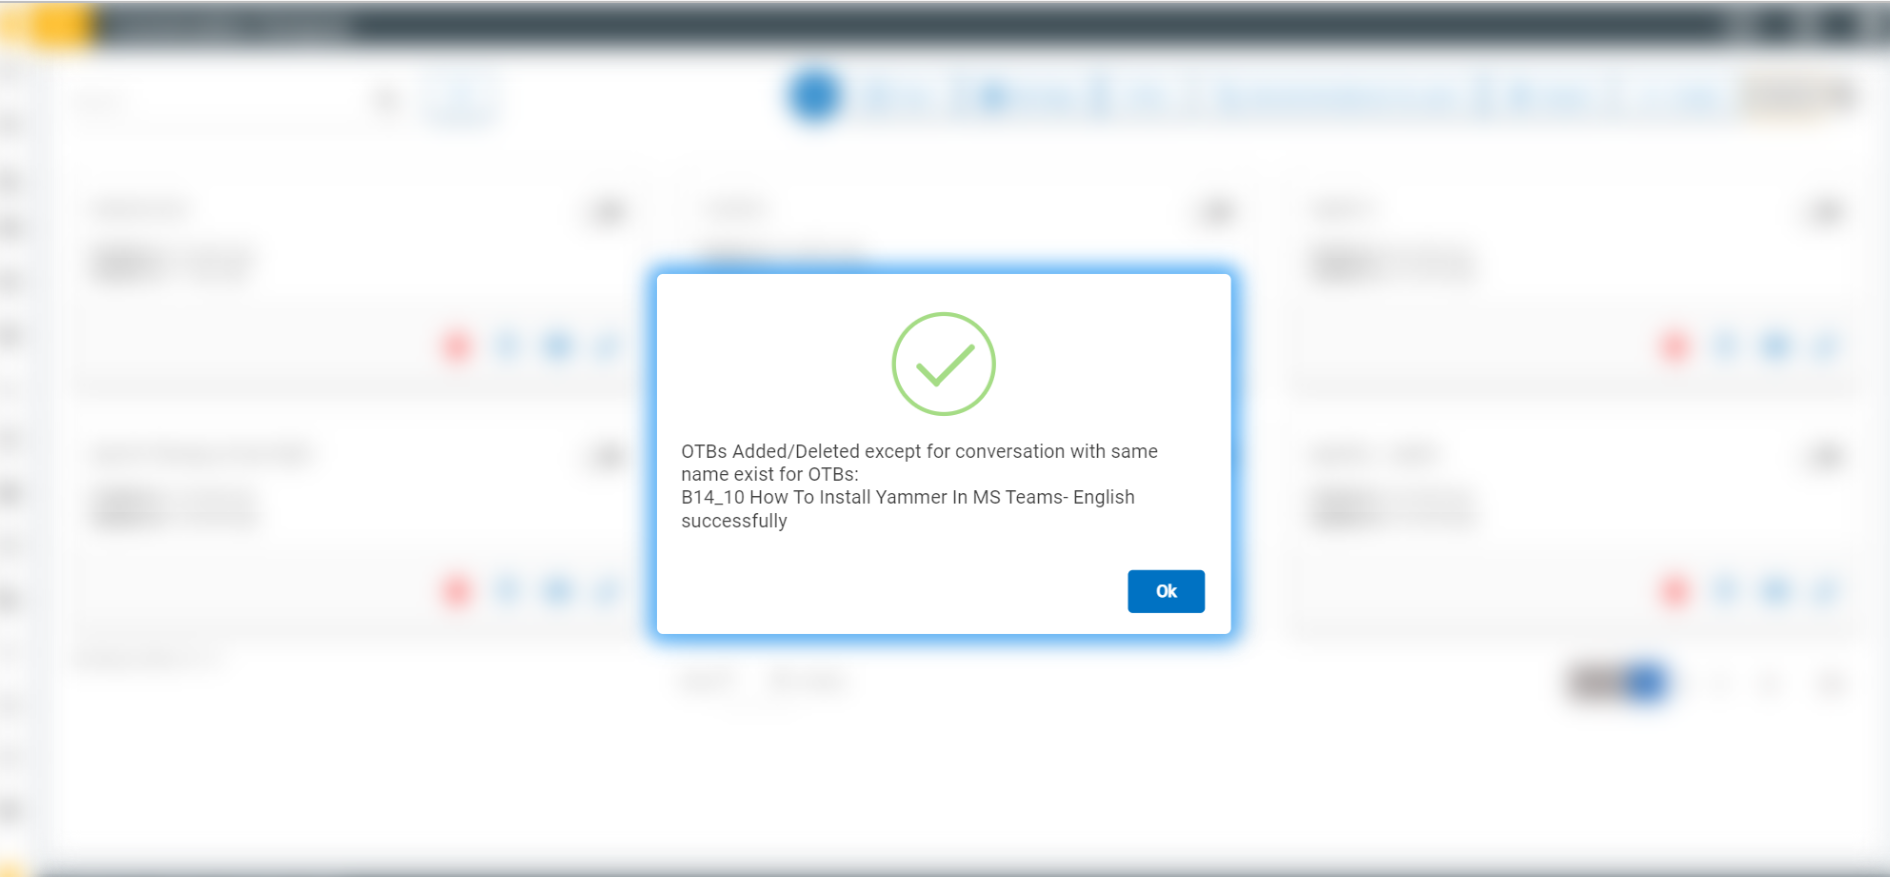
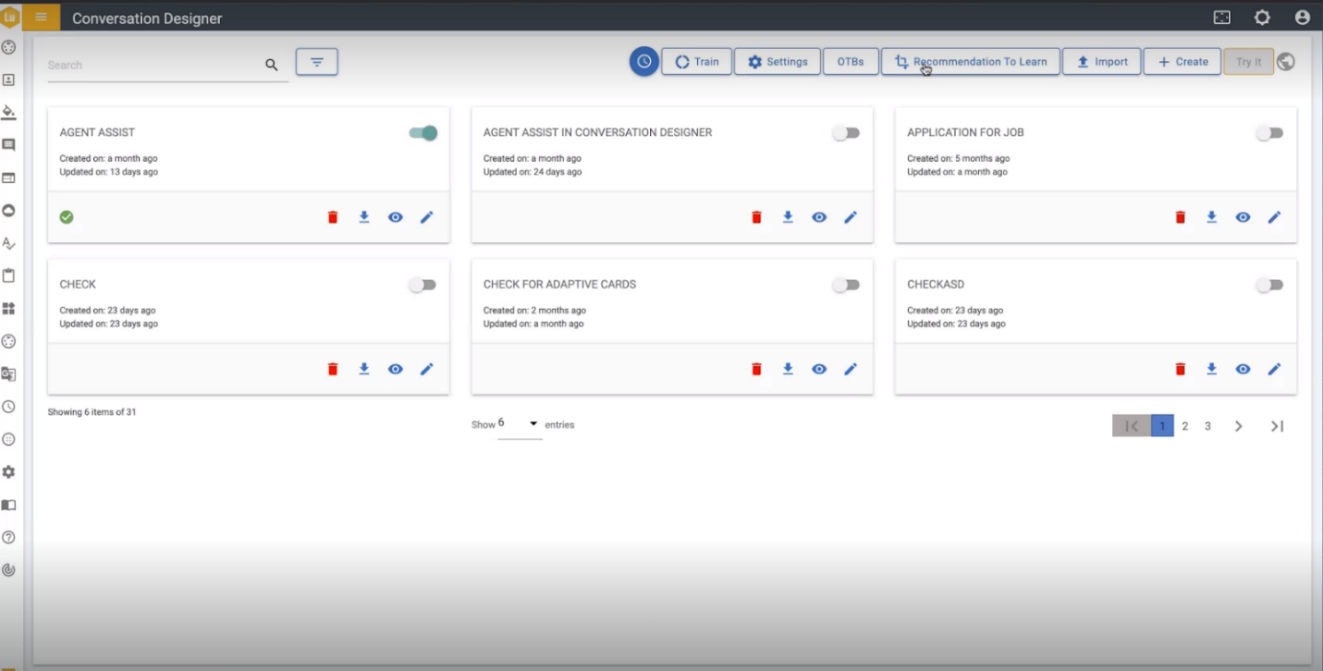
The conversation of an OTB is created in Conversation Designer, and all the OTBs created from the list of OTBs by default are marked as active.
Figure 25. Figure 116 - Selected OTBs under active state 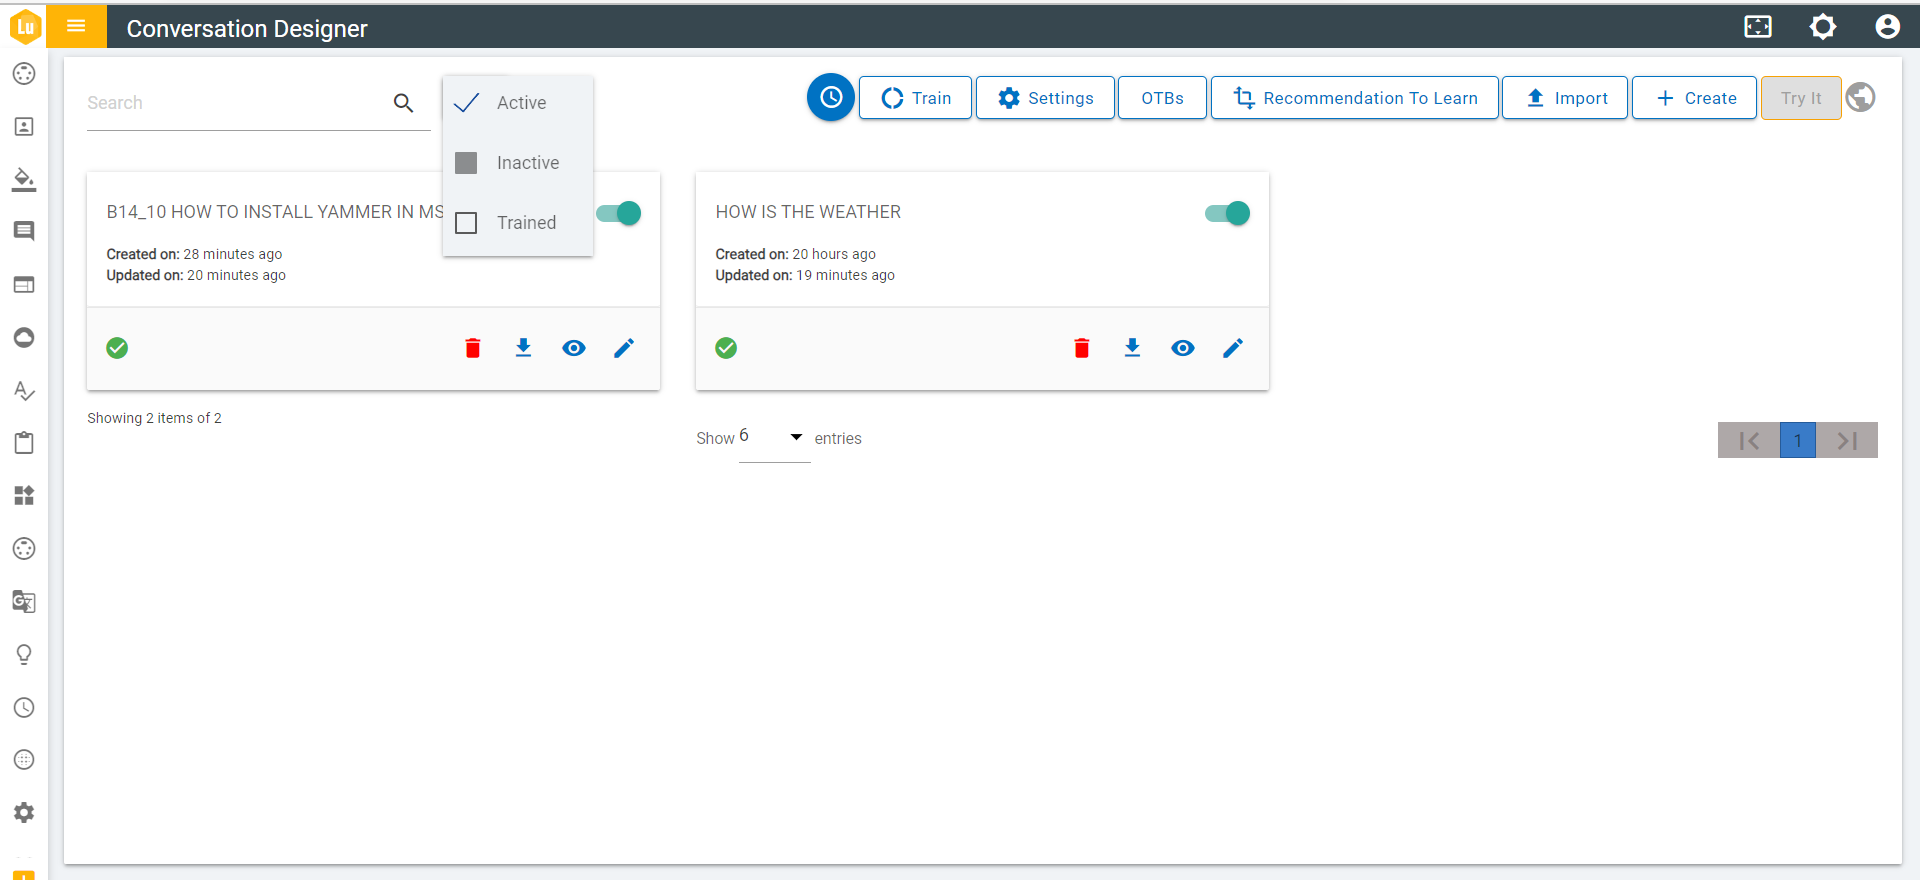
- Click on the view icon, to view the conversation created for an OTB.
Figure 26. Figure 117 – View OTB 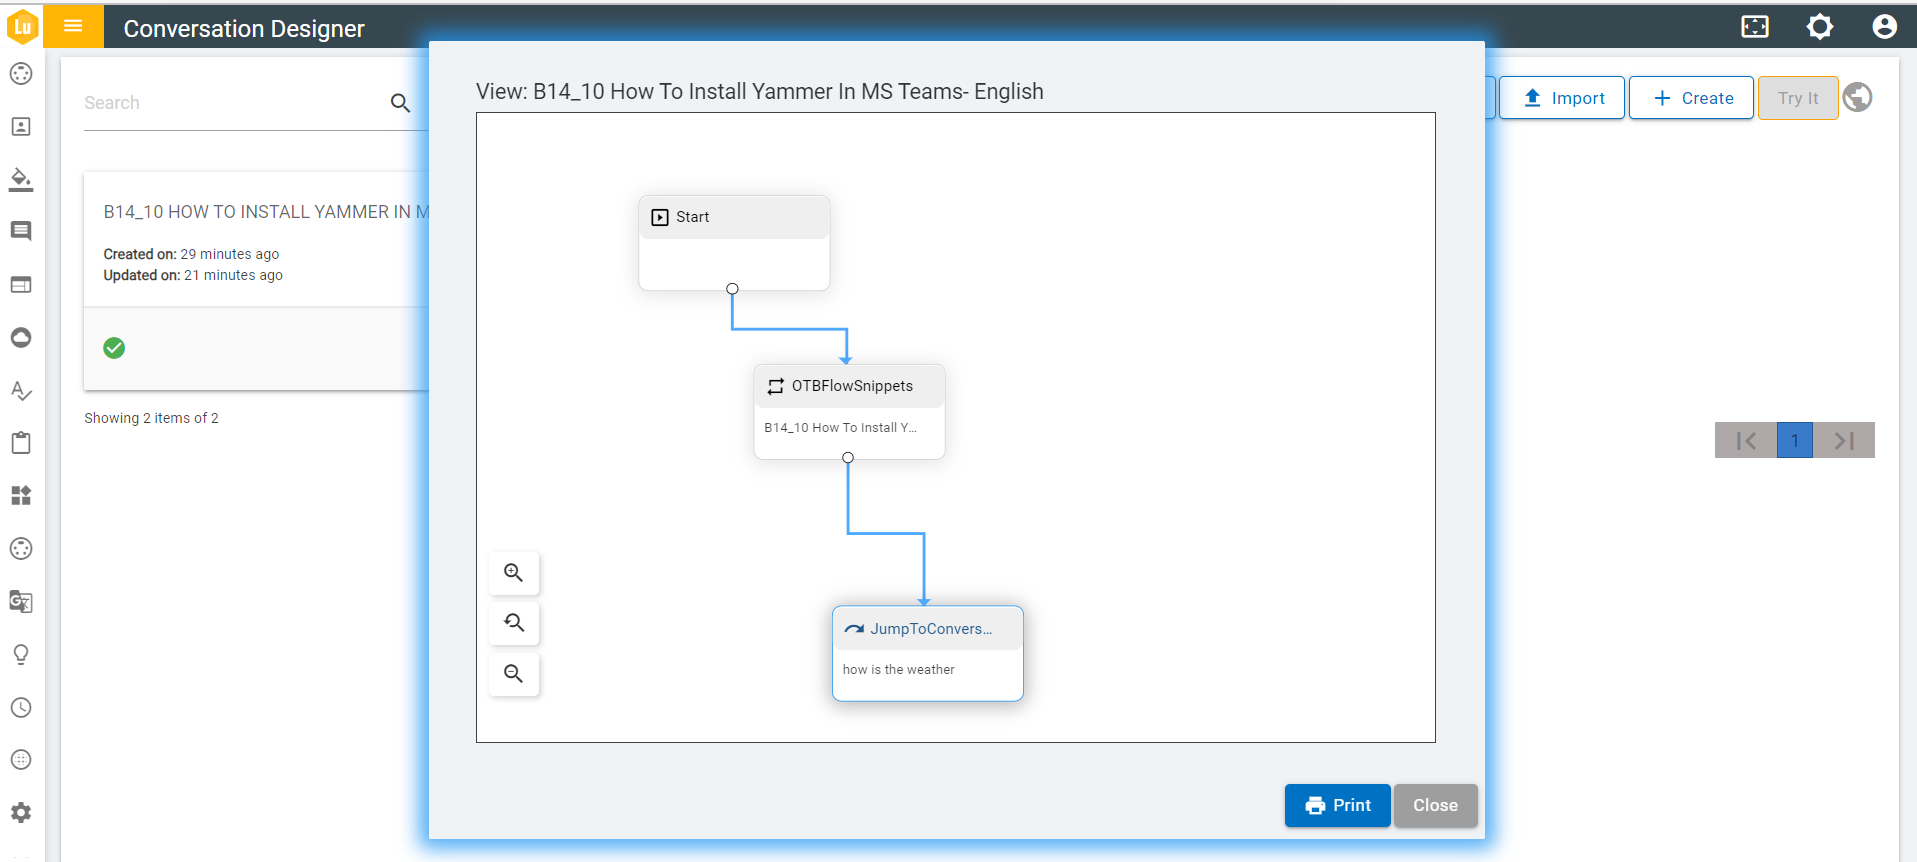
- Click on the edit icon to modify the OTB.
Figure 27. Figure 118 – Edit OTB 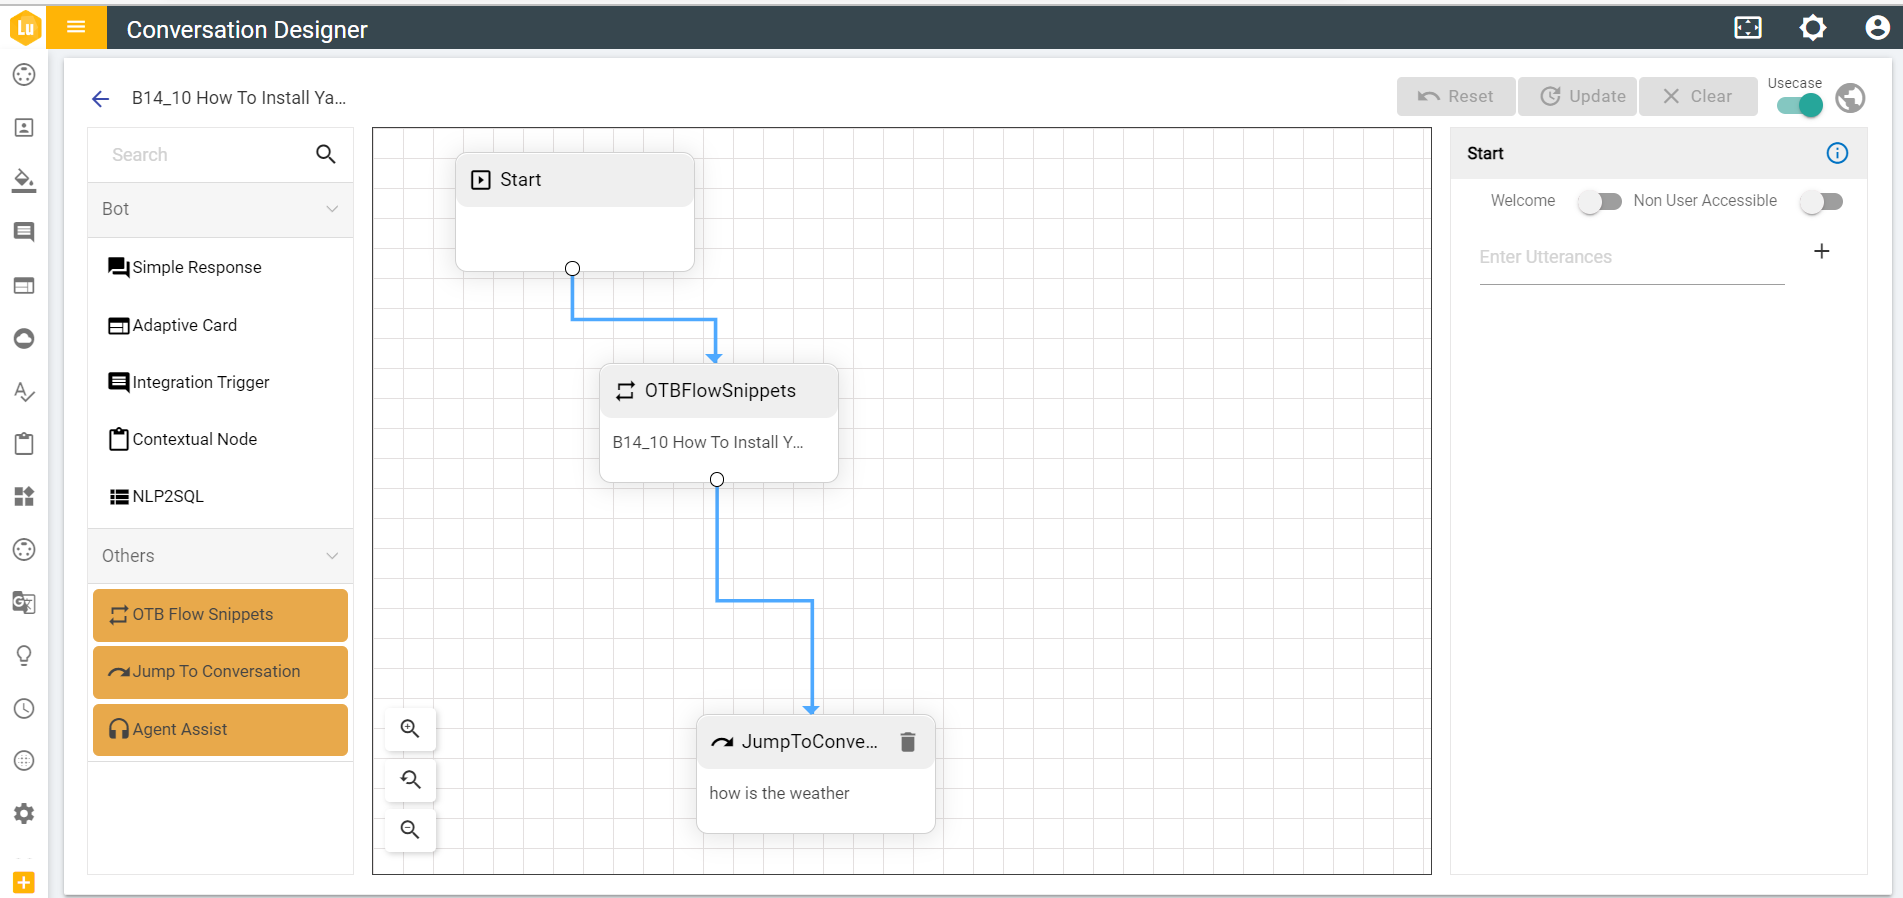
- To train the selected OTB, click on the train button.
- Fill in the ‘Skill Name’ as shown below.
Figure 28. Figure 119 – Train OTB 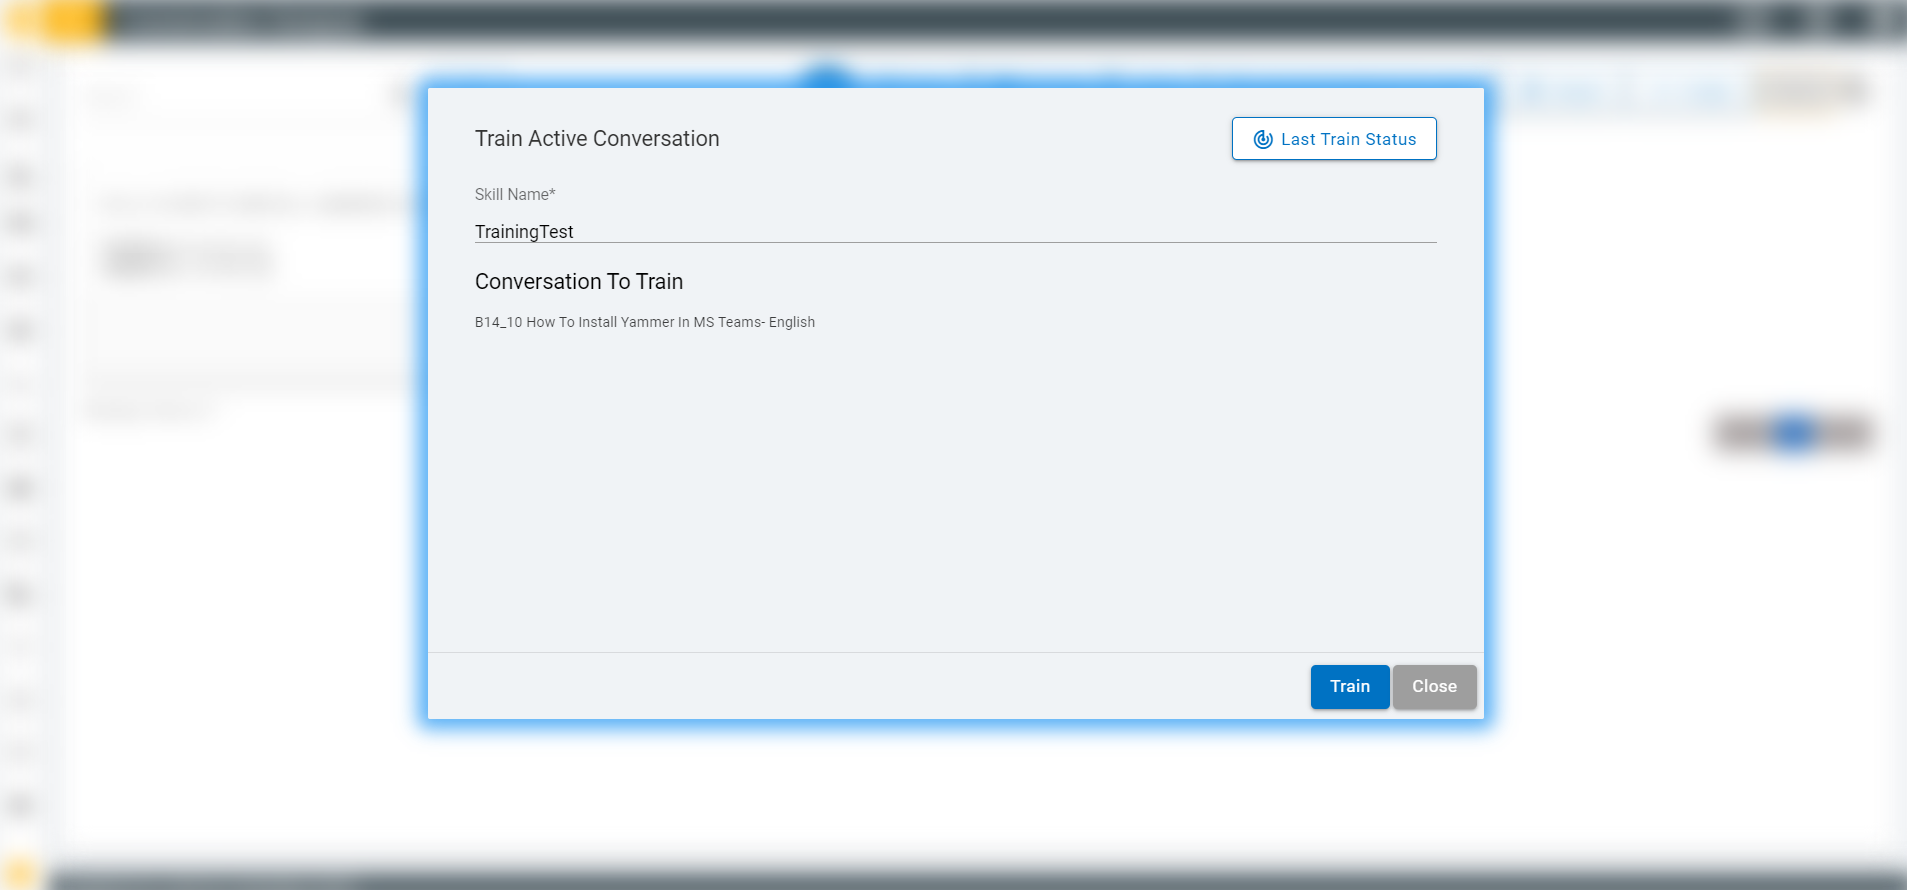
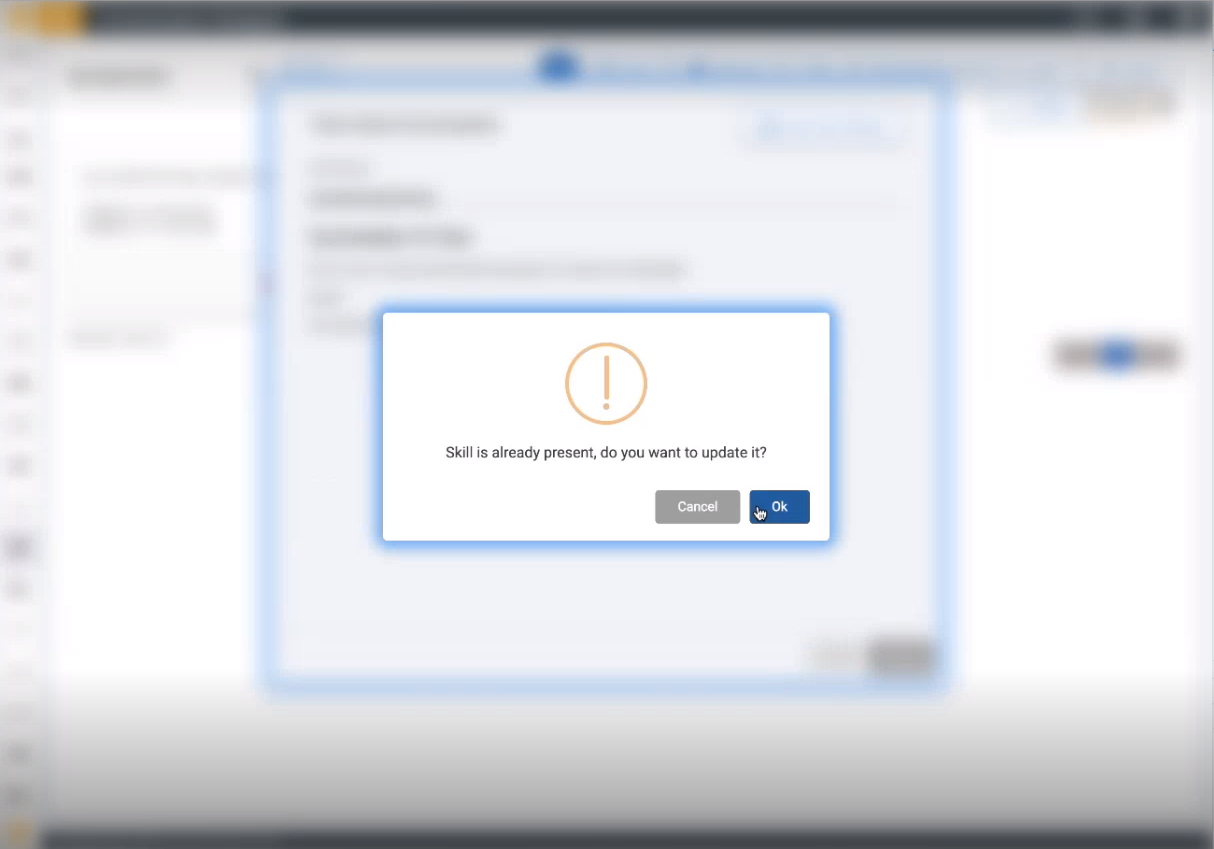
- A pop-up message will appear asking for confirmation to update the skill.
- Click OK to update the skill, or click Cancel to cancel the update skill action.
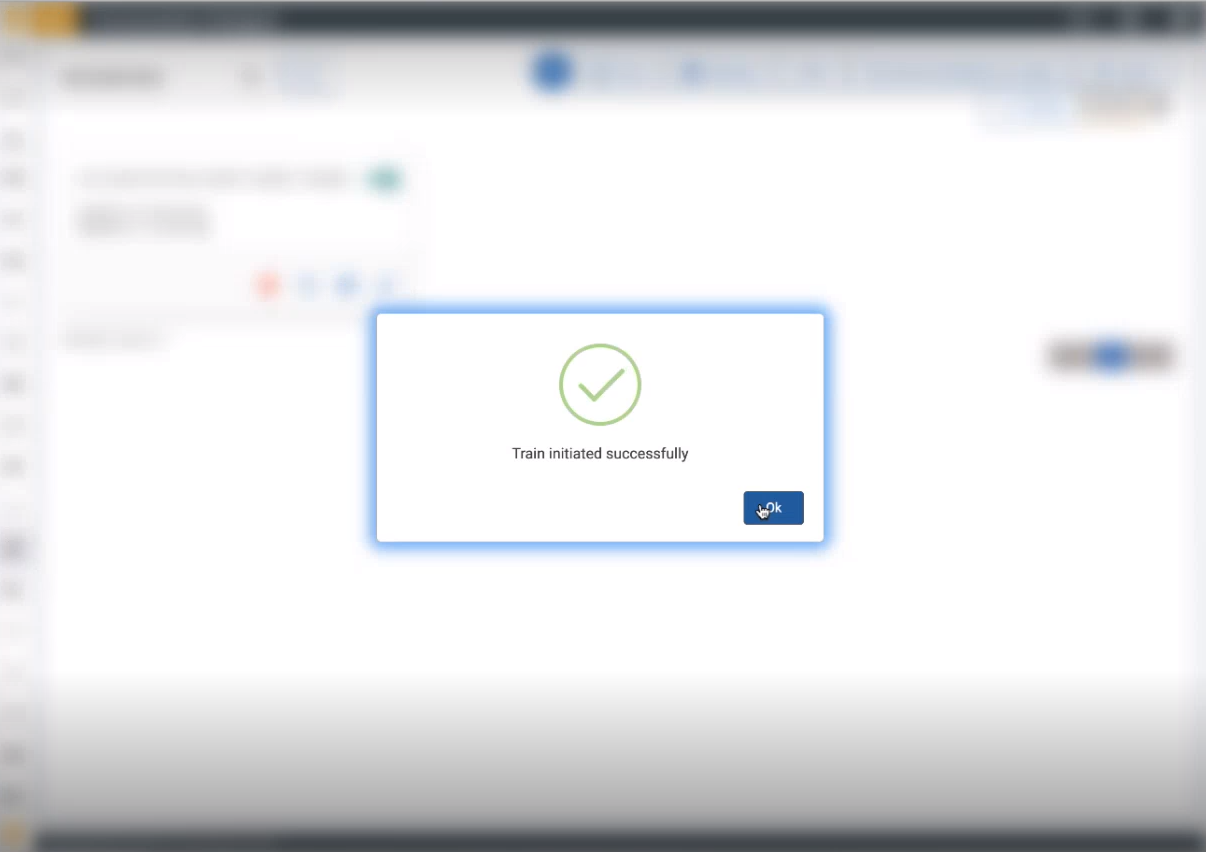
A “Train initiated successfully” success message will appear.
After training, the conversation of OTB is now created in Use Case Design.

- To modify anything in the created conversation, the user needs to manually update the conversation.
- To delete the conversation, select the OTB under the selected section and click on the shift to left icon as shown below
- Click on Continue to delete the created conversation of OTB.
Recommendation To Learn
This section is used for auto-learning. Agents can add variations or SOPs in the agent assist console. Variations or SOPs added are implemented directly; they are checked at two levels:
- The supervisor should approve the use case in the agent assist console.
- SMEs should approve in the Conversation Designer.
SME-level approval
When supervisors approve the variations or SOPS suggested by the agent, it comes under the recommendation to learn tab in Conversation Designer, which is visible only to SME. Once the SME approves the variations, or SOPS, in Conversation Designer, the use cases are added to Conversation Designer.
After getting approval from the supervisor, variations or SOPs are shown under "Recommendation To Learn" in the Conversation Designer.
- Click on the Recommendation to Learn tab in Conversation Designer, and the page will appear as shown below.
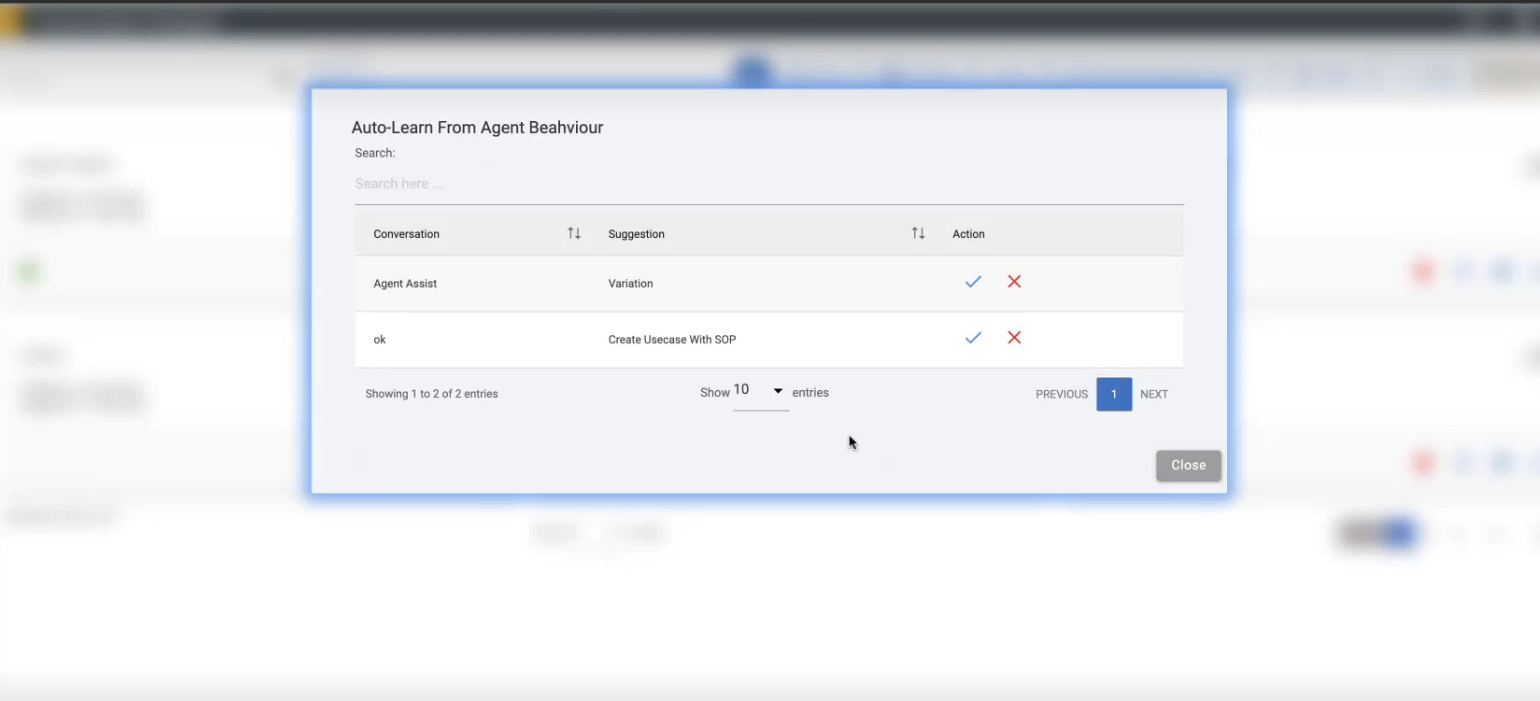
- SMEs can view the list of variations or SOPs that have been approved by the supervisor.
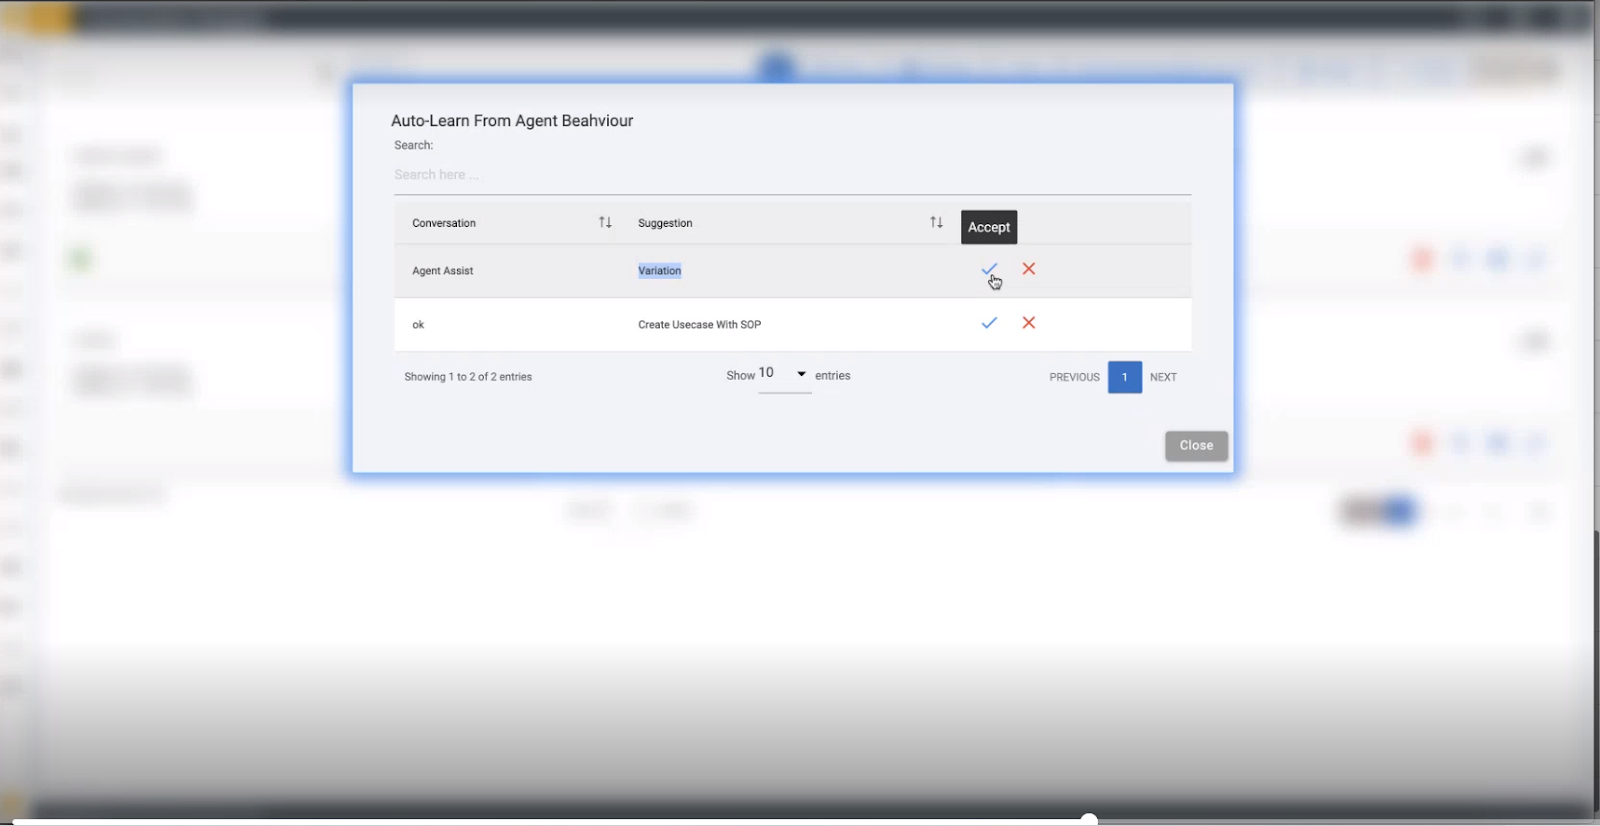
- SME can accept the Variations or SOPs by clicking on the check mark under the actions table.
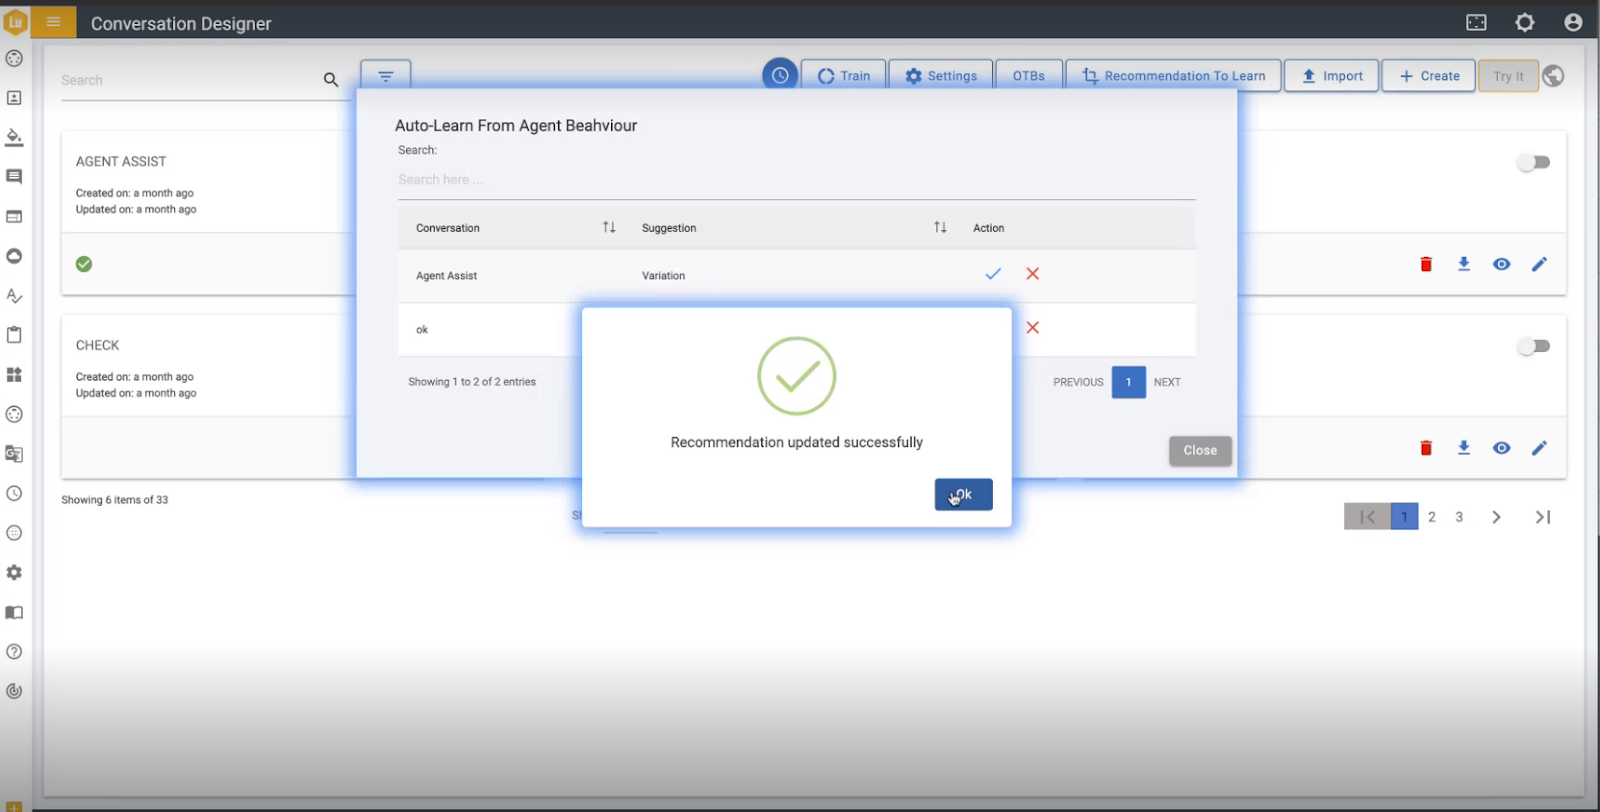
- Click on the check mark and a ‘Recommendation updated successfully’ messages appears.
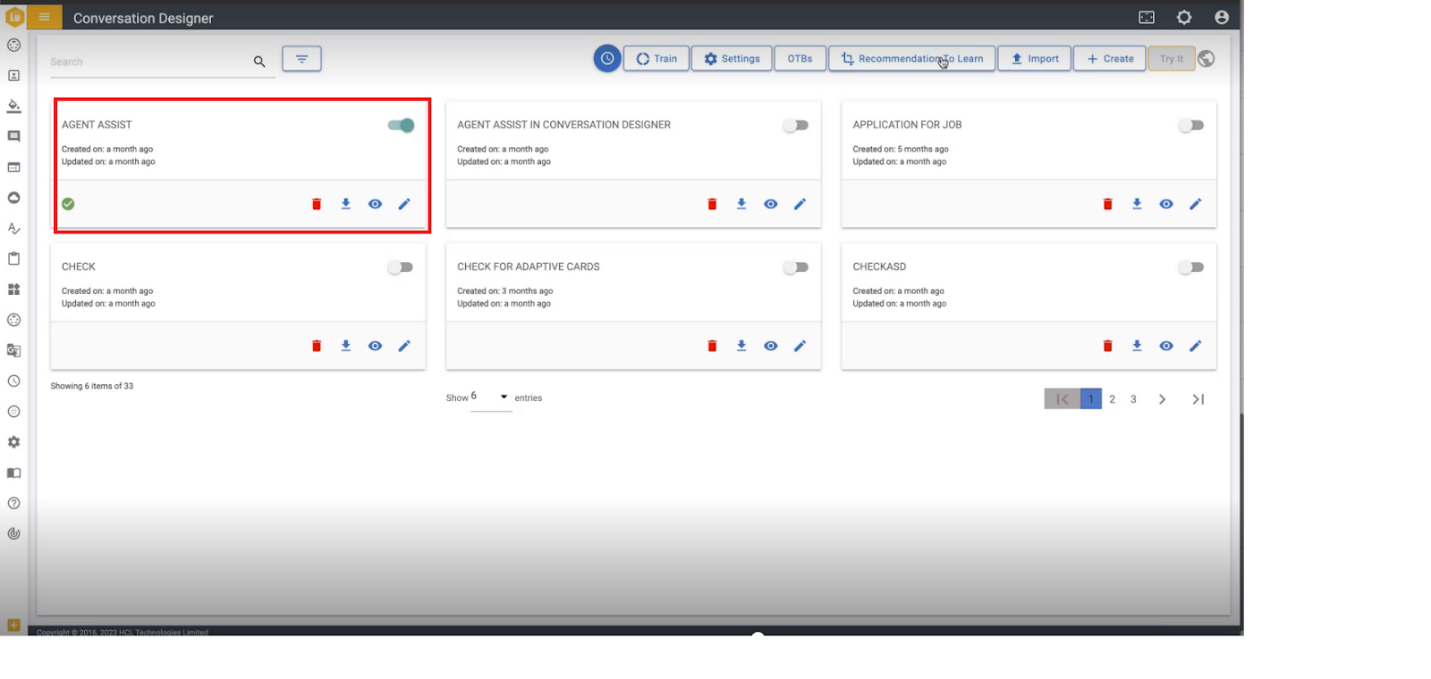
After SMEs accept the variation or SOP, it is added to the conversation designer.
Search Bar: Search bar allows the user to type the name of the conversation flow to search the conversation from the list of conversations.
- As soon as the user starts typing the alphabets of the name of the conversation the visible list of the conversation flow starts getting updated according to the alphabets that the user has typed in the search bar.