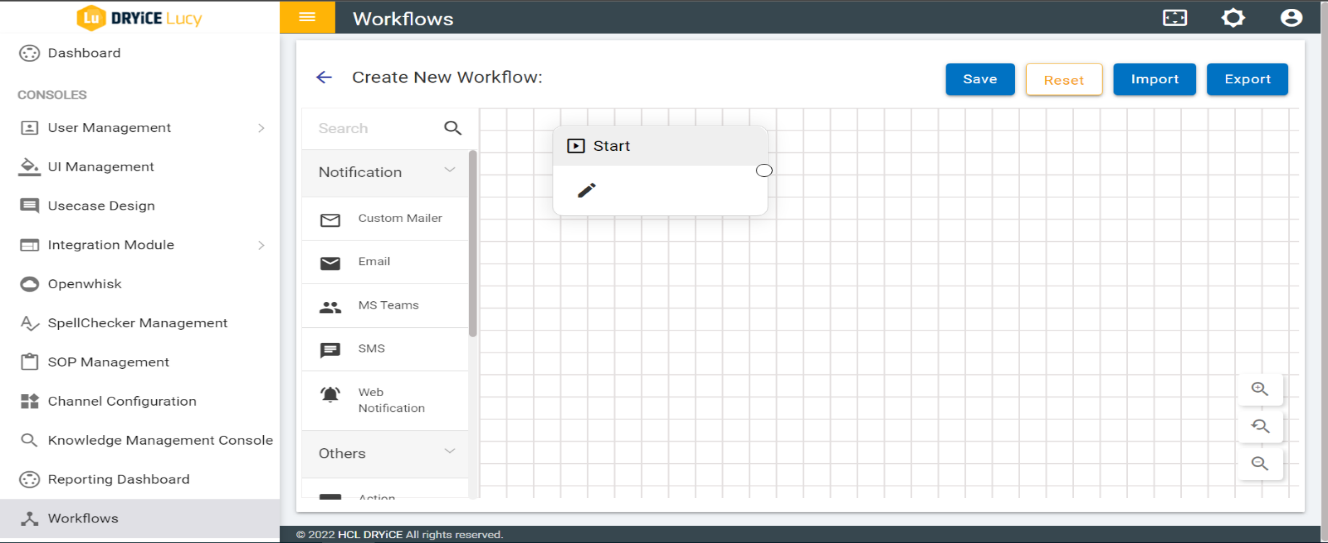
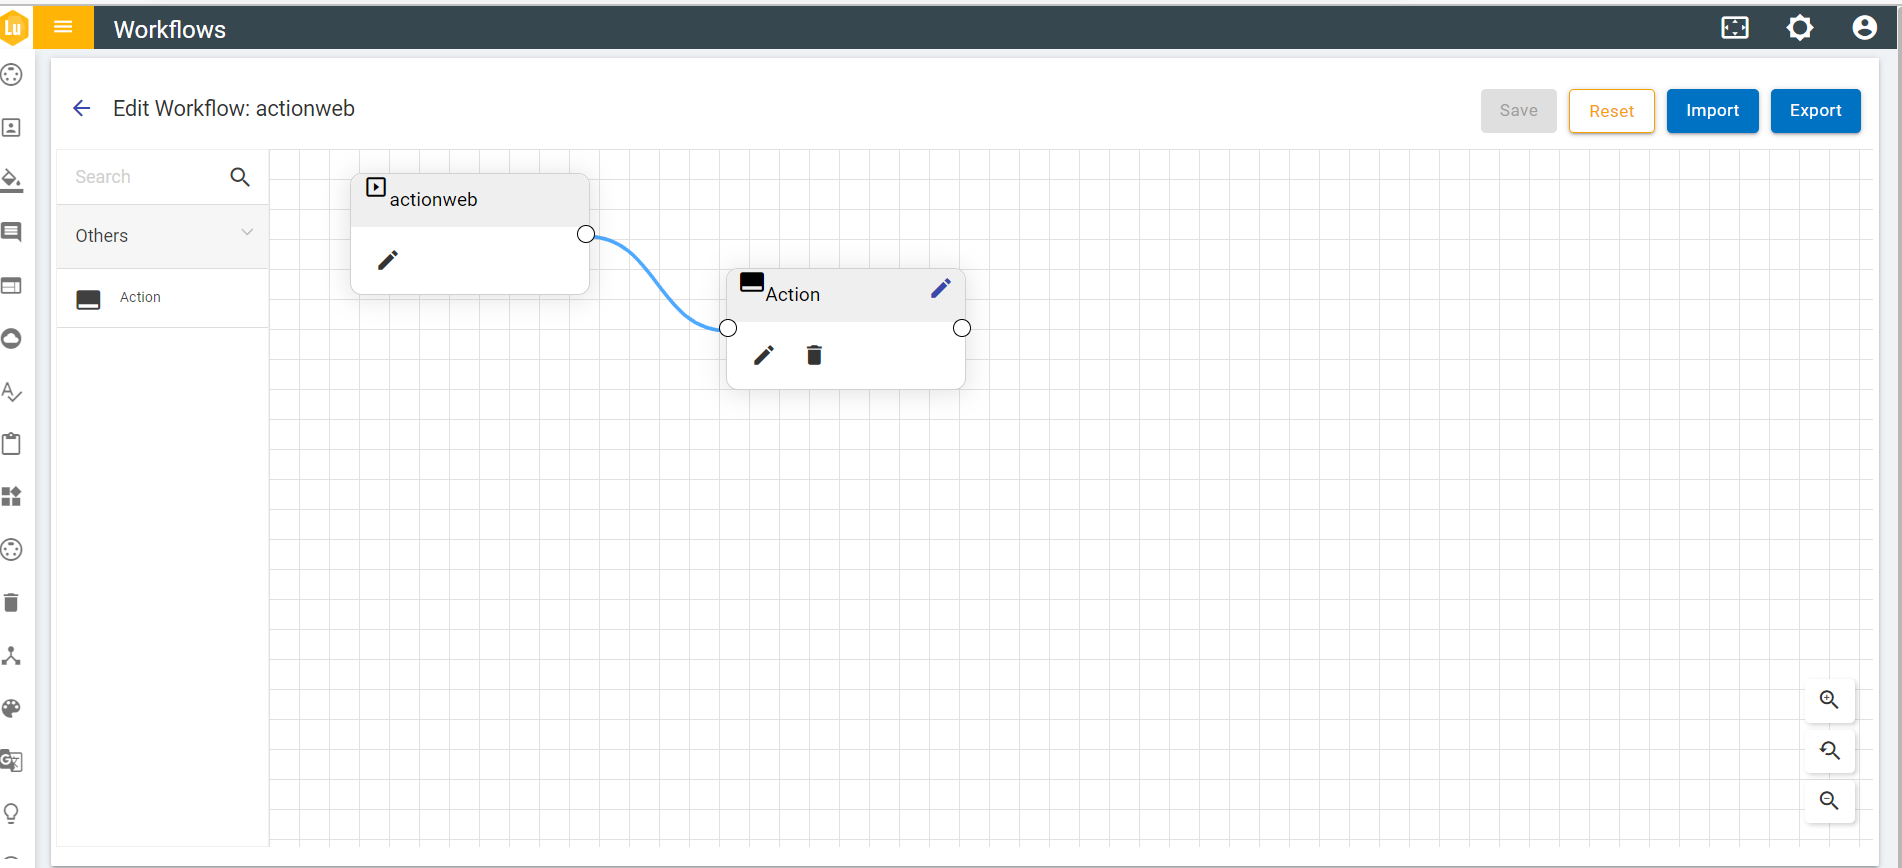
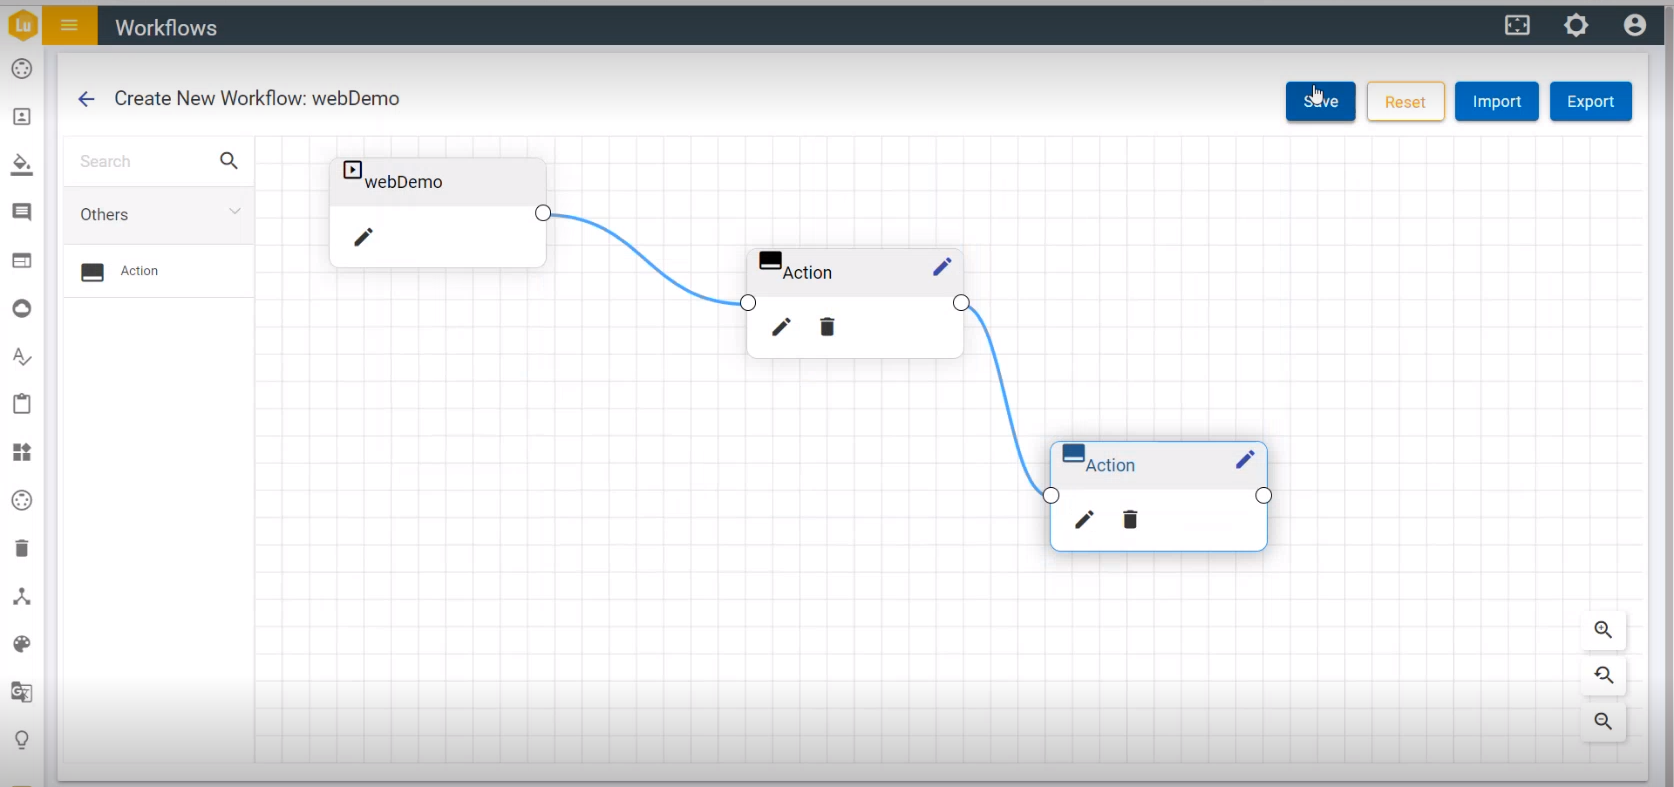
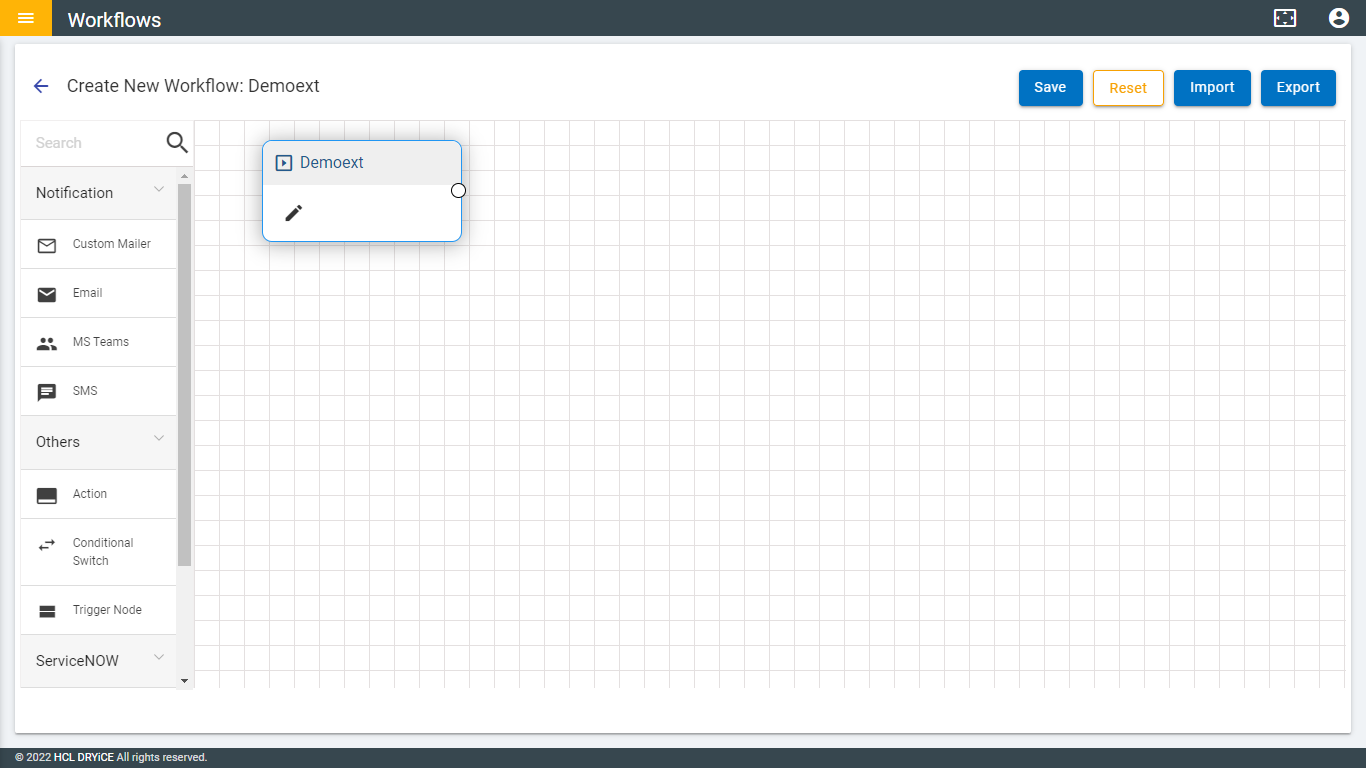
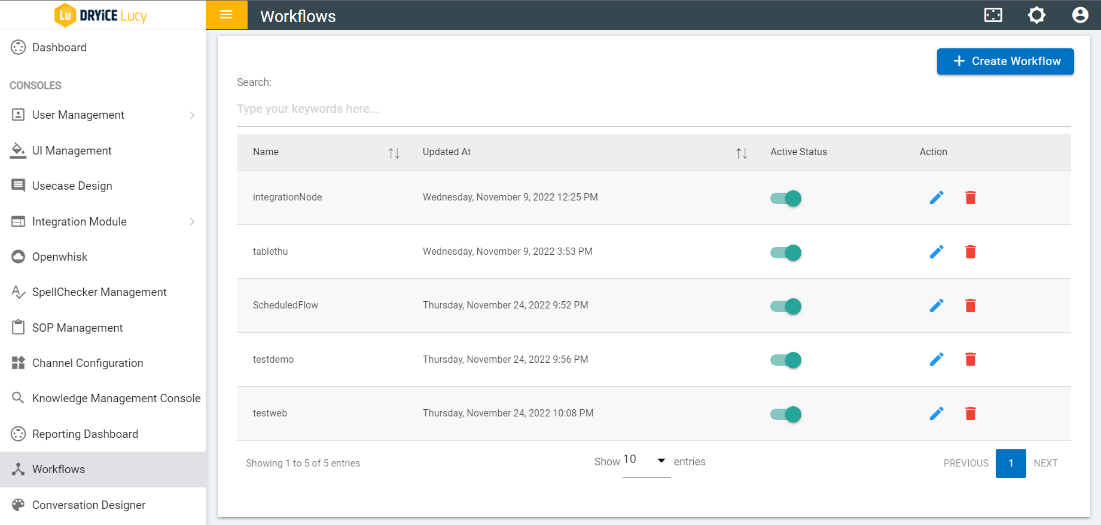
Create New Flow
- Click on
 button on the top
right side of the Workflow list screen and it will open a new page
where you can create a new flow.
button on the top
right side of the Workflow list screen and it will open a new page
where you can create a new flow.
- In the Create Workflow page, there is a side bar consisting of three labels: Notification, Others, and Service Now.
- From there, you can drag the required nodes and drop them in the drop area. You can also search for the necessary node in the sidebar.
- Nodes have forms associated with them and need to be filled. All the nodes should relate to each other, but then 10 nodes are not allowed.
- There is a Start node in the drop area by default. Click on
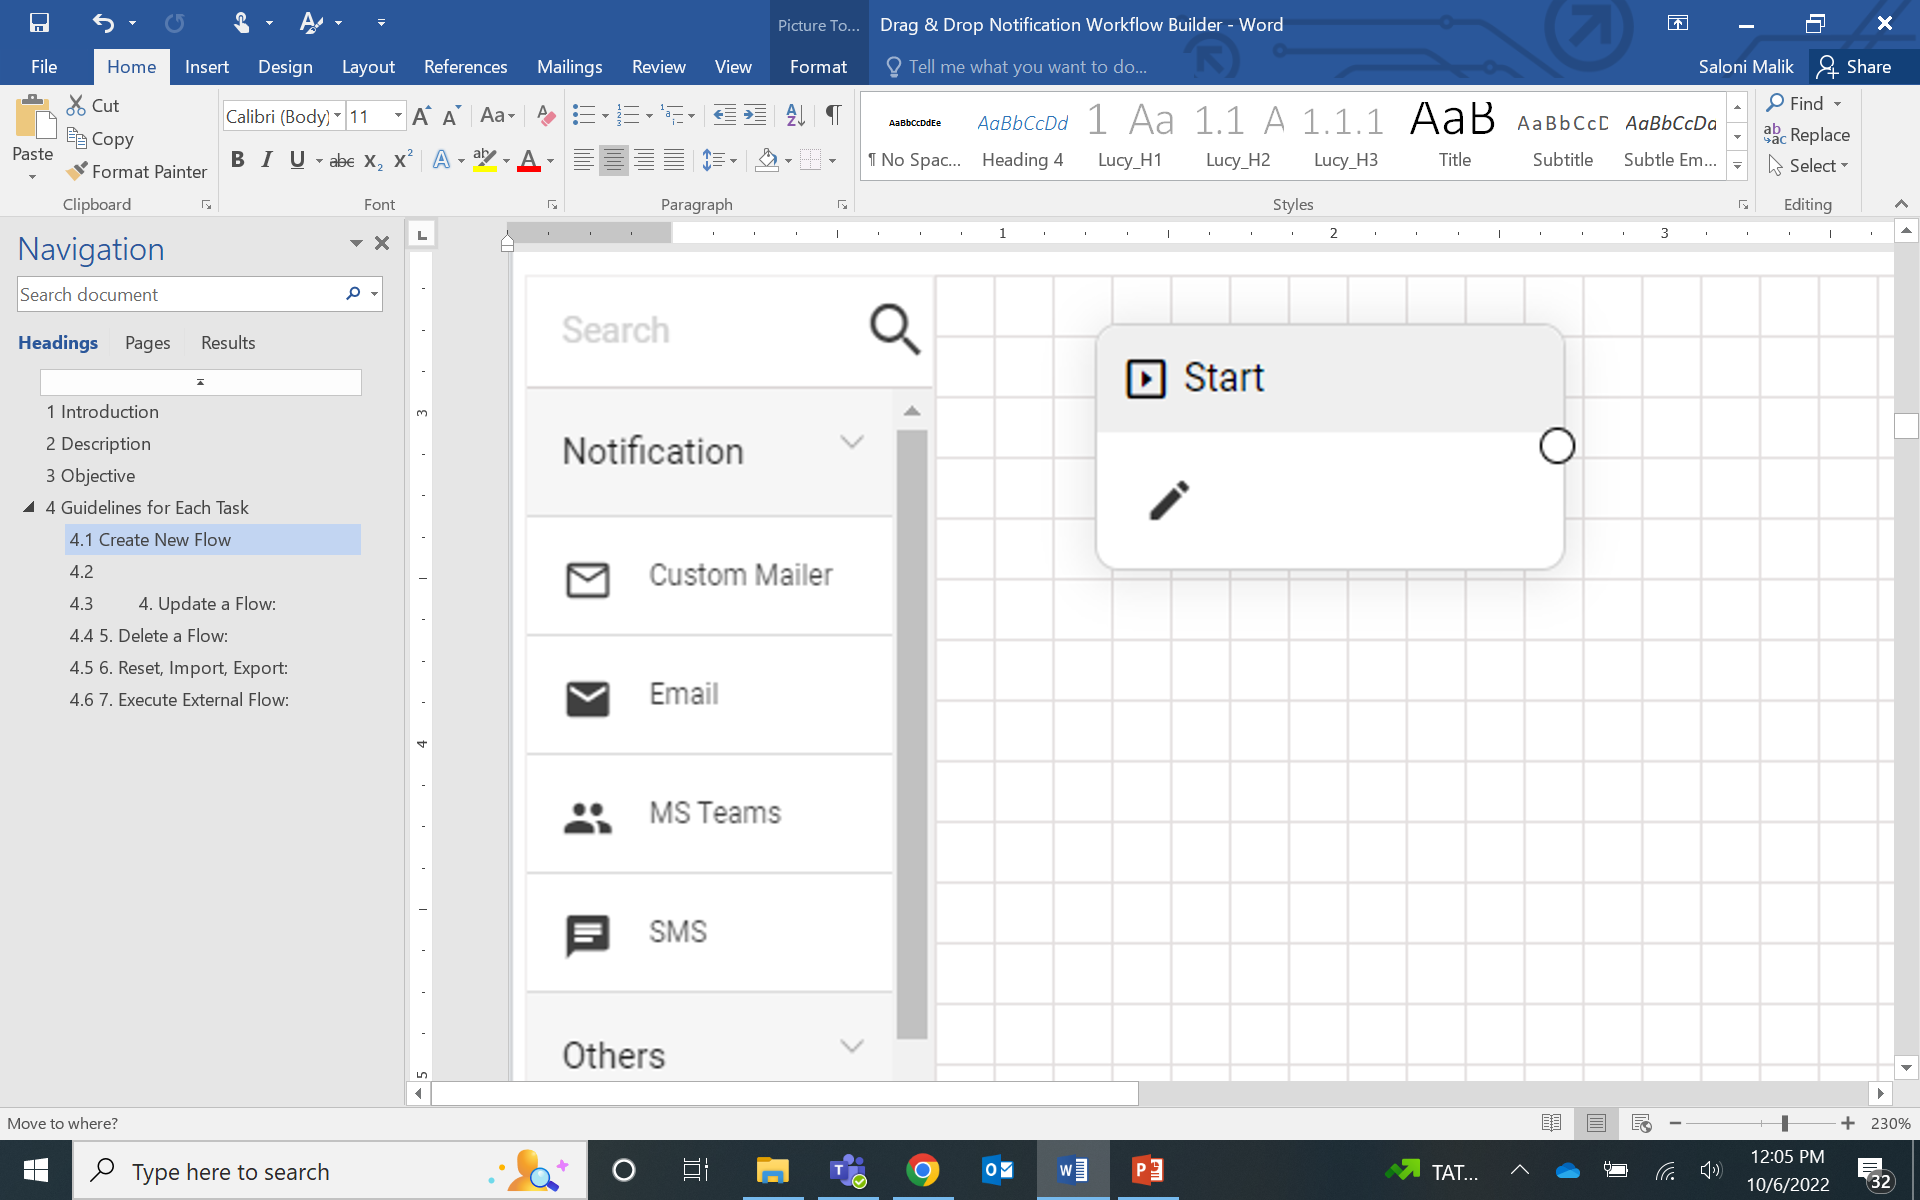 of the start node.
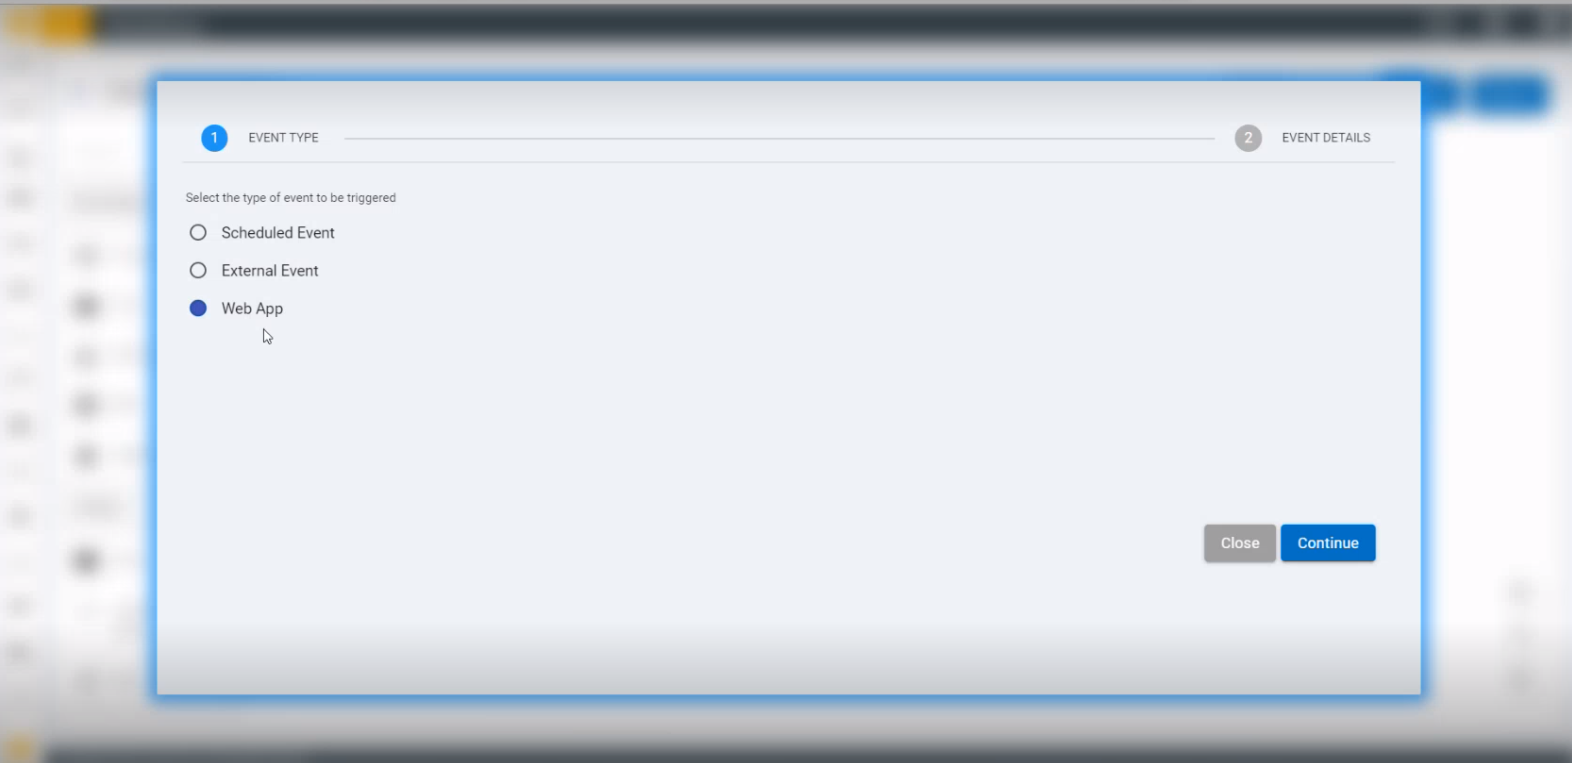
- Clicking the edit button, displays the following image. There are three events in Start node: Scheduled, External, and Web App event.
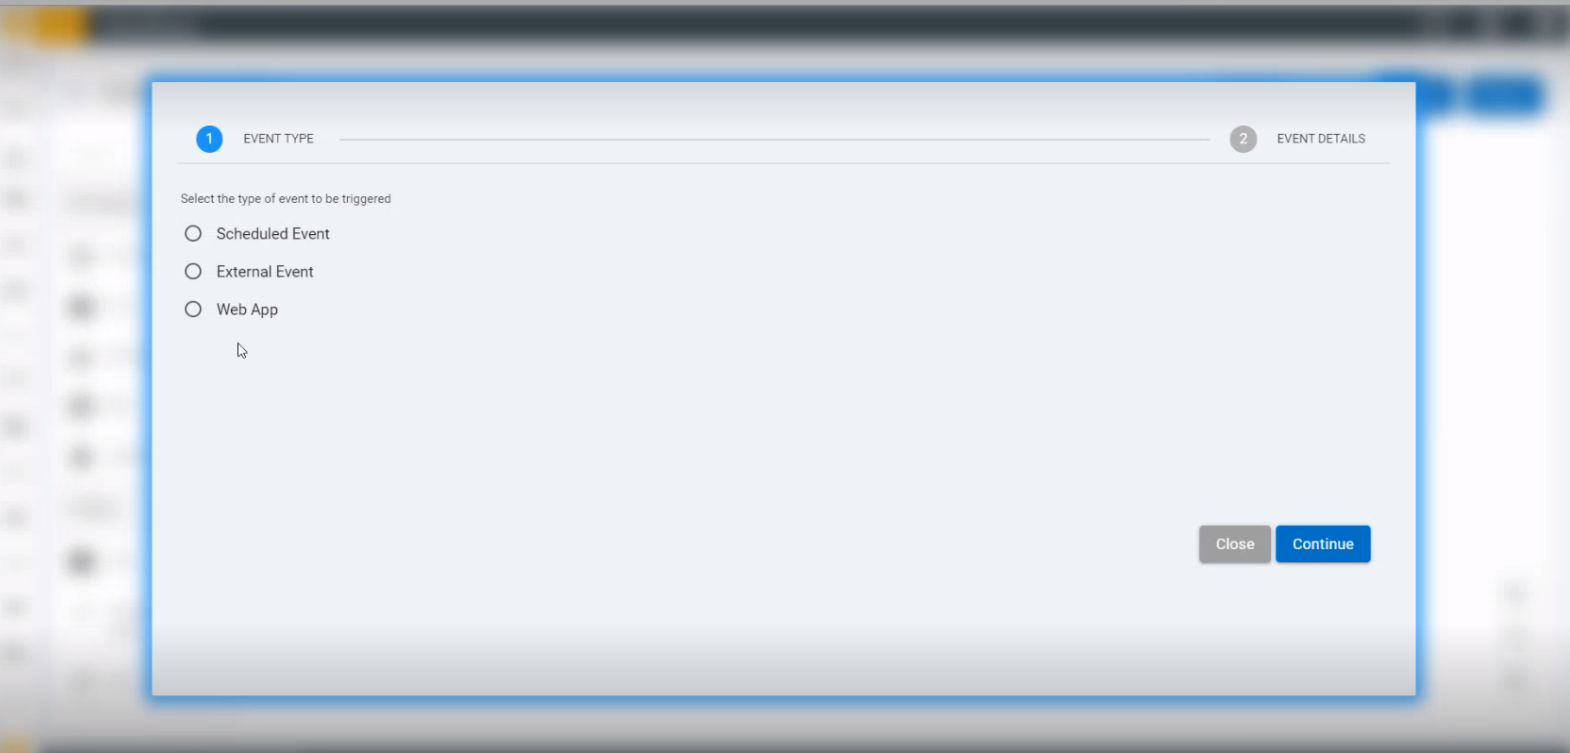
- Select one of the options and click on Continue.
- Scheduled events get triggered at the time set by the user in its Cron expression, while the External events get triggered from the BOT connect API.
If Scheduled event is selected.
- Fill in the Workflow name, Cron expression, and JSON payload (optional).
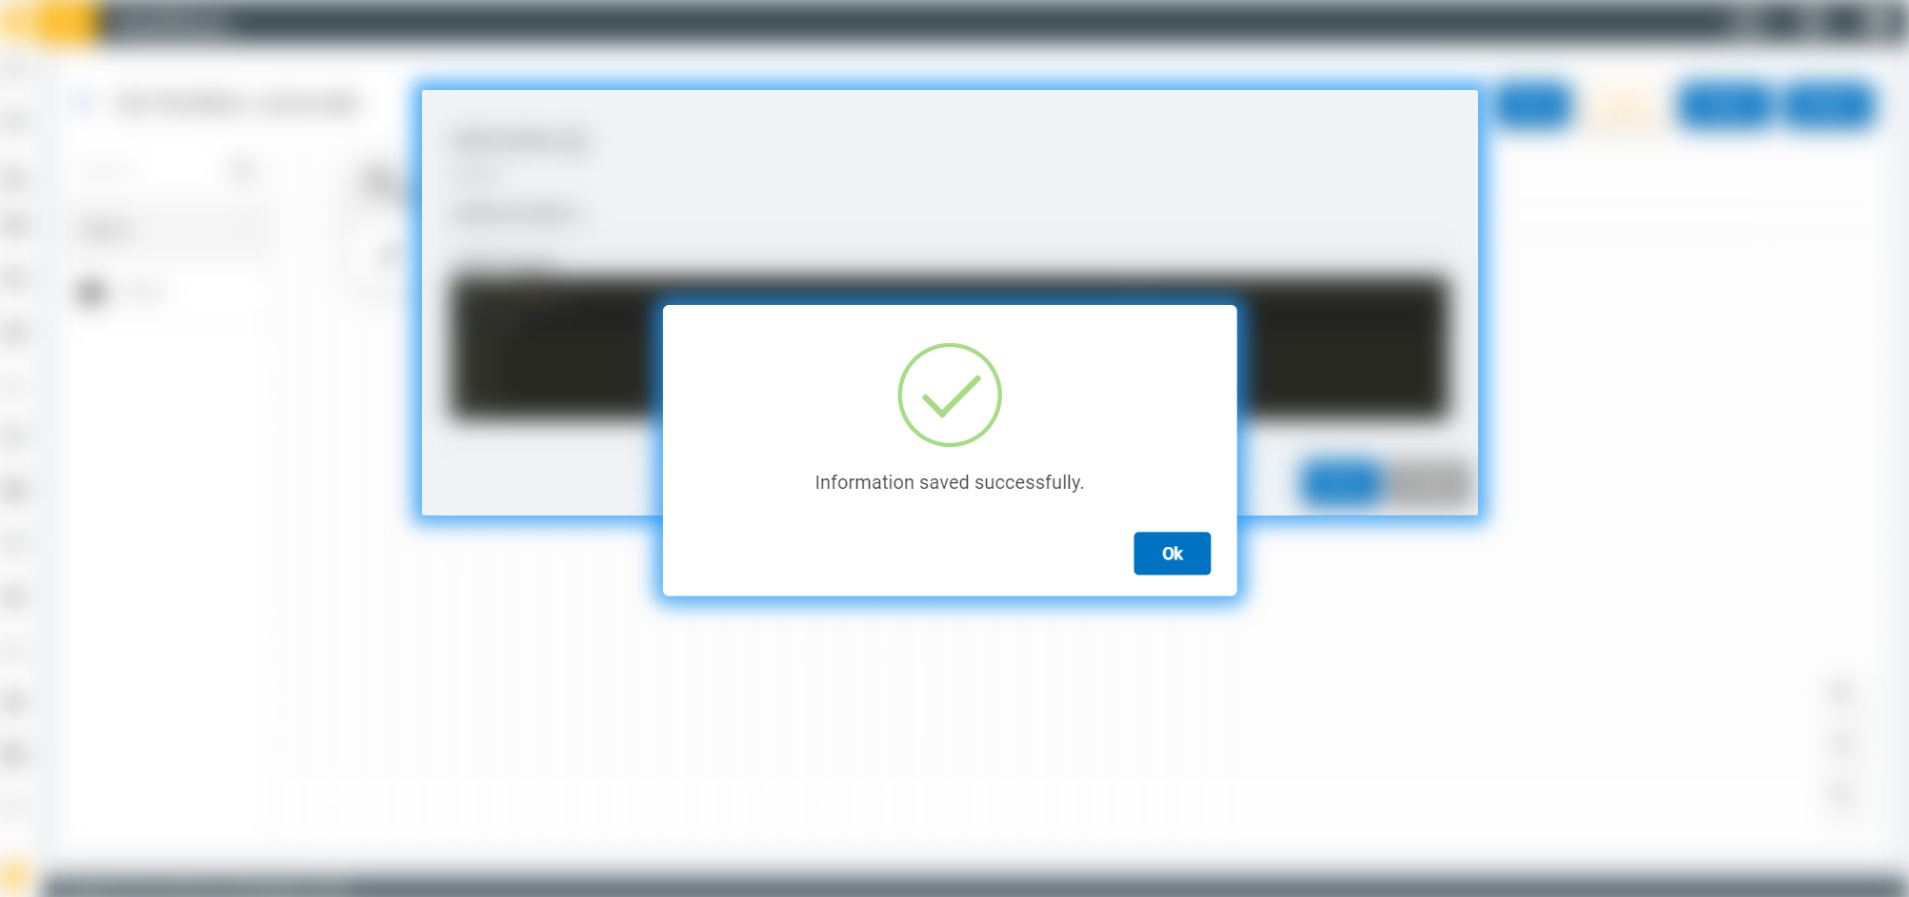
- Click on Save and the information gets saved.
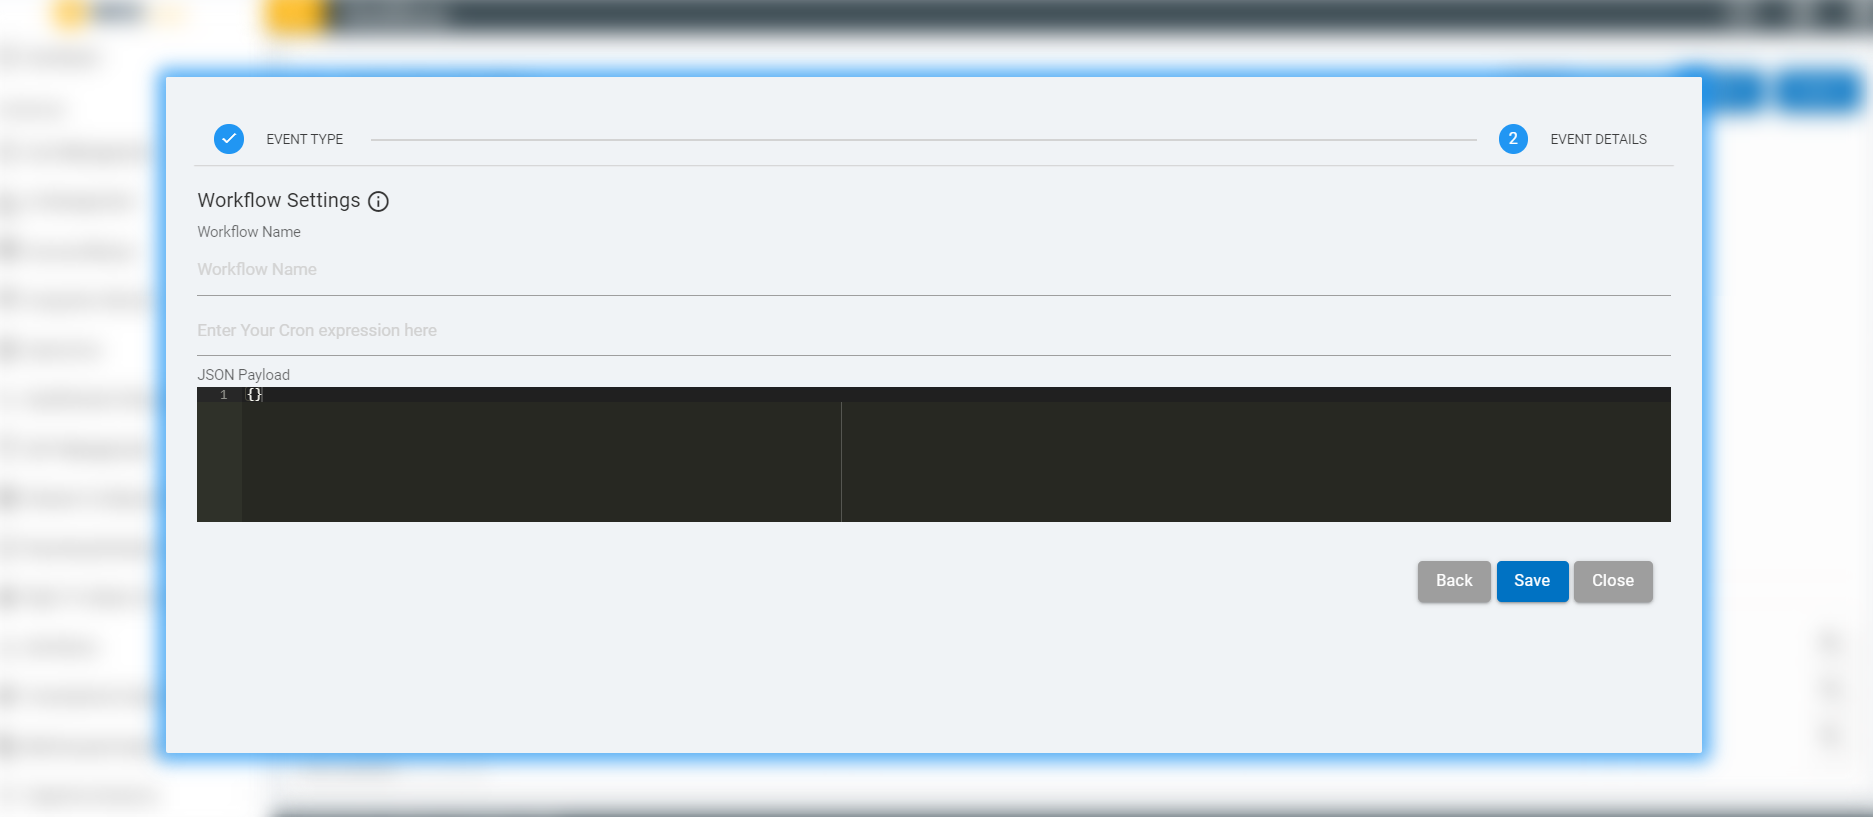
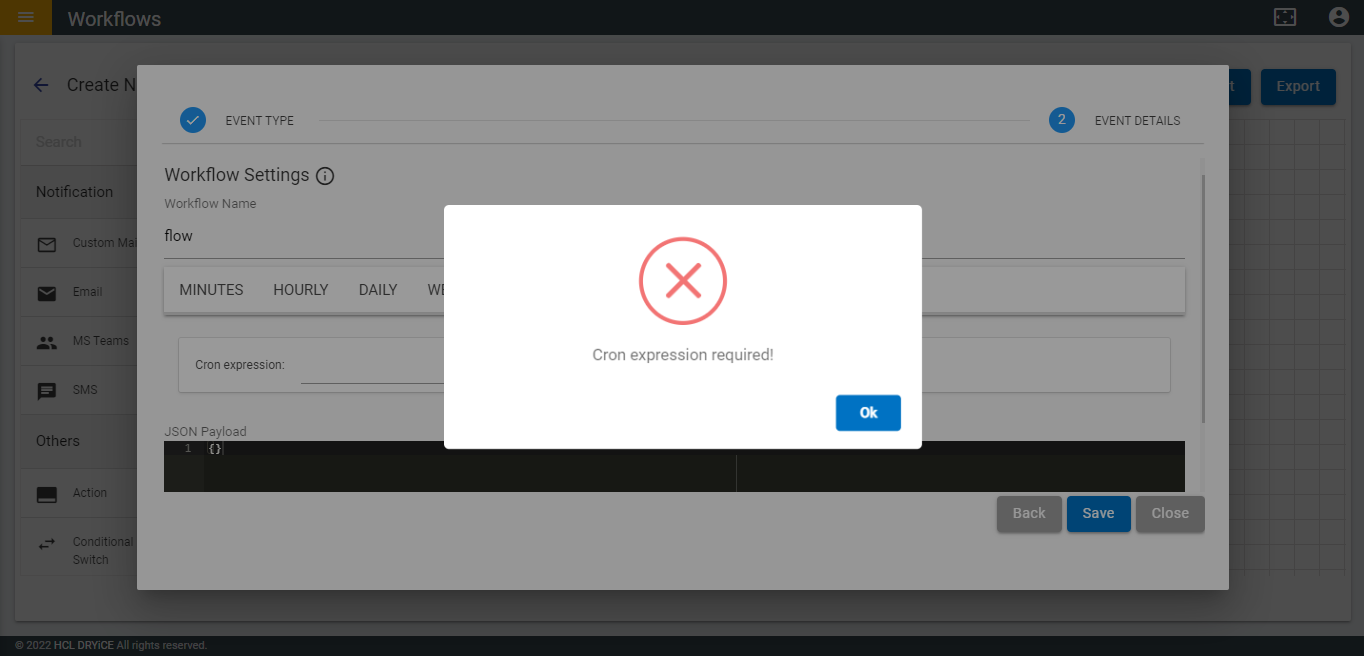
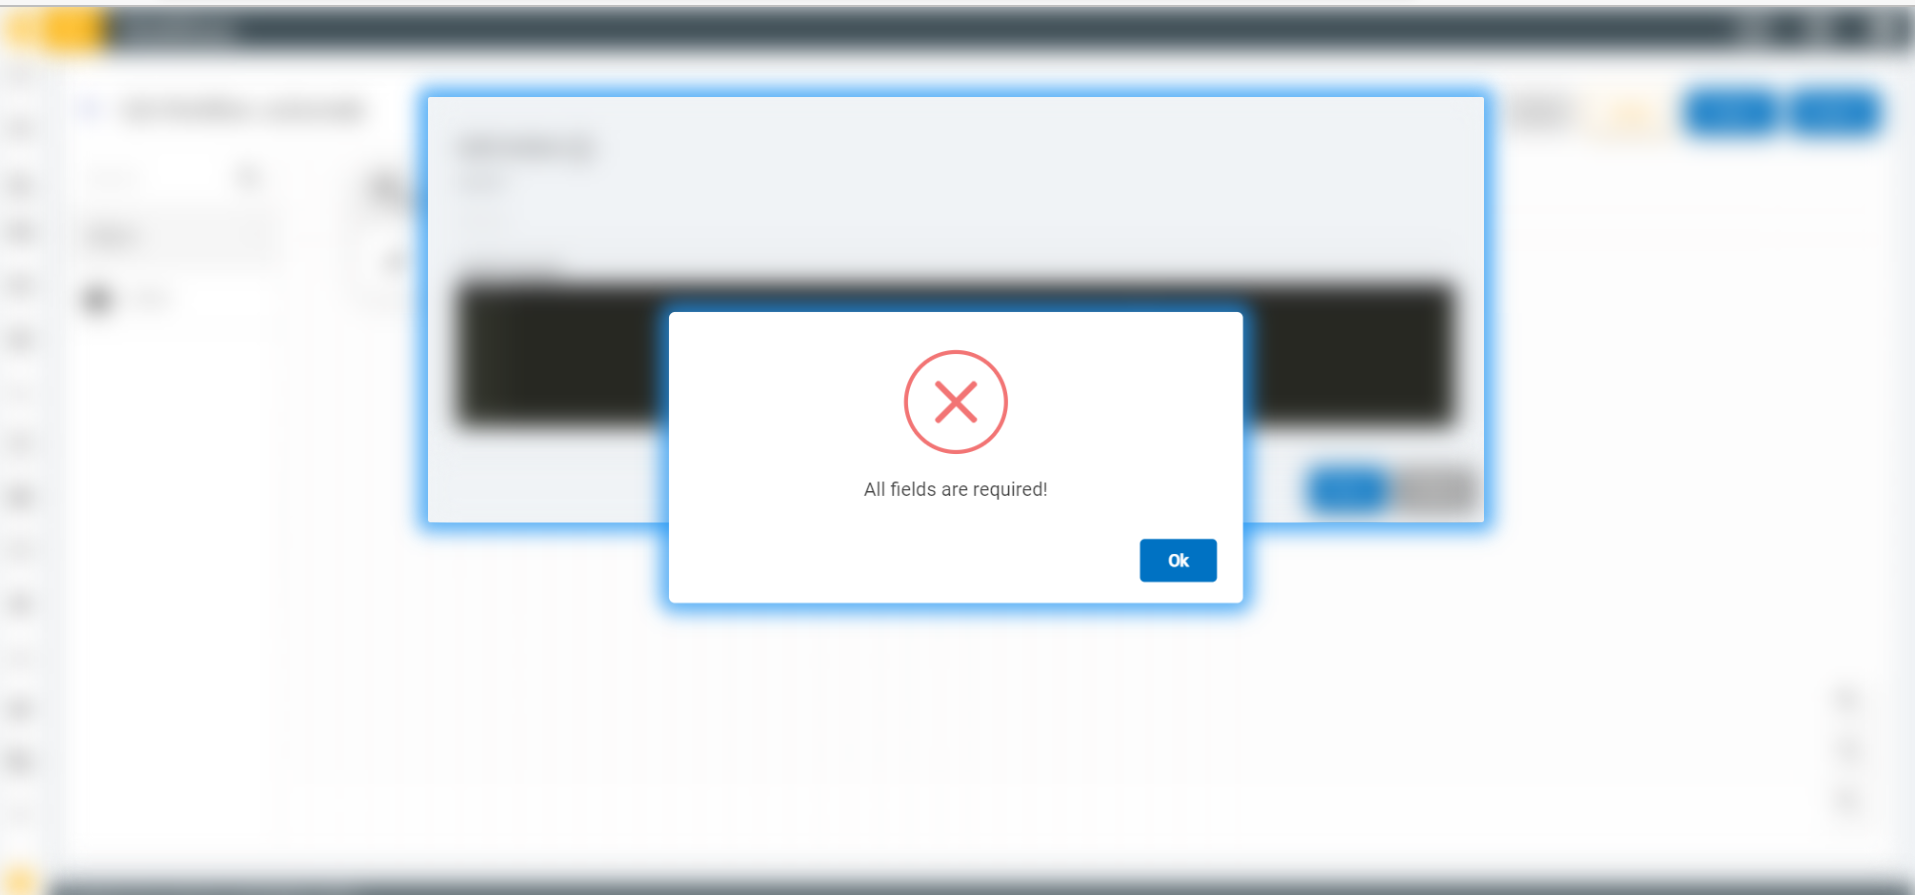
- Before clicking on Save, make sure that the Workflow name and Cron expression should not be empty and JSON Payload is optional field and the Workflow name’s length should be less than 18 characters. If any of the two mandatory fields are empty, then the following popup will come.
If External event is selected
- Fill the Workflow name and JSON payload(optional).
- Click on Save and the information gets saved.
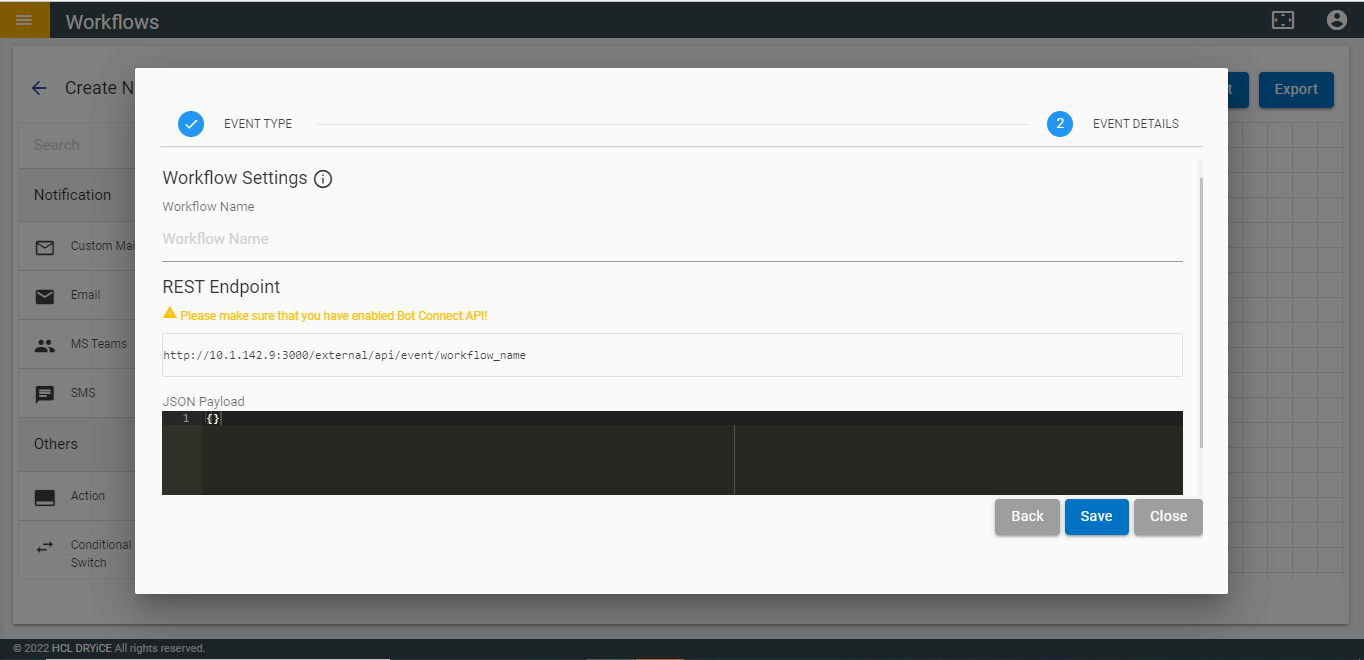
- Before clicking on Save, make sure the Workflow name is not empty and if JSON needs to be filled then JSON should be in a valid JSON format. If Workflow name is empty, then the following popup will show up.

- After clicking on Save of the Start node, the Workflow name appears in Start node.
If Web App is selected
Web App is triggered by the BOT Connect API.
Once triggered by a Web App event, this event will execute the entire flow. Once the execution is finished, it will give the result.
- Select Web App and click on Continue.
- Fill in the Workflow Name, which is a mandatory field, and the JSON Payload, which is an optional field.
- Click on Save and the information gets saved.
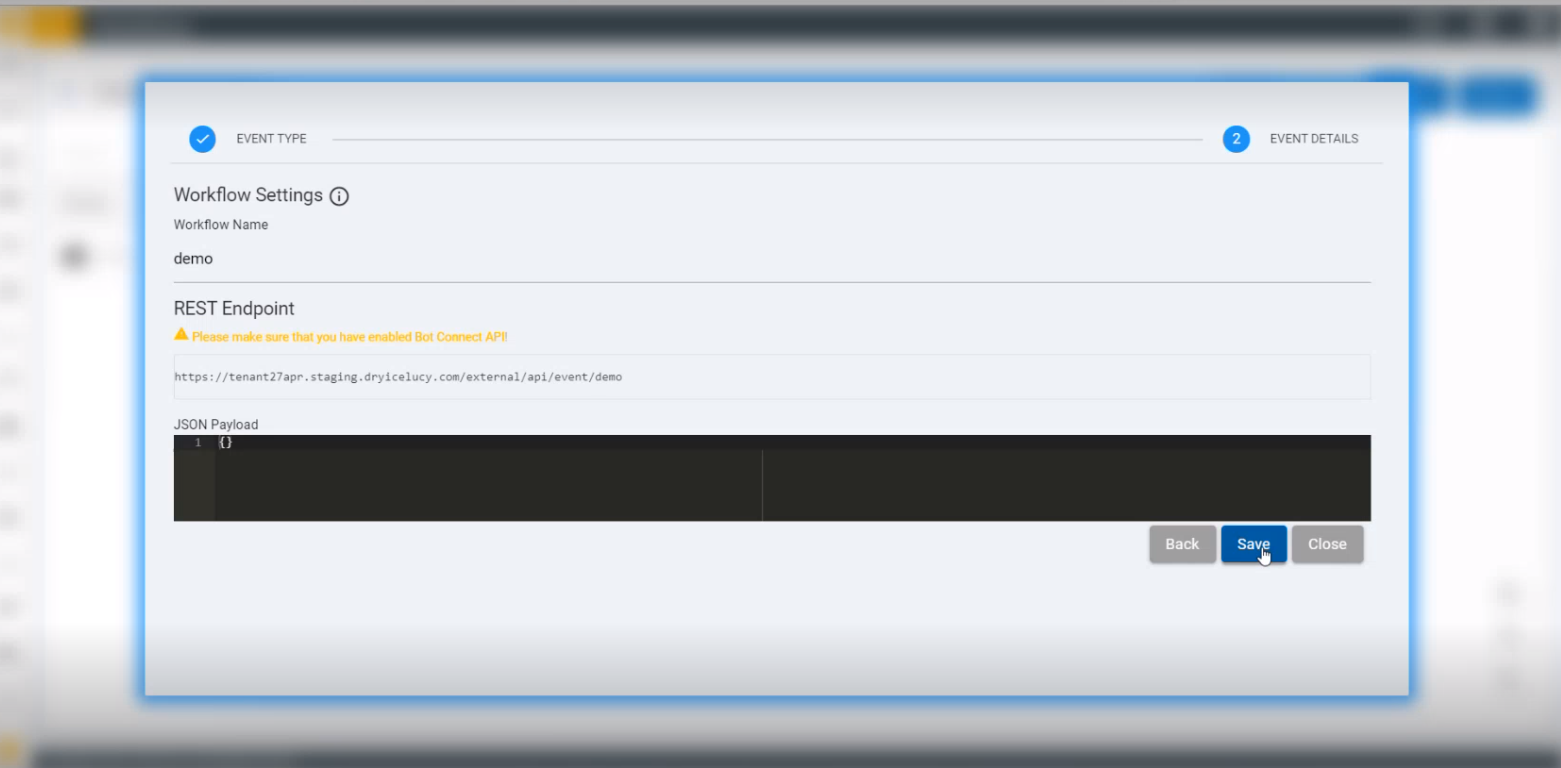
Before clicking on Save ensure that:
- Workflow Name is not empty.
- If filled, JSON should be in a valid JSON format.
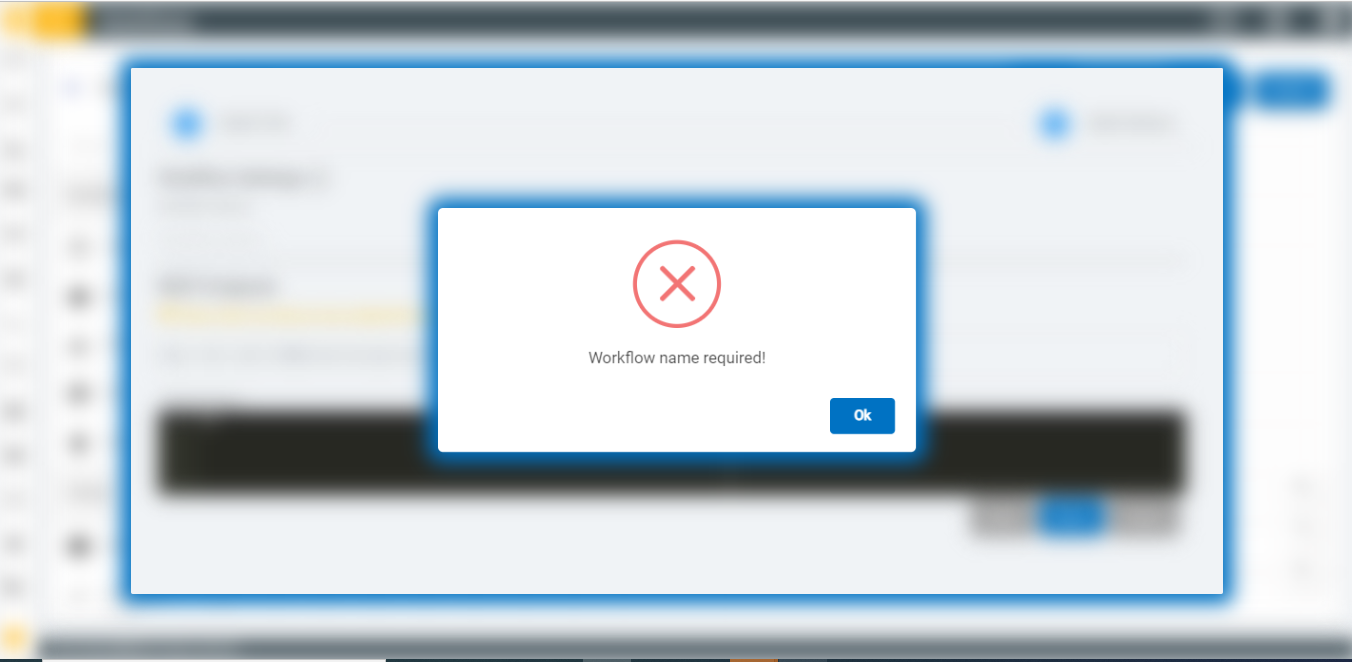
If the Workflow Name is left empty, the following popup appears.
After clicking on Save, a success message appears as shown below.
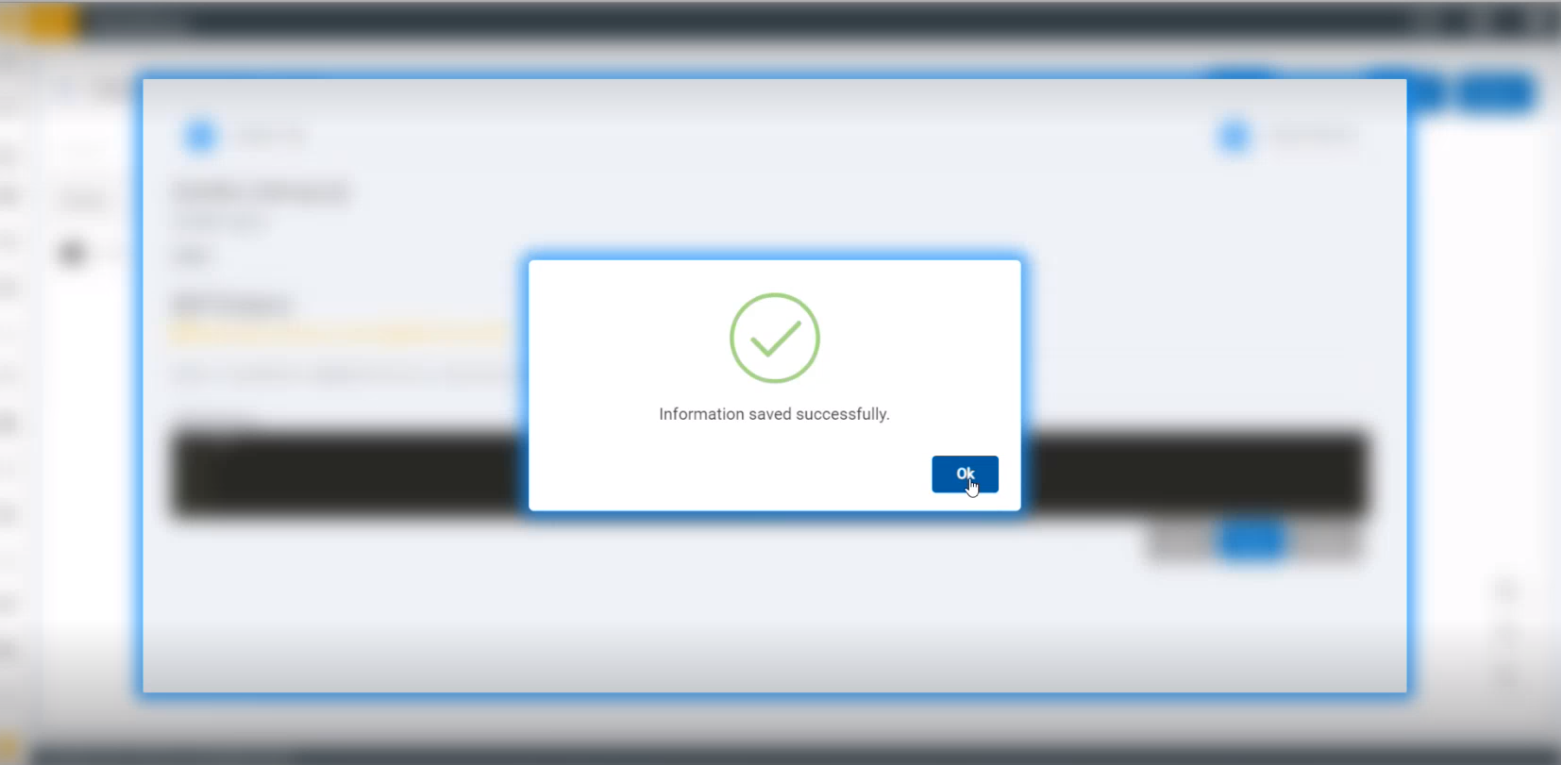
The Workflow Name appears in the Start node after being saved.

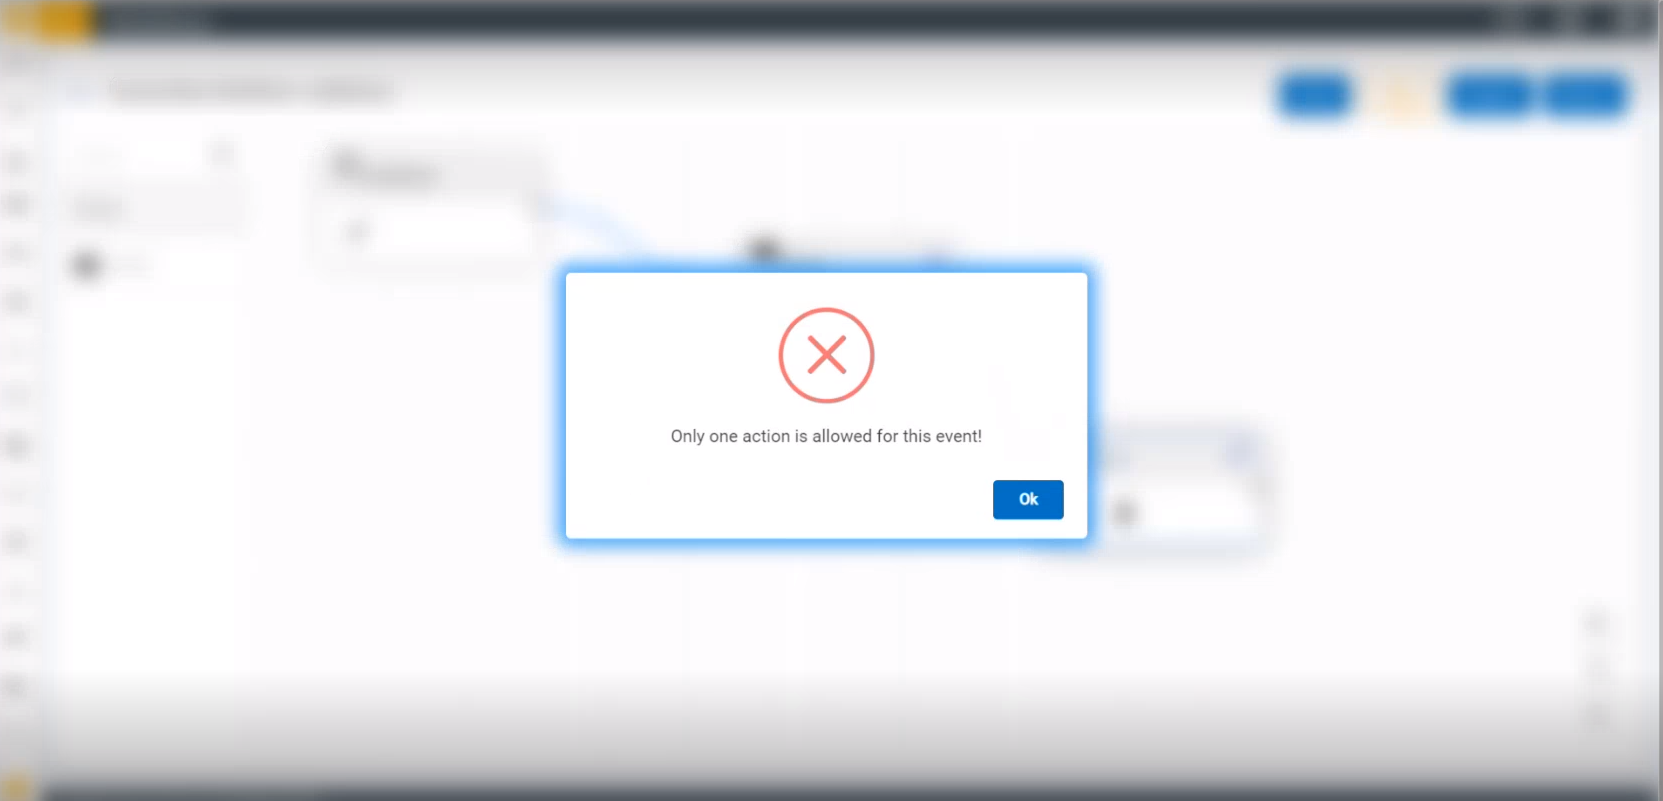
Only one action node can be requested and approved for an entire event.
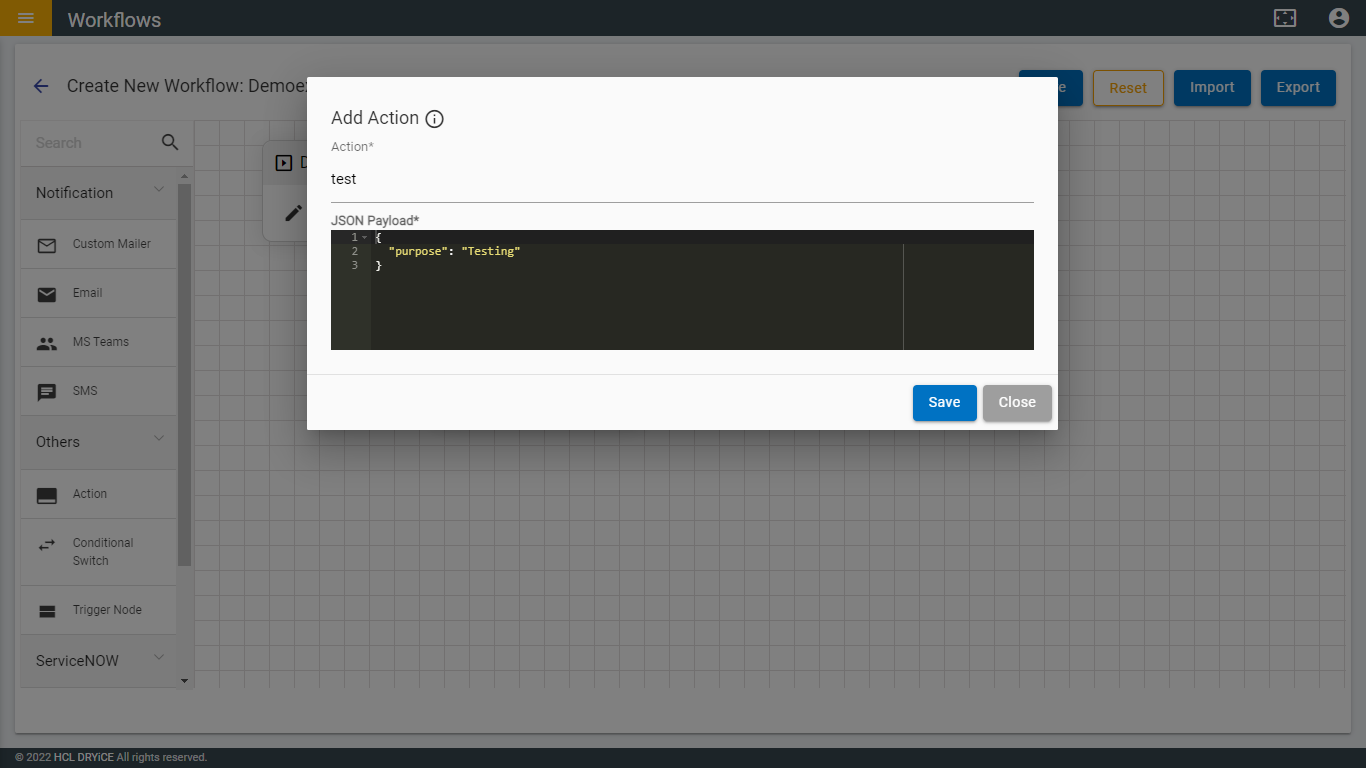
- To drag Action node, user must click on the edit button of Action node.
- Fill the mandatory fields.
- Select an Openwhisk function name from Action drop-down box and fill JSON payload.
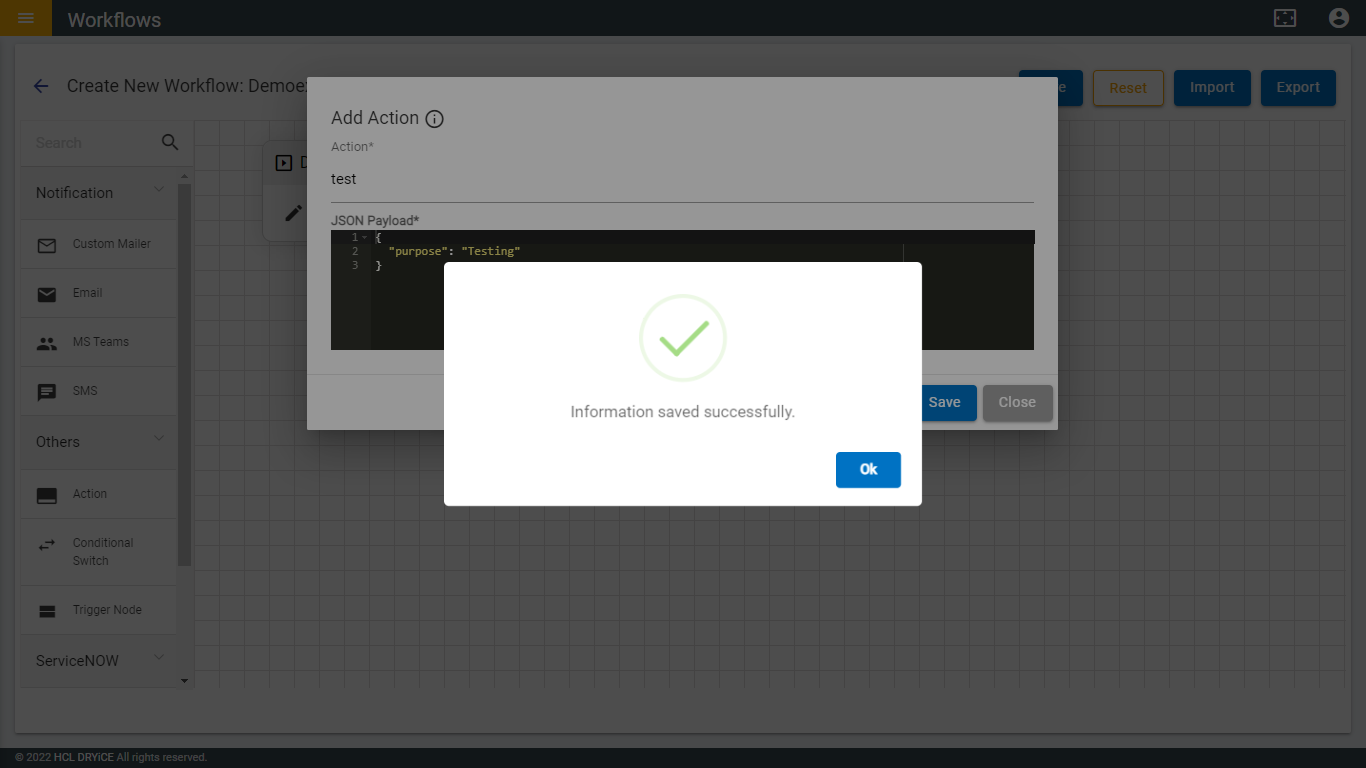
- Click on Save.
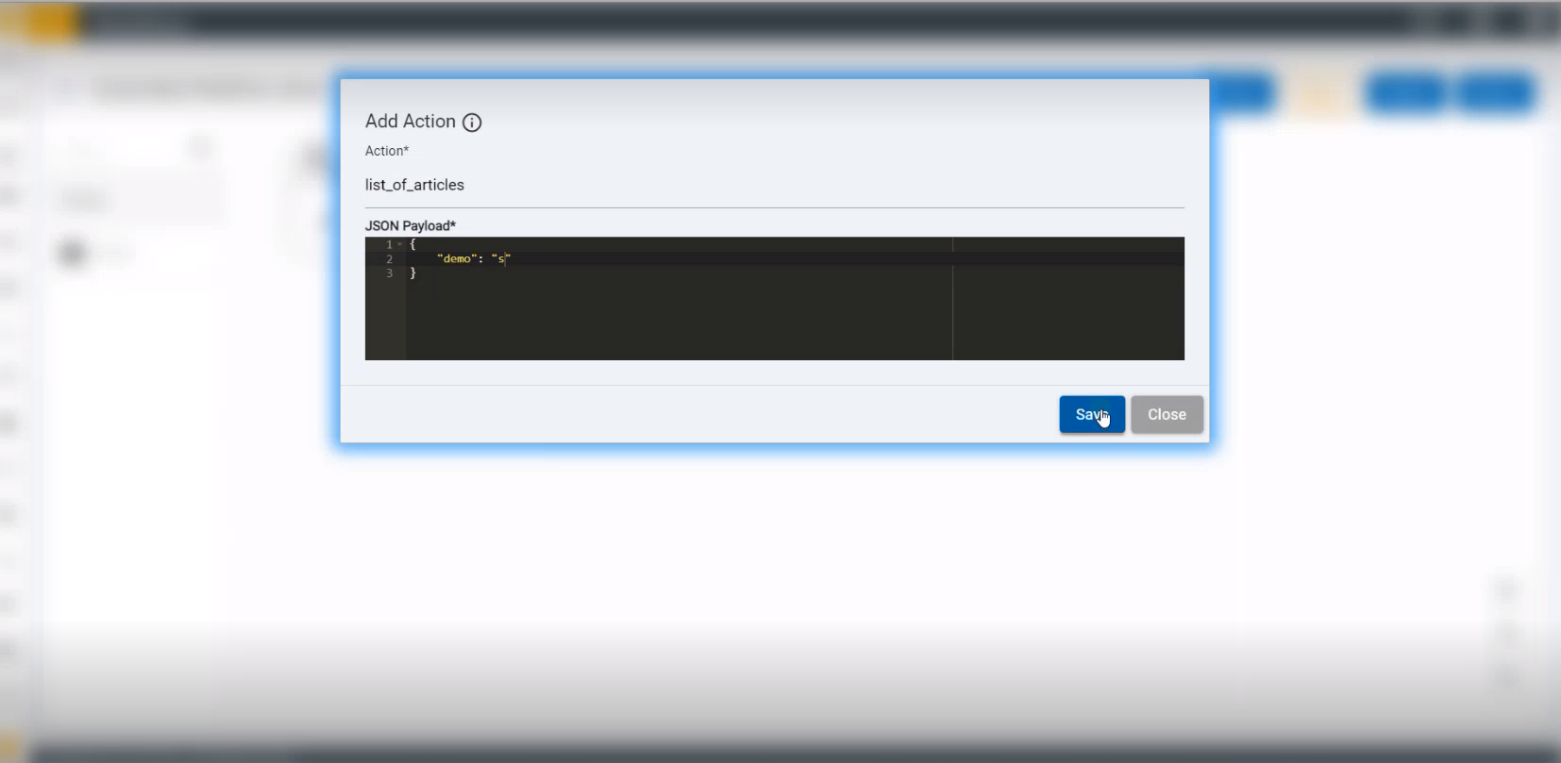
A pop up success message appears.
If these two fields are left empty, a pop-up appears stating “All fields are required!” would appear.
If more than one action node is added to Web App, an error message is displayed stating “Only one action is allowed for this event!” appears.
- Add one Action node and click on Save button.
- The event is saved successfully.
Figure 18. Figure 158 – Success Message 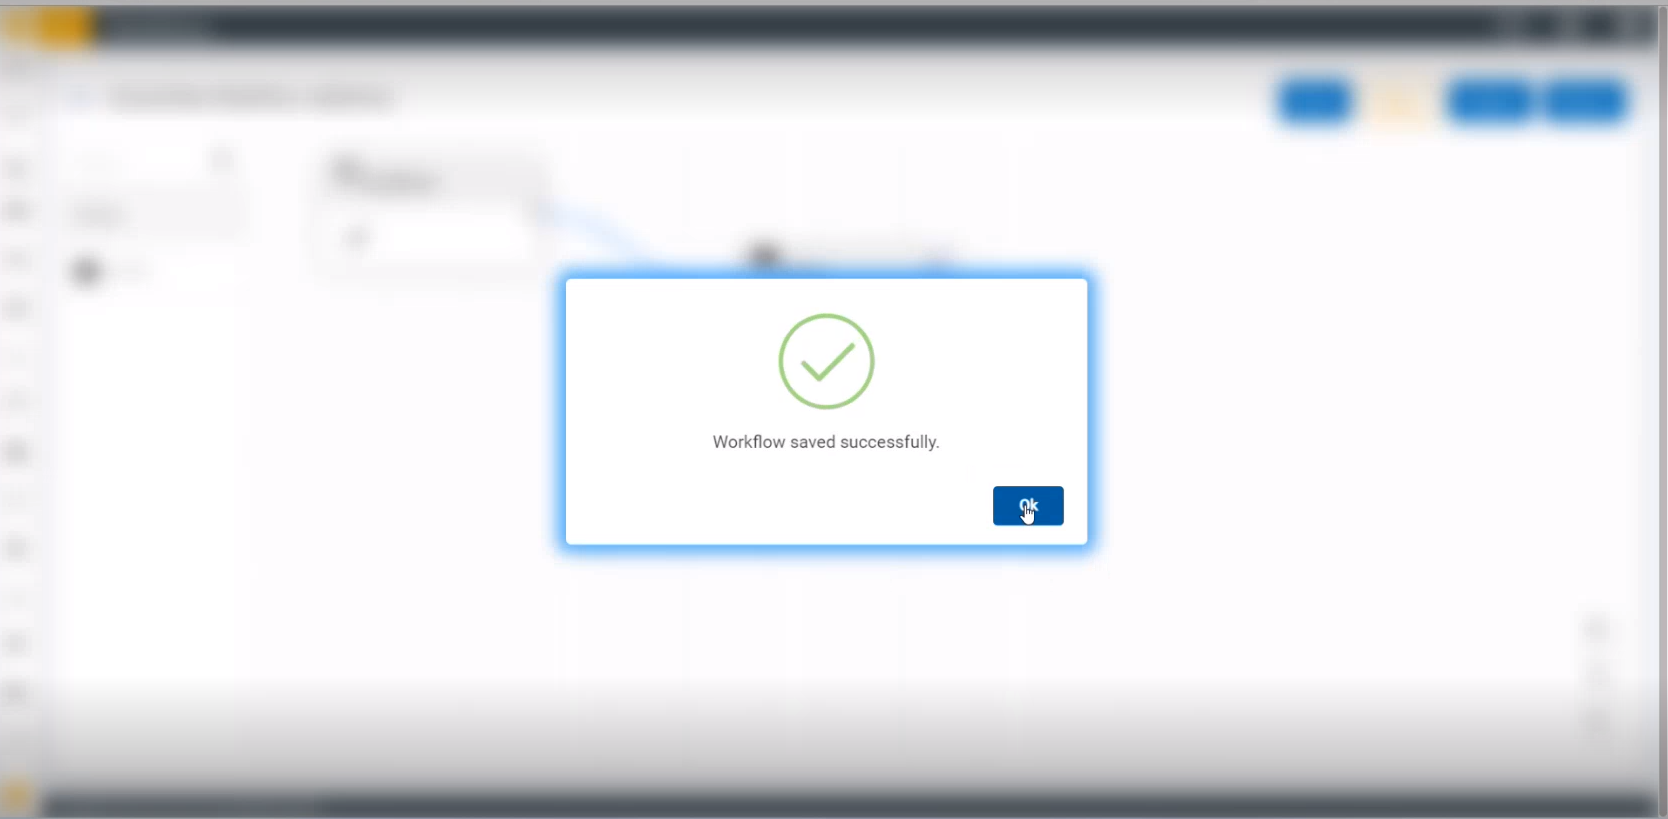
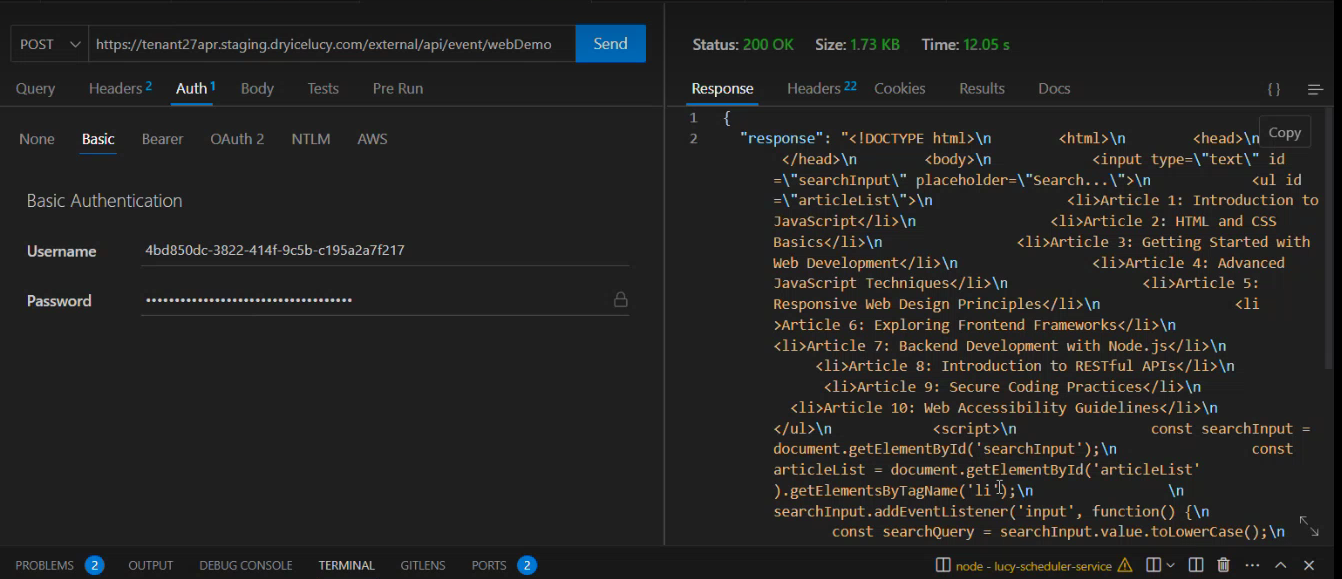
- To execute the Web App flow, the user must hit that flow in postman using the following URL: https://tenant-name/admin/external/api/event/workflow-name.
- Once triggered by a Web App event, it executes the entire flow.
- The result is shown once the execution is finished.
- Drag Action or any other node.
- Click on
.png) of Action node and
fill the mandatory fields.
of Action node and
fill the mandatory fields. - Select an Openwhisk function name from Action drop-down box and fill the JSON payload.
- Click on the Save button.
- If these two fields are empty, then a pop-up will be shown stating that ‘All fields are required’
- After filling the details, click on Save.
- Click on Ok.
- The following confirmation pop-up will be shown for Save button of all the nodes.
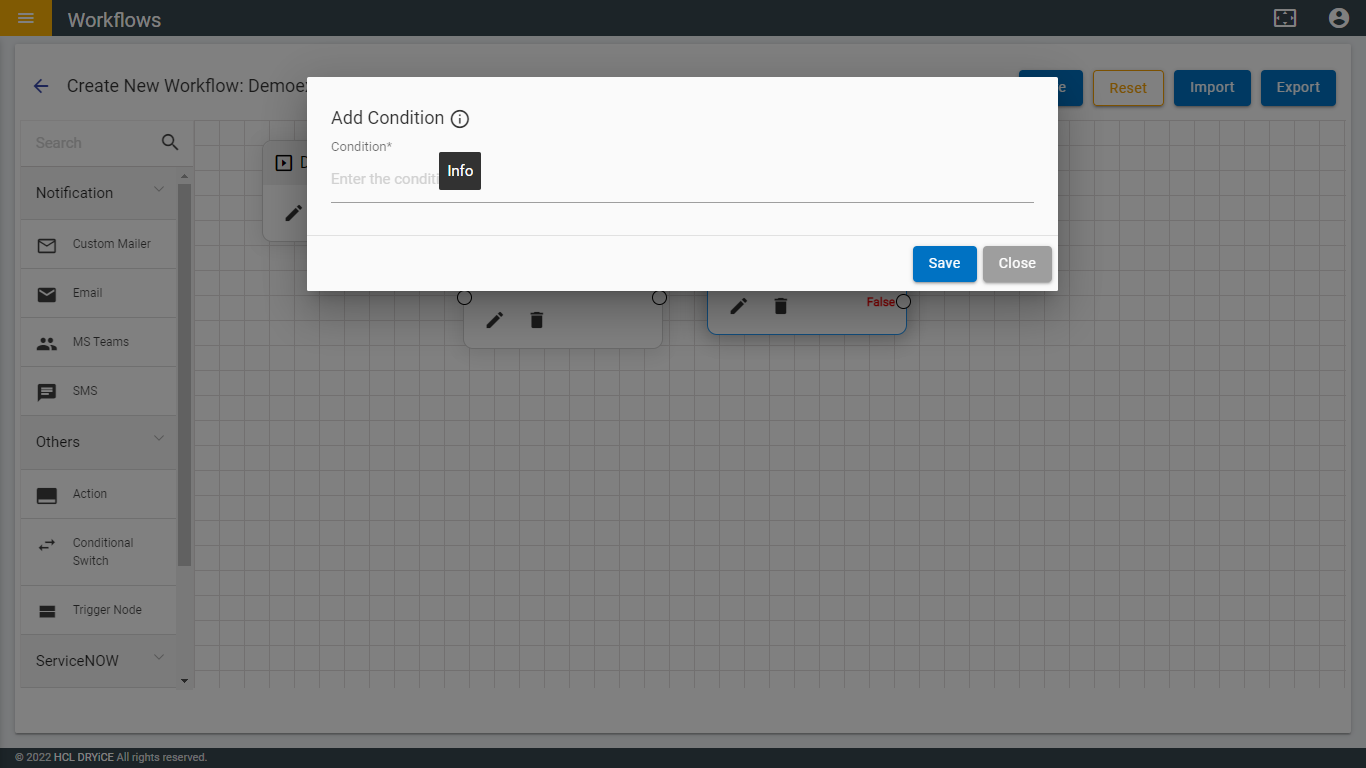
- Drag Conditional Switch node.
- Click on
.png) button of the node
and fill the condition field which is mandatory.
button of the node
and fill the condition field which is mandatory. - You can click on
 to see what
you need to write in the condition field.
to see what
you need to write in the condition field.
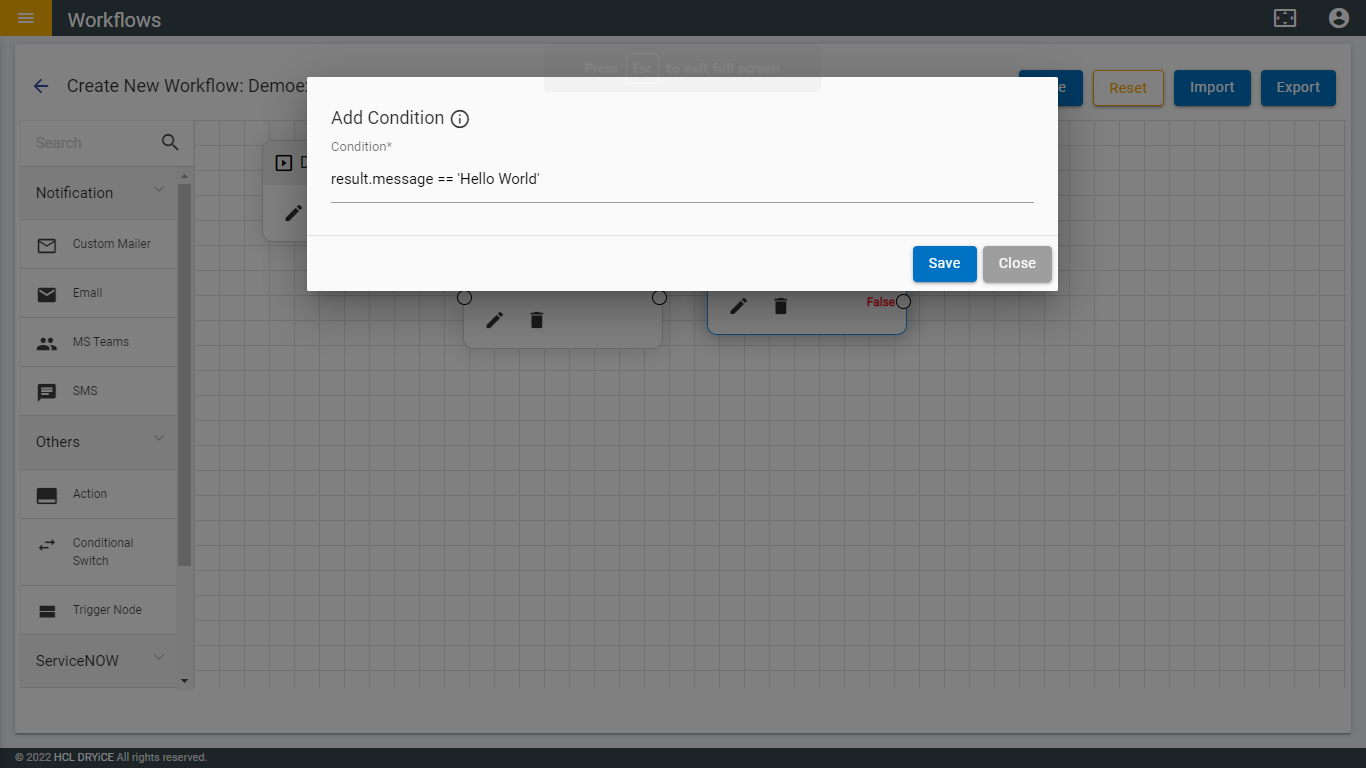
You need to use result object to access previous node’s output. For example: Action node’s output is {message: ‘Hello World’}, so you need to write a condition in condition field, result.message == ‘Hello World’.
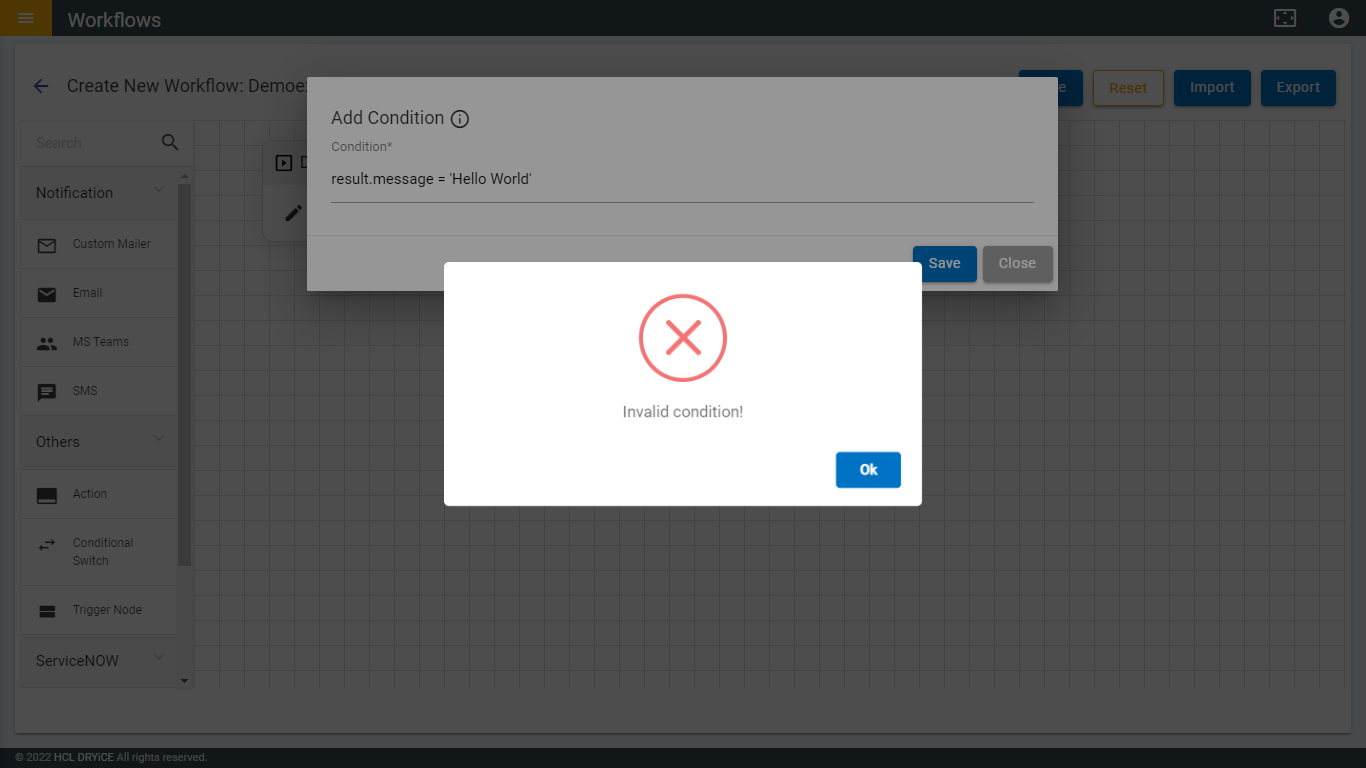
Condition should be syntactically correct otherwise it will show Invalid syntax. Some keywords are restricted for use as condition. Keywords are: if, else, for, switch, case, this, require, global, process, console, object, map, forEach, await, async, function, var, let, const, throw, new, every and all assignment operators. If any of these keywords are used, then the following pop-up will be shown.
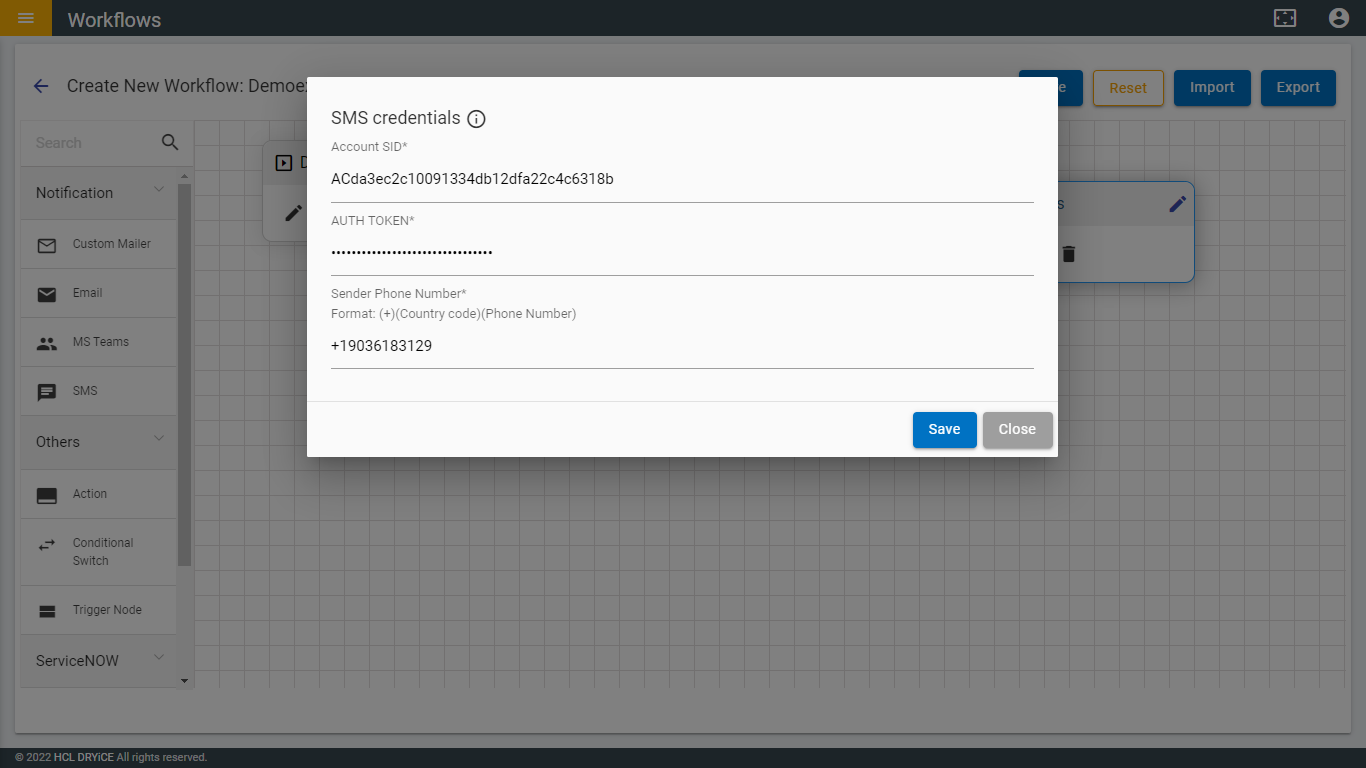
- Now drag SMS node and click on the
.png) button of SMS node and fill the
required details.
button of SMS node and fill the
required details. - The recipient’s details and the body of the message will come from previous node’s output (e.g. Action). To send SMS, you need to have an account in Twilio. A Twilio Account SID, Auth Token, and Twilio phone number are required.
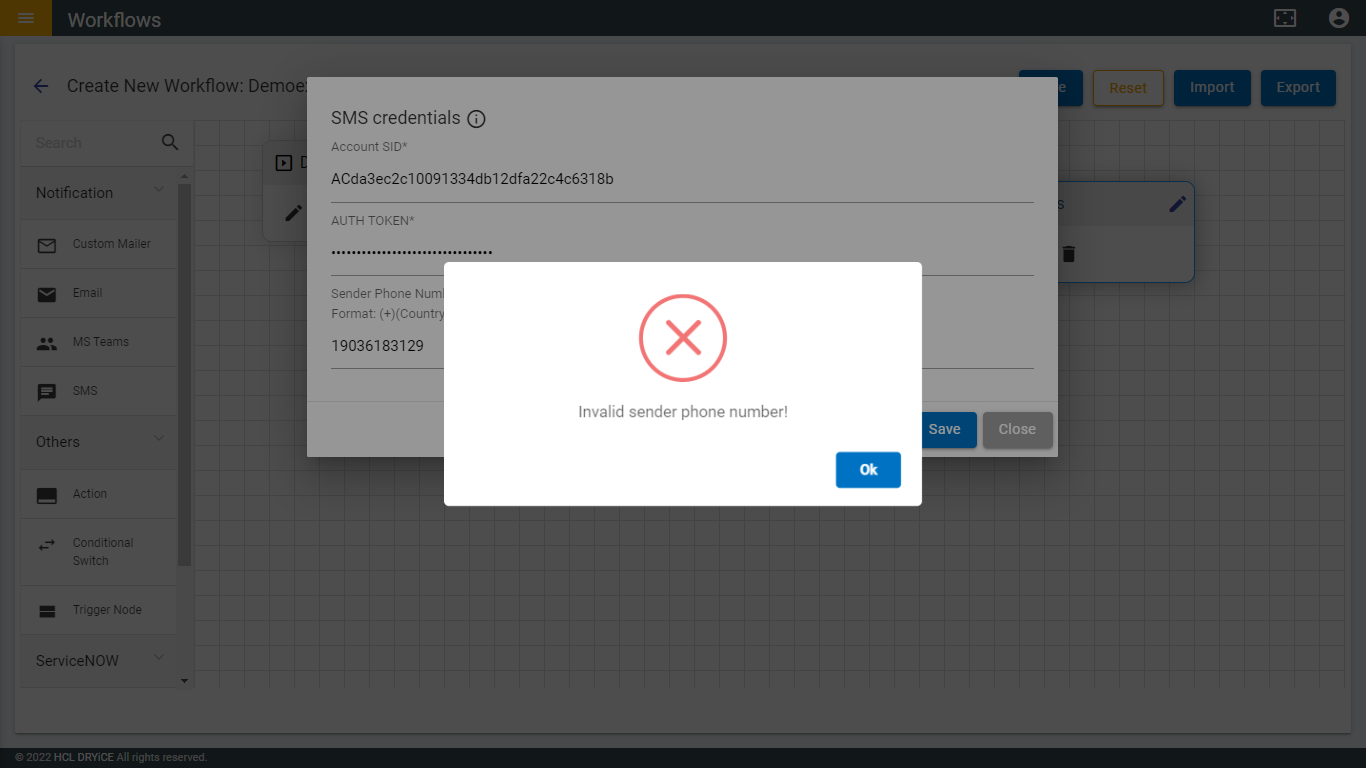
- In the ‘Sender phone number’ field, enter your Twilio phone number. All the fields are mandatory.
- After filling in all the fields click on Save.
- If any of the fields are empty, then a pop-up will be shown stating “Please fill the required fields”.
- The Sender Phone Number field of SMS node maintains a format. If you write phone number in wrong format and click on Save, then the following pop-up will come.
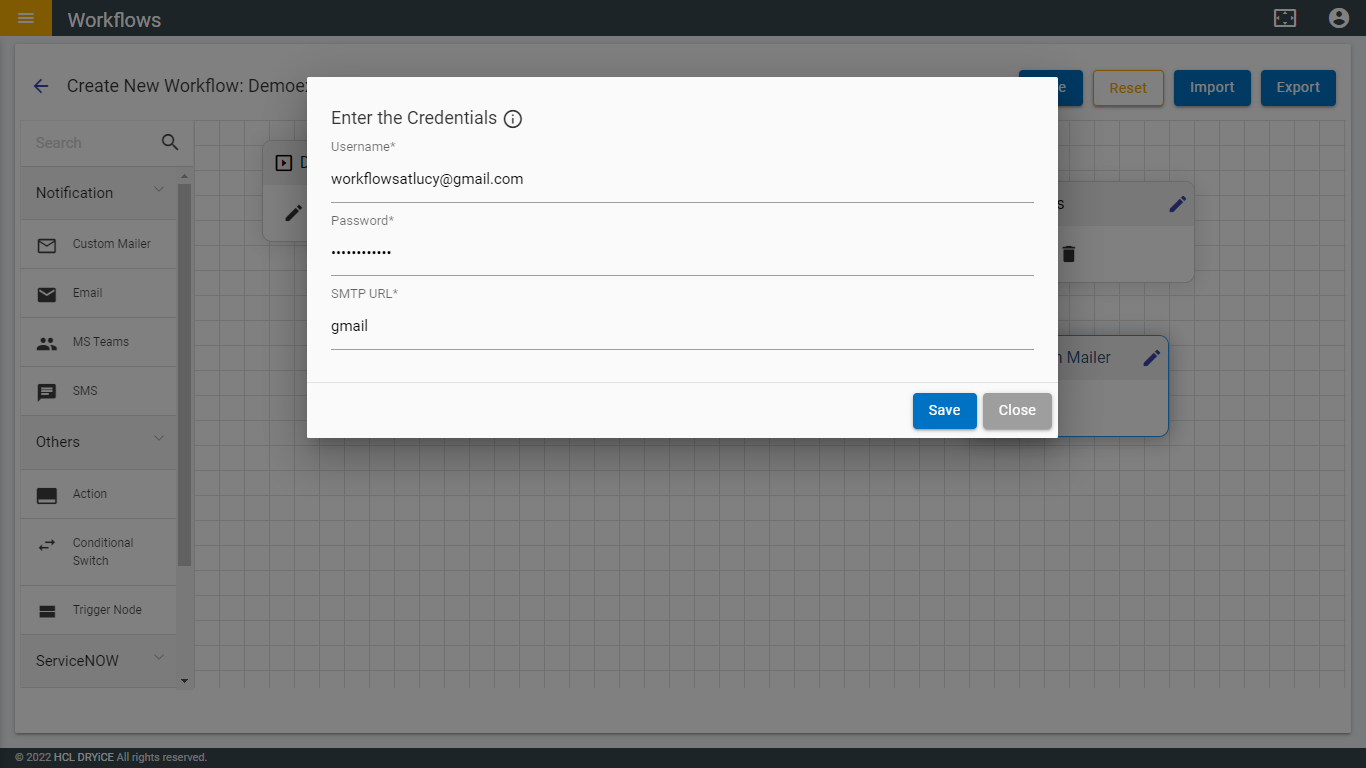
- Now drag Custom Mailer and click on the
.png) button of the node. You need to fill
all the fields, Username should be a valid email
id, Password should be the same email id’s
password and service should be the same email id’s domain.
The mail recipients and body of the mail should come from previous
node’s output (e.g. Action) and you can see all the
information regarding this by clicking the Info icon. After filling
all the details, you need to click on Save
button.
button of the node. You need to fill
all the fields, Username should be a valid email
id, Password should be the same email id’s
password and service should be the same email id’s domain.
The mail recipients and body of the mail should come from previous
node’s output (e.g. Action) and you can see all the
information regarding this by clicking the Info icon. After filling
all the details, you need to click on Save
button.
- You can edit the name of nodes by clicking on the Edit
Name button (
 ) which is
present at the top right corner of each node, a cursor is placed at
front of the node name.
) which is
present at the top right corner of each node, a cursor is placed at
front of the node name. - After giving it a name, the user needs to press Enter and the node name will be saved.
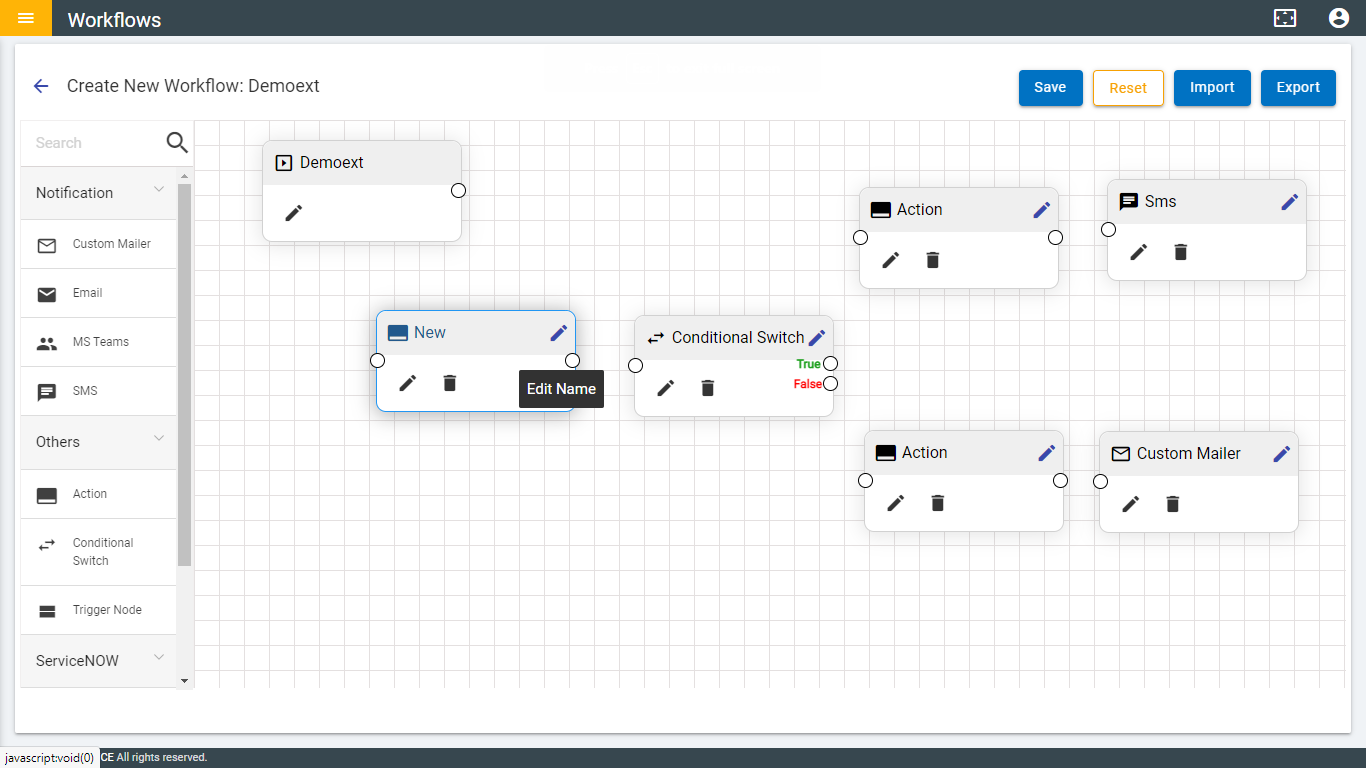
- After filling in all the node’s information, link all the nodes together, and click on the Save button.
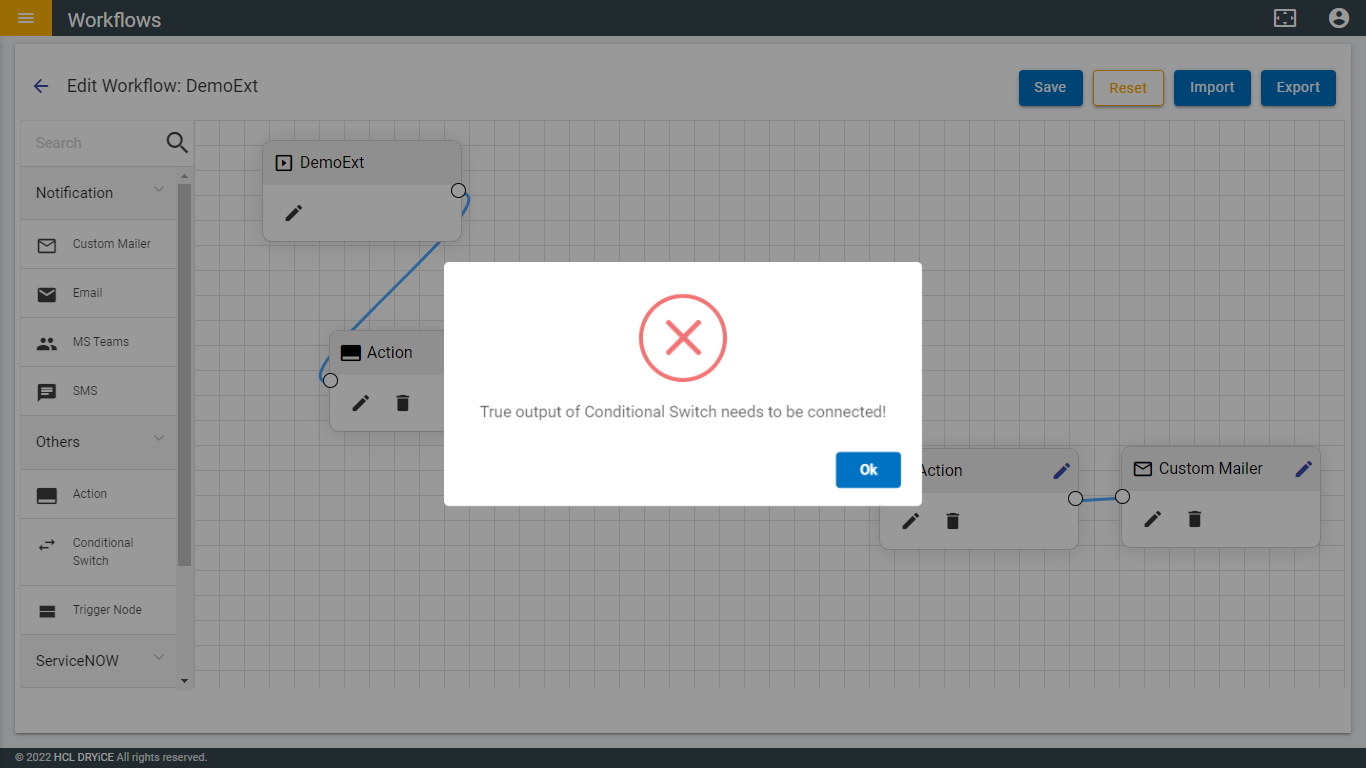
- Connection to the Condition Node’s ‘True’ output must be present, whereas Condition Node’s ‘False’ output is optional.
- If connection is not present in True output, then after clicking on Save, the following pop-up will be shown.
- After clicking on the Save button, the flow will be saved, and the pop-up will be shown:
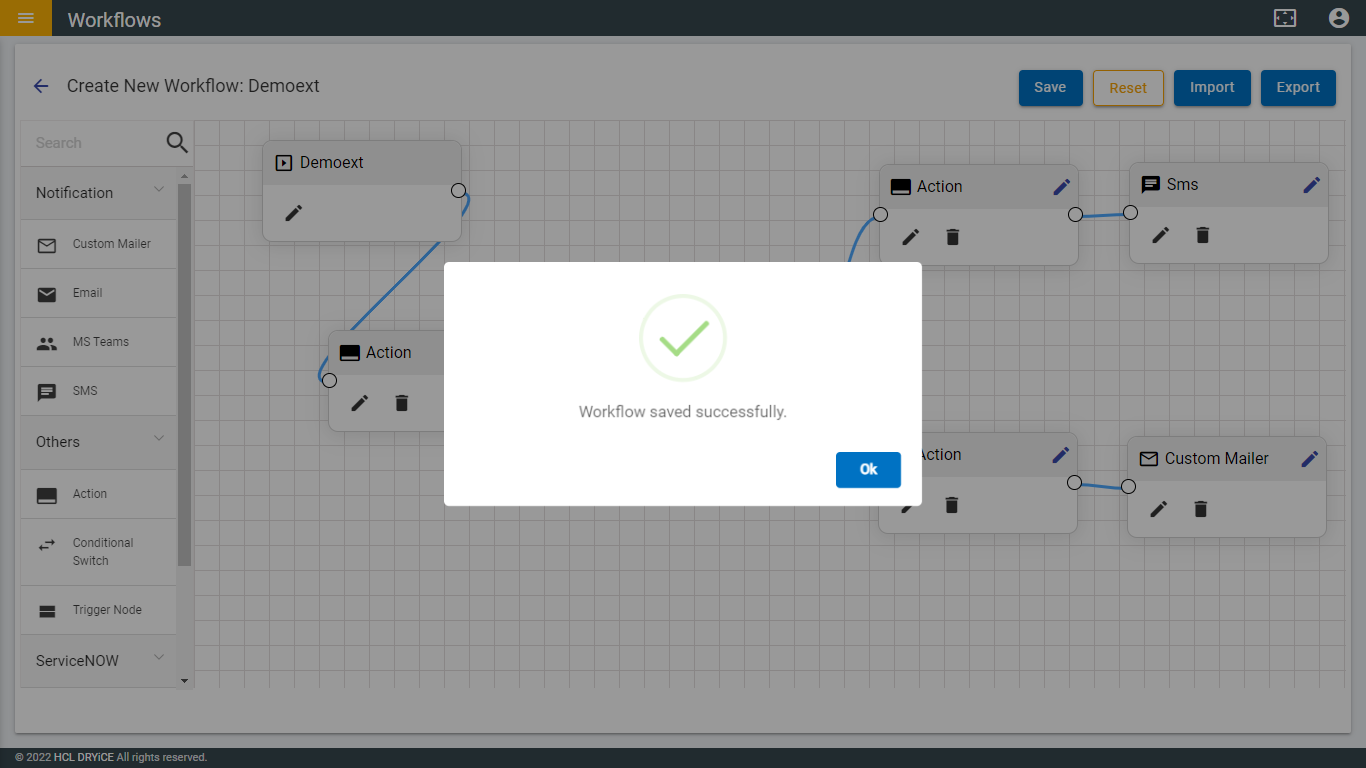
- Click on Ok and you will be redirect to the Workflow List Page where You can now see the newly created flow in the list.
- Flow with Trigger node: There is a node to trigger another flow that exists in the Workflow List page named "Trigger Node." This node is present only during external events.
- To use this node, you need to drag the node and click on the edit icon of the node.
- Select a flow from the drop-down and click on Save.
- An example with Trigger node is shown in the below figure.

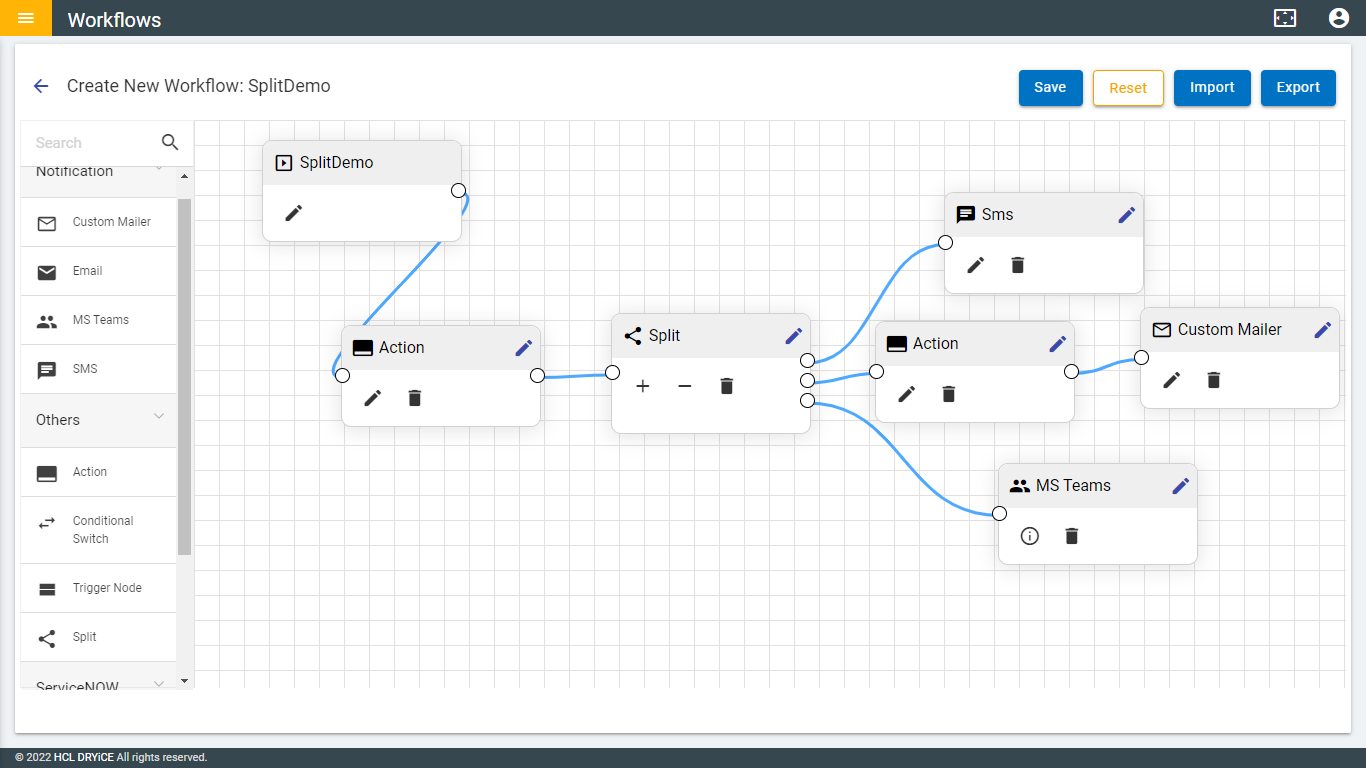
- Flow with Split Node: Split node is a special node that can have more than two outputs for one input. The node accepts a maximum of five outputs, and all outputs should relate to other nodes.
- Output can be added by clicking on the Add icon.
- Output can be removed by clicking on the Minus icon.
- If all the outputs are not connected, then the following pop-up will appear: "All outputs of the split node should be connected’. An example flow with Split node is shown in the below figure.