Post Installation Activities
This section provides information on how to perform various post installation activities.
This section describes how to perform certain post installation activities which are strictly dependent on the organization’s requirements.
It includes the following:
Enable Secure Communication (Changing HTTP to HTTPS)
Configuration Changes – Certificate Name Change (Type – PFX)
Configuration Changes – Certificate Name Change (for PEM/CRT/KEY Certificates)
Configuration Changes - Access BigFix Runbook AI without Certificate (Type – PFX)
Configuration Changes - Access BigFix Runbook AI with Certificate (Type – PFX)
Configuration Changes - Access BigFix Runbook AI without Certificate (Type – PEM)
Configuration Changes – SaaS based Ticket Analysis
Configuration Changes – Run BASEUI and WEBAPI on same port
All the post installation activities listed above are optional.
Enable Secure Communication (Changing HTTP to HTTPS)
This section describes how to enable the secure communication by changing HTTP to HTTPS. It can be enabled for both the BigFix Runbook AI website and the deployed components.
Website Only
This section describes how to enable the secure communication by changing HTTP to HTTPS for the BigFix Runbook AI website.
Following changes are required in the underlying components to achieve the same.
Key Rotation Service (KRS)
To change the hosting of KRS from HTTP to HTTPS using the existing certificate, for e.g. 'HclTech.iautomate.Web', please follow the below steps:
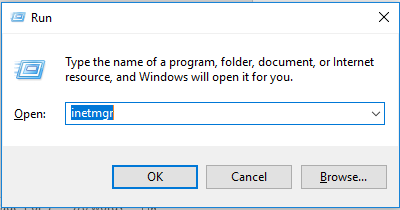
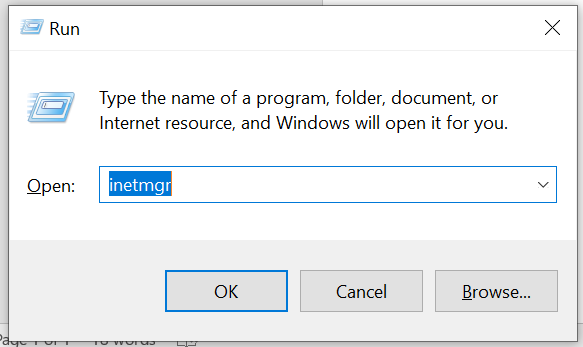
- Press Win+R and type inetmgr.
- Click OK to open IIS.
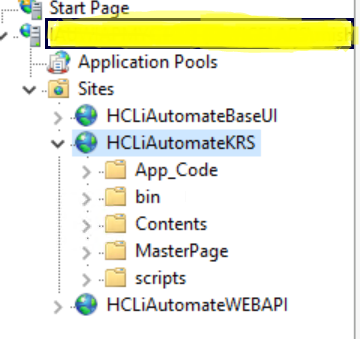
- Expand Sites and click HCLiAutomateKRS.
- Click on Bindings in the Edit Site section.
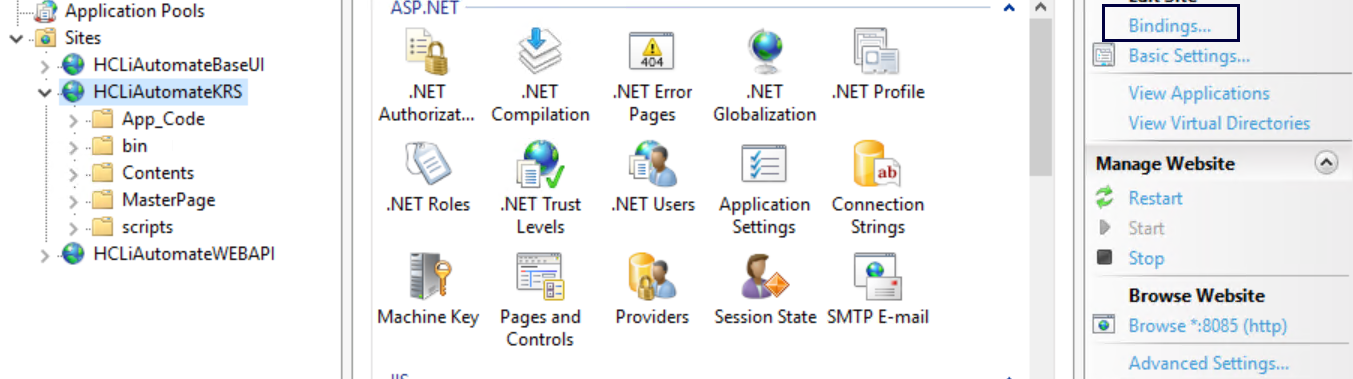
- Click Add New.
- Select Type as ‘https’. Port information gets populated automatically. Select the SSL Certificate .
- Click OK.
- Right click HCLiAutomateKRS.
- Click Explore.
- Find Web.config file and open it in a Notepad.

- Within the Web.config file, find the tag <security> and change it to <security mode= "TransportWithMessageCredential">.

- Save the file for changes to be reflected.
- Select the service and click Restart to restart the services.
Base User interface
To change the hosting of BaseUI from HTTP to HTTPS using the existing certificate, for e.g. 'HclTech.iautomate.Web', please follow the below steps:
- Press Win+R and type inetmgr.
- Click OK to open IIS.
.png)
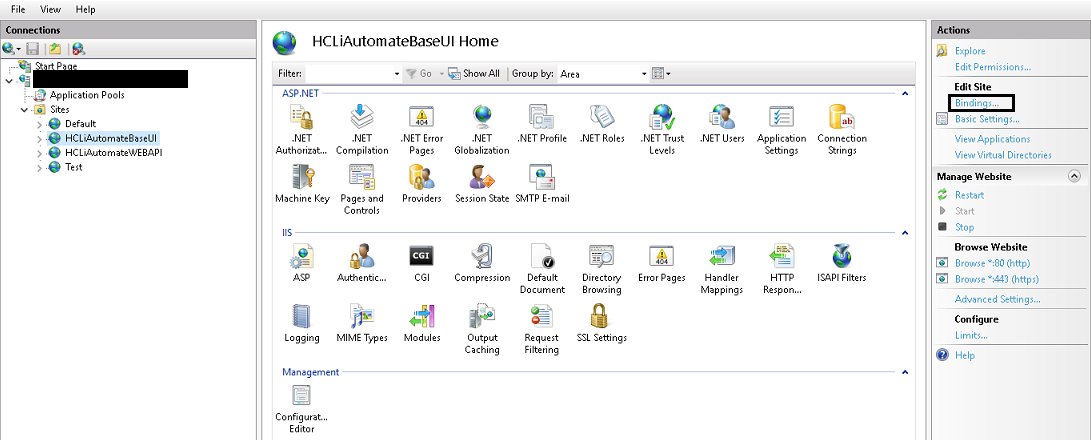
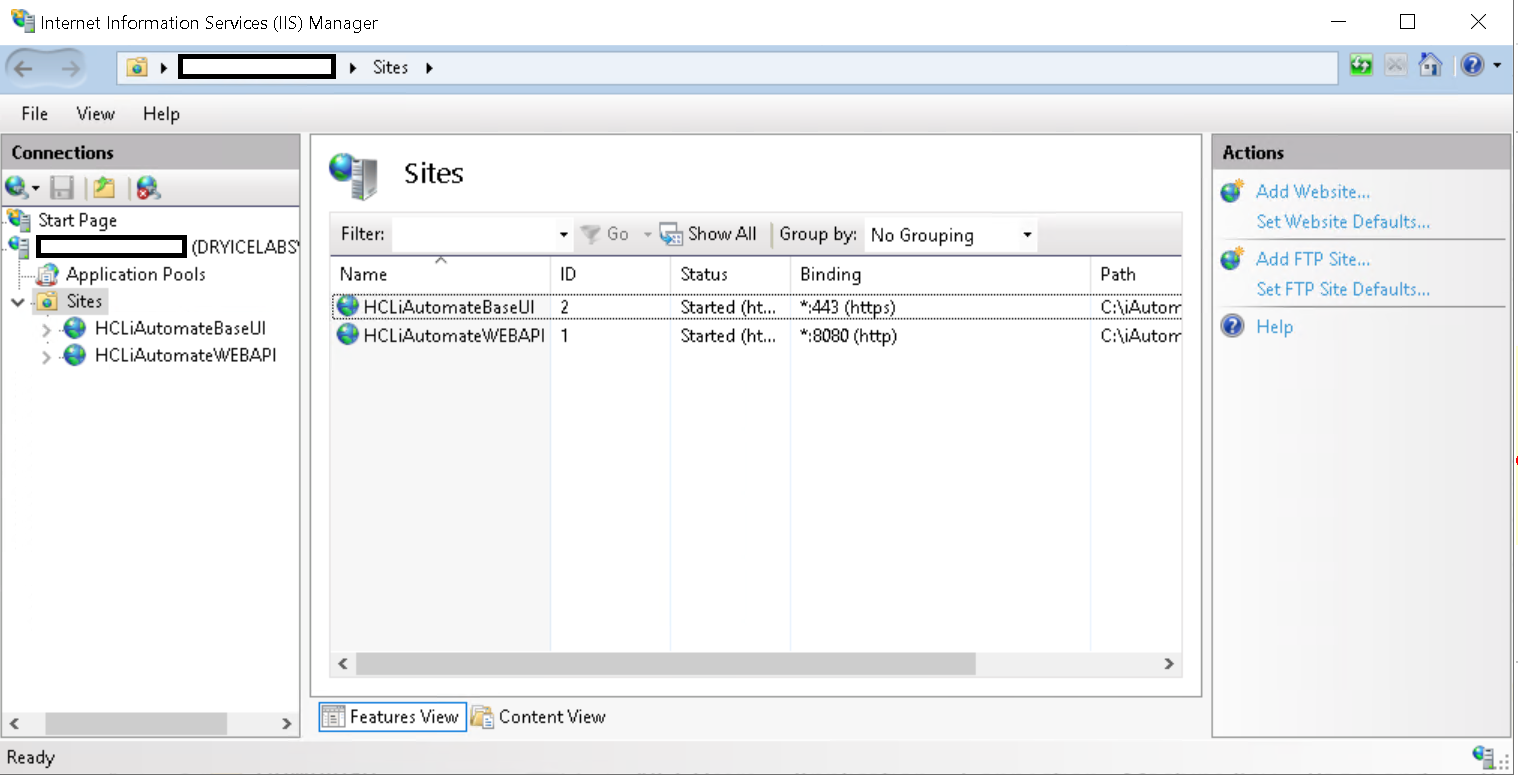
- Expand Sites and click HCLiAutomateBaseUI.

- Click on Bindings in the Edit Site section.
.png)
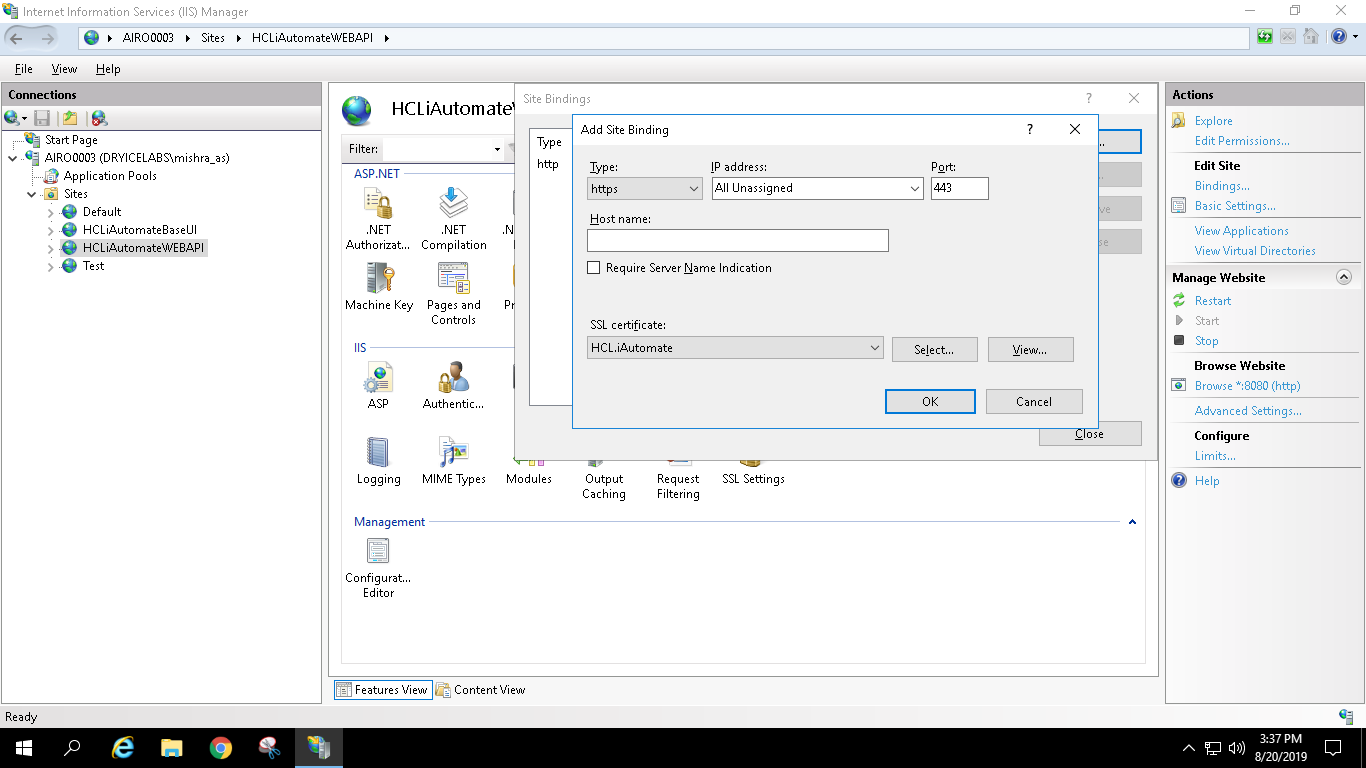
- Click Add.
- Select Type as https. Port information gets populated automatically. Select the SSL Certificate .
- Click OK.
.png)
- Right-click HCLiAutomateBaseUI.
- Click Explore.
- Find Web.config file and open it in a Notepad.
.png)
- Within the Web.config file, find the key URL and change its value from HTTP to HTTPS.

- If the certificate is self-signed, find the key IsSelfSigned_KRS and change its value to ‘Y’. Else, the value will be ‘N’.

- Save the file for changes to be reflected.
- Select the service and click Restart to restart the services.
Web API
To change the hosting of Web API from HTTP to HTTPS using the existing certificate, for e.g. 'HclTech.iautomate.Web', please follow the below steps:
- Press Win+R and type inetmgr.
- Click OK to open IIS.
.png)
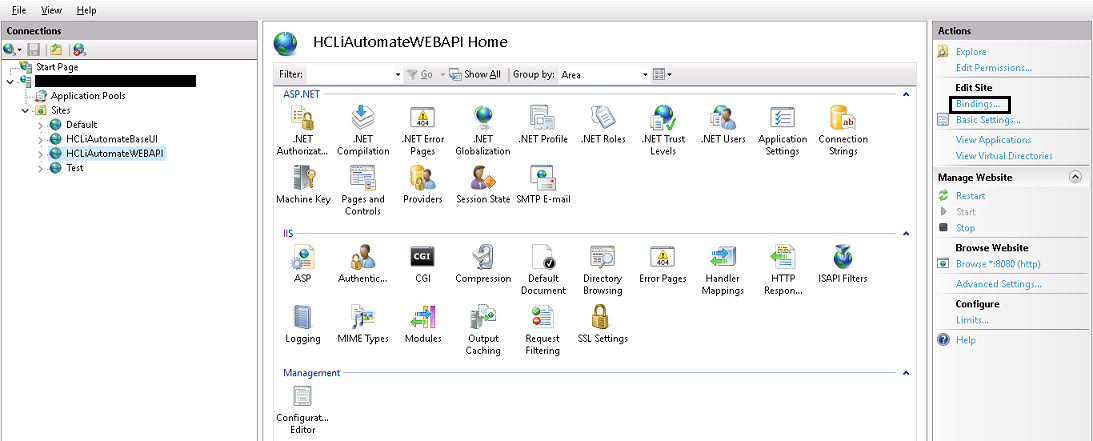
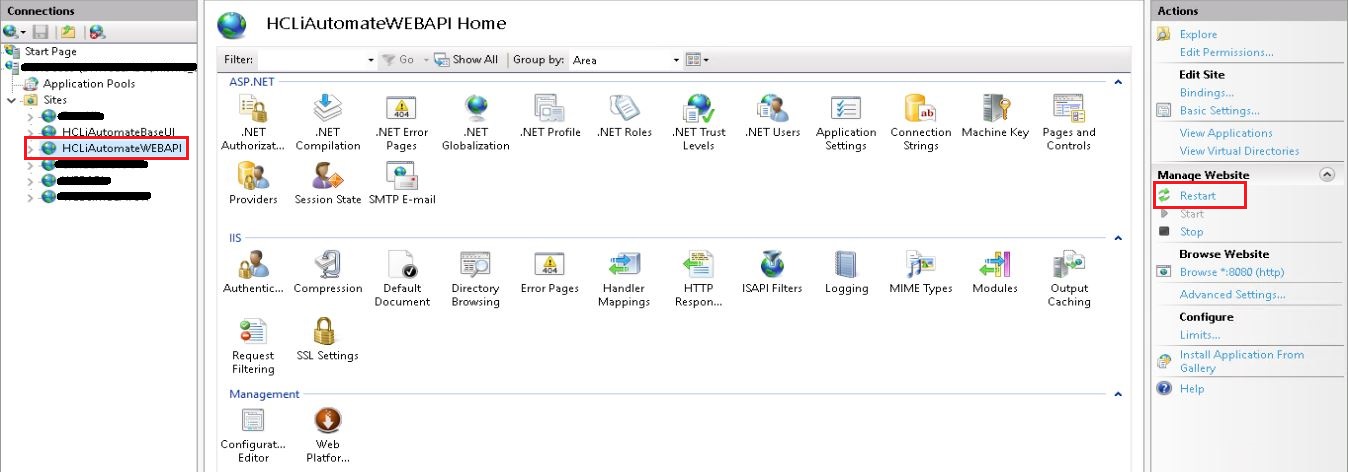
- Expand Sites and right-click HCLiAutomateWEBAPI.
- Click Explore.
.png)
- Find Web.config file and open it in a Notepad.
.png)
- Within the Web.config file, find the key ‘URL’ and change its value from HTTP to HTTPS.
.png)
- If the certificate is self-signed, find the key IsSelfSigned_KRS and change its value to ‘Y’. Else, the value will be ‘N’.
.png)
- Save the file for changes to be reflected.
- Select the service and click Restart to restart the services.
Listener
To change the configuration of the Listener from HTTP to HTTPS, please follow the below steps:
- Press Win+R and type services.msc.
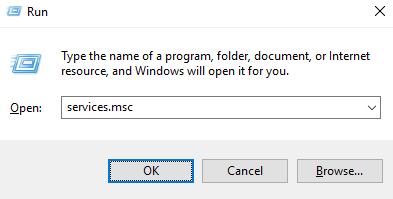
- Click OK to open the Windows Services.

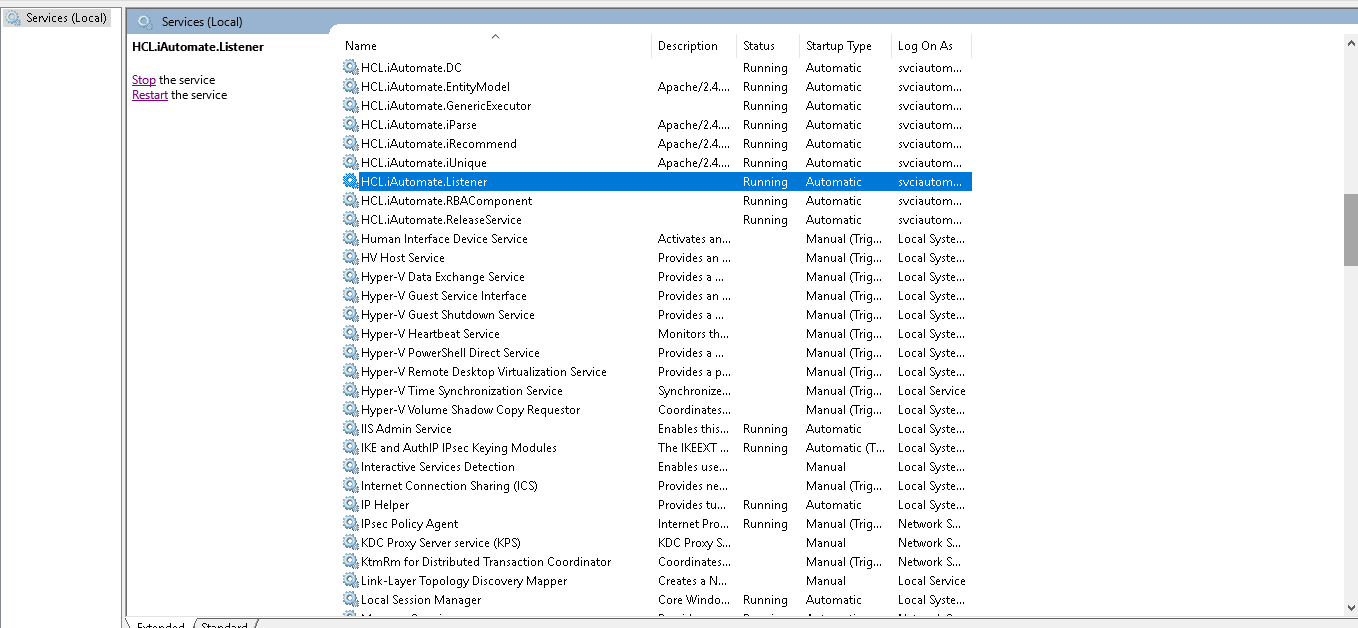
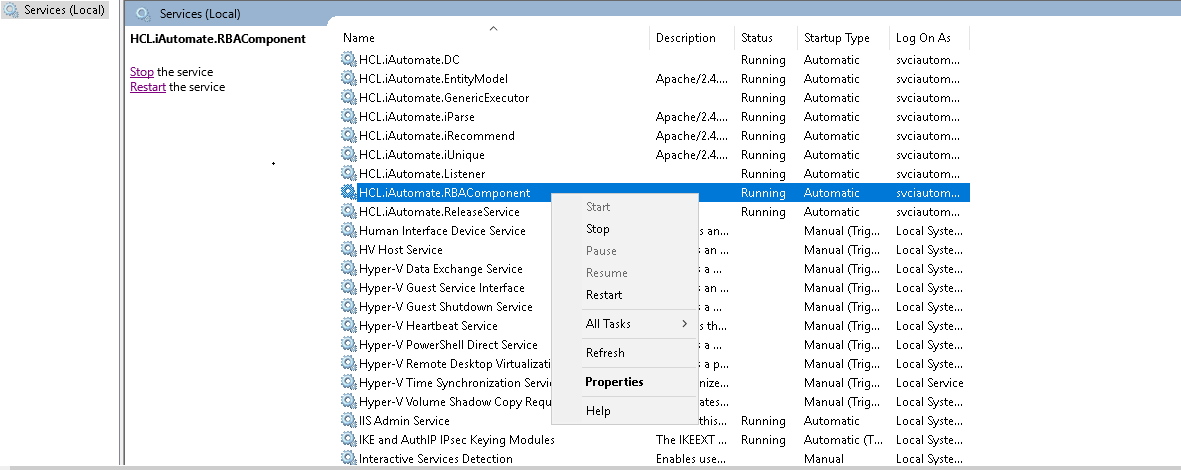
- Search for HCL.iAutomate.Listener service and right-click on it.
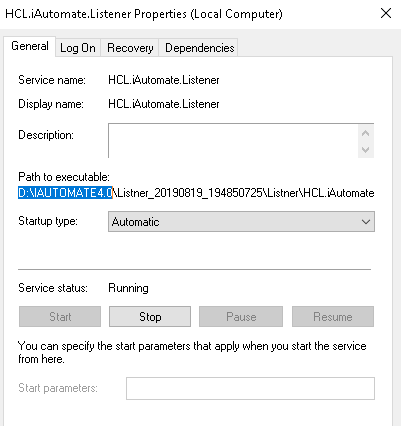
- Click Properties.
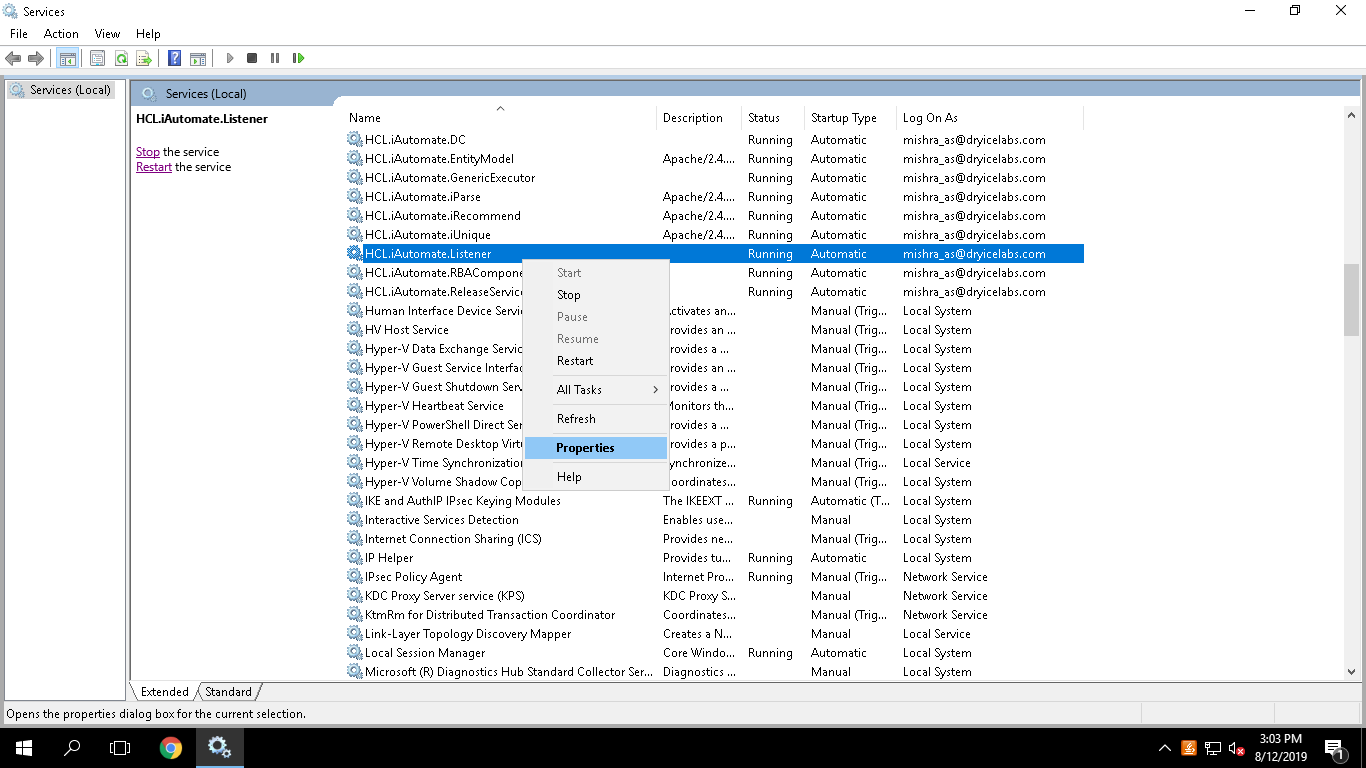
- Copy the value mentioned in Path to executable field as shown in the image below.
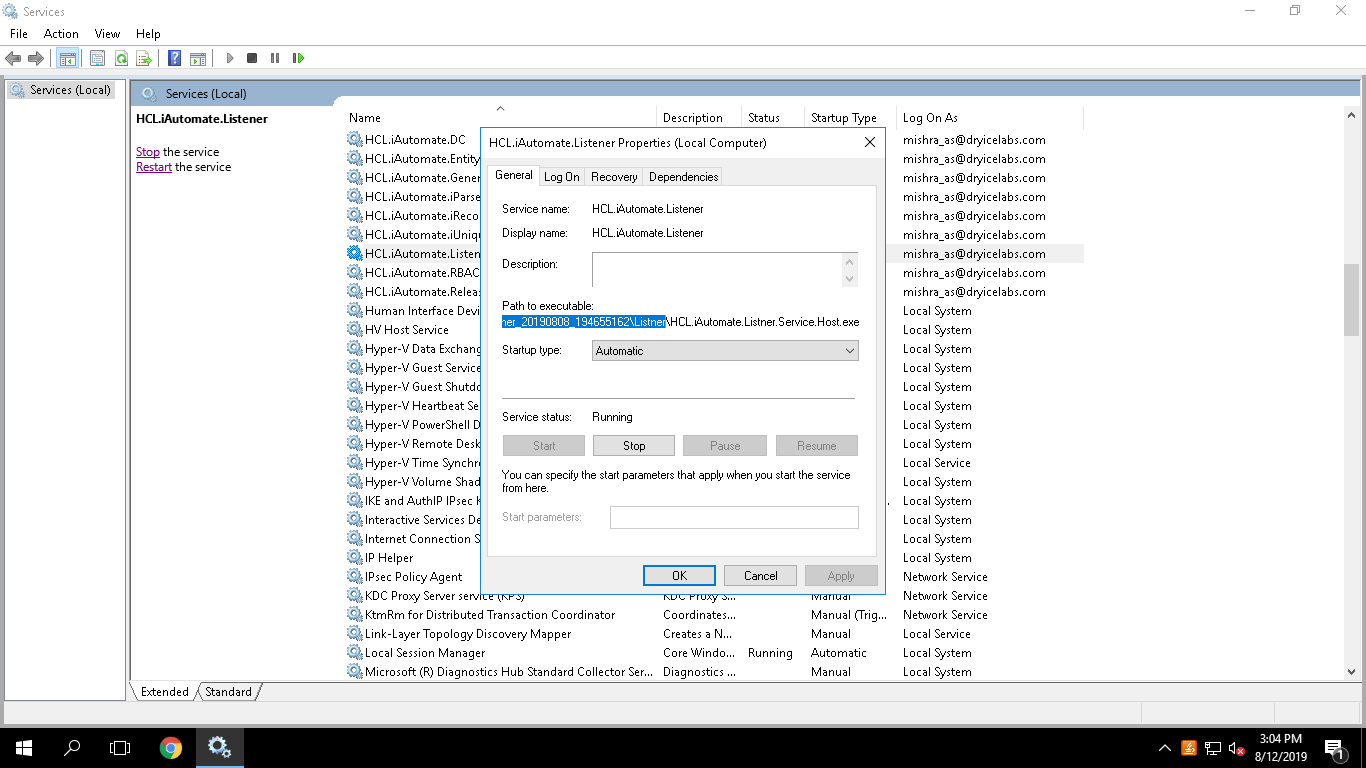
- Open File Explorer , then paste the copied path and press Enter to open the desired folder.
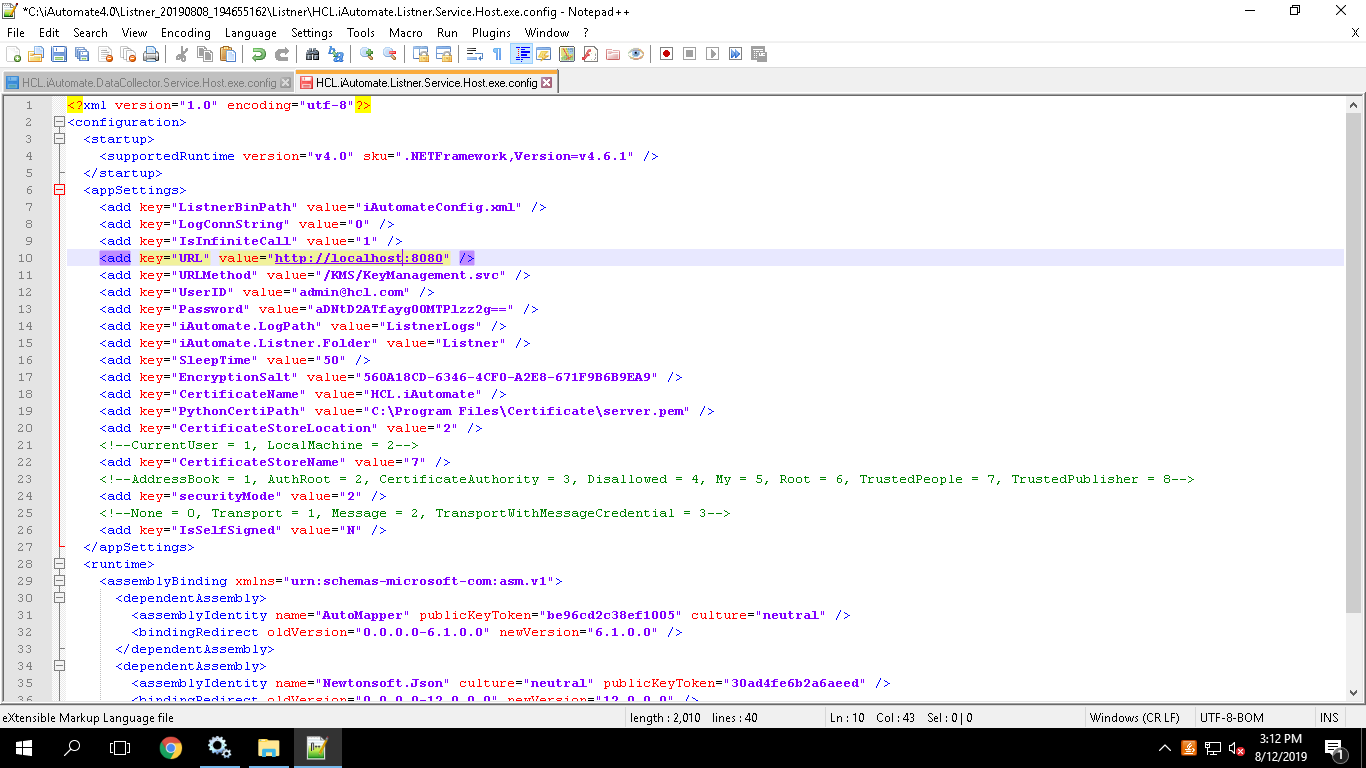
- Search for HCL.iAutomate.Listner.Service.Host config file and open it in a Notepad.

- Within the HCL.iAutomate.Listner.Service.Host config file, find the key URL and change its value from HTTP to HTTPS.

- If the certificate is self-signed, find the key IsSelfSigned_KRS and change its value to ‘Y’. Else, the value will be ‘N’.
.png)
- Save the file for changes to be reflected.
- Select the service and click Restart to restart the services.
Configuration Changes via GUI
To change the configuration of Screen from HTTP to HTTPS, please follow the below steps:
- Login to BigFix Runbook AI using the Super Admin credentials.
- Roll-over to the EnvironmentBigFix Runbook AI Configuration.
- Select Component Name as Web API .
- Change the Load Balancer URL from HTTP to HTTPS.

- Click Update to save the changes.
Components
This section describes how to enable the secure communication by changing HTTP to HTTPS for the BigFix Runbook AI Components.
As a prerequisite, user needs to have the Thumbprint of the certificate which can be identified using the below steps:
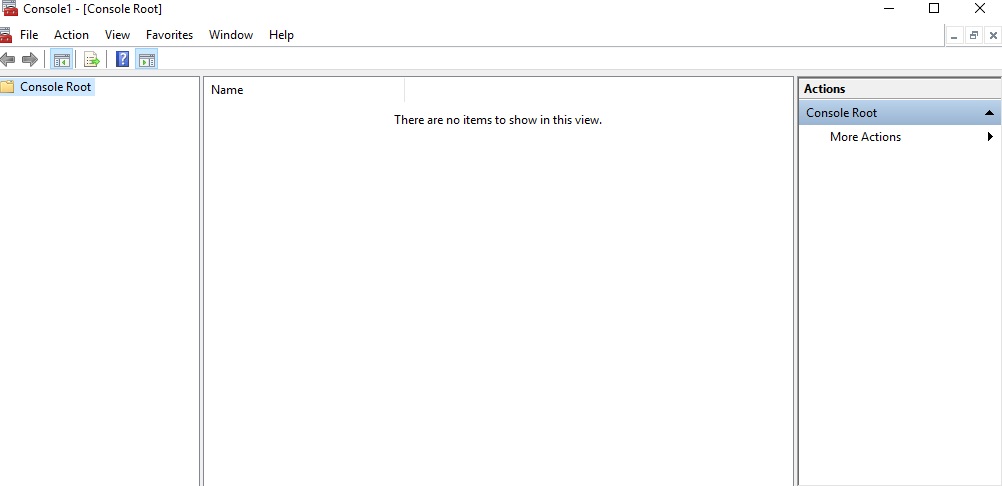
- Press Win+R and type mmc.

- Click OK to open the Microsoft Management Console.
- From the File menu, select Add / Remove Snap-in.
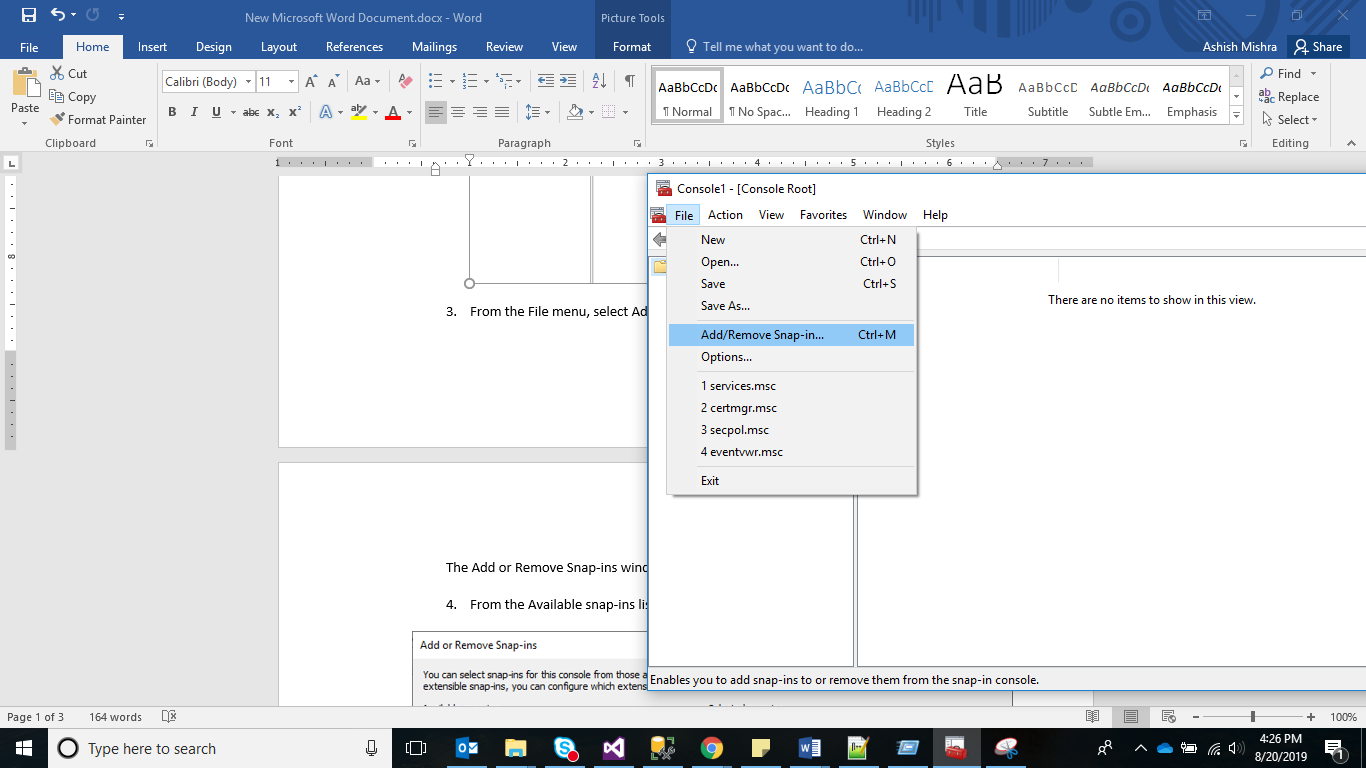
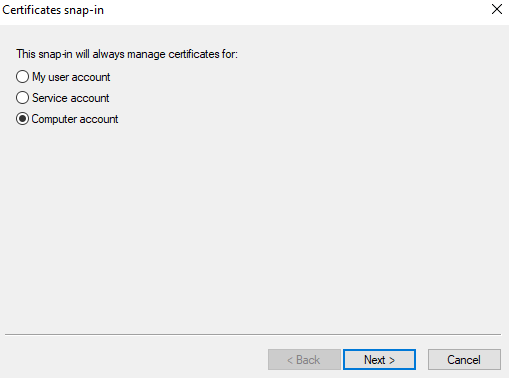
- From the Available snap-ins list, select Certificates, then click Add.
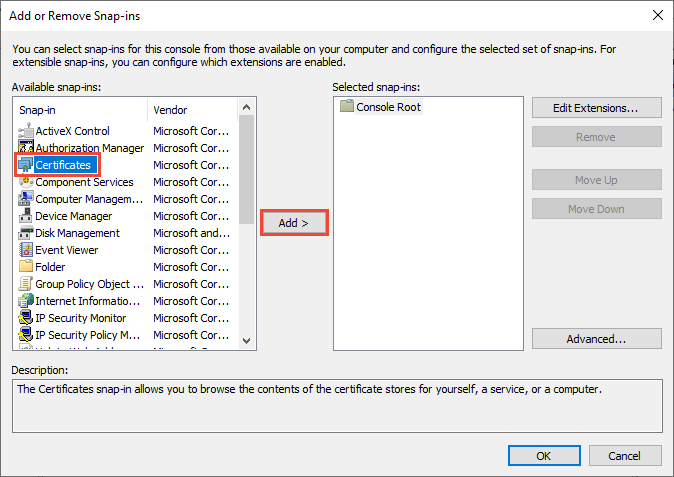
- Click OK.
- From the Certificates Snap-In window, select Computer Account and click Next.
- In the left pane, under Console Root, click Certificates (Local Computer).
- Click Personal folder to expand it and then click Certificates folder to expand it.
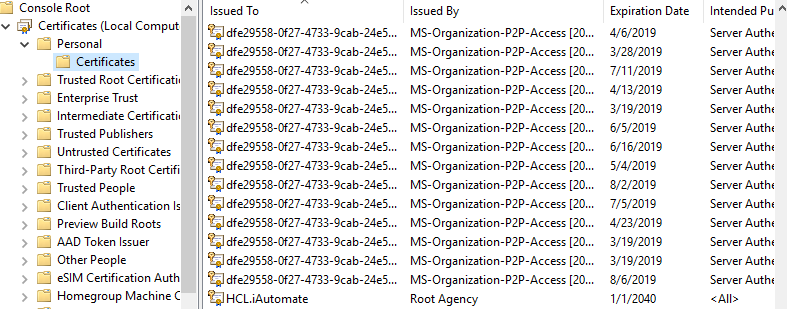
- In the list of certificates, find certificate HclTech.iautomate.Web .
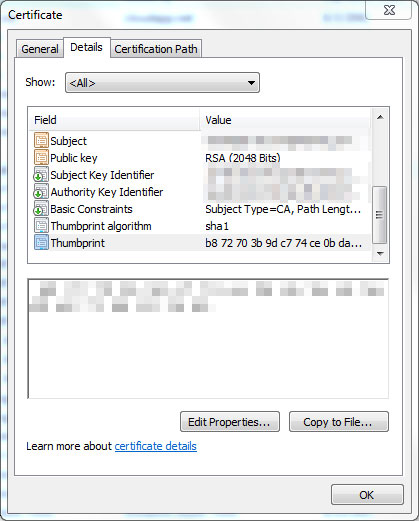
- Double-click the certificate to open the Certificate dialog box.
- Scroll through the list of fields and click Thumbprint to display the value.
Following changes are required in the underlying components:
Listener
To change the configuration of Listener from HTTP to HTTPS, please follow the below steps:
- Press Win+R and type services.msc.
.png)
- Click OK to open Windows Services.
.png)
- Search for HCL.iAutomate.Listener service and right-click on it.
- Click Properties.
.png)
- Copy the value mentioned in Path to executable as shown in the image below.
.png)
- Open File Explorer and paste the copied path and press Enter to open the desired folder.
- Search for HCL.iAutomate.Listner.Service.Host config file and open it in a Notepad.
.png)
- Within the HCL.iAutomate.Listner.Service.Host config file, find the key URL and change its value from HTTP to HTTPS
.png)
- Within the HCL.iAutomate.Listner.Service.Host config file, find the key ‘IsSelfSigned_Service’ and change its value from N to Y.

- Save the file for changes to be reflected.
- Open the command prompt as administrator and run the following command.
netsh http add sslcert ipport=<ip>:<port on which service is running> appid={fa605232-f580-4d28-895e-3e021ffed82d} certhash="<Thumbprint of the certificate>"
Replace the < Thumbprint of the certificate> with the GUID identified earlier.
- Select HCL.iAutomate.Listener service and click Restart to restart the service.
Data Collector
To change the configuration of Data Collector from HTTP to HTTPS, please follow the below steps:
- Press Win+R and type services.msc.
.png)
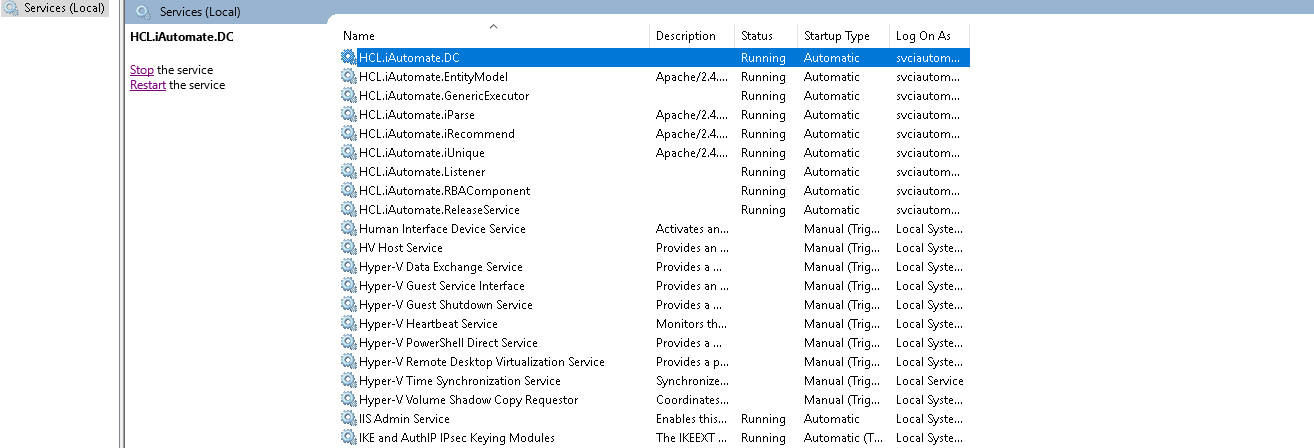
- Click OK to open Windows Services.
.png)
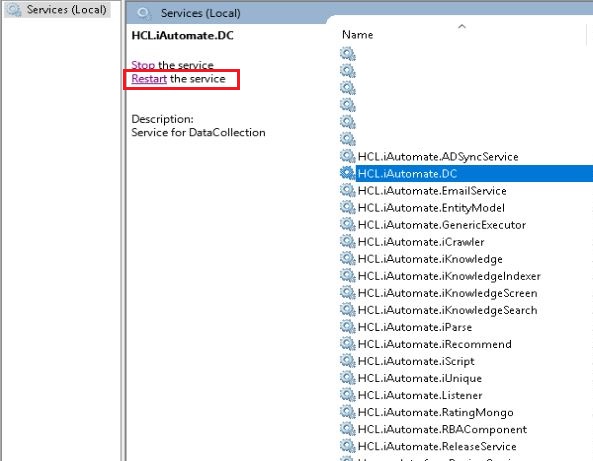
- Search for HCL.iAutomate.DC service and right-click on it.
- Click Properties.
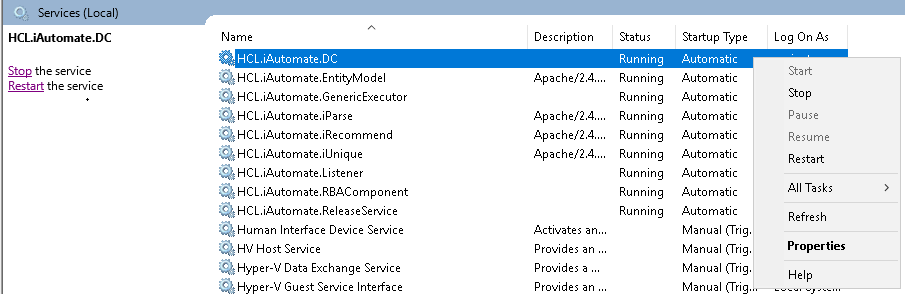
- Copy the value mentioned in ‘Path to executable ’ as shown in the image below.
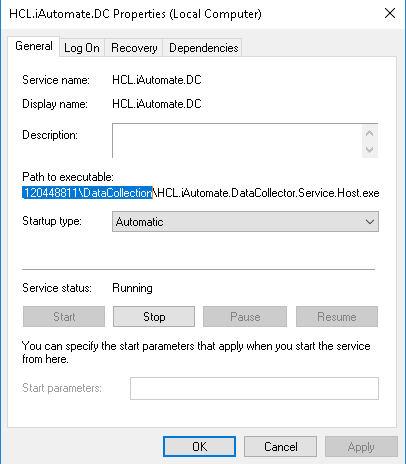
- Open File Explorer and paste the copied path and press Enter to open the desired folder.
- Search for HCL.iAutomate.DataCollector.Service.Host.exe config file and open it in a Notepad.

- Within the HCL.iAutomate.DataCollector.Service.Host.exe config file, find the key ‘ServiceHostURL’ and change its value from HTTP to HTTPS.

- Within the HCL.iAutomate.DataCollector.Service.Host.exe config file, find the key ‘securityMode_Service’ and change its value from 2 to 3.

- Within the HCL.iAutomate.DataCollector.Service.Host.exe config file, find the key ‘IsSelfSigned_Service’ and change its value from N to Y.
.png)
- Save the file for changes to be reflected.
- Open the command prompt as administrator and run the following command.
netsh http add sslcert ipport=<ip>:<port on which service is running> appid={dcd67c7b-c67a-4956-b4cc-6545ace1d2e9} certhash="<Thumbprint of the certificate>"
Replace the < Thumbprint of the certificate> with the GUID identified earlier.
- Select HCL.iAutomate.DC service and click Restart to restart the service.
Generic Service
To change the configuration of Generic Service from HTTP to HTTPS, please follow the below steps:
- Press Win+R and type services.msc.
.png)
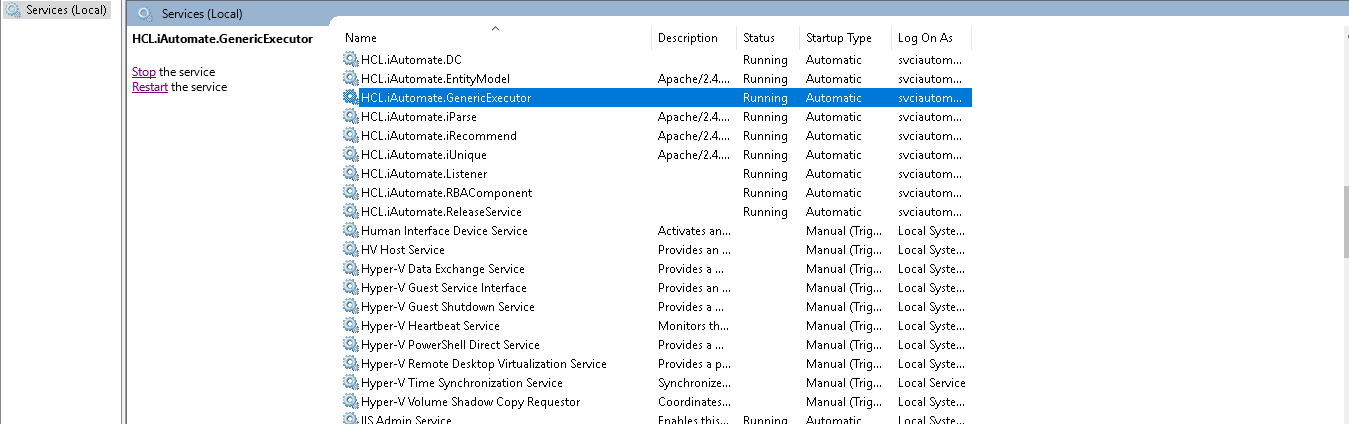
- Click OK to open Windows Services.
.png)
- Search for HCL.iAutomate.GenericExecutor service and right-click on it.
- Click Properties.

- Copy the value mentioned in Path to executable as shown in the image below.

- Open File Explorer and then paste the copied path and press Enter to open the desired folder.
- Search for HCL.iAutomate.Generic.Host.exe config file and open it in a Notepad.

- Within the HCL.iAutomate.Generic.Host.exe config file, find the key ‘iAutomate.Generic.ServiceHostURL’’ and change its value from HTTP to HTTPS.

- Within the HCL.iAutomate.Generic.Host.exe config file, find the key ‘securityMode_Service’ and change its value from 2 to 3.
.png)
- Within the HCL.iAutomate.Generic.Host.exe config file, find the key ‘IsSelfSigned_Service’ and change its value from N to Y.
.png)
- Save the file for changes to be reflected.
- Open the command prompt as administrator and run the following command.
netsh http add sslcert ipport=<ip>:<port on which service is running> appid={c60c3690-7b58-4c68-8590-e2fd061edd23} certhash="<Thumbprint of the certificate>"
Replace the < Thumbprint of the certificate> with the GUID identified earlier.
- Select HCL.iAutomate.GenericExecutor service and click Restart to restart the service.
RBA Component
To change the configuration of RBA Component from HTTP to HTTPS, please follow the below steps:
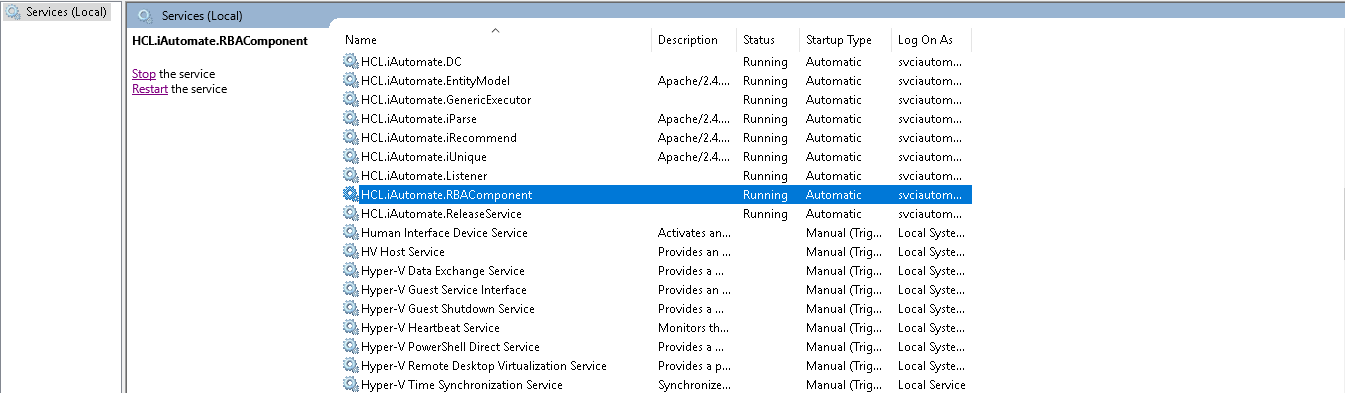
- Press Win+R and type services.msc.
.png)
- Click OK to open Windows Services.
.png)
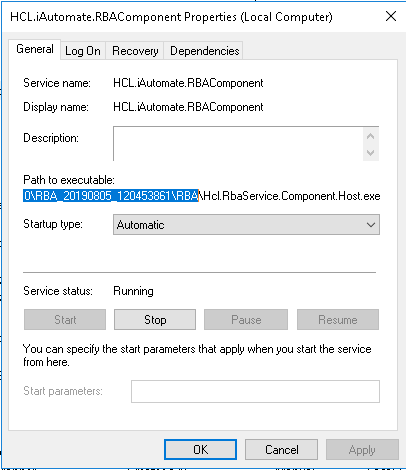
- Search for HCL.iAutomate.RBAComponent service and right-click on it.
- Click Properties.
- Copy the value mentioned in Path to executable as shown in the image below.
- Open File Explorer and then paste the copied path and press Enter to open the desired folder.
- Search for HCL.RbaService.Component.Host.exe config file and open it in a Notepad.

- Within the HCL.RbaService.Component.Host.exe config file, find the key ‘ServiceHostURL’ and change its value from HTTP to HTTPS.

- Within the HCL.RbaService.Component.Host.exe config file, find the key ‘securityMode_Service’ and change its value from 2 to 3.
.png)
- Within the HCL.RbaService.Component.Host.exe config file, find the key ‘IsSelfSigned_Service’ and change its value from N to Y.
.png)
- Save the file for changes to be reflected.
- Open the command prompt as administrator and run the following command.
netsh http add sslcert ipport=<ip>:<port on which service is running> appid={11f43d84-3d5c-47cf-b29e-0dd38c0e8f85} certhash="<Thumbprint of the certificate>"
Replace the < Thumbprint of the certificate> with the GUID identified earlier.
- Select HCL.iAutomate.RBAComponent service and click Restart to restart the service.
Release Service
To change the configuration of Release Service from HTTP to HTTPS, please follow the below steps:
- Press Win+R and type services.msc.
.png)
- Click OK to open Windows Services.
.png)
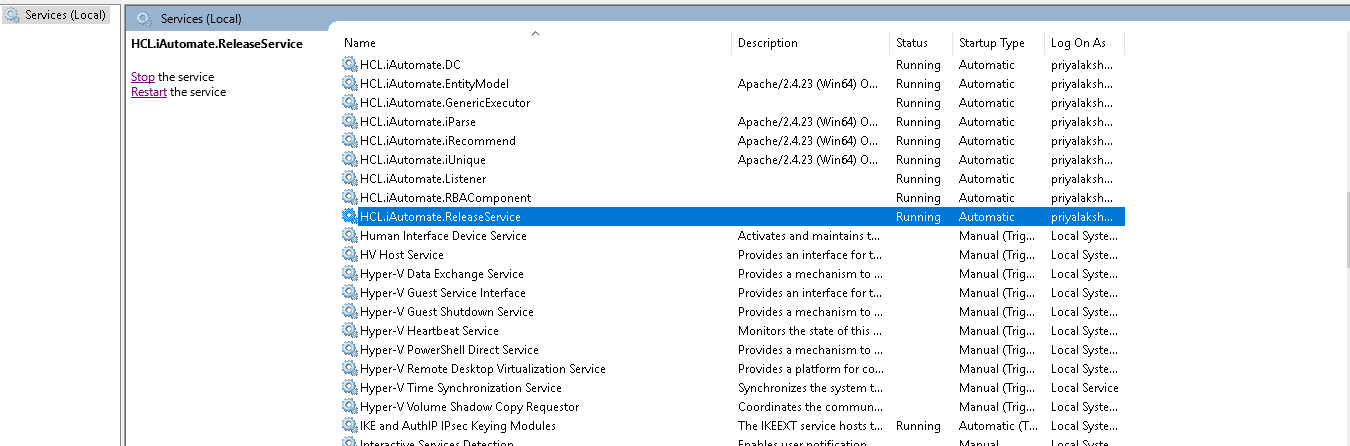
- Search for HCL.iAutomate.ReleaseService service and right-click on it.
- Click on Properties.
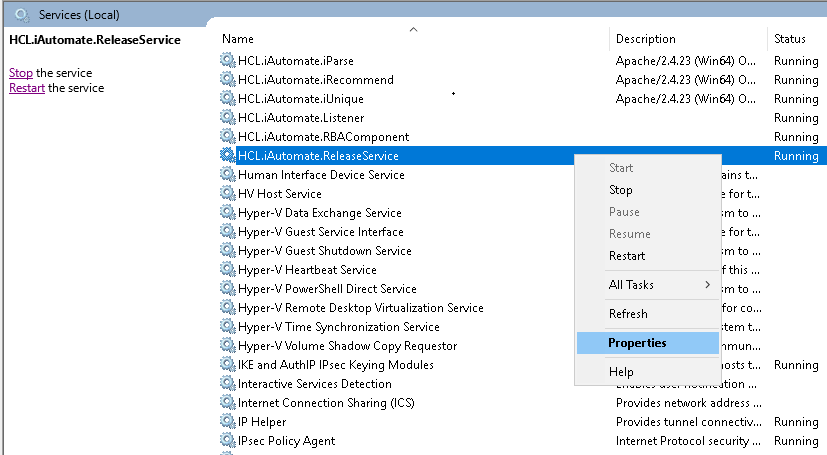
- Copy the value mentioned in Path to executable as shown in the image below.
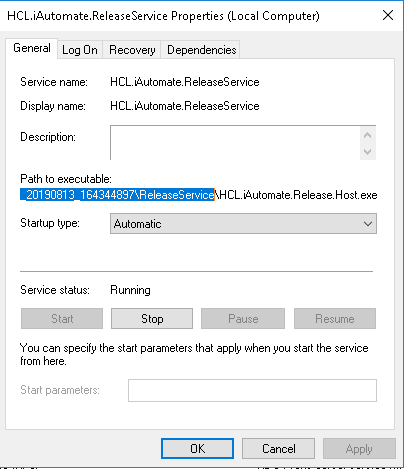
- Open File Explorer, then paste the copied path and press Enter to open the desired folder.
- Search for HCL.iAutomate.Release.Host.exe config file and open it in a Notepad.

- Within the HCL.iAutomate.Release.Host.exe config file, find the key ‘iAutomate.Release.ServiceHostURL’ and change its value from HTTP to HTTPS.

- Within the HCL.iAutomate.Release.Host.exe config file, find the key ‘securityMode_Service’ and change its value from 2 to 3.
.png)
- Within the HCL.iAutomate.Release.Host.exe config file, find the key ‘IsSelfSigned_Service’ and change its value from N to Y.
.png)
- Save the file for changes to be reflected.
- Open the command prompt as administrator and run the following command.
netsh http add sslcert ipport=<ip>:<port on which service is running> appid={d32cb30c-7e1a-4549-a2e2-32bf01a1d345} certhash="<Thumbprint of the certificate>"
Replace the < Thumbprint of the certificate> with the GUID identified earlier.
- Select HCL.iAutomate.ReleaseService service and click Restart to restart the service.
AD Sync
To change the configuration of AD Sync from HTTP to HTTPS, please follow the below steps:
- Press Win+R and type services.msc.
.png)
- Click OK to open Windows Services.
.png)
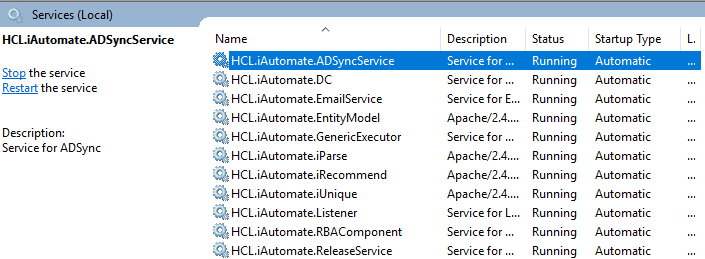
- Search for HCL.iAutomate.ADSyncService and right-click on it.
- Click Properties.

- Copy the value mentioned in ‘Path to executable ’ as shown in the image below.
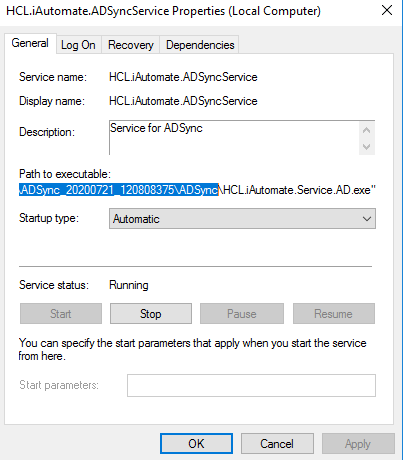
- Open File Explorer and paste the copied path and press Enter to open the desired folder.
- Search for HCL.iAutomate.Service.AD.exe config file and open it in a Notepad.

- Within the HCL.iAutomate.Service.AD.exe config file, find the key ‘ServiceHostURL’ and change its value from HTTP to HTTPS.

- Within the HCL.iAutomate.Service.AD.exe config file, find the key ‘securityMode_Service’ and change its value from 2 to 3.

- Within the HCL.iAutomate.Service.AD.exe config file, find the key ‘IsSelfSigned_Service’ and change its value from N to Y.
.png)
- Save the file for changes to be reflected.
- Open the command prompt as administrator and run the following command:
netsh http add sslcert ipport=<ip>:<port on which service is running> appid={8c00e29d-1a3e-439b-a449-7e26b64b9d27} certhash="<Thumbprint of the certificate>"
Replace the < Thumbprint of the certificate> with the GUID identified earlier.
- Select HCL.iAutomate.ADSyncService service and click Restart to restart the service.
Email Service
To change the configuration of Email Service from HTTP to HTTPS, please follow the below steps:
- Press Win+R and type services.msc.
.png)
- Click OK to open Windows Services.
.png)
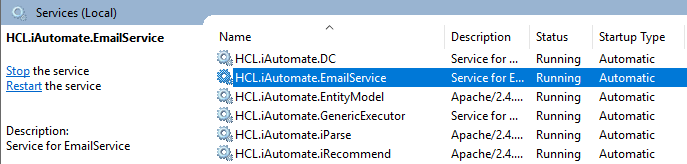
- Search for HCL.iAutomate.EmailService and right-click on it.
- Click Properties.
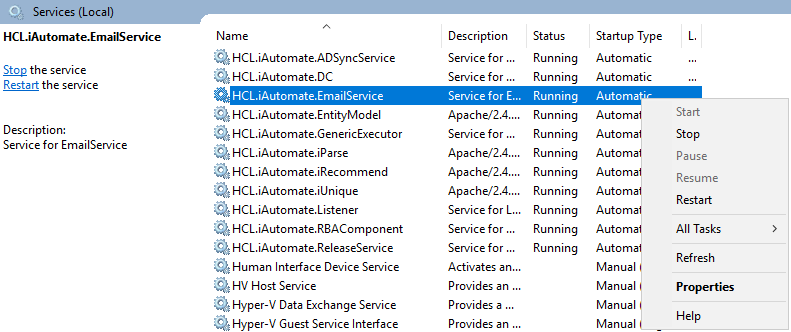
- Copy the value mentioned in ‘Path to executable ’ as shown in the image below.
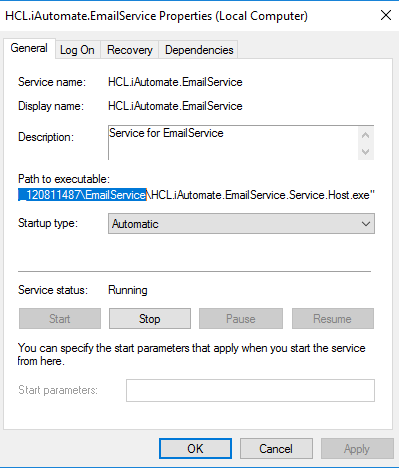
- Open File Explorer and paste the copied path and press Enter to open the desired folder.
- Search for HCL.iAutomate.EmailService.Service.Host.exe config file and open it in a Notepad.

- Within the HCL.iAutomate.EmailService.Service.Host.exe config file, find the key ‘ServiceHostURL’ and change its value from HTTP to HTTPS.

- Within the HCL.iAutomate.EmailService.Service.Host.exe config file, find the key ‘securityMode_Service’ and change its value from 2 to 3.
.png)
- Within the HCL.iAutomate.EmailService.Service.Host.exe config file, find the key ‘IsSelfSigned_Service’ and change its value from N to Y.
.png)
- Save the file for changes to be reflected.
- Open the command prompt as administrator and run the following command.
netsh http add sslcert ipport=<ip>:<port on which service is running> appid={21fa9088-0c69-479e-8fdc-a81eb836e264} certhash="<Thumbprint of the certificate>"
Replace the < Thumbprint of the certificate> with the GUID identified earlier.
- Select HCL.iAutomate.EmailService service and click Restart to restart the service.
Configuration Changes via GUI
To change the configuration for various components via GUI from HTTP to HTTPS, please follow the below steps:
- Login to BigFix Runbook AI using the Super Admin credentials.
- Roll-over to the Environment and click BigFix Runbook AI Configuration.
- Select Component Name as Web API.
- Change the Load Balancer URL from HTTP to HTTPS.
.png)
- Click Update to save the changes.
- Select Component Name as Data Collector.
- Change the Load Balancer URL from HTTP to HTTPS.

- Click Update to save the changes.
- Select Component Name as ‘Generic Service’.
- Change the Load Balancer URL from HTTP to HTTPS.

- Click Update to save the changes.
- Select Component Name as ‘Release Service’.
- Change the Load Balancer URL from HTTP to HTTPS.

- Click Update to save the changes.
- Select Component Name as ‘RBA Service’.
- Change the Load Balancer URL from HTTP to HTTPS.

- Click Update to save the changes.
- Select Component Name as ‘Active Directory’.
- Change the Load Balancer URL from HTTP to HTTPS.

- Click Update to save the changes.
- Select Component Name as ‘Email Service’.
- Change the Load Balancer URL from HTTP to HTTPS.

- Click Update to save the changes.
Configuration Changes – Certificate Name Change (Type – PFX)
This section describes how to make the configurational changes if the SSL certificate name (Type - PFX) is other than ‘HCL.iAutomate’.
Please install the certificate through the Microsoft Management Console in both Personal as well as Trusted People folder. Refer to the pre-requisites document for the detailed procedure for certificate installation at required locations.
Change name of Certificate used to connect KRS
Website
This section describes configuration changes required for the Website in case SSL certificate is other than HCL.iAutomate .
Following changes are required in the underlying components.
Key Rotation Service (KRS)
To make changes for the KRS, please follow the below steps:
- Press Win+R and type inetmgr.
- Click OK to open IIS.
.png)
- Expand Sites and click HCLiAutomateKRS.
.png)
- Right click HCLiAutomateKRS.
- Click Explore.
- Find Web.config file and open it in a Notepad.
.png)
- Within the Web.config file, find the tag <serviceCertificate> and change the value of attribute ‘findValue’ with the updated Certificate Name.

- If the certificate is self-signed, find the key ‘IsSelfSigned’ and change its value to ‘Y’. Else the value will be ‘N’.

- Save the file for changes to be reflected.
- Select the service and click Restart to restart the services.
Base User interface
To make changes for the BaseUI, please follow the below steps:
- Press Win+R and type inetmgr.
- Click OK to open IIS.
.png)
- Expand Sites and click HCLiAutomateBaseUI.
.png)
- Right-click HCLiAutomateBaseUI and click Explore.
- Find Web.config file and open it in a Notepad.
.png)
- Within the Web.config file, find the key ‘Certificate_Name_KRS’ and change its value with the new Certificate Name.

- If the certificate is self-signed, find the key ‘IsSelfSigned_KRS’ and change its value to ‘Y’. Else the value will be ‘N’.

- Save the file for changes to be reflected.
- Select the service and click Restart to restart the services.
Web API
To make changes for the Web API, please follow the below steps:
- Press Win+R and type inetmgr.
- Click OK to open IIS.
.png)
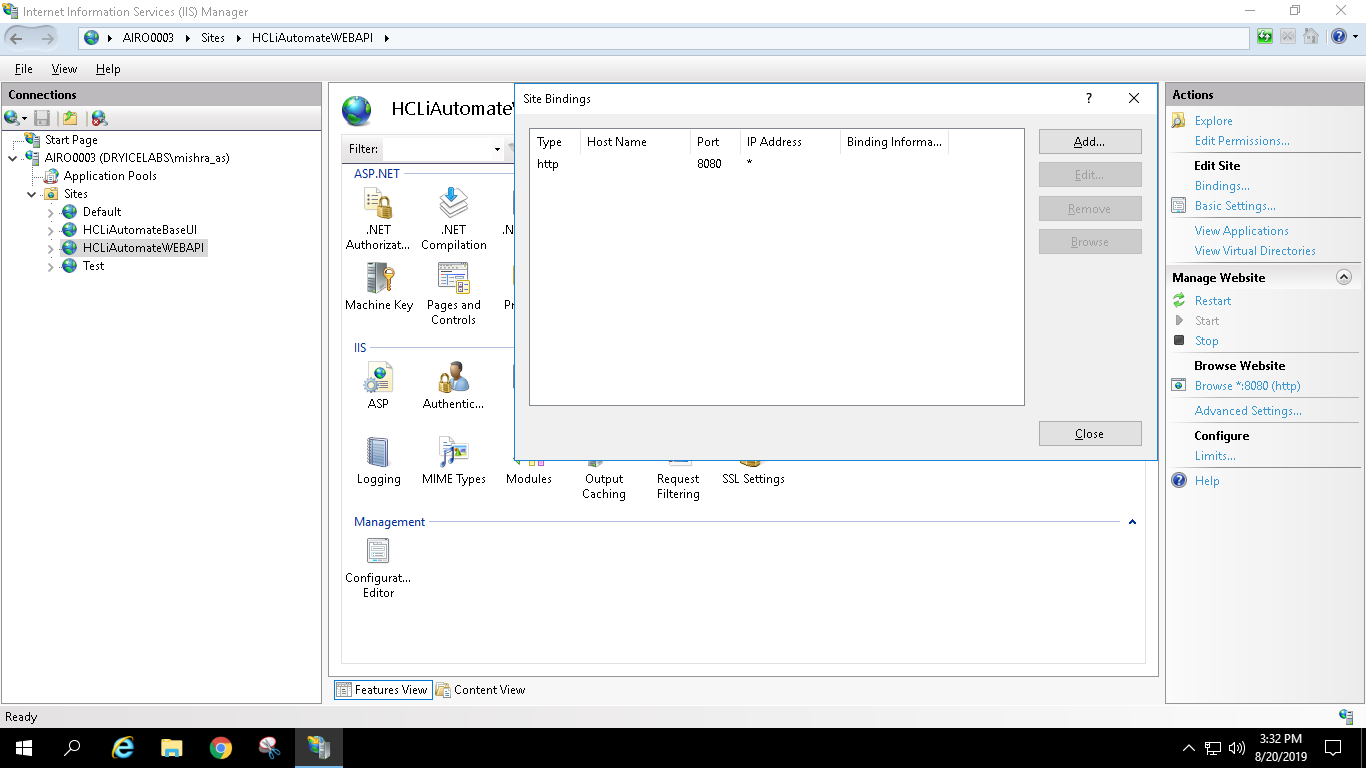
- Expand Sites and right-click HCLiAutomateWEBAPI.
- Click Explore.
.png)
- Find Web.config file and open it in Notepad.
.png)
- Within the Web.config file, find the key ‘Certificate_Name_KRS’ and change its value with the new Certificate Name.
.png)
- If the certificate is self-signed, find the key ‘IsSelfSigned_KRS’ and change its value to ‘Y’. Else the value will be ‘N’.
.png)
- Save the file for changes to be reflected.
- Select the service and click Restart to restart the services.
Components
This section describes the configuration changes required for the Components in case the SSL Certificate name is other than HCL.iAutomate .
Following changes are required in the underlying components:
Listener
To make changes for the Listener, please follow the below steps:
- Press Win+R and type services.msc.
.png)
- Click OK to open Windows Services.
.png)
- Search for HCL.iAutomate.Listener service and right-click on it.
- Click Properties.
.png)
- Copy the value in Path to executable as shown in the image below.
.png)
- Open File Explorer then paste the copied path and press Enter to open the desired folder.
- Search for HCL.iAutomate.Listner.Service.Host config file and open it in a Notepad.
.png)
- Within the HCL.iAutomate.Listner.Service.Host config file, find the key ‘CertificateName_KRS’ and change its value with the new Certificate Name.
.png)
- If the certificate is self-signed, find the key ‘IsSelfSigned_KRS’ and change its value to ‘Y’. Else the value will be ‘N’.
.png)
- Save the file for changes to be reflected.
- Select the service and click Restart to restart the services.
Data Collector
To make changes for the Data Collector, please follow the below steps:
- Press Win+R and type services.msc.
.png)
- Click OK to open Windows Services.
.png)
- Search for HCL.iAutomate.DC service and right-click on it .
- Click on Properties.
.png)
- Copy the value mentioned in Path to executable as shown in the image below.
.png)
- Open File Explorer, then paste the copied path and press Enter to open the desired folder.
- Search for HCL.iAutomate.DataCollector.Service.Host.exe config file and open it in a Notepad.
.png)
- Within the HCL.iAutomate.DataCollector.Service.Host.exe config file, find the key ‘CertificateName_KRS’ and change its value with the new Certificate Name.
.png)
- If the certificate is self-signed, find the key ‘IsSelfSigned_KRS’ and change its value to ‘Y’. Else the value will be ‘N’..
.png)
- Save the file for changes to be reflected.
- Select HCL.iAutomate.DC service and click Restart to restart the service.
.png)
Generic Service
To make changes for the Generic Service, please follow the below steps:
- Press Win+R and type services.msc.
.png)
- Click OK to open Windows Services.
.png)
- Search for HCL.iAutomate.GenericExecutor service and right-click on it.
- Click on Properties.
.png)
- Copy the value in Path to executable as shown in the image below.
.png)
- Open File Explorer and paste the copied path and press Enter to open the desired folder.
- Search for HCL.iAutomate.Generic.Host.exe config file and open it in a Notepad.
.png)
- Within the HCL.iAutomate.Generic.Host.exe config file, find the key ‘CertificateName_KRS’ and change its value with the new Certificate Name.
.png)
- If the certificate is self-signed, find the key ‘IsSelfSigned_KRS’ and change its value to ‘Y’. Else the value will be ‘N’.
.png)
- Save the file for changes to be reflected.
- Select HCL.iAutomate.GenericExecutor service and click Restart to restart the service.
.png)
RBA Component
To make changes for the RBA component, please follow the below steps:
- Press Win+R and type services.msc.
.png)
- Click OK to open Windows Services.
.png)
- Search for HCL.iAutomate.RBAComponent service and right-click on it.
- Click Properties.
.png)
- Copy the value mentioned in Path to executable as shown in the image below.
.png)
- Open File Explorer , then paste the copied path and press Enter to open the desired folder.
- Search for HCL.RbaService.Component.Host.exe config file and open it in a Notepad.
.png)
- Within the HCL.RbaService.Component.Host.exe config file, find the key ‘CertificateName_KRS’ and change its value with the new Certificate Name.
.png)
- If the certificate is self-signed, find the key ‘IsSelfSigned_KRS’ and change its value to ‘Y’. Else the value will be ‘N’.
.png)
- Save the file for changes to be reflected.
- Select HCL.iAutomate.RBAComponent service and click Restart to restart the service.
.png)
Release Service
To make changes for the Release Service, please follow the below steps:
- Press Win+R and type services.msc.
.png)
- Click OK to open Windows Services.
.png)
- Search for HCL.iAutomate.ReleaseService and right-click on it.
- Click Properties.
.png)
- Copy the value mentioned in Path to executable as shown in the image below.
.png)
- Open File Explorer , then paste the copied path and press Enter to open the desired folder.
- Search for HCL.iAutomate.Release.Host.exe config file and open it in a Notepad.
.png)
- Within the HCL.iAutomate.Release.Host.exe config file, find the key ‘CertificateName_KRS’ and change its value with the new Certificate Name.
.png)
- If the certificate is self-signed, find the key ‘IsSelfSigned_KRS’ and change its value to ‘Y’. Else the value will be ‘N’.
.png)
- Save the file for changes to be reflected.
- Select HCL.iAutomate.ReleaseService service and click Restart to restart the service.
.png)
AD Sync
To change the configuration of AD Sync from HTTP to HTTPS, please follow the below steps:
- Press Win+R and type services.msc.
.png)
- Click OK to open Windows Services.
.png)
- Search for HCL.iAutomate.ADSyncService and right-click on it.
- Click Properties.
.png)
- Copy the value mentioned in ‘Path to executable ’ as shown in the image below.
.png)
- Open File Explorer and paste the copied path and press Enter to open the desired folder.
- Search for HCL.iAutomate.Service.AD.exe config file and open it in a Notepad.
.png)
- Within the HCL.iAutomate.Service.AD.exe config file, find the key ‘CertificateName_KRS’ and change its value with the new Certificate Name.
.png)
- If the certificate is self-signed, find the key ‘IsSelfSigned_KRS’ and change its value to ‘Y’. Else the value will be ‘N’.
.png)
- Save the file for changes to be reflected.
- Select HCL.iAutomate.ADSyncService service and click Restart to restart the service.
.png)
Email Service
To change the configuration of Email Service from HTTP to HTTPS, please follow the below steps:
- Press Win+R and type services.msc.
.png)
- Click OK to open Windows Services.
.png)
- Search for HCL.iAutomate.EmailService and right-click on it.
- Click Properties.
.png)
- Copy the value mentioned in ‘Path to executable ’ as shown in the image below.
.png)
- Open File Explorer and paste the copied path and press Enter to open the desired folder.
- Search for HCL.iAutomate.EmailService.Service.Host.exe config file and open it in a Notepad.
.png)
- Within the HCL.iAutomate.EmailService.Service.Host.exe config file, find the key ‘CertificateName_KRS’ and change its value with the new Certificate Name.
.png)
- If the certificate is self-signed, find the key ‘IsSelfSigned_KRS’ and change its value to ‘Y’. Else the value will be ‘N’.
.png)
- Save the file for changes to be reflected.
- Select HCL.iAutomate.EmailService service and click Restart to restart the service.
.png)
iRecommend
To make changes for iRecommend service, please follow the below steps:
- Press Win+R and type services.msc.
.png)
- Click OK to open Windows Services.
.png)
- Search for HCL.iAutomate.Listener service and right-click on it.
- Click on Properties.
.png)
- Copy the value mentioned in Path to executable as shown in the image below.
- Open File Explorer and paste the copied path and press Enter to open the desired folder.
- Go to iRecommend folder. Locate irecommend.config file.
- Open irecommend.config in a Notepad and search for below line.

- Change Certificate_Name and the value from HclTech.iautomate.Web to the new Certificate name.
- Save the file to implement the changes.
- Go to iRecommend config folder.
- Locate entity.config file.
- Open entity.config in a Notepad and search for below line.
.png)
- Change Certificate_Name and the value from HclTech.iautomate.Web to the new Certificate name.
- Save the file for changes to get reflected.
iParse
To make changes for iParse service, please follow the below steps:
- Press Win+R and type services.msc.
.png)
- Click OK to open Windows Services.
.png)
- Search for HCL.iAutomate.Listener service and right-click on it.
- Click on Properties.
.png)
- Copy the value mentioned in Path to executable as shown in the image below.
.png)
- Open File Explorer and paste the copied path and press Enter to open the desired folder.
- Go to \iParse\IParse\iparse\config folder.
- Locate parse_config.config file.
- Open parse_config.config in a Notepad and search for below line.
.png)
- Change Certificate_Name and the value from HclTech.iautomate.Web to the new Certificate name.
- Save the file to implement the changes.
iScrape
To make changes for iScrape service, please follow the below steps:
- Go to the folder where user has installed knowledge components.
- Go to \iScript\IScript\iScript\config folder.
- Locate iScrape.cfg file.
- Open iScrape.cfg in a Notepad and search for below line.
.png)
- Change Certificate_Name and value from HclTech.iautomate.Web to the new Certificate name.
- Save the file to implement the changes.
iUnique
To make changes for iUnique service, please follow the below steps:
- Press Win+R and type services.msc.
.png)
- Click OK to open Windows Services.
.png)
- Search for HCL.iAutomate.Listener service and right-click on it.
- Click on Properties.
.png)
- Copy the value in ‘Path to executable ’ as shown in the image below.
.png)
- Open File Explorer , then paste the copied path and press Enter to open the desired folder.
- Go to \iUnique\IUnique\iUnique_final\config folder.
- Locate iUnique.cfg file.
- Open iUnique.cfg in Notepad and search for below line.
.png)
- Change Certificate_Name and the value from HclTech.iAutomate.Web to the new Certificate Name.
- Save the file to implement the changes.
Knowledge
To make changes for Knowledge service, please follow the below steps:
- Go to the folder where user has installed knowledge components.
- Go to \KnowledgeRating\KnowledgeRating\iKnowledge_Rating folder.
- Locate rating.cfg file.
- Open rating.cfg in a Notepad and search for below line.
.png)
- Change Certificate_Name and the value from HclTech.iautomate.web to the new Certificate name.
- Save the file for changes to get reflected.
- Go to the folder where user has installed knowledge components.
- Go to \ AdvanceKnowledge\Crawler\crawler_v5\config folder. Locate icrawler.cfg file.
- Open indexer.cfg in a Notepad and search for below line.
.png)
- Change Certificate_Name and their value from HclTech.iautomate.web to the new Certificate name.
- Save the file for changes to get reflected.
- Go to the folder where user has installed knowledge components.
- Go to \ AdvanceKnowledge\iKnowledge_Indexer folder. Locate indexer.cfg file.
- Open indexer.cfg in a Notepad and search for below line.
.png)
- Change Certificate_Name and their value from HclTech.iautomate.Web to the new Certificate name.
- Save the file for changes to get reflected.
- Go to the folder where user has installed knowledge components.
- Go to AdvanceKnowledge\iKnowledge_Screen folder.
- Locate iKnowledge_Screen.cfg file.
- Open iKnowledge_Screen.cfg in a Notepad and search for below line.
.png)
- Change Certificate_Name and the value from HclTech.iautomate.Web to the new Certificate name.
- Save the file for changes to get reflected.
- Go to the folder where user has installed knowledge components.
- Go to \AdvanceKnowledge\iKnowledge_Search folder.
- Locate iKnowledge_Search file.
- Open iKnowledge_Search in a Notepad and search for below line.
.png)
- Change Certificate_Name and the value from HclTech.iautomate.Web to the new Certificate name.
- Save the file for changes to get reflected.
- Go to the folder where user has installed knowledge components.
- Go to iKnowledge\iKnowledge\knowledge_v4 folder.
- Locate iKnowledge.cfg file.
- Open iKnowledge.cfg in a Notepad and search for below line.
.png)
- Change Certificate_Name and the value from HclTech.iautomate.Web to the new Certificate name.
- Save the file to implement the changes.
CHANGE NAME OF CERTIFICATE USED TO CONNECT SERVICES
This section describes configuration changes required for the components in case ssl certificate is other than HclTech.iautomate.App.
Follow all steps mentioned in section “change name of certificate used to connect KRS” with below changes:
Search for key “CertificateName_Service” instead ‘CertificateName_KRS’.
Search for key ‘IsSelfSigned_Service’ instead ‘IsSelfSigned_KRS’.
For below components:
Base User Interface, Listener, Data Collector, Generic Service, RBA Component, Release Service, Email Service, Ad Sync
For BASEUI and Listener follow below steps:
Search for “<dns value="HclTech.iautomate.App" />” in web.config and change with New Certificate.
Configuration Changes – Certificate Name Change for PEM/CRT/KEY Certificates
If the Certificate that is used for connecting the REST API hosted by Apache gets changed (PEM/CRT/KEY), user needs to change some parameters (params) in the httpd.conf file in apache directory: /Apache24/conf/httpd.conf.
The parameters define the path of the certificates that are used along with certificate names.
For instance, suppose the certificate changes from server.crt to server1.crt then, by default, they are set to default location as “C:/Program Files/certificate/server.crt”, which needs to be changed to new file name of certificates as “C:/Program Files/certificate/server1.crt”.
Load Balancer Configuration
This section describes the steps for making the required configurational changes if, BigFix Runbook AI is installed in High Availability mode.
To make the configuration changes, please follow the below steps:
- Press Win+R and type services.msc.
- Click OK to open IIS.
.png)
- Expand Sites under Connections and click HCLiAutomateBaseUI.
.png)
Figure 221 - Load Balancer Configuration (cont.)
- Click on Bindings in the Edit Site section.
.png)
.png)
- Ensure that the value of Port mentioned is same as configured in Load Balancer. If that is not the case, click Edit to change the Port value.
- Right-click on HCLiAutomateBaseUI and click Explore.
- Find Web.config file and open it in a Notepad.
.png)
- Within the Web.config file, search for the key ‘URL’ and replace the ‘localhost:portnumber’ with the Load balancer IP and Web API Port.

- Save the file to implement the changes.
- Select the service and click Restart to restart the services.
- Expand Sites in Connections section and click HCLiAutomateWEBAPI.
.png)
- Right-click on HCLiAutomateWEBAPI and click Explore.
- Find Web.config file and open it in a Notepad.
.png)
- Within the Web.config file, search for the key ‘URL’ and replace the ‘localhost:portnumber’ with the Load balancer IP and Web API Port.

- Save the file to implement the changes.
- Select the service and click Restart to restart the services.
- Press Win+R and type services.msc.
.png)
- Click OK to open Windows Services.
.png)
- Search for HCL.iAutomate.Listener service and right-click on it.
- Click Properties.
.png)
- Copy the value mentioned in Path to executable as shown in the image below.
.png)
- Open File Explorer , then paste the copied path and press Enter to open the desired folder.
- Search for HCL.iAutomate.Listner.Service.Host config file and open it in a Notepad.
.png)
- Within the HCL.iAutomate.Listner.Service.Host config file, search for the key ‘URL’ and replace the ‘localhost:portnumber’ with the Load balancer IP and Web API Port.
- Save the file to implement the changes.
- Select the service and click Restart to restart the services.
Repeat the steps mentioned above on all the load balanced servers.
- Login to BigFix Runbook AI using the Super Admin credentials.
- Roll-over Environment and click BigFix Runbook AI Configuration.
- Select Component Name as ‘Web API’. Change the Load Balancer URL to the Load Balancer IP.

- Click Update to save the changes.
- Above step must be repeated for all the components. Additionally, for the Component Name ‘iRecommend’, provide the path of the shared drive location in the ‘iRecommend Model Location’ field.

- Click Update to save the changes.
- Additionally, for the Component Name Entity Model, provide the path of the shared drive location in the EntityModel Model Location field.
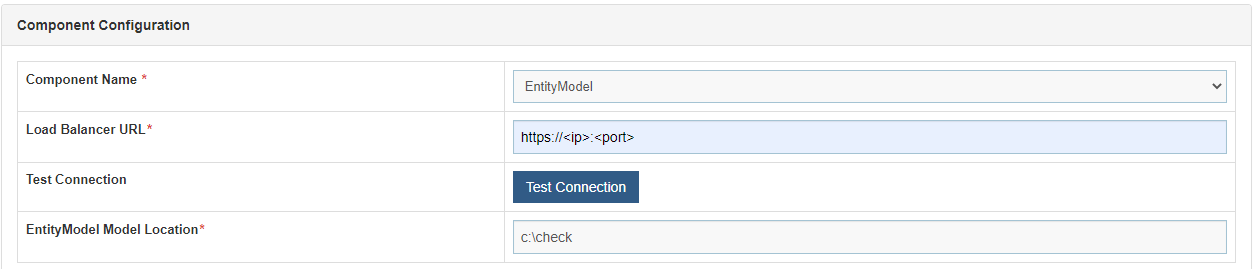
- Click Update to save the changes.
- Additionally, for the Component Name given as Crawler, provide the path of the shared drive location in the Data Directory Location field.
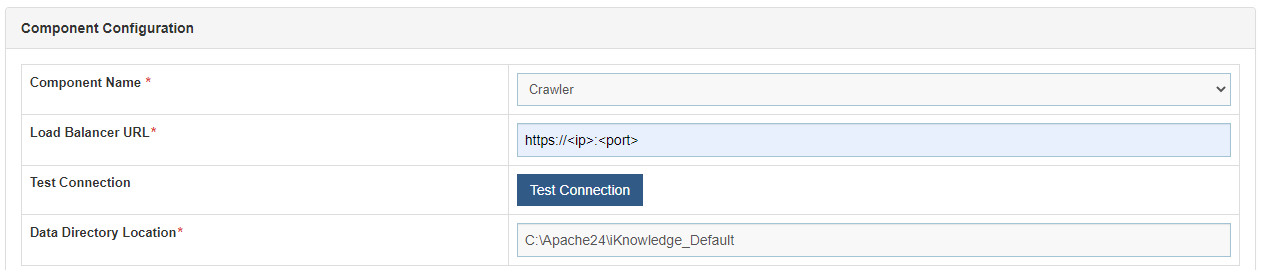
- Click Update to save the changes.
Configuration Changes – Access BigFix Runbook AI without Certificate (Type – PFX)
This section describes the steps for making the required configurational changes to enable access to BigFix Runbook AI when PFX certificate is not available.
To make the configuration changes, please follow the below steps:
Without Certificate used to connect KRS
WCF Services:
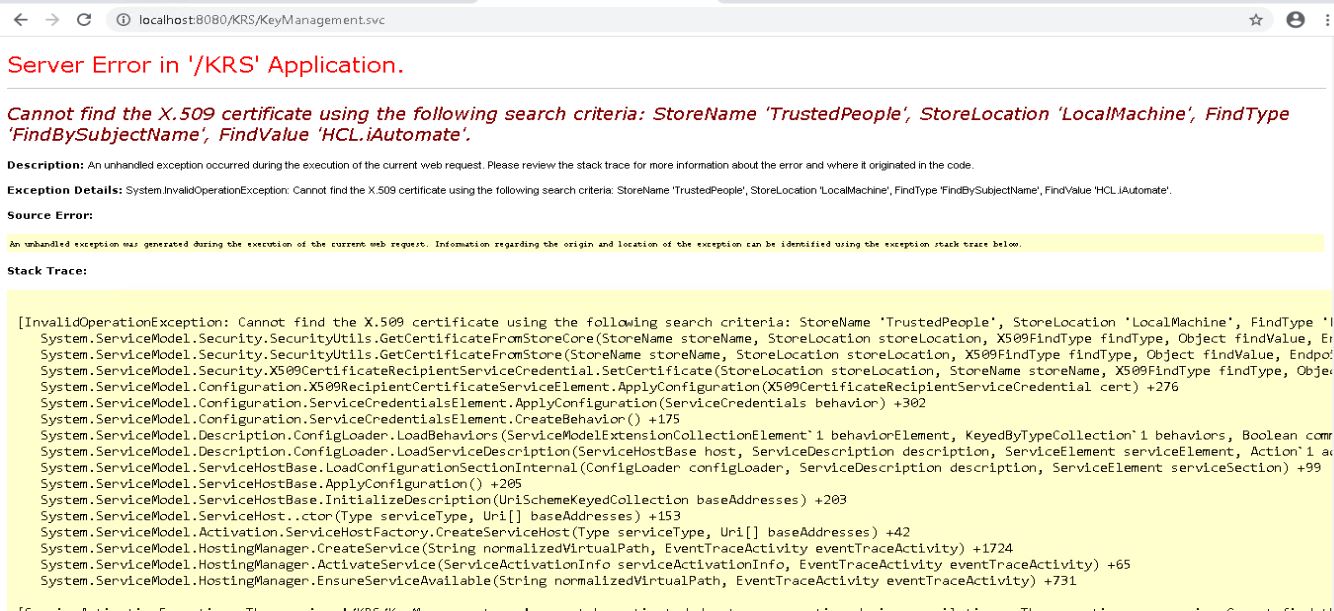
- When no certificate is present in Personal and Trusted folder, following error will occur while loading the KRS wsdl ( <IP address:port>/KRS/KeyManagement.svc )
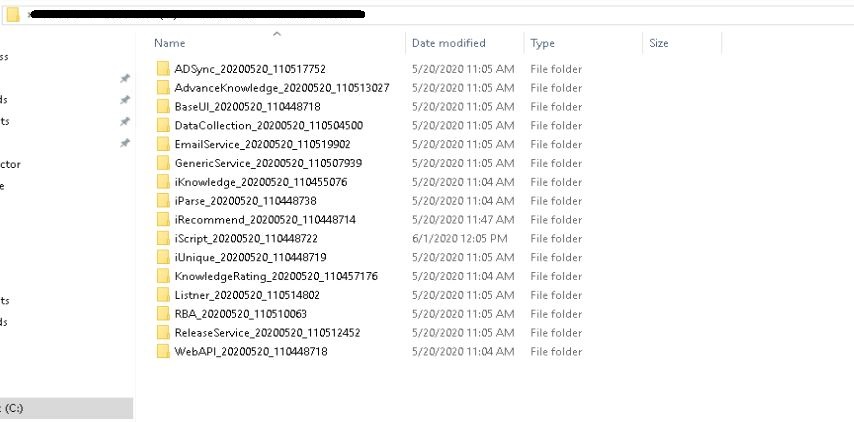
- Go to <BigFix Runbook AI Installer path>.
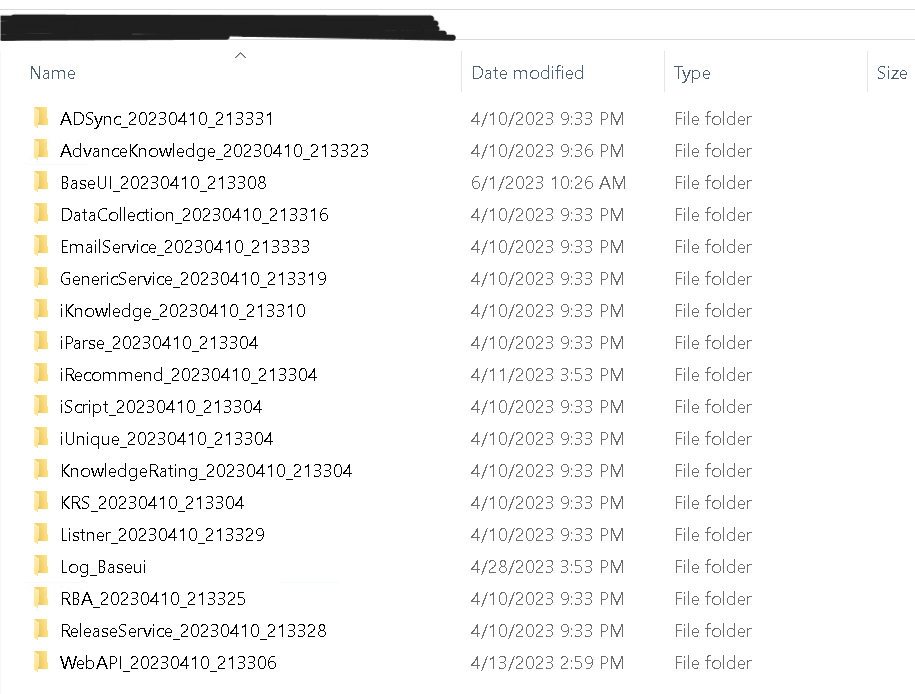
- Go to Path <BigFix Runbook AI Installer path>\KRS.
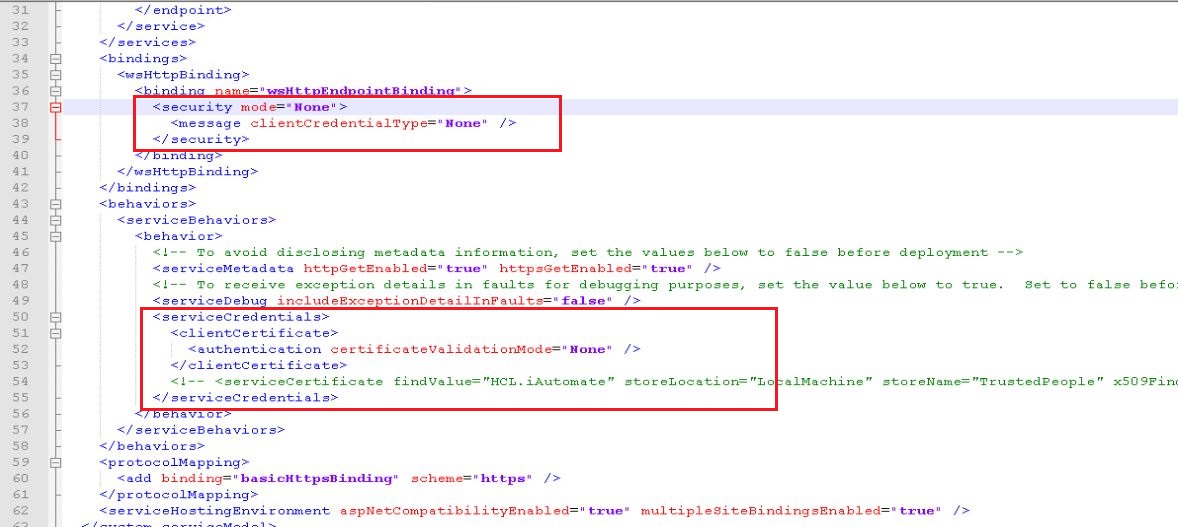
- Open Web.config file.
- Add mode=” None” in <security> tag
- Change clientCredentialType="None" in <serviceCredentials> tag.
- Comment the <serviceCertificate> tag in <serviceCredentials>.
- Go to Path < BigFix Runbook AI Installer path>\ WebAPI
- Open Web.config file.
- Set key “enableCertificate_KRS” value to “N”.

Figure 243 - Configuration Changes – Access BigFix Runbook AI without Certificate (Type – PFX) (cont.)
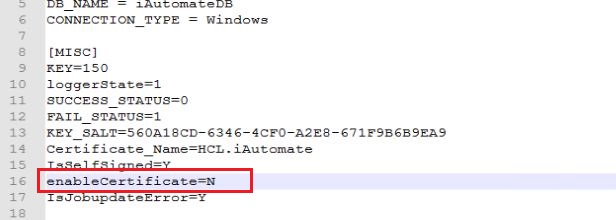
- Go to Path < BigFix Runbook AI Installer path>\Listener…\Listener
- Open HCL.iAutomate.Listener.Service.Host.exe config file.
- Set “enableCertificate_KRS” key to “N”
.png)
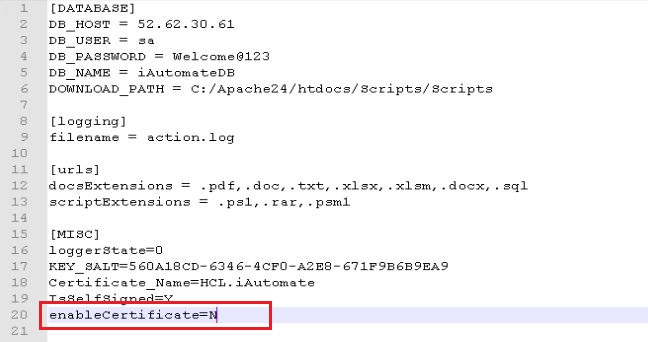
- Go to Path < BigFix Runbook AI Installer path>\BaseUI…\BaseUI
- Open Web.config file.
- Set “enableCertificate_KRS” key to “N”.
.png)
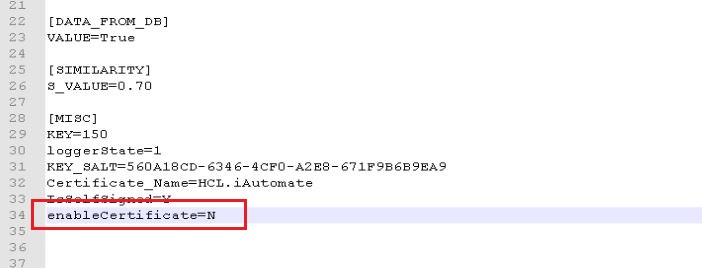
- Go to Path < BigFix Runbook AI Installer path>\DataCollection…\DataCollection folder location
- Open HCL.iAutomate.DataCollector.Service.Host.exe config file.
- Set “enableCertificate_KRS” key to “N”.
.png)
- Follow the last 3 mentioned steps to make the configurational changes required for AD Sync, Email Service, Generic Service, RBA service and Release Service
AI Services:
- Go to Path < BigFix Runbook AI Installer path>\iRecommend…\
- Open IRECOMMEND.CFG file.
- Replace value of “enableCertificate” with “N”.
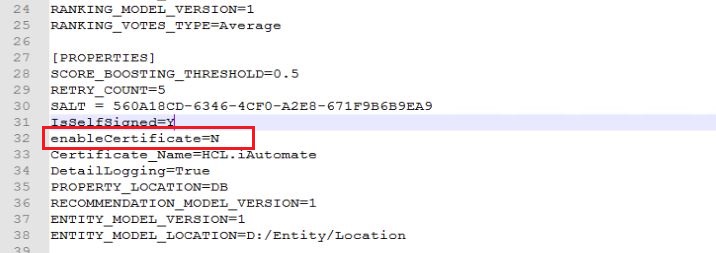
- Open entity.cfg file in entity folder in same location and replace value of “enableCertificate” with “N”
- Go to Path < BigFix Runbook AI Installer path>\iParse…\IParse\iparse\config
- Open Parse_data.cfg file.
- Replace value of “enableCertificate” with “N”
.jpeg)
- Go to Path < BigFix Runbook AI Installer path>\iUnique…\IUnique\iUnique_final\config
- Open iUnique.cfg file.
- Replace “enableCertificate” with “N”
- Go to < BigFix Runbook AI Installer path>\iScript…\IScript\iScript\config
- Open iScrape.cfg file.
- Replace “enableCertificate” with “N”
- Go to < BigFix Runbook AI Installer path>\AdvanceKnowledge\Crawler\crawler_v5\config
- Open iCrawler.cfg file.
- Replace “enableCertificate” with “N”
- Go to < BigFix Runbook AI Installer path>\ AdvanceKnowledge\ iKnowledge_Indexer
- Open INDEXER.cfg file.
- Replace “enableCertificate” with “N”
- Go to < BigFix Runbook AI Installer path>\ AdvanceKnowledge\ iKnowledge_Screen
- Open IKNOWLEDGE_SCREEN.cfg file.
- Replace “enableCertificate” with “N”
- Go to < BigFix Runbook AI Installer path>\ AdvanceKnowledge\ iKnowledge_Search
- Open IKNOWLEDGE_SEARCH.cfg file.
- Replace “enableCertificate” with “N”
- Go to < BigFix Runbook AI Installer path>\ KnowledgeRating …\ iKnowledge_Rating
- Open rating.cfg file.
- Replace “enableCertificate” with “N”
- Go to < BigFix Runbook AI Installer path>\ iKnowledge \ iKnowledge \ knowledge_v4
- Open iknowledge.cfg file.
- Replace “enableCertificate” with “N”
Without Certificate used to connect Services
WCF Services:
- Go to < BigFix Runbook AI Installer path>.
- Go to Path < BigFix Runbook AI Installer path>\BaseUI…\BaseUI
- Open Web.config file.
- Replace value of “enableCertificate_Service” key to “N”.


- Change mode=”None” and clientCertificateType=”None”.
- Go to Path < BigFix Runbook AI Installer path>\Listener…\Listener
- Open HCL.iAutomate.Listener.Service.Host.exe config file.
- Replace value of “enableCertificate_Service” key to “N”.
.png)
.png)
- Change mode=”None” and clientCertificateType=”None”.
- Go to Path < BigFix Runbook AI Installer path>\DataCollection…\DataCollection folder location
- Open HCL.iAutomate.DataCollector.Service.Host.exe config file.
- Replace value of “enableCertificate_Service” key to “N”.

- Follow the last 3 mentioned steps to make the configurational changes required for AD Sync, Email Service, Generic Service, RBA service and Release Service
Configuration Changes – Access BigFix Runbook AI with Certificate (Type – PFX)
This section describes the steps for making the required configurational changes to enable access to BigFix Runbook AI when PFX certificate is available. By default, BigFix Runbook AI will install with Certificate.
To make the configuration changes, please follow the below steps:
With Certificate used to connect KRS
WCF Services:
- Go to < BigFix Runbook AI Installed path>.
.png)
- Go to Path < BigFix Runbook AI Installer path>\KRS.
- Open Web.config file.
- Add mode=” Message” in <security> tag.
- Change clientCredentialType="Certificate" in <message> tag.

- Change certificateValidationMode="PeerTrust" in <serviceCredentials> tag.

- Uncomment the <serviceCertificate> tag, if commented.
- Go to Path < BigFix Runbook AI Installer path>\ WebAPI
- Open Web.config file.
- Set key “enableCertificate_KRS” value to “Y”.

- Go to Path < BigFix Runbook AI Installer path>\Listener…\Listener
- Open HCL.iAutomate.Listener.Service.Host.exe config file.
- Set “enableCertificate_KRS” key to “Y”.
.png)
- Go to Path < BigFix Runbook AI Installer path>\BaseUI…\BaseUI
- Open Web.config file.
- Set “enableCertificate_KRS” key to “Y”.
.png)
- Go to Path < BigFix Runbook AI Installer path>\DataCollection…\DataCollection folder location
- Open HCL.iAutomate.DataCollector.Service.Host.exe config file.
- Replace value of “enableCertificate_KRS” key to “Y”.
.png)
- Follow the last 3 mentioned steps to make the configurational changes required for AD Sync, Email Service, Generic Service, RBA service and Release Service
AI Services
- Go to Path < BigFix Runbook AI Installer path>\iRecommend…\
- Open IRECOMMEND.CFG file.
- Replace value of “enableCertificate” with “Y”.
- Open entity.cfg file in entity folder in same location and replace value of “enableCertificate” with “Y”
- Go to Path < BigFix Runbook AI Installer path>\iParse…\IParse\iparse\config
- Open Parse_data.cfg file.
- Replace value of “enableCertificate” with “Y”
- Go to Path < BigFix Runbook AI Installer path>\iUnique…\IUnique\iUnique_final\config
- Open iUnique.cfg file.
- Replace “enableCertificate” with “Y”
- Go to <BigFix Runbook AI Installer path>\iScript…\IScript\iScript\config
- Open iScrape.cfg file.
- Replace “enableCertificate” with “Y”
- Go to <BigFix Runbook AI Installer path>\AdvanceKnowledge\Crawler\crawler_v5\config
- Open iCrawler.cfg file.
- Replace “enableCertificate” with “Y”
- Go to < BigFix Runbook AI Installer path>\ AdvanceKnowledge\ iKnowledge_Indexer
- Open INDEXER.cfg file.
- Replace “enableCertificate” with “Y”
- Go to < BigFix Runbook AI Installer path>\ AdvanceKnowledge\ iKnowledge_Screen
- Open IKNOWLEDGE_SCREEN.cfg file.
- Replace “enableCertificate” with “Y”
- Go to <BigFix Runbook AI Installer path>\ AdvanceKnowledge\ iKnowledge_Search
- Open IKNOWLEDGE_SEARCH.cfg file.
- Replace “enableCertificate” with “Y”
- Go to <BigFix Runbook AI Installer path>\ KnowledgeRating …\ iKnowledge_Rating
- Open rating.cfg file.
- Replace “enableCertificate” with “Y”
- Go to <BigFix Runbook AI Installer path>\ iKnowledge \ iKnowledge \ knowledge_v4
- Open iknowledge.cfg file.
- Replace “enableCertificate” with “Y”
With Certificate used to connect Services
WCF Services:
- Go to <BigFix Runbook AI Installed path>.
.jpeg)
- Go to Path <BigFix Runbook AI Installer path>\BaseUI…\BaseUI
- Open Web.config file.
- Replace value of “enableCertificate_Service” key to “Y”.

- Go to Path <BigFix Runbook AI Installer path>\Listener…\Listener
- Open HCL.iAutomate.Listener.Service.Host.exe config file.
- Replace value of “enableCertificate_Service” key to “Y”.
.png)
- Go to Path <BigFix Runbook AI Installer path>\DataCollection…\DataCollection folder location
- Open HCL.iAutomate.DataCollector.Service.Host.exe config file.
- Replace value of “enableCertificate_Service” key to “Y”.
.png)
- Follow the last 3 mentioned steps to make the configurational changes required for AD Sync, Email Service, Generic Service, RBA service and Release Service
Configuration Changes - Access BigFix Runbook AI without Certificate (Type – PEM)
This section describes the steps for making the required configurational changes to enable access to BigFix Runbook AI when PEM certificate is not available.
To make the configuration changes, please follow the below steps:
AI Services:
- Go to Path <BigFix Runbook AI Installer path>\Listener…\Listener
- Open HCL.iAutomate.Listener.Service.Host.exe config file.
- Replace value of “enablePEMCertificate” key with “N”.

- Go to Path <BigFix Runbook AI Installer path>\BaseUI…\BaseUI
- Open Web.config file.
- Replace value of “enablePEMCertificate” key to “N”.
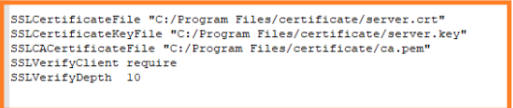
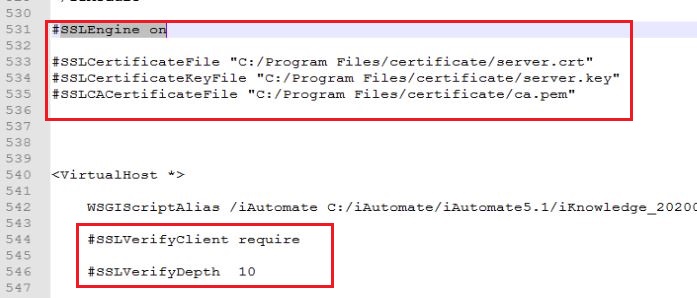
- Got to Path C:/Apache24/conf and open iRecommend.cfg file. Comment the following lines:
- SSLEngine on
- SSLCertificateFile "C:/Program Files/certificate/server.crt"
- SSLCertificateKeyFile "C:/Program Files/certificate/server.key"
- SSLCACertificateFile "C:/Program Files/certificate/ca.pem"
- SSLVerifyClient require
- SSLVerifyDepth 10
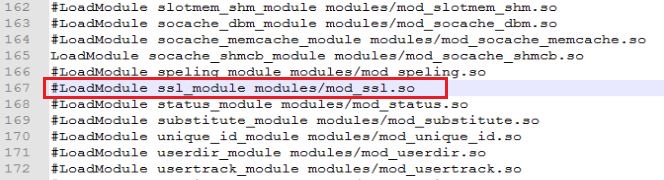
- LoadModule ssl_module modules/mod_ssl.so.
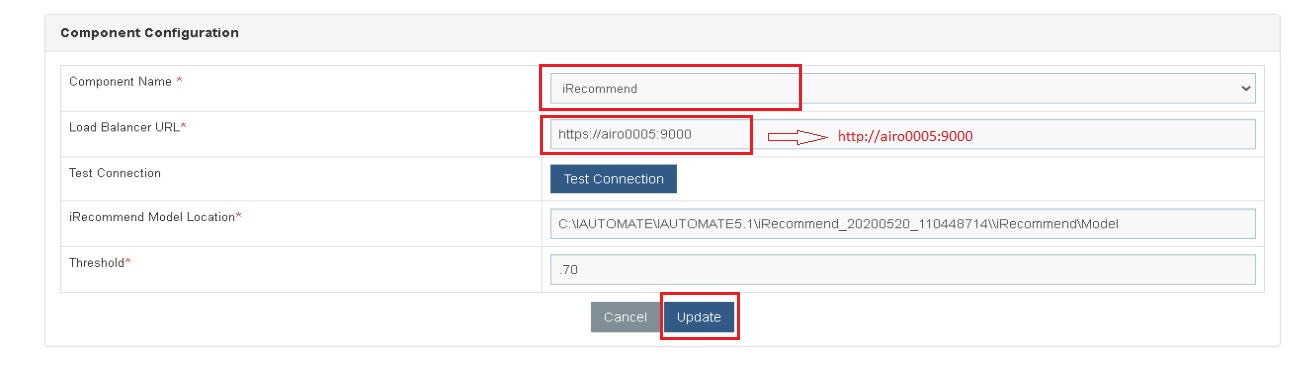
- To make the changes to the Endpoint URL, go to the BigFix Runbook AI website.
- Click Advance Configuration Product Configuration.
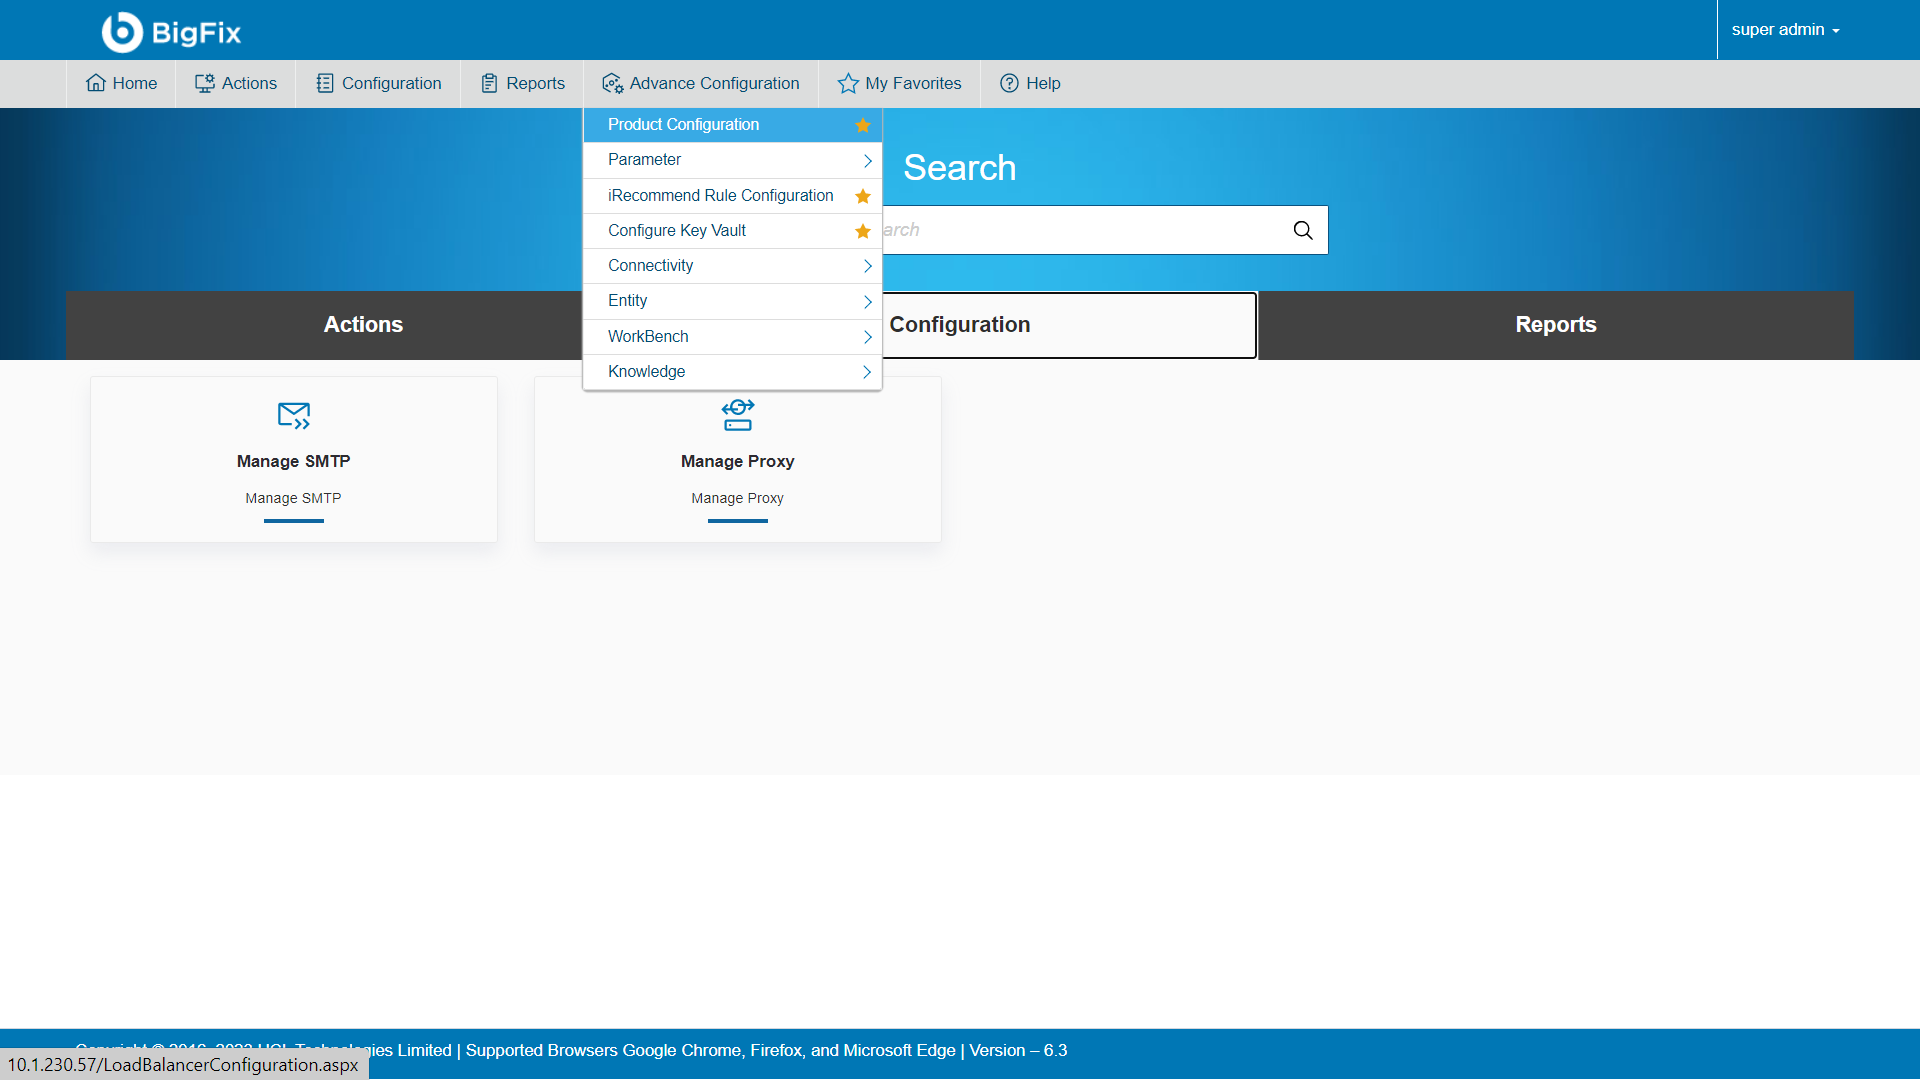
- Select Component Name as ‘iRecommend’.
- Change the Load Balancer URL from ‘https’ to ‘http’.
- Click Update.
- Repeat Steps 7 & 8 for each of the AI components mentioned below –
Entity
iKnowledge
iKnowledgeCrawler
iKnowledgeIndexer
iKnowledgeScreen
iKnowledgeSearch
iParse
iRecommend
iScript
iUnique
ratingMongo
IIS Configuration:
- Press Win + R and type inetmgr.
- Click OK to open IIS.
.png)
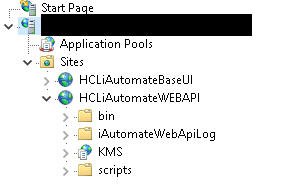
- Expand Sites.
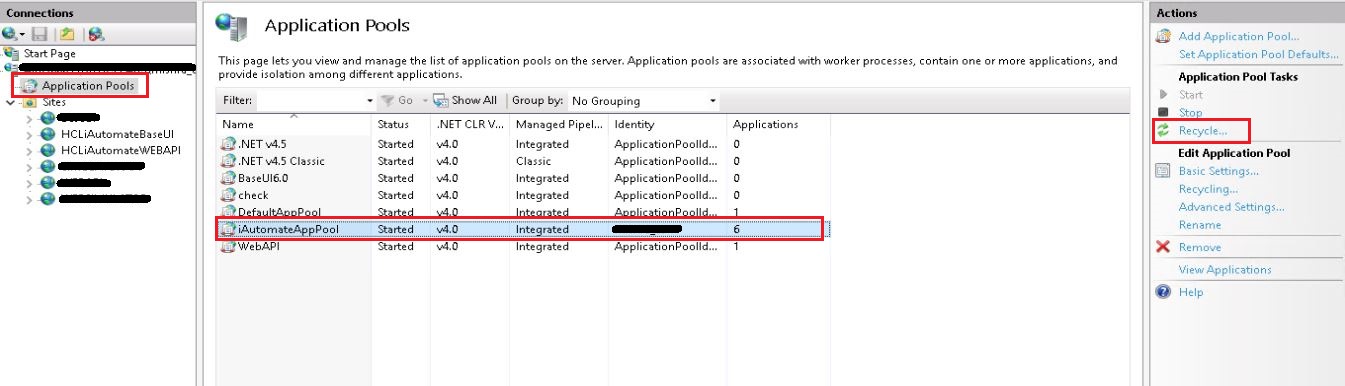
- Go to Application Pools. Click on your specific application pool. Click Recycle or Stop and then click Start
- Go to Sites. Click the site having name BaseUI. Click on Restart.
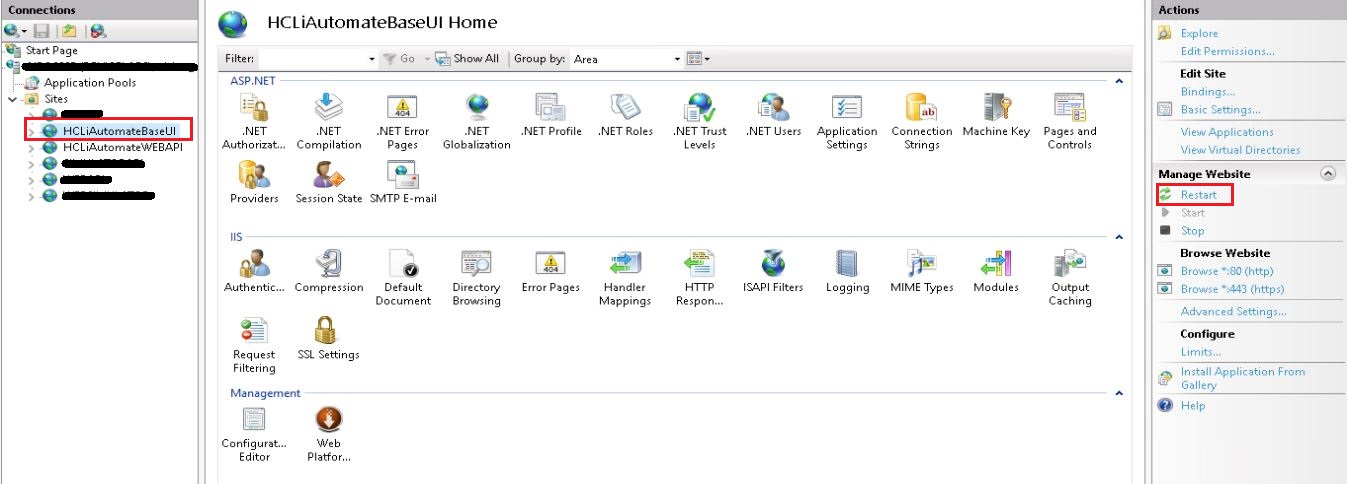
- Go to Sites. Click the site having name WEBAPI. Click on Restart.
Restart Services
- Press Win+R and type services.msc.
.png)
- Click OK to open Windows Services.
.png)
- Search for Services.
- Restart Apache24 service.
- Restart all HCL.iAutomate services.
Configuration Changes - Run BASEUI and WEBAPI on Same Port
This section describes the steps for making the required configurational changes to enable BASEUI and WEBAPI on Same Port.
- Press Win+R and type intemgr.
- IIS will be opened. Expand the server’s name and then the sites.
- Right click on HCLiAutomateBaseUI and click on add application.
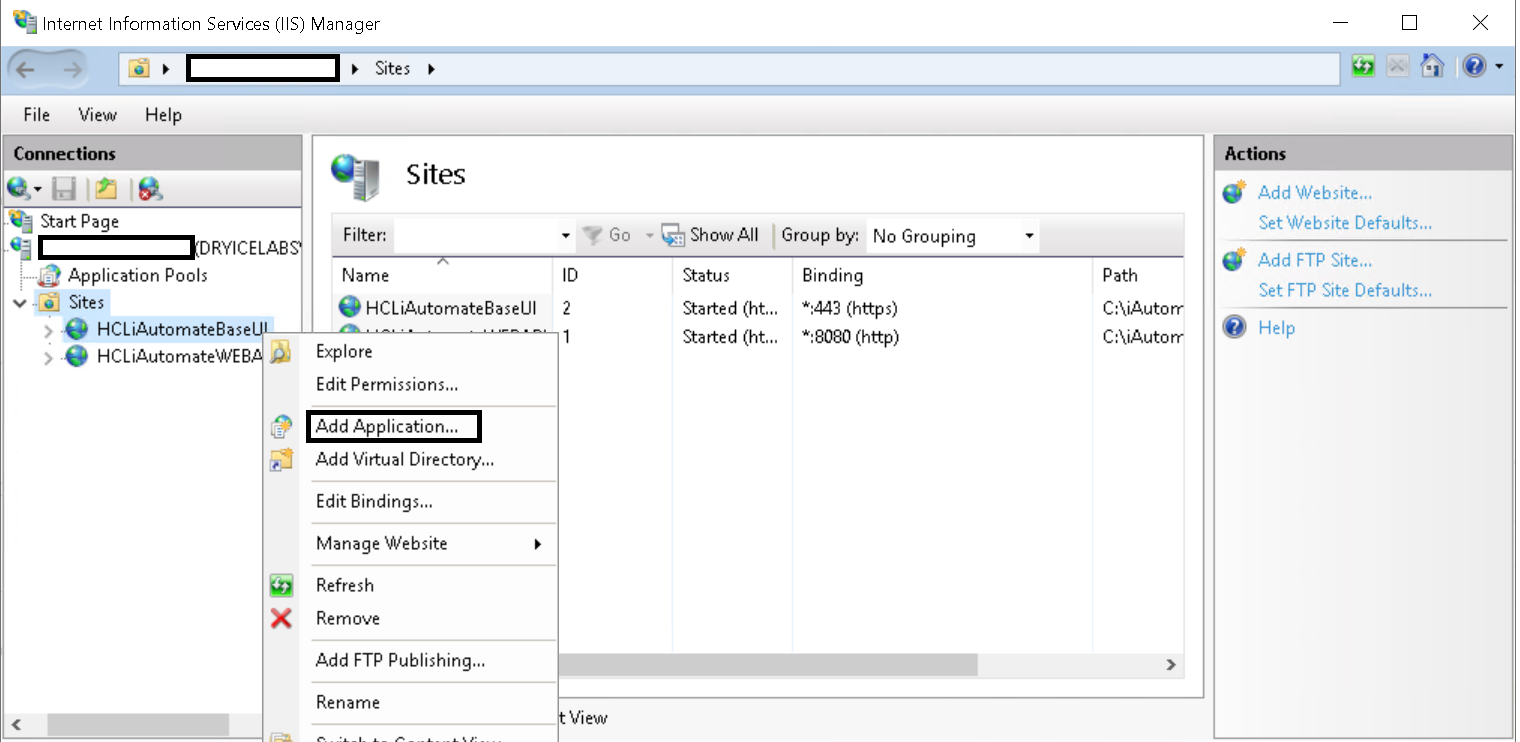
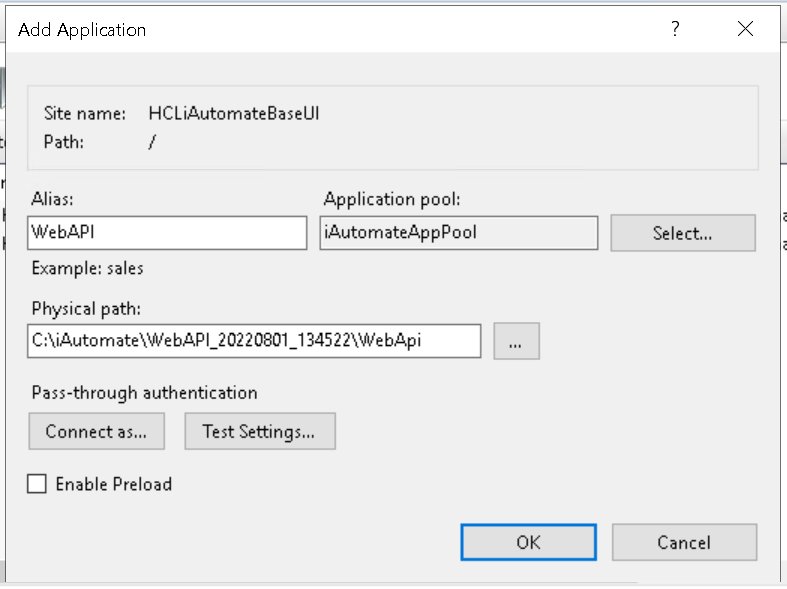
- On the popup opened, enter Alias as ‘WebAPI’, Application pool as ‘iAutomateAppPool’ and enter the path till WebAPI folder in Physical Path. Click Ok.
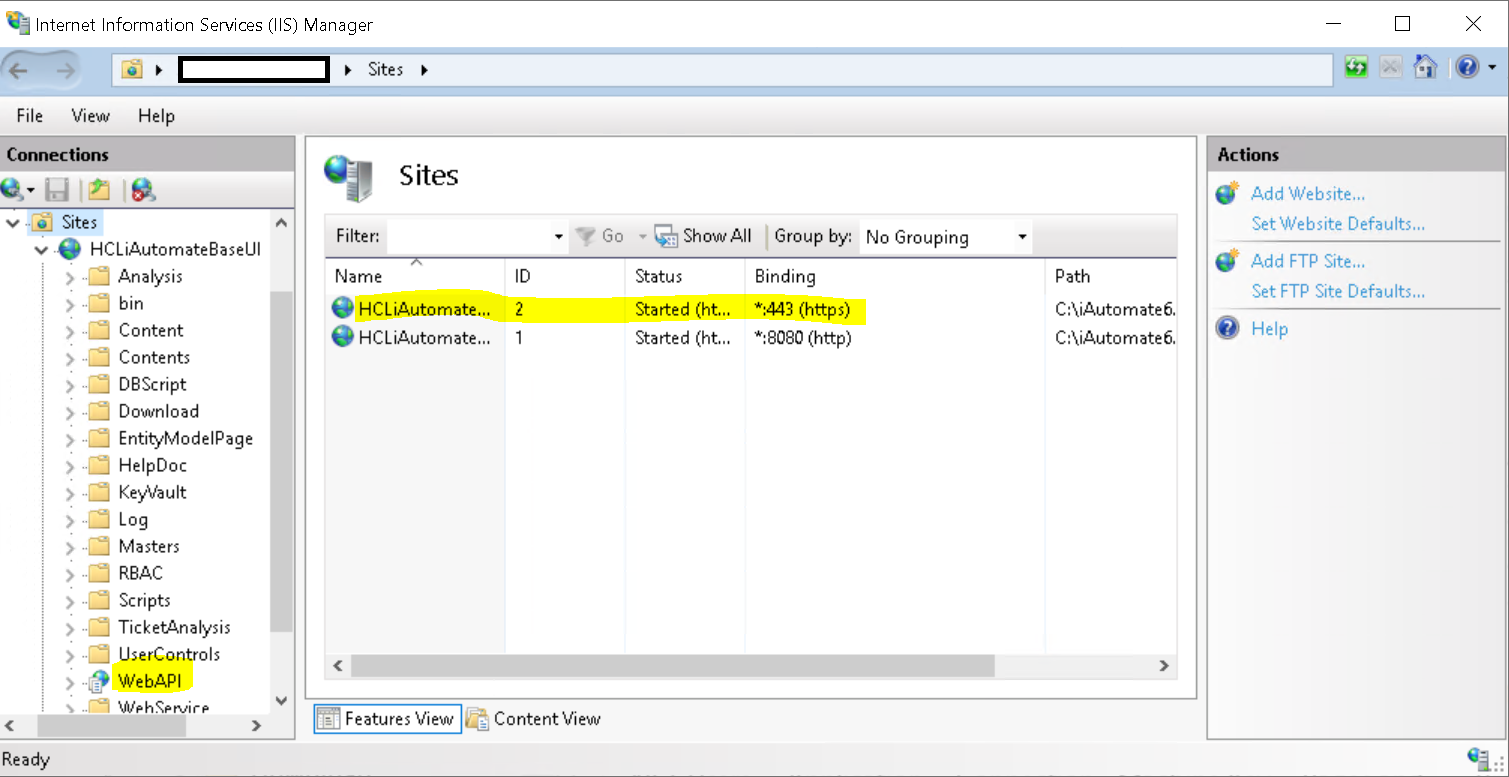
- The WebAPI application will now appear under HCLiAutomateBaseUI.
- To test whether API and BaseUI is working on same port, if BaseUI is accessible as https://localhost:443 then type below URL and see if WebAPI is also accessible with below URL:
- WebAPI URL: <BaseUI URL>/<Alias Name of Folder>/iAutomateAPI/Request/Getheartbeat
- Eg: https://localhost:443/WebAPI/iAutomateAPI/Request/Getheartbeat
- Go to web.config file of BaseUI. For that, go to IIS, expand server name and sites, and right click on HCLiAutomateBaseUI and click on explore. Search the web.config file in the opened folder and open the file.
- In the web.config file, search for ‘sessionState mode= “SQLServer”’. Comment this line and uncomment the line with sessionState mode= “InProc” like given below:

- Save the web.config and restart the HCLiAutomateBaseUI in IIS. Now enter the WEBAPI URL (mentioned in Step 6) in browser. Now it should successfully give the below output:

Configuration Changes in Apache –FOR PYTHON COMPONENTS
- Go to Run (Windows + R) and type services.msc and search and stop the python services.
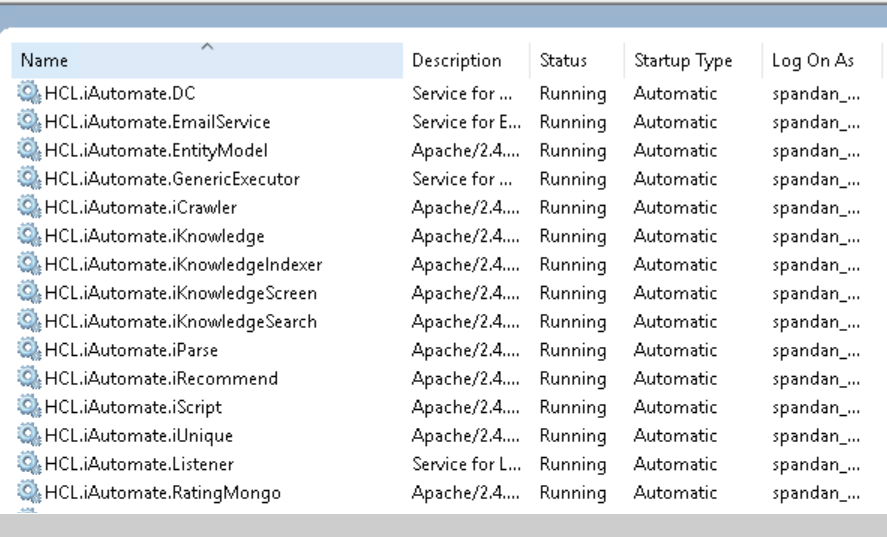
Figure 445- Apache Upgradation
Apache2.4
HCL.iAutomate.Entitymodel
HCL.iAutomate.iCrawler
HCL.iAutomate.iknowledge
HCL.iAutomate.iKnowledgeIndexer
HCL.iAutomate.iKnowledgeScreen
HCL.iAutomate.iKnowledgeSearch
HCL.iAutomate.iRecommend
HCL.iAutomate.iParse
HCL.iAutomate.iScript
HCL.iAutomate.iUnique
HCL.iAutomate.RatingMongo
- Open below path in explorer: C:\Apache24\conf
- Navigate to the above path mentioned, need to update in .conf file of all python components as mentioned in the below screenshot
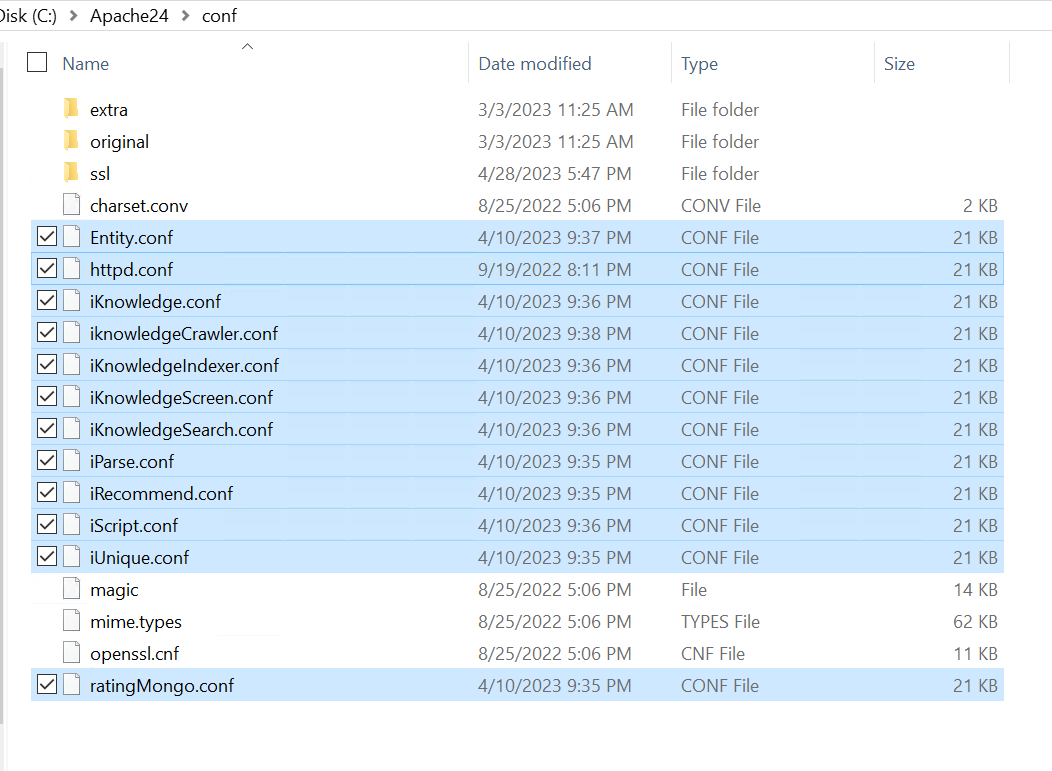
Figure 446 - Apache Upgradation (cont.)
- Open the conf files one by one in notepad++/notepad, locate the word “Define SRVROOT "/Apache24”.
- If it is present you can skip this step and proceed with Step 6, if not add the following 3 lines by searching for the word “ServerRoot "c:/Apache24"
- Replace “ServerRoot "c:/Apache24"” line in the file with below 3 lines
- Define SRVROOT "/Apache24"
- ServerRoot "${SRVROOT}"
- PidFile "${SRVROOT}/httpd.pid"
By Default TLS version, 1.3 has been enabled in this apache configuration. If you want to enable any other TLS version for a particular windows build you need to follow below mentioned steps else continue with step 9
- Then find the line “SSLEngine on” in the same document
- Based on the TLS requirement, check the TLS version that needs to enabled and copy the lines mentioned below for respective TLS version and paste it after “SSLEngine on” line in conf file by removing/uncomment “#” from the beginning and save the file.
- If the required TLS line is already uncommented, skip and proceed with Step No 9, if it’s not present perform below steps.
Table 15 - TLS versions -Apache
|
- For example:
- If need to go with TLS version 1.2: Removed “#” in the below screenshot and save the file.
-
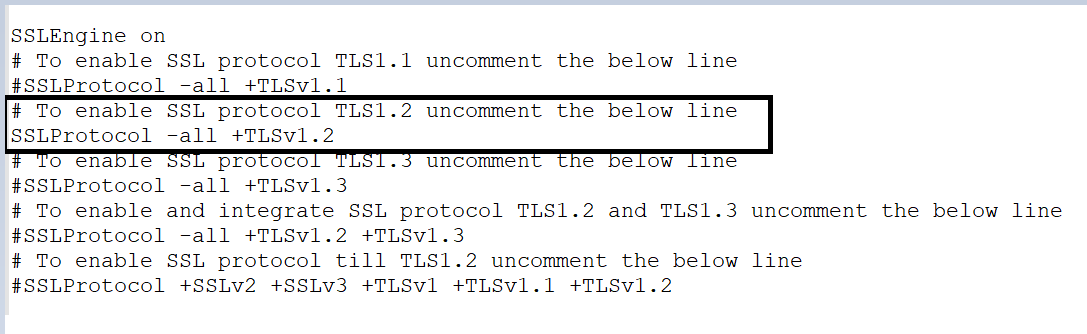
Figure 447 - Apache Upgradation (cont.)
- Changes needs to be done for all Python Components that are selected in figure 446
- Verify the changes done in all python components.
- Go to Run (Windows + R) and type services.msc and start the python services, which are in stop state.
.png)
Figure 448 - Screenshot of the Apache Python services