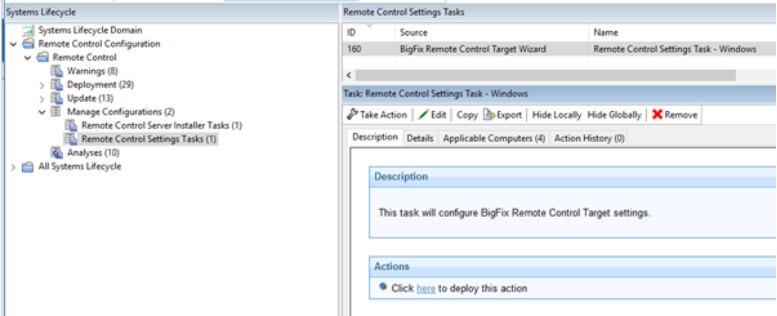
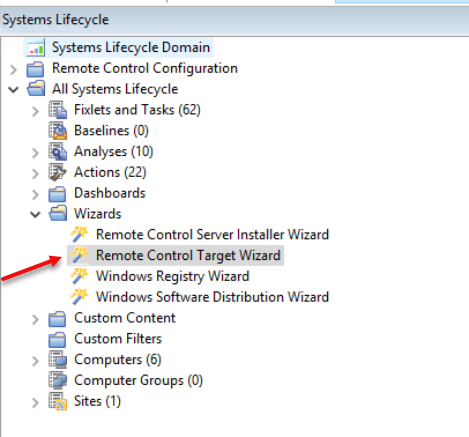
Creating Remote Control target configuration tasks
Use the Remote Control Target wizard to create a set of target configuration parameters.
About this task
Procedure
- Select the relevant operating system.
- Set your configuration values.
- Load settings from an existing task
- Use this feature to load previously created configuration settings.
- Click Load settings from an existing task.
- On the Wizard Fixlets panel, select the task.
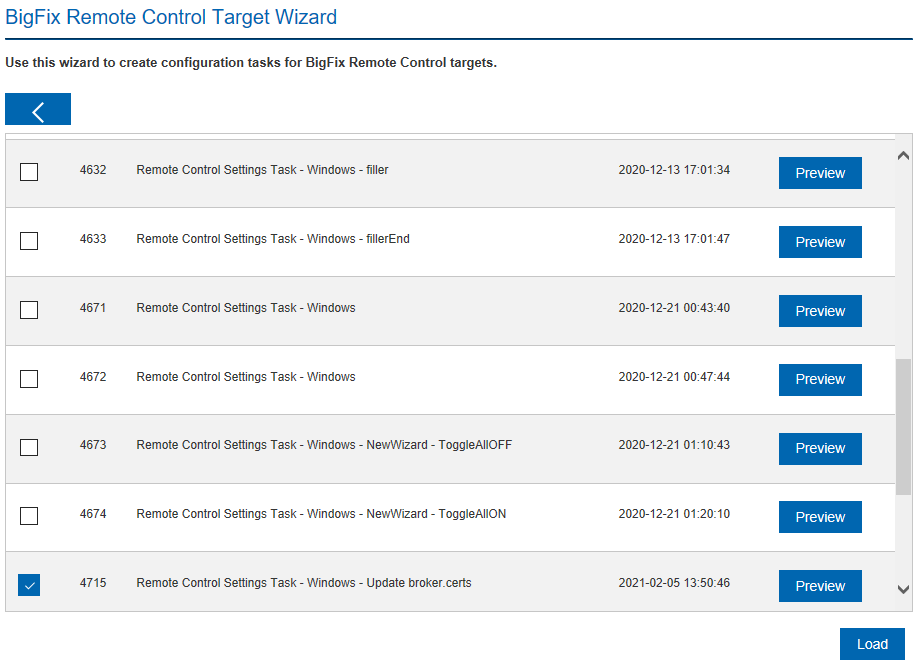
Click Load Wizard with Fixlet. The configuration values are loaded into the wizard.
- Reset to default values
- Use this feature to clear any selections that are made and return the values in the wizard to the default configuration values.
- Selecting configuration values
- The wizard is loaded with default configuration values that you can change to your own
requirements by selecting or clearing the relevant options. Note: Depending on the selected operating system, all or some of the following properties are displayed.
Table 1. Installation option descriptions Installation option Target property Default
ValueDescription Server URL ServerURL blank For the target to register with the server and take part in remote control sessions that are started from the server, provide the Remote Control server url in the format: http://servername/trc, where servername is the fully qualified name of theRemote Control server. For example, http://trcserver.example.com/trc.
Note:- For the targets to take part only in remote control sessions that are started from the server, if you provide a server url, select never for Allow peer-to-peer mode.
- If the Remote Control server has been installed with a custom URL which is not ending with /trc (e.g. https://my.rcserver/trccustom), you need to specify the ServerURL with the /trc at the end (e.g. https://my.rcserver/trc) so that the field is correctly validated then once that the Fixlet has been generated you need to manually edit the URL in the ActionScript. For example the line "ServerURL"="https://my.rcserver/trc" will be replaced with the line "ServerURL"="https://my.rcserver/trccustom".
Proxy URL ProxyURL blank Host name or IP address for a proxy server, if you are using one. Broker List BrokerList blank The list of host names or IP addresses of the brokers and their ports, that you want the target to connect to. Enter in the following format, hostname1:port,hostname2:port,hostname3:port. Trusted certificates for Broker connections n/a Select this option to configure the truststore that is used for verifying broker certificates. To add a certificate, complete the following steps. - Open the certificate file in a text editor.
- Select the certificate and copy it to the clipboard. Note: You must select everything and include the BEGIN CERTIFICATE and END CERTIFICATE lines.
- Click Save.
Register target in group GroupLabel blank Enter a target group name that the target is made a member of when the configuration is applied. This target group must exist in the Remote Control database. Note: The GroupLabel property can be used only if the target is not already registered with the server. If the target is already registered, it is not assigned to the target group. The allow.target.group.override property in the trc.properties file on the server must be set to true for the GroupLabel property value to be applied.Remote Control port PortToListen 888 Specify the TCP port that the target listens on. Allow peer-to-peer mode AllowP2P Never Used to enable peer-to-peer mode. - Never
- A peer-to-peer session cannot be established between a controller and this target. If a ServerURL is provided, the targets can take part only in remote control sessions that are initiated from the server.
- Only if server is unreachable.
- A peer-to-peer session can be established between a controller user and this target only when the Remote Control server is down or unreachable.
- Always
- A peer-to-peer session can be established between a controller user and this
target. Note: If this option is selected and a server url is provided, the targets can take part in both peer-to-peer sessions and sessions that are initiated from the server.
FIPS compliance FIPSCompliance not selected Select this option to enable the use of a FIPS-certified cryptographic provider for all cryptographic functions. For more information about enabling FIPS compliance, see the BigFix® Remote Control Installation Guide. Note: If you enable FIPS compliance on the target, also enable FIPS compliance on the controller components that are installed. Only the IBM® Java™ Run-time Environment (JRE) is supported in FIPS-compliant mode and the JRE is installed when you install the controller software. To enable FIPS compliance on the controller, complete the following steps.- Edit the trc_controller.cfg file on the system that the
controller is installed on.
- Windows® systems
- [controller installation dir]\trc_controller.cfg
where [controller installation dir] is the directory that the controller is installed in.
- Linux® systems
- opt/bigfix/trc/controller/trc_controller.cfg
- Set the fips.compliance property to true and save the file.
Enable NIST SP800-131A compliance (Enables FIPS) SP800131ACompliance not selected Select this option to enforce NIST SP800-131A-compliant algorithms and key strengths for all cryptographic functions. For more information about enabling NIST SP800-131A compliance, see the BigFix® Remote Control Installation Guide. Note: If you enable NIST SP800-131A compliance on the target, also enable NIST SP800-131A compliance on the controller components that are installed. Only the IBM® Java™ Run-time Environment (JRE) is supported in NIST SP800-131A compliant mode and the JRE is installed when you install the controller software. To enable NIST SP800-131A compliance on the controller, complete the following steps.- Edit the trc_controller.cfg file on the system that the
controller is installed on.
- Windows® systems
- [controller installation dir]\trc_controller.cfg
where [controller installation dir] is the directory that the controller is installed in.
- Linux® systems
- opt/bigfix/trc/controller/trc_controller.cfg
- Set the sp800131A.compliance property to true and save the file.
Disable IPv6 Disable IPv6 not selected Prevent the target from using IPv6 addresses. Disable IPv4 Disable IPv4 not selected Prevent the target from using IPv4 addresses. Accessibility Accessibility not selected Select this option to enable the accessibility UI. Available when you select Windows as the operating system. Log Level LogLevel 2 The log level determines the types of entries and how much information is added to the log file. Default value is 2.
0 - Logging is set to a minimal level.
1 - Logging is set to ERROR level.
2 - Logging is set to INFO level.
4 - Logging is set to DEBUG level.
Note: Use Log Level = 4 only by request from HCL support.Log Rollover LogRollover Daily Controls the period after which a new log file is started. This period must be shorter than the LogRotation period, therefore not all combinations are valid. LogRollover cannot be disabled. Default value is Daily.
- Hourly
- Start a new log file on the hour. Recommended if the log is written to frequently or when you use a log level higher than 2.
- Daily
- Start a new log file every day.
Log Rotation LogRotation Weekly Controls the period after which an older log file is overwritten. Log rotation can be disabled. Default value is Weekly.
- Daily
- Overwrite log files after 1 day. When LogRollover is set to Hourly, the suffix that is added to the log file name is 00H to 23H.
- Weekly
- Overwrite log files after 1 week. When LogRollover is set to Hourly, the suffix that is added to the log file name specifies the day and hour. Value can be Mon-00H to Sun-23H. When LogRollover is set to Daily, the suffix that is added to the log file name specifies the day. The value can be Mon to Sun.
- Monthly
- Overwrite log files after 1 month. 01-00H to 31-23H. When LogRollover is set to Hourly, the suffix that is added to the log file name specifies the numeric day of the month and the hour. Value can be 01-00H to 31-23H. When LogRollover is set to Daily, the suffix that is added to the log file name specifies the numeric day of the month. The value can be 01 - 31.
- Disabled
- LogRotation is disabled. When LogRollover is set to hourly, the suffix that is added to the log file name specifies the current date and time. Value can be YYYY-MM-DD-hh. When LogRollover is set to Daily, the suffix that is added to the log file name specifies the current date. The value can be YYYY-MM-DD.
Table 2. Session option descriptions. User options Target property Default Value Description Allow monitor mode AllowMonitor selected Determines whether the target can take part in monitor peer-to-peer sessions. For details of the different types of remote control session that can be established, see the BigFix® Remote Control Controller User's Guide. - selected
- The target can take part in monitor peer-to-peer sessions. The Monitor option is available for selection in the session type list in the controller window. The Open connection window also lists a Monitor option.
- not selected
- The target cannot take part in monitor peer-to-peer sessions. The Monitor option is not available in the session type list in the controller window.
Allow guidance mode AllowGuidance selected Determines whether the target can take part in guidance peer-to-peer sessions. - selected
- The target can take part in guidance peer-to-peer sessions. The Guidance option is available in the session type list in the controller window. The Open connection window also lists a Guidance option.
- not selected
- The target cannot take part in guidance peer-to-peer sessions. The Guidance option is not available in the session type list in the controller window.
Allow active mode AllowActive selected Determines whether the target can take part in active peer-to-peer sessions. - selected
- The target can take part in active peer-to-peer sessions. The Active option is available in the session type list in the controller window. The Open connection window also lists an Active option.
- not selected
- The target cannot take part in active peer-to-peer sessions. The Active option is not available in the session type list in the controller window.
Disable chat DisableChat not selected Determines the ability to start a chat session with the target and also chat to the controller user during a peer-to-peer session. - selected
- If Chat Only is chosen as the connection type on the open connection screen, the session is refused. During the session, the chat icon is not available in the controller window.
- not selected
- A Chat Only session can be initiated from the open connection window. During the session, the chat icon is available in the controller window.
Disable file transfer to Controller DisableFilePull not selected Determines the ability to transfer files from the target to the controller during the session. - selected
- Files can be transferred from the target to the controller.
- not selected
- Files cannot be transferred from the target to the controller.
Disable file transfer to Target DisableFilePush not selected Determines the ability to transfer files from the controller to the target during the session. - selected
- Files can be transferred from the controller to the target.
- not selected
- Files cannot be transferred from the controller to the target.
Disable clipboard transfer DisableClipboard not selected Determines the availability of the clipboard transfer menu. Use the menu to transfer the clipboard content between the controller and target during a remote control session. - selected
- The clipboard transfer menu is available during the session to transfer the clipboard content to and from the target.
- not selected
- The clipboard transfer menu is not available during the session.
Allow local recording AllowRecording selected The controller user can make and save a local recording of the session in the controlling system. - selected
- The record option is available in the controller window.
- not selected
- The record option is not available in the controller window.
Allow collaboration AllowCollaboration selected Use this property to allow more than one controller to join a session. Determines the availability of the collaboration icon on the controller window. - selected
- The collaboration icon is available in the controller window.
- not selected
- The collaboration icon is not available in the controller window.
Allow handover AllowHandover selected The master controller, in a collaboration session, can hand over control of the session to a new controller. Determines the availability of the Handover button on the collaboration control panel. - selected
- The Handover button is displayed in the collaboration control panel.
- not selected
- The Handover button is not displayed in the collaboration control panel.
Allows requests to disconnect session AllowForceDisconnect not selected Determines whether a Disconnect session button is available in the message window that is displayed when you attempt to connect to the target. You can use the Disconnect session option to disconnect the current session. - selected
- The disconnect button is displayed in the message window.
- not selected
- The disconnect button is not displayed in the message window.
Disconnect grace time ForceDisconnectTimeout 45 Number of seconds you must wait for the current controller to respond to the prompt to disconnect the current session. If they do not respond in the time that is given, they are automatically disconnected from the session. The timer takes effect only when AllowForceDisconnect and CheckUserLogin are set to Yes. The default value is 45. Connect at logon AutoWinLogon selected Determines whether a session can be started when no users are logged on at the target. - selected
Session is started with the target.
- not selected
- Session is not started and the following message is displayed. Session rejected because there is no user logged to confirm the session
Run pre-session script RunPreScript not selected Determines whether a user-defined script is run before the remote control session starts. The script is run just after the session is allowed but before the controller user has access to the target. The outcome of running the script and the continuation of the session is determined by the value that is set for Proceed on pre/post-script failure. - selected
- When a remote control session is requested, the defined script is run before the controller user has access to the target.
- not selected
- No script is run before the session.
Run post-session script RunPostScript not selected Determines whether a user-defined script is run after the remote control session finishes. - selected
- When a remote control session ends, the user-defined script is run.
- not selected
- No script is run after the session.
Proceed on pre/post-script failure ProceedOnScriptFail not selected Action to take if the pre-script or post-script execution fails. A positive value or 0 is considered a successful run of the pre-script or post-session script. A negative value, a script that is not found, or not finished running within 3 minutes is considered a failure. - selected
- If the pre-script or post-script run fails, the session continues.
- not selected
- If the pre-script or post-script run fails, the session does not continue and ends.
Reset console after RDP console session WorkaroundW2K3RDP Not selected Automatically reset the console after a Remote Desktop console session. When a Remote Desktop user uses the /admin or /console option to start a Remote Desktop session with a Windows® Server 2003 system and a user starts a remote control session with this target before, during or after the Remote Desktop session, remote control is unable to capture the display. The result is that a gray screen is shown in the controller. This issue is a limitation in Windows® Server 2003 operating systems. Therefore, this property introduces a workaround that will reset the Windows® session either after each Remote Desktop session ends, or before a remote control session starts, depending on the value selected. - 0
- The workaround is disabled. This value is the default value.
- 1
- Reset the session automatically when a remote control session is started.
Note: The Windows® session takes a couple of minutes to initialize and the controller sees a blank desktop until the initialization is complete. A message informs the controller user that the session is being reset and it might take a few minutes.
- 2
- Reset the session automatically when the Remote Desktop user logs out.
Follow Active Session FollowActiveSession Not selected If selected, the controller connects to the active session in the target, even if this session is a Remote Desktop session. This feature is available in Remote Control v9.1.2 IF0002 and later versions and is supported on the following Microsoft™ Windows™ operating system versions:- Microsoft™ Windows™ Vista
- Microsoft™ Windows™ 7
- Microsoft™ Windows™ 8
- Microsoft™ Windows™ 8.1
- Microsoft™ Windows™ 10
Table 3. User acceptance option descriptions User options Target property Default
ValueDescription Confirm incoming connections ConfirmTakeOver selected Determines whether the acceptance window is displayed on the target, when a remote control session is requested. - selected
- The user acceptance window is displayed and the target user can accept or refuse the session.
- not selected
- The user acceptance window is not displayed and the session is established.
Confirm mode changes ConfirmModeChange selected Determines whether the user acceptance window is displayed when the controller user selects a different session mode from the session mode list on the controller window. - selected
- The user acceptance window is displayed each time a session mode change is requested and the target user must accept or refuse the request.
- not selected
- The user acceptance window is not displayed and the session mode is changed automatically.
Confirm file transfers ConfirmFileTransfer selected Determines whether the user acceptance window is displayed when the controller user selects to transfer files between the target and the controller. - selected
- The acceptance window is displayed in the following two cases. The target user
must accept or refuse the file transfer.
- The controller user selects pull file from the file transfer menu on the controller window. The target user must select the file that is to be transferred after they accept the request.
- The controller user selects send file to controller from the Actions menu in the target window.
- Not selected
- The acceptance window is not displayed and files are transferred automatically from the target to the controller system when requested.
Confirm system information ConfirmSysInfo selected Determines whether the user acceptance window is displayed when the controller user requests to view the target system information. - selected
- When the controller user clicks System information in the controller window, the user acceptance window is displayed. The target user must accept or refuse the request. If the target user clicks accept, the target system information is displayed in a separate window on the controller system. If they click refuse, a message is displayed on the controller and the system information is not displayed.
- not selected
- The target system information is displayed automatically when the controller user clicks the system information icon.
Confirm recording ConfirmRecording selected Determines whether the user acceptance window is displayed when the controller user clicks the record icon on the controller window. - selected
- When the controller user clicks the record icon on the controller window, a
message window is displayed. If the target user clicks
Accept, the controller user can select a directory to save
the recording to. If the target user clicks Refuse, a
recording refused message is displayed to the controller. Note: After the target user accepts the request for recording, if the controller user stops and restarts local recording, the acceptance window is not displayed.
- not selected
- When the controller user clicks the record icon on the controller window, the message window is not displayed. The controller user can select a directory to save the recording to.
Confirm collaboration ConfirmCollaboration selected Determines whether the user acceptance window is displayed when another controller user requests to join a collaboration session with a target. - selected
- When the controller user tries to join the collaboration session, the user acceptance window is displayed. The target user must accept or refuse the request to allow the additional controller to join the session. If the target user clicks accept, the additional controller joins the collaboration session. If they click refuse, a message is displayed on the controller system and the additional controller cannot join the collaboration session.
- not selected
- The additional controller automatically joins the collaboration session when they try to connect to the master controller of the session.
Acceptance grace time AcceptanceGraceTime 45 Sets the number of seconds to wait for the target user to respond before a session starts or times out, used with Confirm incoming connections. - Acceptable values 0 - 60. If set to 0, the target user is not asked to respond to the session request.
Note: If Confirm incoming connections is selected, Acceptance grace time must be set to a value >0 to provide the target user with enough time to respond.Proceed on acceptance timeout AcceptanceProceed not selected Action to take if the user acceptance window timeout lapses. The target user did not click accept or refuse within the number of seconds defined for Acceptance grace time. - selected
- Session is established.
- not selected
- Session is not established.
Hide windows HideWindows not selected Determines whether the Hide windows check box is displayed on the user acceptance window when Confirm incoming connections is also selected. - selected
- The Hide windows check box is displayed on the user acceptance window.
- not selected
- The Hide windows check box is not visible on the user acceptance window.
Table 4. security option descriptions Security options Target property Default Value Description Authenticate using system logon CheckUserLogin selected Determines whether the login window is displayed when a session type is selected on the Open Connection window. - Yes
- The logon window is displayed and the controller user must log on with a valid Windows™ operating system ID and password. If the logon credentials are invalid, the target refuses the session.
- No
- The logon window is not displayed and the peer-to-peer session is established.
Authorized user group CheckUserGroup see description Default value is: - Windows® systems
-
BUILTIN\Administrators - Linux® systems
-
wheel
When Authorized user group has a value set, the user name that is used for authentication must be a member of one of the groups that are listed. If the user is not a member, the session is refused. Multiple groups must be separated with a semicolon. For example,
wheel;trcusersNote: By default, on Windows® systems, only the Administrator user is granted access. On Linux® systems, by default no users are granted access. To resolve this issue, complete one of the following steps.- To also grant administrator rights to the users, add them as members to the Administrators group on Windows® systems or the wheel group on Linux® systems.
- For users with no administrator rights, complete the following steps
- Create a group or use an existing group. For example, the following command can
be run as root:
.groupadd trcusers - Add the users to this group. For example, the following command can be run as
root to add bsmith to trcusers:
usermod -a -G trcusers <bsmith> - Add the group to the list in the Authorized user group field.
- Create a group or use an existing group. For example, the following command can
be run as root:
Audit to system log AuditToSystem selected Determines whether the actions that are carried out during remote control sessions are logged to the application event log on the target. This file can be used for audit purposes. - selected
- Entries are logged in the application event log of the target corresponding to each action that is carried out during the session.
- not selected
- No entries are logged to the application event log.
Save chat messages AutoSaveChat not selected Determines whether the chat text, entered during a chat session, can be saved. - selected
- The chat text is saved as an html file. The file is
chat-username-date.html,
where username is the display name of the logged on user on the
controller machine in a peer-to-peer session. In managed mode username
is the display name for the controller user that is on the server. The date is in the
format YYYYMMDD. The file is saved in the working directory of the
target. The location of the working directory is defined by the target property
WorkingDir. For example, on Windows™ systems, the file is saved to
c:\ProgramData\BigFix\Remote Control.
On Linux systems, the file is saved to /var/opt/bigfix/trc/target/. - not selected
- The chat text is not saved to a file.
Enable system access for file transfer EnableFileTransferSystemAccess not selected Determines whether the file transfer session allows for target file system access using System privileges (Windows) or root privileges (Linux). This option is valid for peer to peer sessions only. - selected
- The file transfer session uses System privileges (Windows) or root privileges (Linux) on the target file system.
- not selected
- The file transfer session uses the privileges of the logged on user on the target file system.
Lock target on disconnect SessionDisconnect not selected Determines whether the target computer is automatically locked when the remote control session ends.Allowed value: lock. When you set the value to lock, the target computer is automatically locked at the end of the session. If the property is blank or set to another value, the target computer is not automatically locked at the end of the session.
Allow privacy AllowPrivacy selected Determines whether a controller user can lock the local input and screen of the target when in a remote control session. Determines the visibility of the Enable Privacy option on the controller window. - selected
- The Enable Privacy option is available in the Perform Action in target menu in the controller window.
- not selected
- The Enable Privacy option is not available in the Perform Action in target menu in the controller window.
Allow input lock AllowInputLock selected This property works with Allow privacy and on its own. You can use Allow input lock to lock the target users mouse and keyboard during a remote control session. - selected
- The lock target input menu item is enabled, in the Perform action in target menu in the controller window. Select lock target input to lock the target users mouse and keyboard during a remote control session. The target screen is still visible to the target user.
- not selected
- The lock target input menu item is not enabled in the Perform action in target menu in the controller window.
Note: If the option to Enable Privacy is selected during a session, the remote user input is automatically locked. It is not possible to enable privacy without also locking the input.Enable privacy EnablePrivacy not selected Determines whether the local input and screen are locked for all sessions. Therefore, the target user cannot input or do anything on the target while in a remote control session. - selected
- The target screen is blanked out by the privacy bitmap when the session starts, preventing the target user from interacting with the screen while in the session. The target desktop is still visible to the controller user in the controller window.
- not selected
- The target screen is not blanked out when the session is started and the target user can interact with the screen.
Enable input lock EnableInputLock not selected This property works with Enable privacy. When privacy mode is enabled, use Enable input lock to determine whether the target user can view their screen or not, during a remote control session. - selected
- The target screen is visible to the target user during the session, while in privacy mode but their mouse and keyboard control is locked.
- not selected
- The target screen is not visible to the target user. The privacy bitmap is displayed on the target during the session. The target users mouse and keyboard input is also disabled.
Note: Enable privacy must be selected for Enable input lock to take effect.DisablePanicKey DisablePanicKey not selected Determines whether the Pause Break key can be used by the target user to automatically end the remote control session. - selected
- The target user cannot use the Pause Break key to automatically end the remote control session.
- not selected
- The target user can use the Pause Break key to automatically end the remote control session.
Enable on-screen session notification EnableOSSN not selected Determines whether a semi-transparent overlay is displayed on the target computer to indicate that a remote control session is in progress. Use this property when privacy is a concern so that the user is clearly notified when somebody can remotely view or control their computer. - selected
- The semi-transparent overlay is displayed on the target screen with the text
Remote Control
and what type of remote control session is in progress.
For
                 example, Remote Control
                 - Active Mode.
The overlay does not intercept keyboard or mouse actions, therefore the user is still able to interact with their screen. - not selected
- No overlay is displayed on the target computer.
Note: This policy is only supported on targets that have a Windows® operating system installed.Disable GUI DisableGUI not selected Determines the appearance of the target GUI when the remote control session is starting and also during the session. Note: This option works only when the target is installed in peer-to-peer mode and the Managed target property is set to No. This option is ignored when applied to any targets that were installed by using the Remote Control server mode when a server URL was supplied.- selected
- The target GUI is not visible on the target and the target user is not aware that the session is started. The Remote Control target icon is not visible in the Windows® system tray.
- not selected
- The target GUI is displayed on the target as the session is starting and is available to the target user during the remote control session.
Table 5. performance option descriptions Security options Target property Default Value Description Inactivity timeout IdleTimeout 360 Number of seconds to wait until the connection ends if there is no session activity. Set this value to 0 to disable the timer so that the session does not end automatically. The minimum timeout value is 60 seconds. For values 1 - 59, the session times out after 60 seconds of inactivity.The default value is 360.Note: The inactivity timeout value applies to Active session mode only. The session does not end automatically when other session modes are used.Enable high quality colors EnableTrueColor not selected Determines whether the target desktop is displayed in high-quality colors in the controller window at the start of a session. Used together with Lock color quality.
- selected
- The target desktop is displayed in true color 24-bit mode at the start of the session. Partial screen updates are also enabled.
- not selected
- The target desktop is displayed in 8-bit color mode at the start of the session. Partial screen updates are also enabled. This value is the default value.
Lock color quality LockColorDepth not selected Determines whether the color quality that a remote control session is started with can be changed during the session. Used together with Enable high quality colors.
- selected
- The initial color quality, for the remote control session, is locked and cannot be changed during the session. The Performance settings icon is disabled in the controller window. The controller user cannot change settings to improve the session performance if their network is slow.
- not selected
- The color quality can be changed during the session. The Performance settings icon is enabled in the controller window.
Remove desktop RemoveBackground not selected Determines whether a desktop background image can be removed from view during a remote control session. - selected
- The desktop background image, on the target, is not visible during a remote control session.
- not selected
- The desktop background image, on the target, is visible during a remote control session.
Stop screen saver updates NoScreenSaver not selected Stops the target from sending screen updates when it detects that the screen saver is active. - selected
- While the screen saver is active on the target system, the target stops transmitting screen updates. A simulated screen saver is displayed on the controller computer so that the controller user knows that a screen saver is active on the remote screen. The controller user can close the screen saver by pressing a key or moving the mouse.
- not selected
- No simulated screen saver is displayed in the session window. The target screen is displayed as normal and the target continues to transmit screen updates.
- Click Create Configuration Task. Type the relevant information for your task and click OK
Results