Limiting scope of automated scan
![]() Available from 9.2.8.
To discover software that is installed on shared disks in your
infrastructure, create computer groups that contain only computers on which the same disk is
mounted. Then, scan one of the computers in that group to create a software template.
Finally, share the template between all computers on which the disk is mounted.
Available from 9.2.8.
To discover software that is installed on shared disks in your
infrastructure, create computer groups that contain only computers on which the same disk is
mounted. Then, scan one of the computers in that group to create a software template.
Finally, share the template between all computers on which the disk is mounted.
Before you begin
- This method of scanning is advised for environments with a heavy use of shared disks in which a
single shared disk is mounted on many computers. Important:
 Starting from application updated 9.2.12, this method can be automated. Using the automated
scanning is recommended as it is easier to set up and maintain. The difference is that automatic
mode scans all shared disks that exist in your environment. If you want to scan only selected shared
disks, use manual scanning. For more information, see: Discovering software on shared disks. If you already set up
manual scanning, you can switch to automatic scanning. For more information, see: Switching to automatic scanning of shared disks.
Starting from application updated 9.2.12, this method can be automated. Using the automated
scanning is recommended as it is easier to set up and maintain. The difference is that automatic
mode scans all shared disks that exist in your environment. If you want to scan only selected shared
disks, use manual scanning. For more information, see: Discovering software on shared disks. If you already set up
manual scanning, you can switch to automatic scanning. For more information, see: Switching to automatic scanning of shared disks.  You must be an Administrator to perform this task.
About this task
- Scenario 1: Each computer has access to one shared disk
-
There are two shared disks, each mounted on six computers. To properly report the discovered software, create two computer groups in BigFix Inventory:
- Computer Group 1 that contains computers on which Shared Disk 1 is mounted
- Computer Group 2 that contains computers on which Shared Disk 2 is mounted
From each group, select one computer to be scanned. Scan results from the designated computer are propagated to the remaining computers in the computer group. Thus, software that is installed on Shared Disk 1 is reported on all computers in Computer Group 1 without the need to scan all computers in that group. The same happens for computers in Computer Group 2.
- Scenario 2: Some computers have access to two shared disks
-
There are two shared disks. Shared Disk 1 is mounted on nine computers. Shared Disk 2 is mounted on six computers. To properly report the discovered software, create two computer groups in BigFix Inventory:
- Computer Group 1 that contains computers on which Shared Disk 1 is mounted
- Computer Group 2 that contains computers on which Shared Disk 2 is mounted
Three of the computers belong to both computer groups because they have both disks mounted. Select one of these computers to be scanned. This way, only one computer is scanned to discover software that is installed on both shared disks. Scan results from the designated computer are propagated to the rest of computers in both groups. Computers on which only one disk is mounted show software from that disk only. Computers on which both disks are mounted show software from both disks.
- Scenario 3: Computers have access to one shared disk but run on different operating systems
-
There is one shared disk that is mounted on nine computers. Three of the computers run on Linux, three on AIX, and three on Solaris. To properly report the discovered software, create one computer group in BigFix Inventory. From this group, designate three computers to be scanned, one for every operating system.
It is necessary because the software catalog that is propagated to each computer monitored by BigFix Inventory contains software signatures specific to the operating system on which that computer runs. Thus, scan results from the shared disk must be matched against software catalog for every operating system. Scan results from each designated computer are propagated to the rest of computers that run on the same operating system.
Procedure
- Discover shared disks that exist in your infrastructure.
-
Create a list of unique access points of the discovered shared disks. The information is needed
to group computers on which the same shared disk is mounted.
-
Open the Results tab. The Computer Name column lists computers on which
shared disks are mounted. The Remote Shared Disks column provides information about the type of the
mounted shared disk, the access point, and the path under which the disk is mounted on a particular
computer.

-
Create a list of unique access points.
- If every computer has only one disk mounted, right-click the results of the analysis, and click
Copy Text. Then, paste the list to a text editor, and edit the file so that
it contains only information about access points. For example:
192.0.2.21:/file_server/shared - If a computer has multiple disks mounted, double-click the computer, and scroll down to the
Shared Disk Information section.
Copy the text, paste it to a text editor, and edit the file so that it contains only information about access points. For example:192.0.2.21:/file_server/shared 192.0.2.22:/file_server/shared 192.0.2.23:/file_server/shared
- If every computer has only one disk mounted, right-click the results of the analysis, and click
Copy Text. Then, paste the list to a text editor, and edit the file so that
it contains only information about access points. For example:
-
Open the Results tab. The Computer Name column lists computers on which
shared disks are mounted. The Remote Shared Disks column provides information about the type of the
mounted shared disk, the access point, and the path under which the disk is mounted on a particular
computer.
-
Create a BigFix computer group that contains
computers on which a particular shared disk is mounted. The group is used to easily designate one
computer that can be scanned to create a software template.
-
Create a computer group that contains all computers on which the shared disk is mounted.
- In the top navigation, click .
- Specify the name of the computer group. For example, Shared Disk 1.
- Specify the following conditions:
Remote Shared Disks,contains,<IP:shared_disk>.
If a shared disk is mounted based on the IP address on some of the computers and based on the host name on other computers, BigFix Inventory does not unify addresses of access points. Thus, add the following condition to the definition of the computer group:Remote Shared Disks,contains,<host_name:shared_disk>. Alternatively, create two separate computer groups: one in which the access point based on the IP address and the other in which it is based on the host name. If the same shared disk is mounted on computers that run on different types of operating systems, create a computer group per each type. To create such a group, add the following condition to the definition of the computer group:
OS,contains,<operating_system>, where <operating_system> can have the following values:linuxaixhp-uxsunos
-
Create a computer group that contains all computers on which the shared disk is mounted.
-
From the computer group, choose one computer to be scanned. Information about software
discovered on the shared disk that is mounted on this computer is used as a software template.
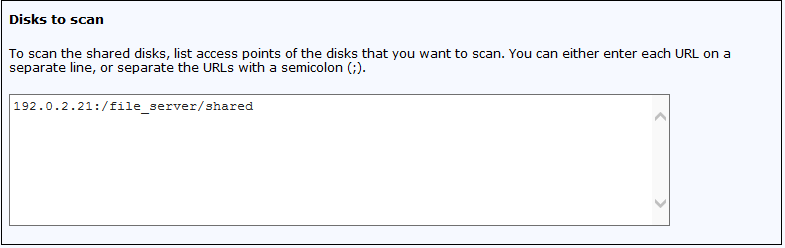
- Optional:
If the computer has multiple shared disks mounted and you want to scan
only some of them, specify URLs of the access points that you want to
scan.
You can enter each URL from a separate line or separate the URLs with a semicolon (;).Tip: Ensure that the URLs are exactly the same as the URLs returned by the Shared Disks Information analysis.
-
To see the status of the scan, activate the Status of Shared
Disks Software Scan analysis, and open the Results tab.
If any of the columns shows
<multiple results>, it means that multiple shared disks are mounted on the scanned computer. To see the status of the scan for each shared disk, hover over the results in the column specific to the type of the scan. The number next to the status corresponds to the number of the shared disk in the Scanned Disks column. You can also double-click the computer, and scroll down to the Status of Shared Disks Software Scan section.
After the scan finishes, a software template is created.
- Optional:
If the computer has multiple shared disks mounted and you want to scan
only some of them, specify URLs of the access points that you want to
scan.
-
If you have not previously scheduled upload of scan results from the scanned computer, schedule
it now. Ensure that the upload is scheduled only once per computer.
- In the navigation tree, click Fixlets and Tasks.
- In the upper right pane, select Upload Software Scan Results, and click Take Action.
- Select the computer that is scanned to create the software template, and click OK.
- To make the software templates available in BigFix Inventory, wait for the scheduled import or run it manually.
-
Create a computer group in BigFix Inventory. The group is
used to report software that is discovered on the shared disk on all computers that belong to this
computer group.
-
Select the software template that you want to share among all computers that belong to this
group. Then, click Create.
Important: Ensure that you assign a software template to a group in which all computers have the shared disk mounted. Otherwise, software discovered on the shared disk is reported on computers that do not in fact have access to that software.
-
Select the software template that you want to share among all computers that belong to this
group. Then, click Create.