Installing the License Metric Tool server and DB2 in interactive mode
To install the License Metric Tool server and DB2 by using the All-in-One installer in interactive mode, run the setup-server-linux-x86_64.sh script. Then, follow instructions in the installation wizard.
Before you begin
- Ensure that a BigFix client is installed on the computer on which you want to install the License Metric Tool server
- Ensure that the computer meets the following requirements:
- A graphical user interface is available
- X server is configured
- DISPLAY variable is set properly
- Ensure that the /home directory is a regular directory with write permissions to allow for the DB2 installation. The use of an automounted directory is not supported.
- The use of
sudois not supported.
Procedure
-
Go to the directory with the installation package, and extract the installation files.
tar xvf installation_package -
To start the installation, run the setup-server-linux-x86_64.sh
script.
./setup-server-linux-x86_64.sh -
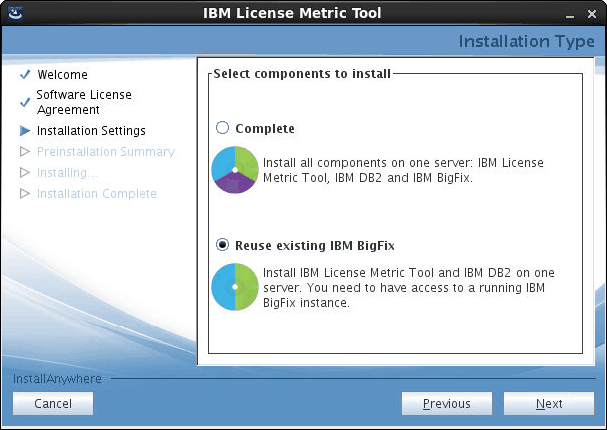
When prompted, choose Reuse existing BigFix to install only the
License Metric Tool server and its database. After the
installation, you must connect them to the existing BigFix server.
-
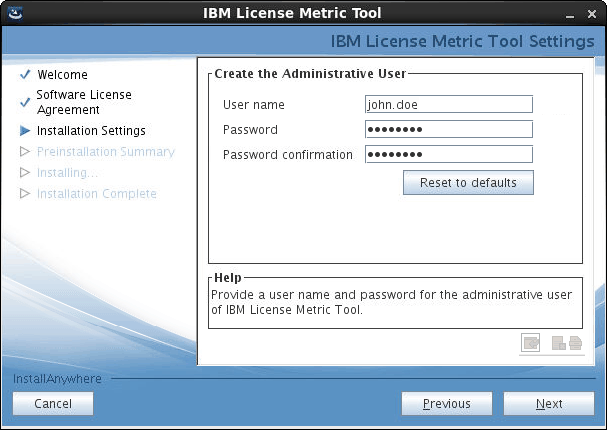
Create the administrative user of License Metric Tool.
This user is required to log in to the application.
Tip: Avoid using admin, administrator, root or a similar name for the administrative account. Such an account might be prone to hacker attacks and locked out if an attacker exceeds the specified number of failed login attempts. For more information, about the account lockout, see: Configuring user account lockout.
-
Provide details for the installation of DB2: installation path, home directory, and a password
for the
db2inst1anddb2fenc1users.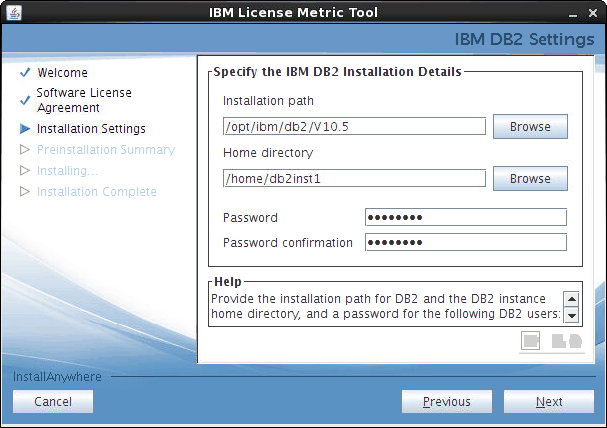
-
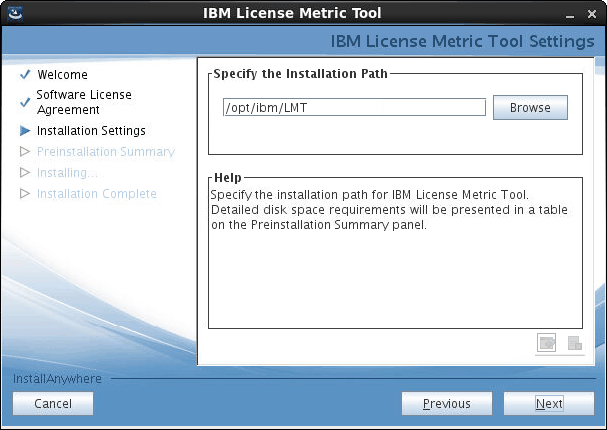
Provide the installation path for the License Metric Tool
server.
-
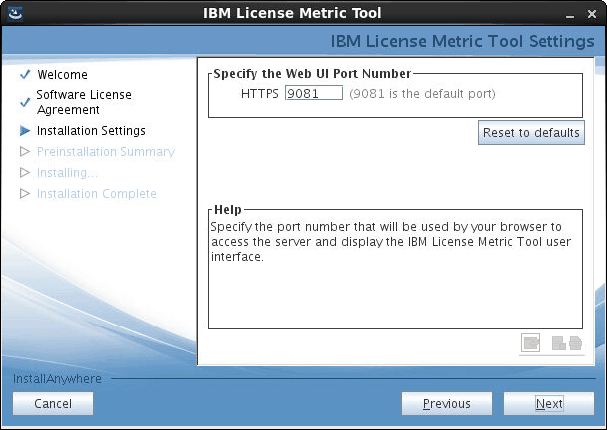
Specify the port number that will be used by the browser to display the License Metric Tool web user interface.
-
When the installation is complete, click Done to open the License Metric Tool web user interface in the browser and complete the
initial configuration.
Note: If you do not have a browser installed, you can access the web user interface from a different computer at https://host_name:port, where host_name is the host name of the computer where the License Metric Tool server is installed, and port is the port that you specified during the installation.
- Optional:
To automatically enable scans that collect data from the computers in your
infrastructure, select Enable default scan schedule for this data
source.The Enable default scan
schedule for this data source check box is selected by default. Clear this check box if
you want to manually configure the scans.
If you enable the default scan schedule, actions that are needed to collect data from the computers in your infrastructure are automatically started on the BigFix server. This option is advised for environments with up to a few thousand computers. For larger environments, finish the installation, divide the computers into groups, and then manually set up scan schedule for each group to avoid performance issues. For more information about the default and manual scan schedule, see: Setting up scans to discover software and hardware inventory.
-
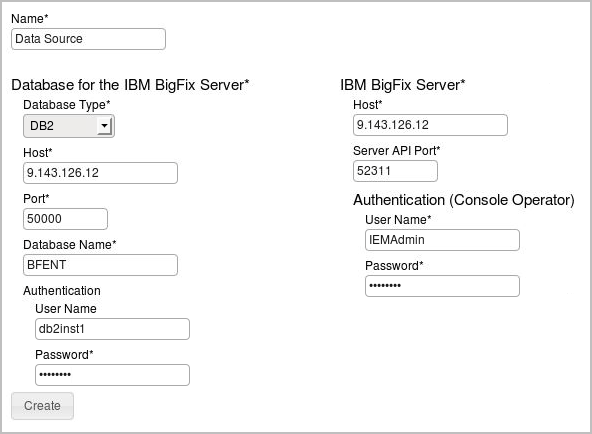
Configure the connection to an existing BigFix server and its database and then click Create. Optionally, you can connect
to the Web Reports database to enable Web Reports users to access the application.
- To start the initial import, click Import Now.
What to do next
If you did not enable the default scan schedule, manually configure scans to collect data that is later on displayed on the reports.