Configure the XMPP proxy server to allow XMPP-based instant
messaging systems to flow to and from the IBM® Sametime® Gateway.
Before you begin
Expected state: the SIP and XMPP proxy server node is installed
and federated into the cell. A Sametime cluster has been
installed. The deployment manager is started.
Procedure
- On the deployment manager node, log into the Integrated
Solutions Console.
- Click and select the XMPPProxyServer from
the list.
- Click Ports.
- Click New to add a port.
- Select User-defined Port .
- Type XMPP_INTERNAL_PORT in the Specify
port name field.
The proxy will use this
port for internal traffic only between servers and the proxy.
- In the Host name field, type the
IP address of the computer on which XMPPProxyServer is installed.
- In the Port field, type 5272.
- Click OK and Save.
- In the Integrated Solutions Console, click .
- In the "Additional properties" section, click Custom
Properties, and click New.
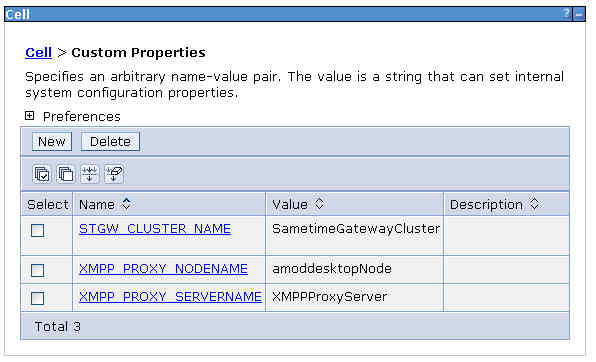
- Create Name and Value pairs
for the Sametime Gateway
cluster, XMPP proxy node name, and XMPP proxy server name. Type the
names and values as they are spelled out in the table. For XMPP
proxy node name, substitute the name of the node on which
the XMPP proxy resides.
| Name | Value |
|---|
STGW_CLUSTER_NAME |
SametimeGatewayCluster |
XMPP_PROXY_NODENAME |
XMPP proxy node name |
XMPP_PROXY_SERVERNAME |
XMPPProxyServer |
- Click Apply and Save after
you type each pair. When you are done, you will have a table that
looks something like this:
What to do next
Next, you must configure a class loader and a shared library
for the XMPP proxy server.
