Installing MongoDB on Windows
MongoDB can be downloaded from the MongoDB website. This topic guides you through the steps for installing MongoDB on Windows.
About this task
For additional information on installing MongoDB on Windows, refer to Install MongoDB Community Edition on Windows.
Note: In the following steps, MongoDB version 4.4 is used as an
example. If you are using a different version of MongoDB, refer to the MongoDB
documentation for instructions on how to issue commands for the version that you are
using.
Procedure
- Download the latest MongoDB version from the Download MongoDB Community Server page.
-
In the Available Download section, select the version to
download.
- From the Platform field, select Windows.
- From the Package field, select msi. You have the option to download a msi or zip file.
- Select Download.
- Navigate to the folder where the MongoDB installation file was downloaded and run the msi file. This starts the installation process.
- Follow the MongoDB Setup Wizard to complete the install. Select Next to view the license agreement. To continue, accept the license and select Next.
- On the Choose Setup Type window, select Complete.
-
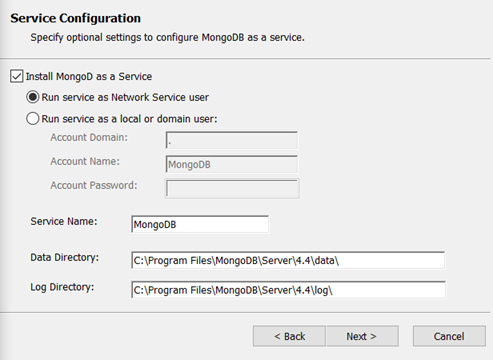
On the Service Configuration window, specify the following
options and then select Next.
- Check Install MongoDB as a Service. It is required to run MongoDB as a Windows service.
- Enable Run service as Network Service user.
- You can use the default values for Service, Data Directory, and Log Directory. If you modify these values, save or record the values. They are needed for the configuration steps.
-
Installing MongoDB Compass is optional and not required for deploying Sametime.
Clear the checkbox for Install MongoDB Compass and select
Next.
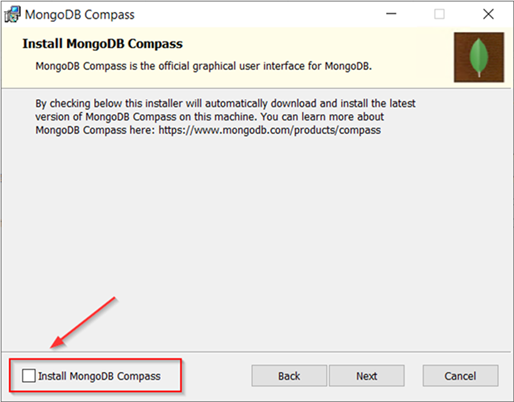
If MongoDB Compass is installed, it starts after the installation process completes. You can shut down the MongoDB Compass application, as it is not used for Sametime deployments. -
Select Install to complete the MongoDB installation.
During the installation process, you might be prompted about files that cannot
be updated while the system is running. You can choose to continue and manually
restart the computer later.
After the install process completes, you must restart your computer.

- When the installation process is complete, select Finish.
-
After the system restart, MongoDB automatically runs as a Windows
service.

-
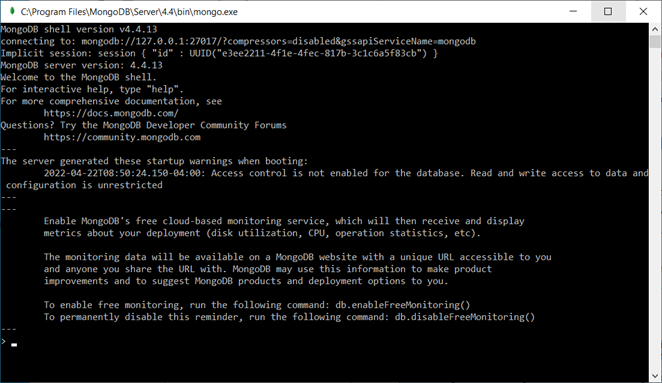
Verify that MongoDB installed successfully by opening the MongoDB console. To
open the console, navigate to the MongoDB installation directory and locate the
bin directory. For example: C:\Program
Files\MongoDB\Server\4.4\bin. Start the mongo
application.
To close the console, type Exit on the command line.