Lesson 8: Creating a compound test
You can learn about creating a compound test with multiple tests. Every individual test within the compound test performs a part of the main scenario. When you run the compound test, the individual tests are run in sequence.
Before you begin
You must have completed the following tasks:
- Generated a Web UI test. See Lesson 1: Recording actions on an AUT.
- Read and been familiar with splitting actions in a test. See Lesson 5: Splitting actions in a test.
- Read and been familiar with the concept of compound tests. See Compound tests.
About this task
For the test scenario in this tutorial, you can create a compound test that consists of the wiki-search test followed by the wiki-search-animals test.
Procedure
-
Click in the UI Test perspective.
The Compound Test Name and Location dialog is displayed.
-
Perform the following steps in the Compound Test Name and Location
dialog:
-
Click Add in the Compound Test Contents
panel, and then click Test.
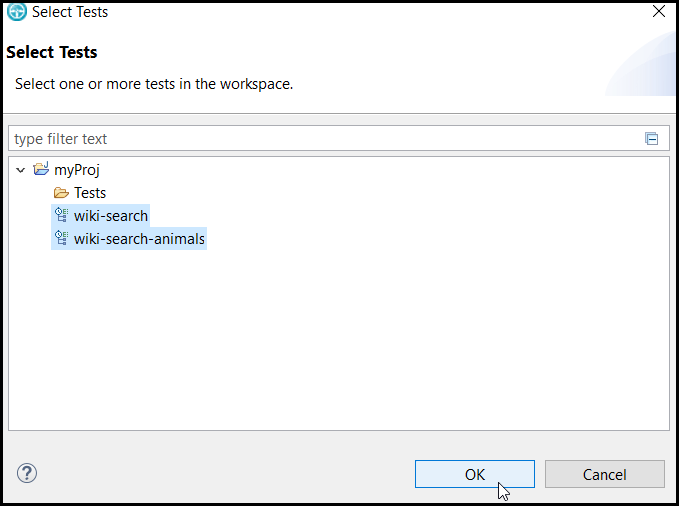
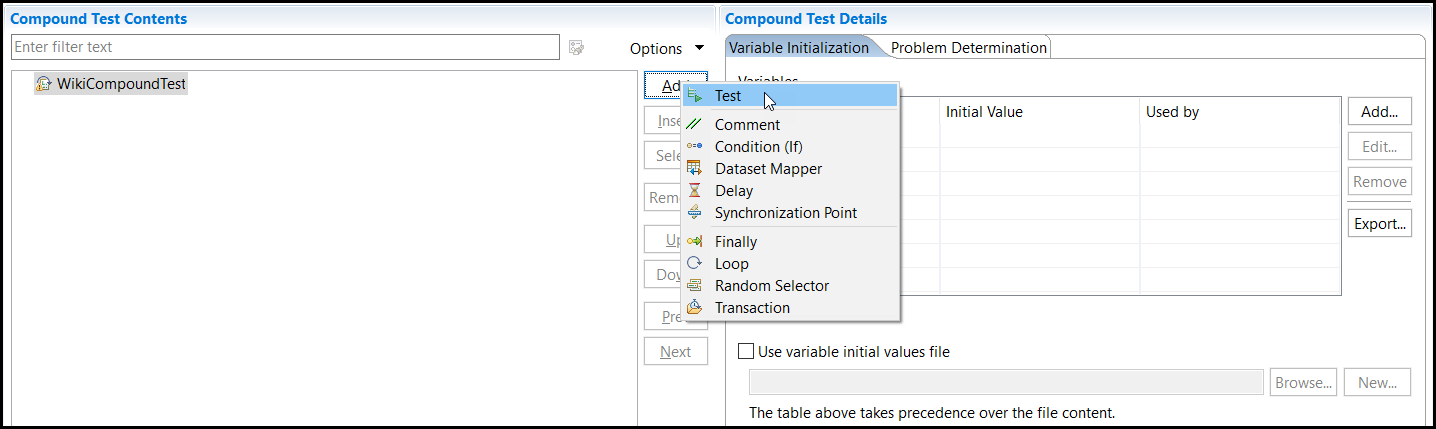 The Select Tests dialog is displayed.
 -
Select the wiki-search and wiki-search-animals
tests from the myProj folder, and then click
OK.
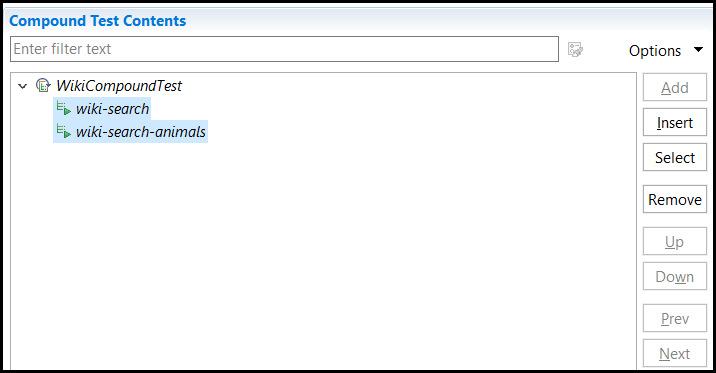
 The wiki-search and wiki-search-animals tests are displayed within the WikiCompoundTest test in the Compound Test Contents panel.
 -
Click to save the changes.