HTTP test editor overview
With the test editor, you can inspect or customize a test that you recorded.
The test editor lists the HTTP pages for a test, by title. The following example shows the visitIBM test, which was generated from a recording of these tester actions: type http://www.ibm.com, under Shop for select Software, stop recording.
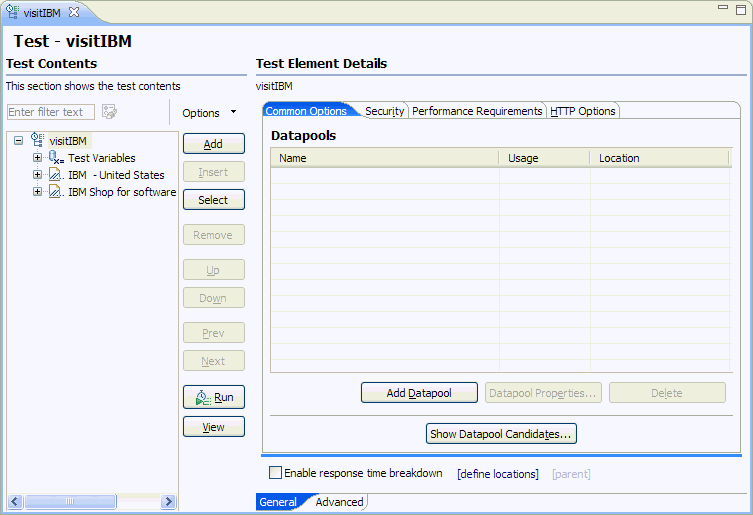
The test editor window contains two main areas. The area on the left, Test Contents, displays the hierarchy of the HTTP pages for the test. The area on the right, Test Element Details, displays common options and specific information about the HTTP protocol. The HTTP options apply to every page an HTTP test.
The Test Variables are listed at the top of the Test Contents area. These variables, which are the host names and ports in the test, are automatically created when the test is generated. Click a variable name to see where it is used in the test. By changing these variables, you can share or reuse the test for different configurations and web hosts. User-defined variables are also listed at the top of the Test Contents area. For more information on this subject, see related topics.
When you expand a test page, you see a list of the requests for the page, in separate folders, with names that are full web addresses minus the initial http://. The following example shows the expanded first page of the visitIBM test with the page selected in the Test Contents area. In this example, the settings that are displayed in the Test Element Details apply to the selected page.
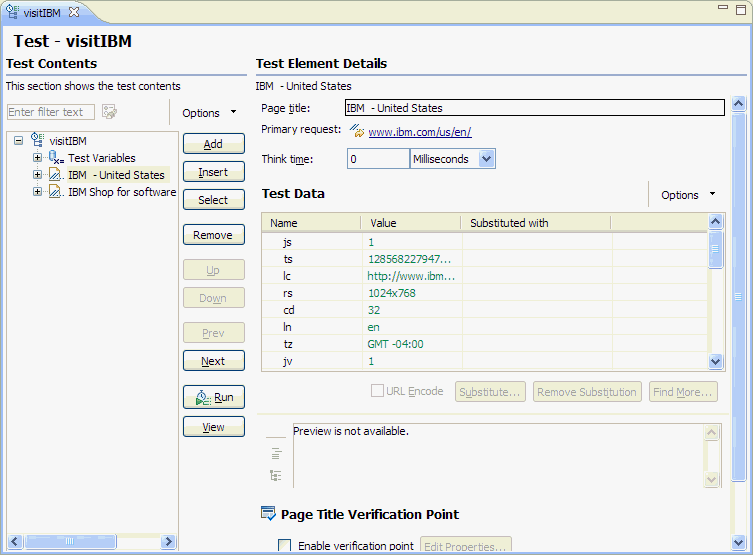
The primary request, which is listed in bold, is the basis of the page title. The primary request can be the web address that the tester typed into the browser, a hyperlink that was clicked, or a web address to which the tester was redirected from another page request. In the example, the primary request shows that the tester was redirected to www.ibm.com/us/ from the initial page request (www.ibm.com). If the primary request does not return a page title, the test generator creates a unique name for it from the first node of the web address.
- A dataset candidate: This is a value, usually one specified by the tester during recording, that the test generator determined is likely to be replaced by values in a dataset. An example of a dataset candidate is a string that you search for in a recorded test. The string is highlighted as a dataset candidate on the assumption that, before playback, you might want to associate the string with a dataset column that contains appropriate substitute values. For more information on this subject, see related topics.
- Correlated data: These are values in a test, usually one of them in a response and the other in a subsequent request, that the test generator determined needed to be associated in order to ensure correct test playback. An example is a photograph that is returned to the browser by a test that searches an employee database. The test generator automatically correlates employee names with photographs. Suppose that, before running the test with many virtual users, you replace the employee name searched for in the recorded test with names in a dataset. Because the test correlates the data, each virtual user searches for a different employee, and the server returns an appropriate photograph. For more information on this subject, see related topics.
When you expand a request, you see the Response data for the request. As shown in the following example, requests can also contain Connection data. Because the response is selected in the Test Contents area, the Test Element Details area displays the response data for this request.

The Response data inside each request shows the data that the web server returned to the browser based on that request. Collectively, the requests listed inside a page are responsible for everything that was returned by the web server for that page.
- Response code
- Response reason
- Response size
- Binary indicator
- Parent request
- Content verification point
- Response code verification point
- Response size verification point
Click Add to add child elements to the selected test element. Alternatively, you can right-click a test element and select an action from a menu. The choices that you see depend on what you have selected. For example, after you select a test, you can add a new page, a block of custom code, or an IF condition. After you select a page, you can add a request or an IF condition.
The Insert push button works similarly. Use it to insert a sibling element before the selected element.
The Remove, Up, Down push buttons, and some Add choices (HTTP Page, HTTP Request, Basic Authentication) are primarily for use with tests that you write by hand; these actions or choices are likely to break a generated test. The types of structures that are commonly used in generated tests are explained in Verifying expected behavior and Adding test elements.
If you test Siebel applications, see Testing Siebel applications for prerequisites and details about the differences between standard HTTP tests and Siebel tests.
A portion of the test editor can occasionally be obscured.
To see the obscured area, move the cursor over one of the blue lines
until it changes to  , and drag up or down while holding the left mouse
button.
, and drag up or down while holding the left mouse
button.
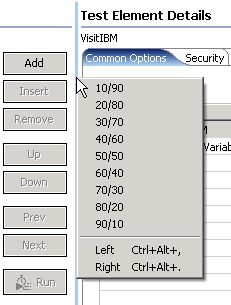
- Click Ctrl+Alt+> or Ctrl+Alt+< to enlarge or reduce the window.
- Hover at the left side of the Test Element Details area.
When you see a vertical blue line, right click the line and select
a size ratio from the menu.