Setting up a new synchronization source
You can set up a Swagger document in an IBM z/OS Connect Profile as a synchronization source in an HCL OneTest™ API project.
Before you begin
Procedure
- Open the Logical View of the Architecture School perspective of HCL OneTest™ API.
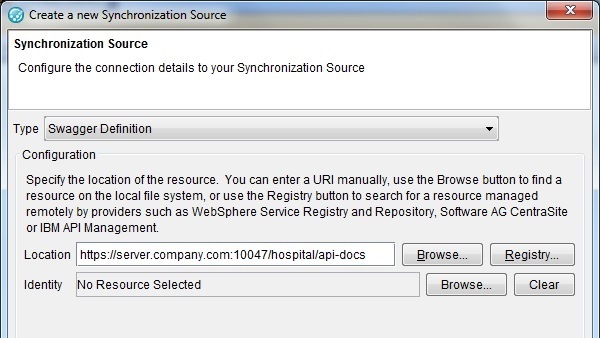
- Open the toolbar of Logical View, click Web > Swagger Definition. The Synchronization Source window in the Create a new Synchronization Source wizard is displayed. In the Type list, look for Swagger Definition.
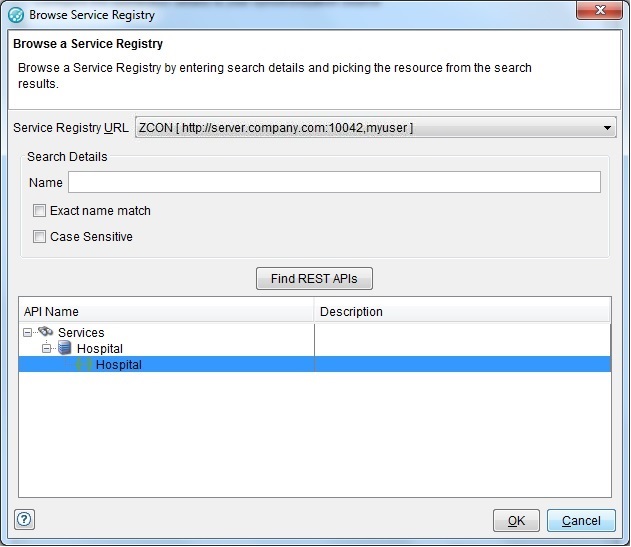
- Click Registry next to the Location field. The Browse a Service Registry window is displayed.
- Verify that the Service Registry URL list displays the IBM z/OS Connect Profile to be used.
- Optionally, you can do these steps:
- In the Name field, enter the full or partial name of the Swagger document that you want to import. You can use an asterisk (*) as a wildcard.
- To search Swagger documents in the selected IBM z/OS Connect Profile only by exact names, select the Exact name match check box.
- For a search of Swagger documents in the selected IBM z/OS Connect Profile to be case-sensitive, select the Case Sensitive check box.
- To search for the Swagger document to import, click Find REST APIs. Depending on the search parameters that you selected, search results are displayed in the Browse a Service Registry window.
- Double-click the relevant IBM z/OS Connect Profile. The Swagger documents associated with the selected IBM z/OS Connect Profile are displayed.
-
Select the Swagger document to import.
-
Click OK to close the Browse
a Service Registry window. The selected Swagger document
is displayed in the Configuration area on the Synchronization
Source window in the Create a new Synchronization Source
window.
-
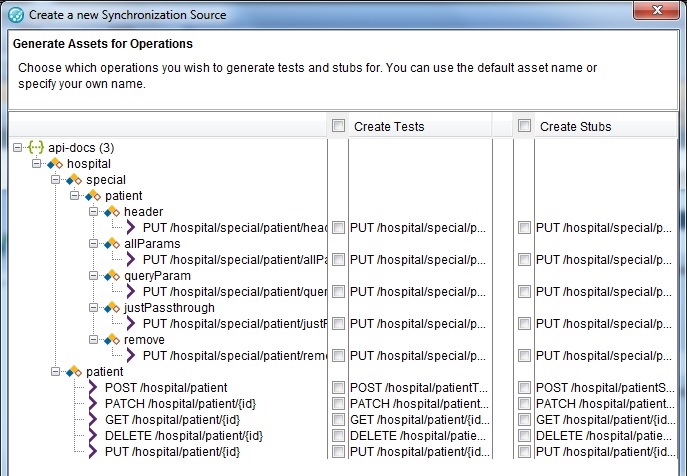
Click Next. The Generate
Assets for Operation window in the Create a new Synchronization
Source wizard is displayed. To generate tests and virtual services
for the operation, click Create Tests and Create
Stubs. You can modify the name of the asset or continue
to use the default name.
- Click Next. The Create Test for Operation window of the Create a new Synchronization Source wizard is displayed.
-
For each test you requested, provide the following information:
Note: The number of tests to be created is shown in the Test creation progress bar at the bottom of the window.When you have specified sources for all selected tests, a Summary page is displayed with the number of synchronization items, tests and stubs that were created. Starting from HCL OneTest™ API Version 10.0.0, the Summary page displays all information, warning, and error messages that occurred during synchronization.
- Click Finish. The Test Factory perspective is displayed.
Results
What to do next
- Configure the physical transport of the web server. For details, see Creating physical web server resources.
- Open the Schema Library and verify that the schema for the selected API has been imported.
- Make changes to the generated tests and stubs as required and then start testing against the RESTful APIs or applications.