Adding an application in Microsoft Azure AD
In order for your calendar users to perform free time lookups for people who use Microsoft 365, you must register an application in the Azure portal. The application's identity and credentials are used by Domino's Exchange Busytime Connector to perform searches using the Graph API.
Before you begin: Make sure you've completed the steps in Setting up the Domino credential and certificate stores.
- Registering the application
- Creating a client secret to use for authentication
- Granting the application permission to see users' free time data
Registering an application
Registering your application establishes a trust relationship between your app and the Microsoft identity platform. The trust is unidirectional: your app trusts the Microsoft identity platform, but not the other way around.
- Sign in to the Azure portal as a global domain administrator.
- If you have access to multiple tenants, use the Directories + subscriptions filter in the main menu to switch to the tenant where you want to register the application.
- Search for and select Azure Active Directory.
- Under Manage, select .
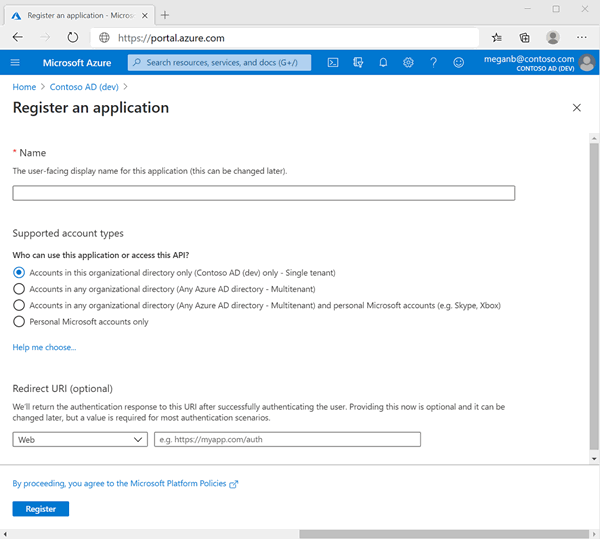
- Fill out the registration page.

- Enter a display name for your application. You can change the display name at any time,and multiple application registrations can share the same name. The application registration's automatically generated Application (client) ID, not its display name, uniquely identifies your application within the identity platform.
- In Supported Account Types select Accounts in this organizational directory only.
- Leave the Redirect URI (optional) section blank.
- Select Register to complete the initial application registration.
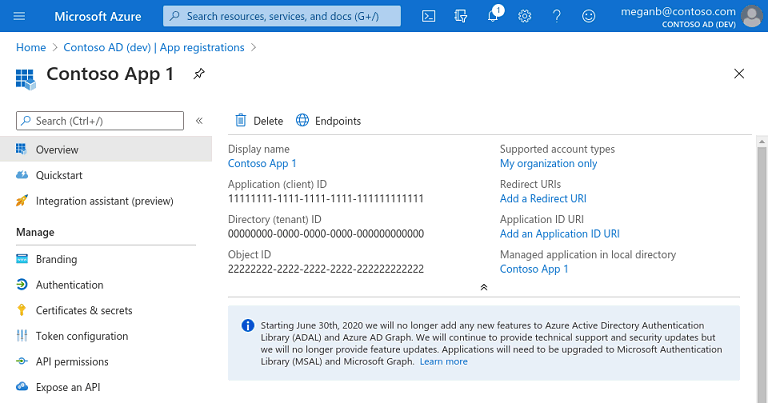
- On the application page, copy both the Application (client)
ID value, which uniquely identifies the new application, and the
Directory (tenant) ID value for use later when
configuring the connector on the Domino server.

Adding credentials
Credentials are used an application that accesses the Graph API to authenticate as itself requiring no interaction from a user at runtime. The application needs a client secret, not a certificate, so that the connector can authenticate with Microsoft 365.
- Select .
- Add a description for your client secret.
- Select an expiration for the secret or specify a custom lifetime.
- A client secret lifetime is limited to 2 years (24 months) or less. You can't specify a custom lifetime longer than 24 months.
- Microsoft recommends that you set an expiration value of less than 12 months.
- Select Add.
-
Important: Record the client secret value for use later when configuring the connector on the Domino server. This secret value will not be displayed again. If you do not record it, you will need to generate a new secret.
Granting permissions
You must now grant the application the Calendars.Read permission with admin consent in order to read the free time data for the Microsoft 365 users.
- On the application's Overview page, in the Manage section, select .
- Select Microsoft Graph from the list of available APIs and then add the Calendars.Read permission.
- Select Add Permissions.
- Click the Grant admin consent button that precedes the list of permissions.
- In the Grant admin consent confirmation dialog box, click Yes.
What to do next
Do the steps in Configuring the Exchange Busytime Connector.