Join the custom process groups to the connector
In this lesson, you join the custom processor groups to your connector.
About this task
Use the following link for NiFi:
http://ElasticSearchHostname:30600/nifi/
Procedure
PriceStage. You can use either of the following
options.-
Option 1: Manually copy the custom process groups and attach them for both the
toolkit and runtime environments.
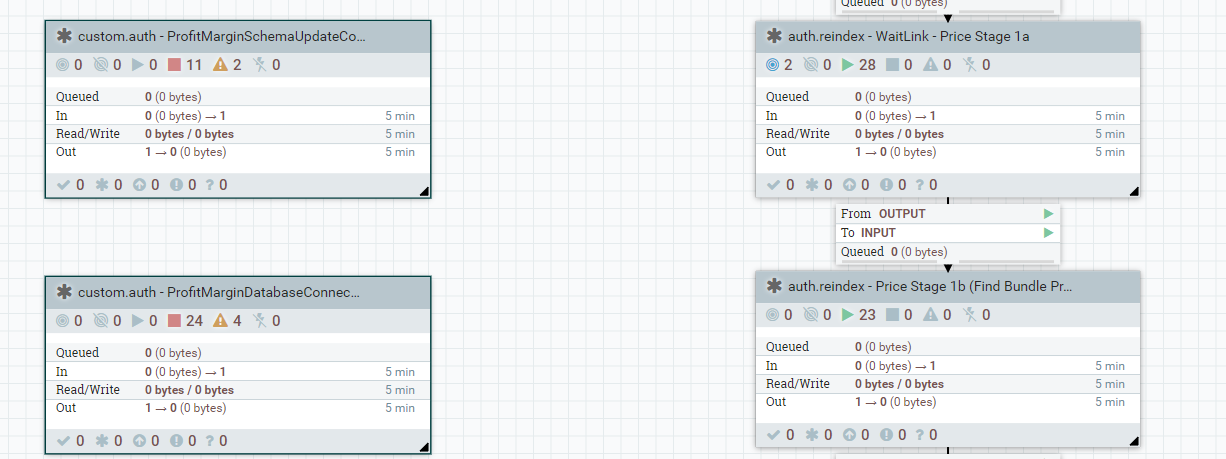
- Select both the “custom.auth – ProfitMarginSchemaUpdateConnector” and “custom.auth – ProfitMarginDatabaseConnectorPipe” process groups.
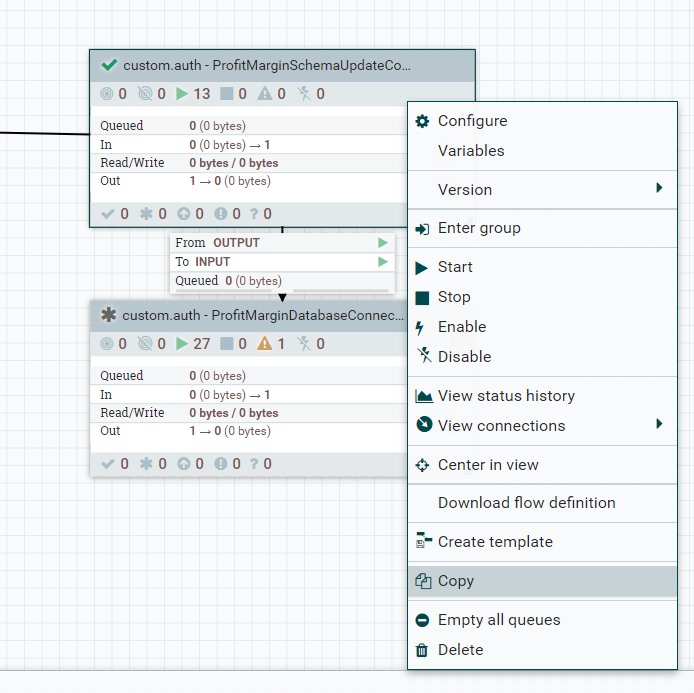
- Right-click any one of the selected process groups and click
Copy.
- To join the process groups to your auth.reindex or live.reindex, search
for the respective PriceStage.
 In this example, the
PriceStage Connectors are “auth.reindex - Price Stage 1b
(Find Bundle Prices)” followed by
“auth.reindex - WaitLink - Price Stage
1a”.
In this example, the
PriceStage Connectors are “auth.reindex - Price Stage 1b
(Find Bundle Prices)” followed by
“auth.reindex - WaitLink - Price Stage
1a”. In this example, the
PriceStage process groups are “auth.reindex - Price Stage
1a (Find Product Prices)” followed by
“auth.reindex - WaitLink - Price Stage
1a”.
In this example, the
PriceStage process groups are “auth.reindex - Price Stage
1a (Find Product Prices)” followed by
“auth.reindex - WaitLink - Price Stage
1a”.9.1.9+ 9.1.11+ 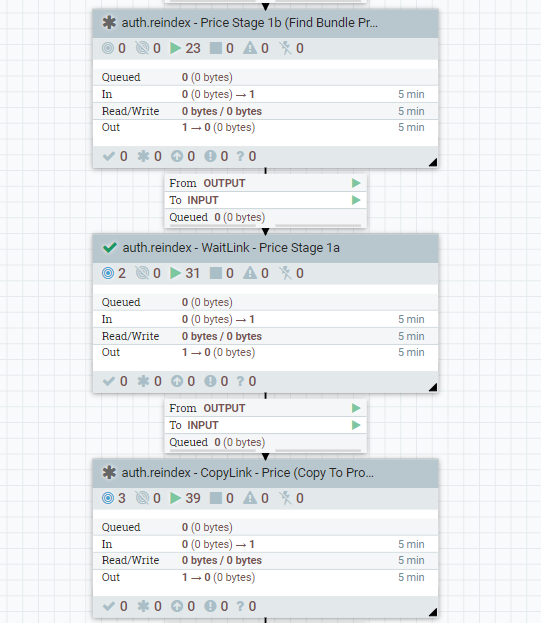

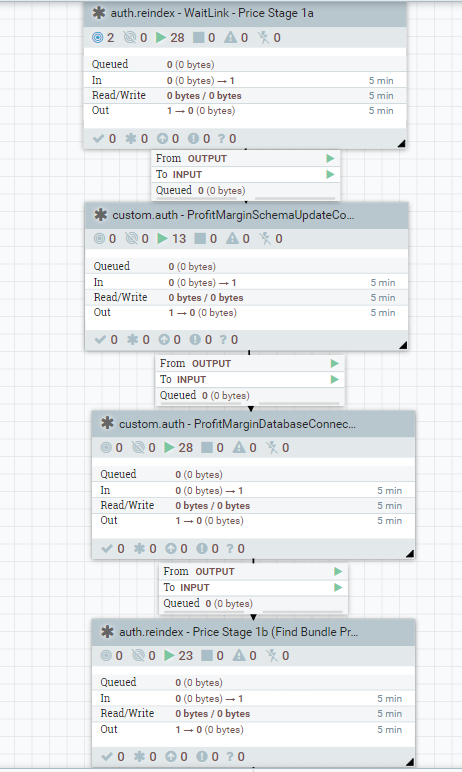
- Paste the process groups that you copied in Step 2 in front of “auth.reindex
- WaitLink - Price Stage 1a”.
9.1.9+ 9.1.11+ 
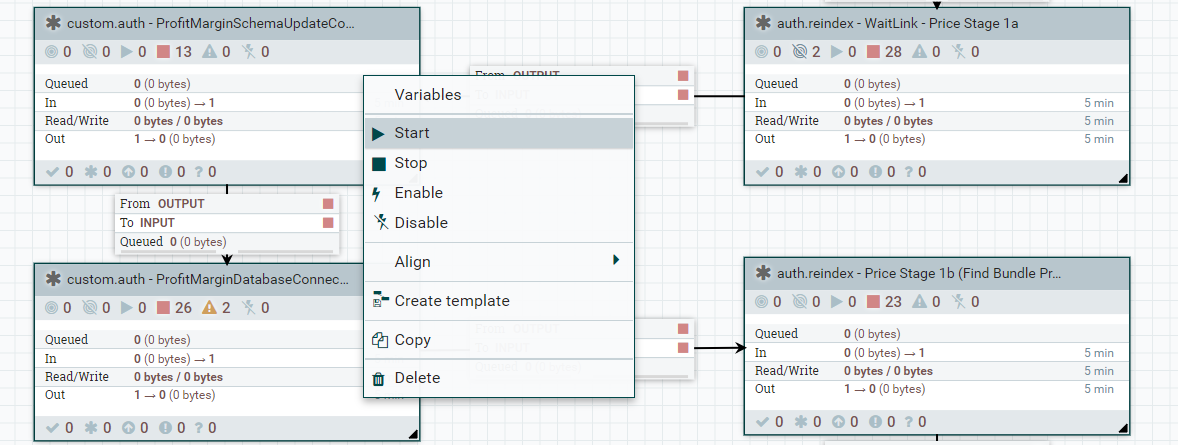
- To establish a connection from the custom process groups to the existing
pipeline, stop all the process groups with which the connection is to be
established. To stop the process groups, select all the required process
groups by pressing the Shift key and clicking all the process groups.
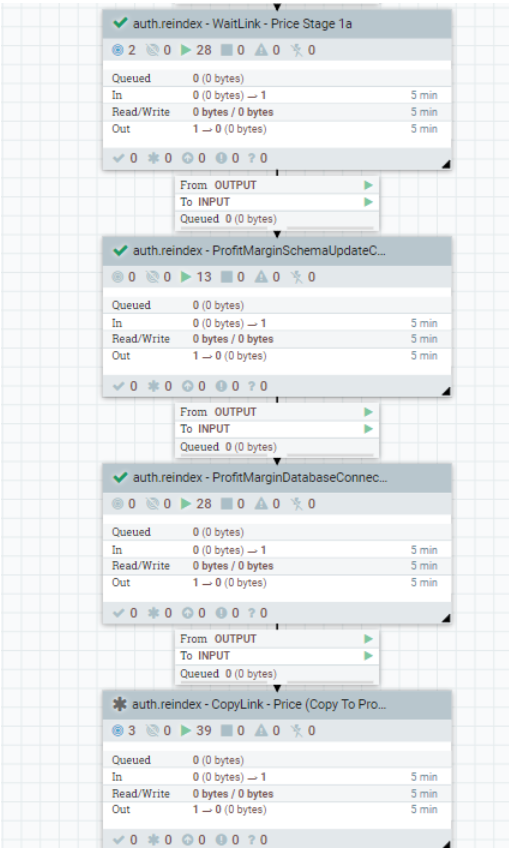
Right-click any one of them and click Stop.In this example, you must stop
“auth.reindex - WaitLink - Price Stage 1a”
and “auth.reindex - CopyLink - Price (Copy To
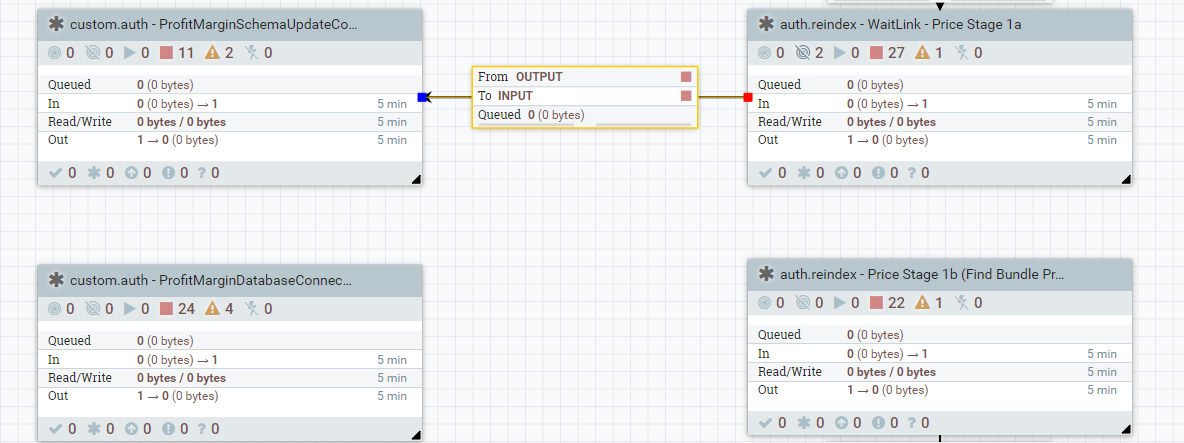
Product)”.In this example,
you must stop “auth.reindex - WaitLink - Price Stage
1a” and “auth.reindex - Price Stage 1b
(Find Bundle Prices)”.
9.1.9+ 9.1.11+ 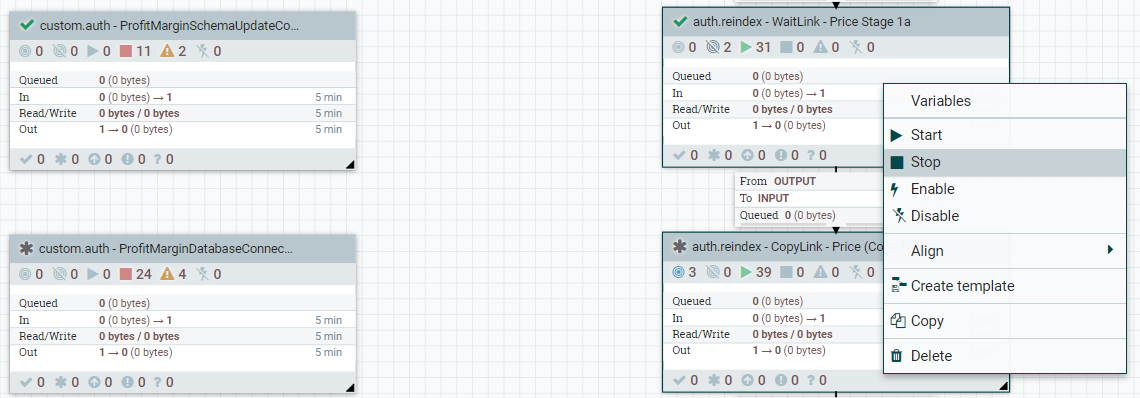
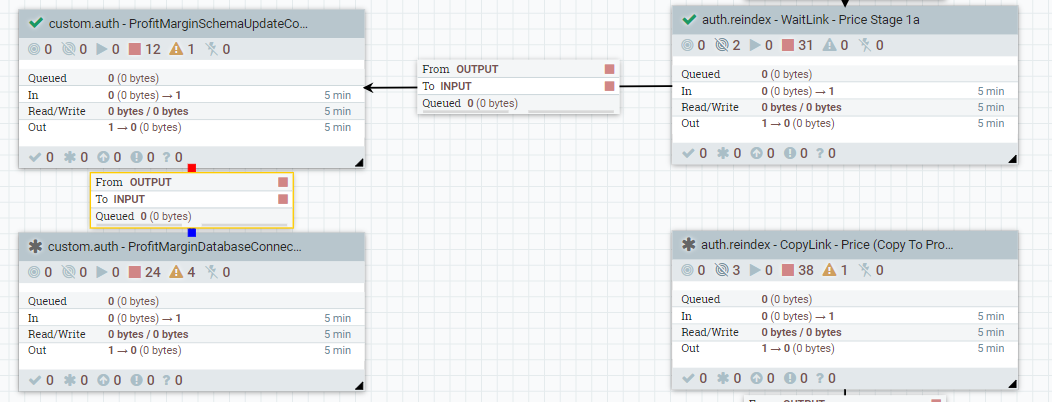
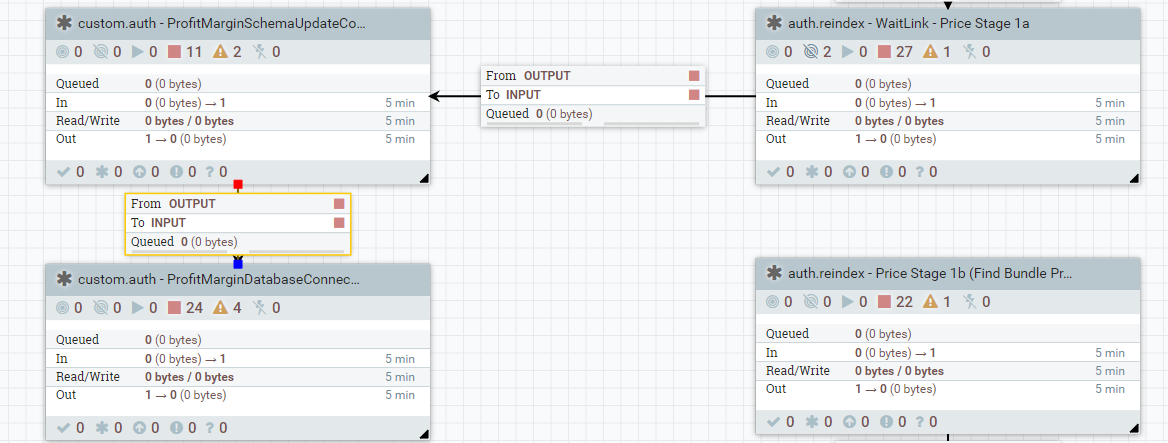
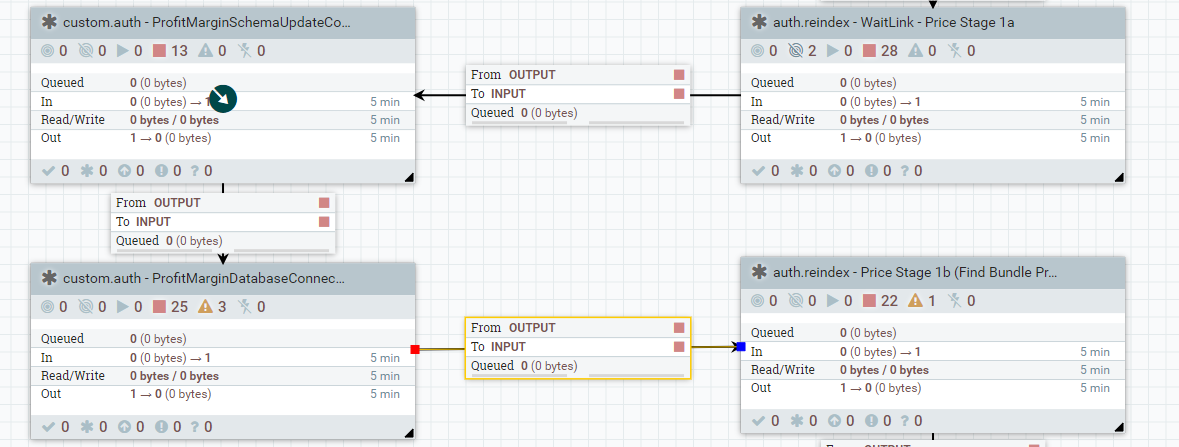
- Delete all existing connections between the process groups.
Table 1. 9.1.9+ 9.1.11+ 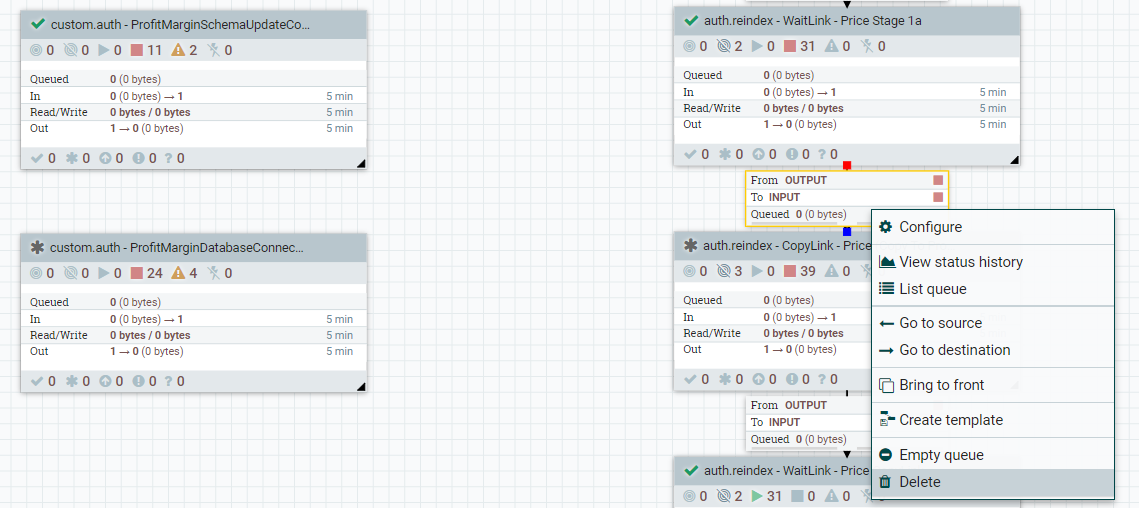
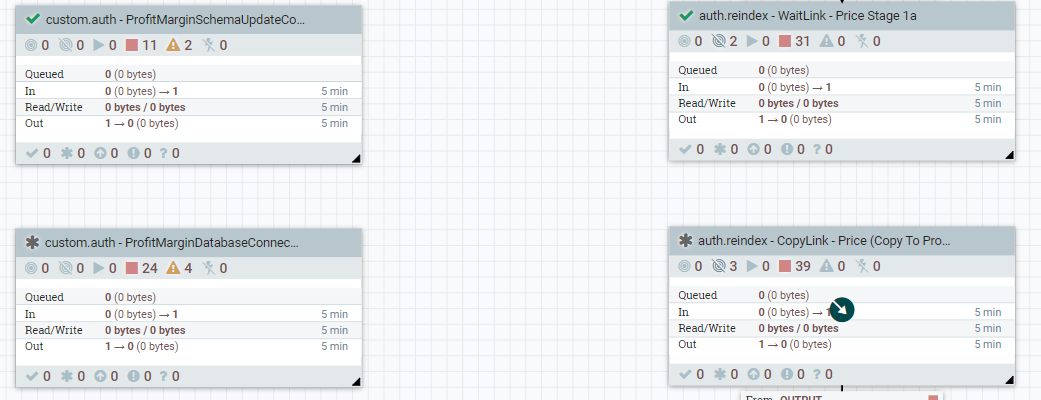
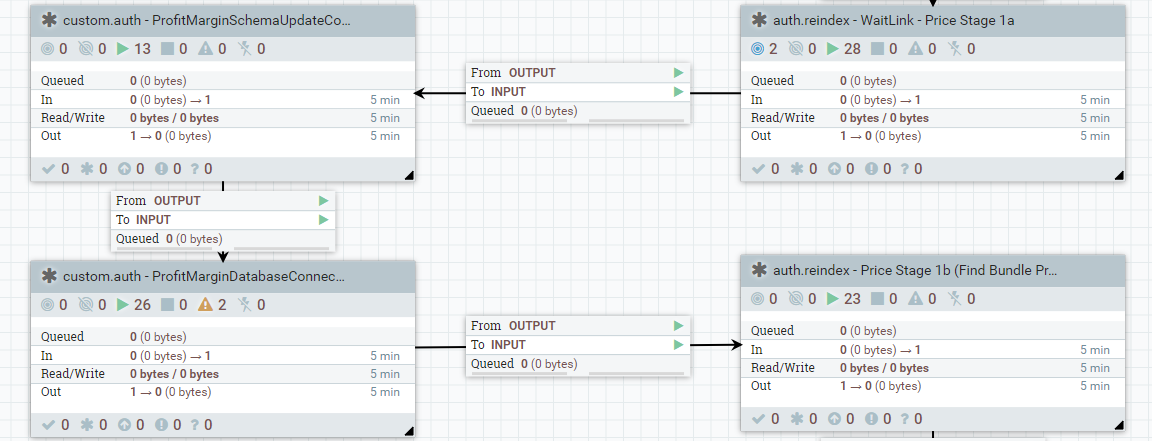
After deleting the connection, the process groups appear as follows:
Table 2. 9.1.9+ 9.1.11+ 

- Move the mouse pointer over “auth.reindex -
WaitLink - Price Stage 1a” and drag the arrow towards a
process group to establish a connection. The Create
Connection window opens.
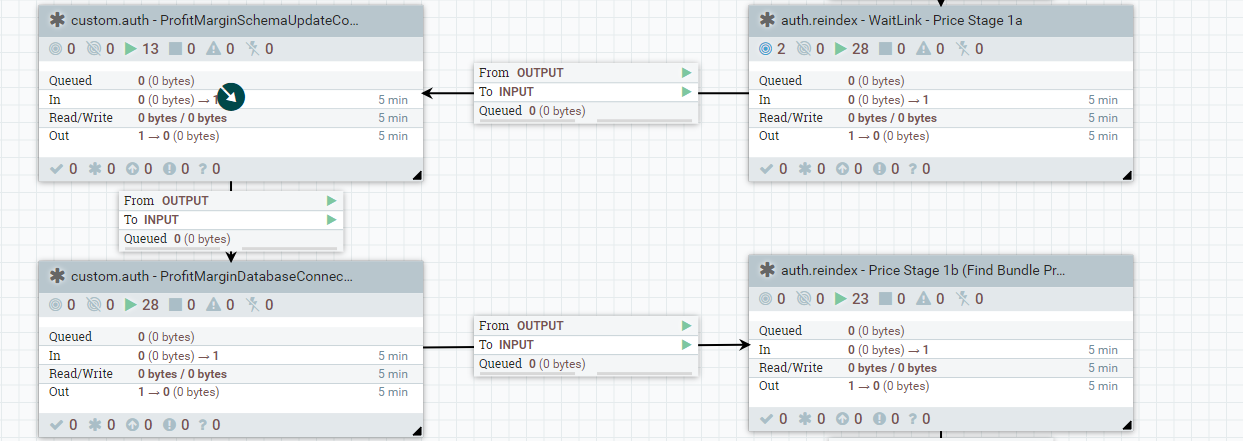
In this example, establish a connection from “auth.reindex - WaitLink - Price Stage 1a” to “custom.auth - ProfitMarginSchemaUpdateConnector”.
- In the Create Connection window, keep
all the default values and click Add.
A connection between
WaitLinkand the process group is now established.Table 3. 9.1.9+ 9.1.11+ 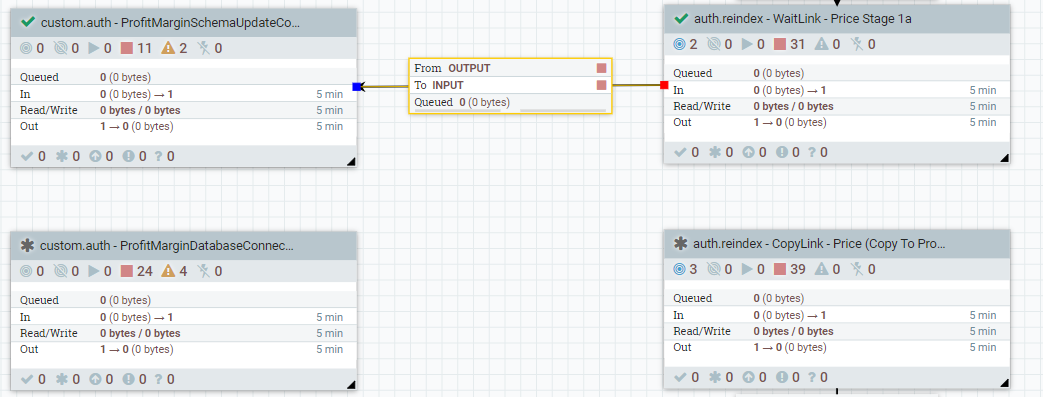
- Repeat steps 7 and 8 to establish connections between
all the process groups:
- Between custom.auth –
ProfitMarginSchemaUpdateConnector and
custom.auth -
ProfitMarginDatabaseConnectorPipe.
- Between custom.auth -
ProfitMarginDatabaseConnectorPipe and
auth.reindex - CopyLink - Price (Copy To
Product).

- Between custom.auth –
ProfitMarginSchemaUpdateConnector and
custom.auth -
ProfitMarginDatabaseConnectorPipe.
- Between custom.auth -
ProfitMarginDatabaseConnectorPipe and
auth.reindex - Price Stage 1b (Find Bundle
Prices).
- Between custom.auth –
ProfitMarginSchemaUpdateConnector and
custom.auth -
ProfitMarginDatabaseConnectorPipe.
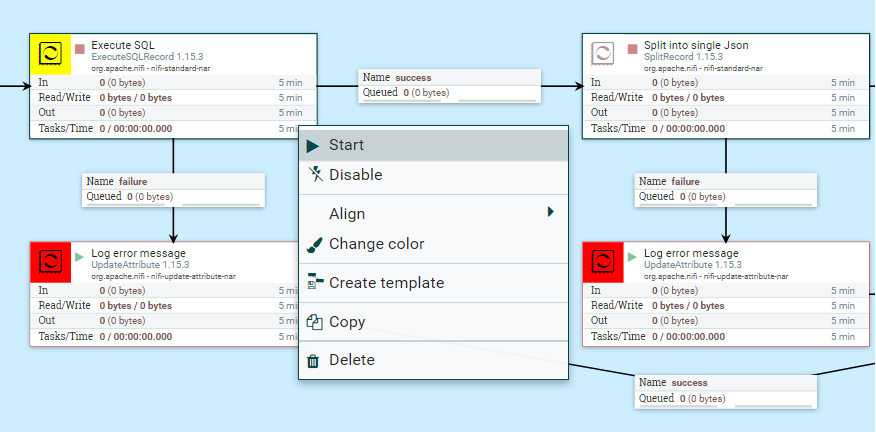
- After all the connections are completed, start the process groups. To
start the process groups, select all the required process groups by
pressing the Shift key and clicking all the process groups. Right-click
any one of them and click Start.
9.1.9+ 9.1.11+ 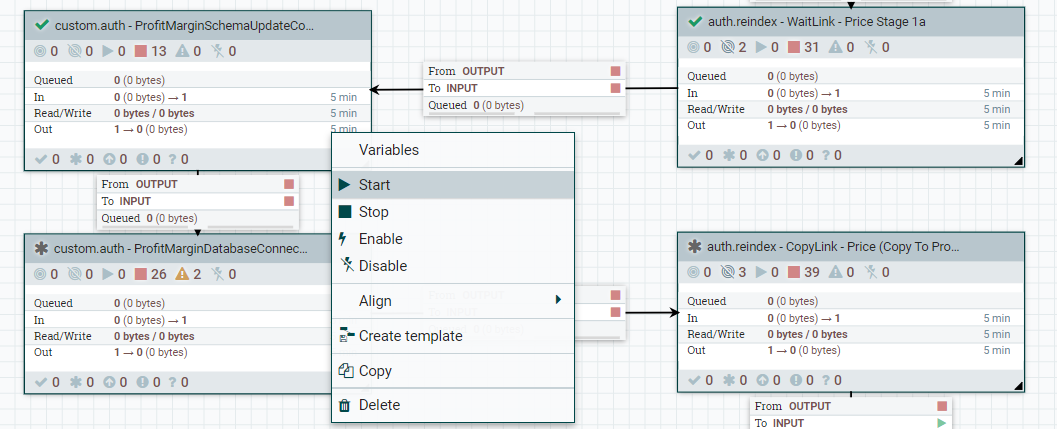
The process groups are now started.
9.1.9+ 9.1.11+ 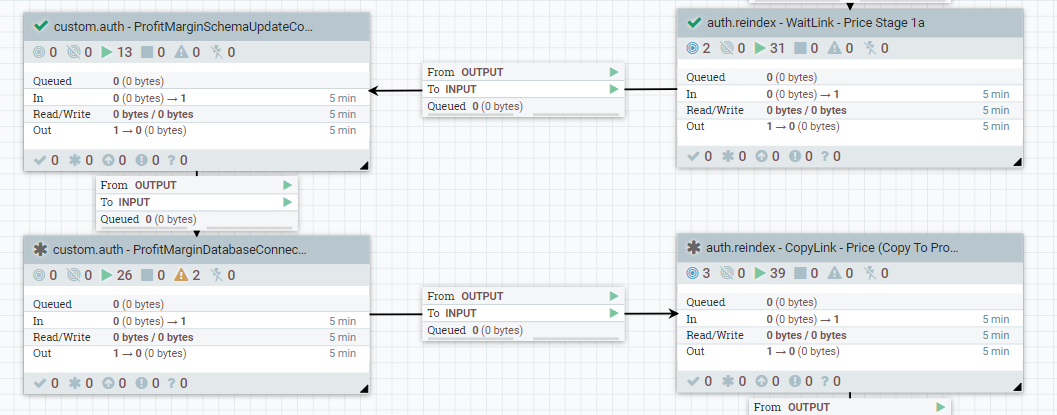
- After you manually copy and attach the process group, ensure that they
point to the correct database.
- Right-click “custom.auth - ProfitMarginDatabaseConnectorPipe" and click Configure.
- Go to the Controller Services
tab.

- If the controller service is enabled, disable
Database Connection Pool by clicking
the "cancelled lightning bolt" button.

- Click Configure (gear icon).
- Navigate to and start Execute SQL and
Split into single Json if required.
-
- Update the following properties by replacing
“AUTH”or“LIVE”as required:- Database Connection URL
- Database Driver Location(s)
- Database User
- Database Driver Location(s)
- Update the following properties by replacing
- Set the value of the property Password and click Apply.
- Enable Database Connection Pool (lightning bolt button). Ensure that there are no errors when the controller services are enabled. If a red icon is displayed in the first column of the controller service, you might need to review and fix the errors.
- On the Controller Services tab, enable Json Record Set Writer and Json Tree Reader.
9.1.9+ 9.1.11+ 
-
Option 2: Upgrade connector descriptor of the existing connector using Ingest
API, as described in Upgrade connector descriptor of the existing connector.
After this step, the connections between the custom connector are as follows for the Runtime environment.
9.1.9+ 9.1.11+