Deploying technology levels and service packs to a new or existing alternate disk clone
Use the AIX Advanced Deployment Wizard to create a new clone of the current running system to an alternate disk and deploy the updates to the newly created clone. Deploying updates to a copy of the running system allows updates to run without extended periods of downtime. It also allows for a backup of the system's current state that can be quickly restored.
Before you begin
- Prior to a Technology Level upgrade or a Service Pack update, install the expect package (5.42 or higher) or the expect.base fileset for AIX 6.1. You can obtain the package from the AIX toolbox download site: https://help.hcltechsw.com/bigfix/9.5/patch/Patch/Patch_AIX/t_deploying_tl_and_sp.html.
- Before you access the AIX Advanced Deployment Wizard to create
a new clone of the current running system to an alternate disk, you
must run the Deploy AIX StartUp/Shutdown script for alt
disk reboot task (ID # 84). By running this task, the
scripts (
SZCopyAltDiskBESDATAandKZCopyAltDiskBESDATA), which are responsible for copying the BESClient data to the alternate disk, are created in the /etc/rc.d/rc2.d folder. These scripts are crucial for alternate disk patching. - Alternate disk cloning deployments require that an alternate disk is available to the system. When deploying to a new alternate disk clone, the alternate disk must not have any volume groups assigned to it.
Procedure
- From the BigFix console, click .
- Under the Alternate Disk Operations tab,
click Deploy Technology Level and Service Pack Fix Pack
to a New or Existing Alternate Disk Clone to expand the
deployment options pane.
Figure 1. Deploy technology level and service pack fix pack to a new or existing alternate disk clone 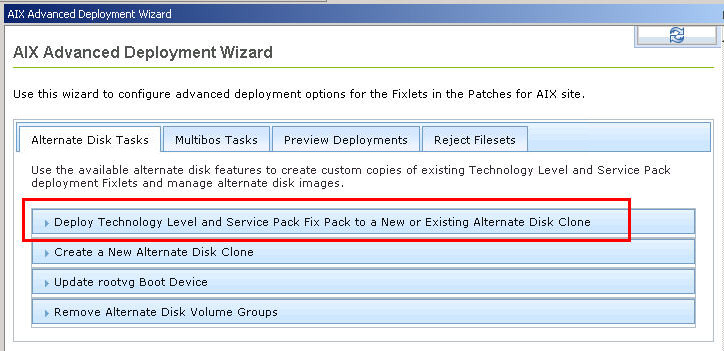
- Select the major version, technology level, and service
pack of the operating system level that you want to deploy to the
alternate disk location.
Figure 2. Available options 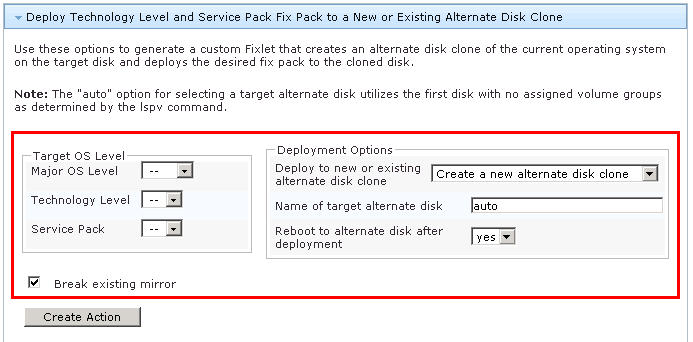
- Select the option to either create a new alternate disk clone or use an existing clone image.
- Enter the name of the existing rootvg clone image or the
name of the alternate disk where the new clone is created.
Note:
- If you set this option to auto, the generated content attempts to use the first disk that has no assigned volume group, which is determined by the lspv command. The auto option is only valid when creating a new alternate disk clone.
- When the auto option is used with the Break existing mirror check box selected, the auto function will use the mirrored disk as the alt disk.
- Verify that the reboot option is at the preferred setting.
Note: If you set this option to not reboot after patches are deployed, you can use the AIX: Restart Computer task (ID # 62) to manually reboot the endpoints. This task uses the
trap
'' 15; shutdown -Fr
command. You can use this task to reboot multiple endpoints at the same time. - If you want to create a new alternate disk clone, verify
that Break existing mirror is selected.
This setting breaks the mirrors for failback purposes.
- Optional: Select the check box to create a one-time action rather than a reusable Fixlet.
- Click Create Action.
- Deploy the action.