Importing and managing drivers for Windows deployments
The Driver Library dashboard is divided into tabs, from which you can easily manage all device drivers needed for your deployments.
From the Driver Library tab you can import new drivers, and manually associate them to specific computer models and operating systems in your environment. You can add labels and model bindings to existing drivers, delete unused drivers, and modify a driver's operating system, model, and architecture compatibility. You can also filter and search drivers with specific characteristics.
From the Bindings tab, you can simulate the driver selection that is automatically used for the deployment of a given image on a computer model, by generating a binding grid. You can preview driver assignments in advance, and you can add manual driver bindings for a given image.
From the Check Drivers tab, you can verify that all critical drivers needed to deploy one or more images on one or more computer models are available. If drivers are missing, you can import missing drivers selectively.
In the Windows Driver Library, a set of action and filter buttons are available at the top of the list. When you highlight a driver in the list, the details for that driver are displayed in the bottom part.
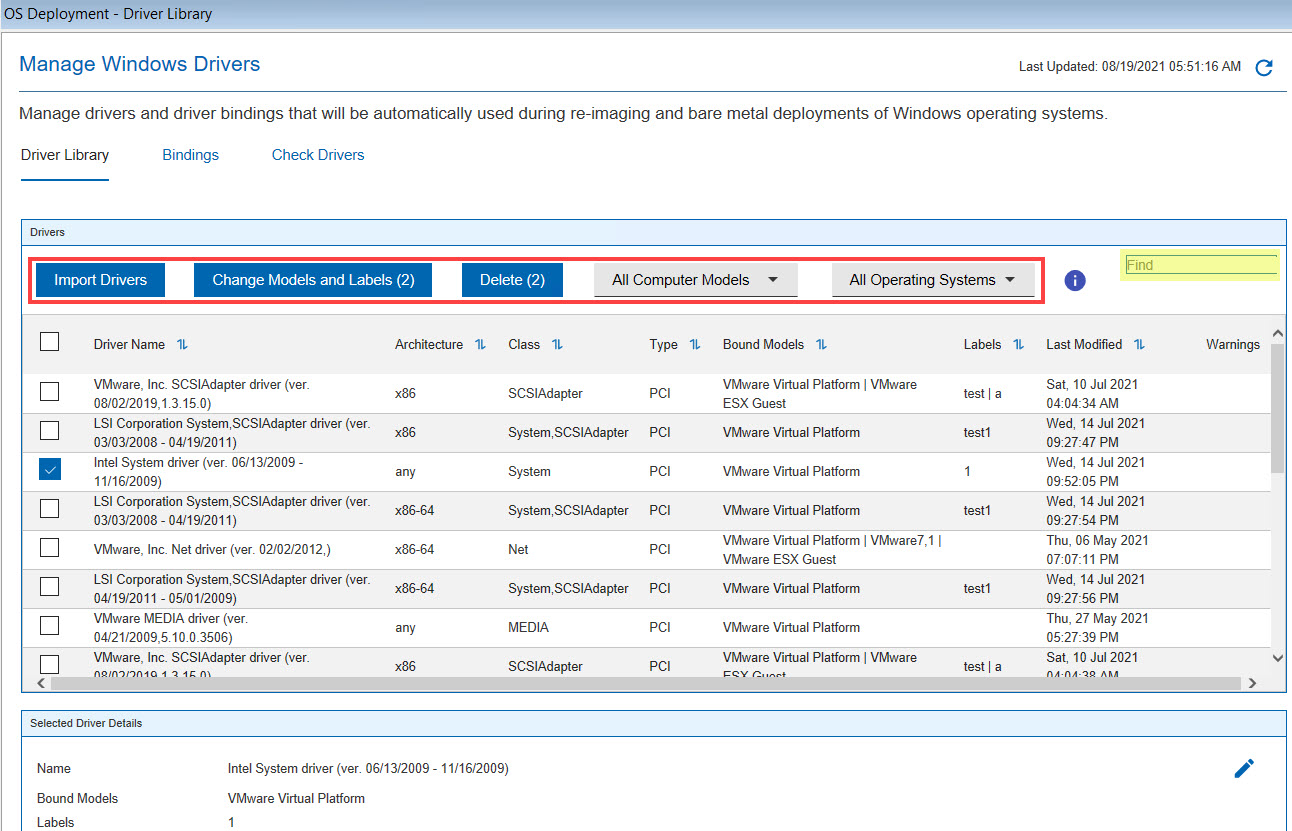
Drivers are organized by name, architecture, class, and type. The type column lists the device BUS type which is retrieved from the .inf file. Depending on the choices you make when importing drivers, or if you modify the current associations of drivers to computer models, additional information is displayed. See Importing drivers.
Vendor - Computer Model. For models reported by analysis
352 the format is *- Computer Model. 
For Bare Metal targets, the devices listed for the discovered computer models are a minimal set of those present on the computer. If a computer model is detected for both a Bare Metal target and an BigFix (BES) client, the model relevant to the BES client takes precedence and is listed.
You can also filter driver compatibility by Operating System. Click All Operating Systems and make your selection. The filtered list displays the drivers that are compatible with the selected operating system. Using both filters narrows the list further to display only the drivers that are compatible with the selected Computer model and Operating system combination.
- Driver Name (including the driver version)
- Class
- Model bind ("Bound Models" column in the Driver Library tab)
- Labels (Labels column in the Driver Library tab)
- Hardware IDs, which identify the specific device and are displayed in the driver details
- Any specific file that is part of the imported driver, including the path that was specified in the wizard ("Imported From" column in the Driver Library tab).
- Add one or more labels or delete all labels.
- Add other model bindings or delete all current model bindings.
To add or modify operating system associations for a driver, click ![]() in the corresponding
row. The details for the selected driver are displayed in the bottom
section of the dashboard. Modify the current associations, and save
your changes.
in the corresponding
row. The details for the selected driver are displayed in the bottom
section of the dashboard. Modify the current associations, and save
your changes.
pending changesmessage displays at the top of the dashboard. You can commit and finalize these changes by clicking Save Changes or Cancel Changes. An action is created to automatically update any bare metal server with the changes you have saved.

Importing drivers
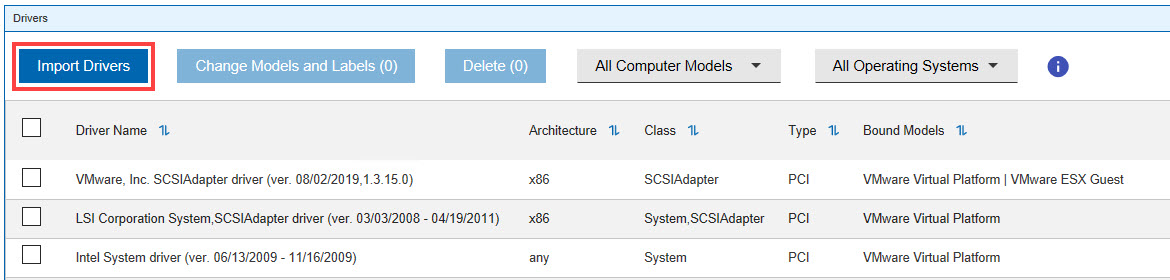
To import new drivers, complete the following steps:
- Click Import Drivers.
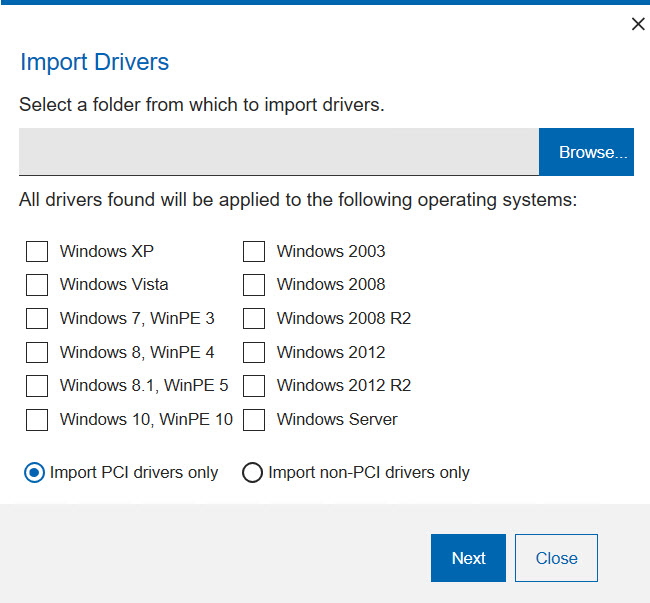
- In the Import Drivers dialog, browse to select a folder from which to import drivers. Then
select the compatible operating systems for which the imported drivers are to be used. By
default, only PCI drivers are imported from the specified folder. If you want to import only
non-PCI drivers, select the corresponding option. Click Next. The
application examines the specified path to identify and analyze the available drivers.
- The drivers found in the specified path are displayed:
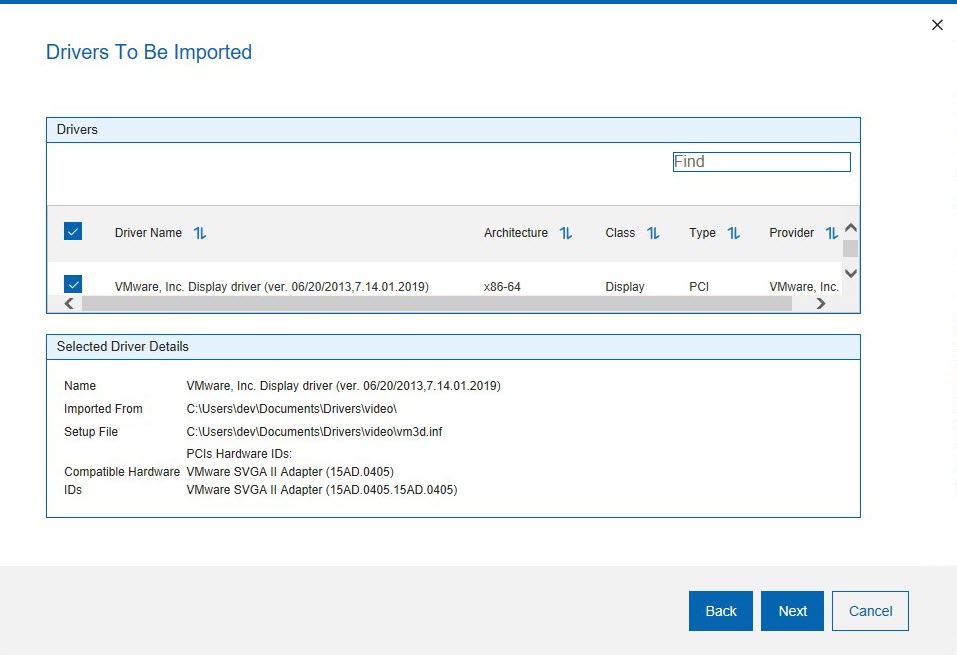
From this panel you can simply verify if the drivers you want are included in the specified directory. In this case, after viewing the drivers click Cancel to exit the wizard. To proceed with the import operation, select one or more drivers from the list and click Next.
- You can optionally select hardware models to bind to the imported drivers. If you do not bind
the drivers to any specific models, they are imported and managed using "best match" criteria,
after the other drivers that you have bound to specific models. You can optionally assign one
or more free text labels to make the drivers you are importing easily identifiable and to
simplify driver search. The labels and models that you specify are displayed in the
corresponding columns in the Driver Library. Both are optional. If you specify more than one
label, each label must be separated by the
|
(vertical bar) character. Labels are viewed in the corresponding column of the dashboard, with the vertical bar separating each label. Using labels can be useful if you are importing drivers for models that are not yet deployed in your network. You can tag these drivers and easily retrieve them to bind them to your new computer models when they are available in your network. When you are done, click Import.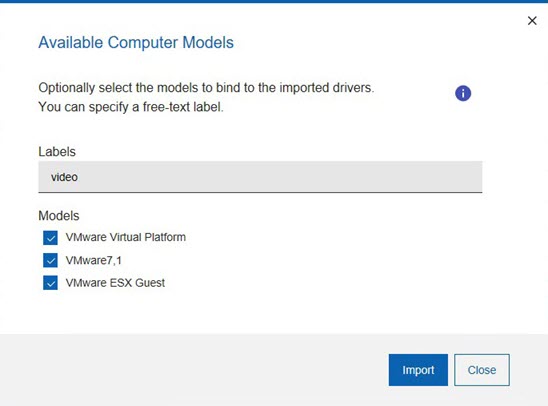
- The import results are displayed for each driver you selected, as well as the details.
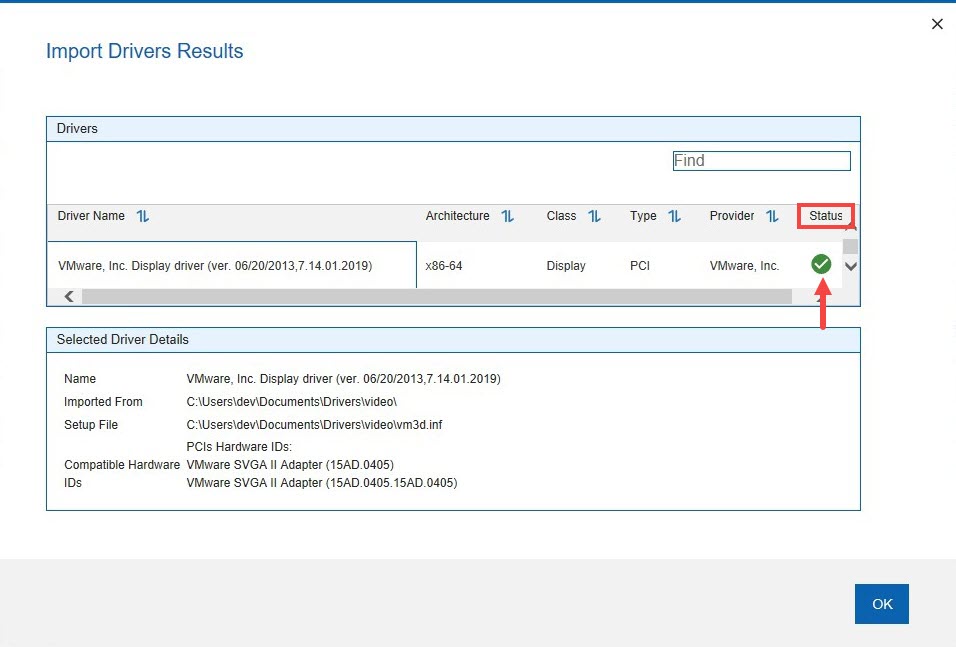
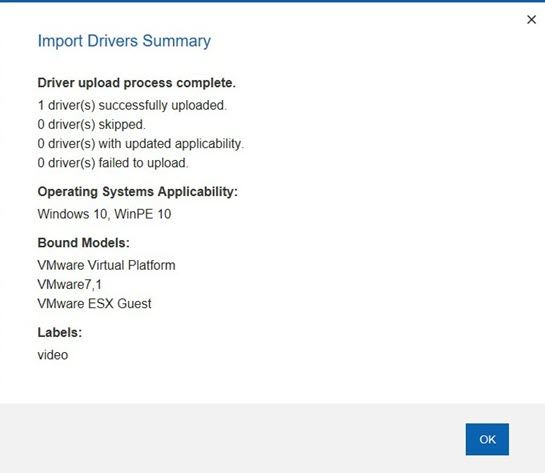
Click OK - The Import Drivers Summary is displayed. You can view how many drivers were uploaded. If a
driver was already found, its applicability is updated with the information you supplied.
 Note:
Note:- As a best practice, import smaller folders of drivers all at the same time. This allows for easier assigning of manual OS and model compatibility and also avoids importing unnecessary drivers. The memory limit for importing drivers requires that the size of the folder to be imported does not exceed the available system memory.
- Drivers that were imported with OS Deployment Version 3.6 or earlier do not have any model bindings defined. These drivers are bound at run time using a best match criteria. You can add these associations manually by using Change Models and Labels. If you have one or more driver packages that were imported with earlier versions, you can reimport the same driver packages (without deleting the existing ones) specifying the models that you want to bind at import time. The driver applicability will be updated and the new model binding mechanism is used during deployment.
When drivers are imported, the action Update Driver Manifests on Bare Metal Servers is automatically created and run to update the driver manifests on any bare metal server with any changes. The drivers are imported when the action completes.
Non-PCI driver management
You can manage non-PCI "Server-Site Installation" drivers. From the Driver Library, you can import non-PCI drivers. You can also tag non-PCI drivers by binding them to specific computer models. However, these model bindings are not used at run time during deployments. To use non-PCI drivers during a deployment, you must manually bind the drivers to the image that you want to deploy from the Bindings tab. If you do not manually bind them, they are not used during deployments.