Locations Overview
You can have IBM BigFix apply different CPM for Mac security configuration based on a client’s current geographical location. For example, say that an organization has offices in California, New York, and Germany, and that travel between offices is not uncommon. In California and New York, the corporate security policy requires that suspicious files be quarantined. In Germany such files must be deleted. In locations other than California or Germany, incidents must be logged but no action taken. You can accommodate all these regulations by creating Location Properties. In short, a client can disconnect from the corporate network in the California one day and reconnect in Germany the next, and the client's computer will automatically pick up the correct security policy for the new location.
This same idea also applies to firewall configurations, and other CPM for Mac security features. For example, in addition to location-specific configurations, you can create NIC-specific security policies. If you want to have one set of malware and firewall settings that govern wireless connections and another set for wired connections. Your LAN and W-LAN settings can be the same for all geographic locations, or they too can vary to reflect a local security policy.
For example, wireless connections in New York might have one set of rules and wired connections another. In Germany, there might be different rules for both wired and wireless connections - two locations, but four sets of rules that might apply.
Create Locations
Use the BigFix Location Property wizard to create one or more named properties that allow BigFix Agents to identify themselves according to their current network location or status. As soon as the property is created, it will be propagated to all clients and applicable computers will pick up the setting (that is, their configuration status might change according to the choices you have in place.) Before you begin, you should know or have a list of the subnets used in your organization and their respective geographic locations. Alternatively, you can create a custom relevance expression to dynamically map retrieved client properties using a key/ value set. For more information, see the ESP Administrator’s Guide.
- Log on to the BigFix Console as Master Console Operator.
- On the Console click All Content on the lower-left pane.
- From the upper-left navigation pane, go to Wizards > All Wizards > Location Property Wizard. The Location Property Wizard screen opens.
- Choose one of the following options and click Next.
- Create a retrieved property that maps subnet to location: For each location that you want to identify, type the subnet IP address. If a single location includes more than one subnet, type each subnet IP address (followed by the same location name) on a new line. Clients self-determine their relevance to a particular location by comparing their current IP address with the value or values specified here. Clients with multiple NICs might self-identify by using their W-LAN or LAN IP address, so you might need to include both subnets.
- Create a retrieved property that maps subnet to location using only the first two octets: Use this option to support a larger block of IP addresses. As described above, clients self-identify their relevance to this IP address block. Clients not included in the block either inherit the default configuration that is not location-specific, or not be covered by any location property.
- Create a retrieved property that maps IP address range to location: Only one range per line is supported (do not delimit multiple ranges).
- Create a retrieved property that uses a custom relevance expression and maps the result using a key/value set: For more information, see the ESP Administrator’s Guide.
- Give the property a name that clearly identifies its purpose and click Next.
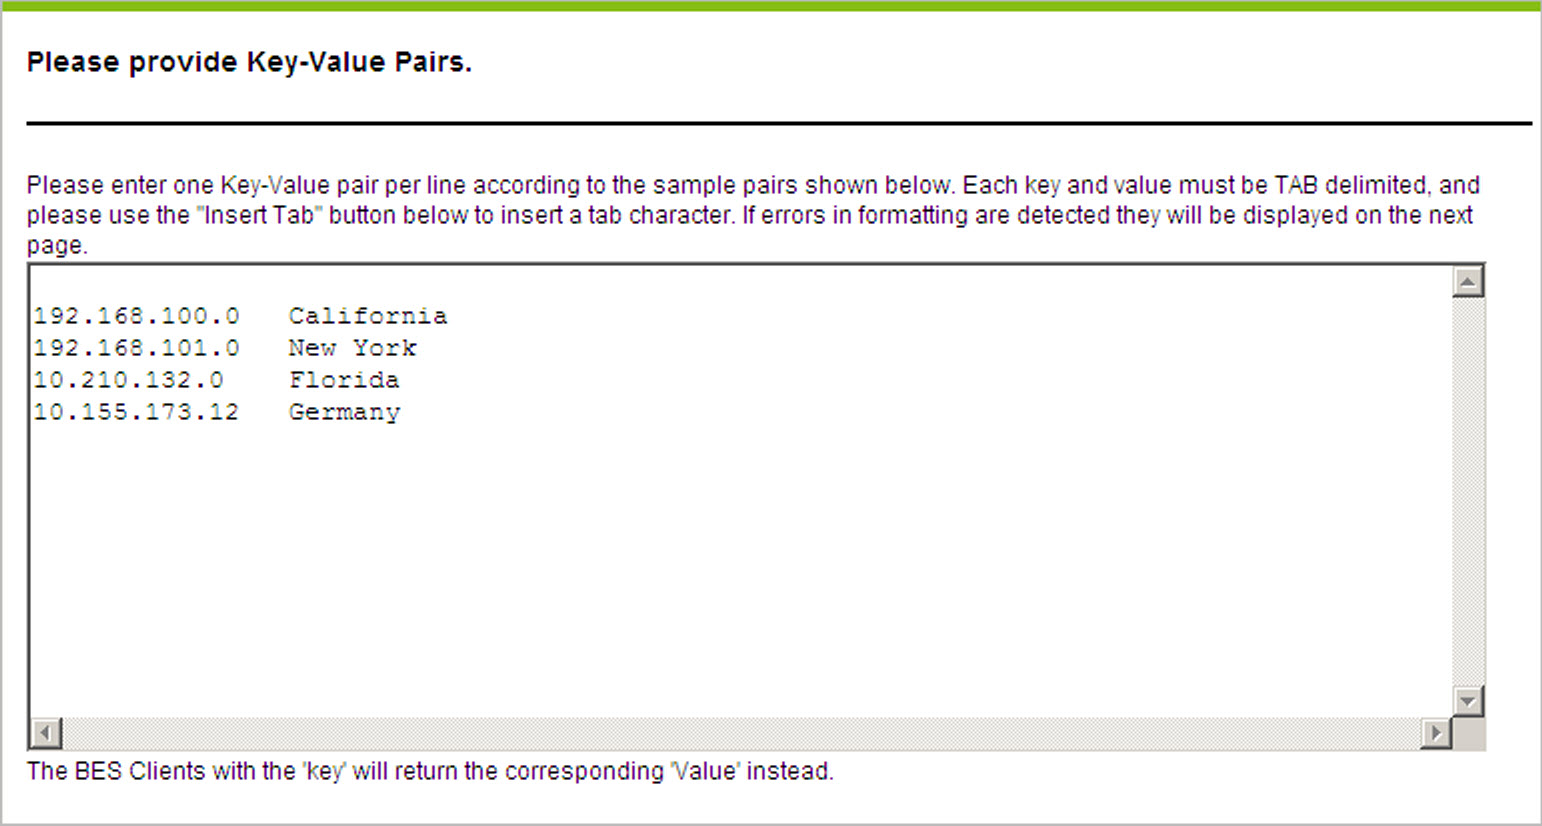
- For each location, type the subnet address or addresses. Click the Insert
Tab button, and then type a name. Use only one IP/location pair per line as shown in the
following screen. Create multiple lines for the same location if it uses multiple subnets.
 Note: Be careful not to "overlap" any IP addresses when you are specifying ranges. Computers included in multiple locations will constantly be updated as they reevaluate and recognize their relevance to one location and then another.
 - Click Next, and if no valid IP/location pairs are displayed, click Next again.
- Accept the defaults that are selected in the Additional Options window
and click Finish. The Import Content window
opens.

- Click OK.
- At the prompt, type your private key password and click OK.
- In the Action | Summary window that opens, monitor the "Status" and "Count" of the Action to confirm that it is "Running" and then "Completed". Now that locations are defined, the next step is to create a couple of different configuration settings and bundle them into a Task. You can then associate these Tasks with the Locations you created.