Update Pattern Files on CPM for Mac Clients
Before you perform the client update procedures, be sure to update the pattern files on the CPM Server and enable that server to perform automatic updates. For details, see Pattern File Management.
Trend Micro recommends that you perform the first full pattern-file update on a few CPM for Mac clients and then repeat the procedure on a broader scale as you become more familiar with the procedure.
In summary:
- Enable automatic pattern file updates for CPM for Mac clients.
- Schedule and apply automatic pattern file updates.
- Manually update CPM for Mac clients with the latest pattern files.
Note: Automatic updates are enabled by default.
Enable Automatic Updates for CPM for Mac Clients
- From the IBM BigFix Console, click Endpoint Protection on the lower left pane.
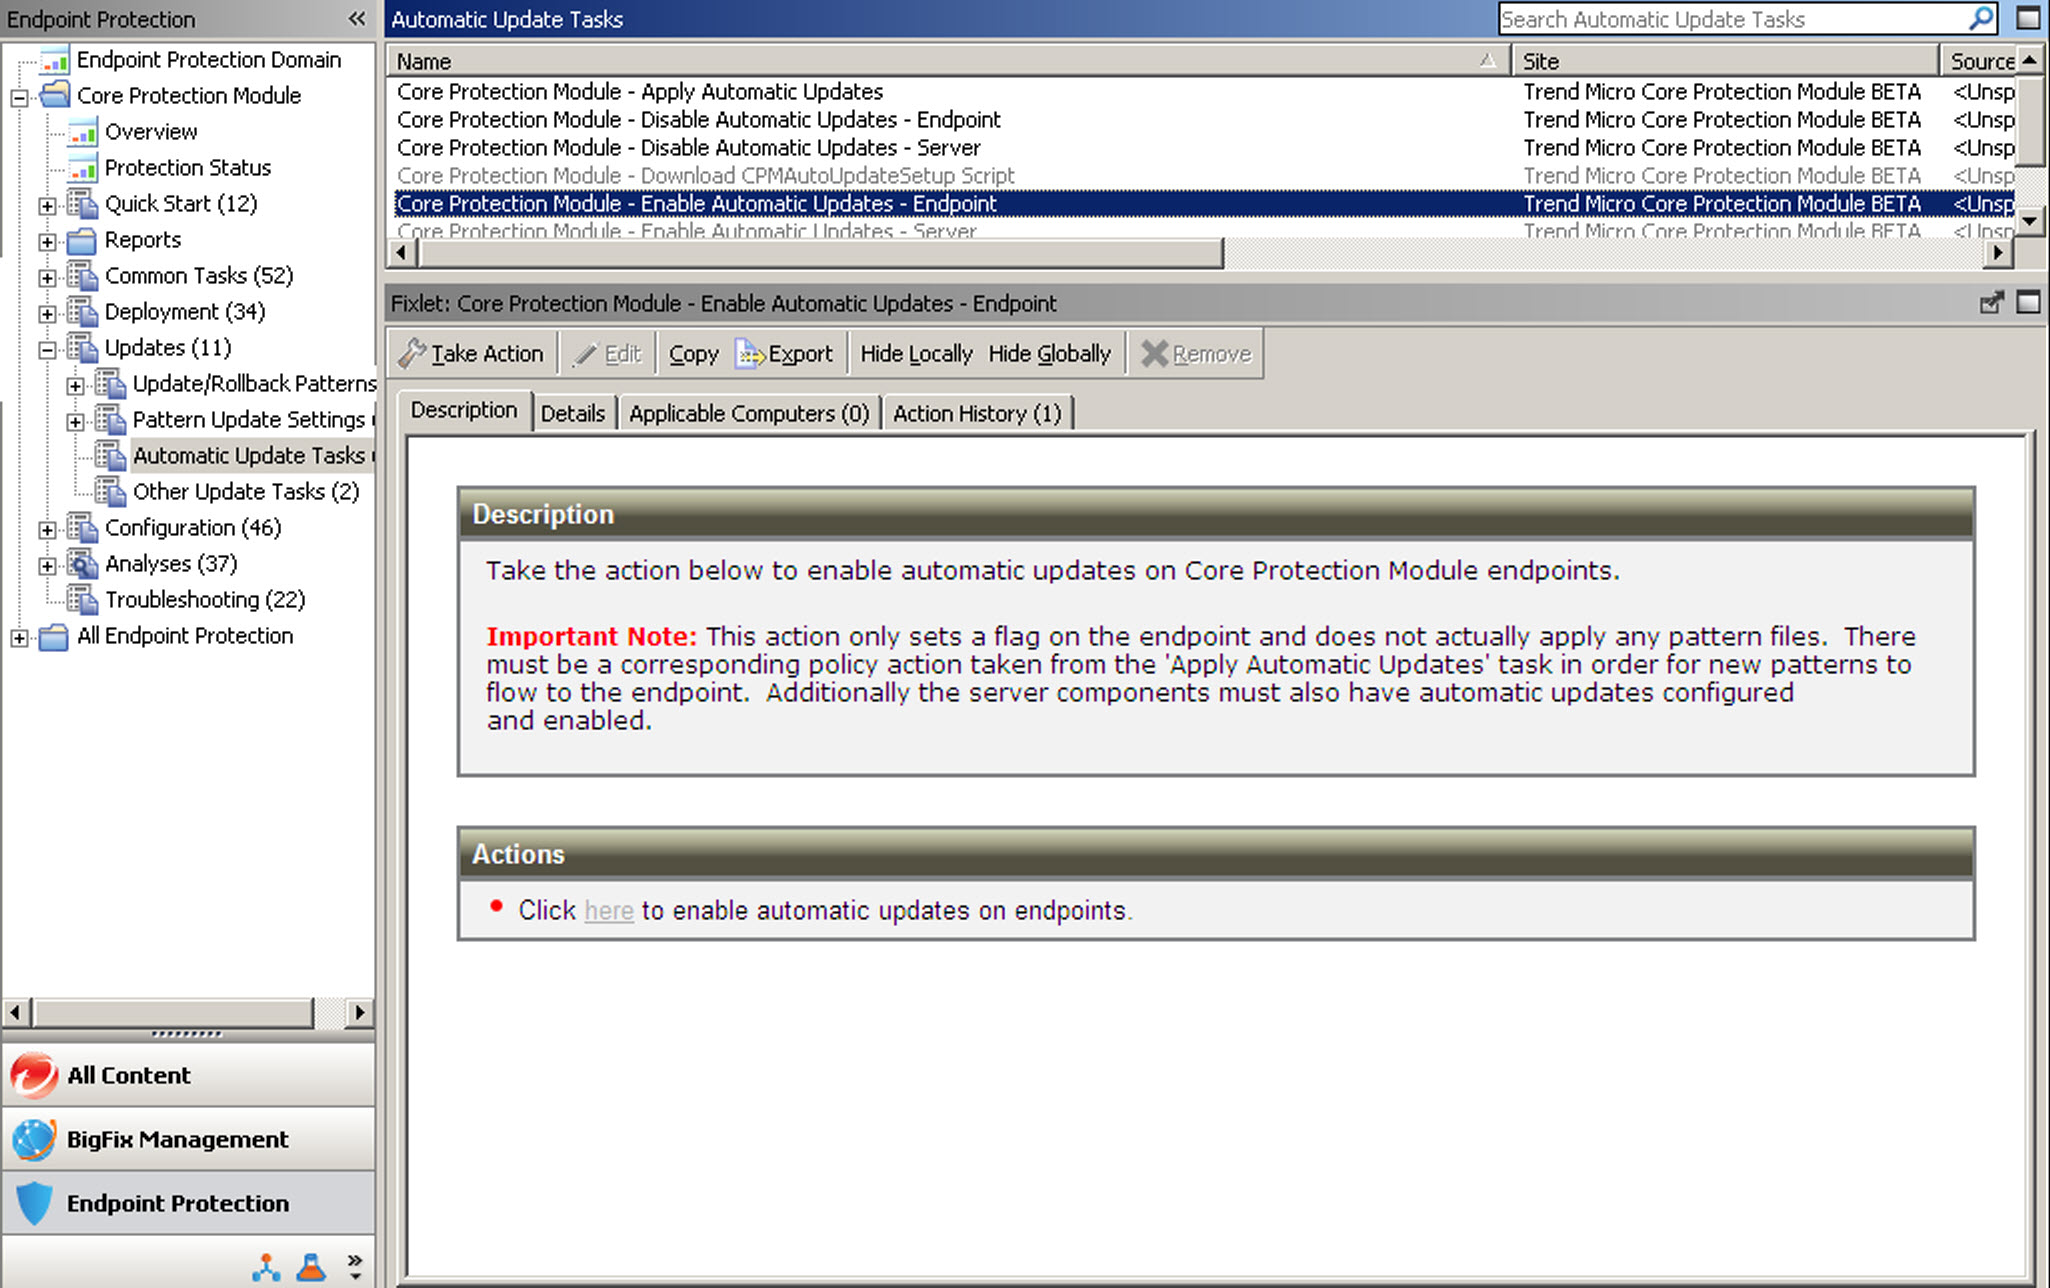
- From the upper left navigation pane, go to Core Protection Module > Updates > Automatic Update Tasks.
- Select Core Protection Module - Enable Automatic Updates - Endpoint from the list on the right. The Fixlet Description tab opens.
- Below Actions, click the hyperlink to open the Take
Action window.
- On the Target tab, choose All computers with the property values selected in the tree list below.
- Choose a property that includes all the computers that you want to deploy this Action to and click OK.
- At the prompt, type your private key password and click OK.
- In the Action | Summary window that opens, monitor the "Status" and confirm that it "Fixed."
Schedule and Apply Automatic Pattern File Updates
- From the BigFix Console, click Endpoint Protection on the lower left pane.
- From the upper left navigation pane, go to Core Protection Module > Updates > Automatic Update Tasks.
- From the list on the right, select Core Protection Module - Apply Automatic Updates. A screen displaying the Task Description tab opens.
- Below Actions, click the hyperlink to open the Take Action window.
- Click the Execution tab to display scheduling options:
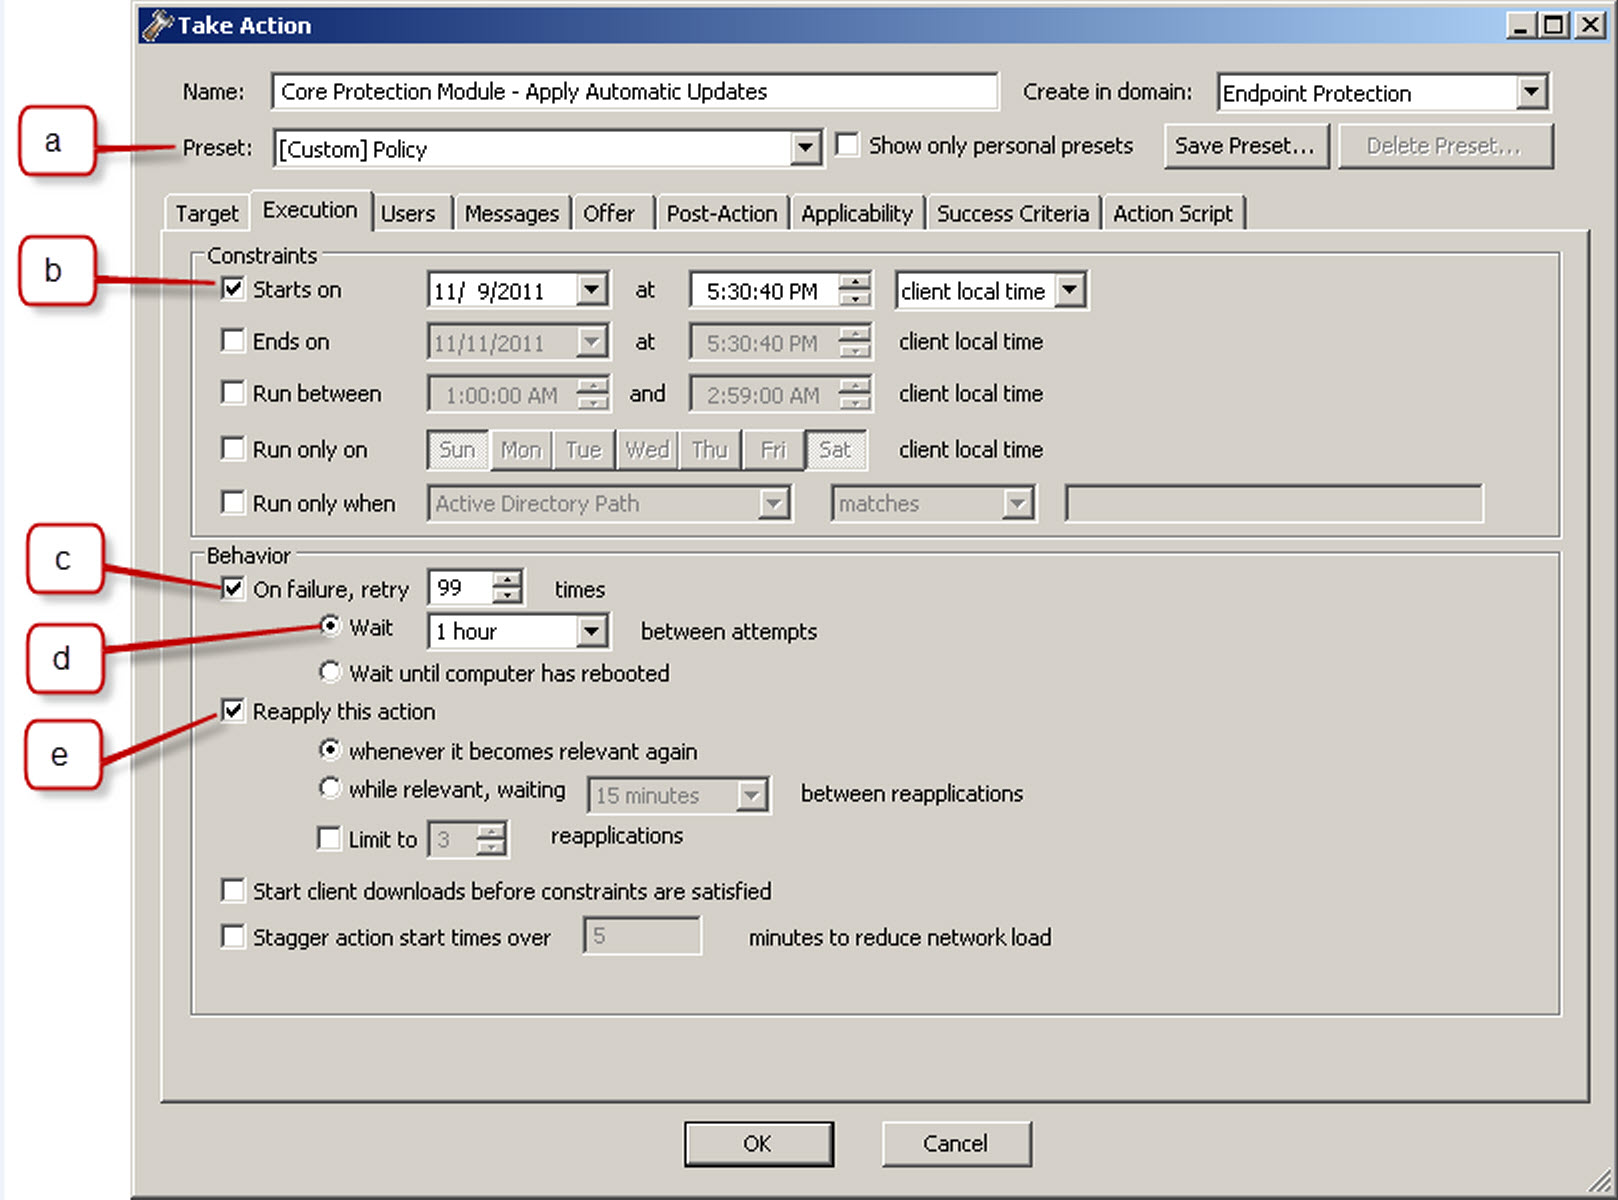
- Change Preset as shown by the letter "a" in the figure.
- Enable Starts on and choose the current date and time (do not set Ends on).
- Enable On failure, retry 99 times (default setting).
- Choose to Wait 15 minutes between attempts (default setting).
- Enable Reapply this action... whenever it becomes relevant again (default setting).
- On the Target tab, choose All
computers with the property values selected in the tree list below and
then select All Computers.Note: It is important to target All Computers for this action; only endpoints that have the CPM for Mac client installed and automatic updates enabled will be relevant.
- Click OK.
- At the prompt, type your private key password and click OK.
- In the Action | Summary window that opens, monitor the "Status" and "Count" of the Action to confirm that it is "Running" and then "Completed."
Manually Update CPM for Mac Clients with the Latest Patterns
- From the BigFix Console, click Endpoint Protection on the lower left pane.
- From the upper left navigation pane, go to Core Protection Module > Updates > Updates/Rollback Patterns > Create Pattern Update/Rollback Task. The Pattern Updates Wizard opens.
- In the list of folders that displays, click the ">" icon next to most recent folder to expand
and display individual patterns as shown in the following figure.Note: If you recently updated the pattern file for the first time, there will be only one folder will be available.

- Click Deploy across from the folder. In the window that opens, choose:
- Deploy a one time action
- Opens the Take Action window. Select the computers that you want to apply this one-time Action to. Any computers included in the Target that are not relevant for the Action at the time of deployment will respond with a "not relevant" statement. Click OK.
- Create an update Fixlet
- Opens the Edit Fixlet Message window. Configure a Fixlet that will deploy the Action whenever the selected clients become relevant. When finished, click OK and in the window that opens, click the hyperlink that appears below Actions to open the Take Action window.
- In the Target tab that opens, click All computers with the
property values selected in the tree list. Choose a property that includes all the
computers that you want to deploy this Action to.
- Execution
- Set the time and any retry behavior for the update.
- Users
- This option works in combination with Target, which is linked by the AND operand (both conditions must be present for the installation to occur).
- After you select the computers to update, click OK.
- At the prompt, type your private key password and click OK.
- In the Action | Summary window that opens, monitor the "Status" and "Count" of the Action to confirm that it is "Running" and then "Completed."