Update Sources
By default, CPM is configured to use the Trend Micro ActiveUpdate (AU) server for pattern updates. Although you can use an intranet source (for example by manually downloading the pattern files to an internal computer and then pointing the BigFix Server to that source), Trend Micro recommends that you use the AU server. This is the only official source for pattern updates, and in conjunction with CPM, AU provides several layers of authentication and security to prevent the use of forged or unsupported patterns.

Configure the CPM server to frequently contact the AU server to check for and download pattern and component updates. If there is a proxy server between the BigFix Server and the Internet, you need to identify it and provide any required log on credentials. The proxy server you identify here is not "inherited" for use by other CPM components, including the client settings for Web Reputation. That is a separate configuration. Likewise, if you have configured a proxy to enable BESGather service (typically identified during install), those settings will not be inherited for pattern updates, even if the same proxy is being used.
Choosing an Update Source
Procedure
- From the console menu, click Endpoint Protection on the bottom left pane.
- From the upper left navigation pane, go to . The Server Settings Wizard opens.
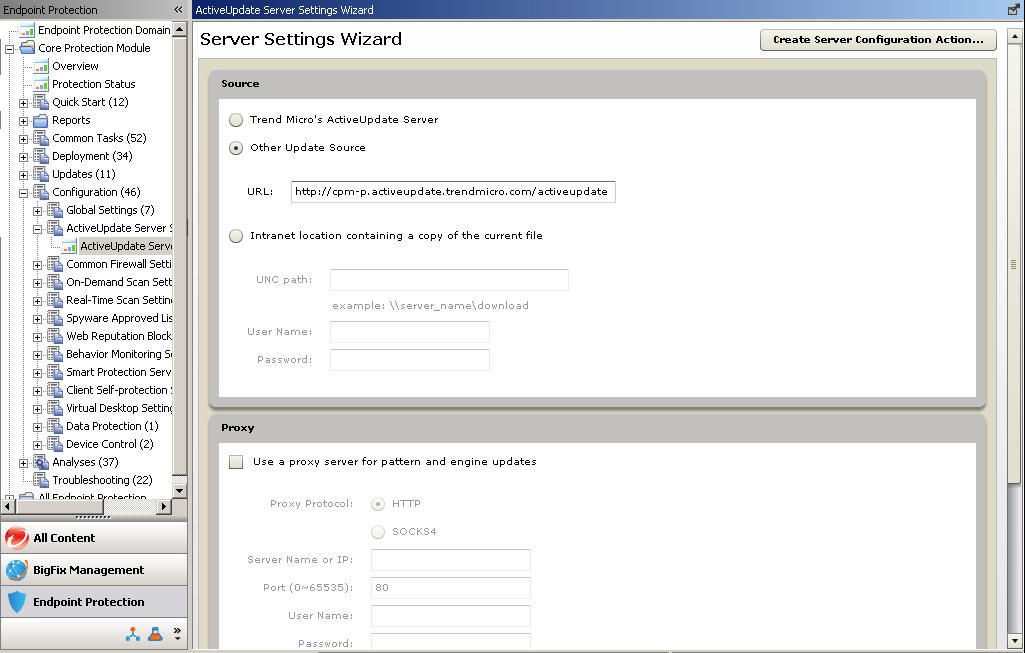
- Under Source, choose Trend Micro’s ActiveUpdate Server. See ActiveUpdate Server Settings Wizard for information about all the configuration choices available on this page.
- Under Proxy, click Use
a proxy server for pattern and engine updates and provide
the following (there is no validation checking; be sure of the settings
you configure here):
Proxy Protocol: Choose the option that reflects your proxy server.
Server Name or IP: Use an IP address if you have not configured the server to recognize host names.
Port: Typically, this is port 80 or 8080.
User Name: Type a name with access rights to the proxy.
Password: The password is encrypted when stored and transmitted.
- Click the Create Server Configuration Action... button. The Take Action window opens.
- Select the server and click OK.
- When prompted, type your private key credential. The Action | Summary tab appears. Check the "Status" of the Action to confirm that it is "Completed".
