Creating and Deploying Smart Policies: Example
In this procedure, you will create four firewall policies, one for each of the policy goals listed below.
Usage scenario: Endpoints are comprised of desktop computers and laptops. All are running the CPM Firewall. Desktops have a single, wired, LAN. The laptops have both a LAN and W-LAN. The laptops, being mobile, often travel to different corporate offices (London and New York). In addition, they are used outside the corporate network (Airport.)
Create one firewall policy for each of the following cases:
Policy 1: Prevent wireless FTP connections in London
Policy 2: Allow wired and wireless FTP connections in New York
Policy 3: Allow wired FTP connections in London and New York
Policy 4: Prevent all but HTTPS connections in unknown locations (wireless)
When targeting specific IP addresses in a firewall policy, be sure that the IP address ranges specified are mutually exclusive: that the same IP address is not included in related policies.
London = 10.10.0.0–10.10.255.255
New York = 192.168.0.0–192.168.255.255
Unknown = Not London or New York
Creating a Policy for Each Case
About this task
The steps for creating the first policy are provided below. Repeat steps 3 and 4, modifying as needed, to create the remaining three policies.
Procedure
Creating Tasks for Different Locations
About this task
In this procedure, you will create different Tasks and include in them different combinations of the policies created above. The combinations you select for a Task are important, as they determine the policies a given endpoint will have available to use.
Procedure
- In the Firewall Policy Settings Wizard screen, do the following:
- Be sure the policies are ordered correctly, that is, put the policy with an IP address range above the one for all IP addresses.
- Select both London policies (Policies 1 and 3).
- For New York, use Policies 2 and 3.
- For Unknown, use Policies 1, 2, and 4.
- Click the Create Firewall Policy Task... button at the top of the screen. The Policy Deployment Description appears.
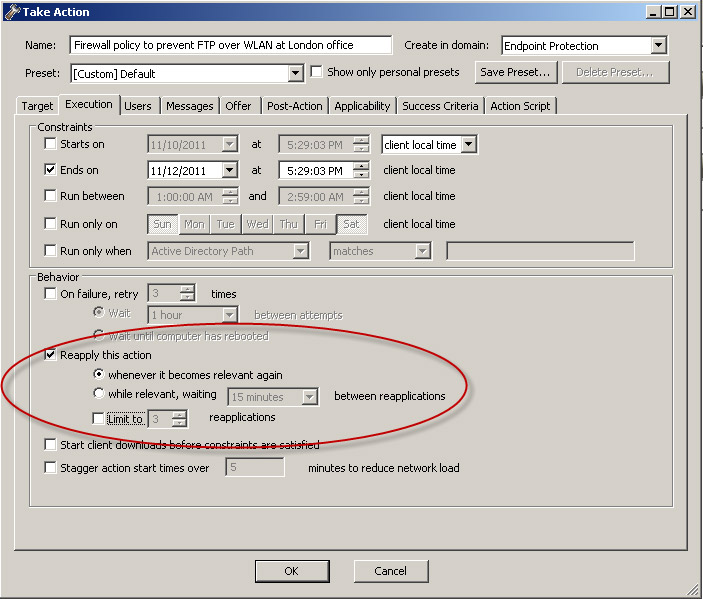
- In the Name field, give the Task descriptive name, such as Firewall policy to prevent FTP over WLAN at London office.
- Below Description, edit the text to provide, for example, the rationale for the policy to other console operators.
- Use the default settings in the Actions sections.
- Click OK to close the windows. At the prompt, type your private key password and click OK. The Task Description window appears.
- Below Actions, click the hyperlink to open the Take Action window.
- Click Applicable Computers or whichever option will include all endpoints with the firewall installed.
- Click the Execution tab to make
it active. Remove any Constraints that you do not want to apply (such
as a Start and End date), and in the Behavior section, make sure only
the following option is enabled: Reapply this action...
whenever it becomes relevant again.
- Click OK. At the prompt, type your private key password and click OK.
- In the Action | Summary window that opens, monitor the "Status" and "Count" of the Action to confirm that it is "Running" and then "Completed."