BigFix Runbook AI Configuration
This section provides instructions on how to configure BigFix Runbook AI using the Admin Console.
Follow the steps described below to configure BigFix Runbook AI through Admin Console.
The BigFix Runbook AI Super Administrator is the first login that happens in any organization and helps in the organization specific configuration.
The BigFix Runbook AI Admin Console offers the capability to define multiple roles and grant access to each based on the organizational policies.
BigFix Runbook AI super admin console contain the following menus:
- Home
- Actions
- Manage Organization
Runbooks
- Inventory Runbooks
- Build Models
- Manage Jobs
- RBAC
- User Management
- Role Management
- Group Management
- Entity Management
Configuration
- Manage SMTP
- Manage Proxy
Reports
- Component Logs
- Ticket Evaluation Report
- User Activity Logs
Advance Configuration
- Product Configuration
- Parameter
Manage Parameter Master
Configure Parameter Type
Hyperparameter Configuration
Add Hyperparameters
- iRecommend Rule Configuration
- Configure Key Vault
- Connectivity
Component Key Value Configuration
Component configuration
iScrape API details
Connection Details
- Entity
Manage Named Entity
Create Entity
Entity Mapping
- Workbench
Unique Analysis
Recommend Analysis
- Knowledge
Manage Collections
Map Generic Collections
Knowledge Analysis
Knowledge Search
Manage API/Domains (Basic)
My favorites
Help
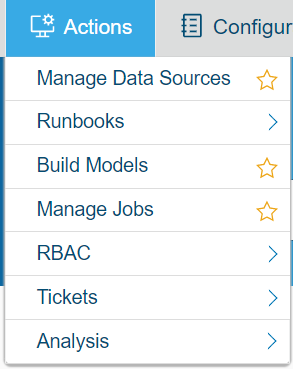
BigFix Runbook AI Organization Admin Console contains the following menus:
Actions
- Manage Data Sources
- Runbooks
Manage Runbook Tool
Map Runbook Tool
Manage Runbooks
Map Runbooks
Manage Execution Scope
Manage Rules
Schedule Runbooks
Create Runbook
Inventory Runbooks
Ticket Flow
- Build Models
- Manage Jobs
- RBAC
User Management
Group Management
- Tickets
Actionable Tickets
Auto Execution View
Ticket Logs
- Analysis
Ticket Analysis
Recommendation Analysis
Script Analysis
Configuration
- Manage Configuration
- Manage SMTP
- Manage Proxy
Reports
- License Report
- Component Logs
- Ticket Evaluation Report
- User Activity Logs
- Dashboard
Advance Configuration
- Product Configuration
- Parameter
Manage Parameter Configuration
Configure Parameter Type
Manage Column
- iRecommend Rule Configuration
- Configure Key Vault
- Connectivity
Component Key Value Configuration
Component configuration
iScrape API details
Connection Details
- Entity
Manage Named Entity
Create Entity
Entity Mapping
- Knowledge
Manage Collections
Knowledge Analysis
Knowledge Assistant
Knowledge Search
Manage API/Domains (Basic)
- Script
Manage Custom Script
My Favorites
Help
From this console, the administrator can view and access all admin menus.
Home
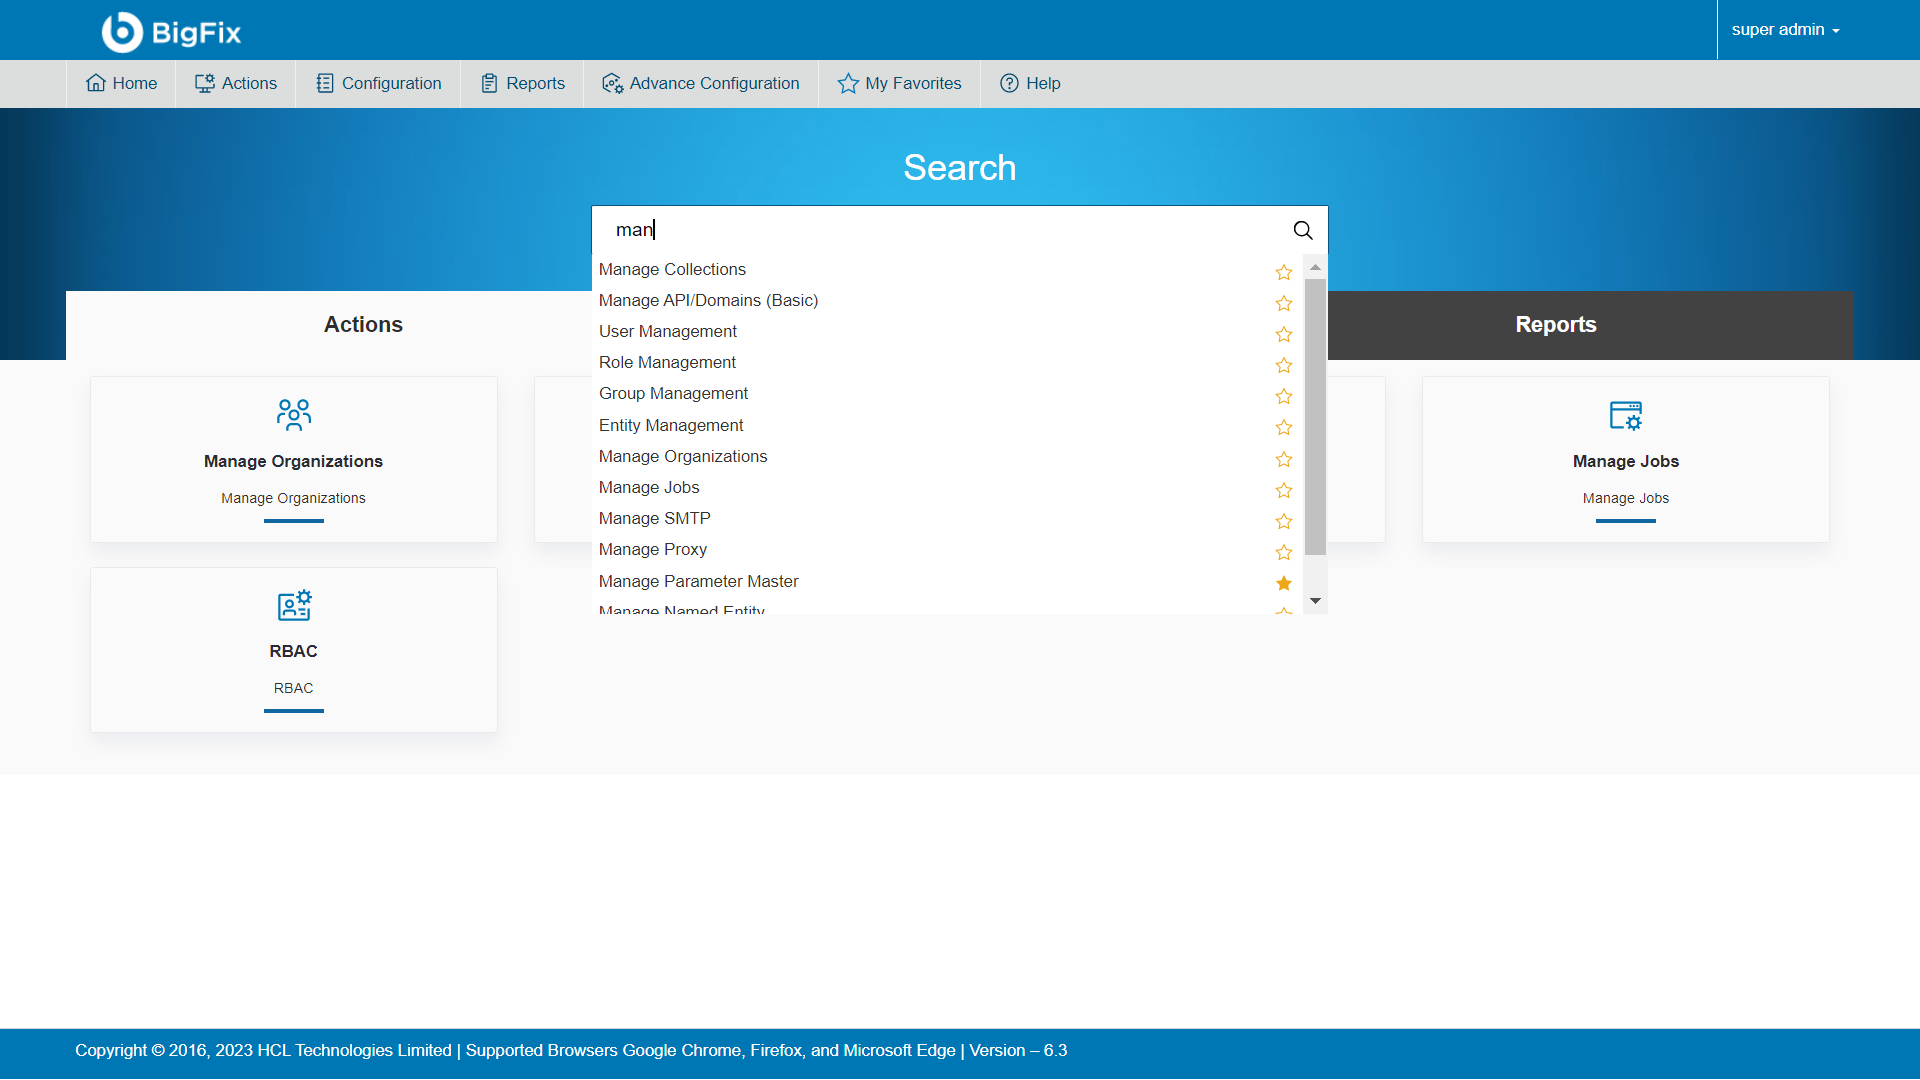
On home screen, there is an option to search for menus for easy accessibility of the same. For that, on the home screen, there is a search bar given in which type at least 3 letters to search for a menu.
Actions →Runbooks
A runbook is a script that automatically resolves a ticket with no human involvement. A runbook coordinates multiple infrastructure elements such as applications, network components, or servers. The runbook tool is a platform used to specify these runbooks. Typically, a runbook contains procedures to start, stop, supervise, and debug the system.
To configure runbooks and the runbook tool, click Runbook on the main menu bar.
A drop-down menu appears with the following options:
Map Runbook Tool
Manage Execution Scope
Map Runbooks
Manage Rules
Schedule Runbooks

Manage Runbook Tool
The user must configure the runbook tool to define the runbooks in it.
Before proceeding with Manage Runbook Tool, the user is required to create the Organization. Please refer to Create Organization section and follow the mentioned steps. Proceed forward after a new organization has been created.
To manage the runbook tool, perform the following steps:
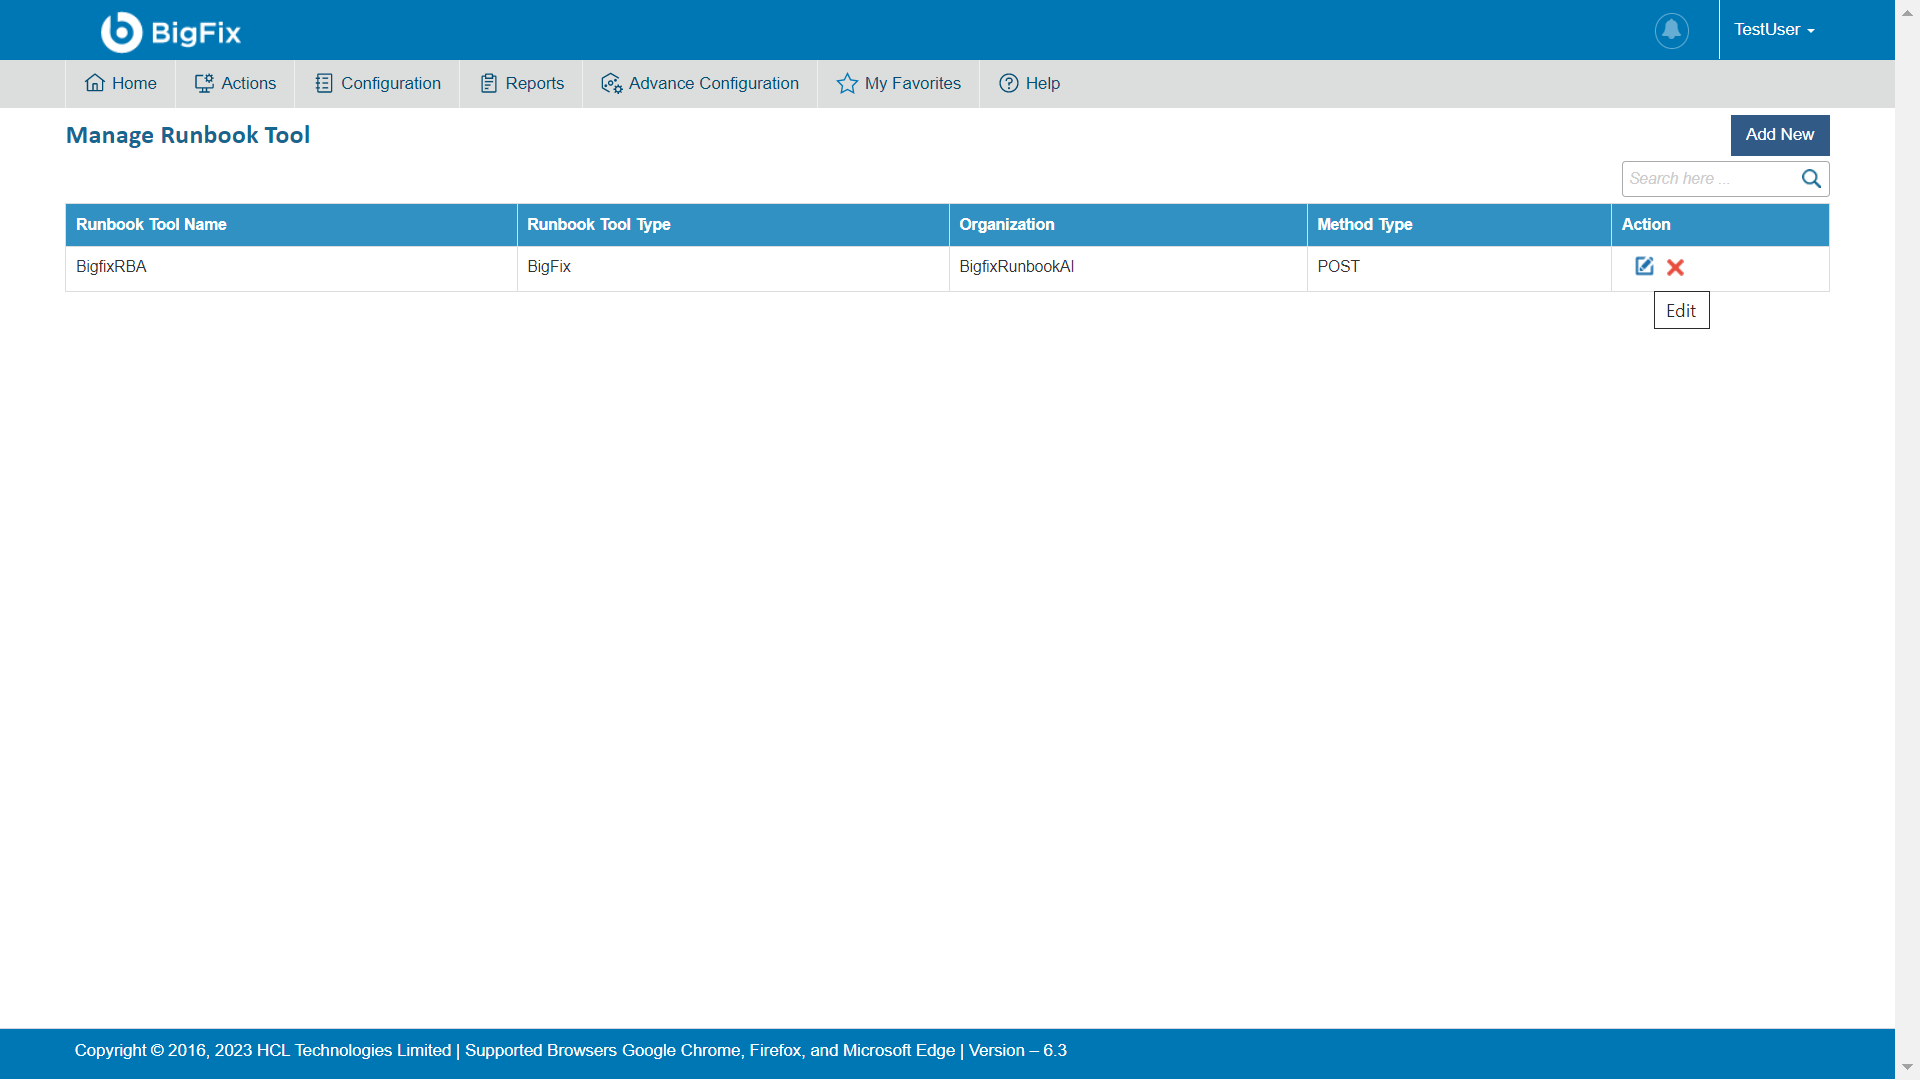
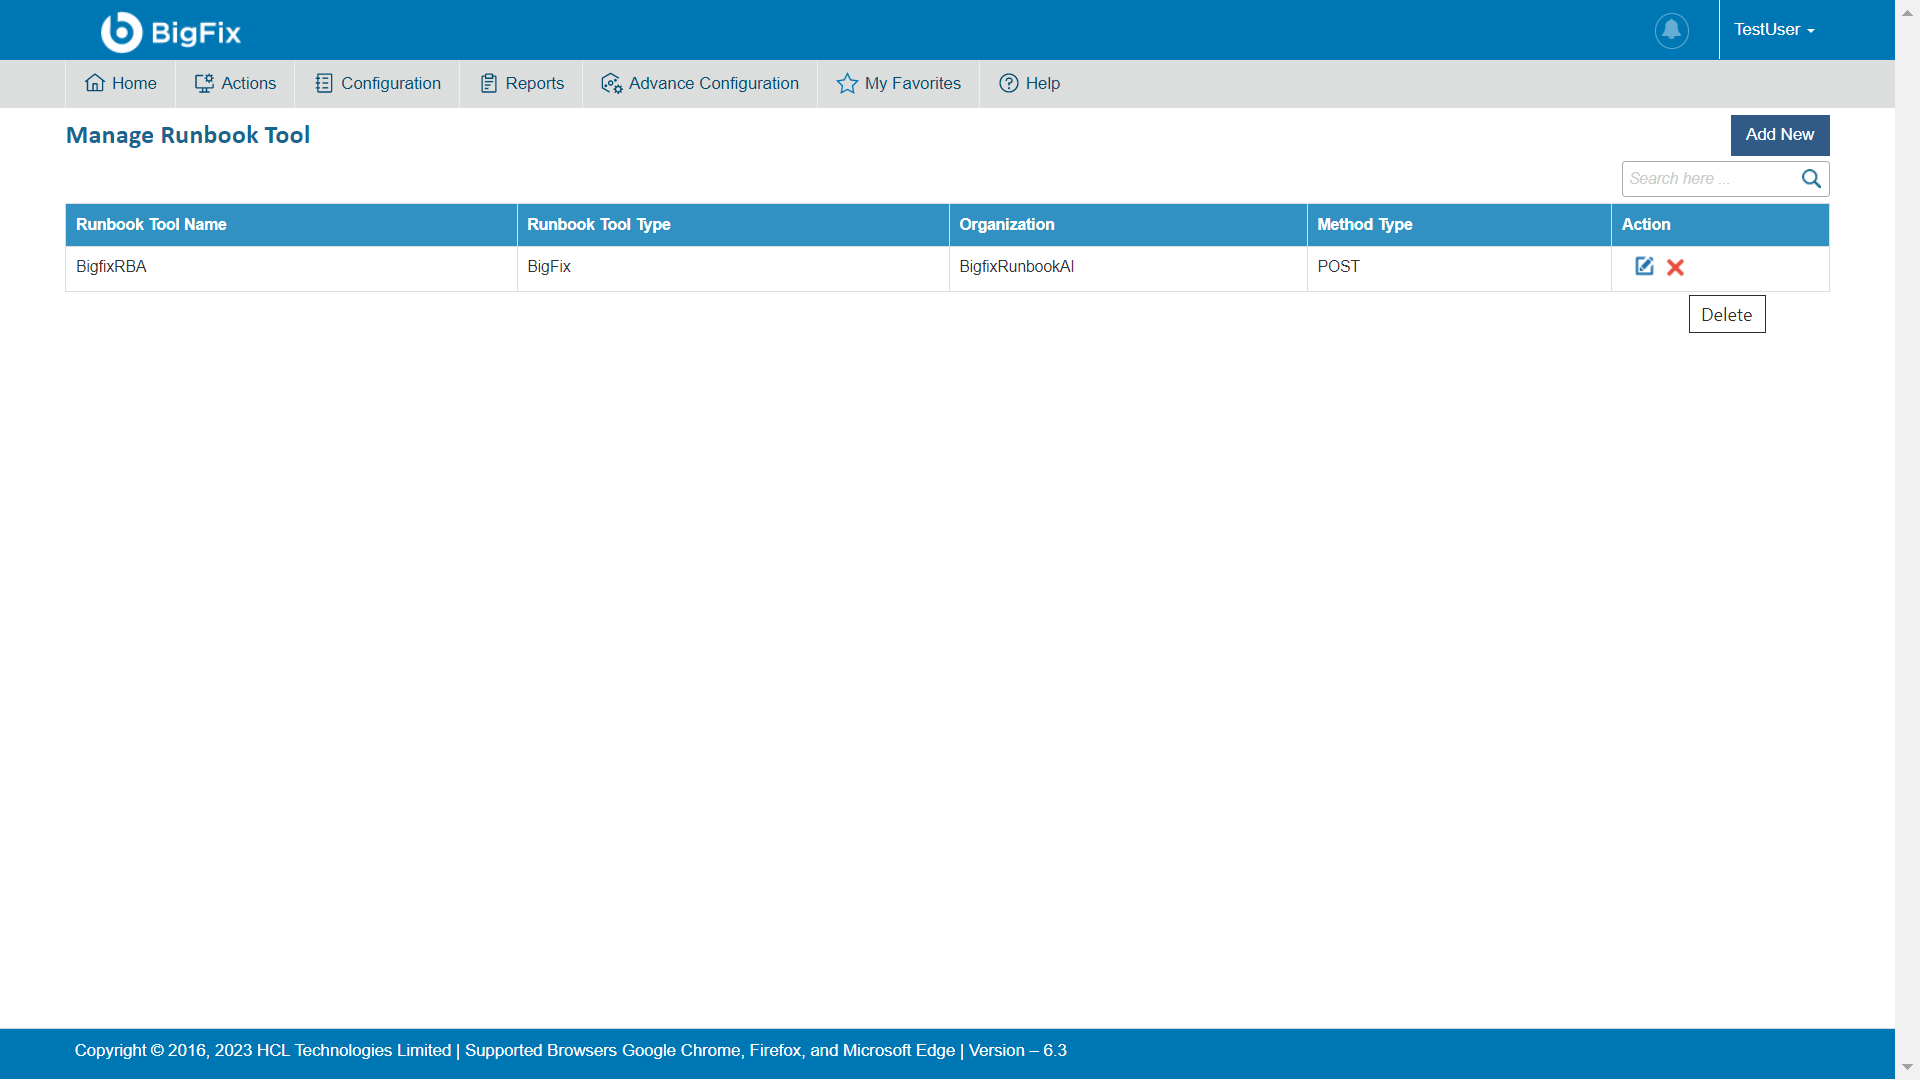
- On the main menu bar, click Runbooks, and then click Manage Runbook Tool. The Manage Runbook Tool page appears.

It lists the available runbook tools in a tabular view and lets the user add a new runbook tool using Add New button. User can also edit or delete the existing runbook tools.
Add Runbook Tool
User can add a runbook tool in an environment by performing the following steps:
- On the Manage Runbook Tool screen, click Add New.

- Fill in the following details to create a runbook tool. You must provide values for all the mandatory parameters.
- Organization: Select the organization name for which the runbook tool is to be created.
- Runbook Tool Name: Type the runbook tool name.
- Runbook Tool Type: Select the type of runbook tool from the drop-down.
- Integration Method: Select the integration method to integrate the runbook tool with BigFix Runbook AI.
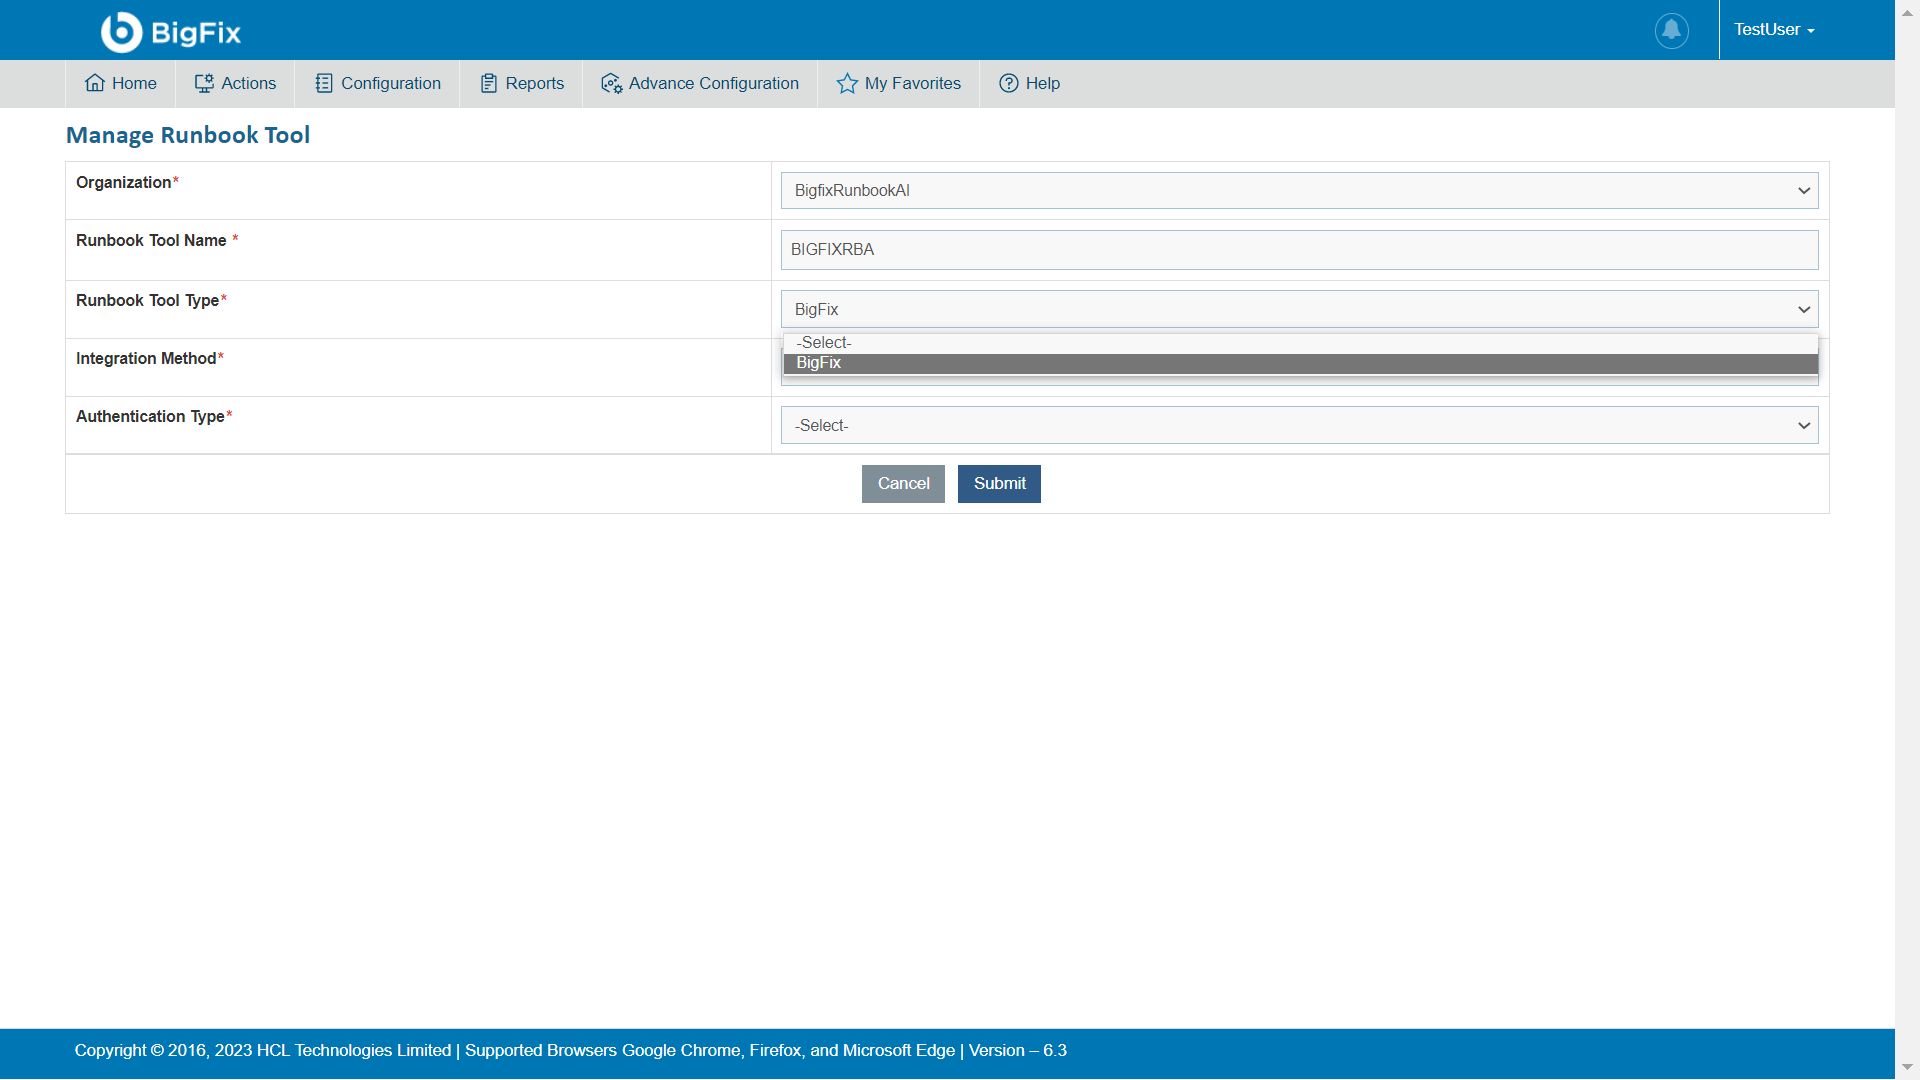
Selecting the integration method populates the data based on the selected runbook tool type and displays the following fields:
Secondary information is auto filled based on the selected integration methods.
Configure Runbook Tool
This section describes how to configure the runbook tool using the SOAP API in case of CA ITPAM integration method or REST API in case of vRO, Microfocus Operations Orchestrator, BigFix, BMCAO, and Microsoft System Orchestrator integration method.
To configure the runbook tool using the selected integration method,
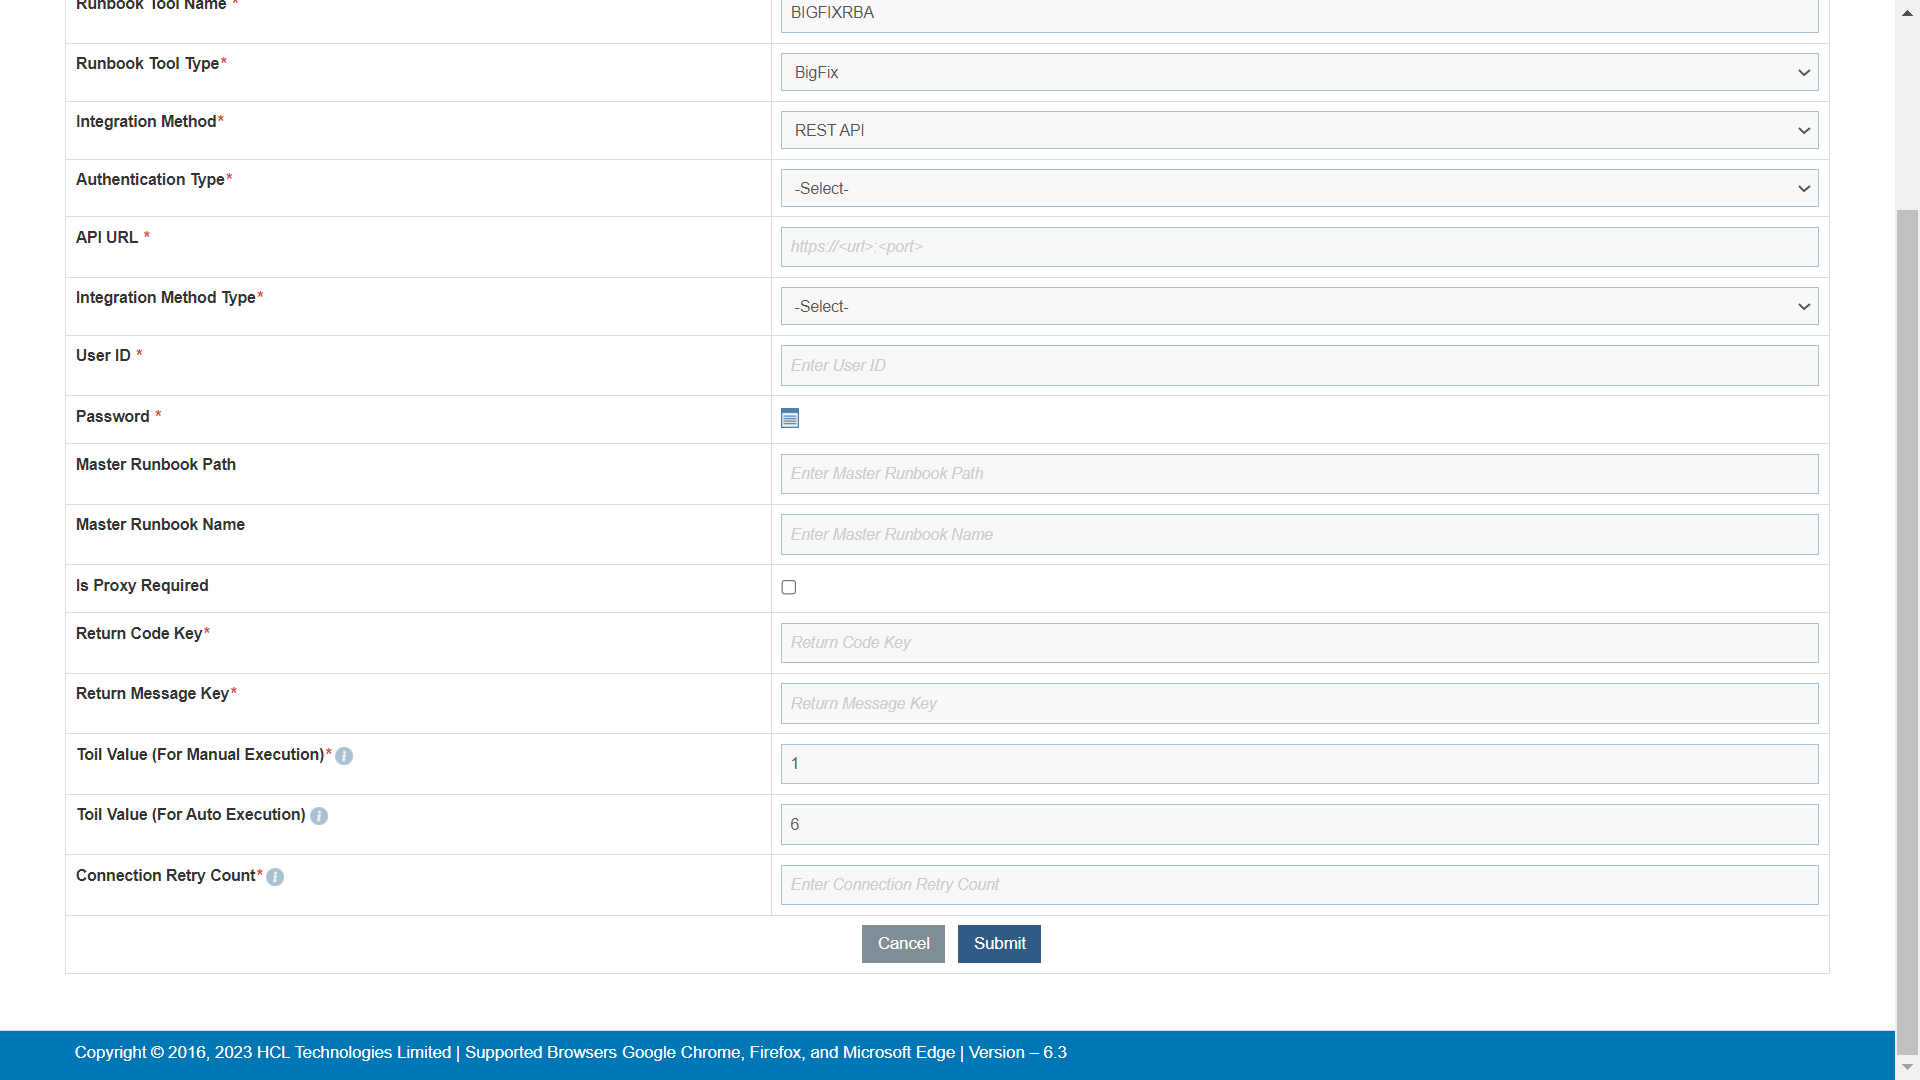
- Select the Authentication Type to authenticate the Runbook Tool.
- Type the API URL as shown- http<s>://sourceinstanceName.com in the API URL field.
- Select the integration method type from the Integration Method Type field.
- Type the username and password in the User ID and Password field to get access to API web services.
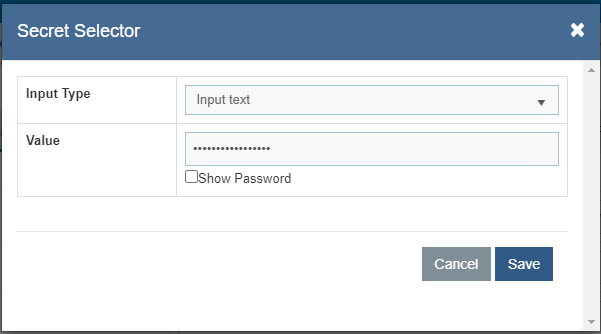
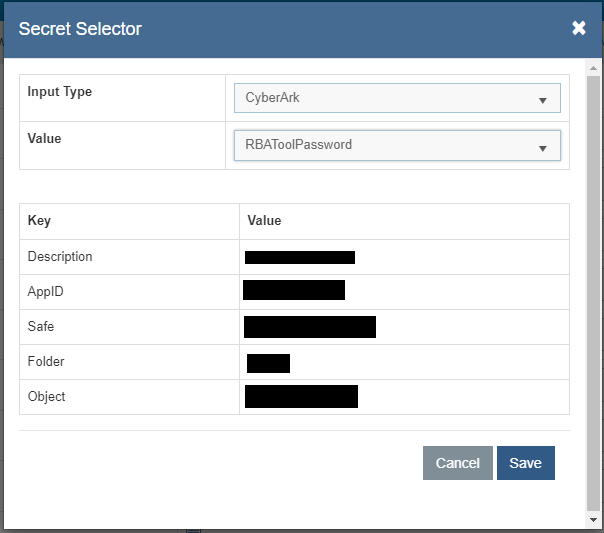
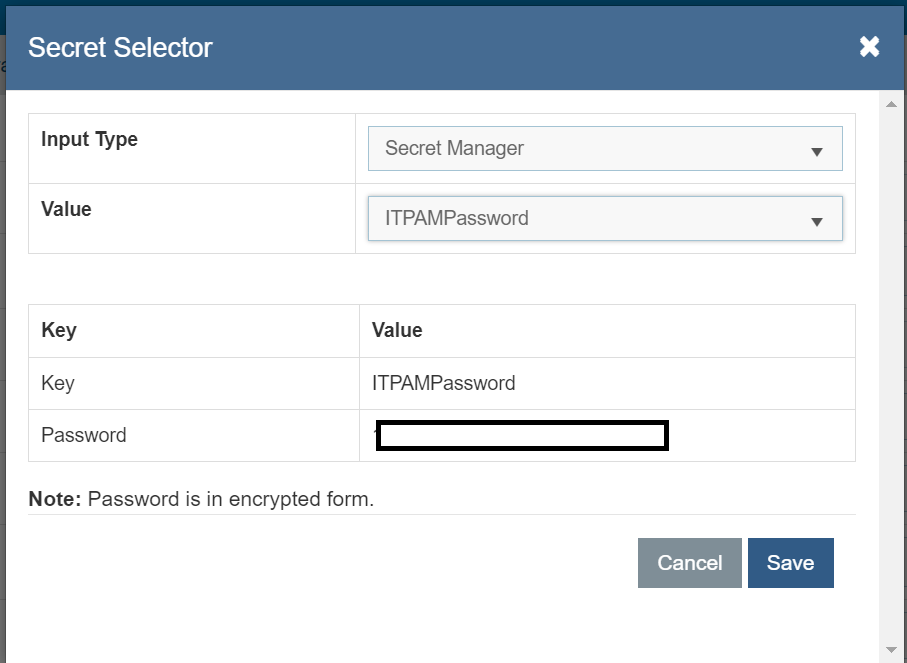
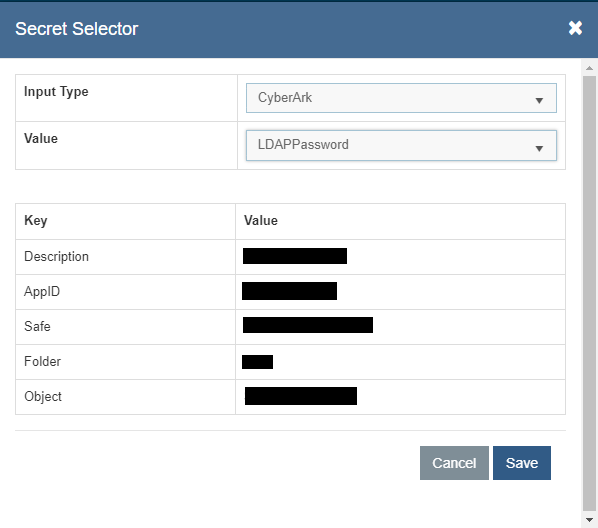
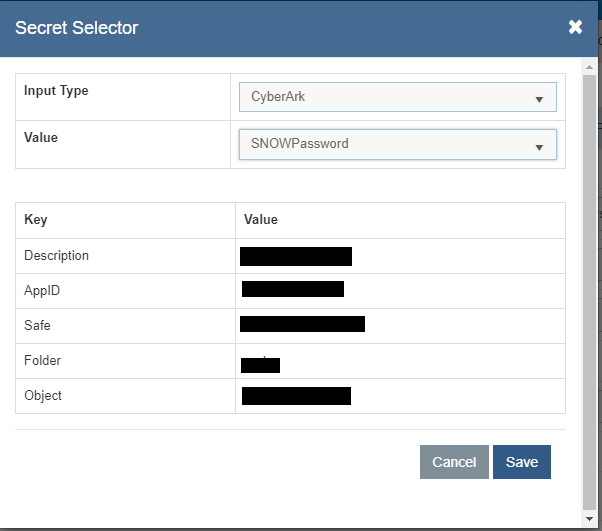
- For password, click on
 icon. If the password is
available in plaintext, then select Input type as Input Text and enter the password in
Value field. Else if it is available in any Key Vault such as CyberArk or Secret Manager
then select Input Type as CyberArk or Secret Manager respectively and then select any of
the configured details from the value field.
icon. If the password is
available in plaintext, then select Input type as Input Text and enter the password in
Value field. Else if it is available in any Key Vault such as CyberArk or Secret Manager
then select Input Type as CyberArk or Secret Manager respectively and then select any of
the configured details from the value field.
API URL, User ID, and Password are dependent on the selected integration method
- Specify the path to get the consolidated scripts for the execution of runbooks in the Master Runbook Path field. This will be provided by respective Runbook Tool teams if they have a master runbook .
This is not a mandatory field. Users can change and run these scripts later.
- Select Proxy Required if the environment needs access to content from servers outside a firewall. On selecting a proxy, the system uses the proxy connection, as specified in the Manage Proxy section.
- Type the return code key value – (Status) in the Return Code Key field to identify the success or failure of runbook execution.
- Type the return message key value – (Result) in the Return Message Key field to display the success or failure of runbook execution.
- Enter the Toil Value (For Manual Execution) which is the maximum manual execution time of runbook (in minutes). By default, it takes the value of the configured Toil value (For Manual Execution) on the BigFix Runbook AI Configuration page.
- Enter the Toil Value (For Auto Execution) which is the maximum auto execution time of runbook (in minutes). By default, it takes the value of the configured Toil value (For Auto Execution) on the BigFix Runbook AI Configuration page
- Enter the Connection Retry Count which is the number of retry counts in case the connection with RBA tool is failed when the ticket is triggered by BigFix Runbook AI.
All fields marked with an asterisk (*) are mandatory.
- Click Submit to add the runbook tool.
.png)
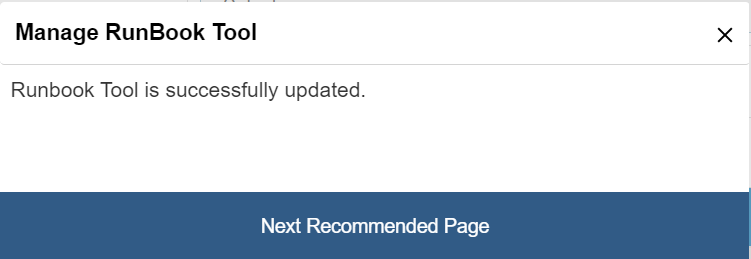
A confirmation dialog box appears.
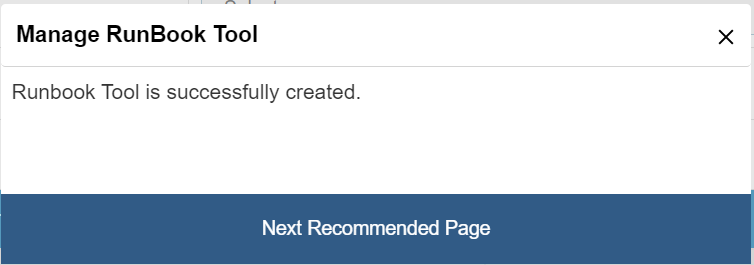
The new runbook tool is created and listed in a tabular view.
If a connection to the BigFix Runbook AI configuration database cannot be established, an error message appears explaining what must be done to resolve the issue.
Edit Runbook Tool
User can open an existing runbook tool, review the available information, and edit the runbook tool details by performing the following steps:
- On the Manage Runbook Tool screen, click
 corresponding to the runbook tool that you want to edit.
- This displays the complete details of the runbook
tool including the runbook tool name and type,
integration method and type, API
URL and its log on credentials, master runbook path, return code key, and the return
message key.
Figure 13. Figure - Edit Runbook Tool (Cont.) 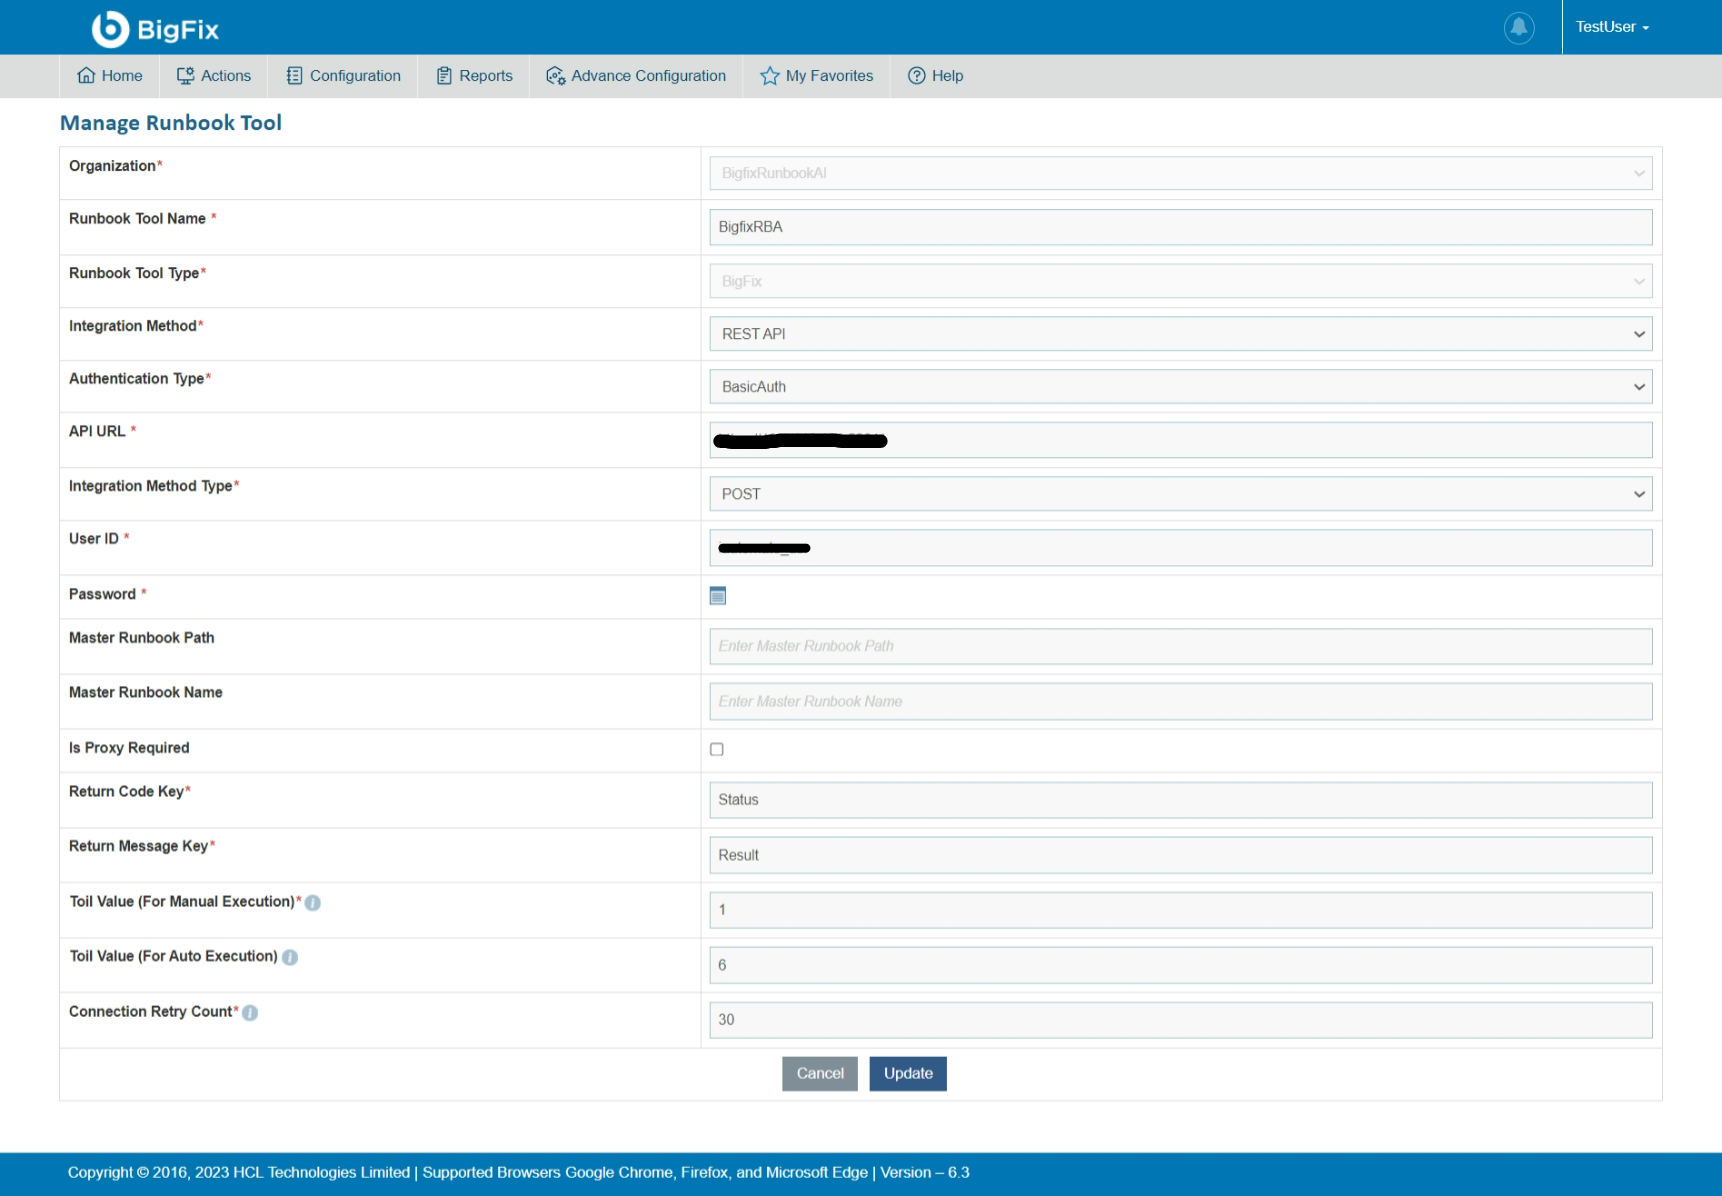
- Edit the selected runbook tool details and click Update to commit the changes. Click Cancel to discard changes.
- A confirmation dialog box appears.
All fields marked with an asterisk (*) are mandatory.
Delete Runbook Tool
If a user no longer wants a specific runbook tool, he/she can delete it from the environment by performing the following steps:
- On the Manage Runbook Tool screen, click
 corresponding to the runbook tool that you want to delete.
- Click OK to confirm.
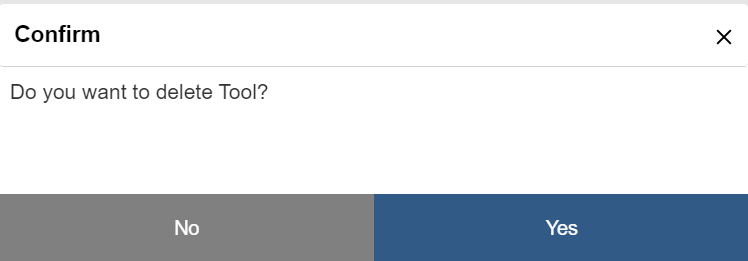
You cannot delete a runbook tool which is mapped to an active organization.
Map Runbook Tool
The user can map runbook tools to an organization to execute runbooks from the selected data source.
To map a runbook tool, perform the following steps:
- On the main menu bar, click Actions -> Runbooks and then click Map Runbook Tool.
- The Map Runbook Tool page appears and lists all the mapped runbook tools in a tabular view.
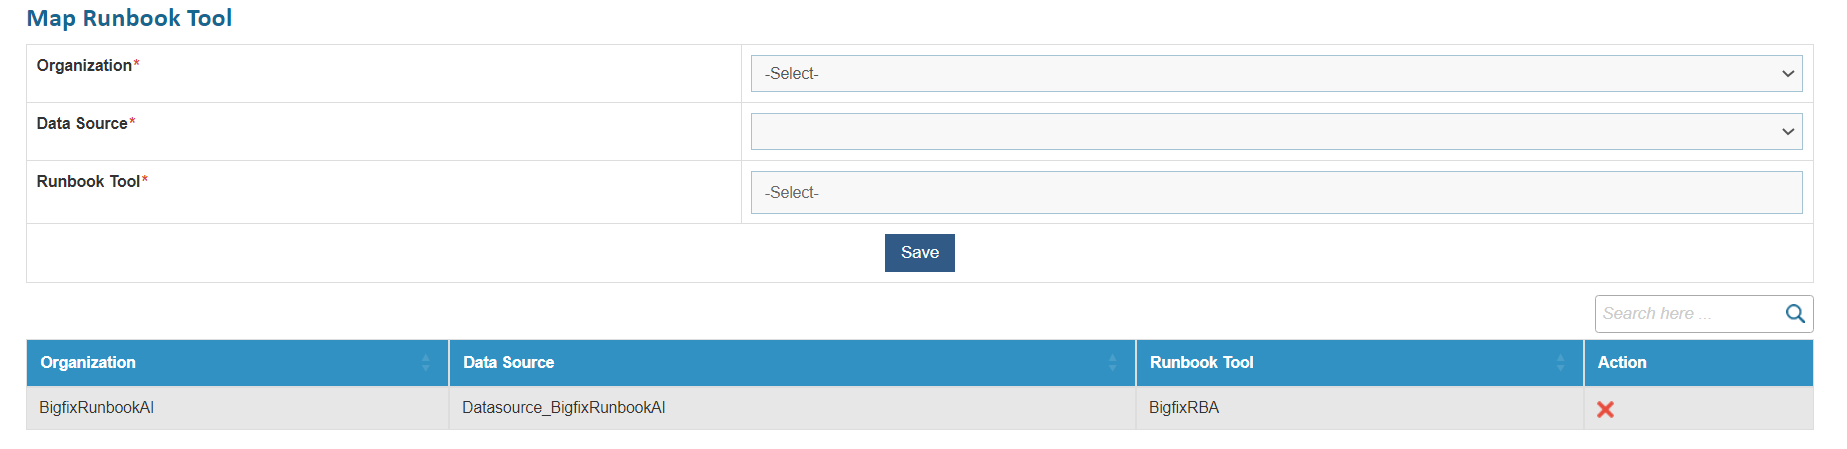
- Select an organization from the list of organizations listed in the Organization Name field.
- Select a data source to fetch the data from the list of data sources listed in the Data Source Name field.
- Select a runbook tool to execute the data from the list of runbook tools listed in the Runbook Tool Name field.
You can map multiple runbook tools to an organization.
- Click Save. The new runbook tool is mapped to an organization and lists in the tabular view.
All fields marked with an asterisk (*) are mandatory.
- If required, the user can delete a mapped runbook
tool from an organization by clicking
 corresponding to the runbook tool.
.png)
Manage Runbooks
BigFix Runbook AI admin can create the metadata for runbooks and configure them. Every runbook is unique and specific to the system and enables the user to effectively manage and troubleshoot a system. Each runbook must be configured using the runbook tool.
To create the metadata for runbooks , perform the following steps:
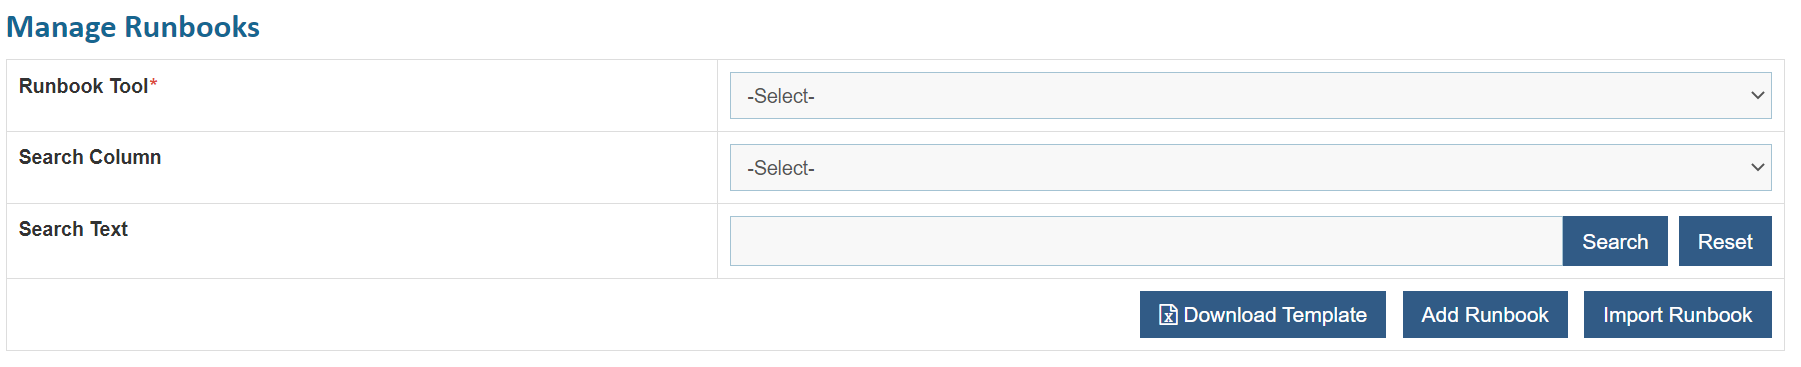
- On the main menu bar, click Runbooks, and then Manage Runbooks. The Manage Runbooks page appears.

It lists the existing runbooks in a tabular view and enables user to add runbooks using Add Runbook or Import Runbook. User can also edit or delete the existing runbooks.
Add Runbook
User can add a single runbook into the runbook tool using Add Runbook button or import multiple runbooks together using Import Runbook.
Add a Single Runbook
To add metadata for one runbook, perform the following steps:
- On the Manage Runbooks screen, click Add Runbook. The Runbook Details page appears.
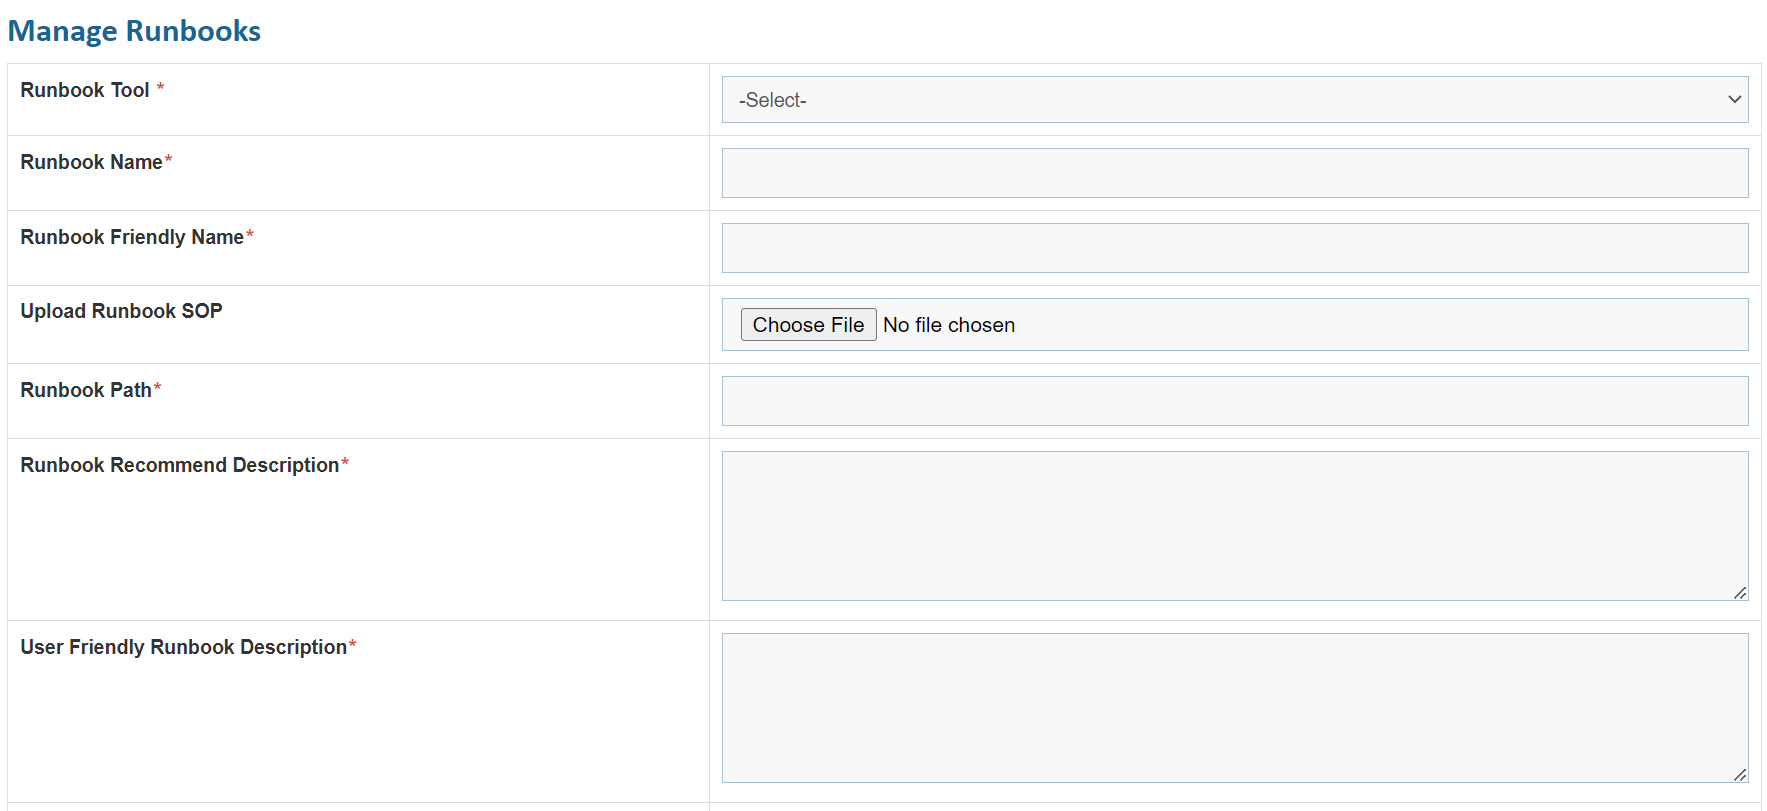
- Select a runbook tool by clicking the drop-down button corresponding to the Runbook Tool field.
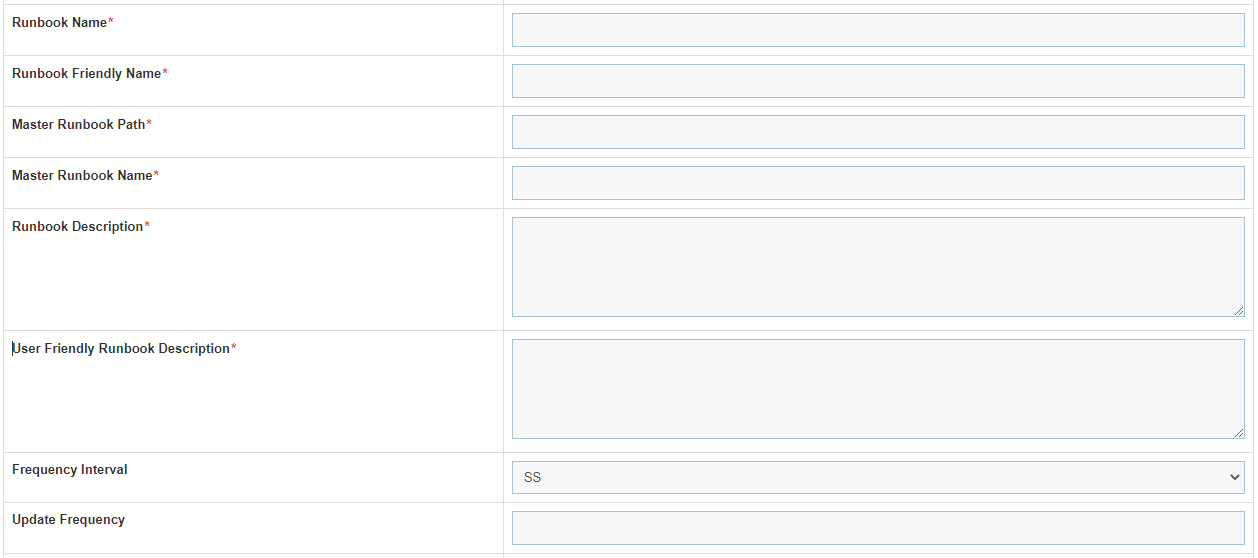
- Type a name for the new runbook in the Runbook Name field. This will be referred by the system at the backend.
- Type a runbook friendly name in the Runbook Friendly Name field to recognize the runbook in your repository. This name will be visible to the end user while getting recommendations and execution.
- In the Runbook Path field, specify the path where the runbook is located within the runbook tool .
- Type the runbook description in the Runbook Recommend Description field to be used during the recommendation process.
- Type a user-friendly description in the User-Friendly Runbook Description field to be shown to the user when selecting the runbook.
- Type the Frequency Interval, which is fixed by the user to fetch the status post runbook execution. This frequency varies with the type of runbook in terms of SS (seconds), MM (minutes), or HH (hours).
- Type the runbook update frequency in the Update Frequency field.
Frequency Interval and Update Frequency are interrelated.
- Selecting Runbook Tool type as ‘BigFix’ enables three more fields:
- Response File Path: Type the location of the file from where response is to be read on target server.
- Wait Frequency Interval: Type the Frequency Interval, which is fixed by the user to wait before going to fetch the response post runbook execution. This frequency varies with the type of runbook in terms of SS (seconds), MM (minutes), or HH (hours).
- Wait Frequency: The time interval to wait before going to fetch the response.
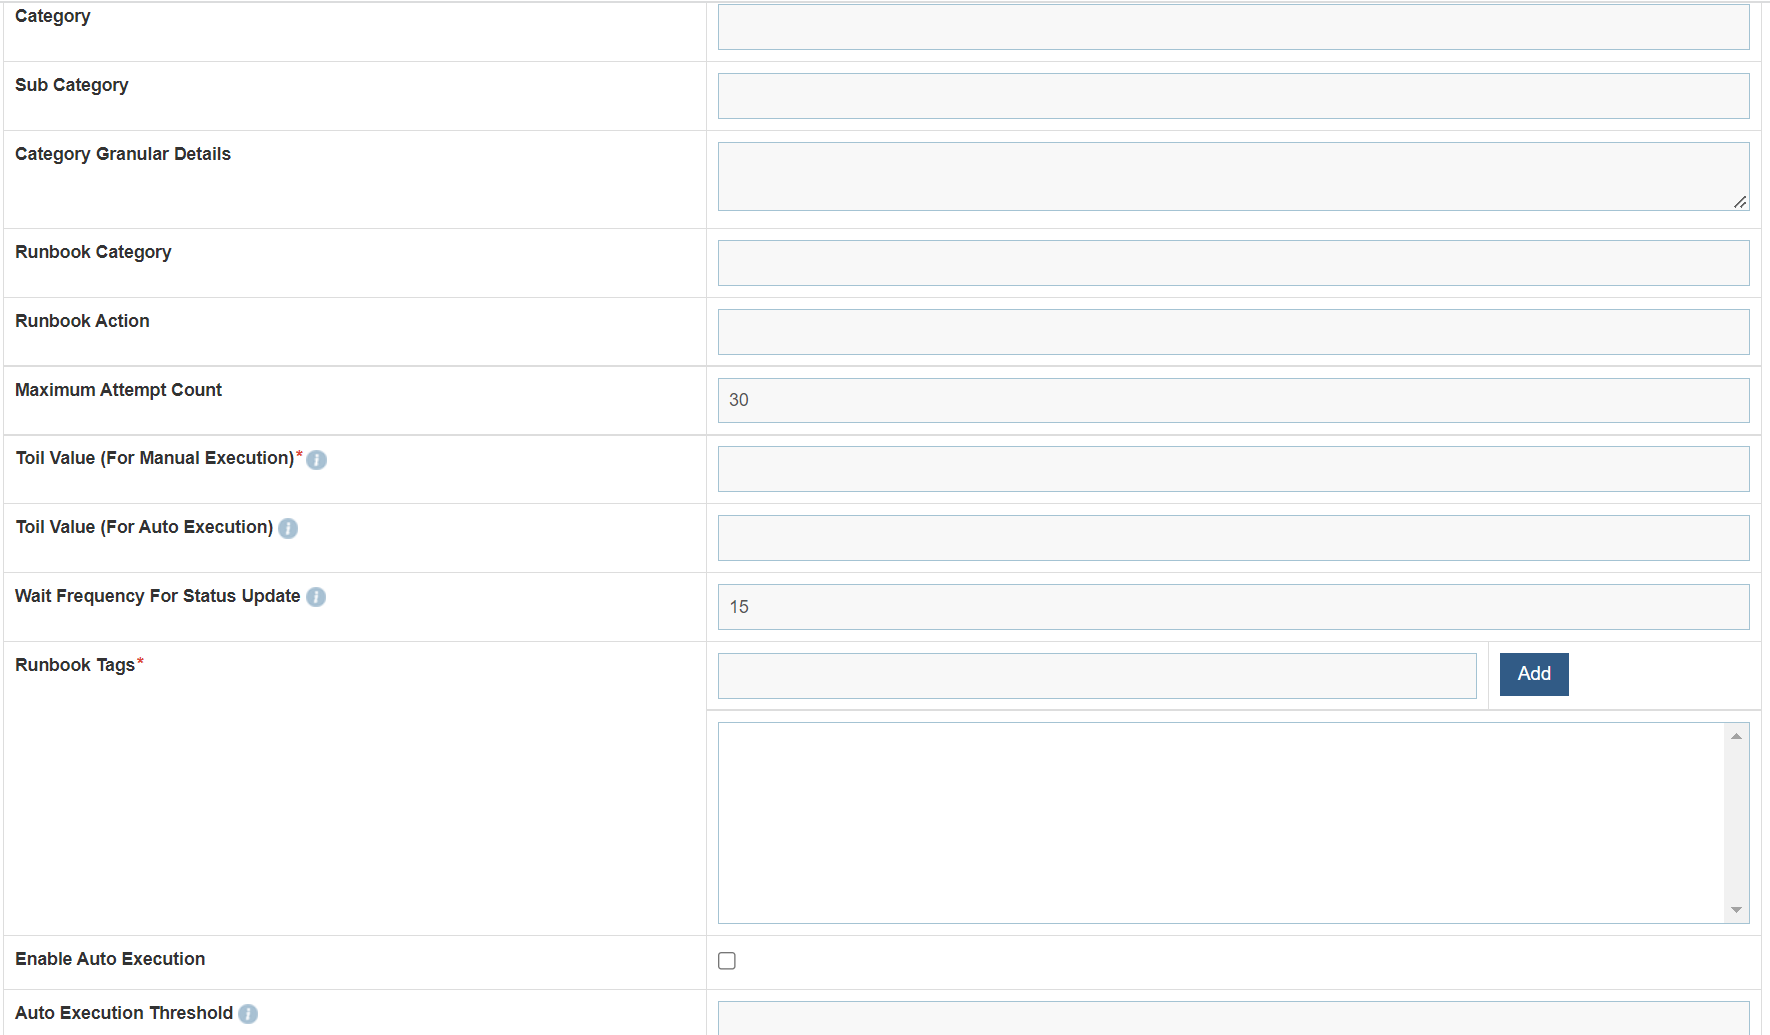
- Type the runbook tool category in the Category field.
- Type the sub-category of the runbook tool in the Sub-Category field.
- Specify the details of the runbook tool category in the Category Granular Details field.
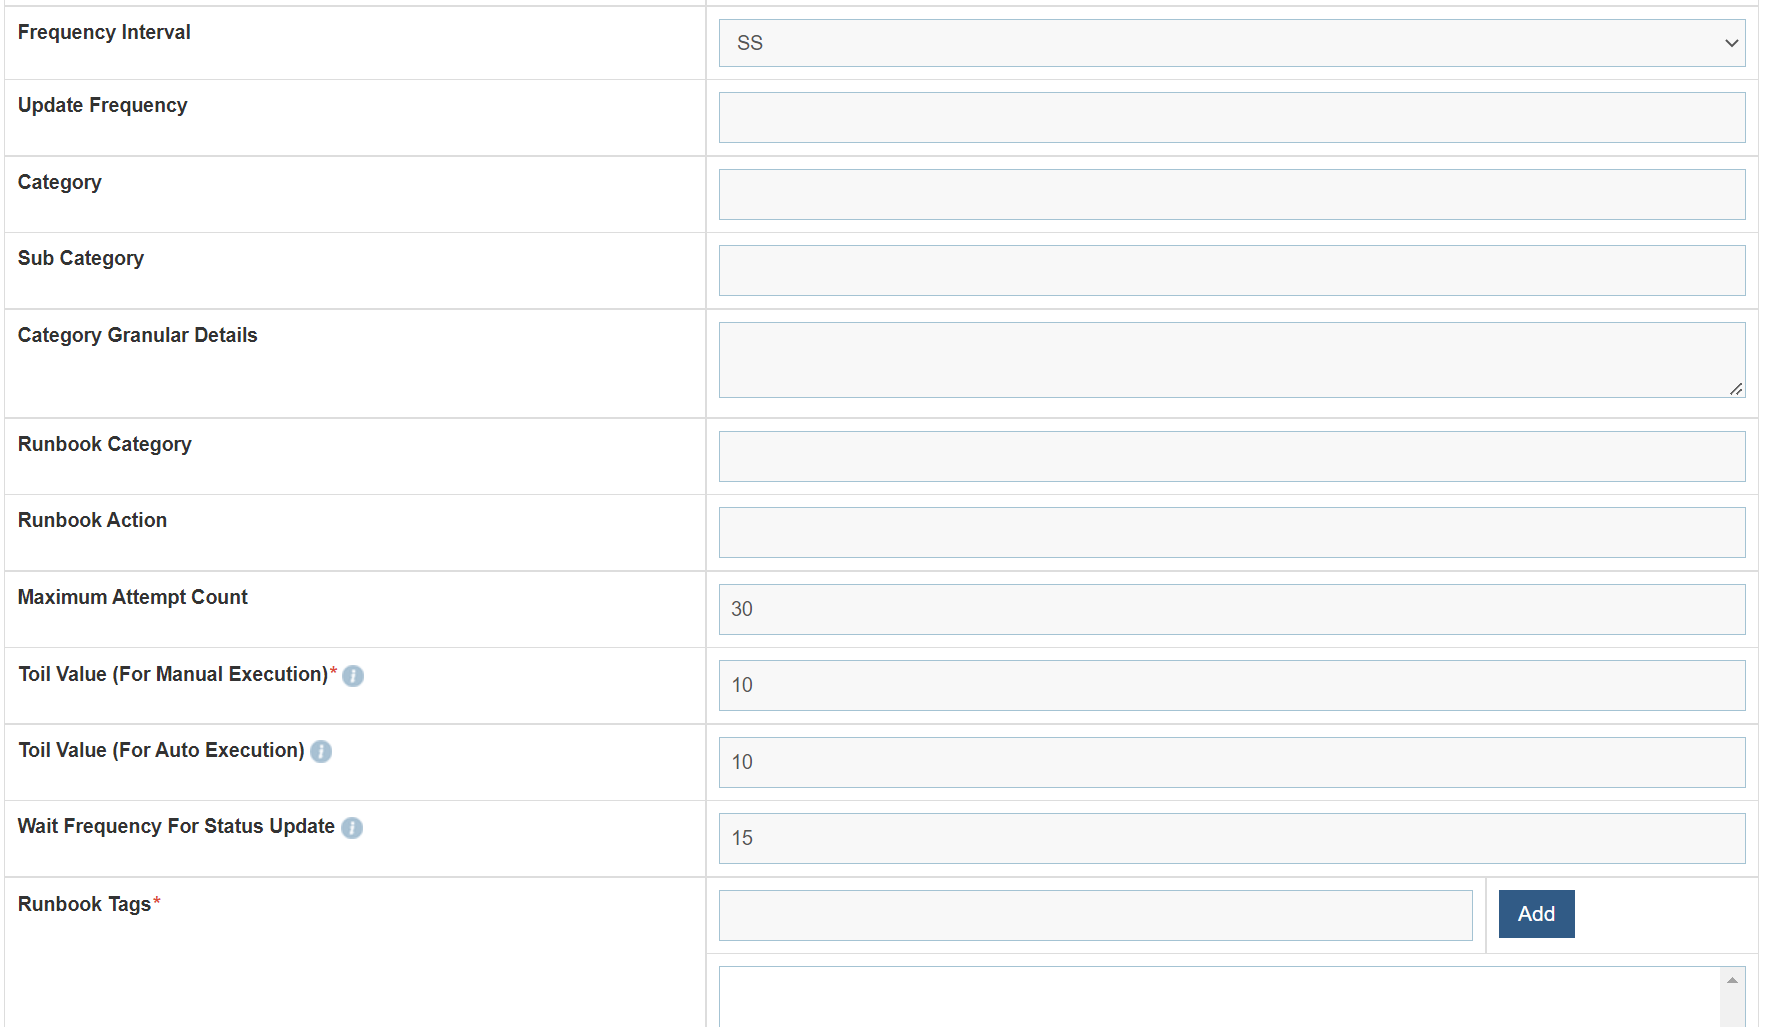
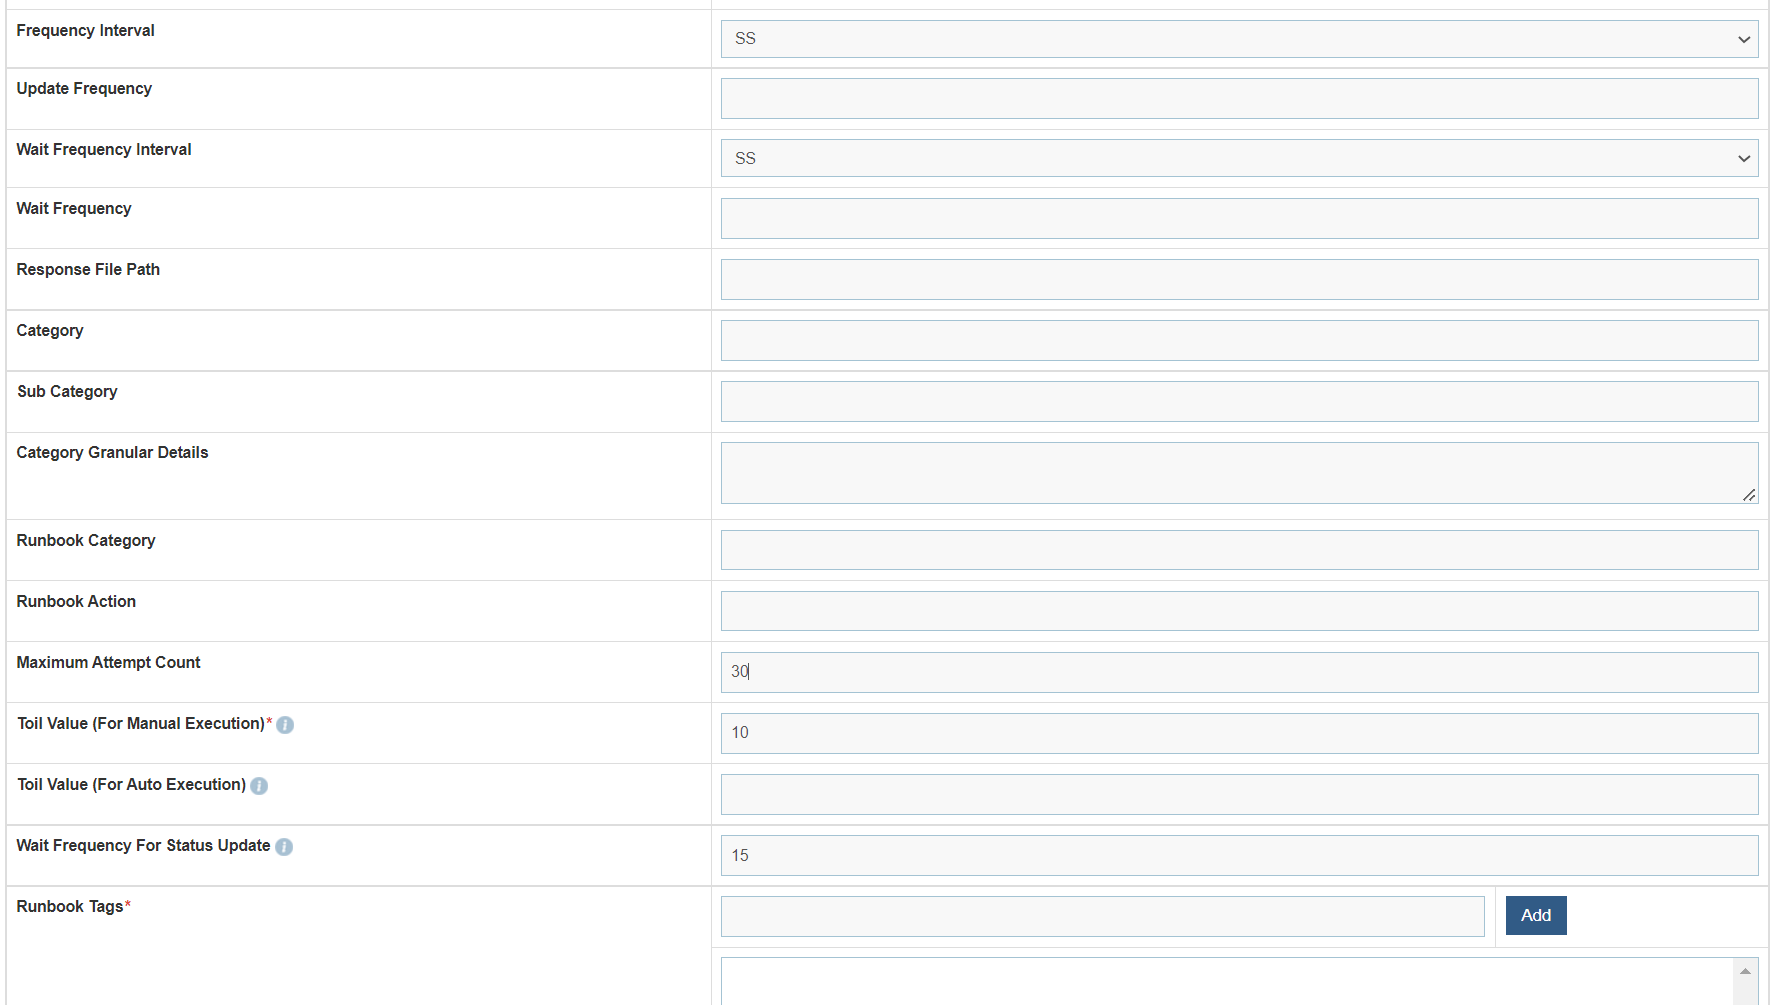
- Type the runbook category in the Runbook Category field.
- Specify the action to be taken by the runbook in the Runbook Actions field.
- Specify the Maximum Attempt Count for the runbook to retry in case of failure.
- Enter the Toil Value (For Auto Execution) which is the maximum manual execution time of runbook (in minutes). By default, it takes the value of the configured Toil Value (For Auto Execution) for the selected runbook tool.
- Enter the Toil Value (For Manual Execution) which is the maximum auto execution time of runbook (in minutes). By default, it takes the value of the configured Toil Value (For Manual Execution) for the selected runbook tool
- Enter the Wait Frequency For Status Update (in minutes) for the case when rba is unable to update execution status back to BigFix Runbook AI after successful interaction (in case push notification is enabled).
- Type a tag for the runbook corresponding to the Runbook Tags field and click Add. Added tags appear in a box, below the Add button. Tags allow users to assign keywords to help identify a runbook while ticket parsing. User can specify multiple tags for a runbook.
- If required, select Enable Auto Execution to enable auto execution of the runbook.
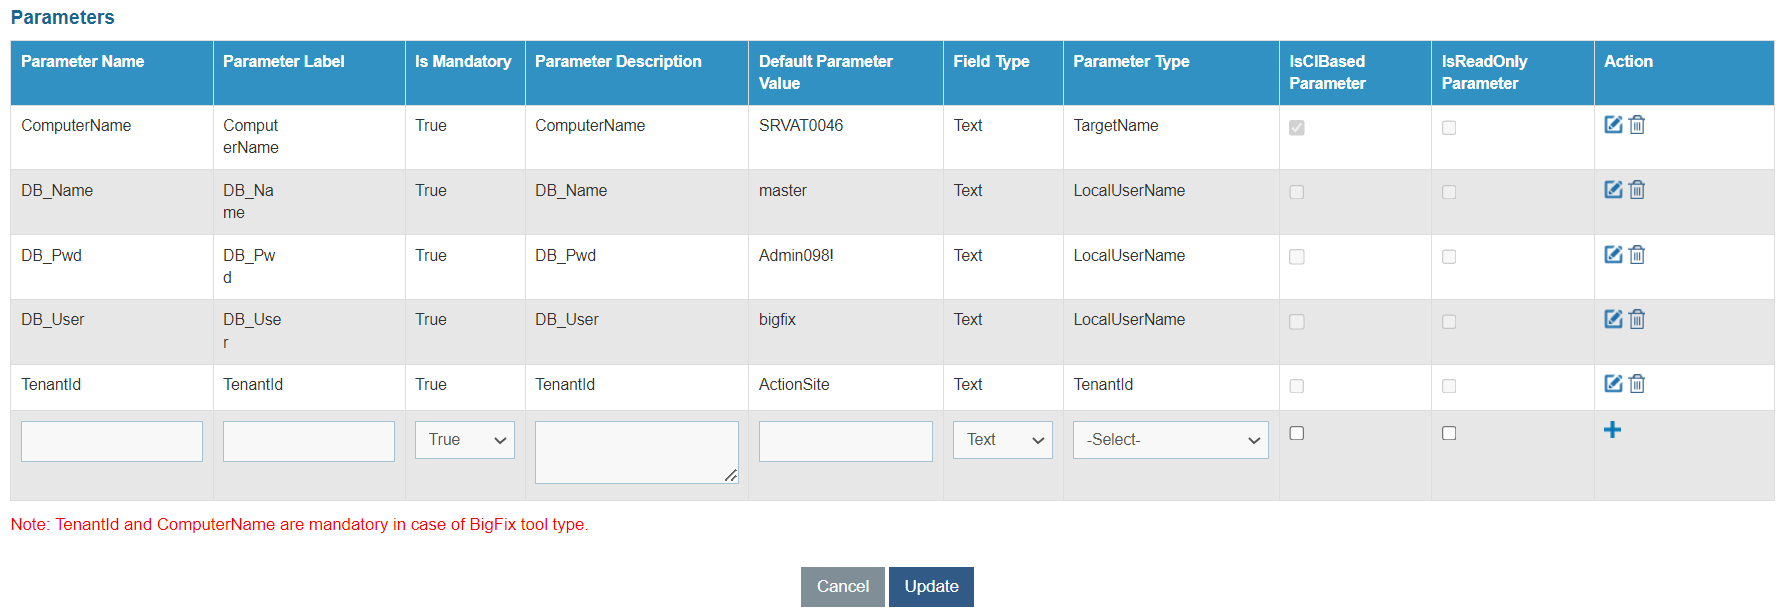
- Once the above values are added successfully, provide the following parameters for runbook execution while ticket parsing.
- Parameter Name- Specifies a name of the parameter which is to be used in a runbook for ticket parsing.
- Parameter Label- Specifies a unique user-friendly name for the parameter to be added .
- Is Mandatory- Select True or False depending on whether the parameter details added are mandatory or not.
- Parameter Description- Describes the parameter.
- Default Parameter Value- Specifies the default value for the parameter.
-
Field Type- Specifies the data type to be used in the parameter field. It may be of
the following types:
Text
Password
- Parameter Type- Lists all the parameter types configured in Configure Parameter Type. On selecting the parameter type, BigFix Runbook AI fetches the related data for ticket parsing.
- IsCIBasedParameter- Check this checkbox if the parameter is a CI based parameter. It is mandatory to have at least one parameter as CI Based.
- IsReadOnlyParameter- Check this checkbox if the parameter is read-only and user should not be able to change its value wherever parameter is parsed.
- Action- Enables user to add, edit or delete the existing parameter by clicking respective action buttons.
- Add- Adds a new row to add another parameter.
- Click Save.
- Click Save at the top of the screen to configure the newly added runbook to the selected runbook tool.

The new runbook is added and listed in a tabular view.
All fields marked with an asterisk (*) are mandatory.
Upload Spreadsheet to Configure Multiple Runbooks
If the user already has a Microsoft Excel spreadsheet with existing runbooks that were written or stored earlier, importing them to the runbook library is easy. Download the .xls file from the Manage Runbook page, update the runbook details, and import it to your system. If this runbook, is not required, it can be deleted.
To upload multiple runbooks, perform the following steps:
- To download a template, click
 . The template asks for the details as described in Add a Single Runbook section.
This functionality allows users to create multiple runbooks together by uploading the required details simultaneously through a single excel document.
- Fill the details in the downloaded template. See Add a Single Runbook section for more information.
- Select a Runbook Tool, then click Import Runbook.
All fields marked with an asterisk (*) are mandatory.
- The Upload Excel File page appears.

- Click Choose file to upload the updated .xls file.
The new runbooks are added and listed in a tabular view.
Edit Runbook
User can open an existing runbook, review the available information, and change the runbook details by performing the following steps:
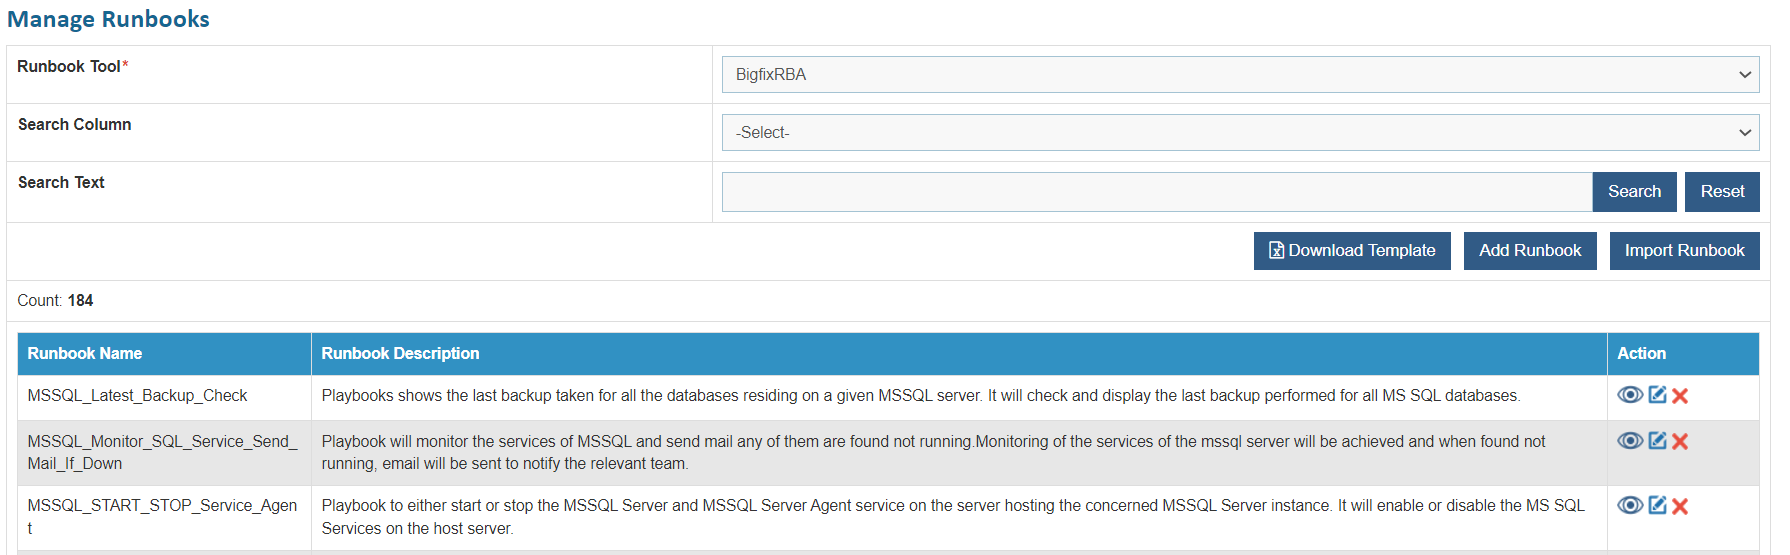
- On the Manage Runbook page, select Runbook Tool to specify the runbook tool. By default, all the runbooks mapped to the selected runbook tool appear in a grid.
- BigFix Runbook AI provides user with search capabilities to access runbook information. The user can limit his runbook search to a specific runbook type by specifying the search filters.
- Select the required parameter in Search Column.
- Type the search keywords in the Search Text field.
- Click Search.
Users can also change the search filter by selecting the Search Column again.
.png)
- Click
.png) next to the
runbook you want to edit that will redirect you to the
Add Single Runbook
screen. It auto-fills the details.
next to the
runbook you want to edit that will redirect you to the
Add Single Runbook
screen. It auto-fills the details.

- Change the selected runbook details.
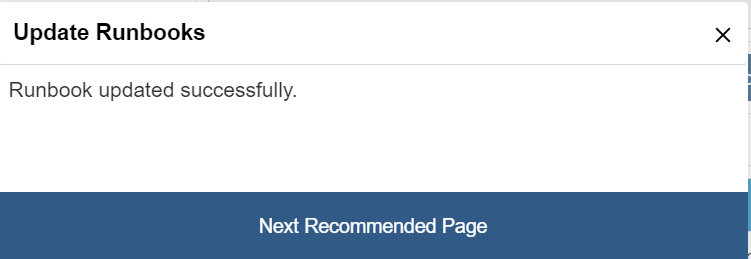
- Click Update to save the changes or click Cancel to discard all changes. A runbook updated confirmation dialog box appears.
Runbooks configured in this section will be shown while mapping a runbook to a customer. All fields marked with an asterisk (*) are mandatory.
Delete Runbook
If a user no longer wants a runbook in a runbook tool, the same can be deleted from the environment.
To delete a runbook from the runbook tool, perform the following steps:
- On the Manage Runbook page, click
.png) corresponding to the runbook that the user wants to
delete.
corresponding to the runbook that the user wants to
delete.
.png)
- Click OK to delete the selected runbook tool.
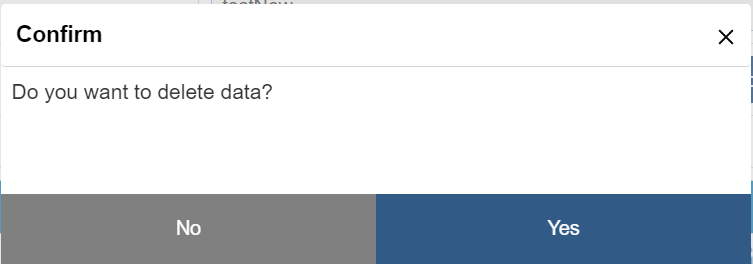
- A confirmation dialog box appears.
Map Runbooks
A runbook is a script that automatically resolves a ticket with no human involvement. A runbook coordinates multiple infrastructure elements such as applications, network components, or servers. The runbook tool is a platform used to specify these runbooks. Typically, a runbook contains procedures to start, stop, supervise, and debug the system. Each runbook must be configured to an organization.
To map a runbook, perform the following steps:
- On the main menu bar, click Actions -> Runbooks, and then click Map Runbook.
- Select an organization from the drop-down list available in the Organization field.
- Select a module from the list of modules configured to a selected organization in the Module field. This populates the runbooks in the following tabs.
- Organization Runbooks- It lists all the runbooks mapped to the selected organization.
- All Runbooks- It lists all the runbooks available for mapping.
The Map Runbook page allows user to map a new runbook and delete an existing, mapped runbook from an organization.
To map a runbook:
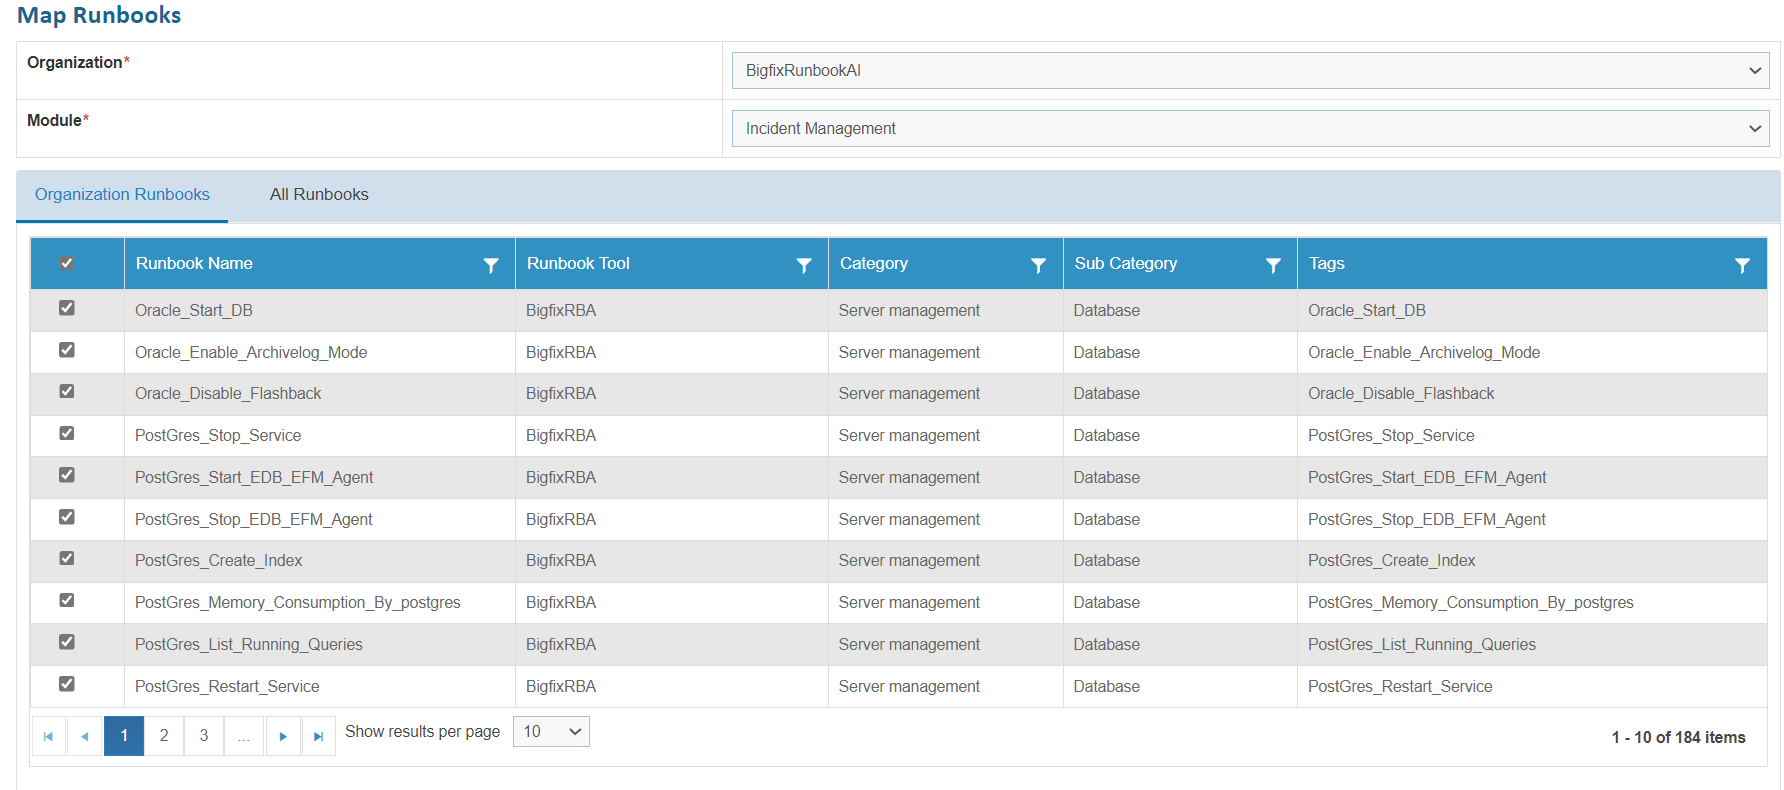
- Go to the All Runbooks tab.
- Select the Runbook to be mapped.

- A confirmation dialog box appears.
To remove a runbook from an organization,
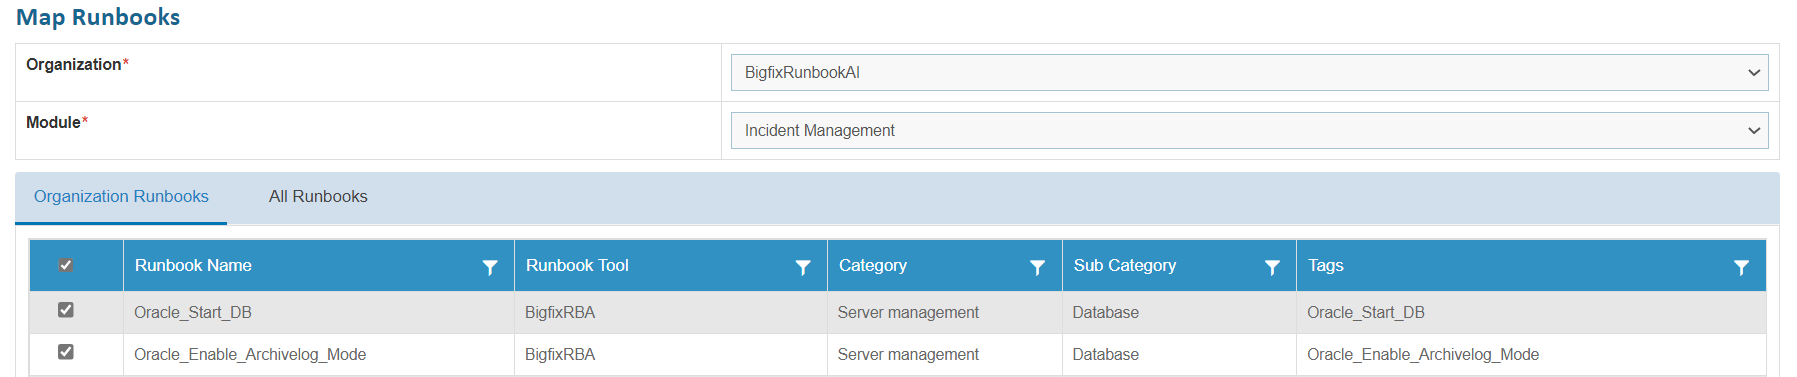
- Go to the Organization Runbooks tab.
- To delete an existing mapped runbook, clear the check box of that runbook.
Figure 38. Figure - Map Runbooks (Cont.) .png)
- Click Yes to confirm that you want to un-map the selected runbook.
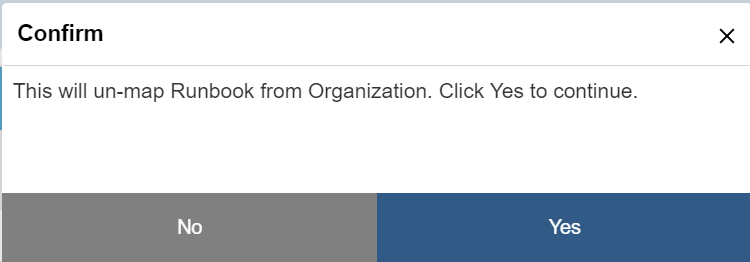
A confirmation dialog box appears.
Manage Execution Scope
Execution scope specifies the rules set up to execute a ticket on a runbook tool. User can also define the execution scope for a data source in an organization.
To manage the execution scope, perform the following steps:
- On the main menu bar, click Actions -> Runbooks, and then click Manage Execution Scope.
- The Manage Execution Scope page appears.
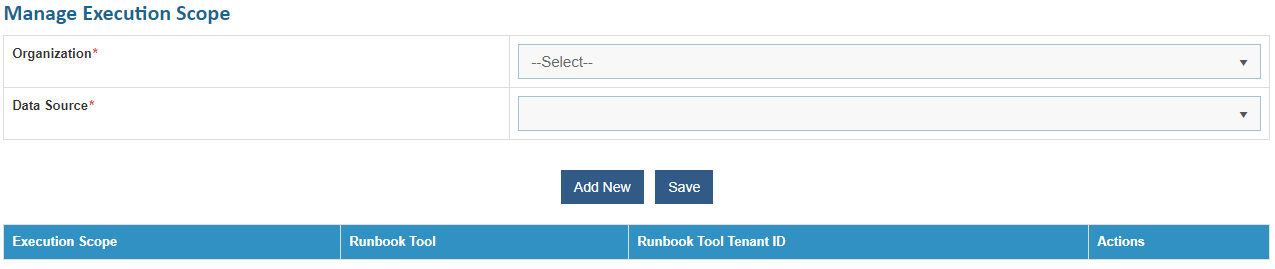
- Select an organization from the drop-down list available in the Organization field.
- Select the data source from the drop-down list available in the Data Source field.
- This enables the Add New button to configure a new execution scope and lists the configured execution scope in a tabular view that allows users to edit or delete them.
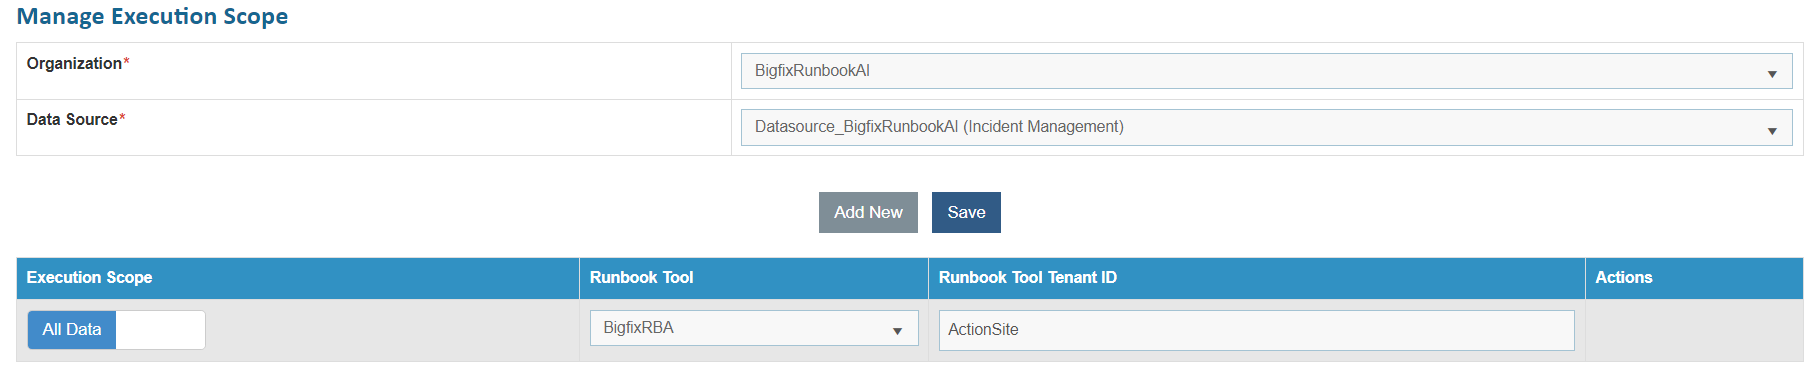
Add New Execution Scope
User can add a new execution scope for a data source in an organization by performing the following steps.
- On the Manage Execution Scope page, click Add New.
.png)
Before the user configures the execution scope, ensure the execution scope is set to Filter. In case of selecting All Data, all the runbook tools remain assigned to a single organization and the Add New button remains disabled. To assign a new runbook tool, set the Execution Scope from All Data to Filter, which enables the Add New button.
- It lists the existing execution scope for the selected organization.
- To define a new scope for execution, click Add New and add a new row below the existing execution scope.
- Select a Runbook Tool in a new row and then type the Runbook Tool Tenant ID, that is assigned to a runbook tool for identification.

- Click Save Rule. A confirmation dialog box appears.
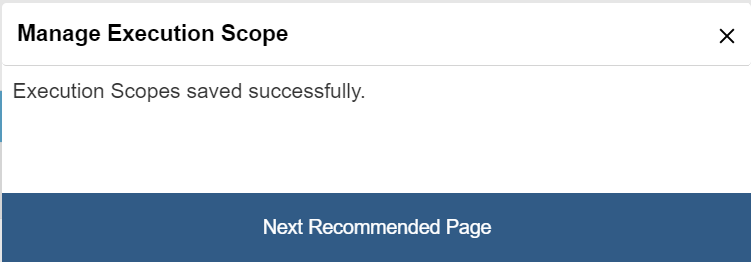
The new execution scope is defined and listed in a tabular view.
To delete an execution scope, click  corresponding to the
execution scope that you want to delete.
corresponding to the
execution scope that you want to delete.
Manage Rules
User can configure rules for the tickets released from BigFix Runbook AI. There are few default rules for release, but these rules can be customized based on the requirements.
To manage the release rule, perform the following steps:
- On the main menu bar, click Actions -> Runbooks, and then click Manage Rules. The Manage Rules page appears:
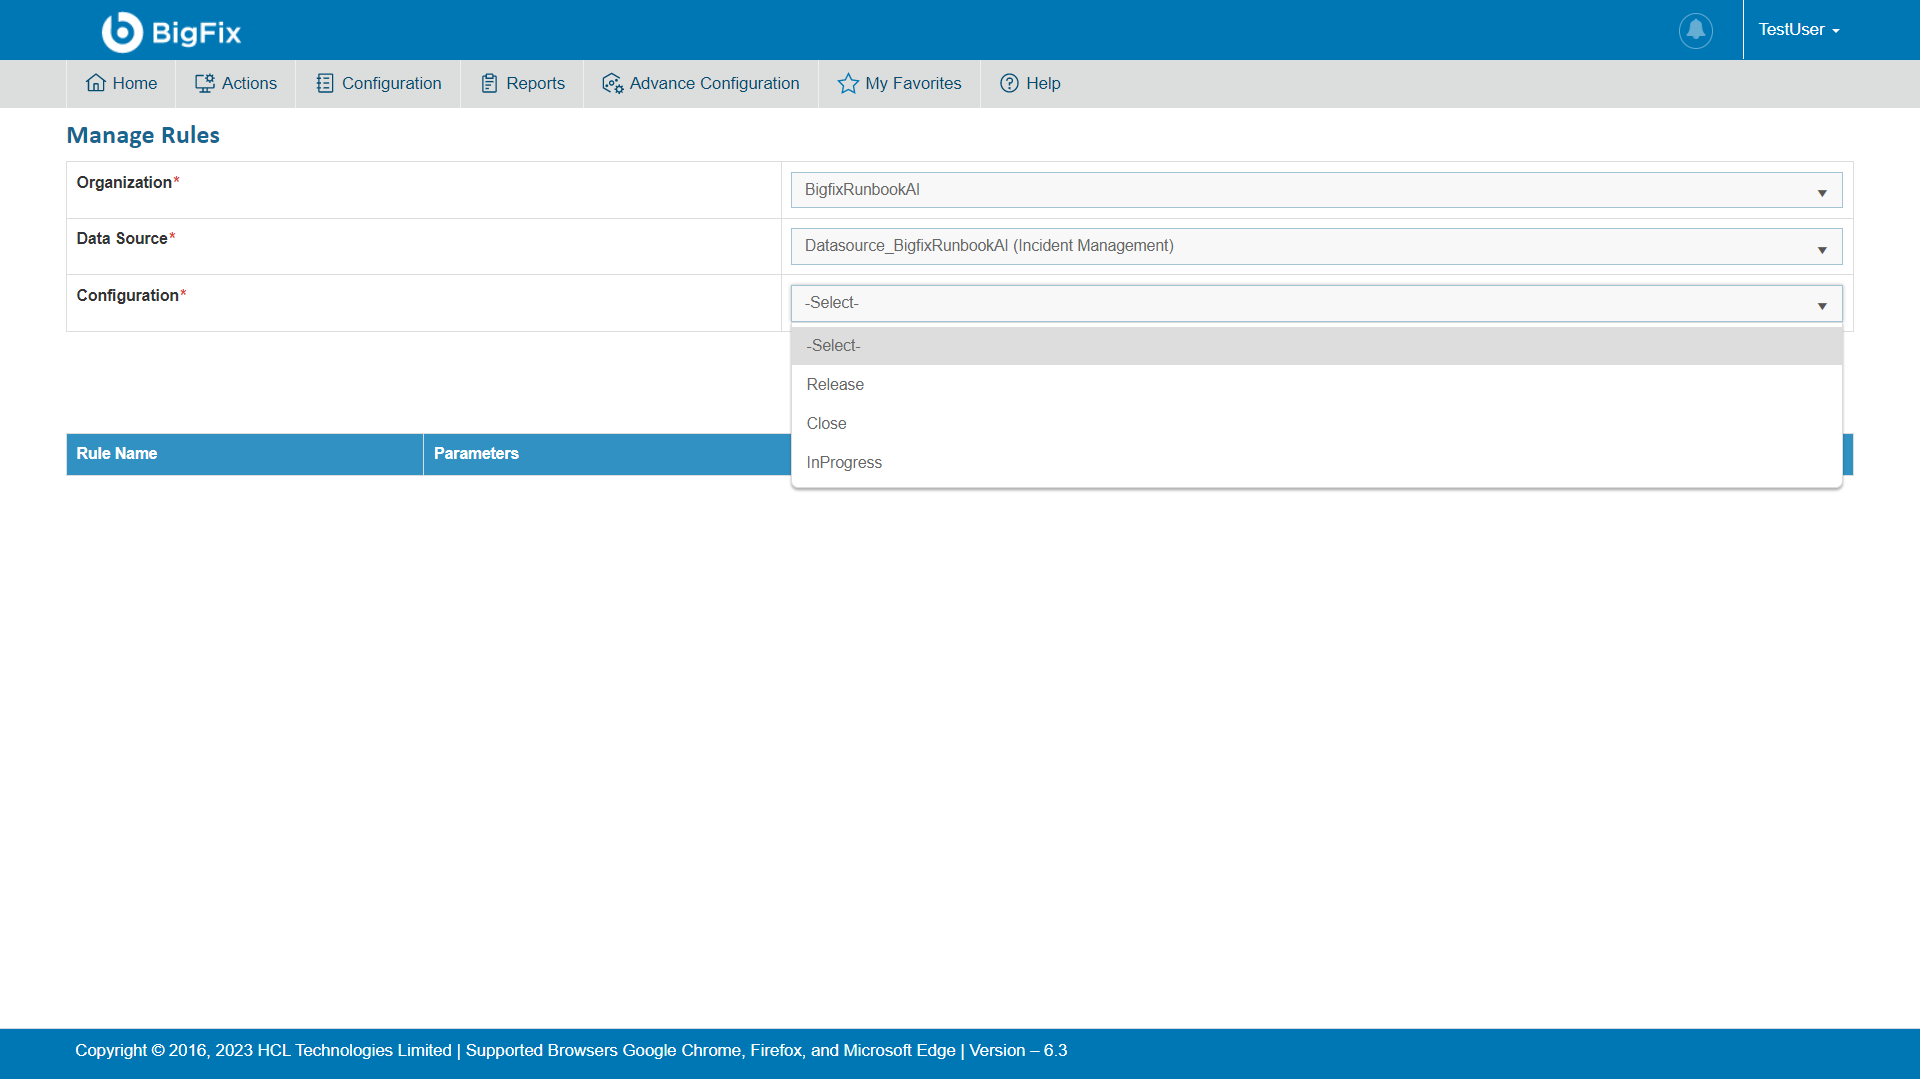
- Select an organization from the list of organizations available in the Organization Name field.
- Select a data source to fetch the data from the list of data sources available in the Data Source Name field.
- Select Configuration from the list of configurations available.
All the existing rules are listed in a tabular view with the associated parameters that allows user to manage the parameters for the existing rules.
No Rule in the condition column indicates the Else or Default condition. If No Rule is added against the selected Customer-Module combination, then BigFix Runbook AI will release the ticket without condition in case of Rule-based Release in the Manage Configuration tab.
Add Rules
User can define multiple release rules for an organization by performing the following steps.
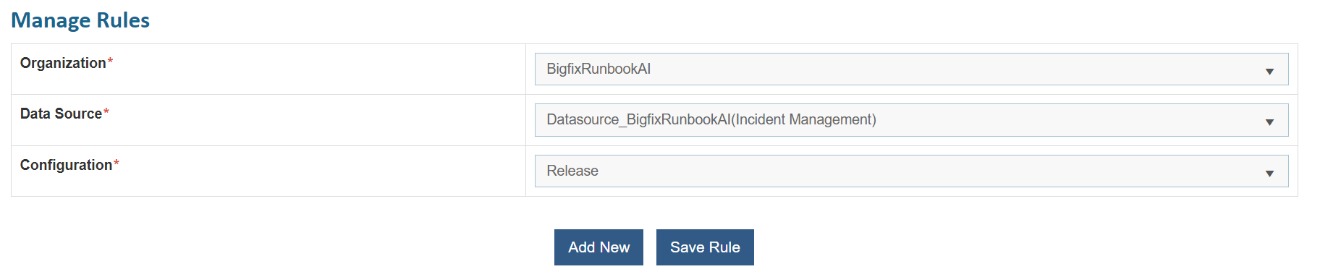
- On the Manage Rules page, select the organization for which user wants to configure the release rules from the drop-down in the Organization field.
The organizations listed in the drop-down are created using Create Organization .
- Select the data source, from where the organization fetches the data in BigFix Runbook AI, from the drop-down in the Data Source field.
- Select Configuration from drop-down. It lists all the configured rules in a tabular view.
- Click Add New.
- It will prompt the user to type the Rule Name, which acts as an identifier for the added rule in the dialog box.
- Click Save.

This adds the new rule, and it appears in the list of rules. After the rule is added, the user must set up the configuration parameters for the newly added rule.

To manage parameters:
- On the Release Rule grid, click
 next to the
rule for which user wants to set the parameters.
next to the
rule for which user wants to set the parameters.

- This prompts user to add the Assignment Group .

- Select Value Type and enter the appropriate details in Value Field.
- Click OK and the added parameter appears against the rule in the Rule grid.
- You can edit the parameter name by clicking
 corresponding to the Rule Name
in the rule list grid. It prompts you to edit the Rule
Name.
corresponding to the Rule Name
in the rule list grid. It prompts you to edit the Rule
Name. Figure 52. Figure - Add Release Rule (Cont.) 
- Click Save to update the changes.
Figure 53. Figure - Add Release Rule (Cont.) 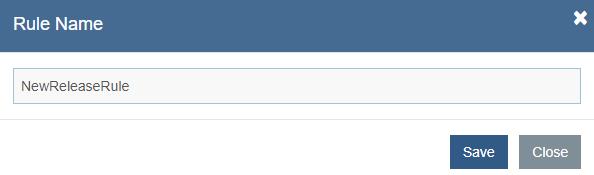
- You can also filter the rule by clicking
 corresponding to the Rule Name in the rule list grid. It auto-fills the
following attributes:
corresponding to the Rule Name in the rule list grid. It auto-fills the
following attributes: Figure 54. Figure - Add Release Rule (Cont.) 
Figure 55. Figure - Add Release Rule (Cont.) 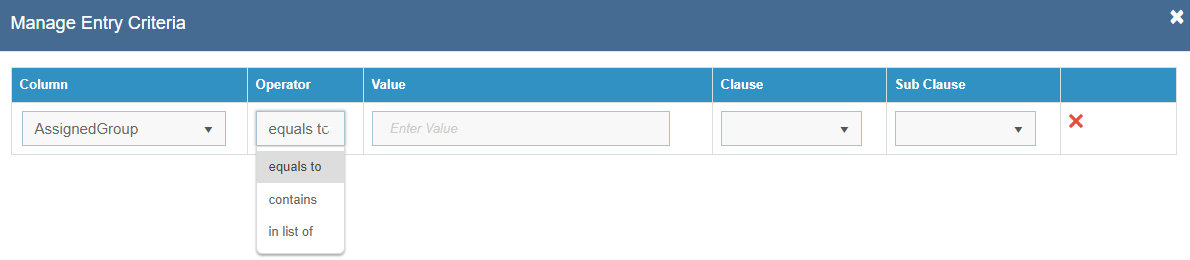
Figure 56. Figure - Add Release Rule (Cont.) 
Figure 57. Figure - Add Release Rule (Cont.) 
- Optionally, you can fill the Column, Operator, Value,
Clause, and Sub-clause attributes and then click
.png) , if you want to delete the added attributes.
, if you want to delete the added attributes. - Click Save to update the filter attributes.
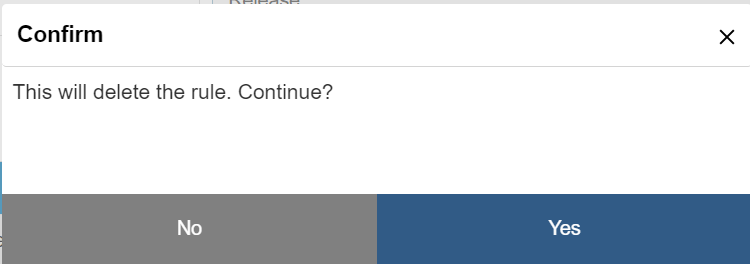
- To delete a rule from an organization, click
.png) corresponding to the rule that you want to delete from the grid.
corresponding to the rule that you want to delete from the grid. Figure 58. Figure - Add Release Rule (Cont.) 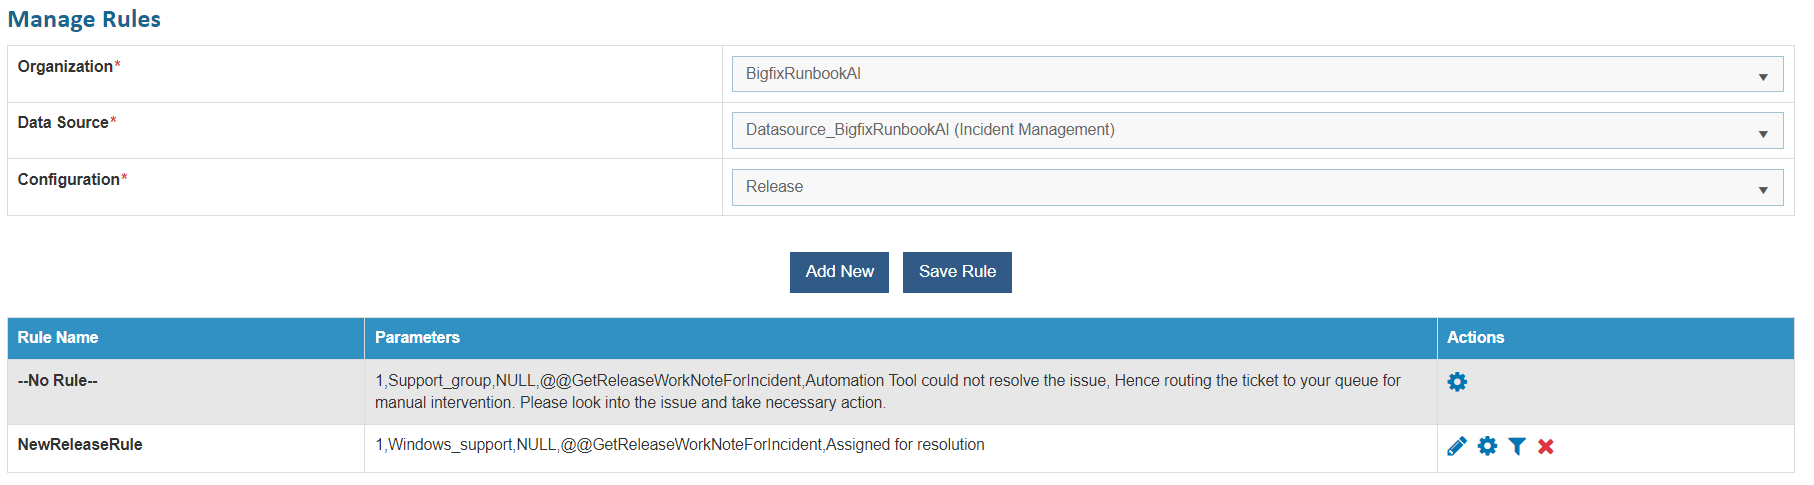
- Click OK to confirm deletion of the selected release rule.
Schedule Runbooks
BigFix Runbook AI allows user to schedule runbooks to run at a specified time. A runbook can be scheduled to run once or on a recurring basis. User can also schedule them for weekly, monthly, specific days of the week or days of the month, or a particular day of the month.
To create a new runbook schedule, perform the following steps:
- On the main menu bar, click Actions -> Runbooks and then Schedule Runbooks. The Schedule Runbook page appears.
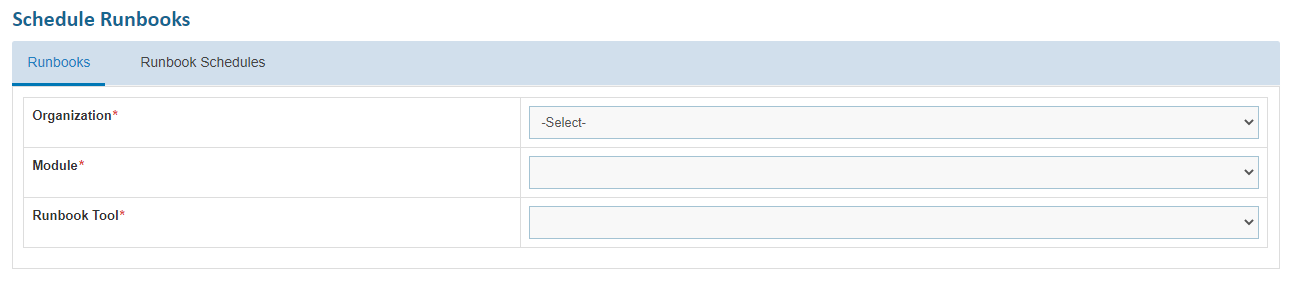
- Select an Organization, Module and then select the Runbook Tool. It lists all the runbooks configured with the selected runbook tool in a tabular view.

- Click
 and fill in the details to schedule a
runbook.
and fill in the details to schedule a
runbook.
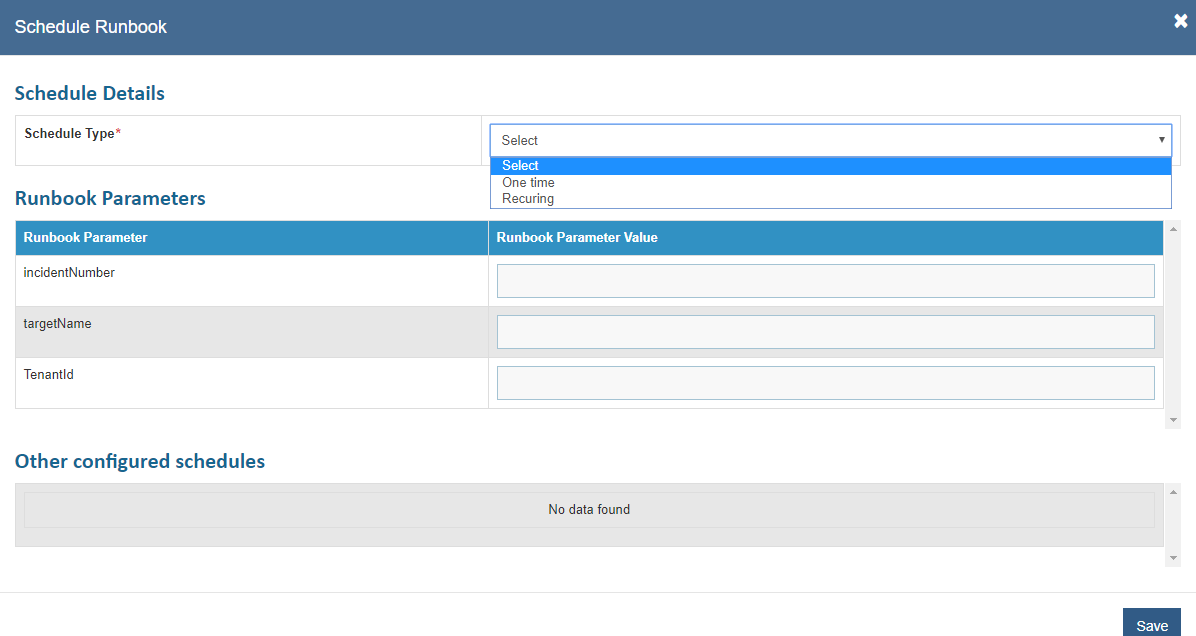
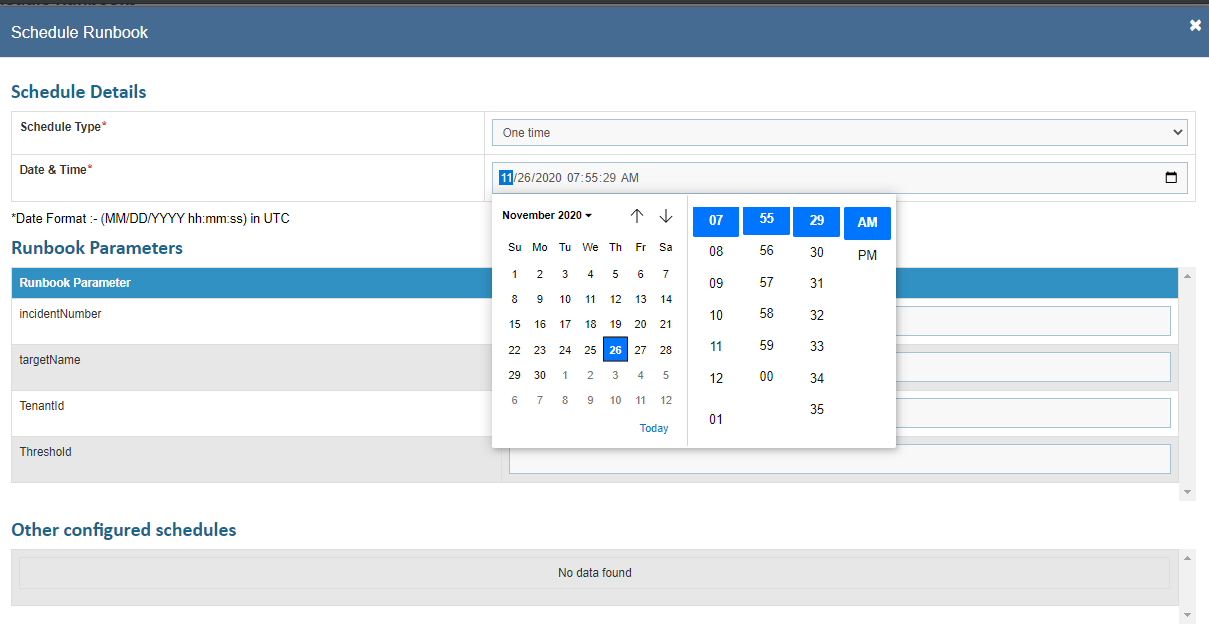
- Select One time or Recurring from the Schedule Type drop-down menu to specify the scheduling frequency.

- If the user selects One time, specify the Start date and time.
- If the user selects Recurring, specify the Time Out Period and the Schedule Frequency for how often user wants the runbook to repeat by hour, day, week, or by month.
.png)
- Click Save. A confirmation dialog box appears.
- This creates a new schedule and lists it in the Runbook Schedule page.
Figure 67. Figure - Schedule Runbooks (Cont.) 
- The Runbook Schedule page enables users to edit or delete existing schedules.
One-time schedule type runbooks cannot be edited. In case user needs to modify it, it will have to be added as a new entry through Schedule Runbook
- Click
 next to the schedule you want to edit. This
opens the auto-filled Schedule Runbook page.
next to the schedule you want to edit. This
opens the auto-filled Schedule Runbook page. - Click Update after editing the required details.
Figure 68. Figure - Edit Details 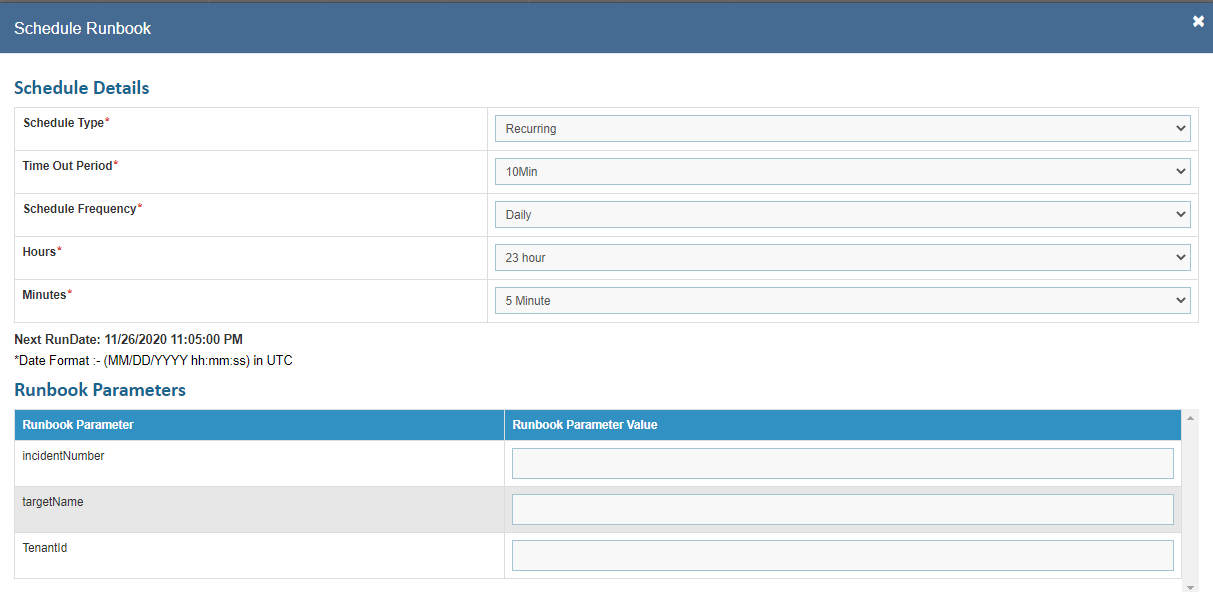
- Click
- A confirmation dialog box appears.
- To delete an existing schedule, click
 corresponding to
the schedule.
corresponding to
the schedule. - Click Yes to confirm.
Create Runbook
This section describes the steps required to create a runbook, including the metadata and scripts. Only a user with super admin rights can access this module.
To create a runbook, perform the following steps:
- On the main menu bar, click Runbooks and then Create Runbooks. The Create Runbook page appears.

- Select a runbook tool to specify the runbook by clicking the drop-down arrow next to the Runbook Tool field.
- User can upload multiple scripts simultaneously using the Upload option or type the script for each runbook in the Script Text field.
- Type a runbook name for the new runbook in the Runbook Name field.
- Type a runbook friendly name in the Runbook Friendly Name field to easily recognize the runbook in your repository.
- Selecting Runbook Tool as ‘BigFix’ enables three more fields:
- Response File Path: Type the location of the file from where the response is to be read.
- Wait Frequency Interval: Frequency Interval, which is fixed by the user to wait before going to fetch the response post runbook execution. This frequency varies with the type of runbook in terms of SS (seconds), MM (minutes), or HH (hours).
- Wait Frequency: The time interval to wait before going to fetch the response.
- Specify the path where the master runbook is located within the runbook tool in the Master Runbook Path field.
- Specify the name of the master runbook in the Master Runbook Name field.
- Type the runbook description in the Runbook Description field.
- Type the user-friendly runbook description in the User Runbook Friendly Description field.
- Type the Frequency Interval, which is fixed by a user to fetch the status post runbook execution. This frequency varies with the type of runbook in terms of SS (seconds), MM (minutes), or HH (hours).
- Specify the frequency for runbook updates in the Update Frequency field.
Frequency Interval and Update Frequency are inter-related.
- Type the runbook tool category in the Category field.
- Type the sub-category of the runbook tool in the Sub-Category field.
- Specify the details of a runbook tool category in the Category Granular Details field.
- Type the runbook category in Runbook Category field.
- Specify the action to be taken by the runbook in the Runbook Actions field.
- Specify the Maximum Attempt Count for the runbook to retry in case of failure.
- Enter the Toil Value (For Manual Execution) which is the maximum manual execution time of runbook (in minutes). By default, it takes the value of the configured Toil Value (For Manual Execution) for the selected Runbook tool.
- Enter the Toil Value (For Auto Execution) which is the maximum auto execution time of runbook (in minutes). By default, it takes the value of the configured Toil Value (For Auto Execution) for the selected Runbook tool.
- Enter the Wait Frequency For Status Update (in minutes) for the case when RBA is unable to update execution status back to BigFix Runbook AI after successful interaction (in case Push Notification is enabled).
- Type a tag for a runbook next to the Runbook Tags field and click Add. Added tags appear in a box below the Add button.
- If required, select Enable Auto Execution to enable auto execution of the runbook.
- Enter the Auto Execution Threshold so that the runbook above this threshold will be auto executed if auto execution is enabled.
- Once the above values are added successfully, provide the following parameters for runbook execution while ticket parsing.
- Parameter Name- Specifies a name of the parameter to be used in runbook for ticket parsing.
- Parameter Label- Specifies a unique user-friendly name for the parameter.
- Is Mandatory- Select True or False depending on if the parameter details added are mandatory or not.
- Parameter Description- Describes the parameter.
- Default Parameter Value - Specifies the default value for the parameter.
-
Field Type- Specifies the data type which is to be used in the parameter field. It
may be of the following types:
Text
Password
- Parameter Type- It lists all the parameter types configured in Configure Parameter Type . On selecting the parameter type, BigFix Runbook AI fetches the related data for ticket parsing.
- IsScript Parameter- Check the checkbox if the parameter is the part of Script uploaded.
- IsCiBased Parameter- Check the checkbox if the parameter is a CI based parameter. It is mandatory to have at least one parameter as CI based parameter.
- IsReadOnly Parameter- Check the checkbox if parameter is read-only and user cannot update the same whenever it is parsed.
- Action- Enables user to add, edit or delete the existing parameter by clicking respective buttons.
- Click Save to configure the newly added runbook to the selected runbook tool.

It adds a new runbook and lists it in a tabular view.
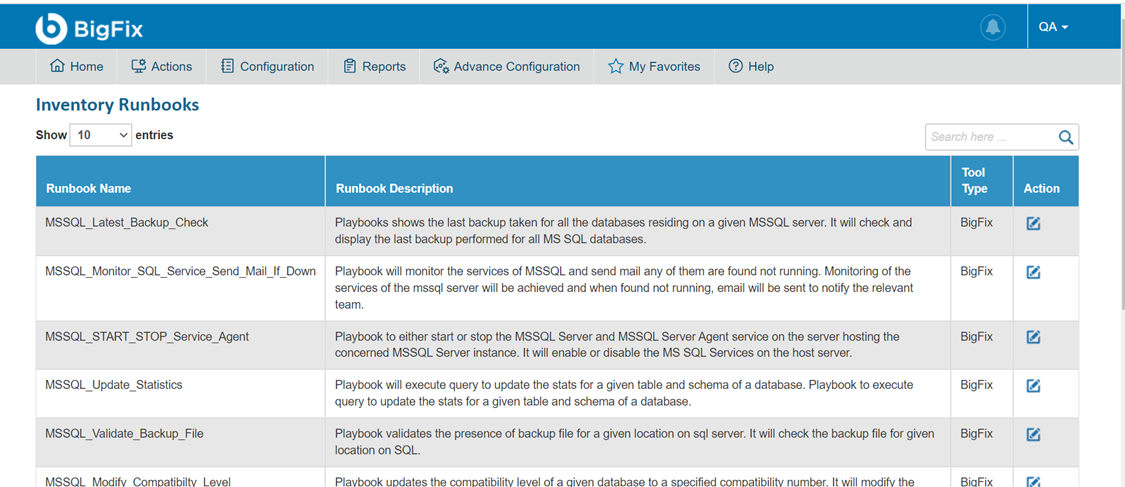
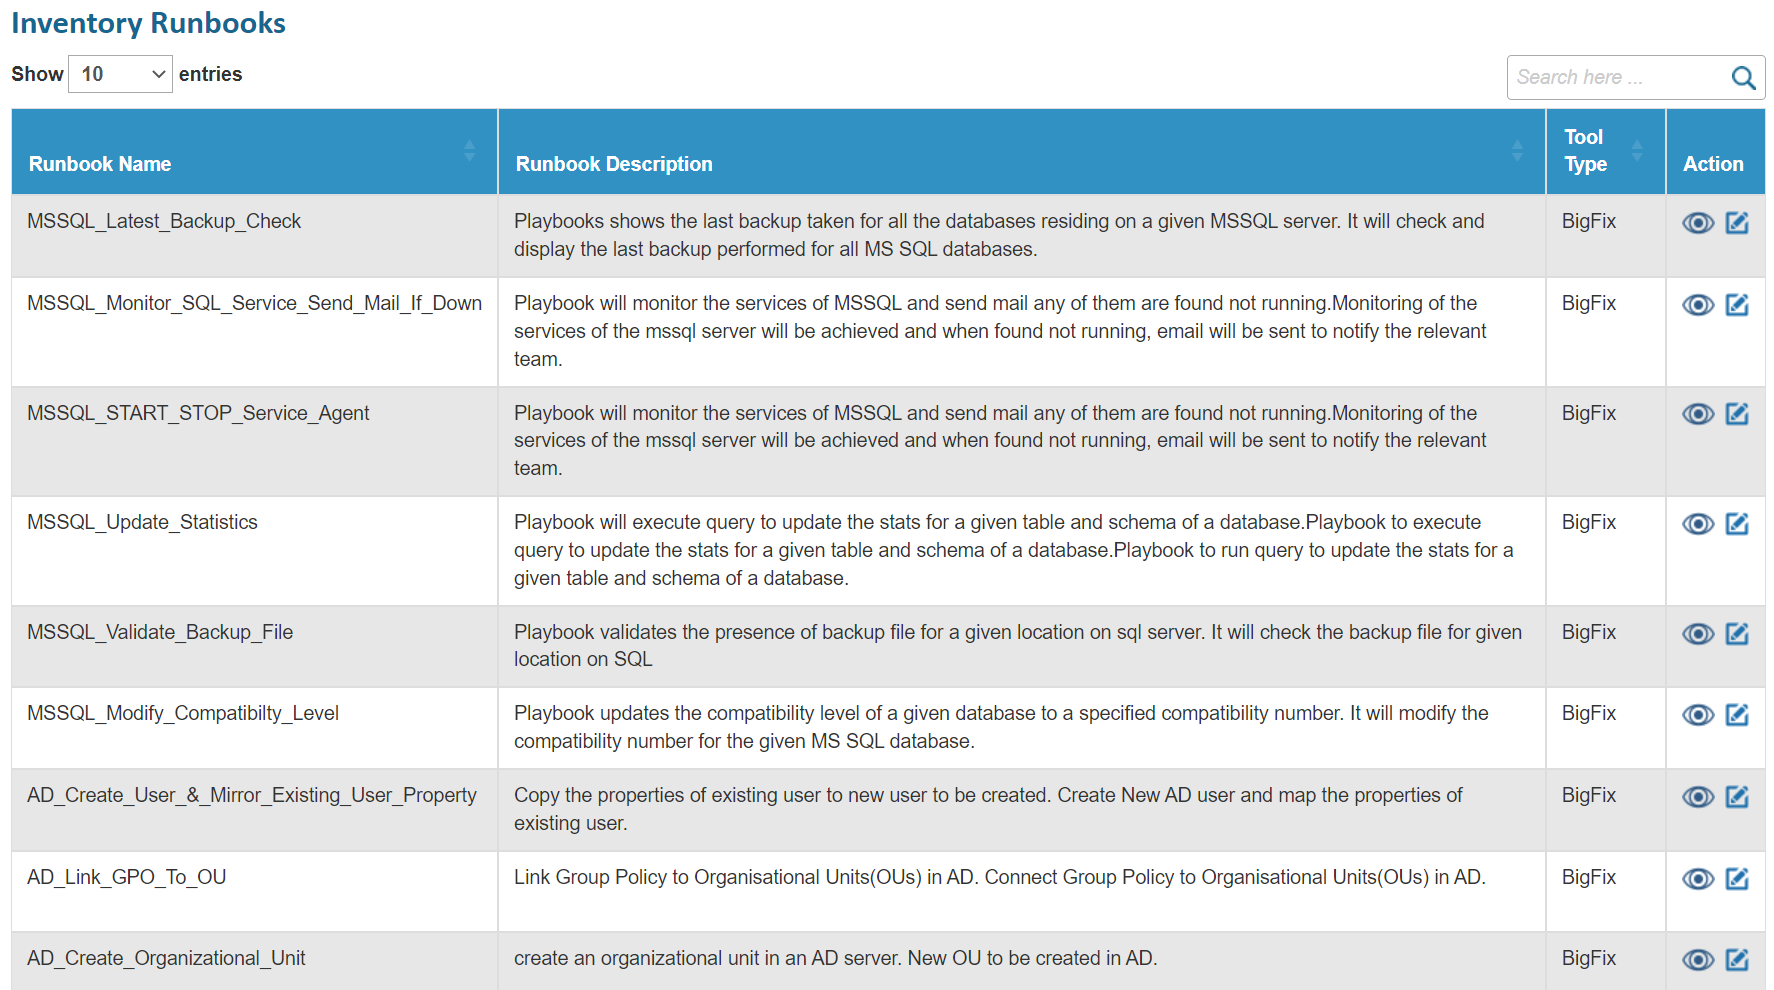
Inventory Runbooks
This section describes the steps required to view inventory runbook metadata. Only a user with super admin rights can access this module.
To access and view the inventory runbook data, perform the following steps:
- On the main menu bar, click Actions -> Runbooks and then Inventory Runbooks. The Inventory Runbooks page appears.
- Click on
 under the Action tab to view or edit
the runbook details.
under the Action tab to view or edit
the runbook details.
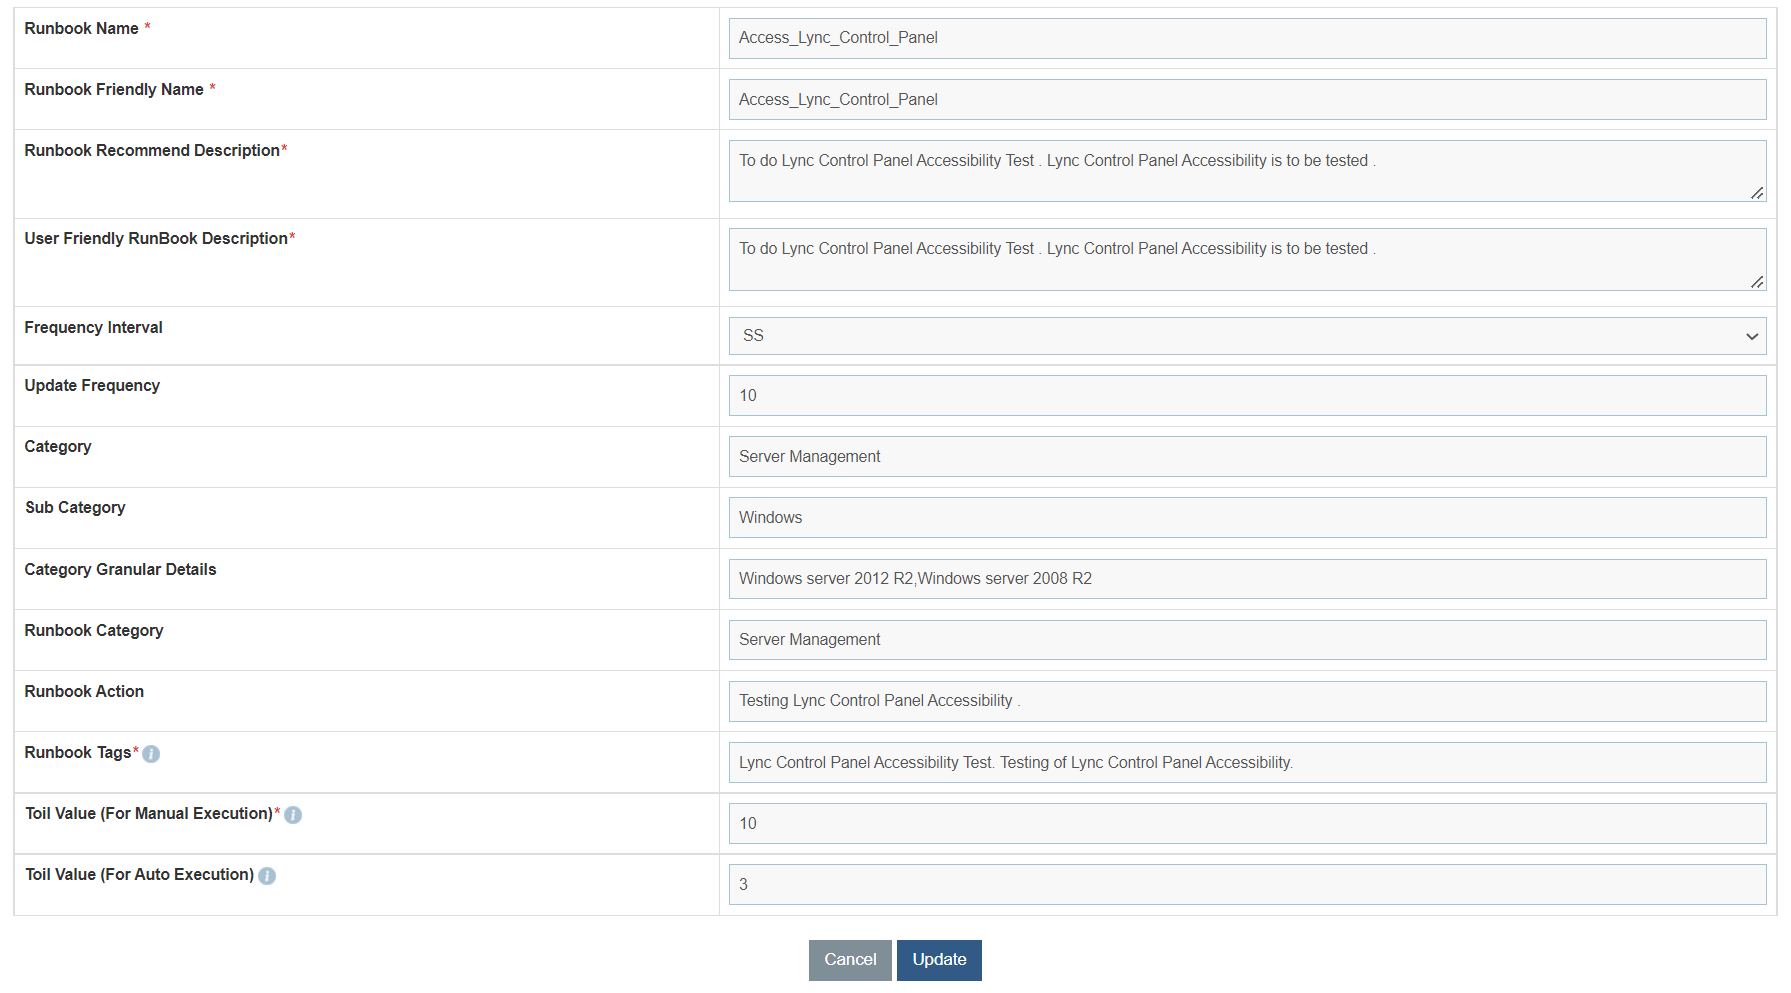
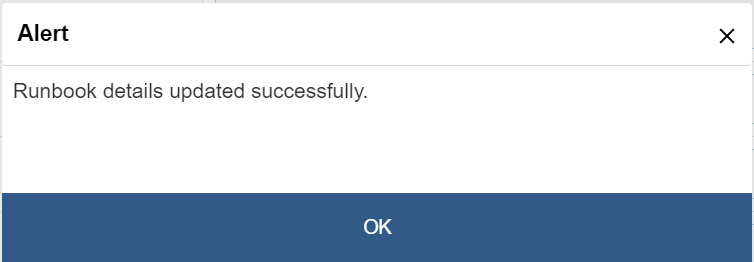
- Update the value of any field and click on update button. A confirmation box appears:
- Type the search text in the Search here box to search for the runbook.
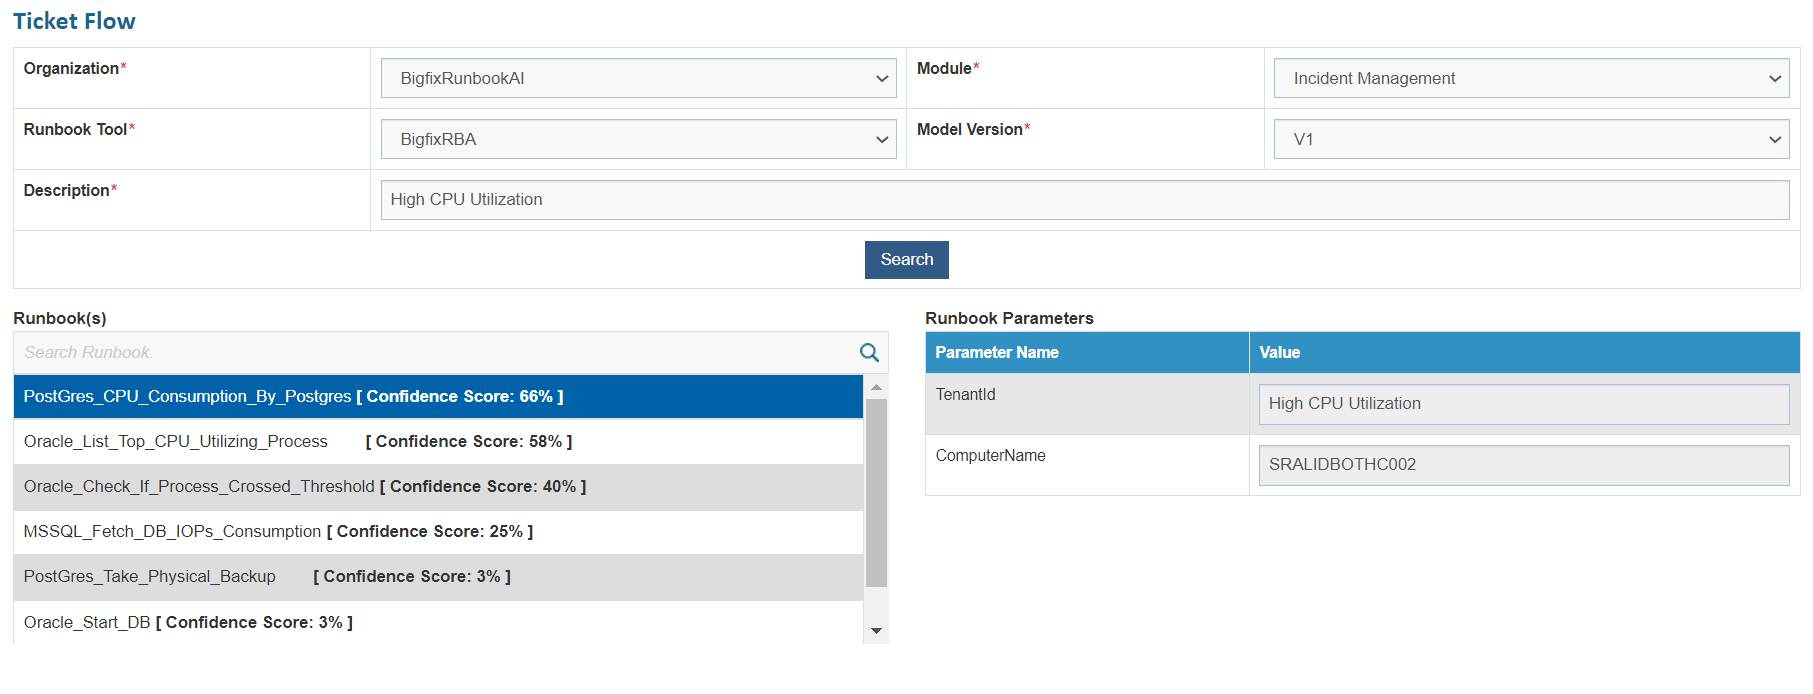
Ticket Flow
This module helps in testing, ensuring that the relevant runbooks are being recommended using the current model and correct information is being parsed and extracted from the tickets as input parameters for the runbook.
To test the ticket flow, perform the following steps:
- On the main menu bar, click Runbooks and then Ticket Flow. The Ticket Flow screen appears.

- Select Organization, Module, Runbook Tool, and Model Version.
- Enter the description of the event / ticket for which you would like to test the runbook recommendations and the extracted input parameter values. Click Search to view the results.
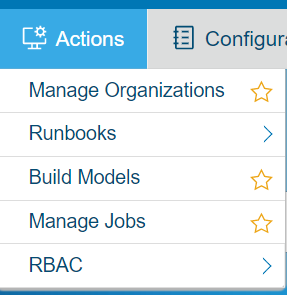
Actions
User can define multiple organizations to leverage BigFix Runbook AI features and functionalities for various kinds of automation opportunities.
To manage an organization, on the main menu bar, click Actions. The drop-down menu lists following options:Manage Organization
RBAC
Runbooks
Build Models
Manage Jobs
Tickets
Analysis
Ensure you are logged on to BigFix Runbook AI as super administrator or organization admin to create and manage the organization parameters. Menus accessible to Super Administrator and Organization Admin will be different.
Manage Organization
As a Super Administrator, user can use the Manage Organization page to set up an organization and begin the BigFix Runbook AI configuration.
To create an organization, perform the following steps:
- On the main menu bar, click Actions and then Manage Organization . Then click on Add New.

- The Create Organization page appears.
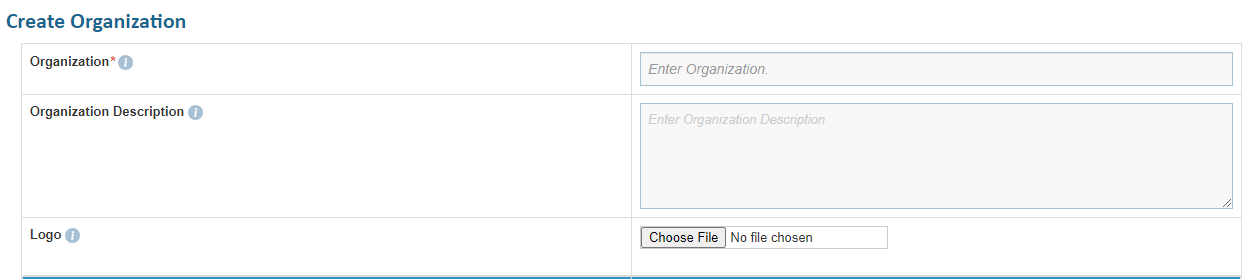
- Type the name of the customer to be created in the Organization field.
- Type the customer description in the Organization Description field.
The supported file type for uploading an image as a logo is .jpg, .jpeg, .gif, and .png and the recommended file size is not over 10 KB.
- Select the ITSM Tool Type from the Module Name field.
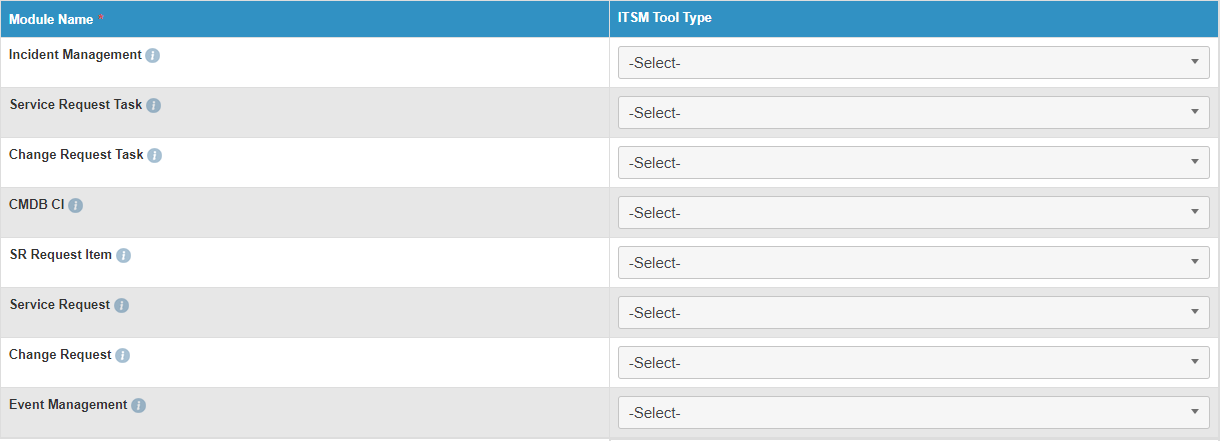
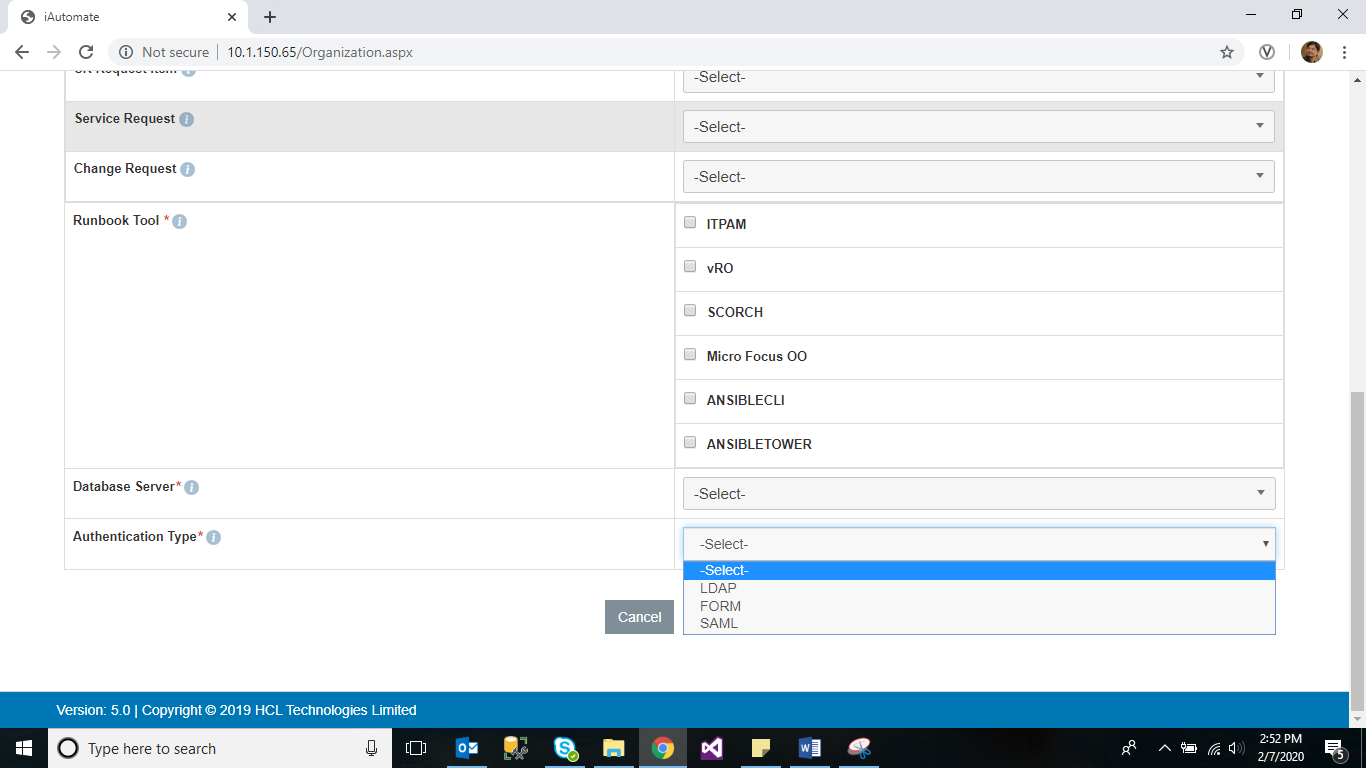
- Select the required Runbook Tool from the list of tools.

You can select single or multiple automation tools against the selected module.
- To manage database files, select the Database Server from the lists available in the Database Server field.
- Select the Authentication Type from the following options:
- Form: Users are authenticated without Active Directory (AD) support.
- LDAP: Users are authenticated using their AD credentials.
- SAML: Users are authenticated using the SSO (Single Sign On) credentials that allows security credentials to be shared by multiple computers across a network.
The selected authentication type will reflect while managing the user as explained in
- Enter a numeric value in the Password Expiration Days field. This numeric value defines the password expiration days for the user of the corresponding user.
Password Expiration days will be visible only in case of FORM authentication type.
- Selection of SAML authentication prompts the additional fields to be filled.
- Type the ID in the SSO ID field.
- Type the URL in the SSO URL to access the BigFix Runbook AI website.
- Type the name ID in the SSO Name ID field.
- Enter the tool in the SSO Tool field.
- Enter the Logout URL.
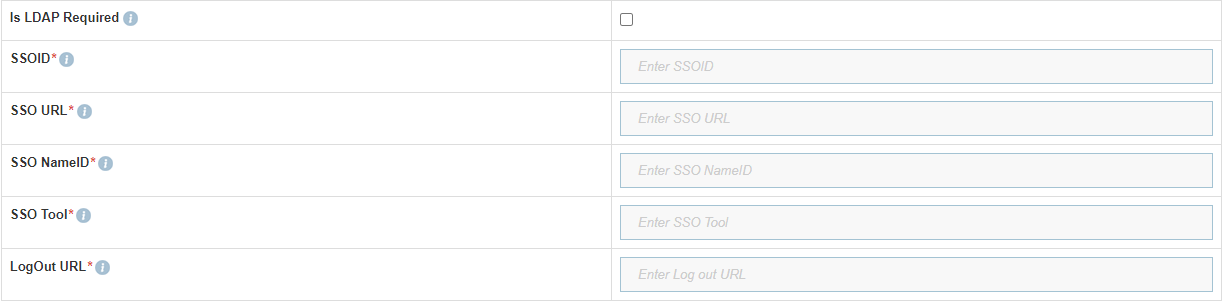
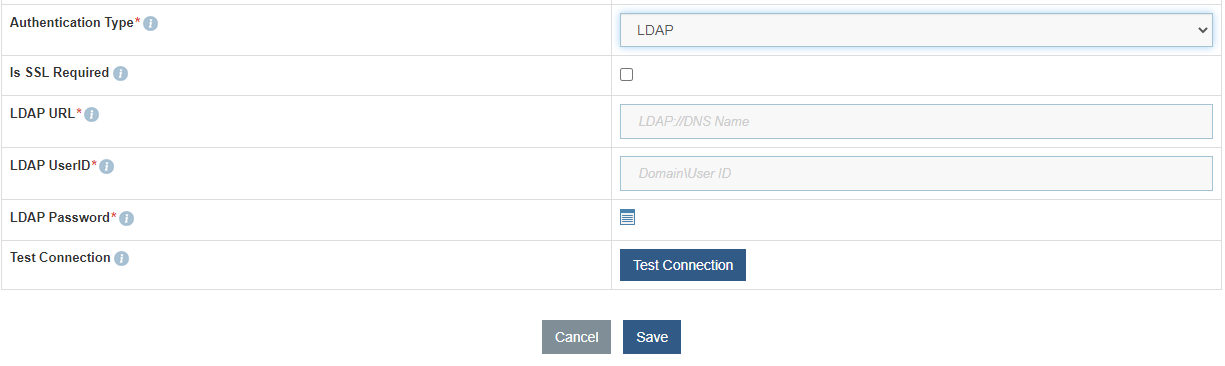
- Enable Is LDAP Required field if the user needs to fetch the data from LDAP.Selection of LDAP authentication prompts the additional fields to be filled.
- Enable Is SSL Required field if configuration Run over LDAPS
- Type the LDAP URL.
- Type the LDAP UserID.
- Enter the LDAP Password.
- For LDAP password, click on icon
 next to it. If the
password is available in plaintext, then select Input type as Input Text and enter the
password in Value field. Else if it is available in any Key Vault such as CyberArk or
Secret Manager then select Input Type as CyberArk or Secret manager respectively and then
select any of the configured details from the value field.
next to it. If the
password is available in plaintext, then select Input type as Input Text and enter the
password in Value field. Else if it is available in any Key Vault such as CyberArk or
Secret Manager then select Input Type as CyberArk or Secret manager respectively and then
select any of the configured details from the value field.
.png)
- Click on Test Connection to check accessibility of LDAP from service
- Click Save.
- A confirmation dialog box appears. Click OK.
- The new organization is added and listed in a tabular view.

- In case of LDAP, click
 to enter the LDAP Group
Information.
to enter the LDAP Group
Information.
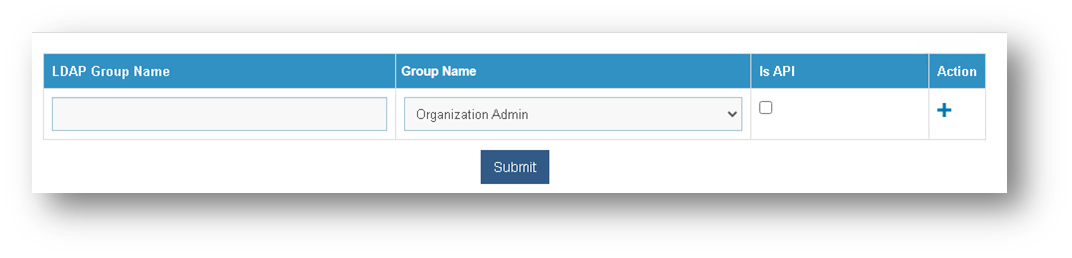
- Enter LDAP Group Name and select the BigFix Runbook AI Group Name from the dropdown.
- Check Is API if this group user needs to be treated as an API user.
- Click
 to add group.
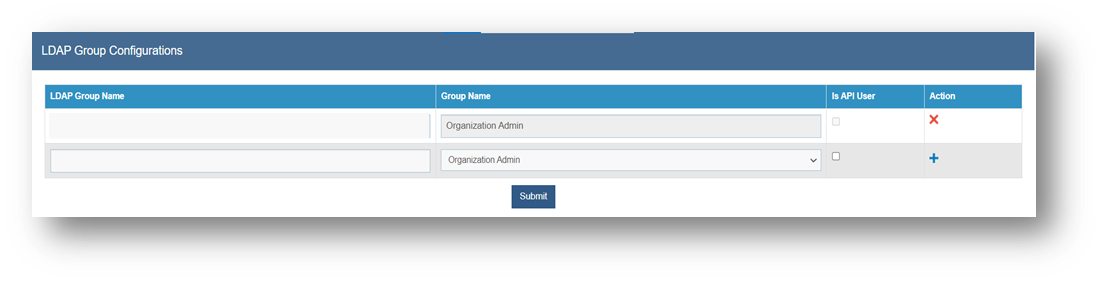
User can add multiple groups, and a group can be deleted by clicking  icon.
icon.
d. After having added the group details, click Submit.
All fields marked with an asterisk (*) are mandatory.
View Organization
User can view the organizations available in the BigFix Runbook AI environment by performing the following steps.
- On the main menu bar, click Actions Manage Organization.
- The Organizations page appears.
Figure 98. Figure - View Organization .png)
- This screen lists all the available organizations in a tabular view with the organization name and organization description. It also allows user to create an organization by clicking Add New, which redirects you to Create Organization screen to create an organization and edit or delete existing organizations.
Edit Organization
User can open an existing organization, review the available information, and edit the organization’s details.
To edit the existing organization, perform the following steps:
- On the Organizations page, click
.png) corresponding to the organization that you want to edit.
corresponding to the organization that you want to edit.
.png)
- This redirects you to the Edit Organization page with all the details auto filled.
- Edit the required details and click Update .
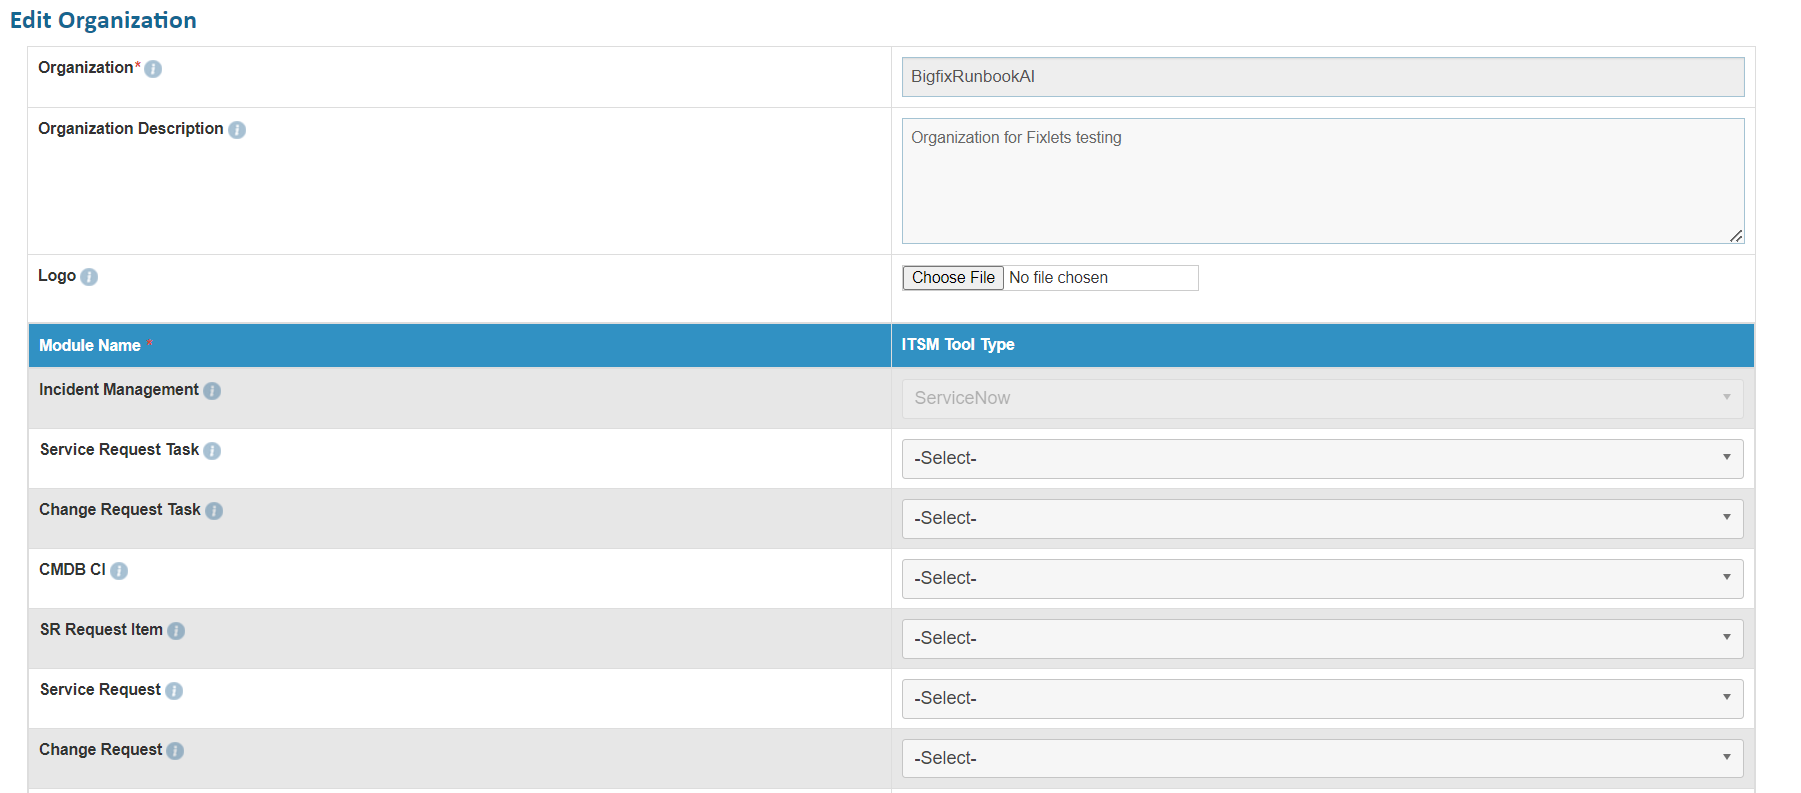

- To view the updated organization, click List. This will redirect you to Manage Organization .
Delete Organization
If a user no longer requires a certain organization, it can be deleted from the environment.
To delete an organization, perform the following steps:
- On the Organization List page, click
 next to
the organization user wants to delete.
next to
the organization user wants to delete.
.png)
- Click OK to confirm.
Manage Data Sources
This section describes how to specify the data source and how the data is processed for automation and analysis in an organization.
To create a data source, perform the following steps:
- Log in with Organization Admin user.
- On the main menu bar, click Actions Manage Data Sources.
- On the Data Sources screen, click Create Data Source.

- The Create Data Source page appears with the following tabs:
- Organization
- Data Source
- Fetch Data Configuration
- Release Rules Configuration
Release Rules Configuration is only applicable for the following Module types- Incident Management, Change Request Task and Service Request Task. This tab will not be activated for other module types.
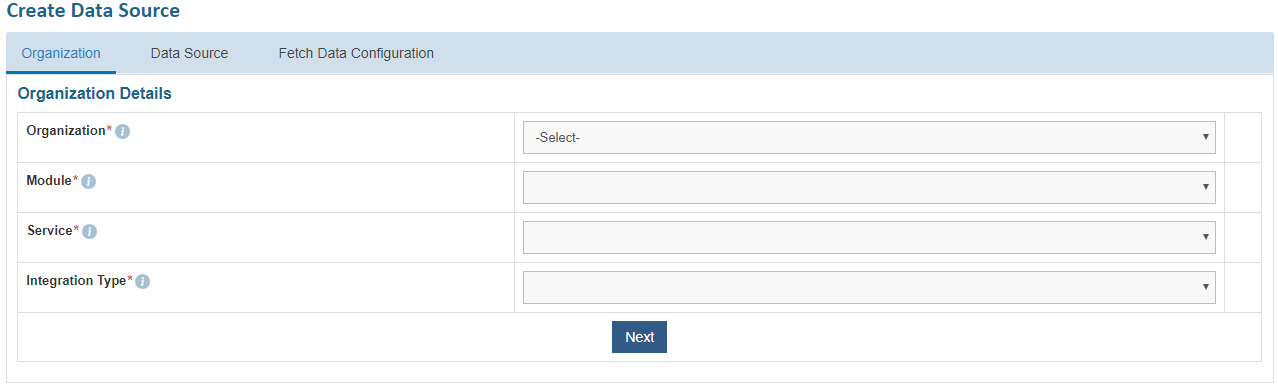
Organization
User can set up an organization, for which the data source will be created, by performing the following steps:
- On the Organization tab, select the organization for which user wants to create the data source from the Organization Name field.
The organizations listed in the drop-down list are created through Create Organization .
- Select a module, where the organization brings the data from the data source in BigFix Runbook AI, from the Module field.
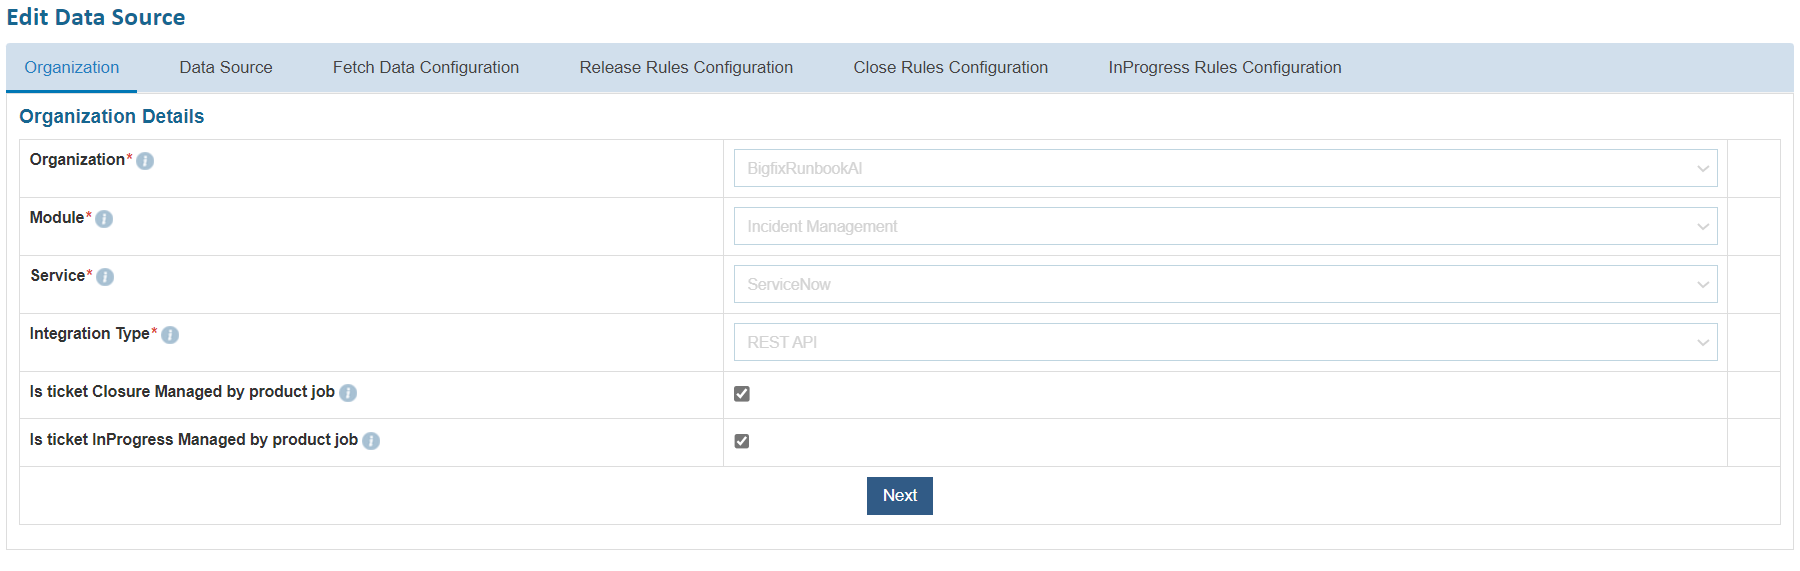
- Upon selection of the Module, the following two additional input parameters will be populated. Select the appropriate option.
- Is Ticket Closure Managed by BigFix Runbook AI job: Check this option if you want BigFix Runbook AI to manage the ticket closure updates instead of the RBA tool. In this scenario, an additional tab “Close Rules Configuration” will be activated for providing further details, steps for which are mentioned later.
- Is ticket InProgress Managed by BigFix Runbook AI job: Check this option if you want BigFix Runbook AI to manage the tickets in progress status updates instead of the RBA tool. In this scenario, an additional tab “InProgress Rules Configuration” will be activated for providing further details, steps for which are mentioned later.
- Select a service, with which BigFix Runbook AI is integrated and pulls data for automation, from the Service field.
Multiple source types are available.
- Select the integration method to integrate between BigFix Runbook AI and the selected service type from the Integration Type field.
- Click Next to update the data source details.
.png)
All fields marked with an asterisk (*) are mandatory.
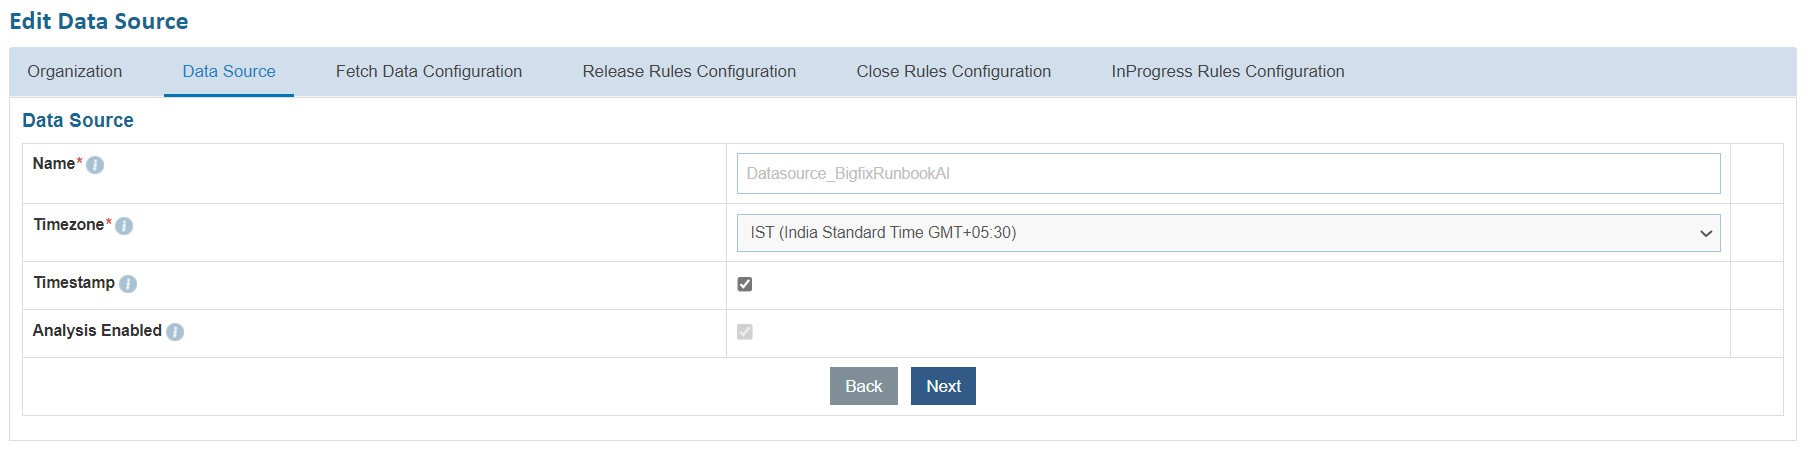
Data Source
The user can create a data source for an organization, to fetch data for automation, by performing the following steps:
- On the Data Source tab, type the new data source name in the Name field.
- Select the Timezone to specify the time zone of the selected data source.
- Select Timestamp to view the present data with date and time.
- Select Analysis Enabled? If you want to analyze the data retrieved from the data source.
- Type the numeric value to specify the batch size of the data fetched from the data source in the Seed Limit field. The recommended value for this field is 1000.
- Click Next to update the data configuration details.
All fields marked with an asterisk (*) are mandatory.
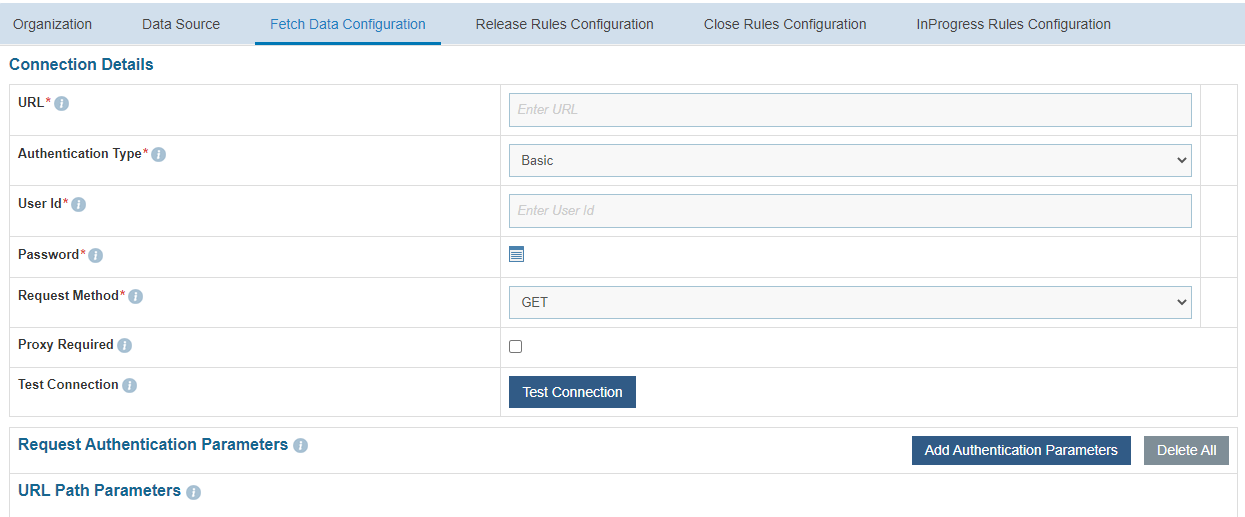
Fetch Data Configuration
User can configure a method for fetching data from the data source by using the following steps:
- On the Fetch Data Configuration page, type the URL of the selected service type in the URL field to fetch data.
- This URL contains the placeholders that display the parameters based on the applied clause such as the number of records to be fetched, query type, date on which the data is fetched, and the order by and so on. It is dependent on the URL or API provided by the tool.
The user can apply multiple clauses into the URL to display only the required parameter into the placeholder. Once you hit the URL, only the placeholders with a hashtag will be displayed with the associated parameters in the URL Path Parameters column. Whenever a user wants to change the data to be filtered, always change the logic in the URL to get the specific parameters.
- Select the Authentication Type. BigFix Runbook AI supports the following types of authentications:
- Windows
- JWT
- OAuth 2.0
- Basic
- NoAuth

-
- Selection of Windows / Basic Authentication requires only Username and Password.
.png)
-
- Selection of JWT / OAuth 2.0 authentication type, user needs to provide the below details:
Type the Authentication URL.
Type the Username and Password.
-
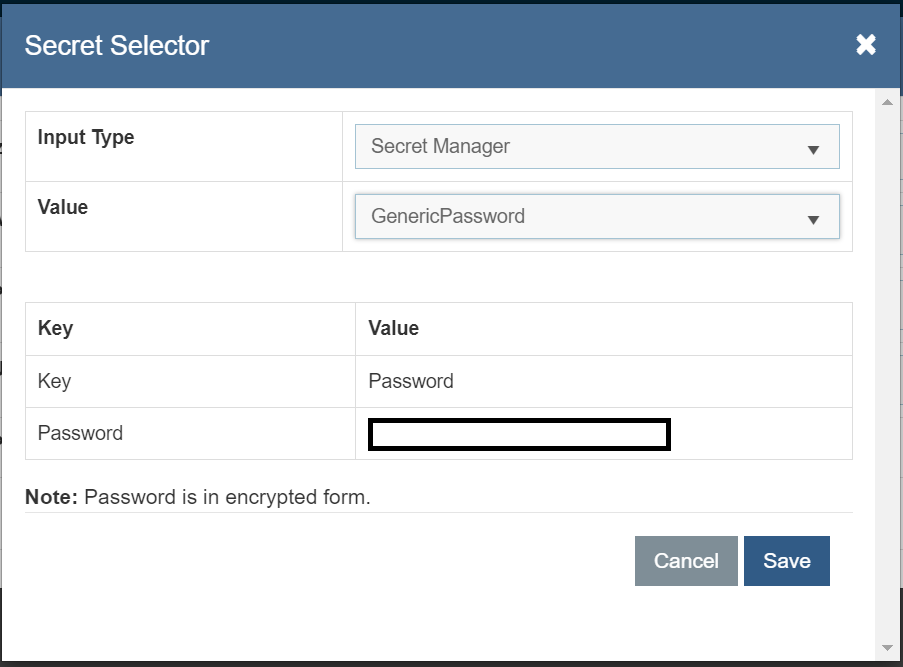
- For password, click on icon
.png) next to it. If the
password is available in plaintext, then select Input type as Input Text and enter the
password in Value field. Else if it is available in any Key Vault such as CyberArk or
Secret Manager then select Input Type as CyberArk or Secret Manager and then select
any of the configured details from the value field.
next to it. If the
password is available in plaintext, then select Input type as Input Text and enter the
password in Value field. Else if it is available in any Key Vault such as CyberArk or
Secret Manager then select Input Type as CyberArk or Secret Manager and then select
any of the configured details from the value field.
- For password, click on icon
.png)
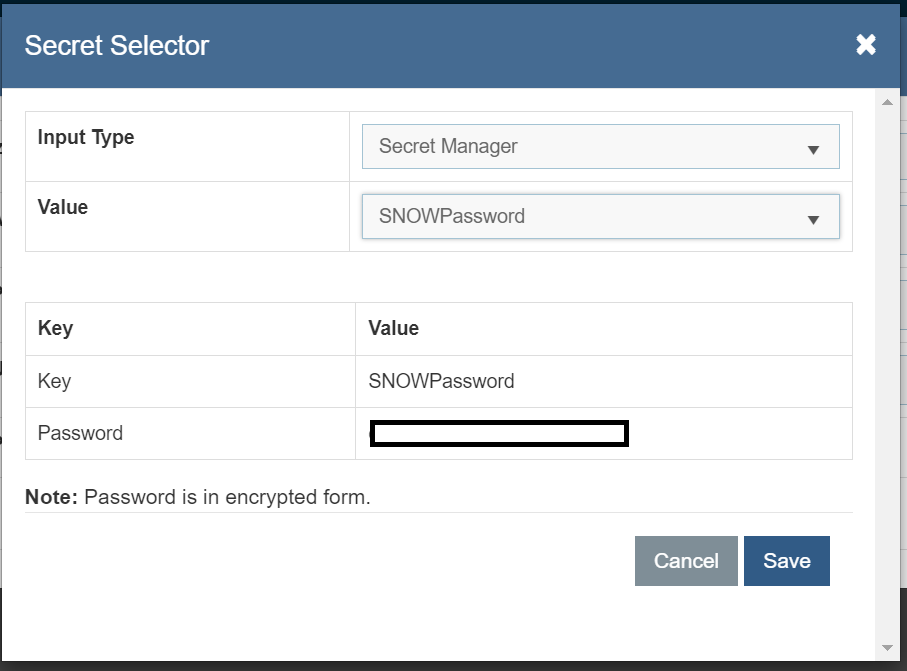
Password from Secret Manager
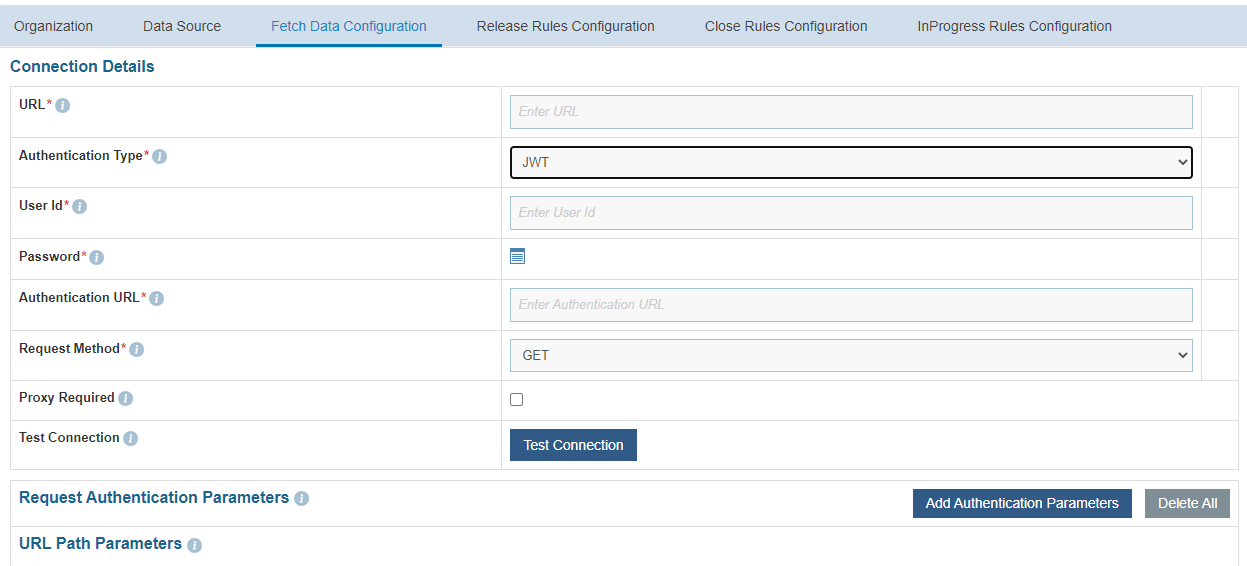
- Select Request Method as GET, PUT, POST or PATCH.
- Select Proxy Required if the environment needs access to content from data sources outside the firewall.
- Click on Test Connection to check accessibility of URL from service. Testing the connection is not mandatory, you can still create Data source
- If the user has additional parameters, click Add Authentication Parameters under the Request Authentication Parameters tab.

- Type the ‘Request Header Parameter’.

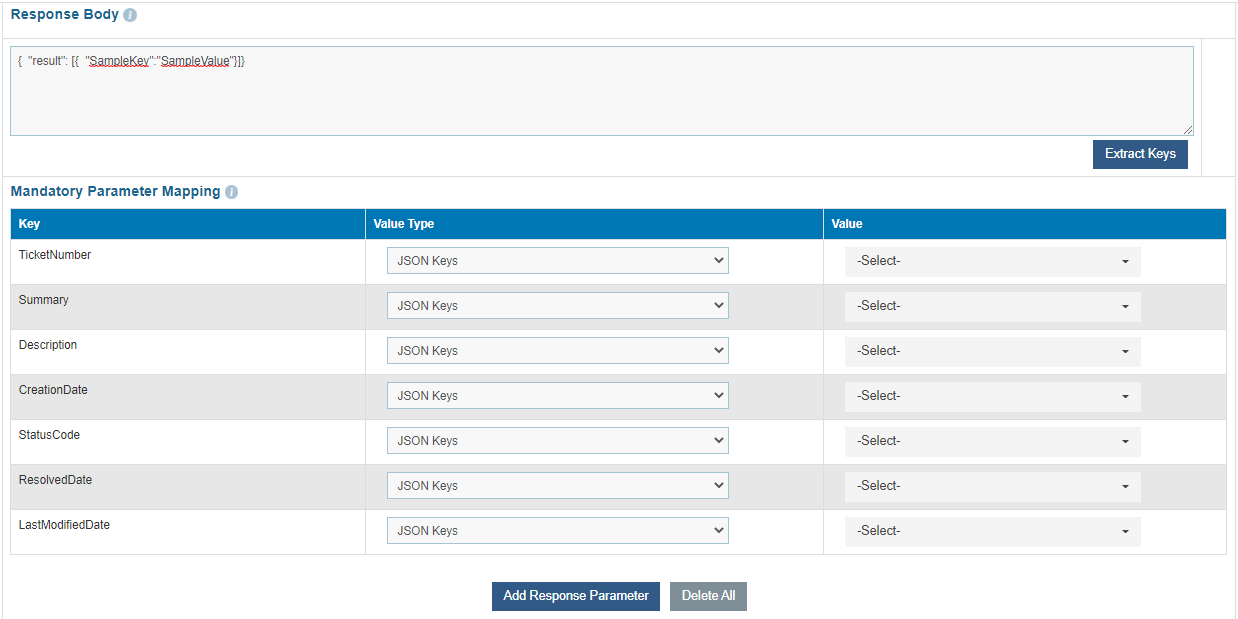
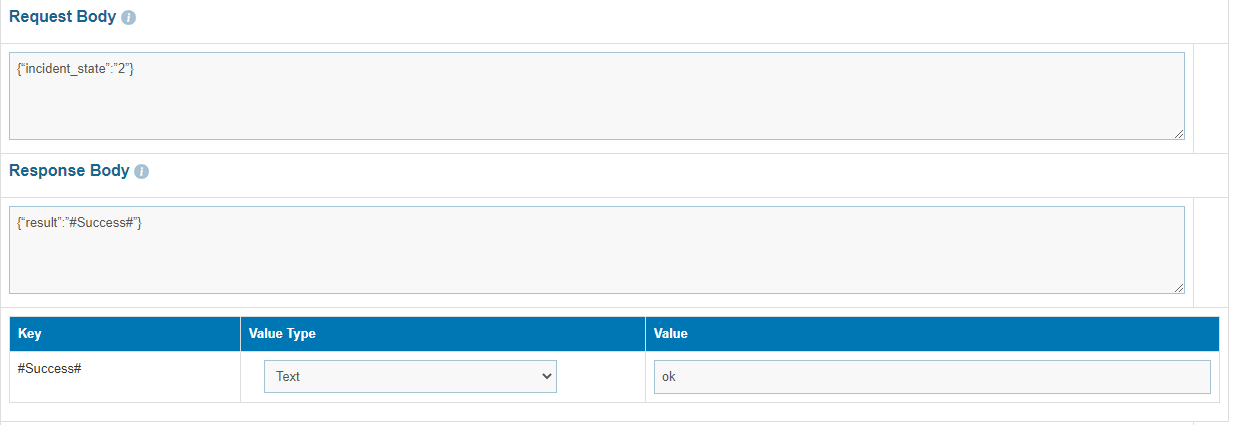
- Type the Request Body in JSON format.
- Type the Response Body in JSON format.
- Click Extract Keys . It adds the parameter and lists in the Mandatory page.
- Click Add Response Parameter if you want to add a new parameter in the Mandatory page.
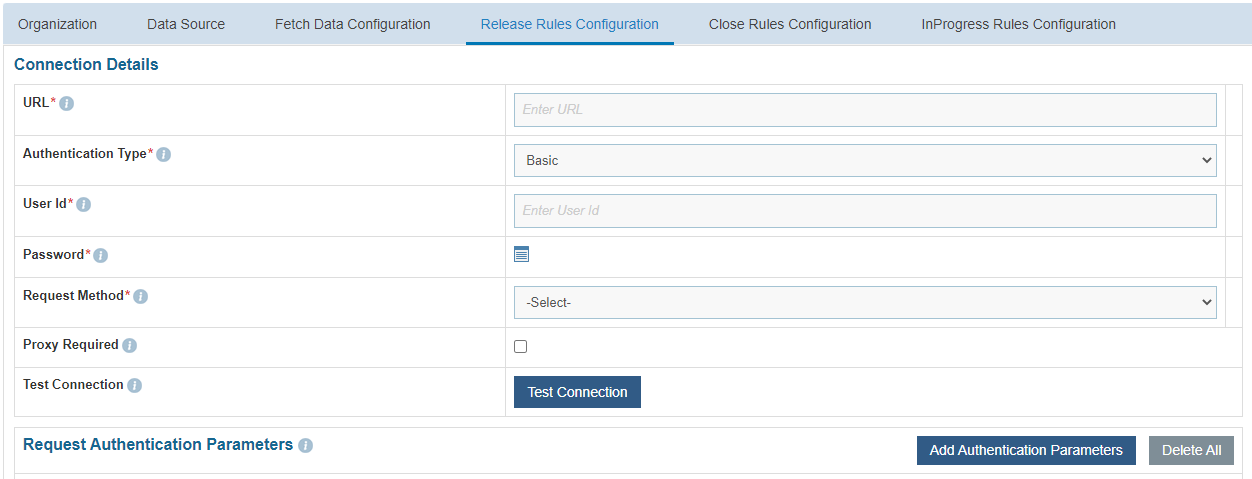
Release Rules Configuration
User can configure a method for releasing the ticket from BigFix Runbook AI queue by performing the following steps.
Release Rules Configuration is only applicable for Incident Management, Service Request Task and Change Request Task
- On the Release Rules Configuration page, type the URL of the selected service type in the URL field to release data.
- This URL contains the placeholders that display the parameters based on the applied clause. It is dependent on the URL or API provided by the tool.
User can apply multiple clauses into the URL to display only the required parameter into the placeholder. Once you hit the URL, only the placeholders with a hashtag will be displayed with the associated parameters in the URL Path Parameters column. Whenever user wants to change the data to be filtered, always change the logic in the URL to get the specific parameters.
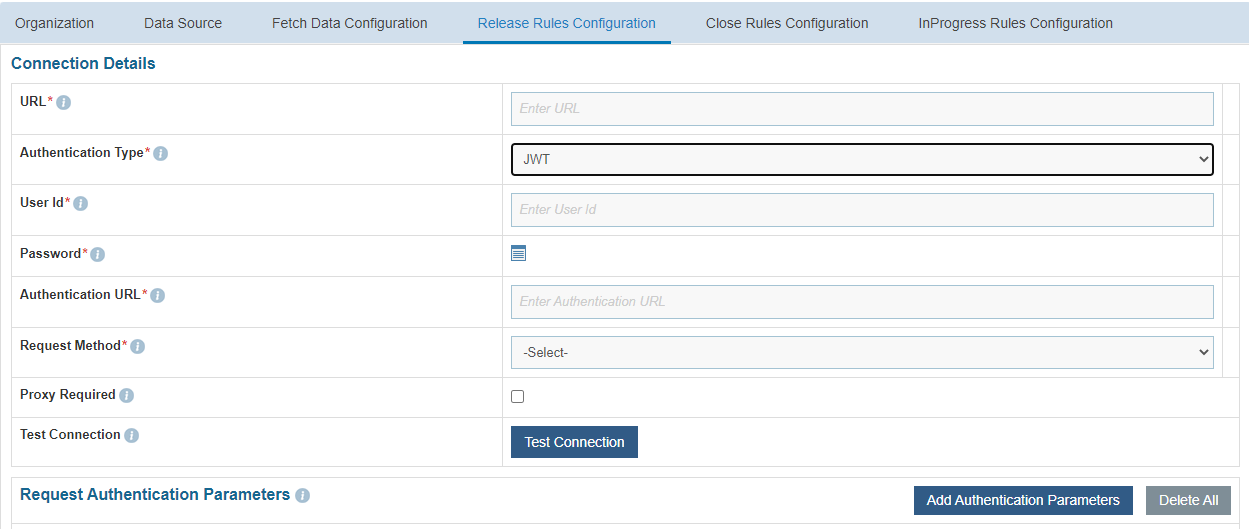
- Select the Authentication Type. BigFix Runbook AI supports the following types of authentications:
- Windows
- JWT
- OAuth 2.0
- Basic
- NoAuth

- Selection of Windows / Basic authentication requires only Username and
Password.
Figure 120. Figure - Authentication Type (Windows / Basic) .png)
- Selection of JWT / OAuth 2.0 authentication type, user needs to provide the below
details.
Type the Authentication URL.
Type the Username and Password.
- For password, click on icon
 next to it. If the
password is available in plaintext, then select Input type as Input Text and enter the
password in Value field. Else if it is available in any Key Vault such as CyberArk
or Secret Manager then select Input Type as CyberArk or Secret Manager respectively and
then select any of the configured details from the value field.
next to it. If the
password is available in plaintext, then select Input type as Input Text and enter the
password in Value field. Else if it is available in any Key Vault such as CyberArk
or Secret Manager then select Input Type as CyberArk or Secret Manager respectively and
then select any of the configured details from the value field.
.png)
.png)
.png)
- Select Request Method as GET, PUT, POST or PATCH.
- Select Proxy Required if the environment needs access to content from data sources outside the firewall.
- Click on Test Connection to check accessibility of URL from service. Testing the connection is not mandatory, you can still create Data source
- If the user has additional parameters, click Add Authentication Parameters under the Request Authentication Parameters tab.
.png)
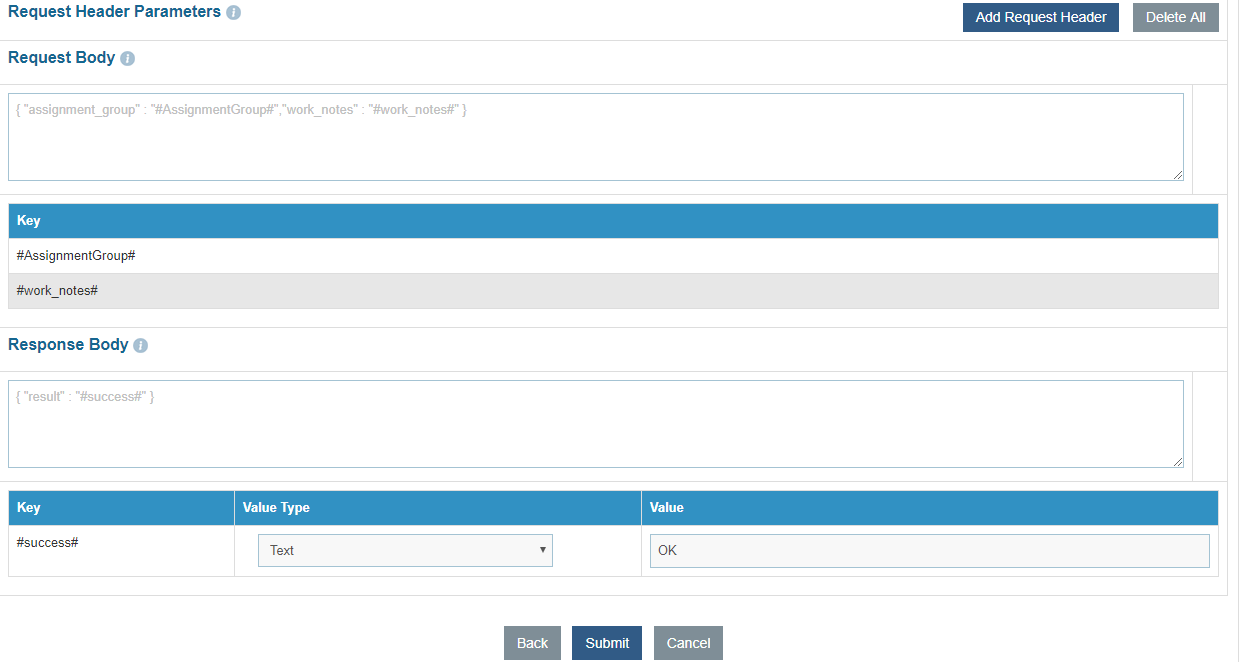
- Type the Request Header Parameter.

- Type the Request Body in JSON format.
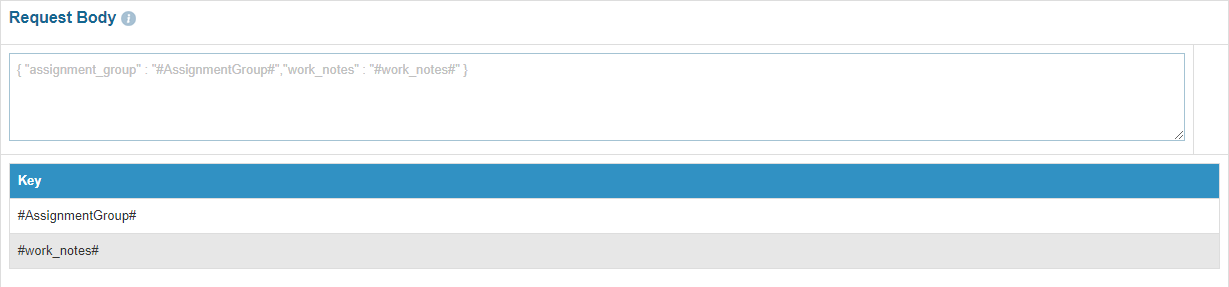
The values for the parameters will be set in the Manage Rules section.
- Type the Response Body in JSON format.

- Click Submit to create the Data Source.
All fields marked with an asterisk (*) are mandatory.
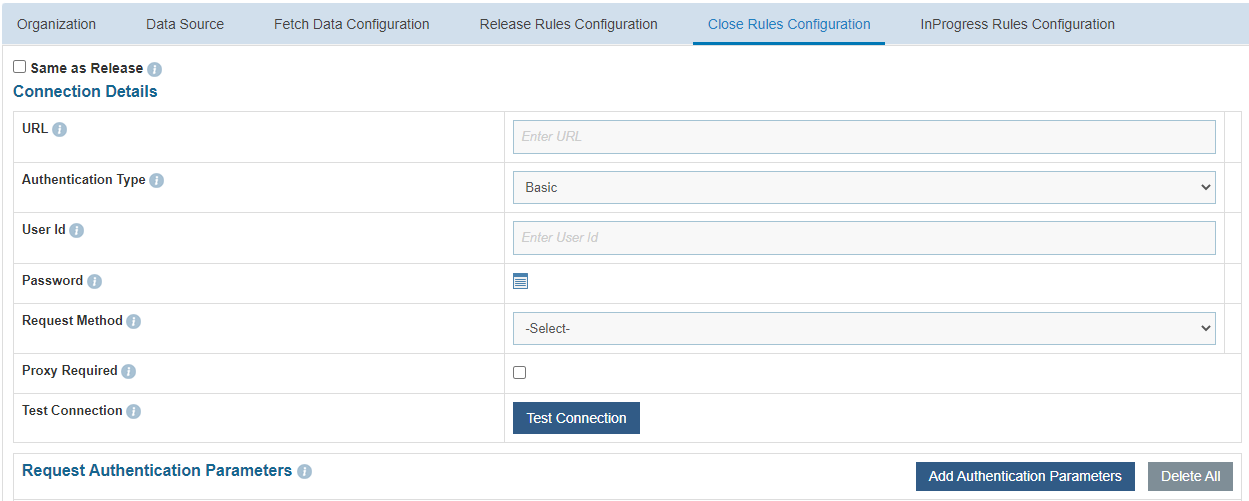
Close Rules Configuration
User can configure the method for Closing the ticket from BigFix Runbook AI queue by performing the following steps.
Close Rules Configuration is only applicable for Incident Management, Service Request Task and Change Request Task
- On the Close Rules Configuration page, click on Same as Release if similar configurations as mentioned in “Release Rules Configuration” are required, else proceed ahead.
- Type the URL of the selected service type in the URL field to release data.
- This URL contains the placeholders that display the parameters based on the applied clause. It is dependent on the URL or API provided by the tool.
User can apply multiple clauses into the URL to display only the required parameter into the placeholder. Once you hit the URL, only the placeholders with a hashtag will be displayed with the associated parameters in the URL Path Parameters column. Whenever user wants to change the data to be filtered, always change the logic in the URL to get the specific parameters.
- Select the Authentication Type. BigFix Runbook AI supports the following types of authentications:
- Windows
- JWT
- OAuth 2.0
- Basic
- NoAuth
.png)
-
- Selection of Windows / Basic authentication requires only Username and
Password.
.png)
Figure - Authentication Type (Windows / Basic)
- Selection of JWT / OAuth 2.0 authentication type, user needs to provide the
below details.
Type the Authentication URL.
Type the Username and Password.
- For password, click on icon
 next to it. If the
password is available in plaintext, then select Input type as Input Text and enter the
password in Value field. Else if it is available in any Key Vault such as
CyberArk or Secret Manager then select Input Type as CyberArk or Secret Manager
respectively and then select any of the configured details from the Value
field.
next to it. If the
password is available in plaintext, then select Input type as Input Text and enter the
password in Value field. Else if it is available in any Key Vault such as
CyberArk or Secret Manager then select Input Type as CyberArk or Secret Manager
respectively and then select any of the configured details from the Value
field.
- Selection of Windows / Basic authentication requires only Username and
Password.
.png)
.png)
.png)
Password from Secret Manager

- Select Request Method as GET, PUT, POST or PATCH.
- Select Proxy Required if the environment needs access to content from data sources outside the firewall.
- Click on Test Connection to check accessibility of URL from service. Testing the connection is not mandatory, you can still create Data source
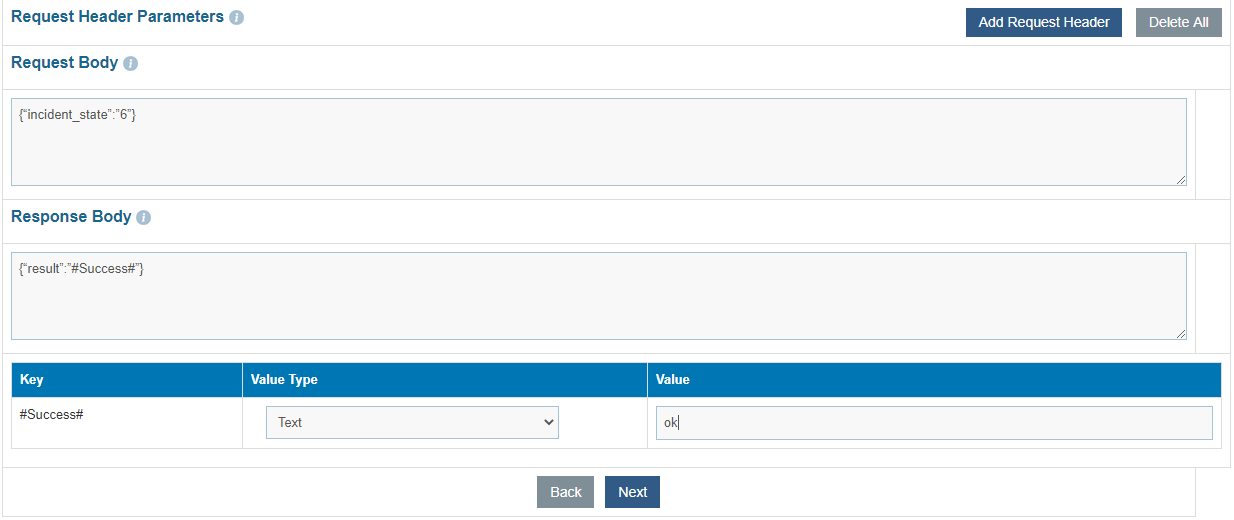
- If user has additional parameters, click Add Authentication Parameters under the tab Request Authentication Parameters.
.png)
- Type the Request Header Parameter.
.png)
- Type the Request Body in JSON format.

The values for the parameters will be set in the Manage Rules section.
- Type the Response Body in JSON format.
.png)
- Click Next to move to next section.
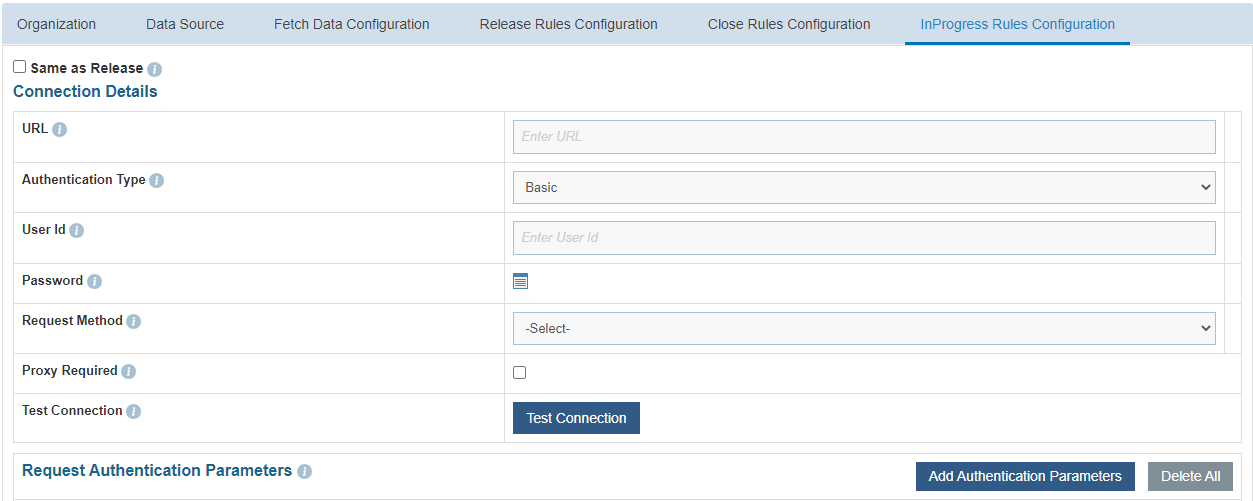
InProgress Rules Configuration
User can configure a method for releasing the ticket from BigFix Runbook AI queue performing the following steps.
InProgress Rules Configuration is only applicable for Incident Management, Service Request Task and Change Request Task
- On the InProgress Rules Configuration page, click on Same as Release if similar configurations as mentioned in “Release Rules Configuration” are required, else proceed ahead.
- Type the URL of the selected service type in the URL field to release data.
- This URL contains the placeholders that display the parameters based on the applied clause. It is dependent on the URL or API provided by the tool.
User can apply multiple clauses into the URL to display only the required parameter into the placeholder. Once you hit the URL, only the placeholders with a hashtag will be displayed with the associated parameters in the URL Path Parameters column. Whenever user wants to change the data to be filtered, always change the logic in the URL to get the specific parameters.
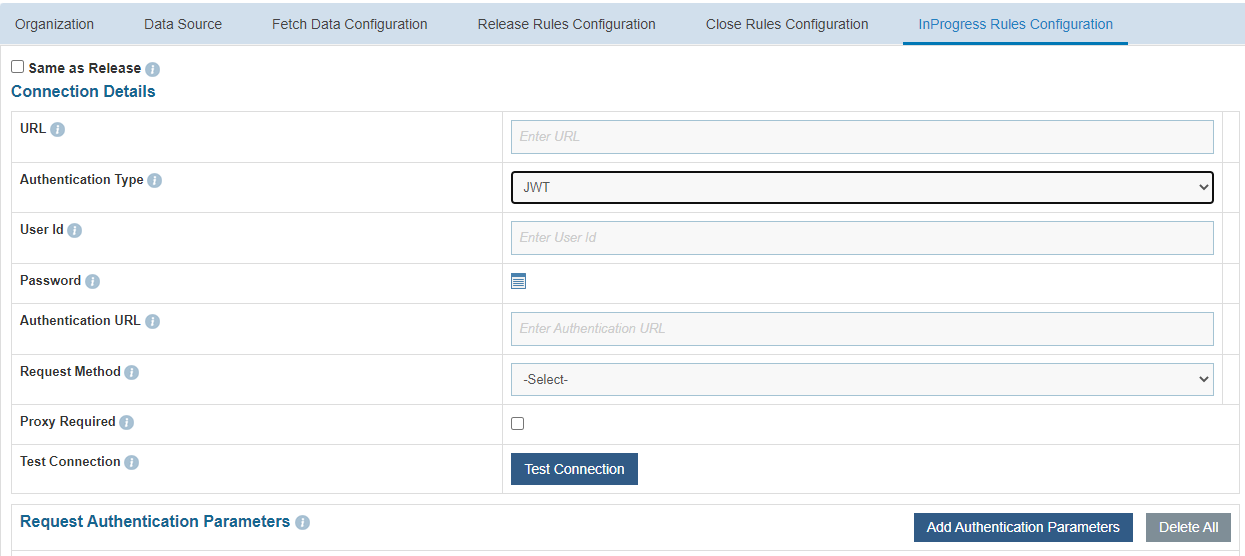
- Select the Authentication Type. BigFix Runbook AI supports the following types of authentications:
- Windows
- JWT
- OAuth 2.0
- Basic
- NoAuth
.png)
-
- Selection of Windows / Basic authentication requires only Username and
Password.
Figure 142. Figure - Authentication Type (Windows / Basic) .png)
- Selection of JWT / OAuth 2.0 authentication type, user needs to provide the
below details.
Type the Authentication URL.
Type the Username and Password.
- For password, click on icon
 next to it. If the
password is available in plaintext, then select Input type as Input Text and enter the
password in Value field. Else if it is available in any Key Vault such as CyberArk
then select Input Type as CyberArk and then select any of the configured details from
the value field.
next to it. If the
password is available in plaintext, then select Input type as Input Text and enter the
password in Value field. Else if it is available in any Key Vault such as CyberArk
then select Input Type as CyberArk and then select any of the configured details from
the value field.
- Selection of Windows / Basic authentication requires only Username and
Password.
.png)
.png)
.png)
Password from Secret Manager
- Select Request Method as GET, PUT, POST or PATCH.
- Select Proxy Required if the environment needs access to content from data sources outside the firewall.
- Click on Test Connection to check accessibility of URL from service. Testing the connection is not mandatory, you can still create Data source
- If user has additional parameters, click Add Authentication Parameters under the tab Request Authentication Parameters.
.png)
- Type the Request Header Parameter.
.png)
- Type the Request Body in JSON format.

The values for the parameters will be set in the Manage Rules section.
- Type the Response Body in JSON format.
.png)
- Click Submit to create the Data Source.
View Data Sources
User can view and manage the data sources configured within an organization.
To view and manage data sources, perform the following steps:
- On the main menu bar, click Actions Manage Data Sources.
- The Data Sources page appears.

This lists the available data sources in a tabular view with their associated organization, module, and service type. Users can create a new data source by clicking Create Data Source. Users can also edit or delete the data source and manage the entry criteria for the data source.
Edit Data Source
User can open a data source, review the available information, and change the data source details.
To edit the existing data source, perform the following steps:
- On the Data Sources page, click
 next to the
data source user wants to edit.
next to the
data source user wants to edit.
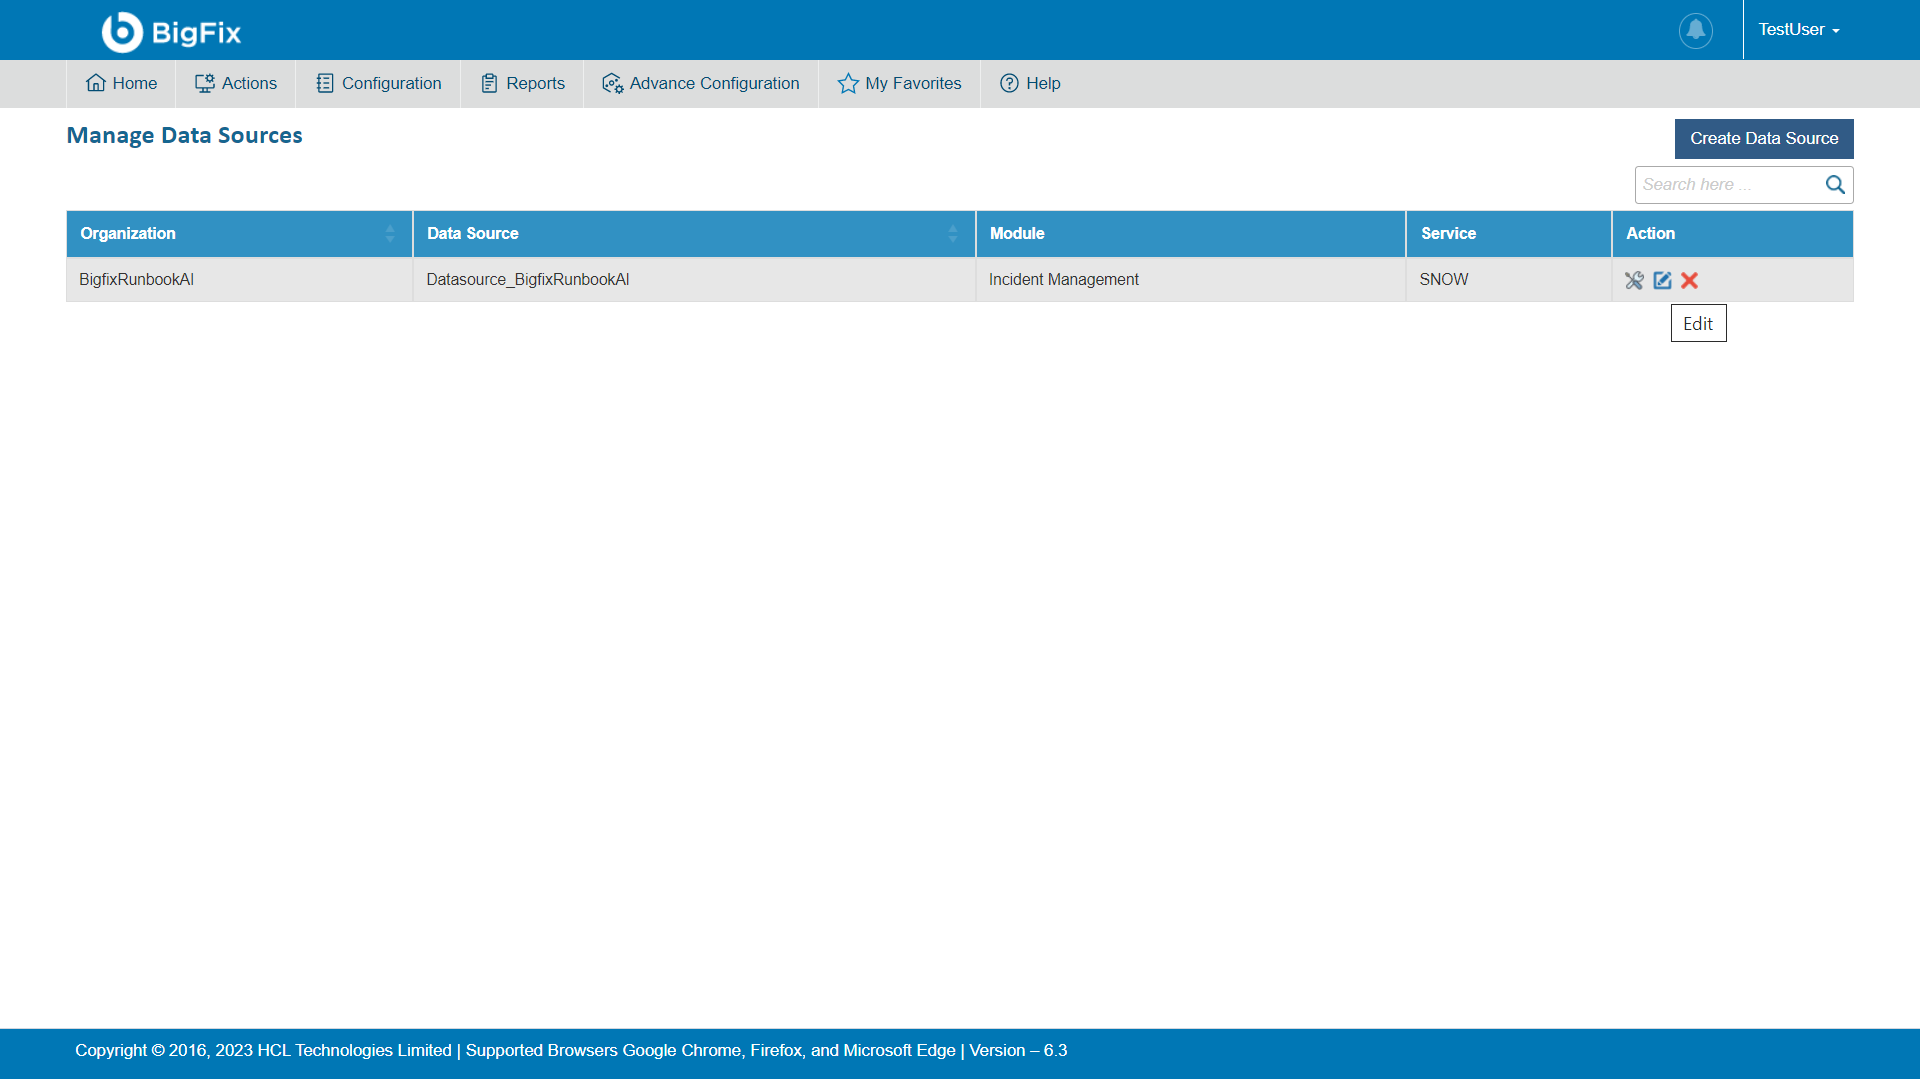
- This redirects you to the Mange Data Source page. Edit the details as required.
- Click Update to commit the changes or click Cancel to discard all changes.
Manage Entry Criteria
Entry criteria are a set of conditions or requirements that must be fulfilled to fetch the data from the data source.
To manage entry criteria, perform the following steps:
- On the Data Sources tab, click
 next to the
data source user wants to manage.
next to the
data source user wants to manage.
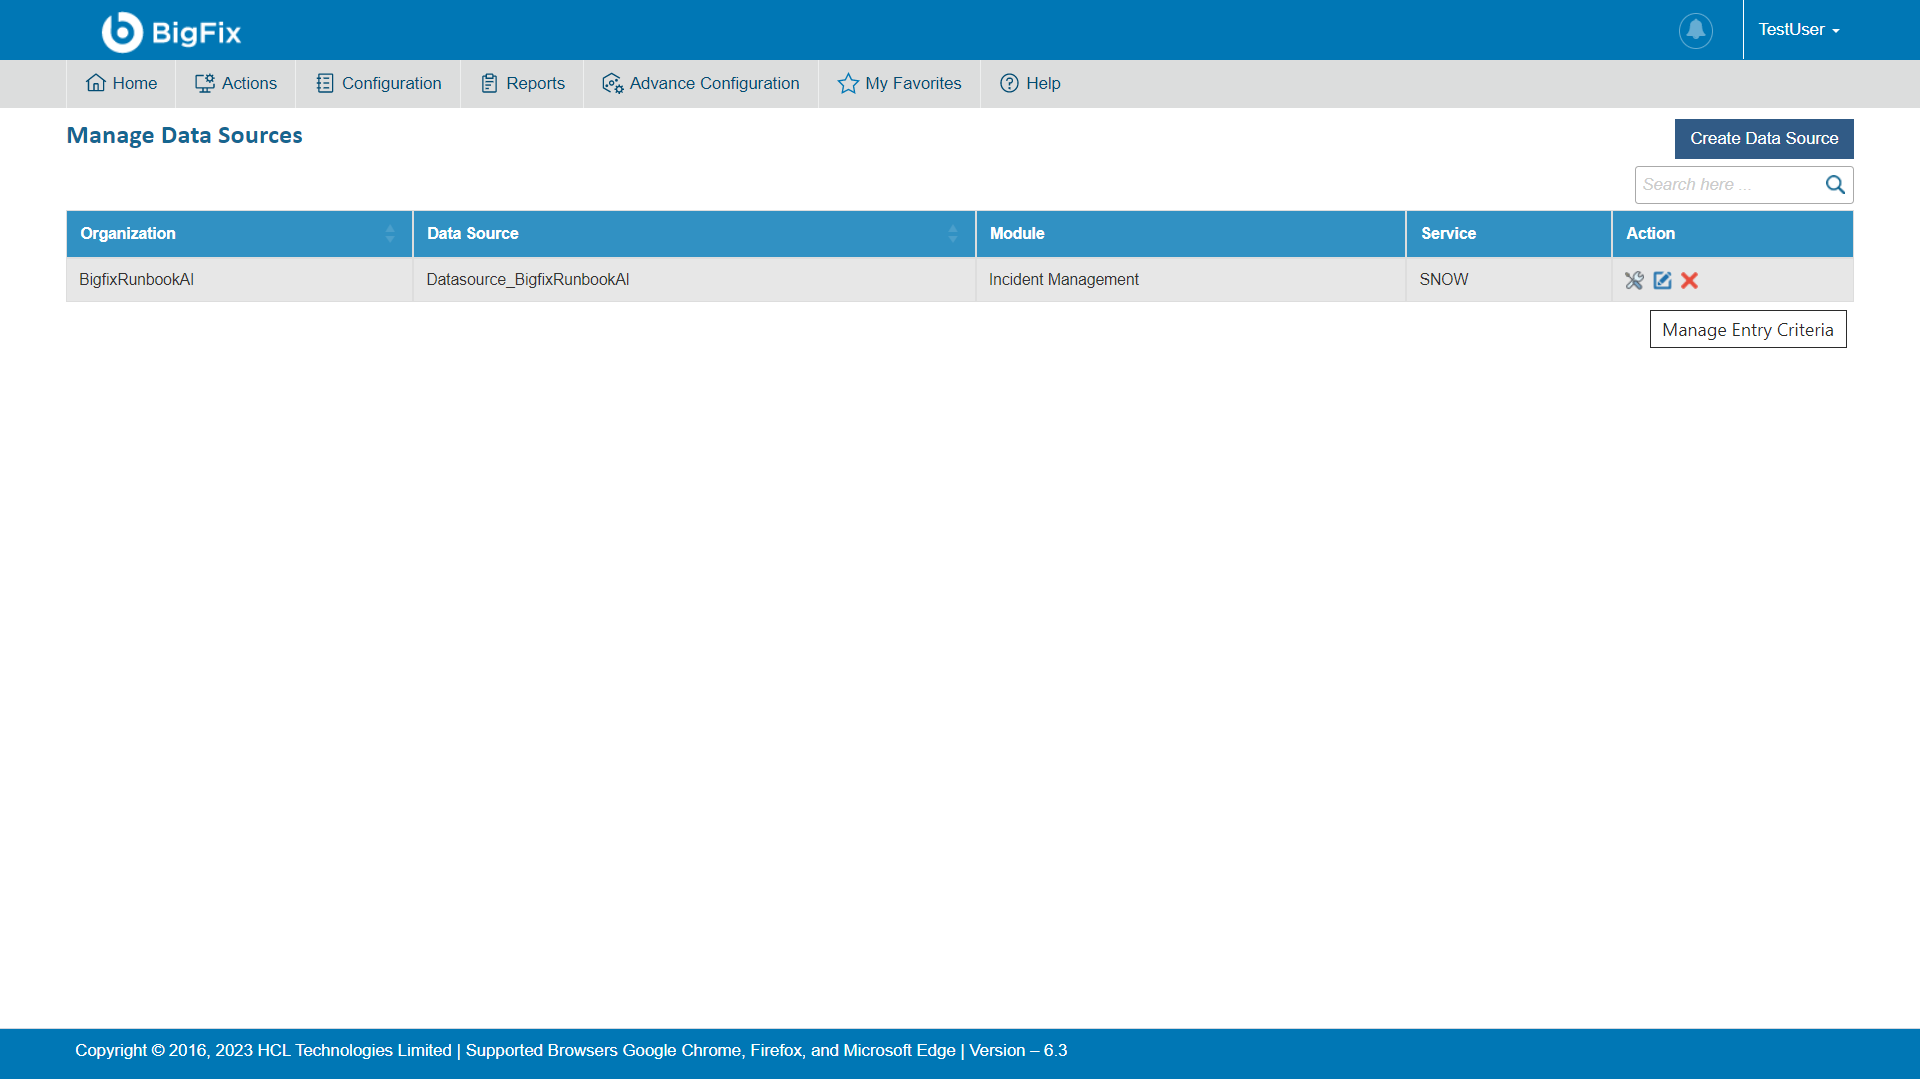
- The Manage Entry Criteria page appears. You will be prompted to apply the following conditions:
- Column
- Operator
- Value
- Clause
- Sub-Clause
- Click Save to go to the next screen.
.png)
.png)
.png)
.png)
Delete Data Source
If a data source in an organization is no longer required, the user can delete it by performing the following steps:
- On the Data Sources tab, click
 to delete the
Data Source.
to delete the
Data Source.

- Click OK to confirm.
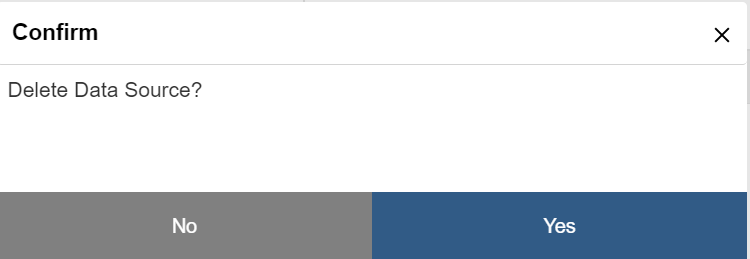
- A confirmation dialog box appears.
Build Models
This section describes the procedure to build various types of Machine Learning models in BigFix Runbook AI.
To build a model, perform the following steps:
- On the main menu bar, click Actions.
- Click Build Models.
- The Build Models page appears and lists the available build models with their status, the associated organization, module, and the runbook tool in a tabular view.
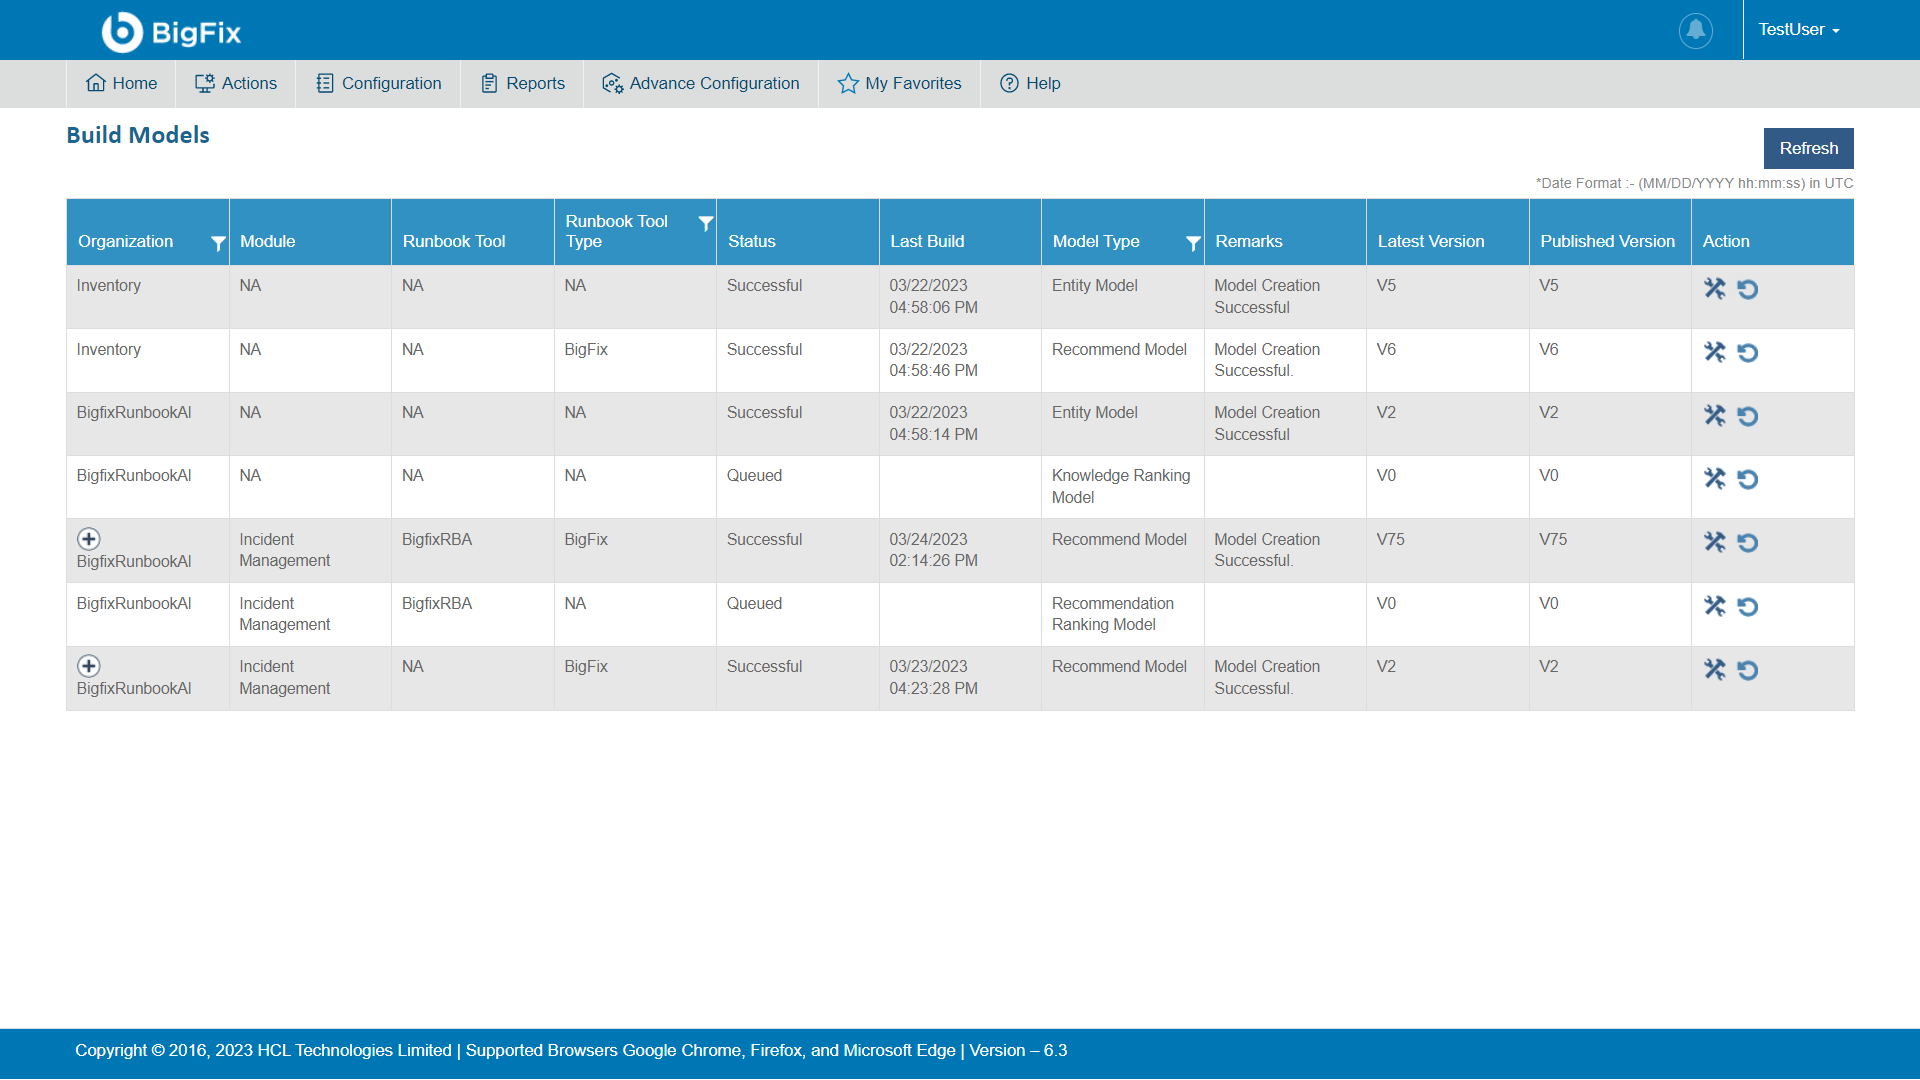
- Using this page, a user can build four types of models:
- Entity Model – This model is used to identify the entities from the runbook description and ticket summary.
- Recommendation Model – This model is used to recommend the list of relevant runbooks based on the ticket summary.
- Recommendation Ranking Model – This model is used to re-rank the list of recommended runbooks based on the resolution status of past executions.
- Knowledge Ranking Model – This model is used to re-rank the list of relevant documents based on the user feedback.
A Recommendation Model cannot be created without creating the Entity Model. Also, a Recommendation Ranking Model cannot be created without the Recommendation Model.
Build Model
User can build any type of model for an organization by performing the following steps. Here, we have used Entity model as reference:
- On the Build Models page, click
 next to the
organization to build the model.
next to the
organization to build the model.

- A message confirming the initiation of
model build appears.
Figure 163. Figure - Build Models (Cont.) 
- The status of the build changes from Queued to Initiate.
Figure 164. Figure - Build Models (Cont.) 
- Once the build is successfully created, the status changes from Initiate to Successful and the Remarks column is updated.

- For Entity, Recommendation and Recommendation Ranking models, the model created will be saved in the location defined in BigFix Runbook AI Configurations or it will save the model at the location where the iRecommend services are installed.
- For Knowledge Rating, the model will be saved in the MongoDB database
Reset Model
The user can reset the status of the existing build model in an organization to its initial state.
- On the Build Models tab, click
 corresponding
to the organization for which you want to reset the model to its initial state.
corresponding
to the organization for which you want to reset the model to its initial state.
.png)
- On resetting the model, the status changes to Queued and a confirmation dialog box appears.
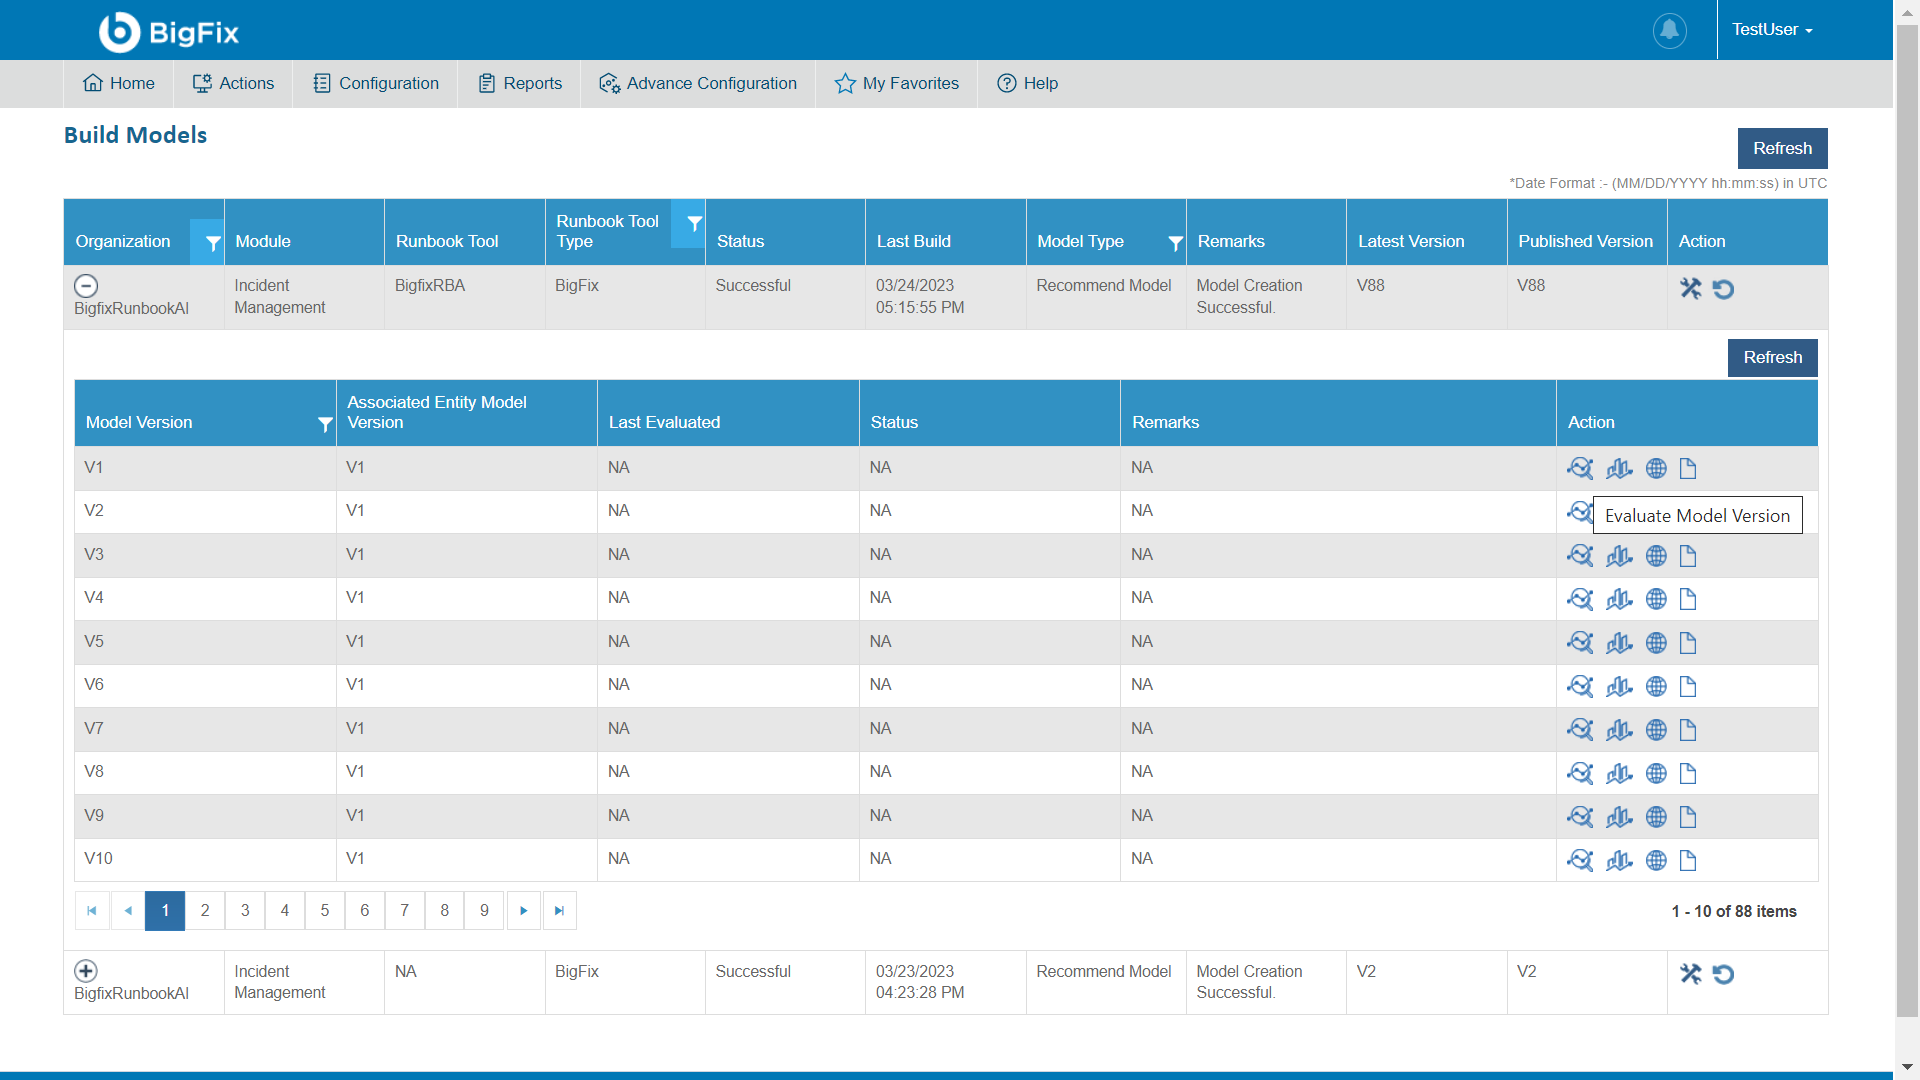
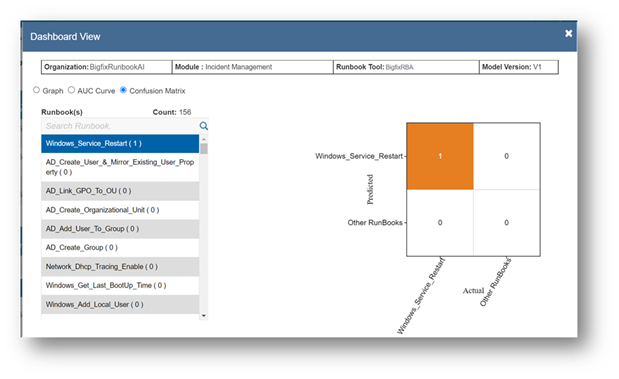
Evaluate Recommendation Model
Through this module, user can evaluate a recommendation model, view its performance report, publish different versions of the model, and view the list of runbooks on which the specific model was created.
To evaluate the recommendation model, perform the following steps:
- On the Build Models tab, click
 corresponding
to the recommendation model associated with a tool for the organization for which you want
to evaluate the model.
corresponding
to the recommendation model associated with a tool for the organization for which you want
to evaluate the model.

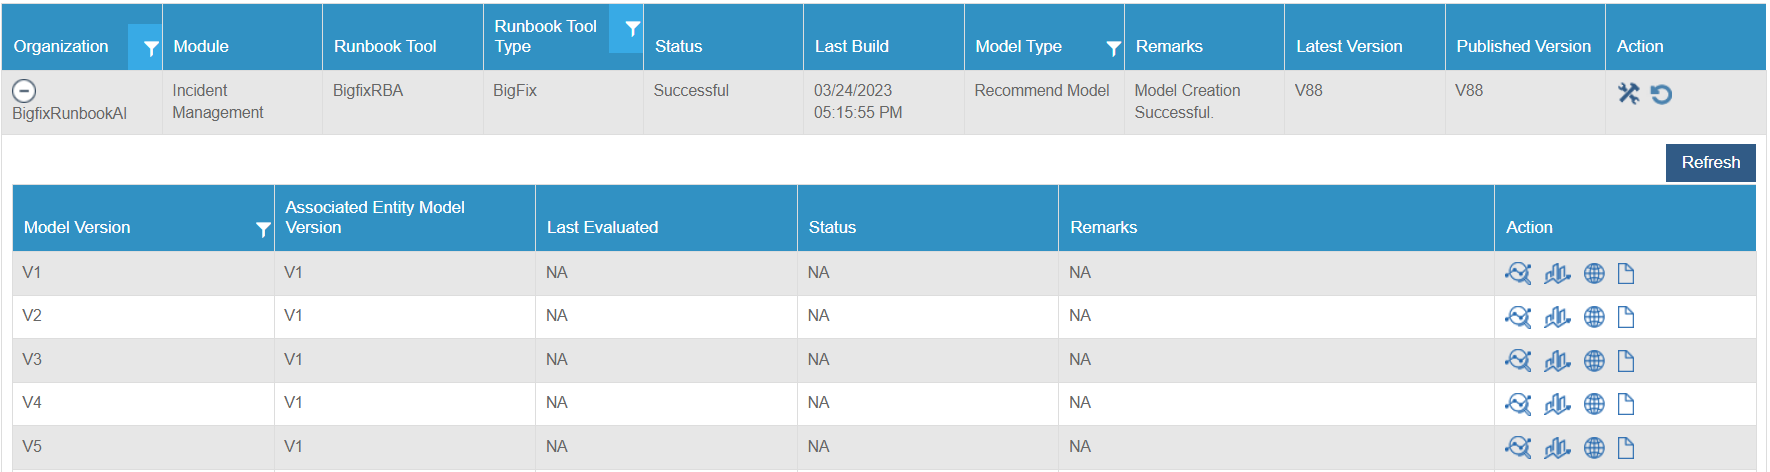
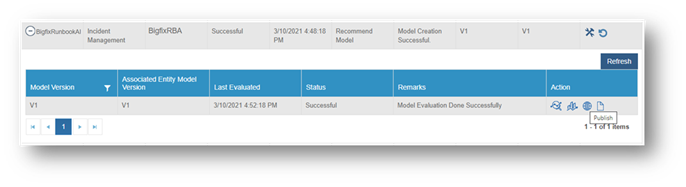
- This opens a model version grid where user can view the different versions of the models listed. Under the Action tab, multiple options are available to the user.
- Click
 to trigger the model evaluation process.
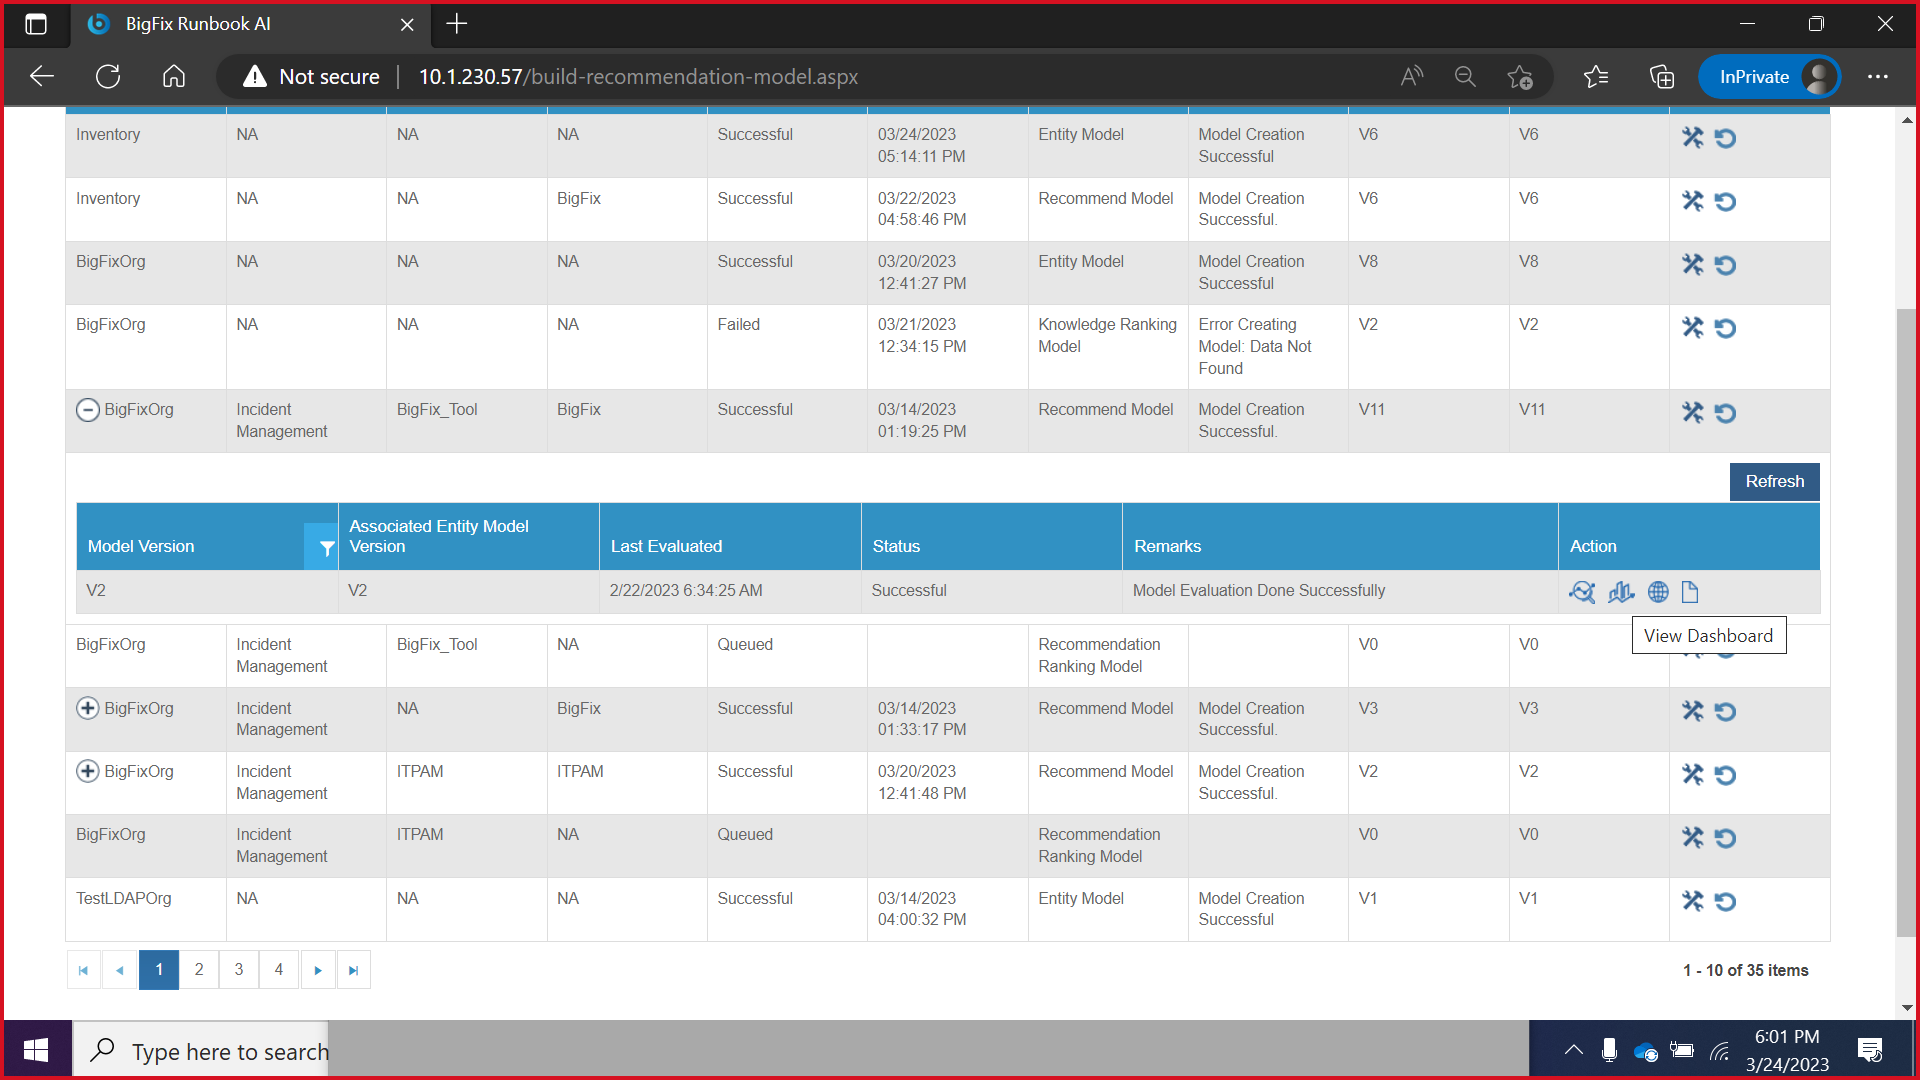
- Upon completion of the model evaluation process, a success message appears as below.

- After successful evaluation, click
 to view the
dashboard.
to view the
dashboard.
- On view dashboard popup, three types of charts are available:
- Precision-Recall Graph:
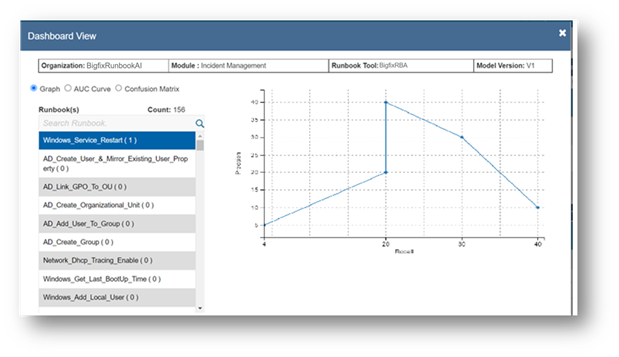
- AUC Curve:
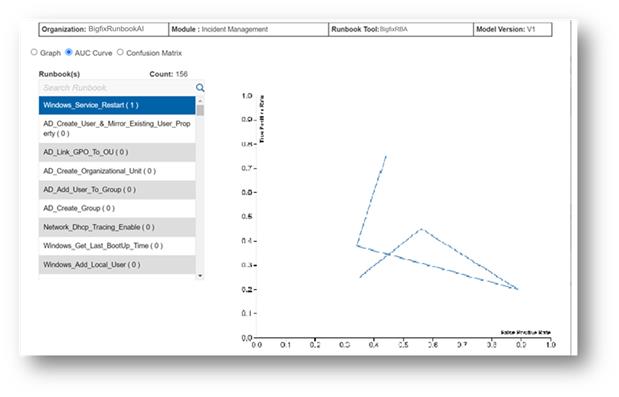
- Confusion Matrix:
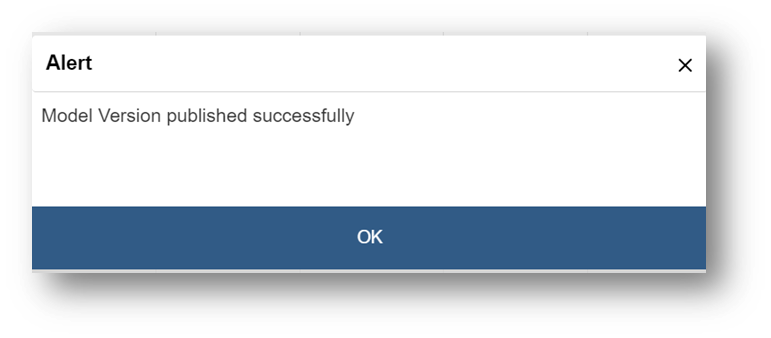
- Click
 to publish the model version of choice.
A success message appears after the model is published successfully.
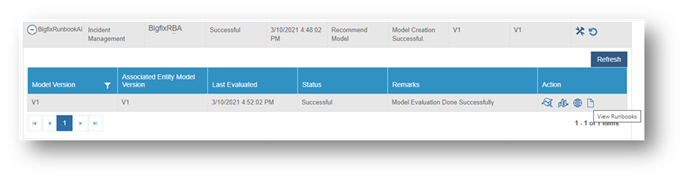
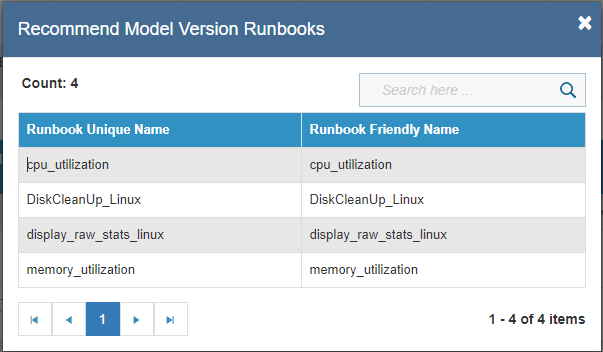
- User can also view the set of runbooks on which the model was built. Click
 to view the list of runbooks.
RBAC → User Management
RBAC enables access management to access the BigFix Runbook AI environment. Using RBAC, user can segregate roles and responsibilities within the system and grant access to the users, organizations, and applications they need to perform their jobs.
To manage role-based access, perform the following steps:
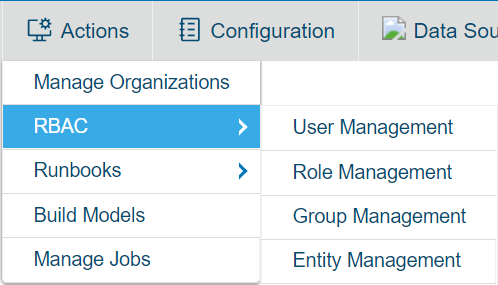
- On the main menu bar, click Actions -> RBAC.
- The drop-down appears with the menu below.
User Management
A Super Administrator or Organization Admin can add other users in an organization.
For user management, perform the following steps:
- On the main menu bar, click Actions then RBAC.
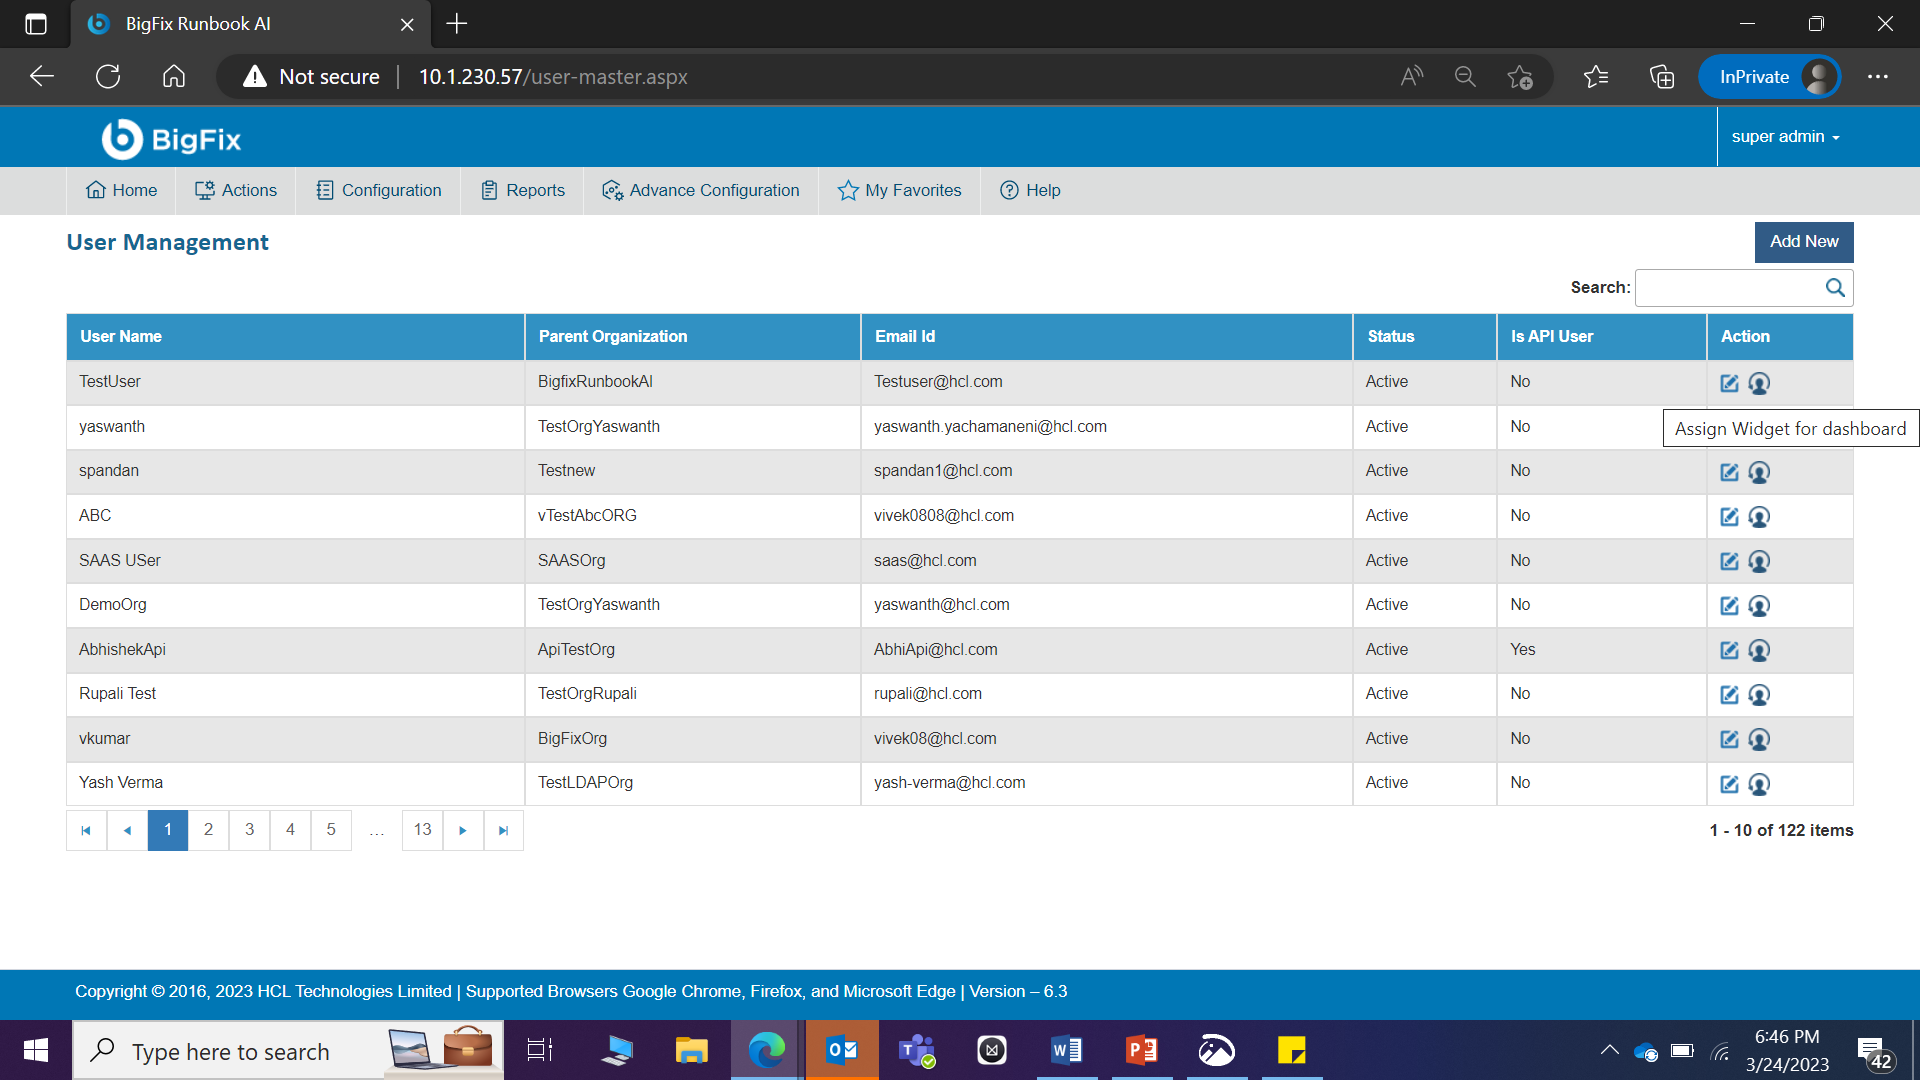
- Click User Management. The User Management page appears.

- It lists the available users in a tabular view and allows user to create a new user, edit the existing user, and assign widgets to users.
Add New User
A Super Administrator or Organization Admin can add a new user in an organization by performing the following steps:
- On the User Management screen, click Add New. The Add User page appears.
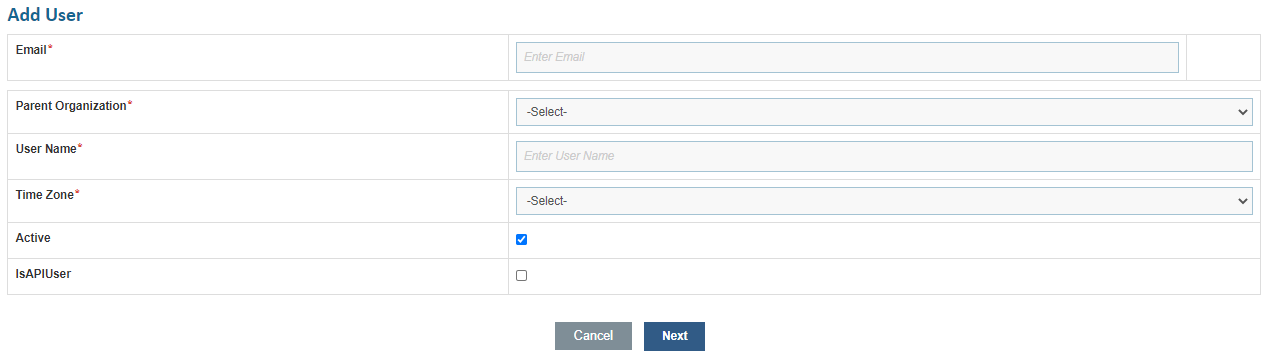
- You must provide the details for the following fields on the Add New User page.
- Specify the email address to send or receive notifications in the Email field.
- Select the organization to which the user belongs in the Parent Organization.
Further fields get auto populate based on the authentication type of selected organization.
In case of selecting the organization with Form Based Authentication, the user password will be auto generated in the Password field.
This password field remains invisible in case of organization with SAML and LDAP based authentication.

- Type the username of the user in the UserName field to authenticate the user.
- Select Time Zone to which the user belongs.
- Select Active check box to activate the user immediately after creation.
- Select IsAPIUser check box to enable the user to access certain services of BigFix Runbook AI only through APIs and not the Web User Interface.
- Click Next. It prompts the user to select an Organization.

- Click Next.
This navigates the user to another screen that lists the existing organization and module to configure the organization for the selected user.
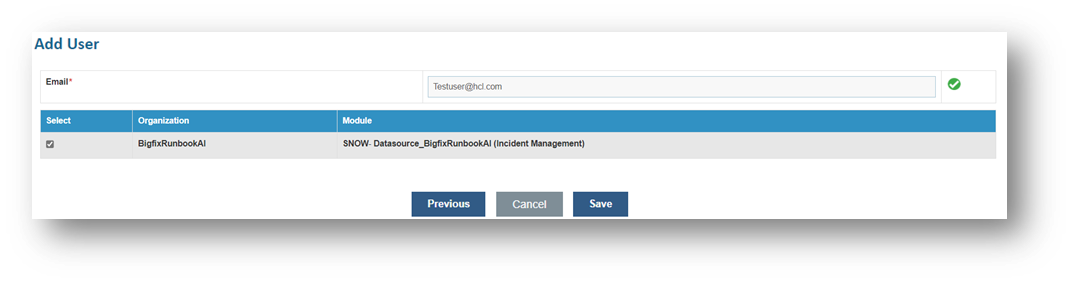
- Select the checkbox of the specific customer and then click Save. A confirmation dialog box appears.
The new user is added and appears in a list of users.
Edit User
User can view an existing user, review the available information, and edit the user details.
To edit the existing user, perform the following steps:
- On the User Management page, click
.png) next to
the user, the user wants to edit.
next to
the user, the user wants to edit.

- Edit the details as required and click Update to save changes.
.png)
A confirmation dialog box appears.
Assign Widgets
User with admin privileges can assign widgets to a user, which helps to track various metrics through the Dashboard.
To assign a widget, perform the following steps:
- On the User Management page, click
 next to the
user who the user wants to assign widgets.
next to the
user who the user wants to assign widgets.
- A widget page appears with mapped Organization and Module dropdown.
- Select Organization and respective module from the dropdown which then lists the available widgets to be mapped to the user.

- Select the widgets to be mapped to the user.
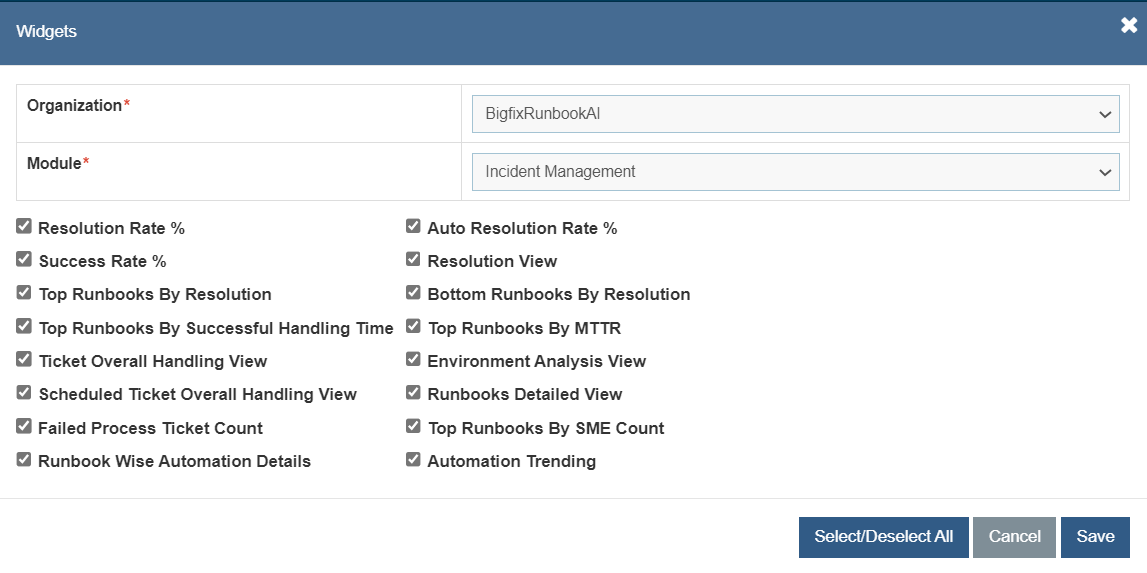
- Click Submit. A confirmation dialog box appears.
You can also search for a user from the list of users if you know certain words or set of characters.
On the User Management screen, type a keyword in the Search to search for the user details.

Super Admin has the capability to unblock any user if the user has been locked due to
entering wrong passwords. For that, click on  icon
corresponding to that locked user.
icon
corresponding to that locked user.

A confirmation box appears:
Clicking Yes unblocks the user successfully. The following success message appears:
RBAC → Role Management
In BigFix Runbook AI, the following table lists the built-in roles supported by a user account.
| Role | Description |
|---|---|
| Super Administrator |
|
| Organization Admin |
|
| Operations Users |
|
| Operations Admin |
|
| SME Users |
|
| Knowledge Users |
|
A Super Administrator can manage roles in the BigFix Runbook AI environment by performing the following steps.
- On the main menu bar, click Actions->RBAC.
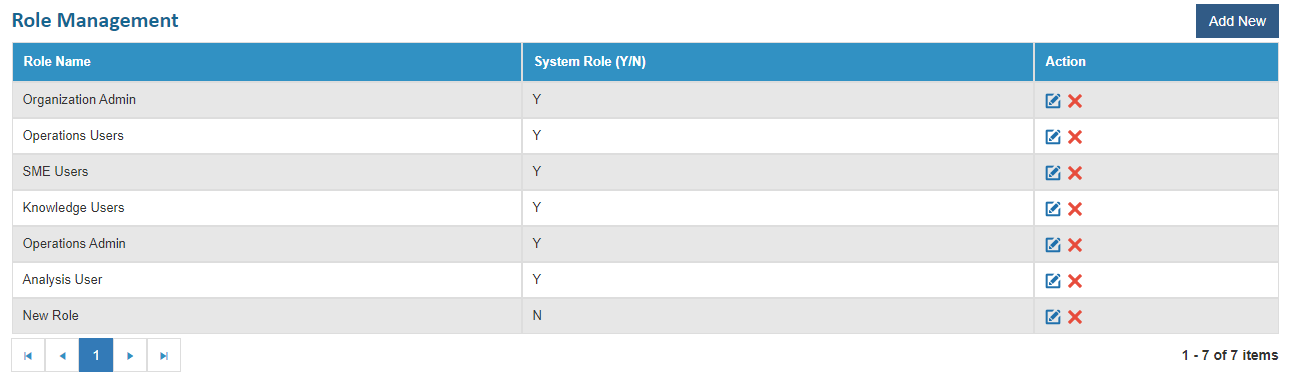
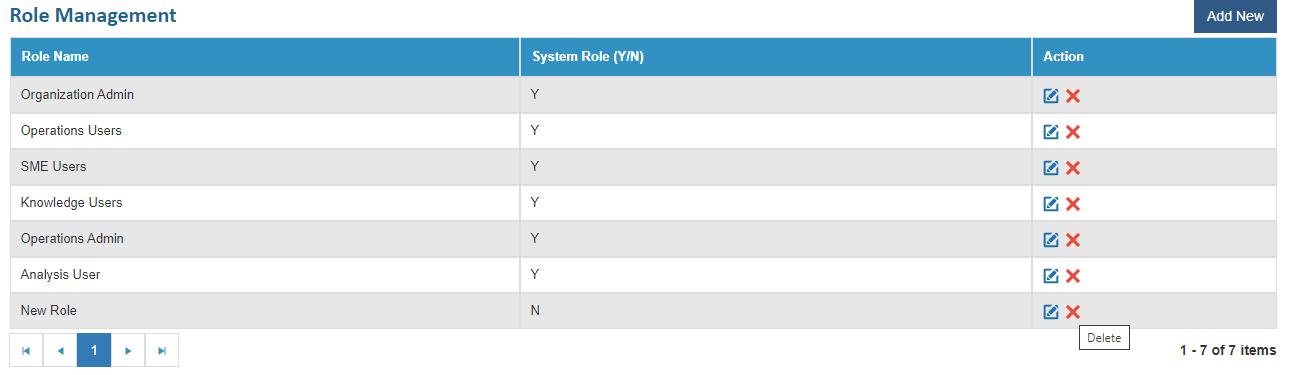
- Click Role Management. The Role Management page appears.
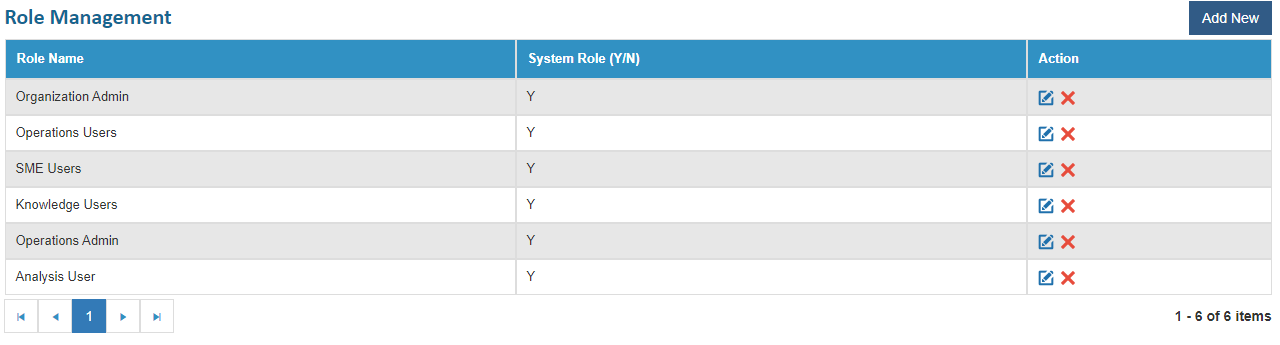
- It lists the available users in a tabular view and enables user to create a new role and edit or delete the existing role.
- The Status column displays the active or inactive status of the roles as Y or N. The System Role column denotes the default role that cannot be modified or deleted from the environment as Y and editable roles that can be modified or deleted as N.
Add New Role
As a super admin, user can add a new role into the BigFix Runbook AI environment by using the following steps.
- On the Role Management page, click Add New.
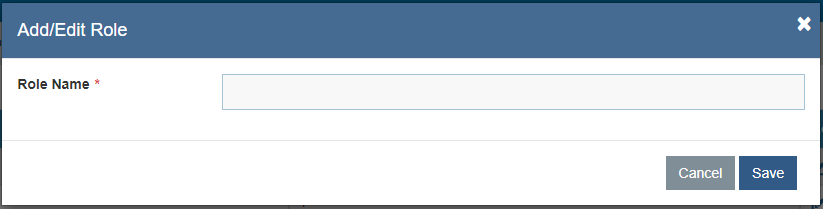
- Enter the Role Name and then click Save. The newly added role will be visible in the grid.
This adds the new role and lists it the bottom of the Role Name column.
Edit Role
User can open and review the available information in existing roles and change the details by using the following steps.
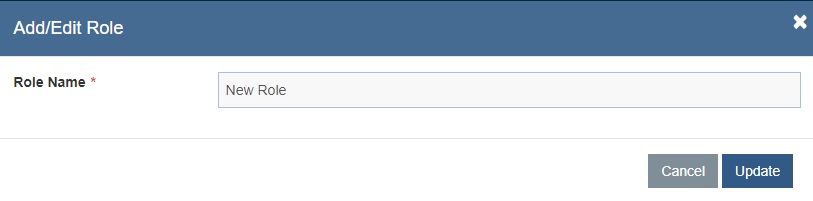
- On the Role Management screen, click
.png) next to
the role user wants to edit.
next to
the role user wants to edit.
.png)
- Edit the Role Name as required and click Update.
- A dialog box appears with the confirmation of the updates.
Delete Role
If user no longer requires a role, it can be deleted from BigFix Runbook AI environment. To delete a role, perform the following steps:
- On the Role Management screen, click
 next to
the role user wants to delete.
next to
the role user wants to delete.
- Click OK to confirm deletion.
- A confirmation dialog box appears.
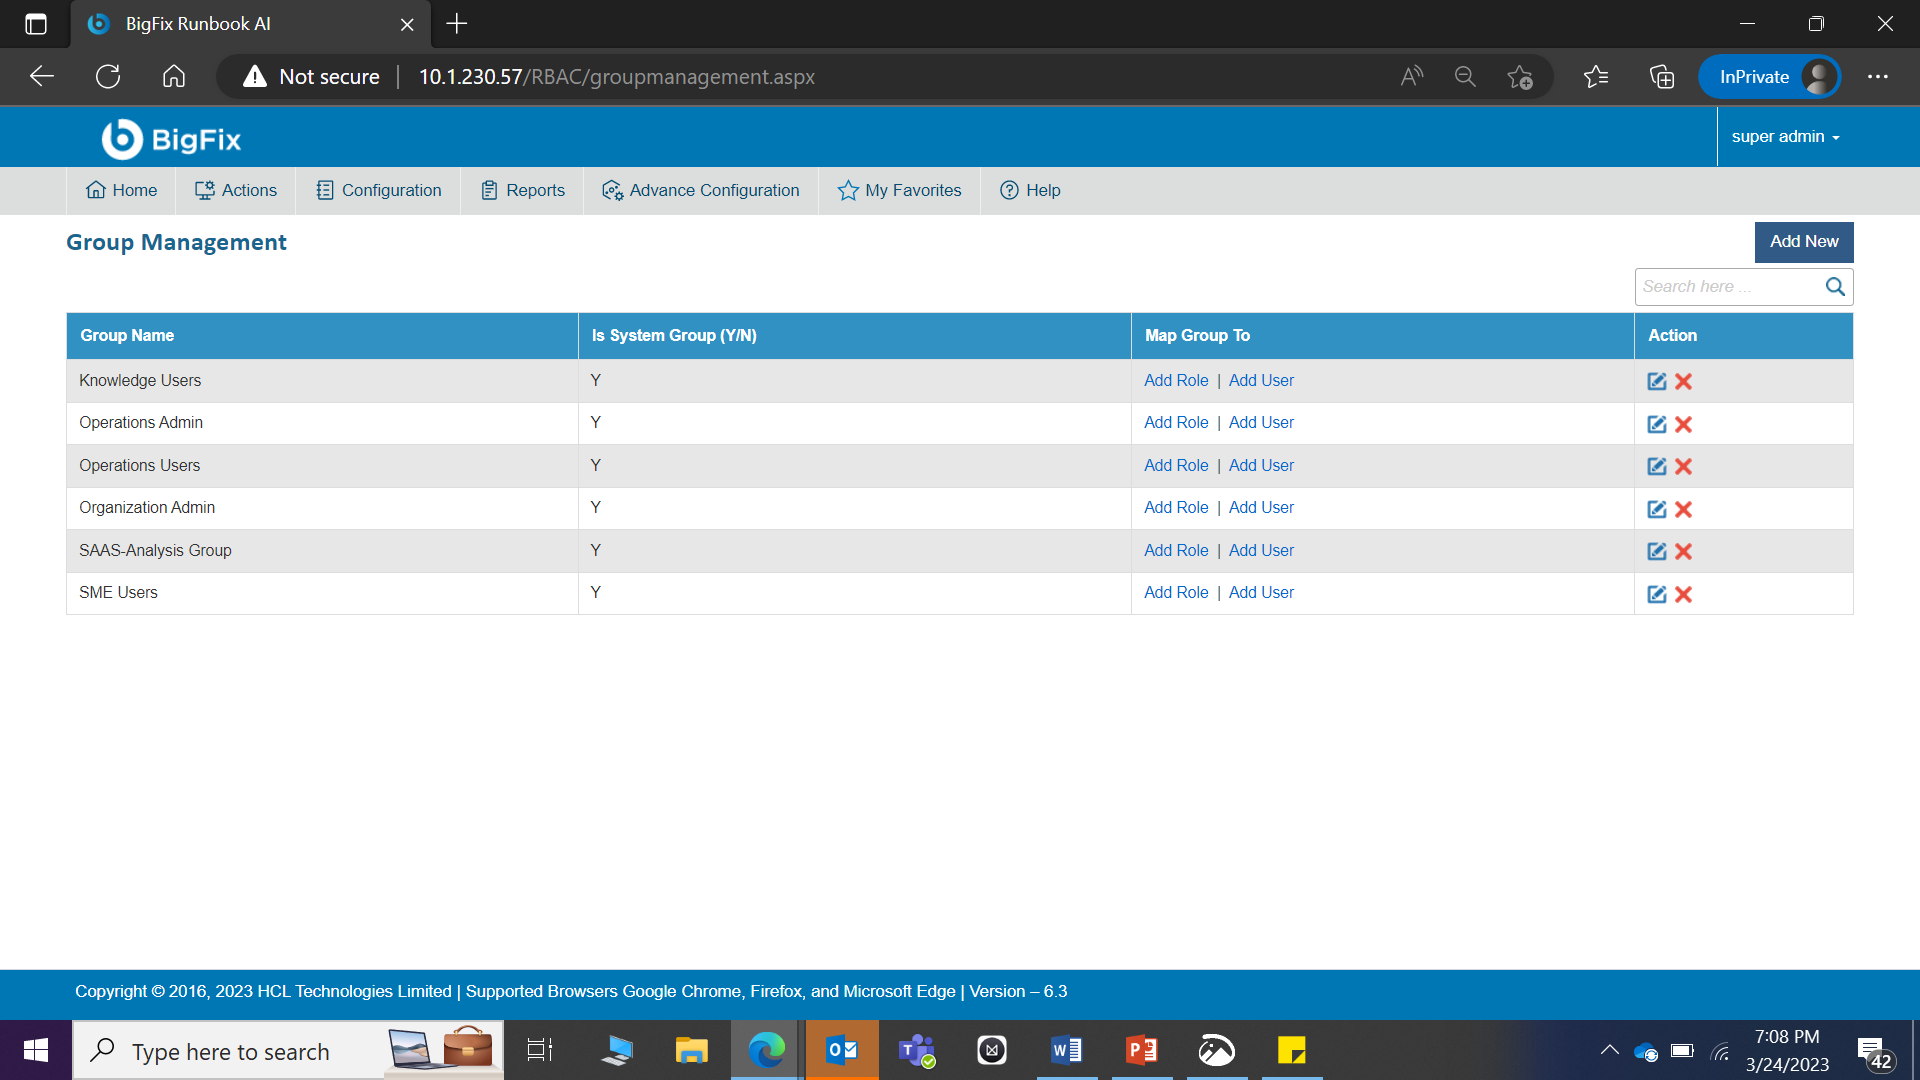
RBAC → Group Management
RBAC defines a management role group that simplifies the assignment of roles to a group of users. All members of a role group are assigned the same set of roles.
For group management, perform the following steps:
- On the main menu bar, click Actions -> RBAC.
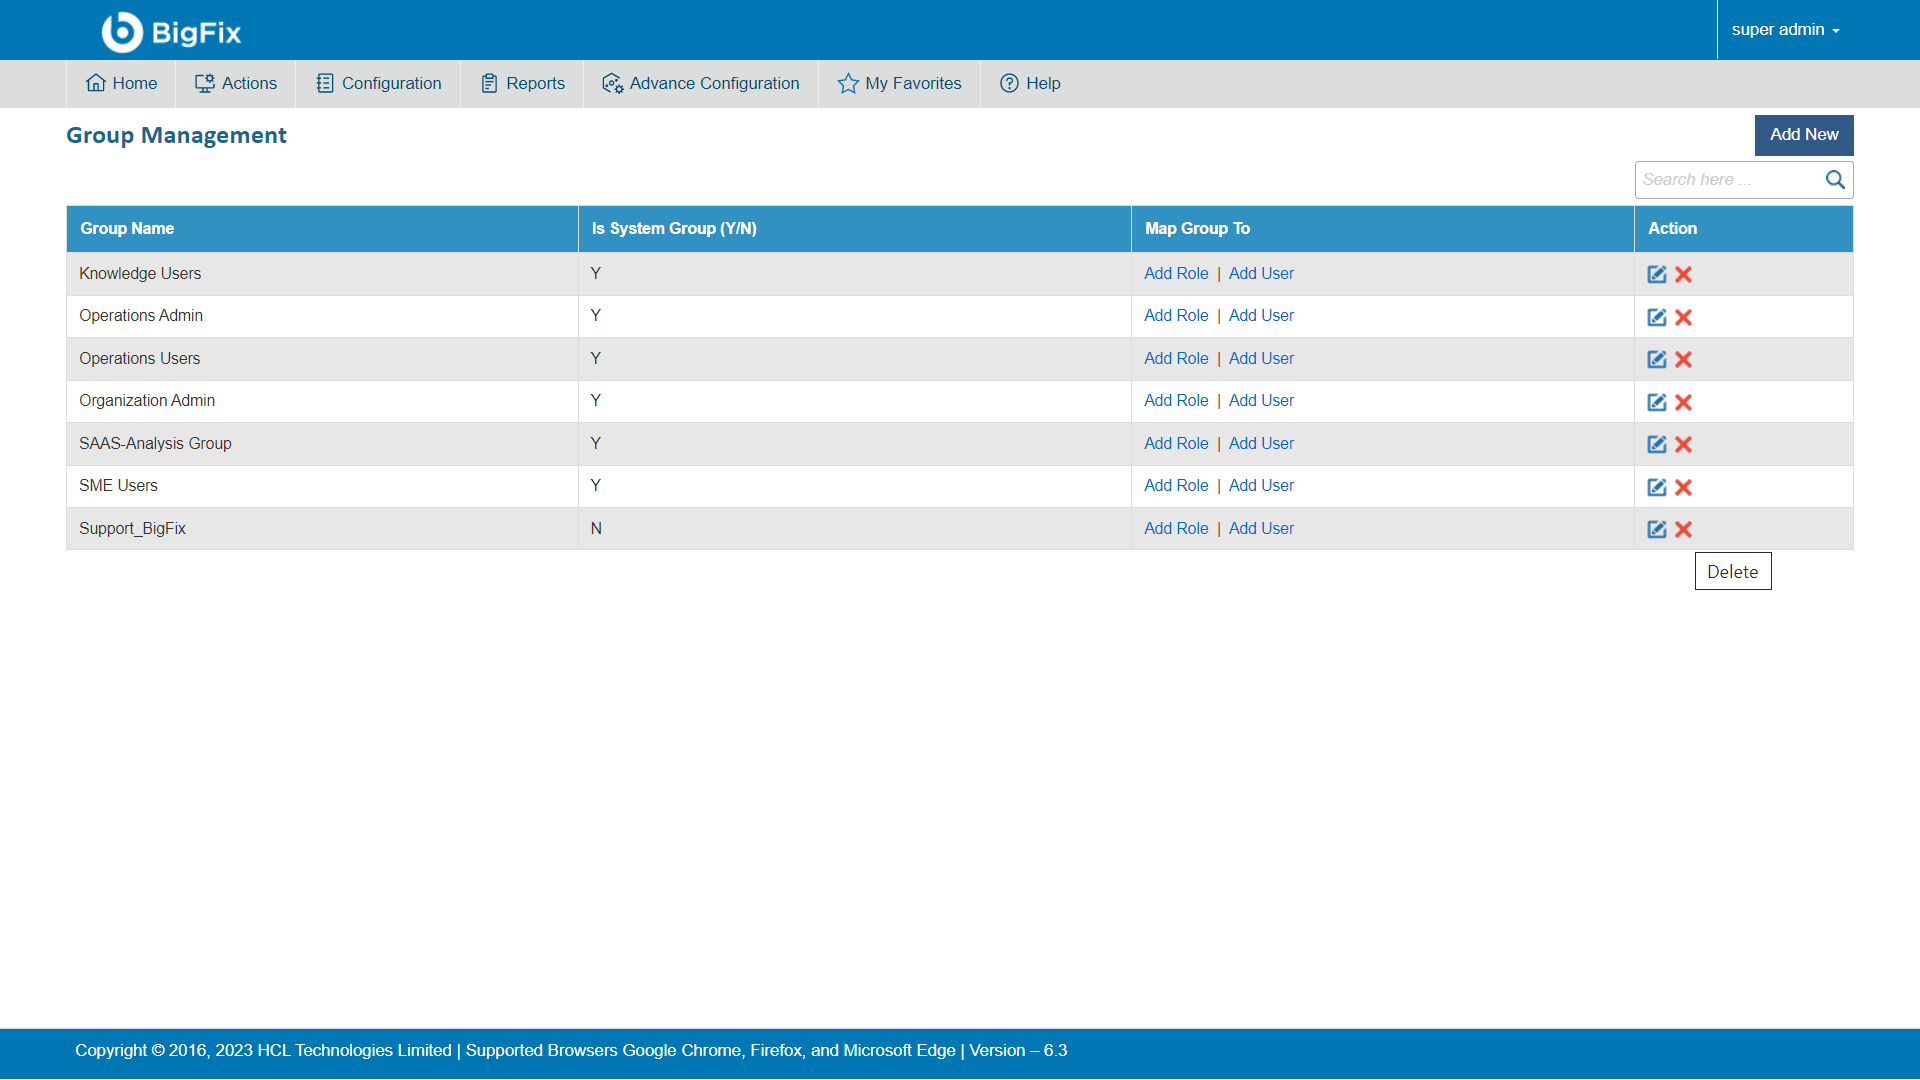
- Click Group Management. The Group Management page appears.
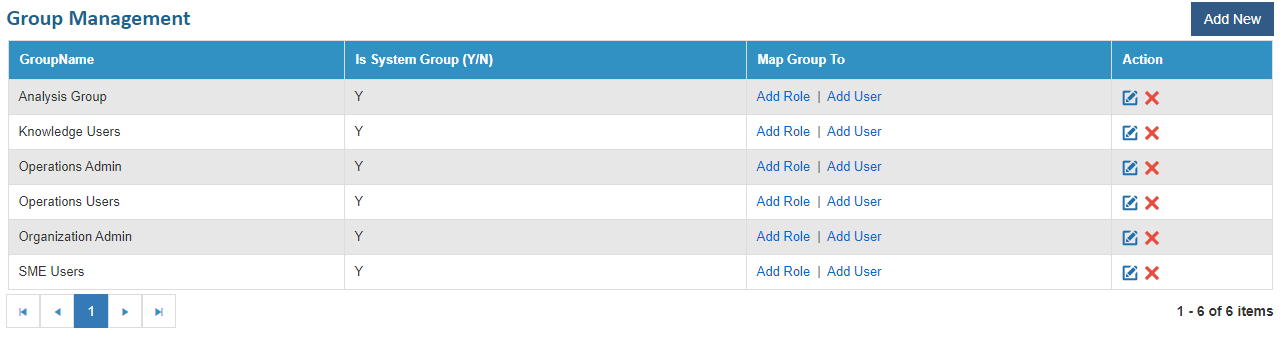
It lists the available groups in a tabular view. User can create a new group and edit or delete the existing group.
- The Status column represents the active or inactive status of the Groups as Y and N.
- The Is System Group column represents the default group that cannot be modified or deleted from the environment as Y and custom groups that can be modified or deleted from the environment as N.
- The Action column represents the action that can be performed for the custom groups. No actions can be performed for the default groups.
Add New Group
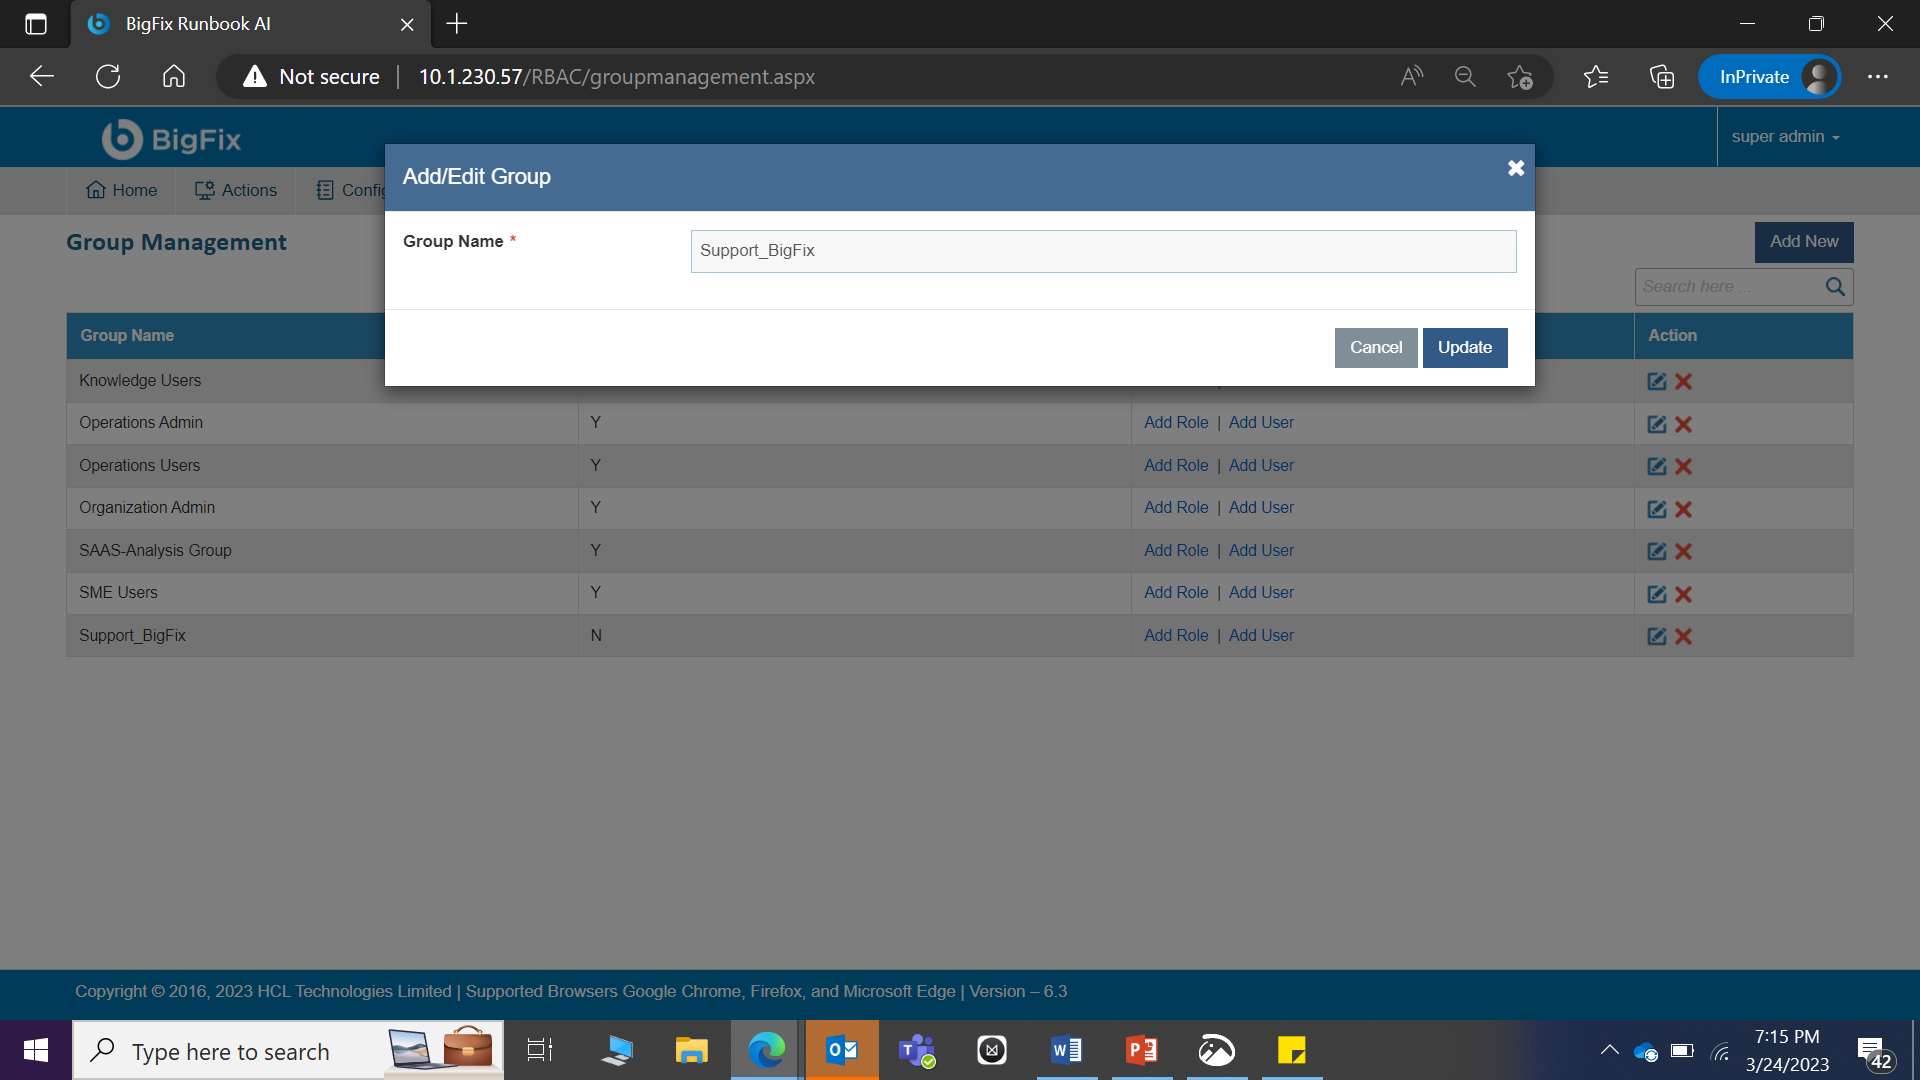
A Super Administrator can add a new group into BigFix Runbook AI environment by using the following steps:
- On the Group Management screen, click Add New.
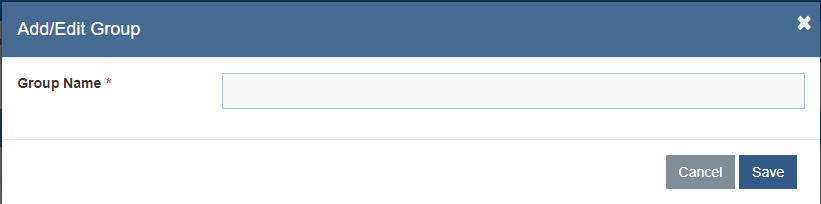
- Enter the Group Name and click Save. The newly created group will appear in the grid.
After the group is created, user can map roles and users to the group.
Map Role to Group
A Super Administrator can map a role to a new group by using the following steps:
- On the Group Management screen, click Add Role next to the group user want to map to a role.

- The Assign Role To page appears.
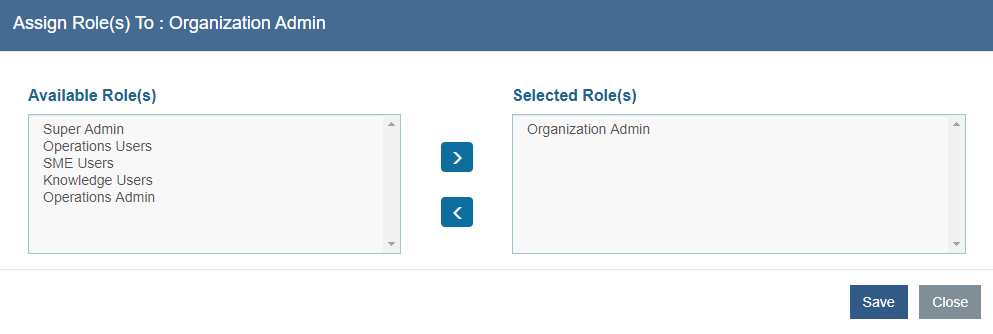
- Select a role from the Available Roles pane and move
it to the Selected Role pane by clicking
 .
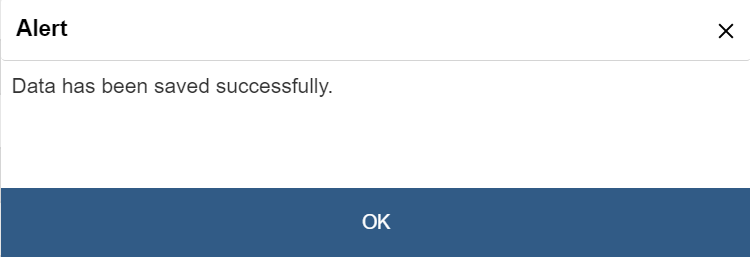
. - Click Save. A confirmation dialog box appears.
Map User to Group
A Super Administrator can map users to a new group by performing the following steps.
- On the Group Management screen, click Add User next to the group to which user want to map to a user.
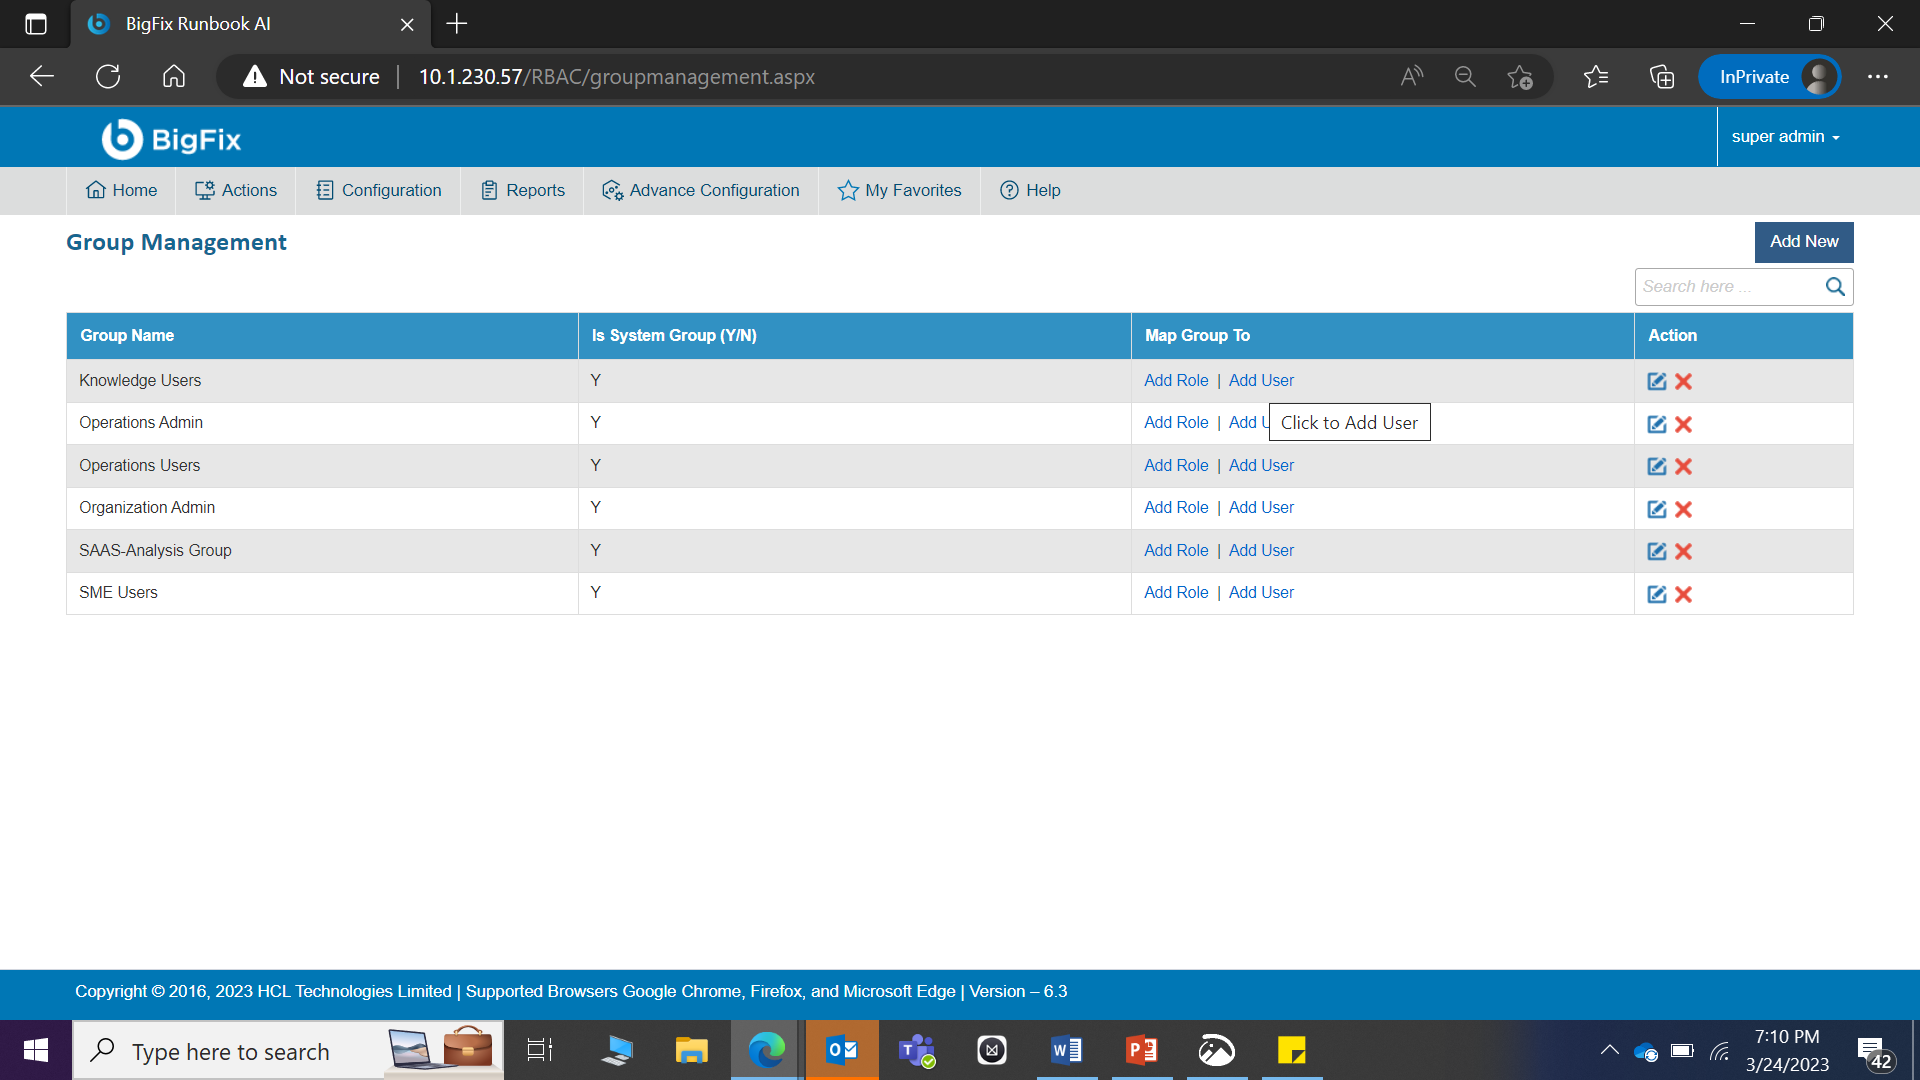
- The Assign Users To page appears.
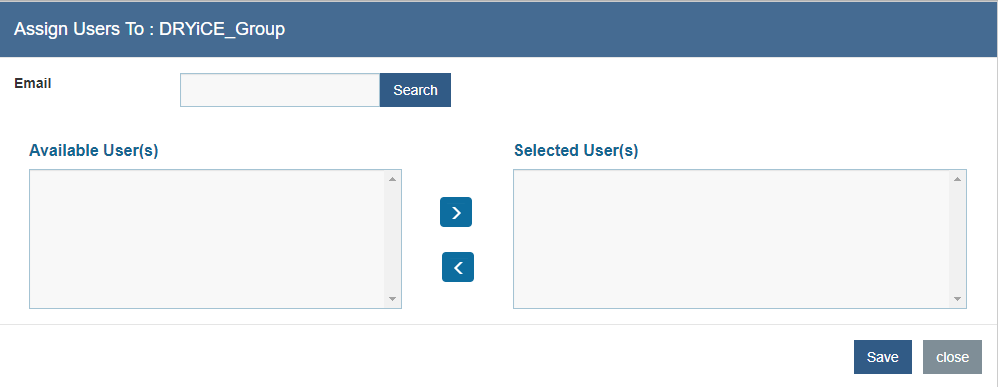
- Specify an email address to send or receive notifications in the Email field.
- Select a role from the Available Users pane and move
it to the Selected Users pane by clicking
.png) .
. - Click Save. A confirmation dialog box appears.
.png)
Edit Group
User can open an existing group, review the available information, and change the group details by using the following steps.
- On the Group Management screen, click
.png) next
to the group user wants to edit.
next
to the group user wants to edit.

- The Group Name and Group Status fields are enabled.
User cannot edit the roles of users with administrator privileges.
- Edit the Group Name and click Update.
A dialog box appears with the confirmation message.
Delete Group
If user no longer needs a group, it can be deleted from BigFix Runbook AI environment by performing the following steps.
- On the Group Management screen, click
.png) next
to the group user wants to delete.
next
to the group user wants to delete.
User cannot delete a group containing users with admin privileges.
- Click OK to confirm.
- A confirmation dialog box appears.
RBAC →Entity Management
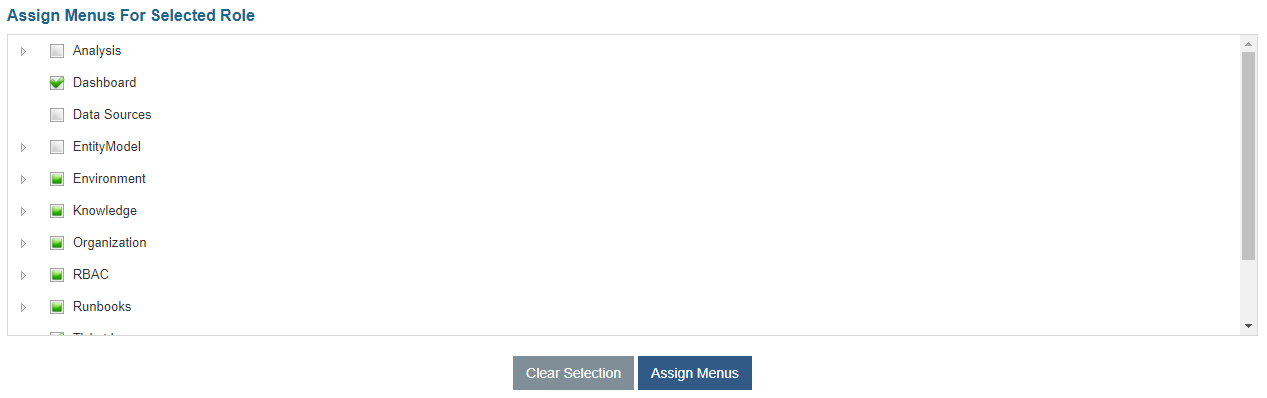
Entity management is a process by which menus and tasks are assigned to a selected role.
To configure entity management, perform the following steps:
- On the main menu bar, click Actions -> RBAC and then click the Entity Management. The Entity Management page appears.

- Select the entity type which specifies the type of data user wants to configure to a role from the Entity Type field.
- Select the type of role to which user wants to configure the selected entity type from the Select Roles field. It auto-fills the available list of menus.
All fields marked with an asterisk (*) are mandatory.
- Select the check box for the required menu, and then click Assign Menus. A confirmation dialog-box appears.
Assigned menus will appear only on the main menu bar of logged-on users with the appropriate role and will apply to all the users mapped to the selected role.
For user management, perform the following steps:
- On the main menu bar, click Actions then RBAC.
- Click User Management. The User Management page appears.
.png)
- It lists the available users in a tabular view and allows user to create a new user, edit the existing user, and assign widgets to users.
Manage Jobs
This section describes how to manage a job in the customer environment.
To manage jobs, perform the following steps:
- On the main menu bar, click Actions.
- Click Manage Job.
- The Manage Jobs page appears.
Figure 226. Figure - Manage Jobs 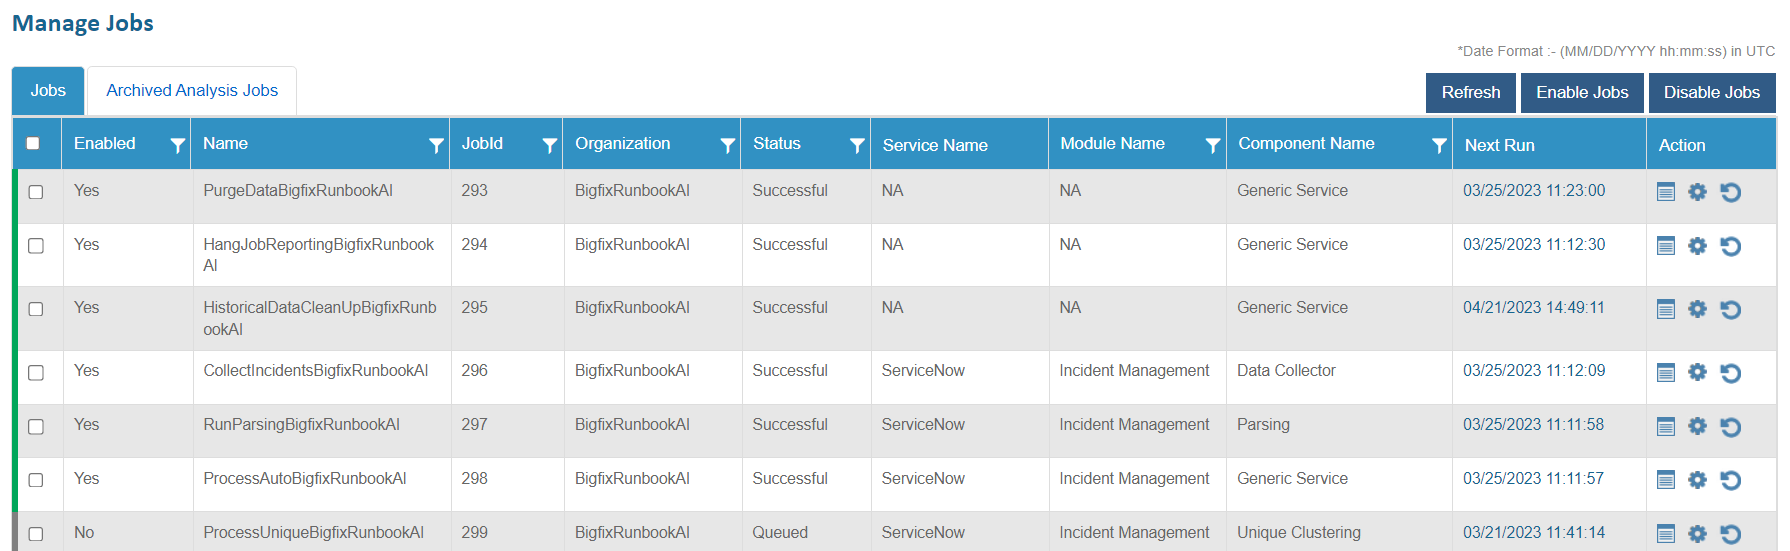
- It lists the job name and status, assigned service type, module name, and component name in a tabular view. User can view the job log, change the status of the job, and edit or delete existing jobs.
- There are two tabs on this screen-
- Jobs tab that lists the job name and status, assigned service type, module name, and component name of all the jobs except successfully completed analysis jobs in a tabular view. User can view the job log, change the status of the job or edit the job properties.
- Archived Analysis Jobs that list the job name and status, assigned service type, module name, and component name of all the analysis jobs that are completed successfully in a tabular view. User can only view the job log.
| JobPrefixName | JobSuffixName | JobDescription | ComponentName |
|---|---|---|---|
| CollectChangeRequest | OrganizationName | Collects Service Requests | Data Collector |
| CollectChgTasks | OrganizationName | Collects All and Actionable Change TASK Data | Data Collector |
| CollectCMDBData | OrganizationName | Collects CMDB data | Data Collector |
| CollectIncidents | OrganizationName | Collects All and Actionable Incident Data | Data Collector |
| CollectRequestData | OrganizationName | Collects Service Requests | Data Collector |
| CollectRequestItem | OrganizationName | Collects Request Item Data | Data Collector |
| CollectSRTasks | OrganizationName | Collects All and Actionable Service Request Data | Data Collector |
| FetchClusterId | OrganizationName | This job fetches the cluster details used by iUnique Service | Fetch Unique Cluster |
| CreateHistoryAndPopulateFact | OrganizationName | This job moves the eligible tickets to history table and populates fact, using the same for reporting | Generic Service |
| ProcessAuto | OrganizationName | This job picks and process based on the auto criteria | Generic Service |
| PurgeData | OrganizationName | This job purges the tables configured in Organization DB | Generic Service |
| iAutomatePurgeData | This job purges the tables configured in the Configuration DB (delete records from log table) | Generic Service | |
| ScheduleRunbook | OrganizationName | This job creates scheduled Ticket in BigFix Runbook AI for the Scheduler | Generic Service |
| RunParsing | OrganizationName | This job fetches and parse the tickets | Parsing |
| ExecuteRunbook | OrganizationName | This job is used for processing the tickets based on run book selected | RBA Service |
| FetchUniqueRecommendation | OrganizationName in case of Environment Analysis else Analysis Name Provided by user while creating CSV analysis or workbench Analysis | This job picks recommendation for the unique clusters created (Analysis) | Recommendation |
| RunRecommendation | OrganizationName | This job picks and binds recommendations to the qualifying tickets | Recommendation |
| ReleaseTickets | OrganizationName | This Job picks the applicable tickets and Release in the underlying tool | Release Service |
| ProcessUnique | OrganizationName in case of Environment Analysis else Analysis Name Provided by user while creating CSV analysis or workbench Analysis | This job picks data from all and creates unique clusters | Unique Clustering |
| FetchScriptForUnique | OrganizationName in case of Environment Analysis else Analysis Name Provided by user while creating CSV analysis | This Job fetches scripts for unique tickets identified | Unique Script |
| Crawler | This Job crawls the Document for Advanced Knowledge Service | Crawler | |
| Indexer | This Job processes the Document for Advanced Knowledge Service | Indexer | |
| ActiveDircetory | OrganizationName | This Job fetches user from Active directory | ADSync |
| EmailProcessing | This Job processes the email related tasks | Email Service | |
| ASPState Delete Expired Sessions | This job is responsible to delete active session | Generic Service | |
| iAutomateHangJobReporting | This job is responsible to notify user if any job stuck from a pre-defined time | Generic Service | |
| HangJobReporting | OrganizationName | This job is responsible to notify user if any job stuck from a pre-defined time | Generic Service |
To see the latest job log entries, click Refresh on the Manage Jobs page.
View Job Log
The job log displays information about job execution. In the Job Log Details view, every row provides details of the job execution. The number of log entries kept depends on the configuration of the scheduled procedure responsible for clearing old log entries. It creates separate log files for each job.
To view the job log details, perform the following steps:
- On the Manage Jobs screen, click
 in the
Action column next to the job user wants to review
in the job log.
in the
Action column next to the job user wants to review
in the job log.

- The Job Log Details page appears.
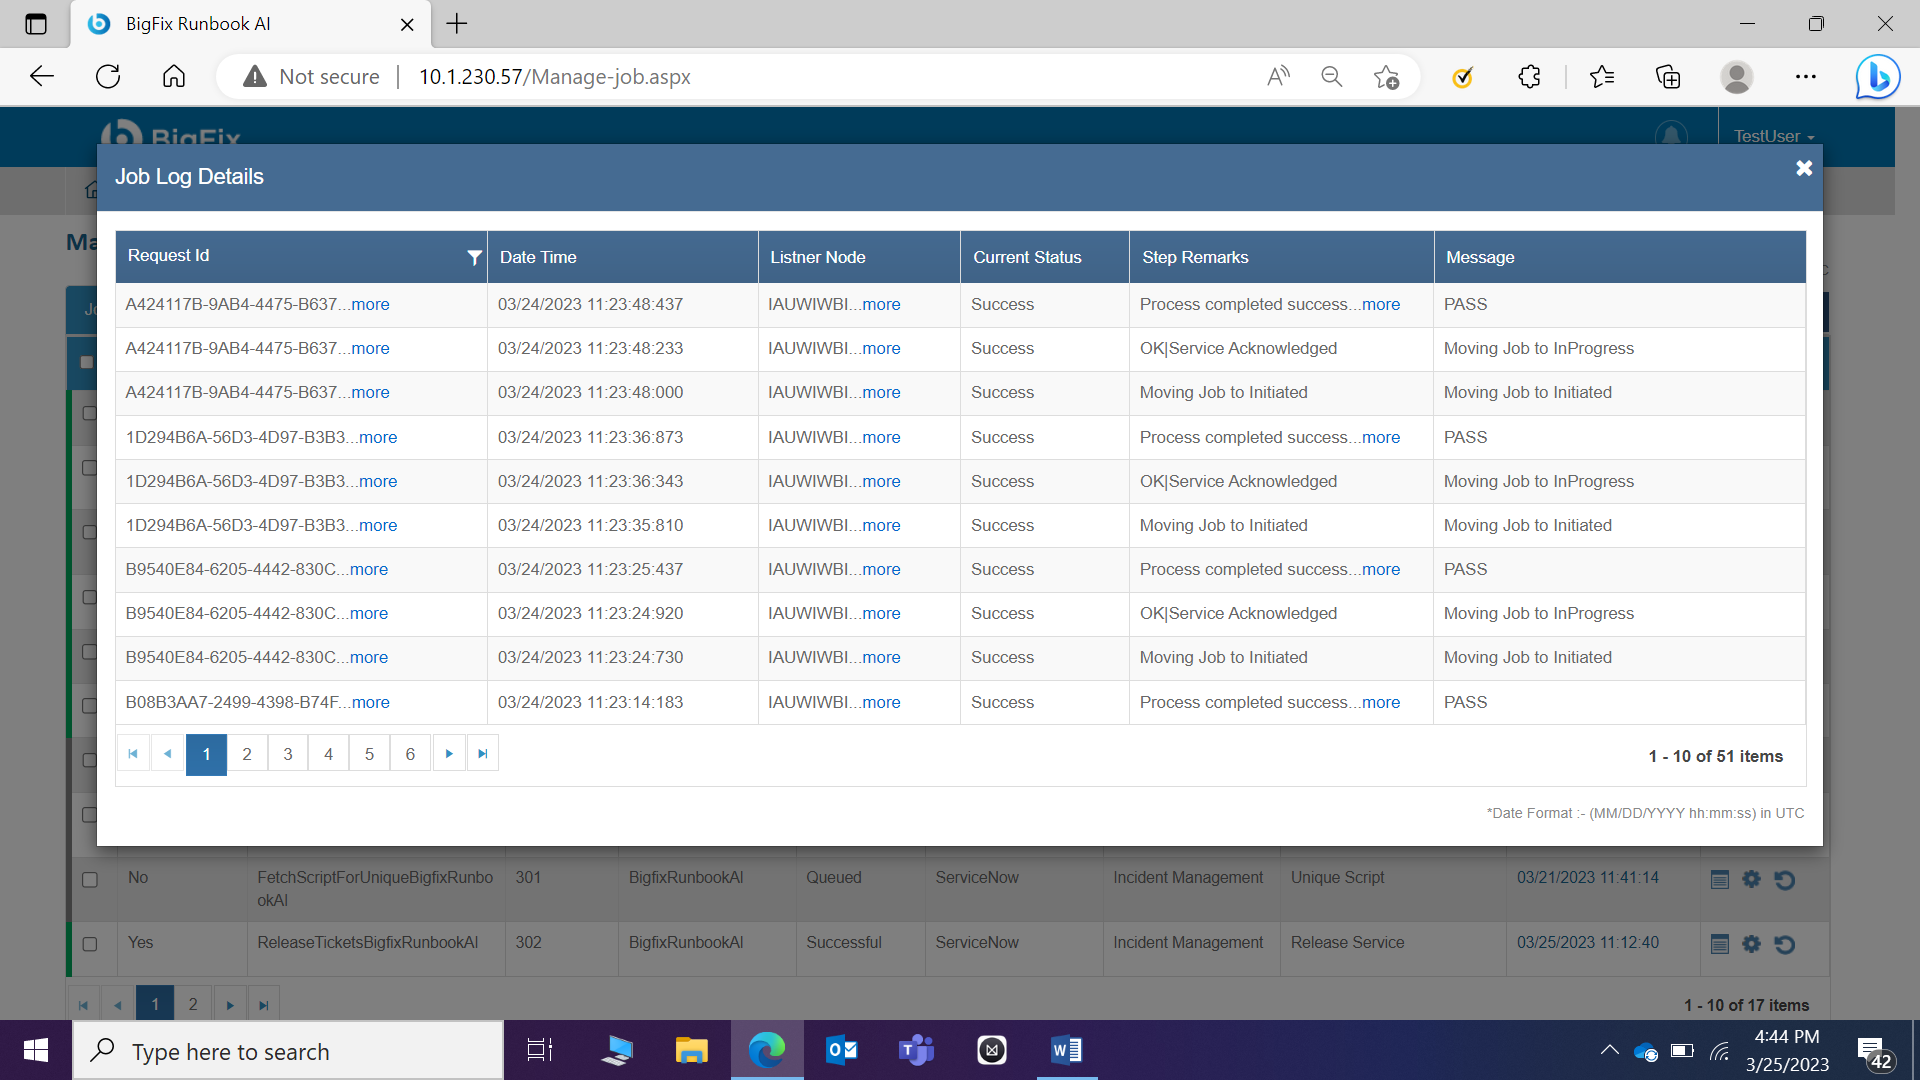
The log contains information about the specific job execution, which includes the following:
- The request Id for the job and user can filter the data based on the request Id
- The date and time when the job was run.
- The listener node that has picked the job for processing.
- The status of each job displayed with the help of system generated messages relevant to the job execution in the Message column.
- Messages that apply to each step in the Step Remarks column.
To enable a job, select the check box of the corresponding job and then click Enable Jobs. To disable a job, click Disable Jobs. After a job is enabled, the job status changes to Initiate.
Manage Job Parameters
Job parameters control which records are to be included or how they are executed when a job runs. A job can have multiple parameters with different data types or no parameters at all.
To manage job parameters, perform the following steps:
- On the Manage Jobs page, click
 in the Action column next to the job you want to manage.
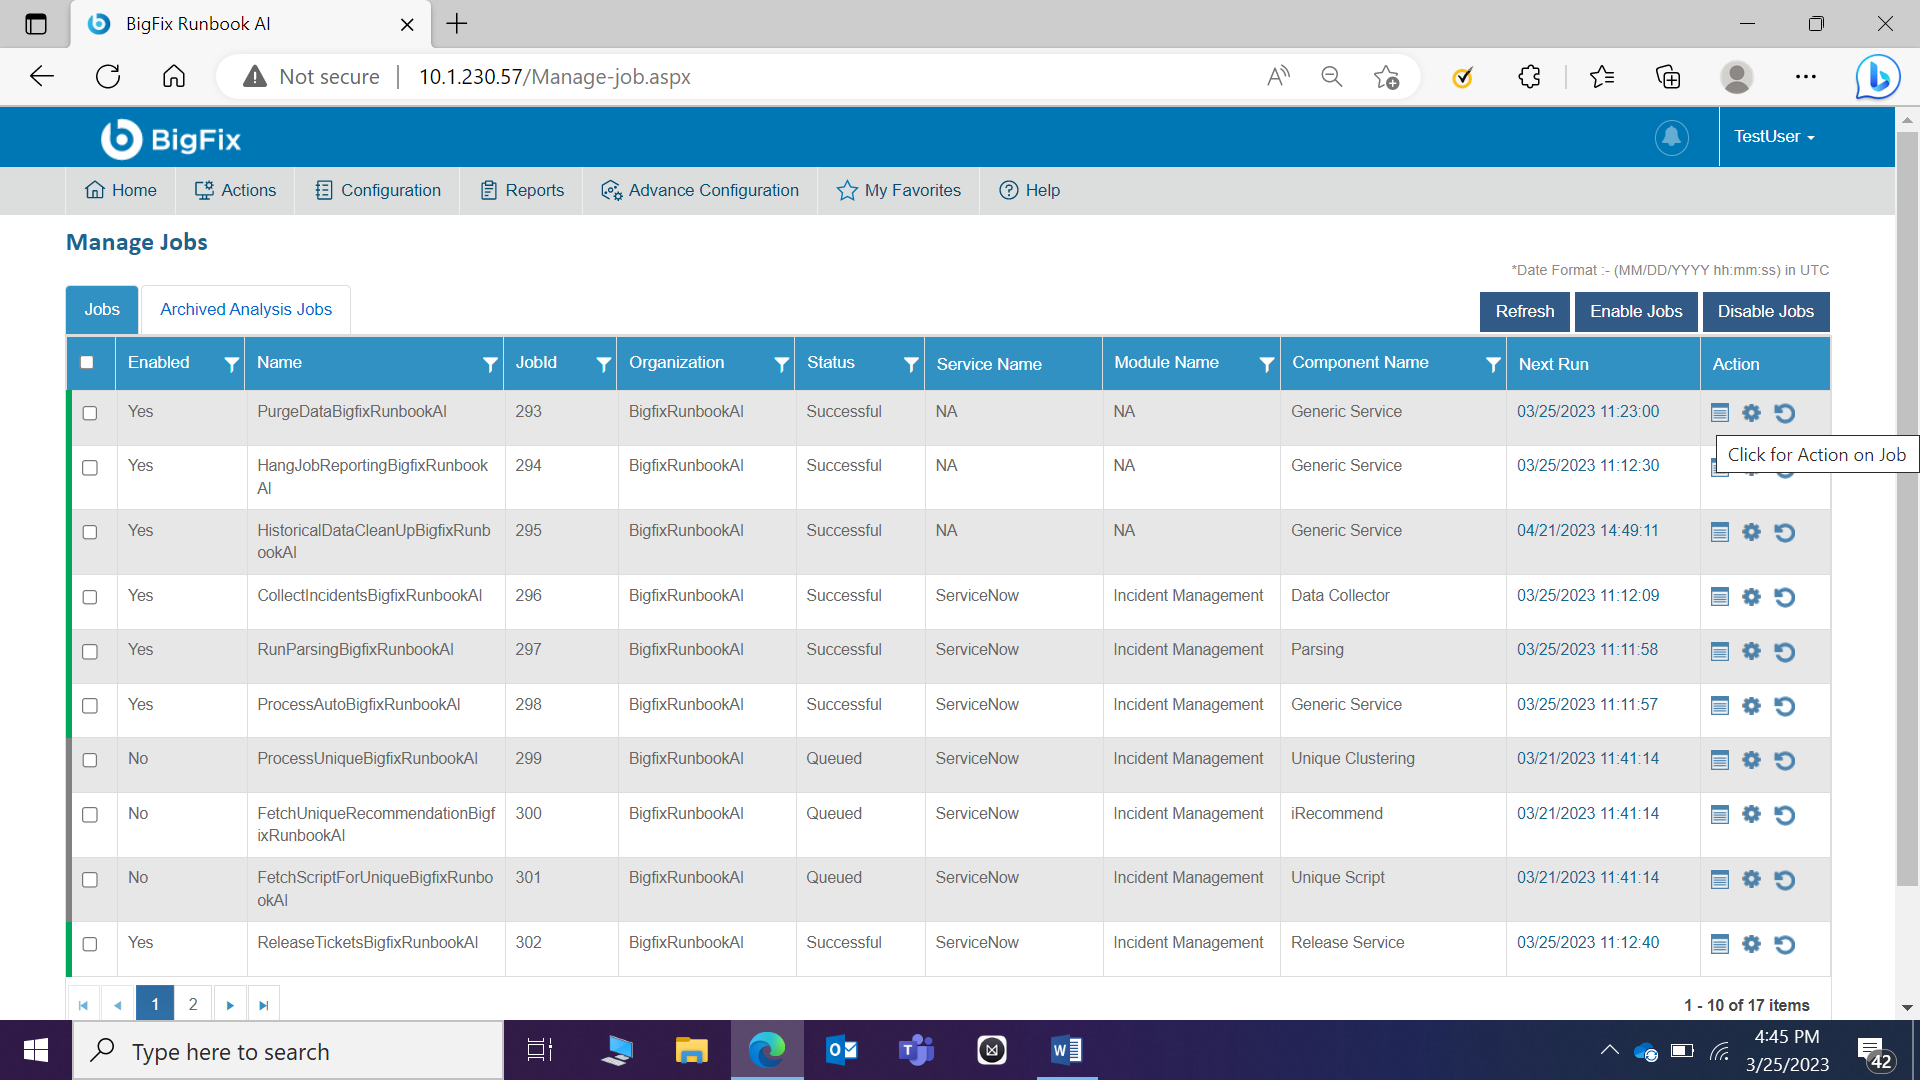
- The Job Actions page appears. It includes the following tabs:
- General
- Schedule
- Parameter
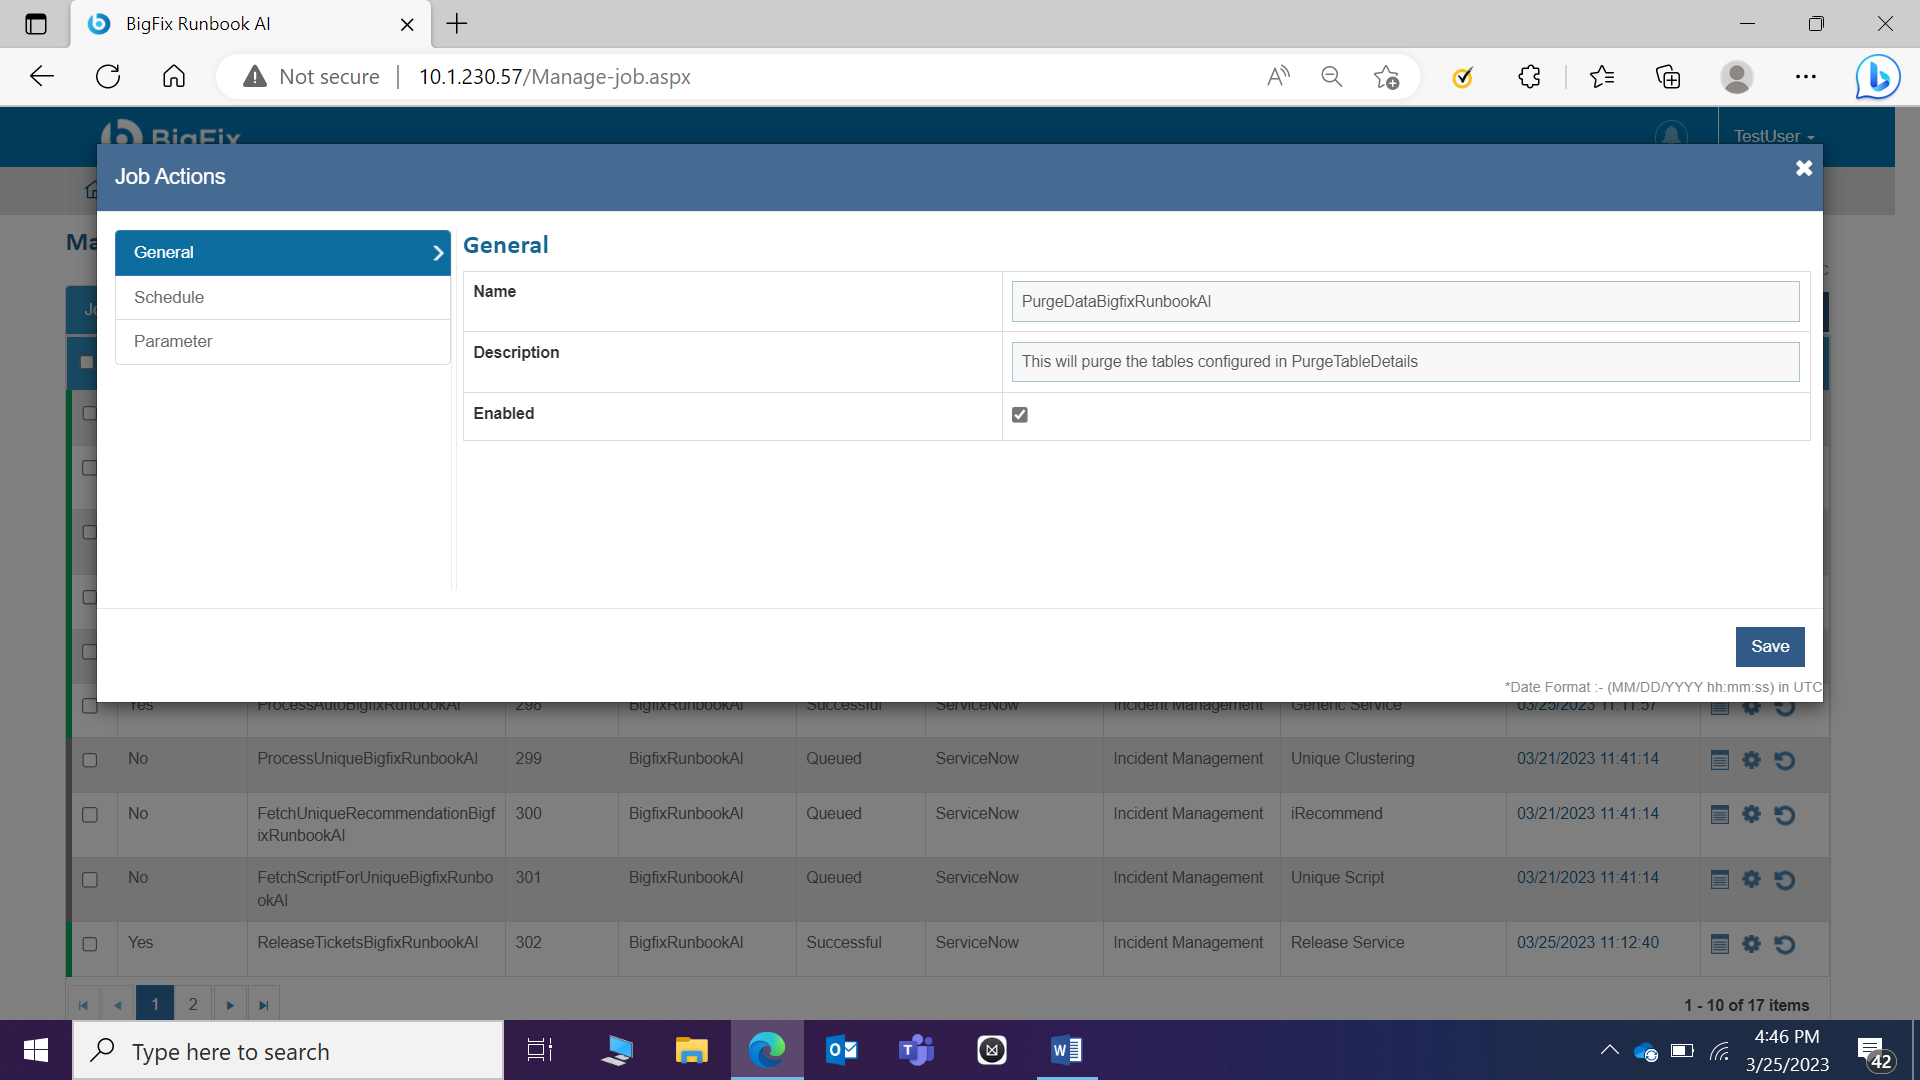
- Click General to configure the general details of a parameter by filling in the following attributes.
- Type the unique parameter name within the job in the Name field and then type the parameter description in the Description field.
- If the user wants to enable the added parameter for execution, select Enabled.
.png)
- Click Schedule to provide parameter details to schedule a job. The user can schedule jobs to automatically run at a particular date or time and/or on a recurring basis.
- Schedule Type: This allows the user (Organization Admin) to schedule job updates. The drop-down menu lists the following options:
- Select One Time, if you want to schedule the job update only once, then select the Date and Time to schedule and then click Save to update the schedule.
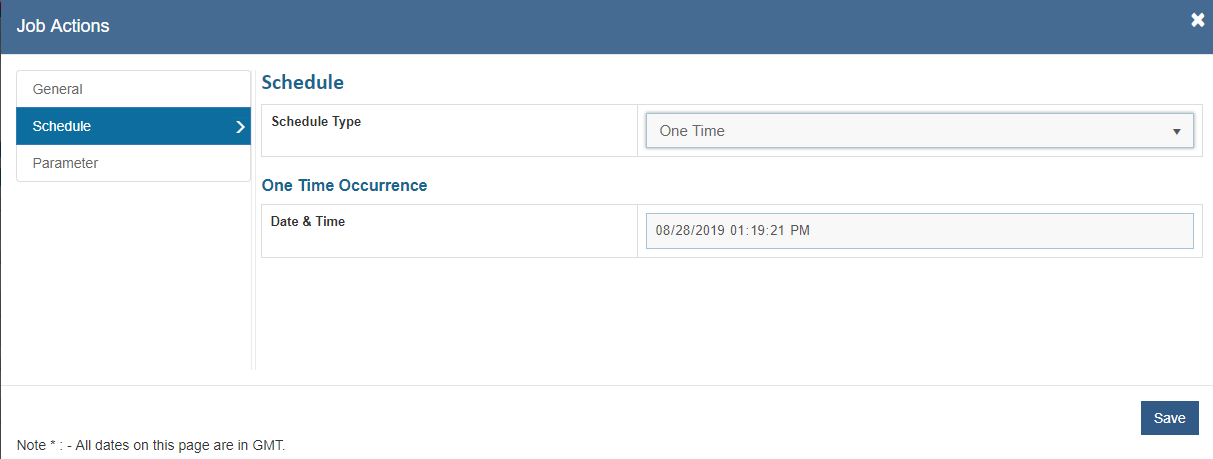
- Select Recurring, to schedule a recurring job update, then type the numerical value for the schedule next to the Occurrence Every field, and then click the drop-down list to select the duration in seconds, minutes, hours, monthly, or daily.
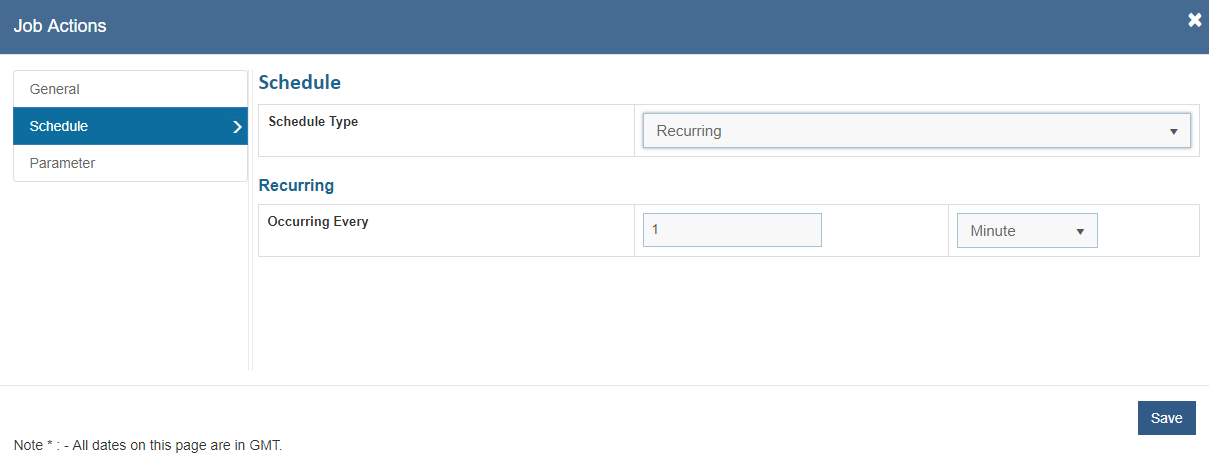
- For the jobs, that are running daily, there is one more field that can be set under Schedule tab and i.e., User can define the time of the day at which the job should run.
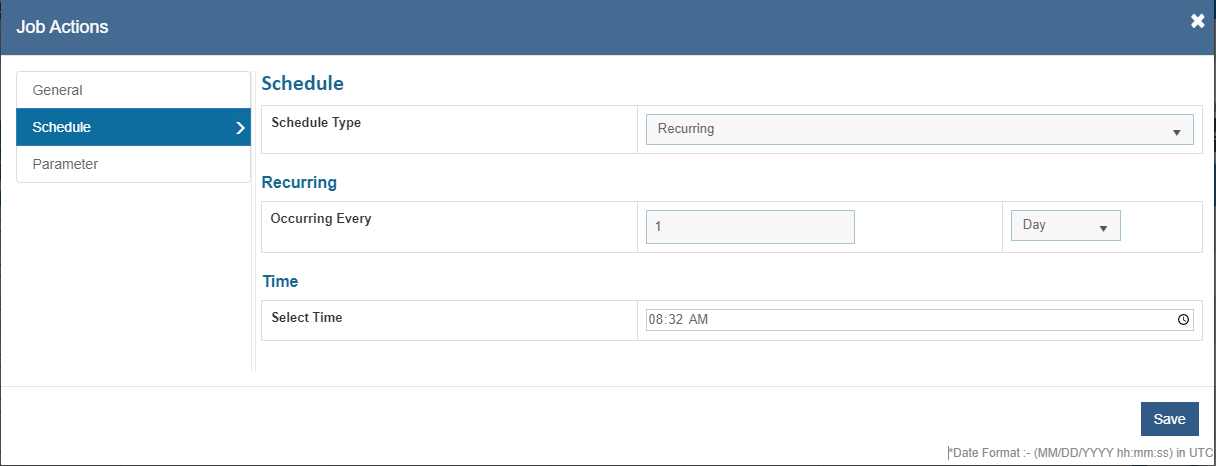
- Click Parameter to enable the added parameter. Switch the value button to Enable the parameter value.
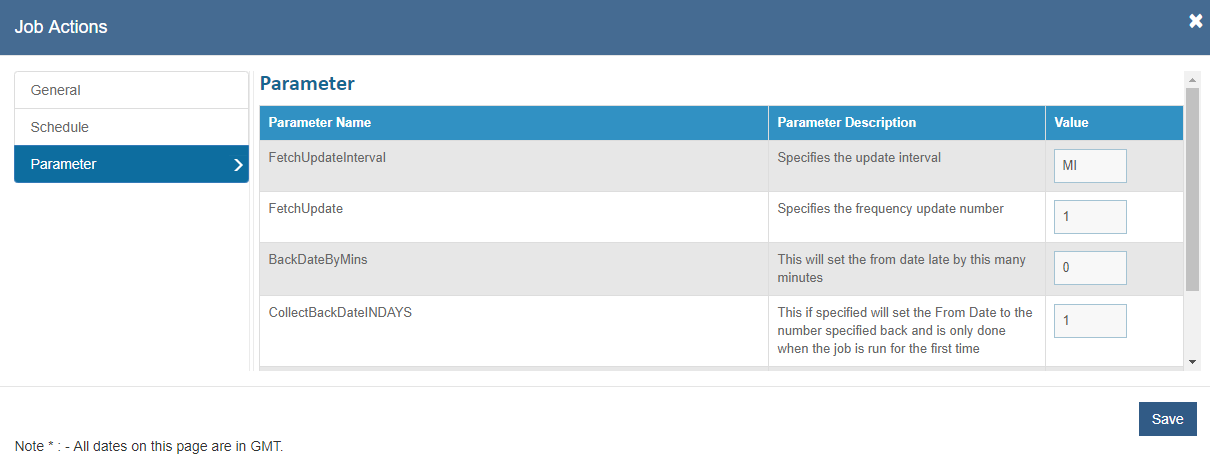
- Click Save.
User can click Save after updating General, Schedule, or Parameter tabs and save the updates.
- A confirmation dialog box appears.
Reset Jobs
This section describes how to reset a job definition before an execution or resubmission.
To reset a job, perform the following steps:
- On the Manage Jobs page, click
 in the
Action column next to the job user wants to reset.
in the
Action column next to the job user wants to reset.

- Click Yes to confirm.
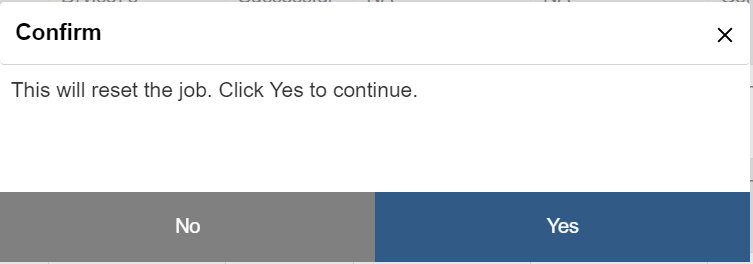
The administrator cannot reset successful jobs and jobs with schedule type selected as One Type.
Analysis
Ticket analysis is the process of identifying tickets that can be automated and create additional runbook for non-automated tickets. When a user reports an incident, it creates a corresponding ticket in the system and serves as a token in the Incident Management Process. Similar process is followed for any service request tasks and change request tasks as well.
Depending on the incident, tickets must be routed to the appropriate expert group who will handle the resolution. The goal is to resolve the ticket as quickly as possible to minimize business disruptions and user dissatisfaction.
To analyze a ticket, perform the following steps:
- On the main menu bar, click Actions->Analysis.
- The following menu appears:
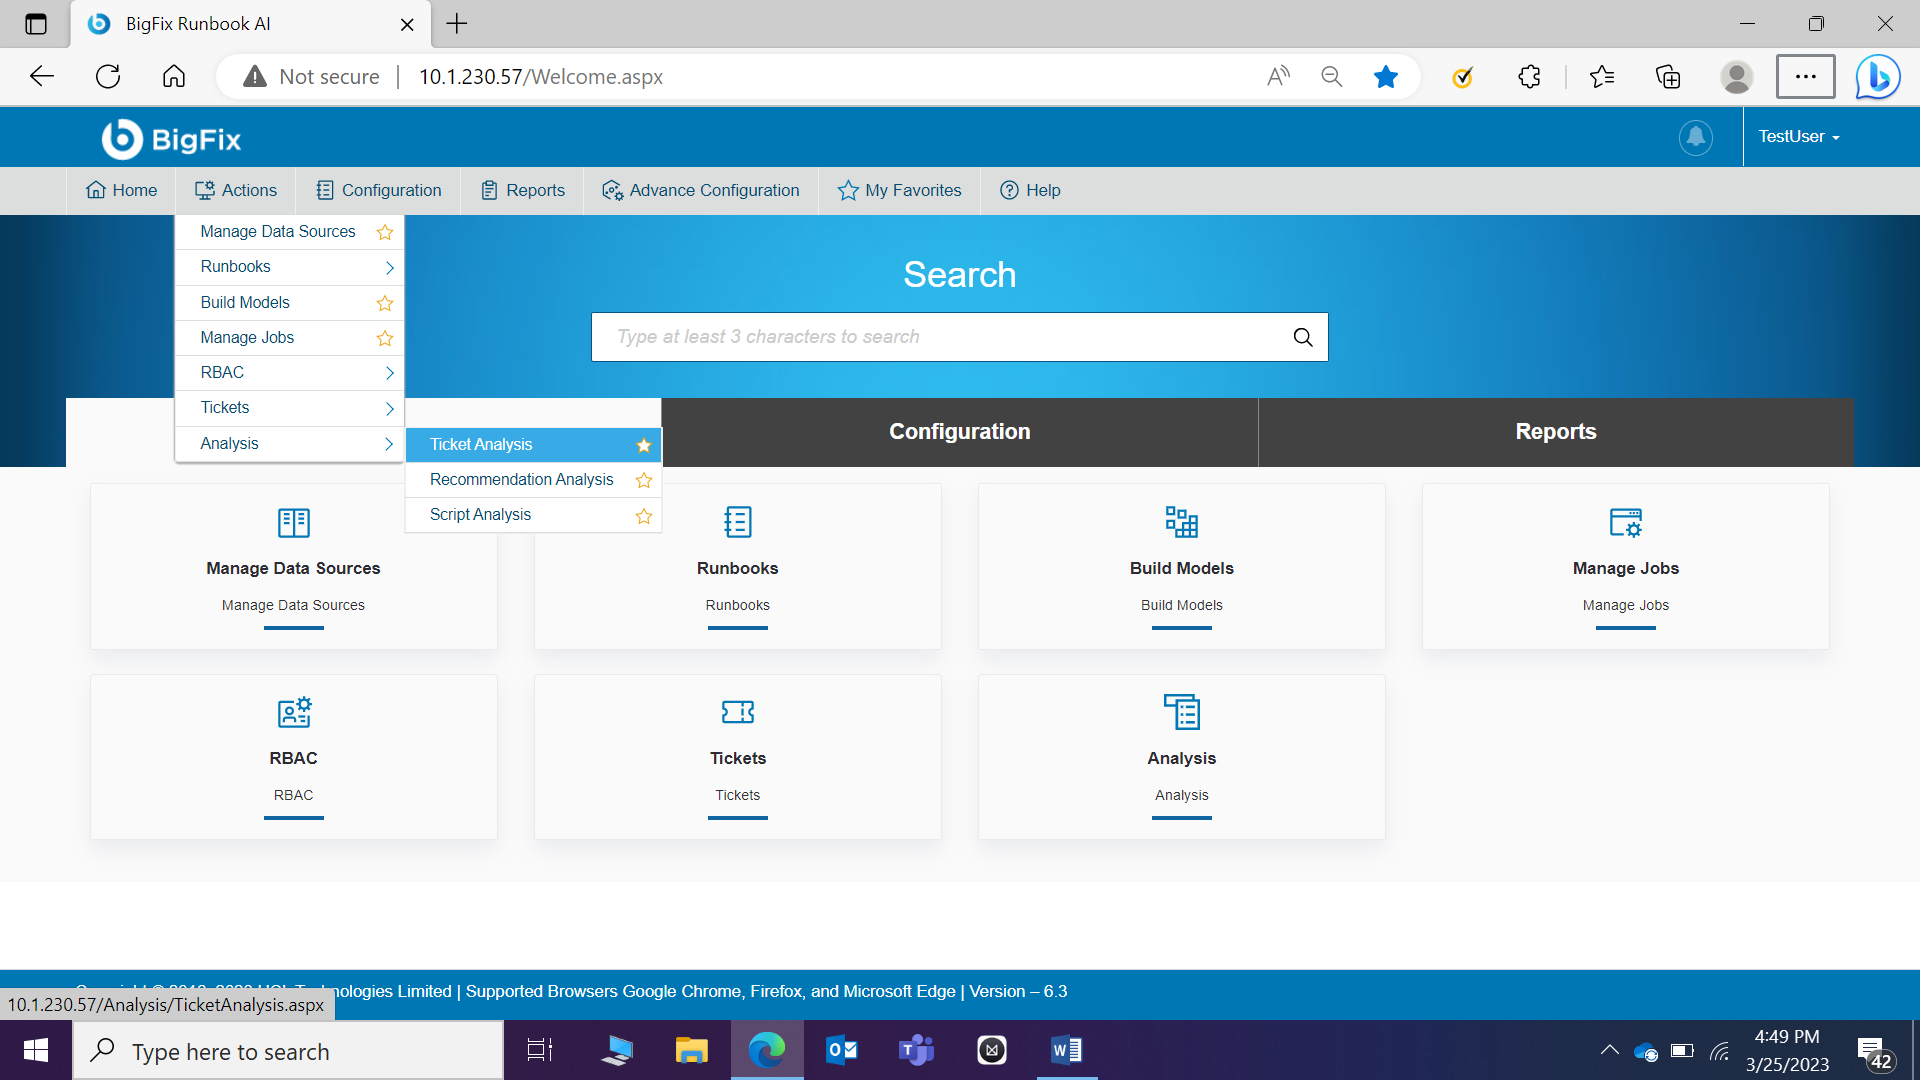
Ensure user is logged on as administrator to create and manage analysis and associated parameters.
Analysis is accessible to Organization Admin or Operation Admin user.
Ticket Analysis
User can configure settings to analyze tickets and categorize them for auto execution or execution with manual intervention.
To manage ticket analysis, perform the following steps:
- On the main menu bar, click Actions->Analysis.
- Click Ticket Analysis. The Ticket Analysis page appears.

This lists the available analysis types in a tabular view and allows user to configure new analyses using the Add New Analysis button, and view, build and approve, merge, or delete the existing analysis.
Ticket analysis can be performed in two ways:
- To CSV Ticket Analysis - In this case, user can use existing organization data for ticket analysis. You can analyze that data and create a runbook of frequently occurring tickets. It imports the same runbook into the database for further use.
- For Environment Specific Ticket Analysis- In this case, the ticket analysis is performed on a continuous basis on the ticket data. Use can configure the frequency to daily, monthly, yearly, etc. under Manage Job section. It can be configured on a daily, monthly, or yearly basis.
Add New Ticket Analysis by Uploading CSV File
User can add a new analysis for an organization by performing the following steps:
- On the Analysis screen, click Add New Analysis.
- The Upload Data page is displayed. It lets the user define the general attributes for a new analysis. User must set attributes marked with an asterisk (*) to appropriate values for your environment before you can start analysis.
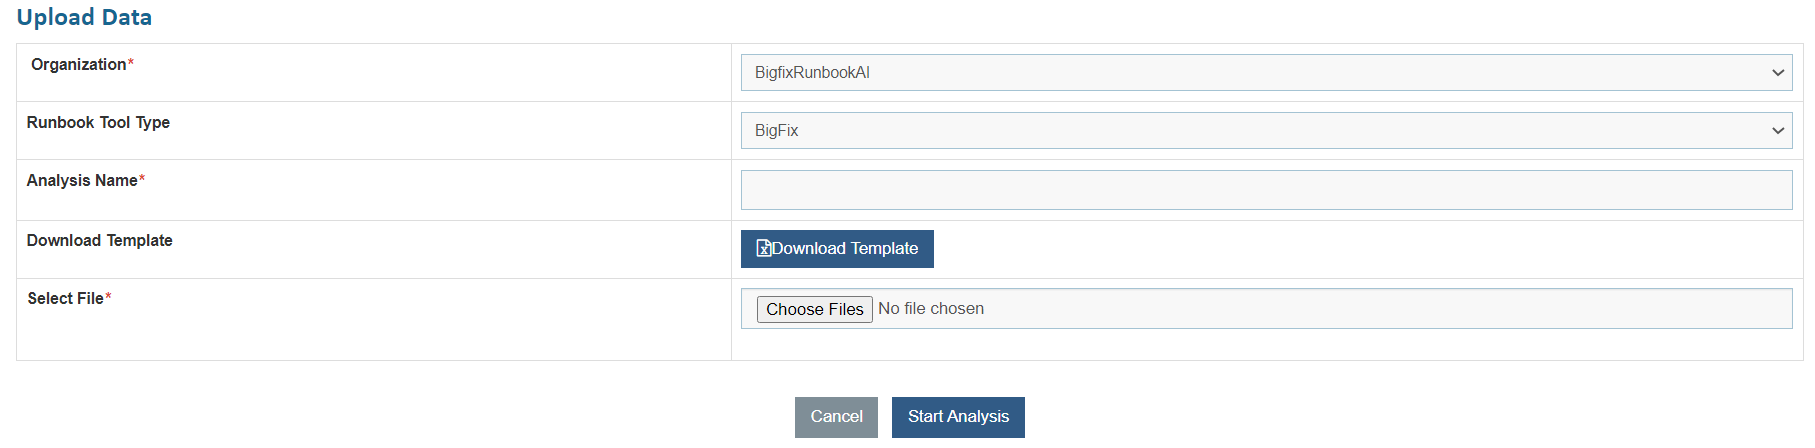
- Select the organization from the list of available
- Select the Runbook Tool Type on which analysis needs to be run.
- In the Analysis Name field, type the unique name for the analysis to be created.
- Click Download Template to download the CSV template for uploading analysis details.
- Fill the details in the downloaded template and click Choose Files to upload the updated CSV template.
- To start ticket analysis, click Start Analysis.
On clicking Start Analysis, three new jobs are created. These are Unique Clustering, Unique Script, and Recommendation. The newly added analyses are listed in the Manage Jobs page.
- To enable the job to view analysis, go to the Manage Jobs page.
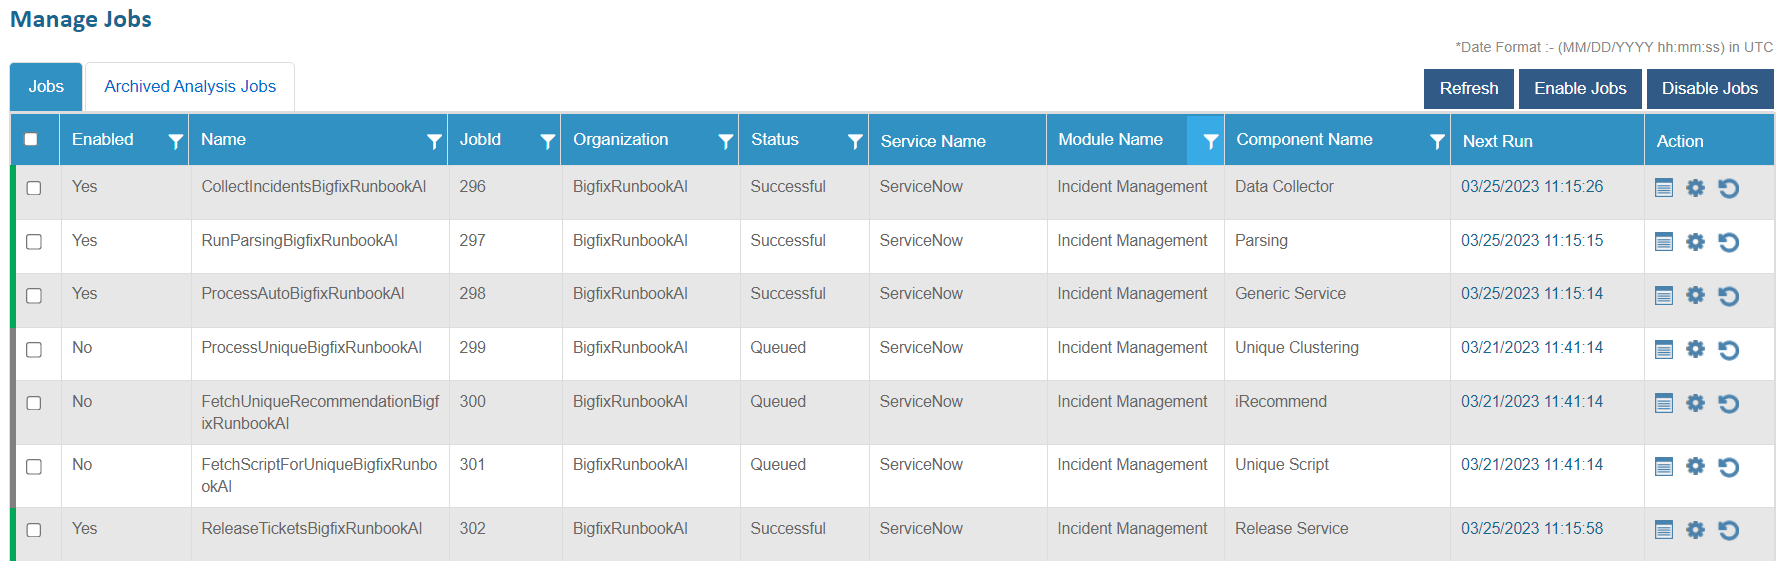
- Select the newly added job for analysis with the status as Queued and then click Enable Jobs. The confirmation dialog box appears.

- This adds the analysis and lists it in a grid with the status as Queued.

Once the unique service starts processing the analysis, the status changes from Queued to Pending Verification.

An administrator user can delete any analysis from the list
of ticket analysis by clicking .png) next to the analysis
type.
next to the analysis
type.
User can only delete the CSV specific ticket analysis displaying a Successful status.
View Ticket Analysis
User can view the information about an analysis that has already been defined.
To view ticket analysis, perform the following steps:
- On the Ticket Analysis page, click
 for the
analysis you want to view.
for the
analysis you want to view.

- The Ticket Details page appears where user can view the total number of tickets, the number of unique tickets, and the number of unprocessed tickets.
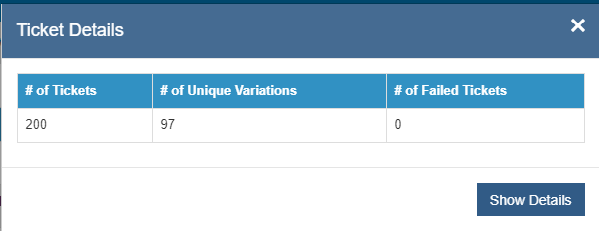
- Click Show Details and it prompts a window that shows the Similarity Score and the Canonical Summary for the selected ticket.
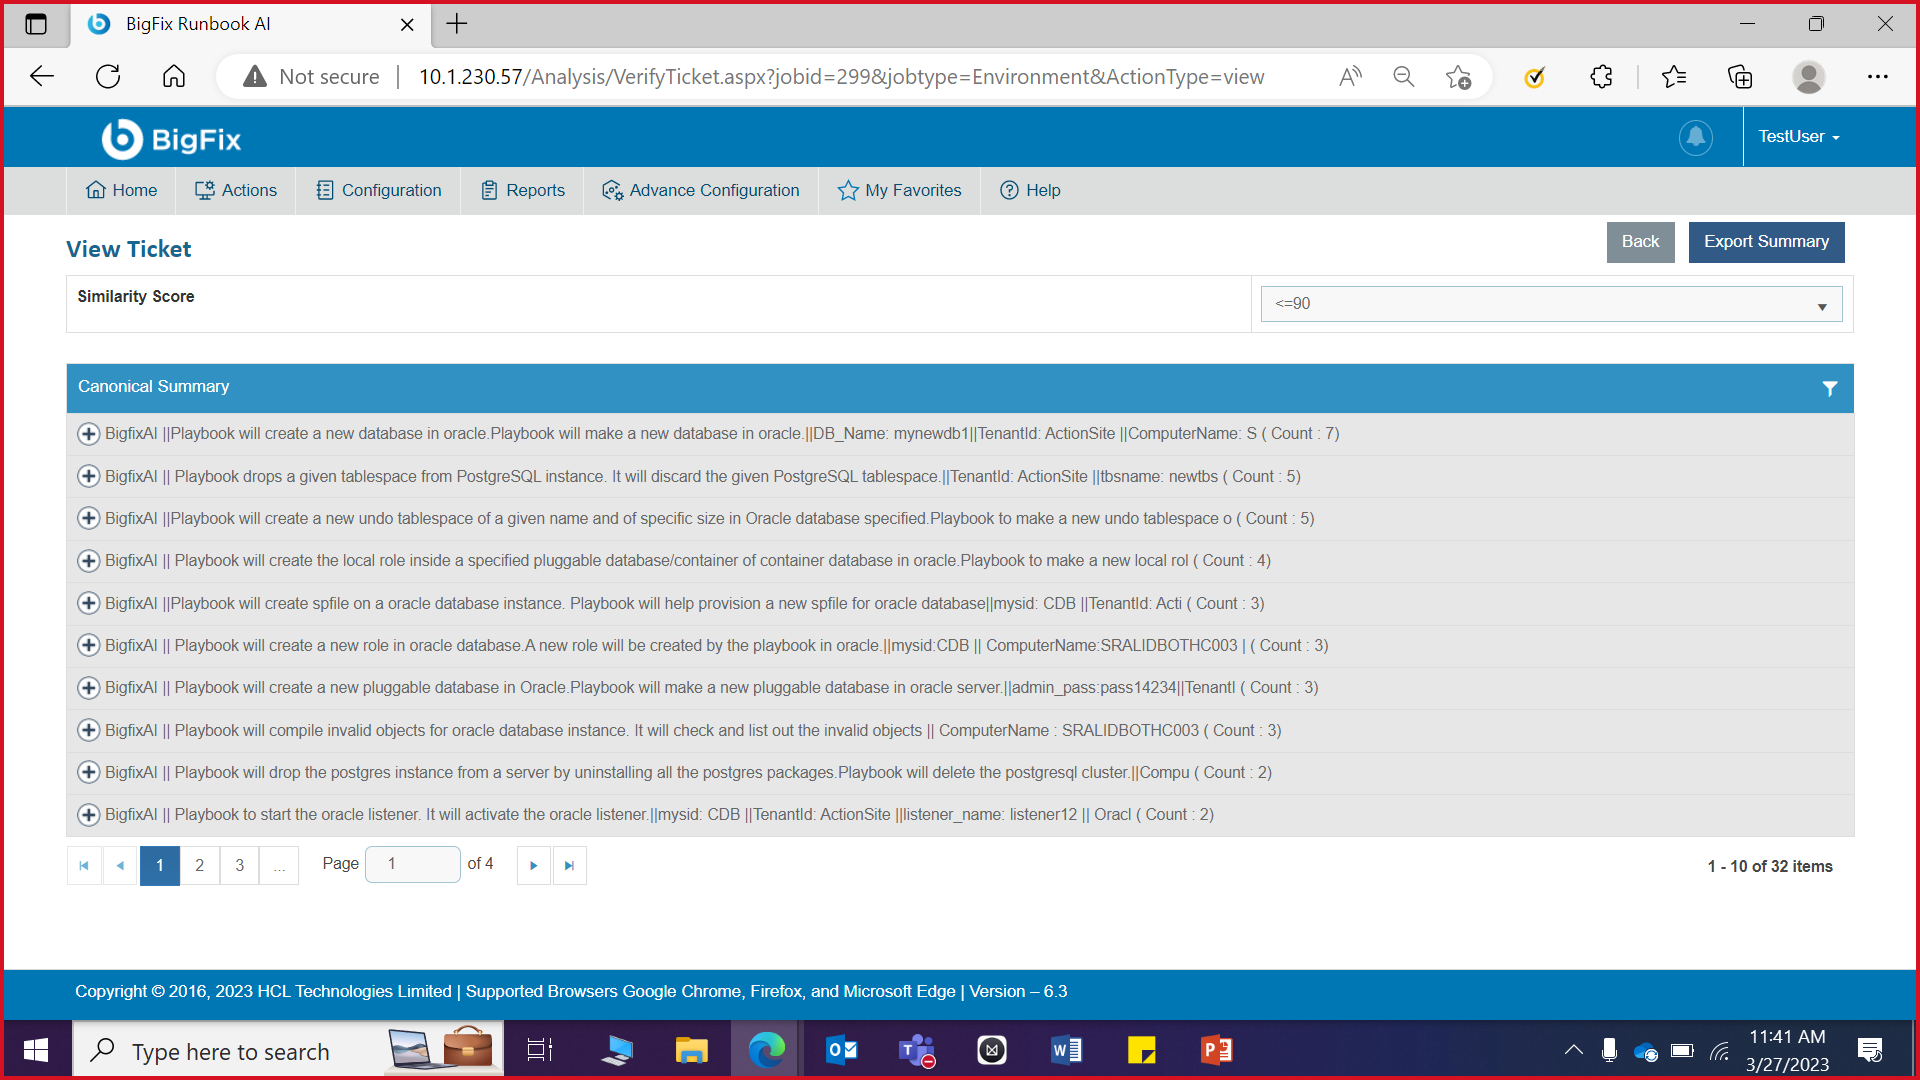
Use Export Summary to export the canonical summary of the ticket to your folder or click Back to go back to the previous screen.
Build and Approve Ticket Analysis
To ensure the correct categorization of tickets into the right buckets, Build Ticket Analysis needs to be done. It helps in validating the ticket categorization.
To build/approve analysis, perform the following steps:
- On the Ticket Analysis page, click
 next to the
analysis you want to build/approve.
next to the
analysis you want to build/approve.
.png)
- On the View Ticket page, analysis appear in a tabular view under the Canonical Summary column, based on the selection of similarity score.
- Expand the selected Canonical Summary to see the tickets under the selected summary.
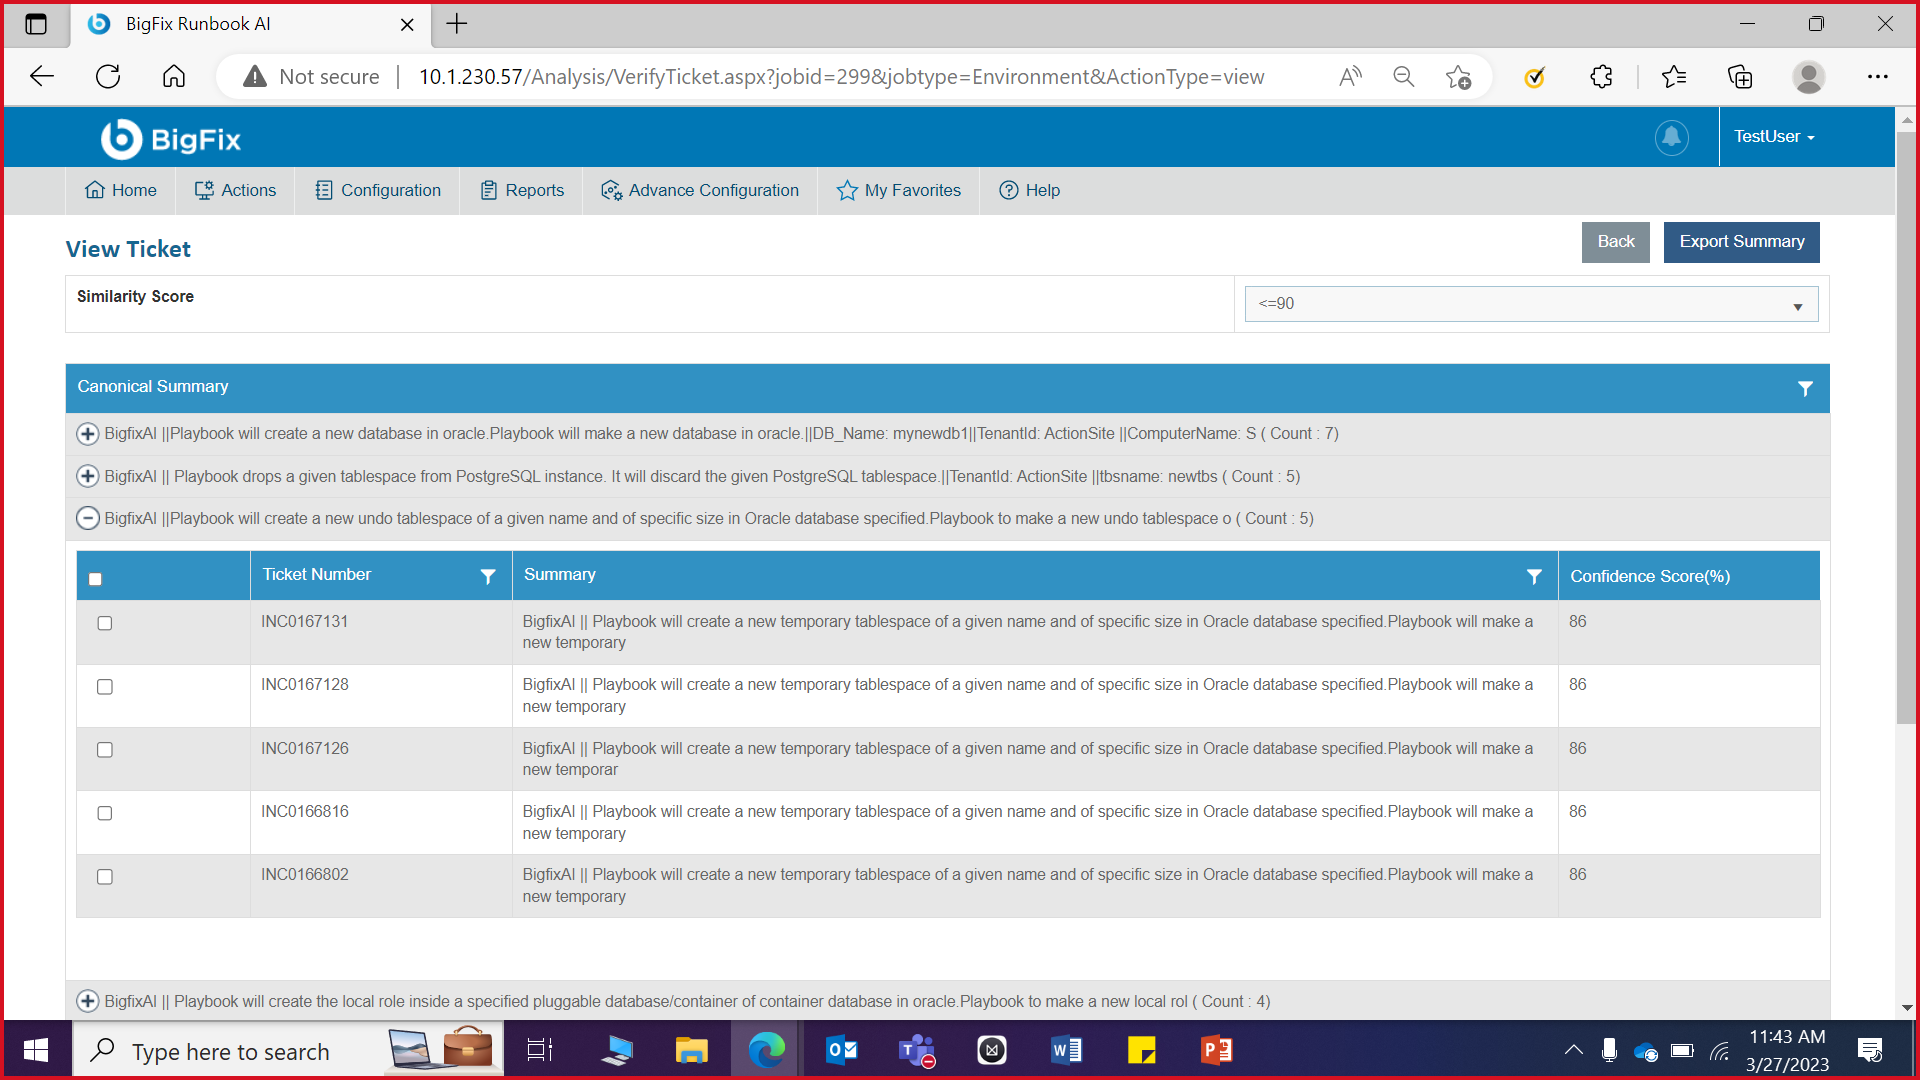
- To remove a ticket from the canonical summary, select a ticket or multiple tickets and then click Remove based on the discriminator.
- This prompts user to select the Existing discriminator , then type at least two comma separated discriminators to verify the uniqueness of the selected tickets, and then click Save.
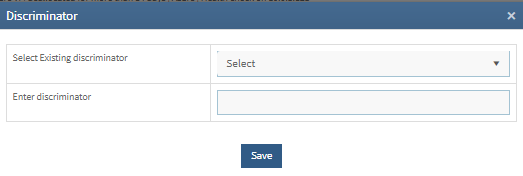
- This adds the new discriminator and lists it under the Discriminator column.
Figure 253. Figure - Build/ Approve Single Analysis (Cont.) 
- To manage the added discriminator for analysis, select Manage Discriminator .
- The Manage discriminator page appears and enables user to delete the
discriminator by clicking
 .
.

User can also specify the discriminator for required tickets simultaneously by uploading the CSV file.
- To upload a discriminator, perform the following steps:
- Click Export Summary to download the CSV file, which contains the canonical
summary name, actual summary, ticket no., confidence score, ticket ID, bucket ID, and the
discriminator.
Table 3. Table 5 - CSV File Template to Upload Discriminator Canonical Summary Actual Summary Number Confidence Score Ticket ID Bucket ID Discriminator CPU Utilization Issue CPU Utilization Issue INC0054414 1 1 1 Test1, Test 2 - Update the required details and then click Import and Build Analysis button.
- Click Choose file to upload the CSV file and then click OK
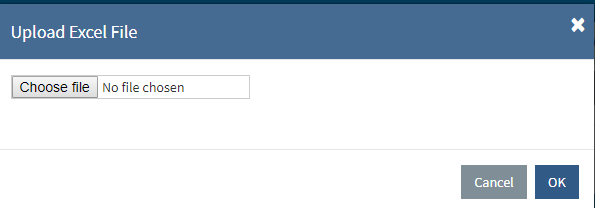
- A Build Started message appears for the selected canonical summary.
- After the discriminators are configured, click Build to restart the ticket analysis of the selected tickets cluster based on the newly added discriminator. This displays the Ticket Analysis screen where the ticket analysis status changes to Queued (Build Initiated).
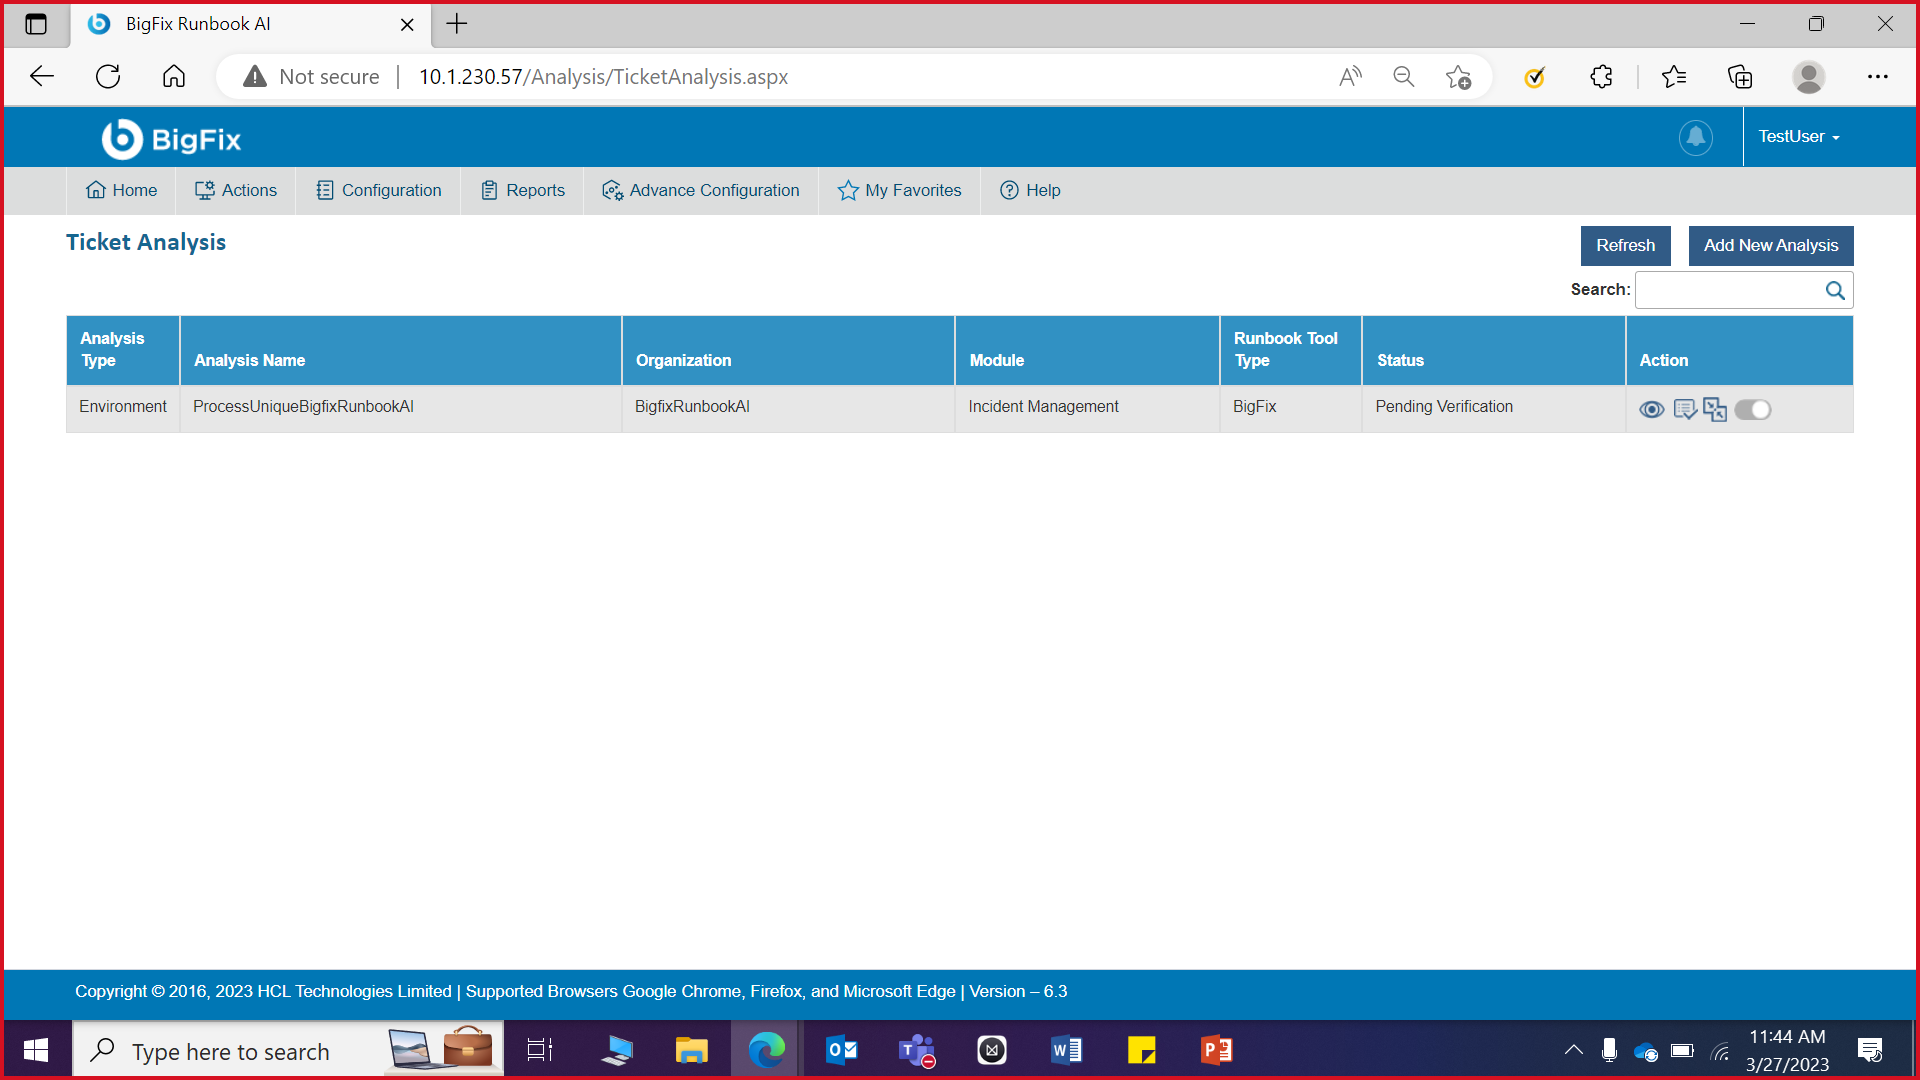
- After the analysis is complete, the status automatically changes to Pending Verification.
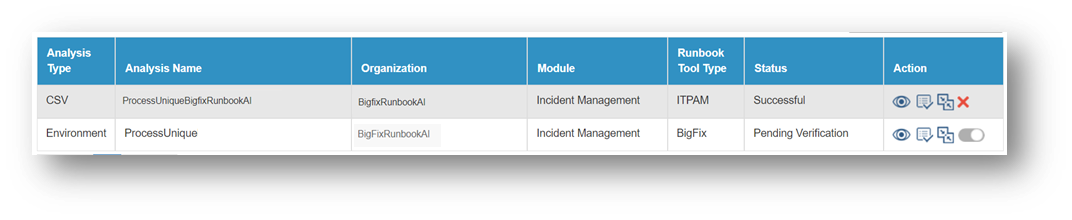
- To verify the pending verification, click
.png) again
next to the analysis you want to verify, and it will redirect you to the
Discriminator page.
again
next to the analysis you want to verify, and it will redirect you to the
Discriminator page.
Whenever a discriminator is added to an analysis, it is mandatory to rebuild the analysis.
- Click Verify to approve the analysis.

The analysis status changes to Verified and Pending Merge.
.png)
User cannot add a discriminator to tickets for analysis after verification of the ticket analysis.
The View Ticket screen displays and enables user to build/approve the ticket analysis by selecting a single ticket or using the Export to CSV option from the bucket.
.png)
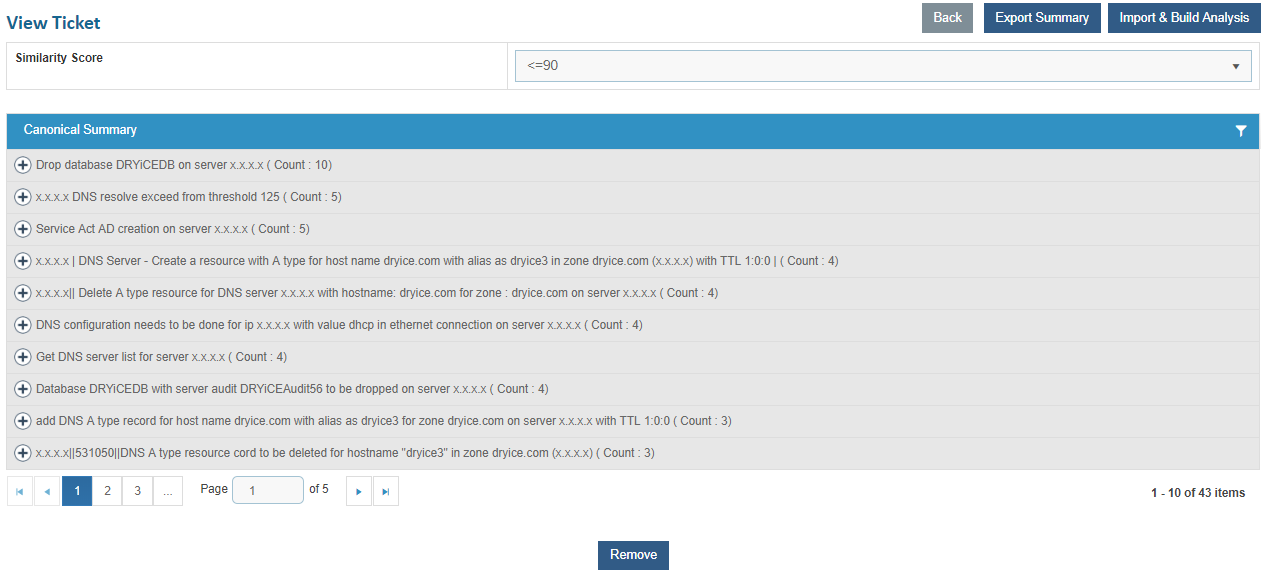
User cannot add a discriminator to tickets for analysis after verification of the ticket analysis.
Merge Analysis
Whenever user adds or removes ticket from the ticket cluster, new unique variations must be merged with the existing unique variations.
To merge an analysis, perform the following steps:
- On the Ticket Analysis page, click
 next to the
analysis you want to merge.
next to the
analysis you want to merge.
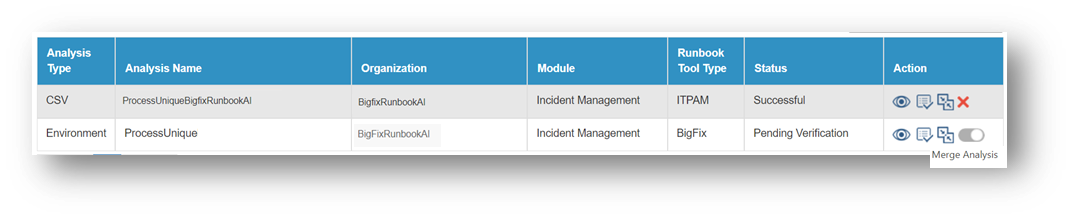
Only tickets with Pending Merge status can be merged using this option.
- The Merge Analysis page lists all the configured variations in a tabular view.
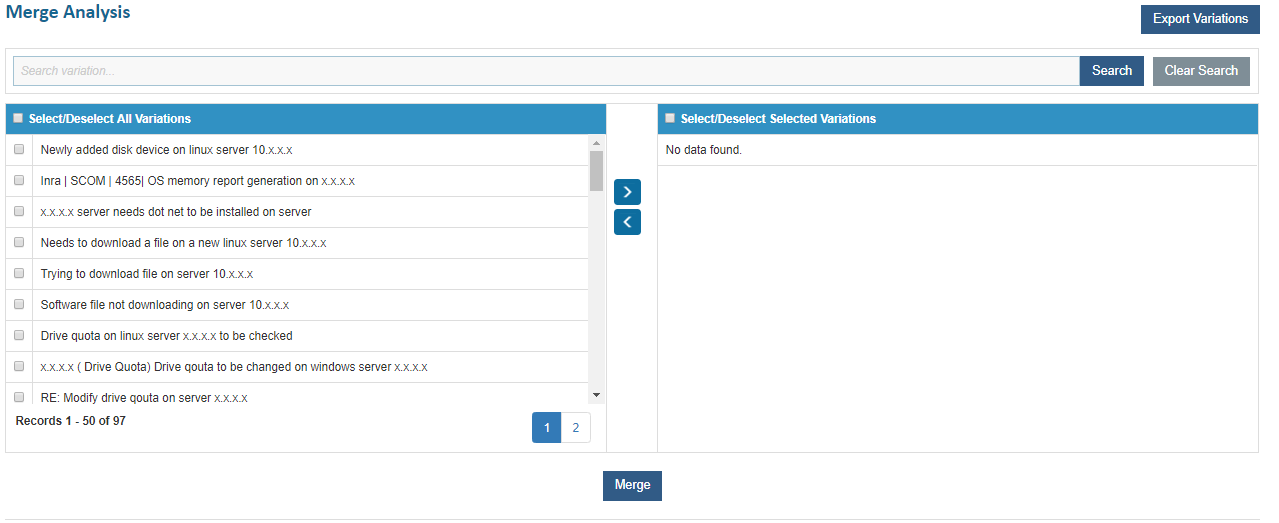
- Select the variations from the left grid. Click
 to
move the selected variations to the right grid and vice
versa to remove selected variations.
to
move the selected variations to the right grid and vice
versa to remove selected variations.
User can select a single variation or multiple variations to merge.
- To merge the selected variations, click Merge, and then click Save.
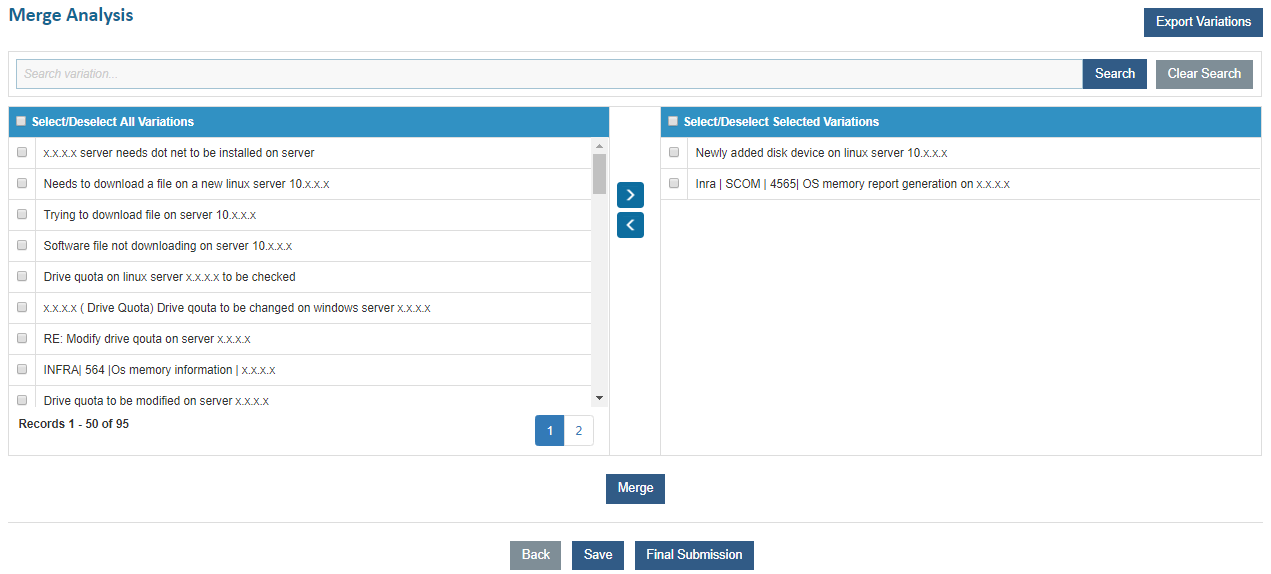
- To proceed with the analysis, click Final Submission to submit the merged variations.
Click Export Variations to export the selected variations.
BigFix Runbook AI provides you with search capabilities to access required variations from the list of variations based on certain keywords or set of characters. Type a value in the Search box and then select Search to get the preferred results.
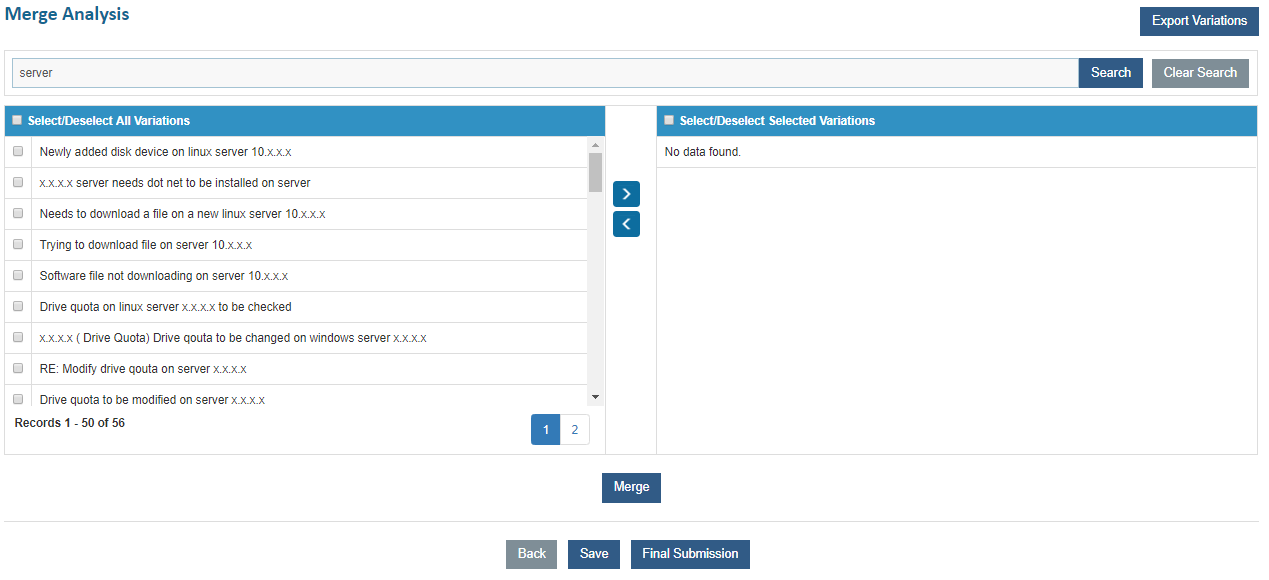
Click Clear Search to cancel the search.
Auto Switch Mode for Analysis
User can automatically validate newly identified unique tickets.
- On the Ticket Analysis screen, enable the toggle button
 next to the analysis to
enable the Auto Switch mode.
next to the analysis to
enable the Auto Switch mode.
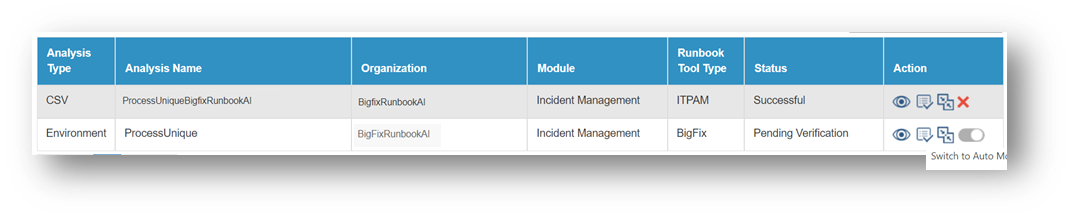
- A confirmation dialogue box appears.
The auto switch mode works only for environment analysis.
Delete Analysis
An analysis can be deleted after successful completion if it is no more required.
To delete an analysis, perform the following steps:
- Click
.png) to delete the analysis.
to delete the analysis.

- Select the appropriate option visible in the confirmation dialog box, if you would like to make the jobs inactive or delete the data along with it.
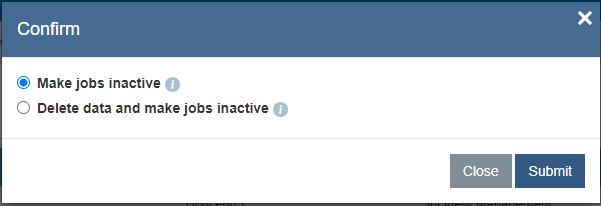
- A confirmation message appears.
Recommendation Analysis
Recommendation analysis identifies relevant runbooks for unique ticket categories, followed by SME feedback for approval.
To manage the recommendation analysis, perform the following steps:
- On the main menu bar, click Actions->Analysis.
- Click Recommendation Analysis. The Recommendation Analysis page appears.

This displays the available analysis types in a tabular view and enables user to view or approve them.
Approve Analysis
User can approve the recommendation analysis, which includes the runbook details and a description of the associated ticket category that has been already defined.
To approve the recommendation analysis, perform the following steps:
- On the Recommendation Analysis page, click
 next
to the analysis type user wants to approve.
next
to the analysis type user wants to approve.

- The Recommendation Analysis page displays the variation’s status in the
Status column, bucket description in Bucket Description column, associated
runbooks in the Runbook column,
runbooks available for approval in Approve Runbook
column, confidence score of the
runbook in the Confidence Score column, and the
SOP required for the selected variation in the SOP
Required column.
Figure 273. Figure - Approve Analysis (Cont.) 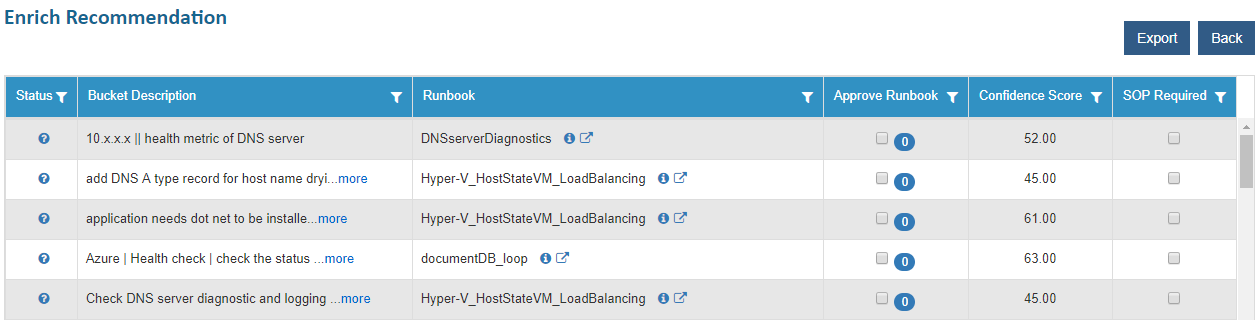
- Click
 to view the
runbook details.
to view the
runbook details.
Figure 274. Figure - Approve Analysis (Cont.) 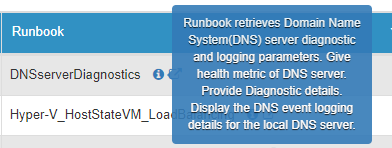
- Click
 to view the complete list of
runbooks available under the bucket description along
with their confidence score.
to view the complete list of
runbooks available under the bucket description along
with their confidence score. - The Runbook page lists the recommended runbooks available for approval.
Figure 275. Figure - Approve Analysis (Cont.) 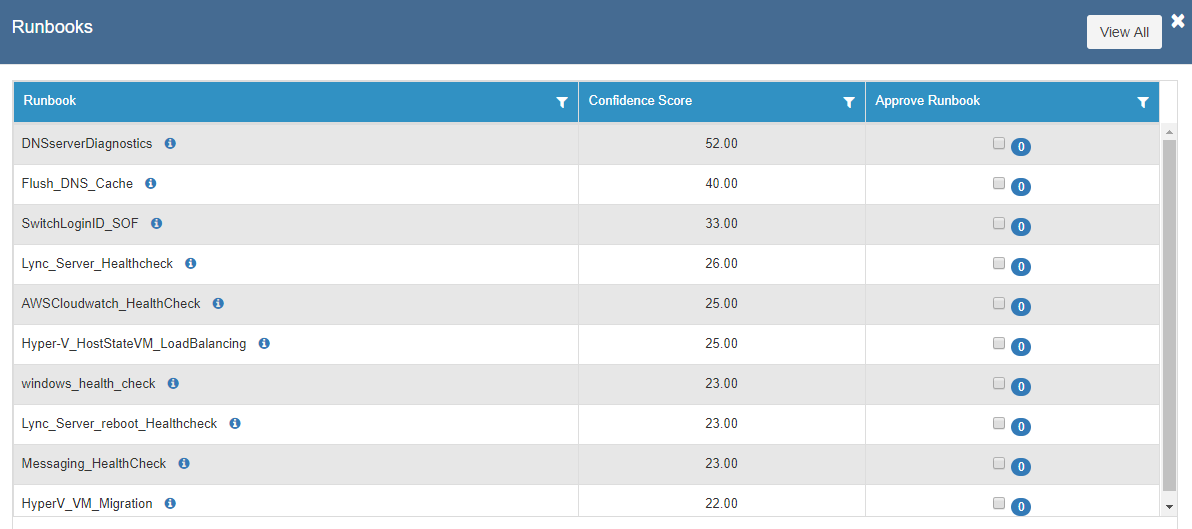
- To approve a runbook, select the checkbox next to the runbook in the Approve Runbook column.
- Click
- A confirmation dialog box appears.
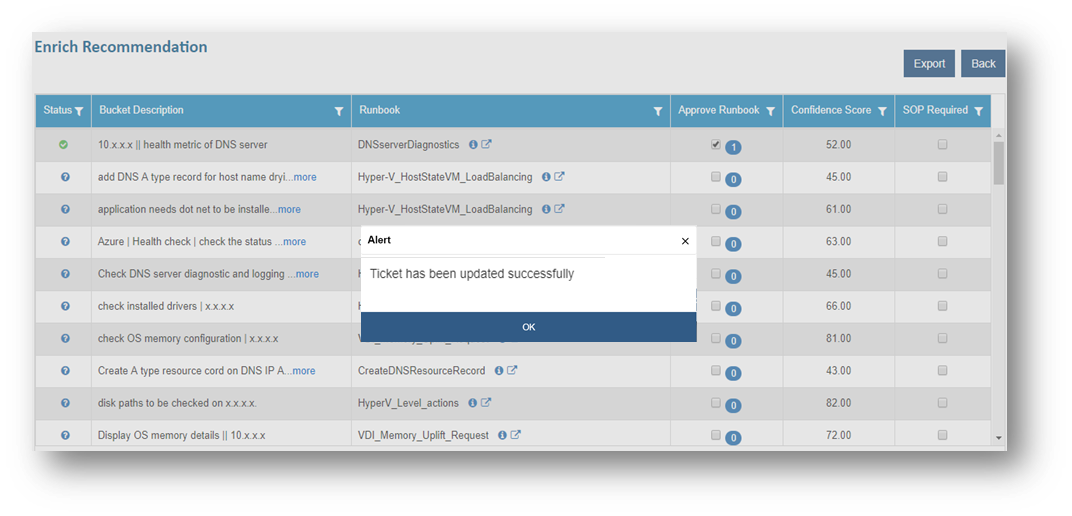
User can view the list of all runbooks from the repository by clicking View All and, if required, you can approve a runbook from the repository.
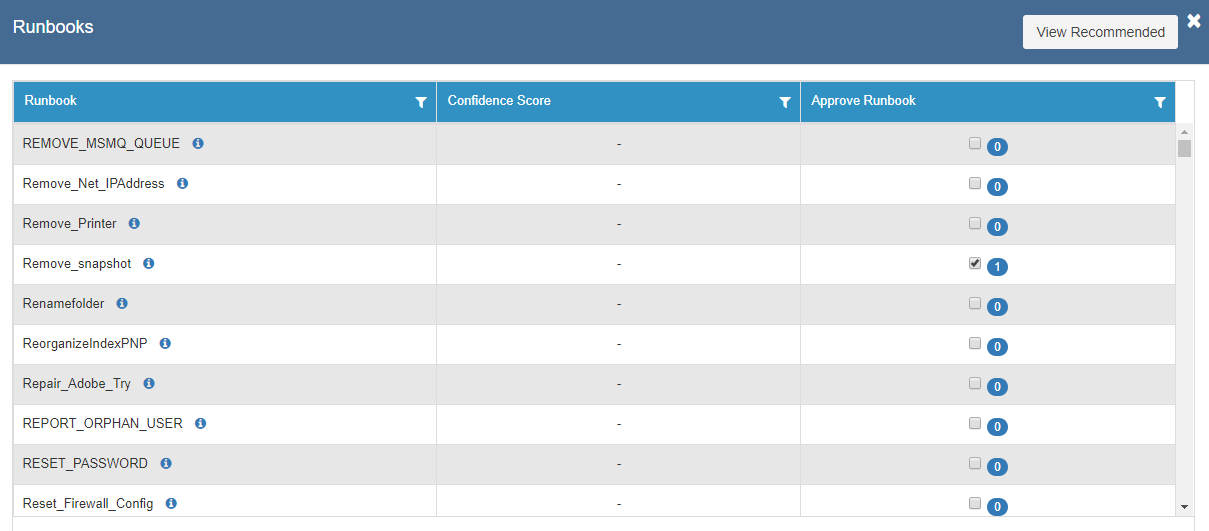
- To go back to the runbooks recommended for a bucket, click View Recommended.
- Click Export to export all the recommended runbooks to Excel spreadsheet.
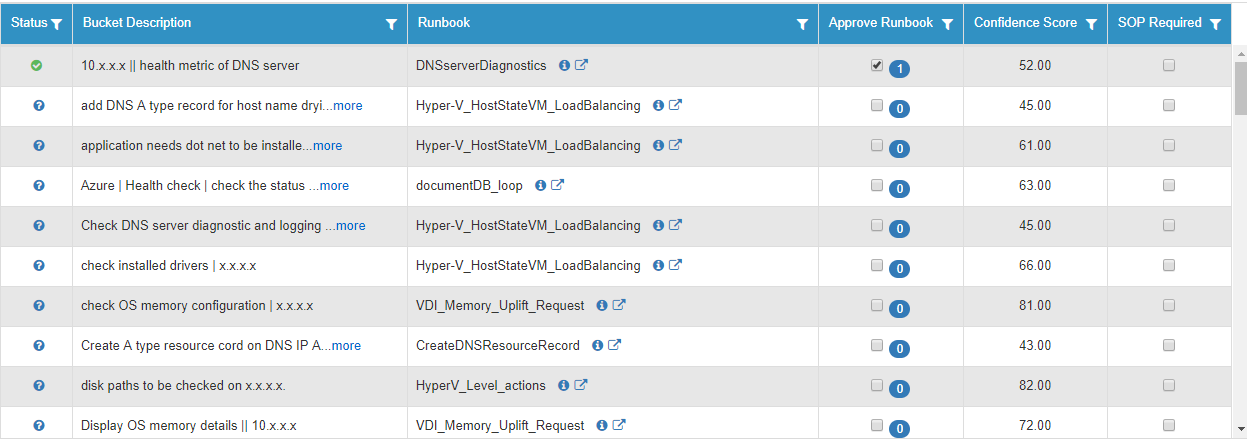
- If the SOP is required for a bucket, then select the SOP Required check box.
View Analysis
User can view the information for an already defined analysis, including the runbook details and the associated bucket’s description.
To view analysis, perform the following steps:
- On the Recommendation Analysis page, click
.png) corresponding to the analysis type you want to view.
corresponding to the analysis type you want to view.
.png)
- The Recommendation Details page appears, displaying the number of unique variations and the number of variations with runbooks above the threshold.
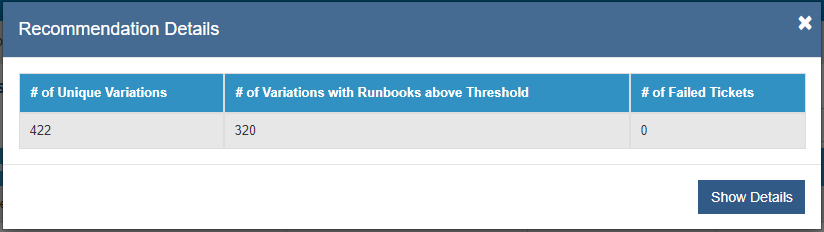
- Click Show Details to view all the details of the recommendation analysis.
Every action button remains disabled for View Analysis, since this is a read-only view.
Script Analysis
In case of unavailable runbooks for a certain set of ticket categories, BigFix Runbook AI helps the users by automatically downloading relevant scripts from internal and external data sources. Users can view, validate, and customize those scripts for future use.
To configure a script analysis, perform the following steps:
- On the main menu bar, click Actions->Analysis.
- Click Script Analysis. The Script Analysis page appears.

This lists the available analysis types in a tabular view and enables user to view and build or approve analysis.
View Analysis
User can view information for an already defined analysis type.
To view the script analysis, perform the following steps:
- On the Script Analysis screen, click
.png) corresponding to the analysis you want to view.
corresponding to the analysis you want to view.
.png)
- The Ticket Variation Details page appears that includes the count of ticket variations in the categories - No Runbook Available, Script Downloaded, and Script Approved.
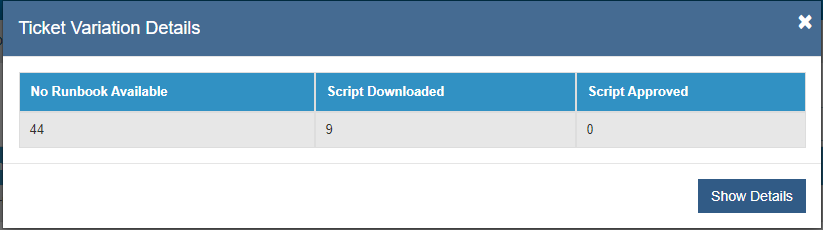
- Click Show Details to view the details including the count of ticket variations for which No Runbook Available, Script Downloaded but not Approved, Script Available, Script Downloaded and Approved, and Script in Progress.
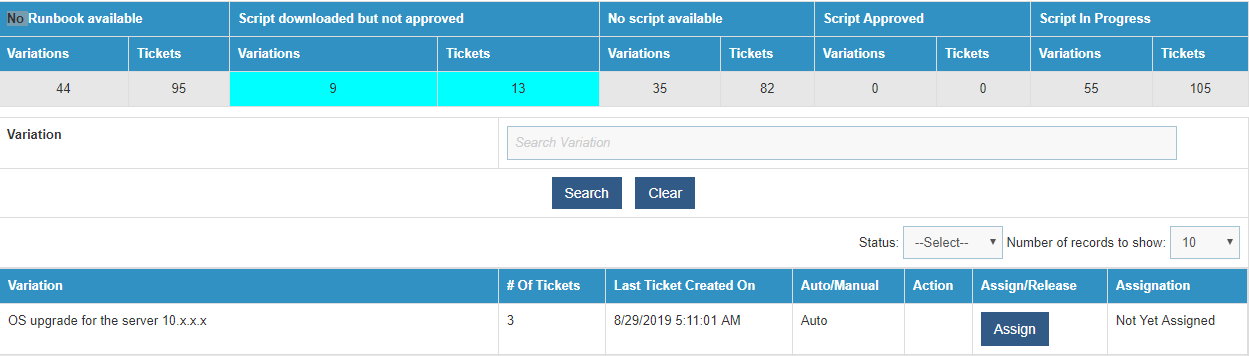
- To scale down the search for variations, type the keywords in a search box next to the Variation field and click Search.
Build/Approve Analysis
User can build or approve script analysis by performing the following steps.
- On the Script Analysis page, click
.png) next to
the analysis type you want to approve.
next to
the analysis type you want to approve.
- The Manage Scripts page appears and lists the available variations in a tabular
view.
Figure 285. Figure - Build/Approve Analysis 
- BigFix Runbook AI provides easy search capabilities to access required scripts from the list of scripts based on certain keywords. Type a value in the Search box and then click Search.
Figure 286. Figure - Build/Approve Analysis (Cont.) .png)
Choose Clear to cancel the search.
- To allow the variation to be used for script analysis, click Assign and the variation will be assigned to the logged in user.
Figure 287. Figure - Build/Approve Analysis (Cont.) 
- After the variation is assigned, the variation status changes to Release and the Assignation column displays the name of the assignee.

If user clicks Release, then the variation status will again change to Assign and will become available for assignment to another user.
- In the Action column, click
 next to the
variation to approve the associated
scripts of the variation.
next to the
variation to approve the associated
scripts of the variation.
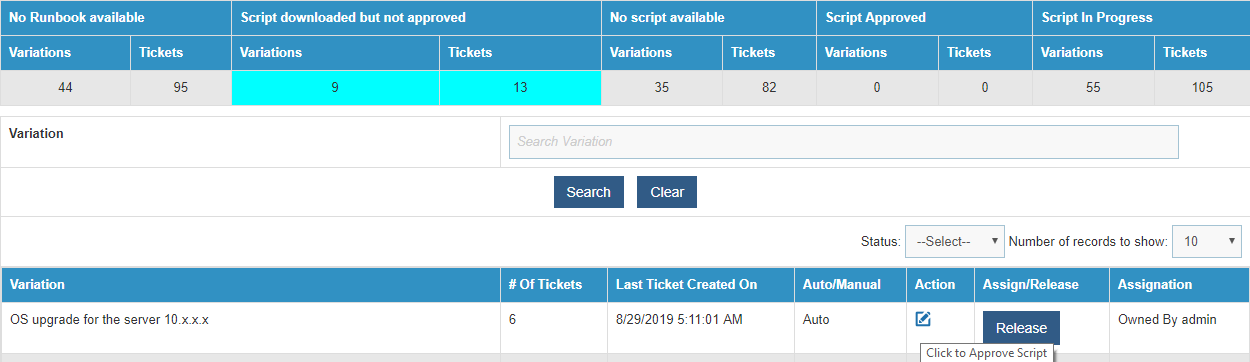
- A list of scripts for the selected variation appears in a tabular view that enables you to download the scripts in script text by clicking Retrieve appearing next to the scripts.

User can add multiple scripts simultaneously using the Export to Excel function or add a single script by clicking Create a New Script from the grid below.
User can download the available scripts and use them to create more scripts. To download a script, select the radio button of the script and click Download.

Upload an Excel to Configure Multiple Scripts
User can create multiple scripts simultaneously using the Export to Excel function.
To create multiple scripts, perform the following steps:
- On the Manage Script page, select Create a New Script at the bottom of the grid.
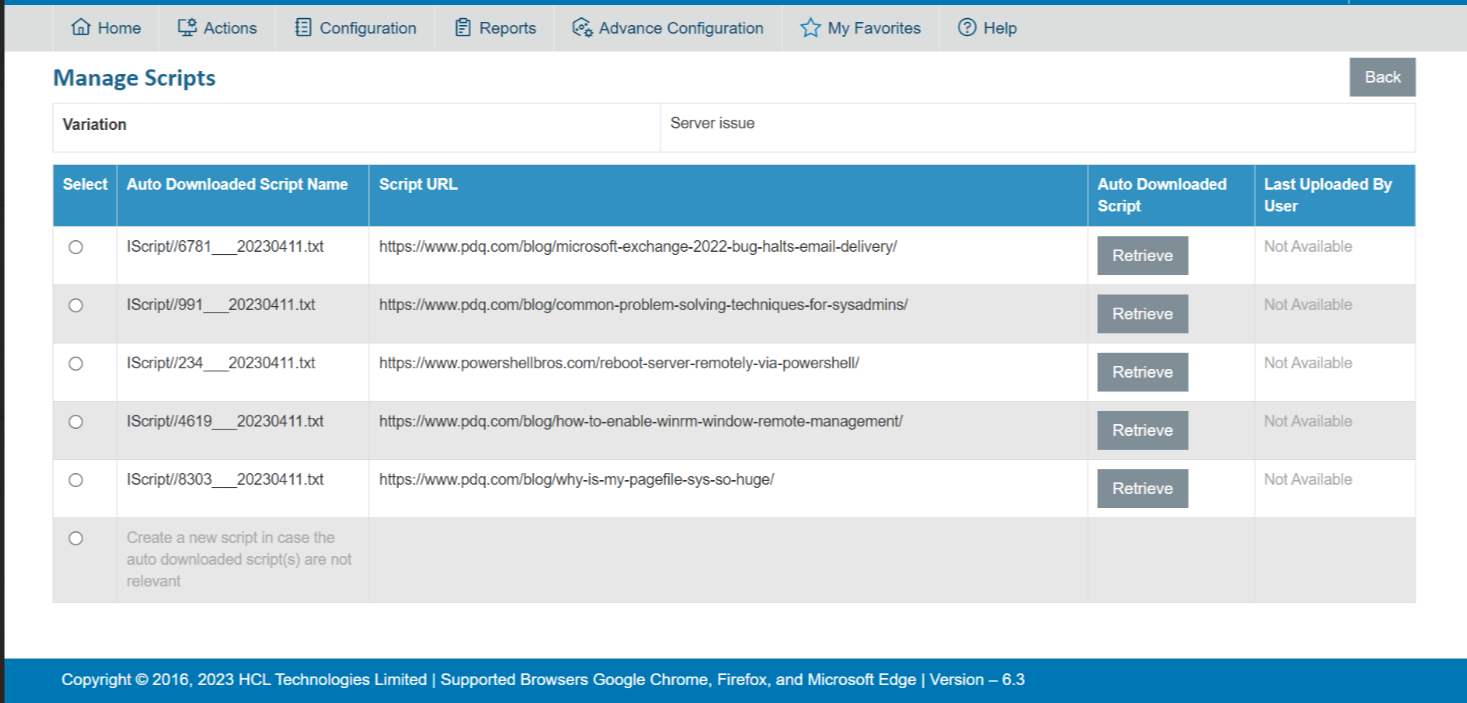
- This auto fills the Upload field.
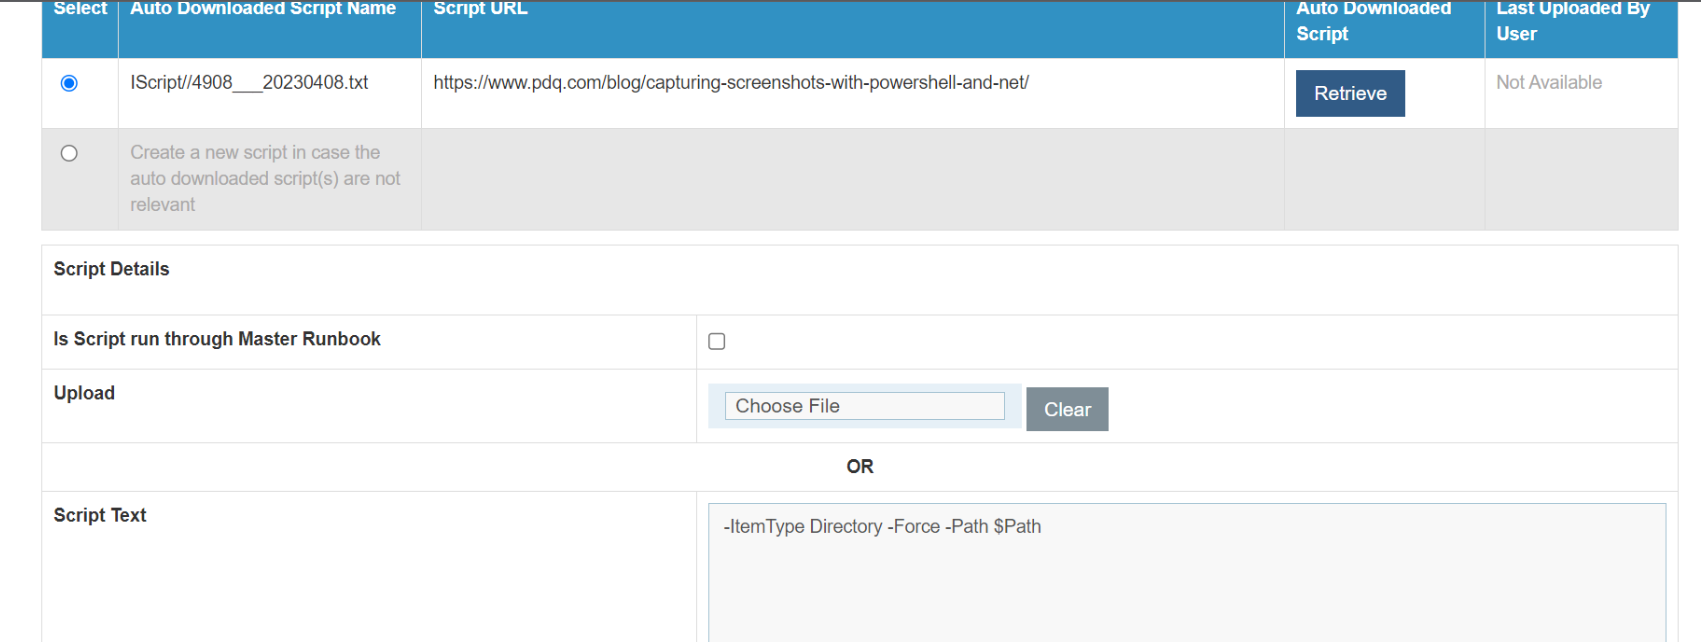
- Click Choose File to upload multiple scripts at the same time. This adds the new scripts and appears in a list.
Create Single Script
User can create a single script for analysis by using the following steps:
- On the Manage Script page, select Create a New Script at the bottom of the grid.
.png)
- It auto-fills the following fields below the Upload option.
- To create a single script, fill in the details below.
- Type the Script Name, the Script Description, and then type the URL from where user downloaded the script.
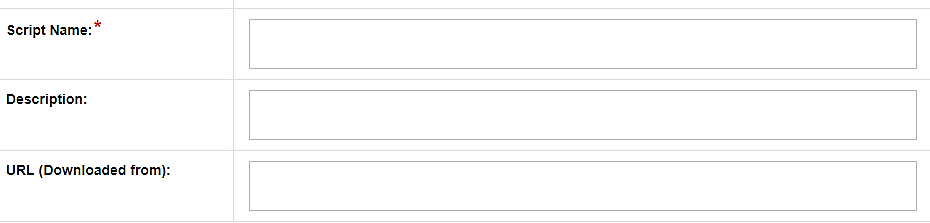
- Type the Category of script, then the Sub-Category of the script.
- Select the checkbox, if you want to Add Bucket Description To Recommendation.
- Type the Recommendation Description, then the Runbook Tags.
Figure 296. Figure - Build/Approve Analysis (Cont.) 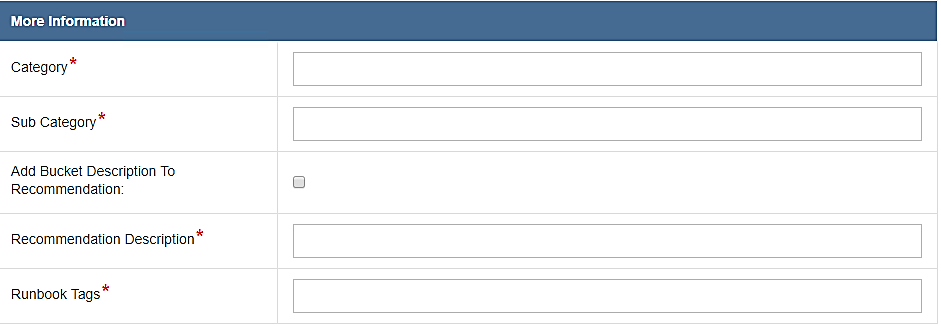
- After user has added the values, provide the following parameters to create a
script:
Parameter Name- Specifies a name for the parameter to be used in the script for analysis .
Field Type: Specifies that field type is text
Is Mandatory- Select True or False if the parameter details added are mandatory or not.
Parameter Description- Describes the parameter.
Parameter Label- Specifies a unique user-friendly name for the parameter to be added.
Default Parameter Value - Specifies the default value for the parameter.
Parameter type- Specifies the method for script parsing.
IsScript Parameter- To specify that parameter is script parameter.
Is CIBased Parameter- To specify that parameter is CI Based
Is ReadOnly parameter- To specify that the parameter is read only parameter
Action- Enables user to edit or delete the existing parameter by clicking Edit or Delete.
Add- Adds a new row to add another parameter.
- Click Save Changes to add the new script.

User cannot edit a script after the analysis is approved.
Configuration
To manage configuration, perform the following steps:
On the main menu bar, click Configuration.
The drop-down lists the menu below for Super Admin:
Manage Proxy
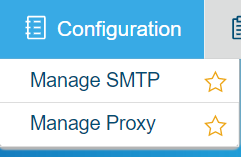
Ensure user is logged into BigFix Runbook AI as Super Administrator to create and manage the environment.
The drop-down lists the following menu for the Organization Admin:
Manage Configuration
Manage Proxy
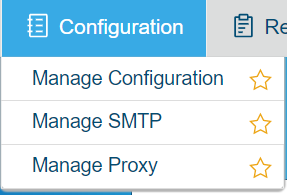
Manage Proxy
If the organization makes use of security measures such as a firewall or a proxy server, then there may be ports and protocols that need to be opened for configuring BigFix Runbook AI. Provide the proxy server information for your site, along with a user account that has access to the local area network through which the server is connecting.
To manage a proxy server, perform the following steps:
- On the main menu bar, click Configuration and then click Manage Proxy. The Manage Proxy page appears.
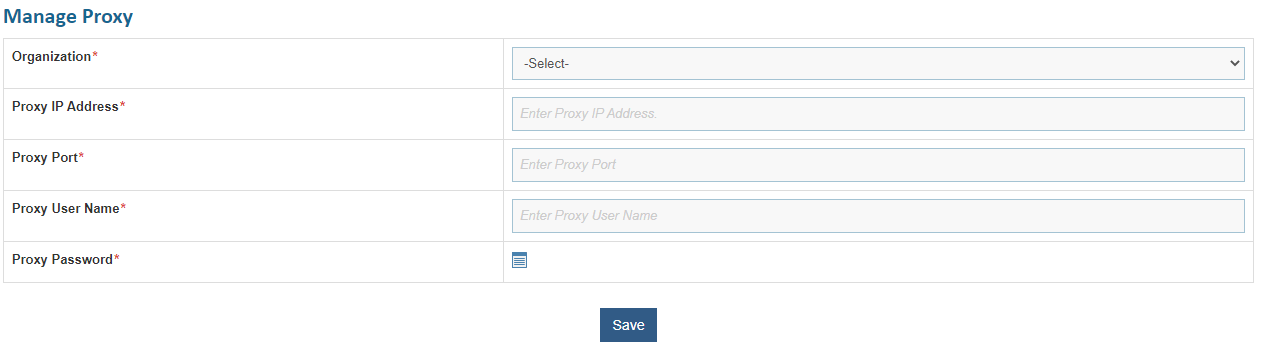
- Select the organization from the Organization dropdown.
- In the Proxy IP Address field, type the proxy URL.
- In the Proxy Port field, type the proxy port.
- In the Proxy UserName and Proxy Password fields, type the username and password to access the proxy server.
- For password, click on icon
 next to it. If the
password is available in plaintext, then select Input type as Input Text and enter the
password in Value field. Else if it is available in any Key Vault such as CyberArk or
Secret Manager then select Input Type as CyberArk or Secret Manager respectively and then
select any of the configured details from the value field.
next to it. If the
password is available in plaintext, then select Input type as Input Text and enter the
password in Value field. Else if it is available in any Key Vault such as CyberArk or
Secret Manager then select Input Type as CyberArk or Secret Manager respectively and then
select any of the configured details from the value field.
.png)
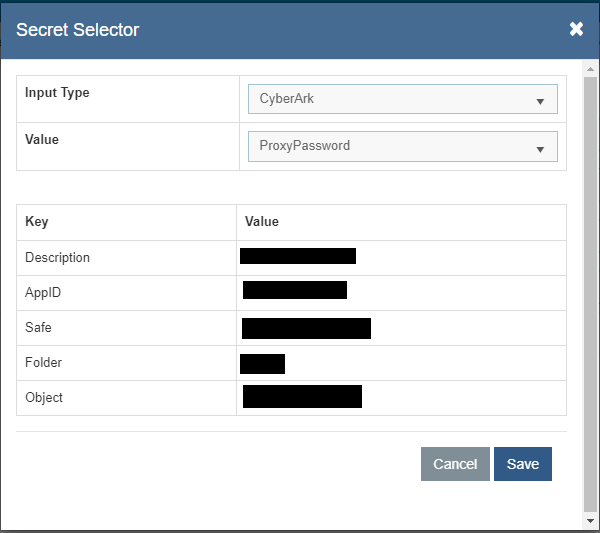
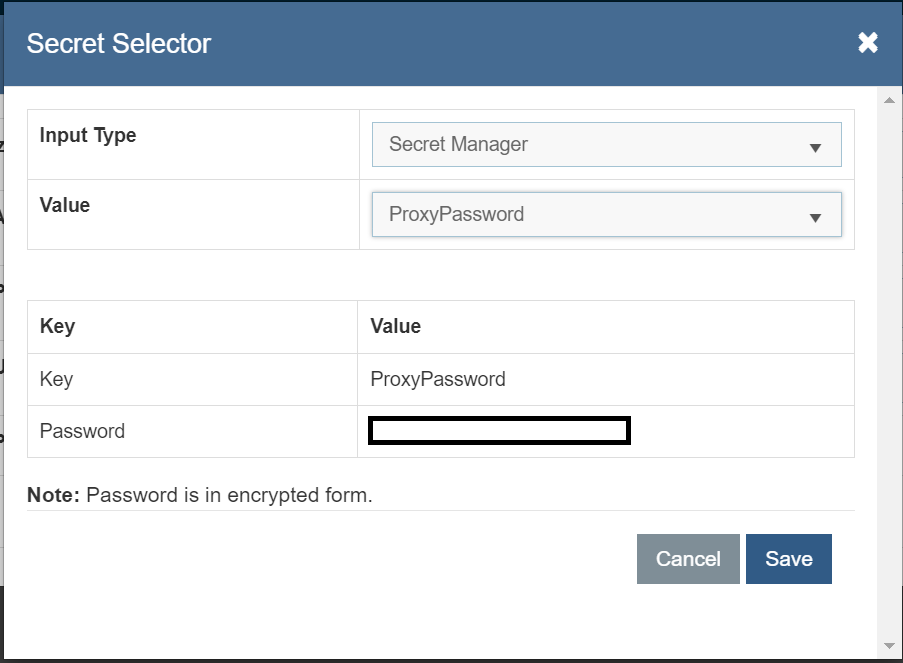
- Click Save.
All fields marked with an asterisk (*) are mandatory.
Manage SMTP
If the organization chooses to make use of mail-based notifications, SMTP specific configurations will be required.
To configure the SMTP details, perform the following steps:
- On the main menu bar, click Configuration and then click Manage SMTP.
- The Manage SMTP page appears.
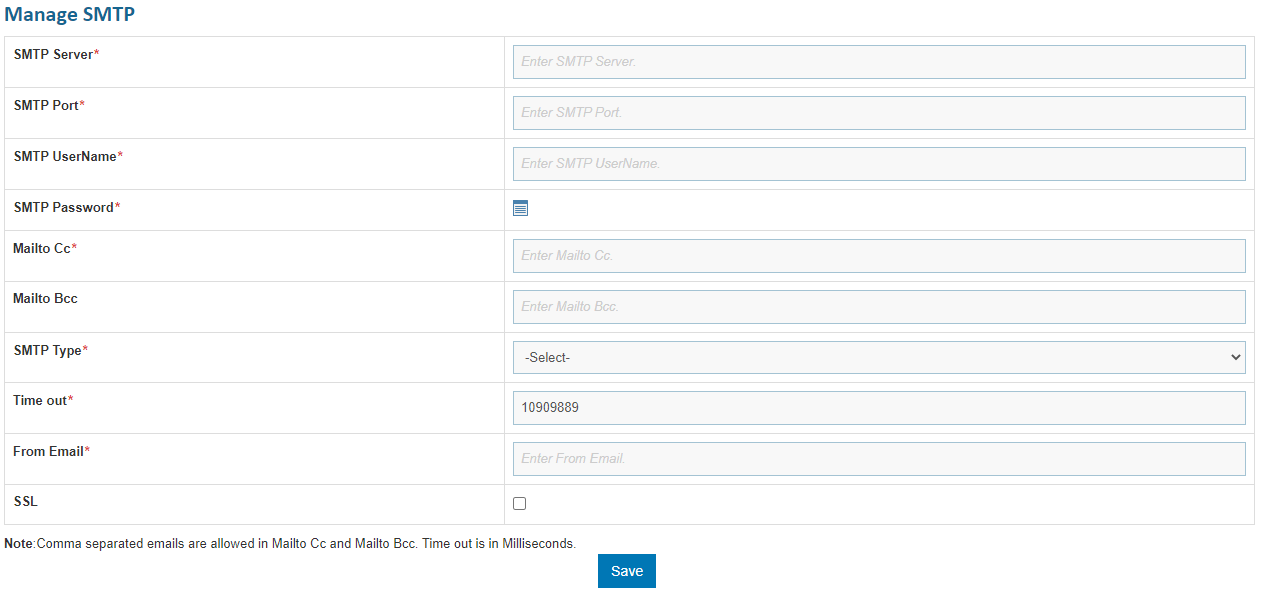
- In the SMTP Server field, type the SMTP Server.
- In the SMTP Port field, type the SMTP port.
- In the SMTP UserName and SMTP Password fields, type the username and password to access the SMTP server.
- For password, click on icon
 next to it. If the
password is available in plaintext, then select Input type as Input Text and enter the
password in Value field. Else if it is available in any Key Vault such as CyberArk or
Secret manager then select Input Type as CyberArk or Secret manager respectively and then
select any of the configured details from the value field.
next to it. If the
password is available in plaintext, then select Input type as Input Text and enter the
password in Value field. Else if it is available in any Key Vault such as CyberArk or
Secret manager then select Input Type as CyberArk or Secret manager respectively and then
select any of the configured details from the value field.
.png)

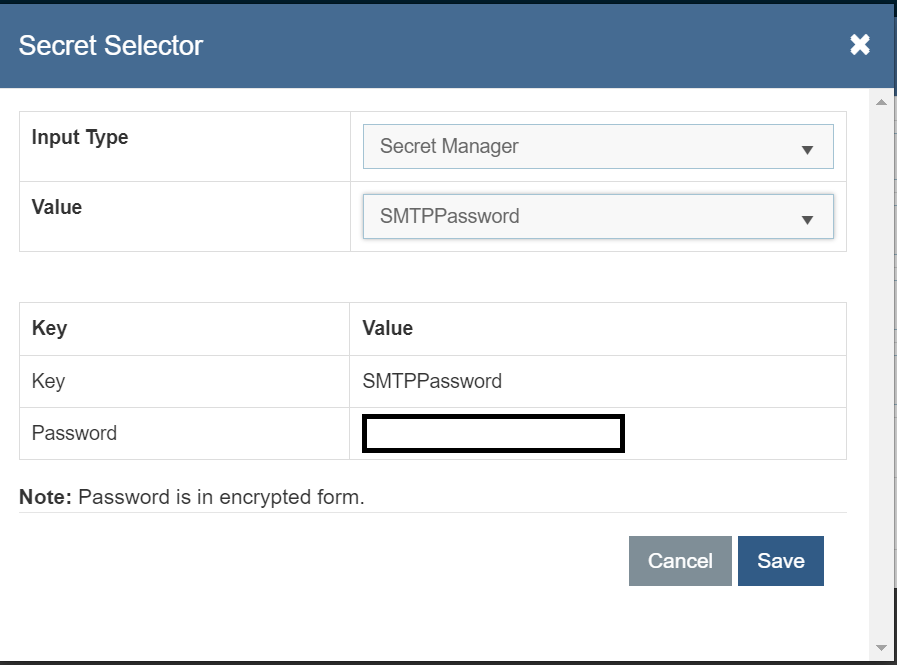
- In the Mailto Cc field, type the email of user, as applicable.
- In the Mailto Bcc field, type the email of user, as applicable.
- Select SMTP Type from the dropdown.
- In the From Email field, type the email id of the user which will be used to send out the mail notification.
- Click Save.
Manage Configuration
If user wants to configure the entire setup and customize the default configuration, the user will need to perform the following additional configuration tasks:
To manage advanced configuration, perform the following steps:
- On the main menu bar, click Configuration, and then click Manage Configuration. The Manage Configuration page appears.

- Select the organization for which user created a data source from the Organization field.
The organizations listed in the drop-down are created through Create Organization .
- Select the module where the organization fetches the data from the data source in BigFix Runbook AI in the Module field.

BigFix Runbook AI receives the recommended runbook as output based on the confidence score. It suggests which runbook needs to be executed against a ticket. However, the execution of the runbook can be done in two modes:
- Manual Execution- The user selects the most appropriate runbook from the list of runbooks suggested by the BigFix Runbook AI.
- Auto Execution- BigFix Runbook AI executes the runbook from the solution without any human intervention.
Manual Execution Configuration
To configure manual execution for tickets, perform the following steps:
- Type the threshold value next to the UI Display Runbook Threshold Value field.
- It filters the list of relevant runbooks based on the threshold value. If the runbook’s confidence score is greater than the threshold value, it is made available to the user for manual execution based on their knowledge.
Confidence score is a value which is dynamically updated for a runbook based on the ticket description and the outcomes of the past ticket resolutions.

Auto Execution Configuration:
To configure auto execution of tickets, perform the following steps:
- To auto execute runbook based on the recommended solution, select Enable Auto Execution.
- To auto re-execute the runbook after every execution
failure or whenever the user changes the confidence score for auto execution, select Re-Execute.
You cannot re-execute a ticket in manual mode after the failure of release.
- To execute with the SME recommendations irrespective of the confidence score, select Override with SME recommendation . The application will ignore all the above selections and will execute runbooks recommended by the SME.
- Type the Threshold Value manually for runbook auto execution.
- Select On Failure Release if a ticket does not get a solution and does not execute. The ticket may show the Failure Status for the following reasons:
A ticket does not get a recommendation.
A ticket gets a recommendation but is not parsed.
A ticket gets a recommendation and is also parsed, but runbook execution fails. In such a case, BigFix Runbook AI enables user to proceed with the following actions:
- Select Manual Mode if user wants to release failed ticket from auto execution mode to manual intervention mode for execution.
- Select Rule-Based Release if user wants to release the failed tickets from auto execution mode to the respective group for execution and moves ticket out of BigFix Runbook AI. These rules are specified in Add Rules.
If a user opts for manual mode, then the failed ticket moves for manual intervention and cannot be released based on release rules.

Initiation Failed RBA Configuration
User can define the solution for a sleeping or paused runbook. If the API is unreachable and the runbook has reached the maximum number of unsuccessful execution attempts, it goes to the sleep/pause mode.
If a runbook does not execute in both the conditions, then provide the details to perform the below-mentioned activities:
- Retry After (In Minutes) - Specifies the wait time to retry the runbook execution after execution failure.
- Retry Count- Specifies the count to retry runbook execution according to the scheduled frequency.
- Release using Rule- If the attempts for manual release of the runbook have failed multiple times (as defined in the Retry Count parameter) , then select Release using Rule to auto-execute the runbook after the retry count over.

Manual Release
In case of a failed ticket, user can immediately move a ticket out of the BigFix Runbook AI queue from the manual and auto execution mode.
- Select Release Using Rule to manually release a ticket from BigFix Runbook AI. These rules are specified in Add Rules _Manage_Rules section.


- In Data Source Configuration field, enter the Release Retry Count. This indicates the maximum number of retry attempts for releasing the ticket.
- Click Submit to save the configuration. A confirmation dialog box appears.
The details updated in this section will be displayed in the main UI either in manual mode or auto mode of runbook execution.
Advance Configuration
Manage Parameter Master
This section describes how to configure a regular expression for use in the parameter type. A regular expression is a special text string to describe a search pattern during ticket parsing.
Manage Parameter Master is accessible to super admin user only.
To manage parameter master, perform the following steps:
- On the menu bar, click Advance Configuration -> Parameter and then click Manage Parameter Master.
- The Manage Parameter Master page appears.
Figure 316. Figure - Manage Parameter Master 
- Select a code by clicking the drop-down next to the Select Code field.
- If there are any available parameter values under the selected code, they are listed in a tabular view that allows the user to add a new parameter, edit or delete existing parameters, and manage the order of existing parameters.
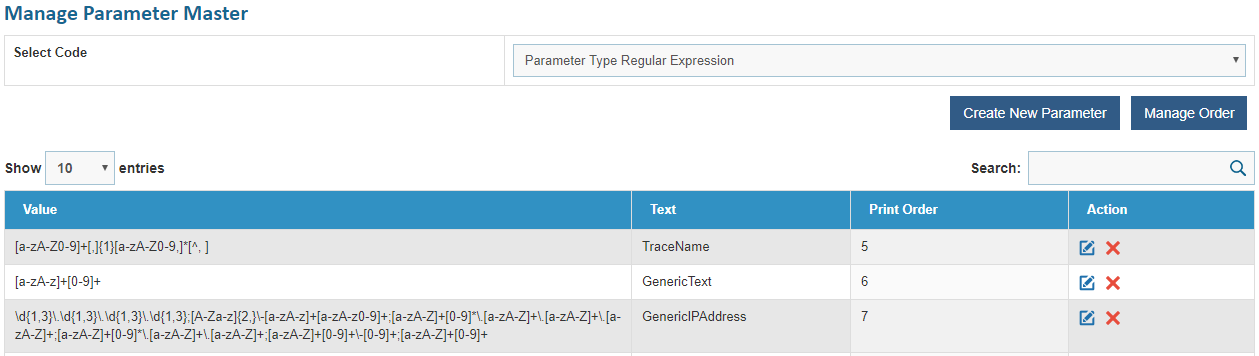
The user can change the list of values shown as a result of selected code by selecting a number under the Show tab. The user can refine the search by typing the Parameter Value keywords in the Search field.
Add Parameter
User can add a new parameter type by performing the following steps:
- On the menu bar, click Advance Configuration Menu -> Parameter and then click Manage Parameter Master.
- On the Manage Parameter Master page, select a code by clicking the drop-down next to the Select Code field. This enables the Create New Parameter button.
.png)
- To create a new parameter, click Create New Parameter.
- The Manage Parameter page appears and prompts user to specify the following attributes.
- Parameter Text: This is used to identify a new parameter.
- Parameter Value : This describes the regular expression for a parameter under the selected code.
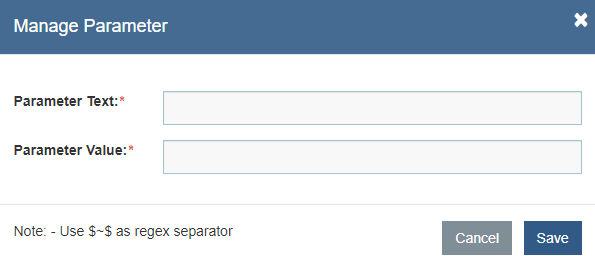
- Click Save.
This adds the new parameter and lists it in the parameters.
Edit Parameter Value
User can open a parameter value, review the available information, and change the parameter’s details by performing the following steps:
- On the Manage Parameter Master page, click
.png) next to the parameter value you want to edit.
next to the parameter value you want to edit.

- The Manage Parameter page appears.
Figure 321. Figure - Edit Parameter Value (cont.) 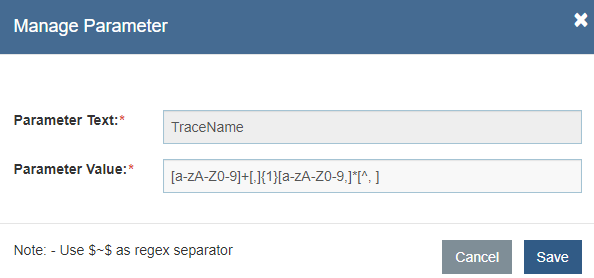
- Edit the required details of the parameter.
- Click Save to save changes or click Close to discard all changes.
- A confirmation dialog box appears.
Delete Parameter Value
BigFix Runbook AI allows user to view parameter values and delete them, if not required.
To delete the parameter value, perform the following steps:
- On the Manage Parameter Master page, click
.png) next to the parameter value user wants to delete.
next to the parameter value user wants to delete.
.png)
- Click OK to confirm.
- A confirmation dialog box appears.
Configure Parameter Type
To enhance the BigFix Runbook AI workflow, user can include customer specific parameter types for parsing tickets.
To configure a customer specific parameter type, perform the following steps:
- On the main menu bar, click Advance Configuration->Parameter.
- Click Configure Parameter Type. The Configure Parameter Type page appears.

This lists the Parameter Type ID, Parameter Type, Parse Order, and User-Friendly Name in a tabular view which enables user to add a new parameter type and edit or delete existing parameter types.
Add Parameter Type
User can add a customer specific parameter type in BigFix Runbook AI by performing the following steps:
- On the Configure Parameter Type Add New.
.png)
- The Configure Parameter Type page prompts users to manually fill the following fields:
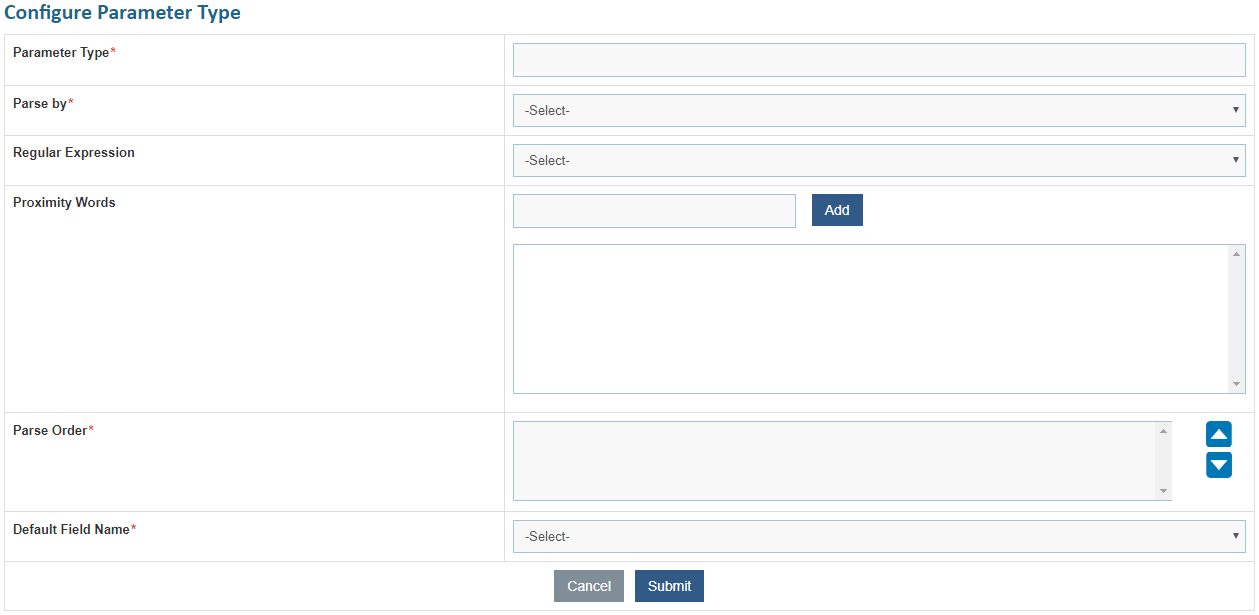
- Type the parameter type identifier in the Parameter Type field.
- Select the ticket parsing method from the Parse by drop-down list .
Regex and Proximity : In this method, both Regex and Proximity features are used for parsing.
Only Regex : In this method, tickets are parsed using the default values added in Regex.
Only Proximity : In this method, tickets are parsed using the proximity words that were added in the Proximity field.
Equal search: In this method, you can manually type single or multiple words which will be used for performing a direct match for ticket parsing.
Figure 329. Figure - Add Parameter Type (Cont.) 
- Select Regular Expression for the parameter type added.
Figure 330. Figure - Add Parameter Type (Cont.) 
- Type the Proximity Word that should be in proximity to the parameter type and
will be used for parsing. To add a proximity word for the selected parameter type, click
Add. The added proximity word appears in the field below the Proximity
Words. To delete the proximity word, click on the cross over the word.
Figure 331. Figure - Add Parameter Type (Cont.) 
- Select the Parse Order to prioritize the parsing methods in case multiple
parsing methods are available.
Figure 332. Figure - Add Parameter Type (Cont.) 
- Type the default field name in the Default Field Name field to fetch the data for parsing.
- Click Submit to configure a new parameter type or click Back to cancel the parameter configuration. The new parameter type is added and listed in a tabular view.
All fields marked with an asterisk (*) are mandatory or click Back if user wants to cancel the parameter configuration.
Component Key Value Configuration
User can use BigFix Runbook AI components to manage application features. Each configuration component contains one or more component keys, each of which identifies a configurable property of the component. This section describes how to manage these key values for the components.
To configure the component key values, perform the following steps:
- On the main menu bar, click Advance Configuration->Connectivity and then click Component Key Value Configuration. The Component Key Value Configuration page appears.
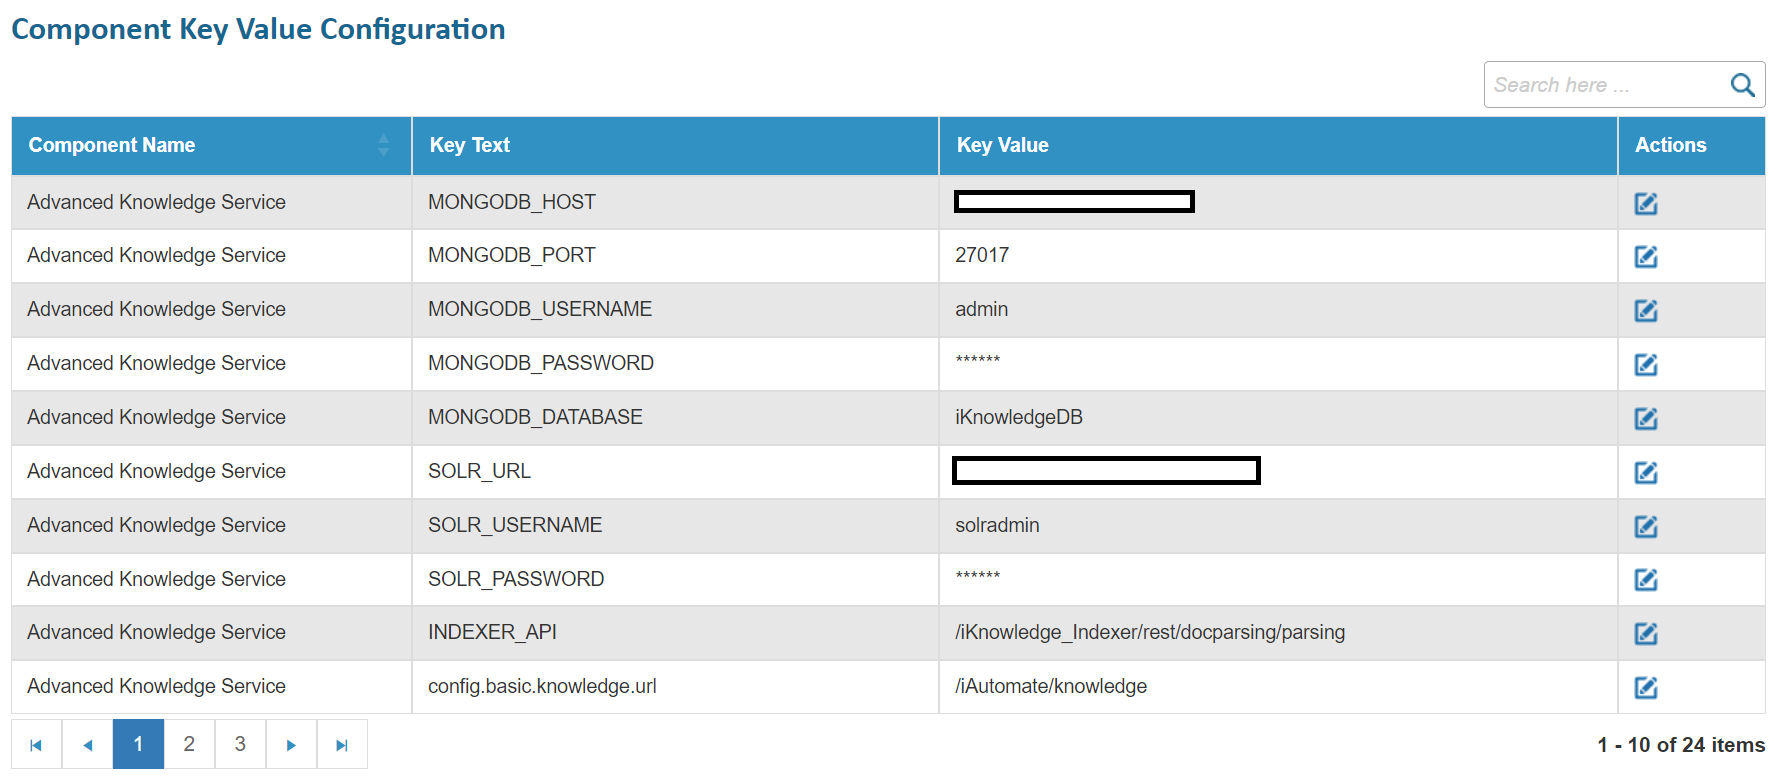
- To edit existing values, click
 next to the value user
wants to edit. It displays a popup with auto-filled details.
next to the value user
wants to edit. It displays a popup with auto-filled details.
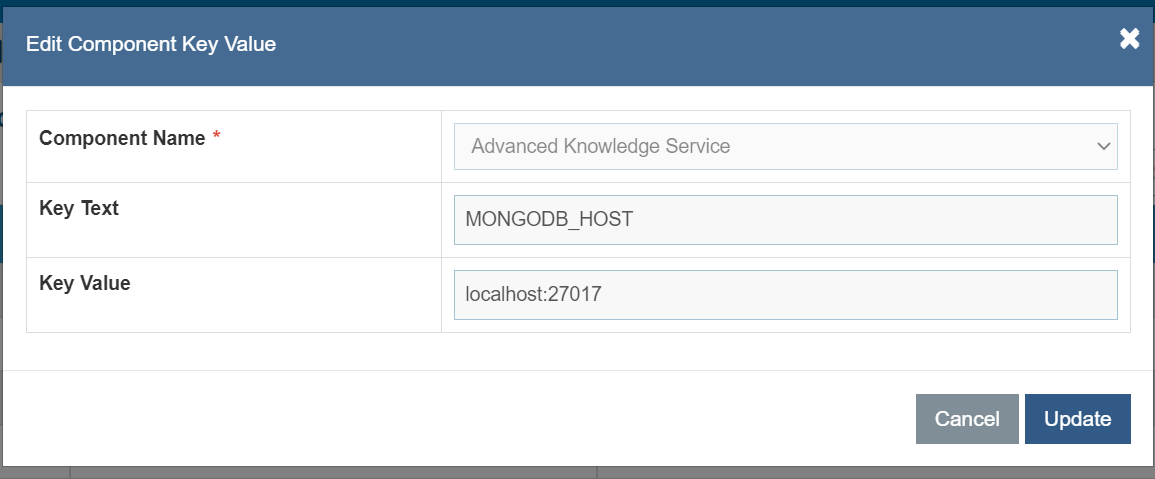
- Edit the required details and click Update.
Incorrect changes to key values can severely degrade system performance.
- Click Clear to cancel any modifications.
BigFix Runbook AI provides easy search capabilities to access required key values from the list of key values for certain words or set of characters. Type a value in the Key Text or Key Value fields and click Search to get the desired outcome.
Product Configurations
This section describes how to perform component configurations and control the behavior of each individual component within BigFix Runbook AI.
To configure the components, perform the following steps:
- On the main menu bar, click Advance Configuration, and then click Product Configuration.
- The BigFix Runbook AI Configuration page appears.
- Toil Value (For Manual Execution) is the maximum manual execution time of runbook (in minutes). By default, it is set to 60 which users can change.
- Toil Value (For Auto Execution) is the maximum auto execution time of runbook (in minutes). By default, it is set to blank which users can change.
Figure 335. Figure - BigFix Runbook AI Configurations 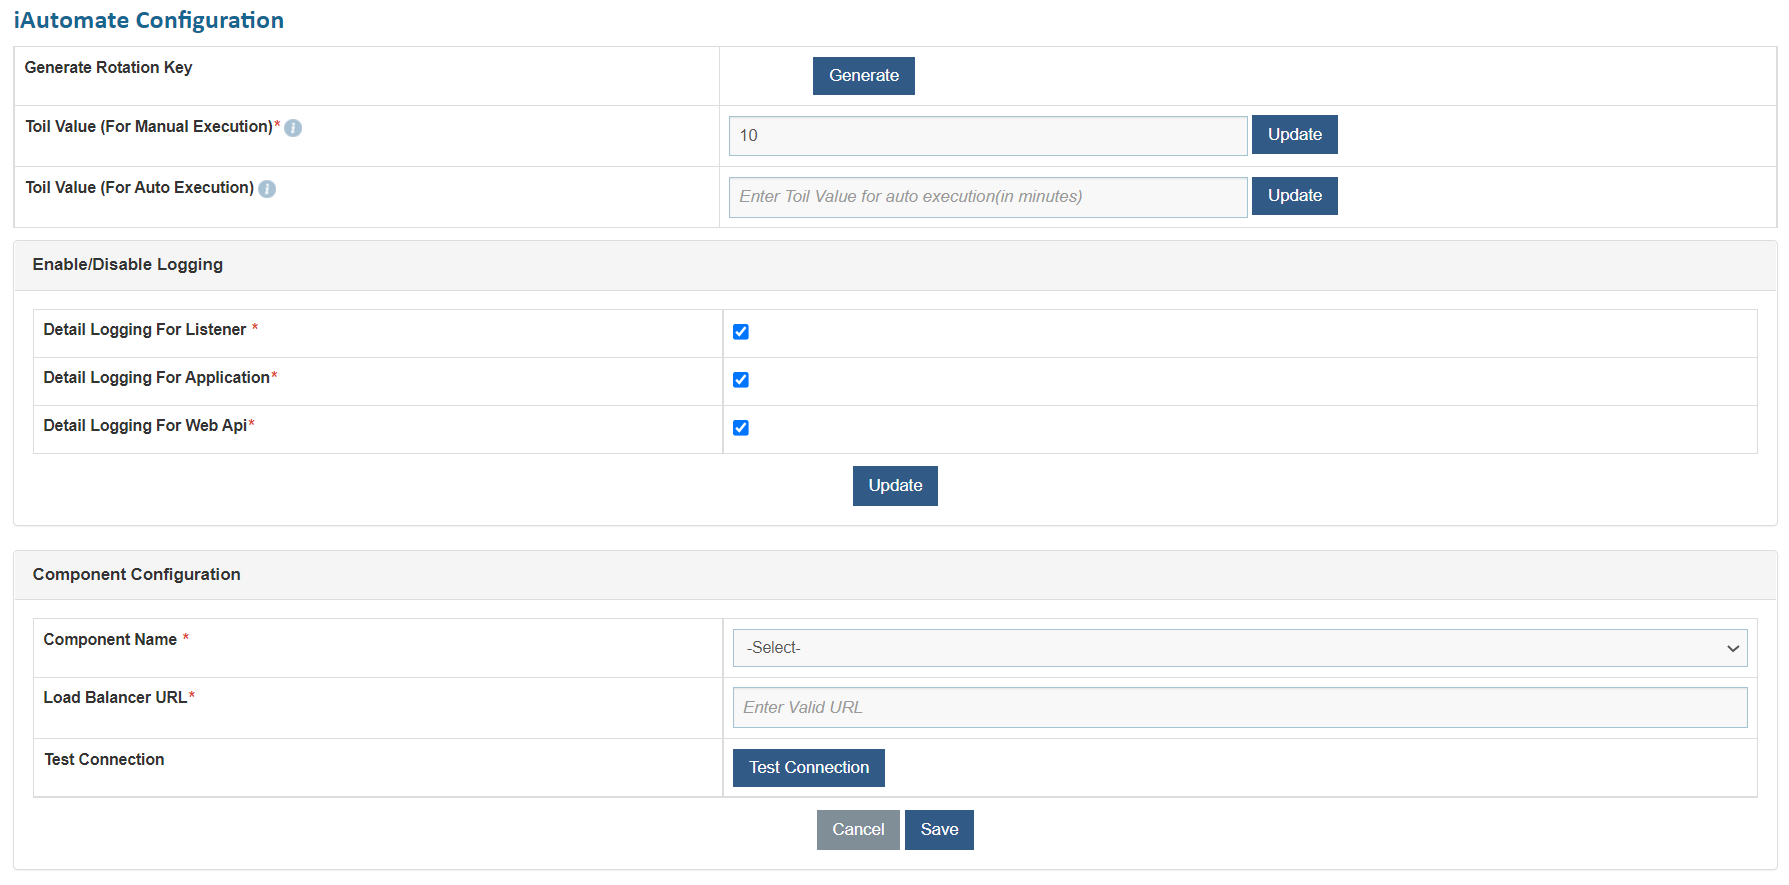
- For a list of components installed on BigFix Runbook AI, refer to ‘Pre-requisite for BigFix Runbook AI Component’ in the BigFix Runbook AI Pre-Requisite Guide.
- Make selection in Enable/Disable Logging field:
- To enable status logging for the Listener, select Detail Logging For Listener under Enable/ Disable Logging for Listener.
- To enable status logging for Application, select Detail Logging For Application under Enable/ Disable Logging for Application.
- To enable status logging for Web API, select Detail Logging For Web API under Enable/ Disable Logging for Web API.
- Click Update to save settings.
- Select a component from the drop-down list next to the Component Name field.
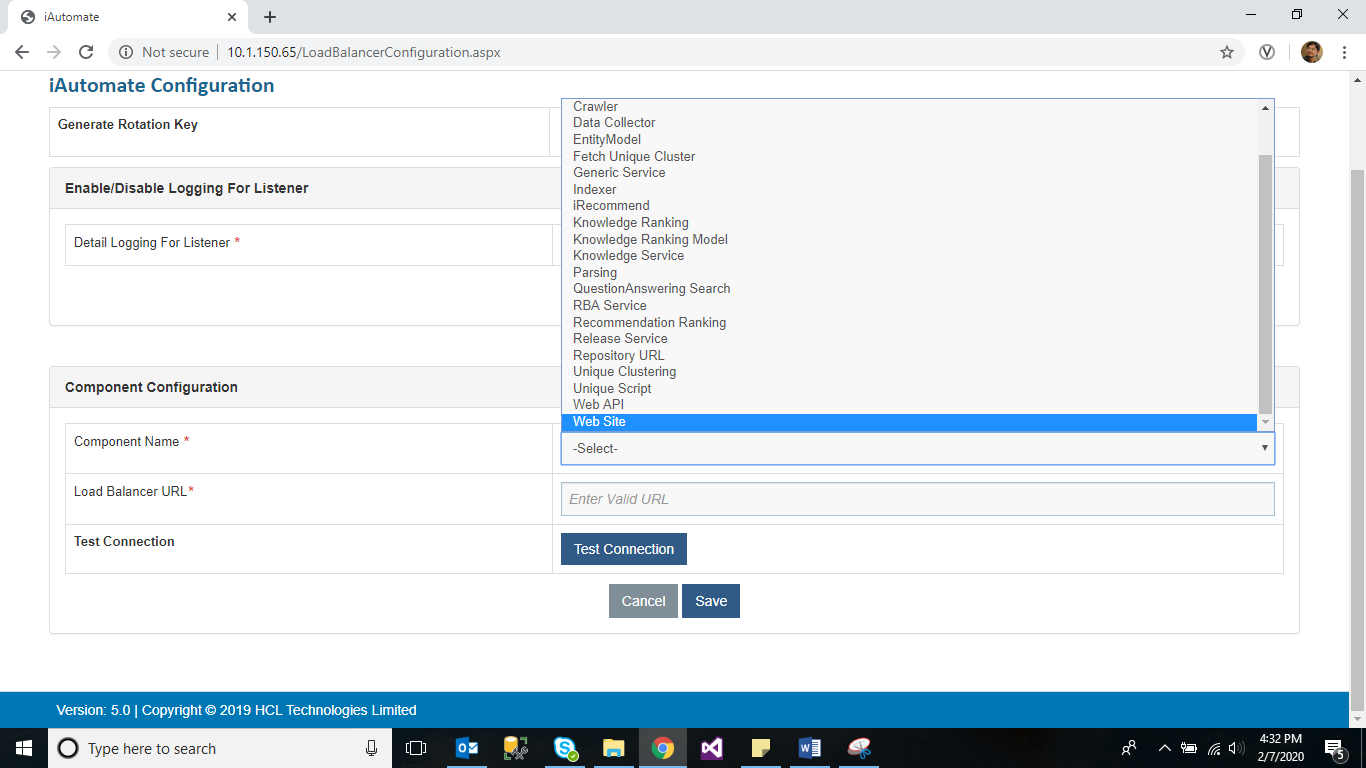
- Type the Load Balancer URL for the selected component to evenly distribute the workload among multiple instances, increasing system throughput.
- Click on Test Connection to check accessibility of provided URL from service.
- Select Recommendation or Entity as a component. This will prompt you to provide the folder location to create the recommendation or an entity model in the Recommendation or Entity Model Location field.
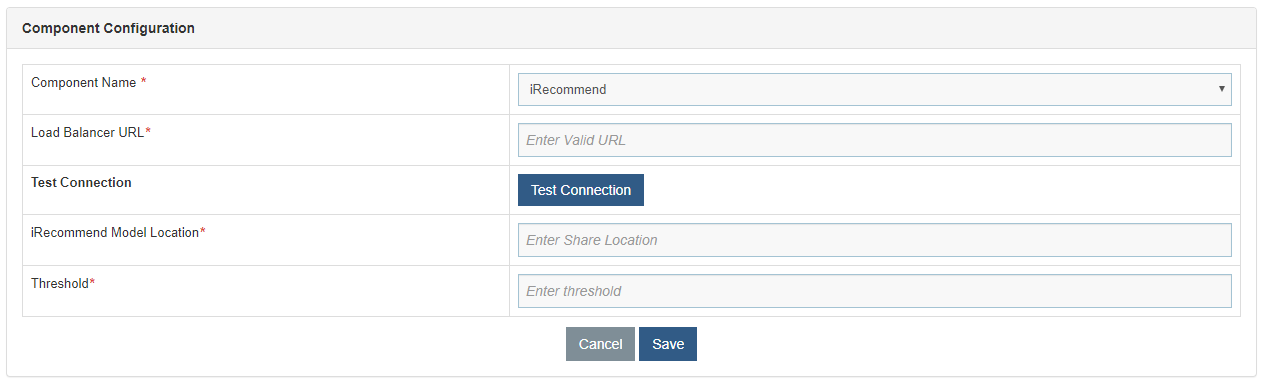
- Click Save.
iScrape API Details
User can configure the API details such as the Google custom search API key, API URL, and so on. User can use these details to fetch scripts using the Google search API.
To manage the iScrape API details, perform the following steps:
- On the main menu bar, click Advance Configuration->Connectivity, and then click iScrape API Details.
- The iScrape API
Details page appears.
Figure 338. Figure - BigFix Runbook AI Configurations (Cont.) 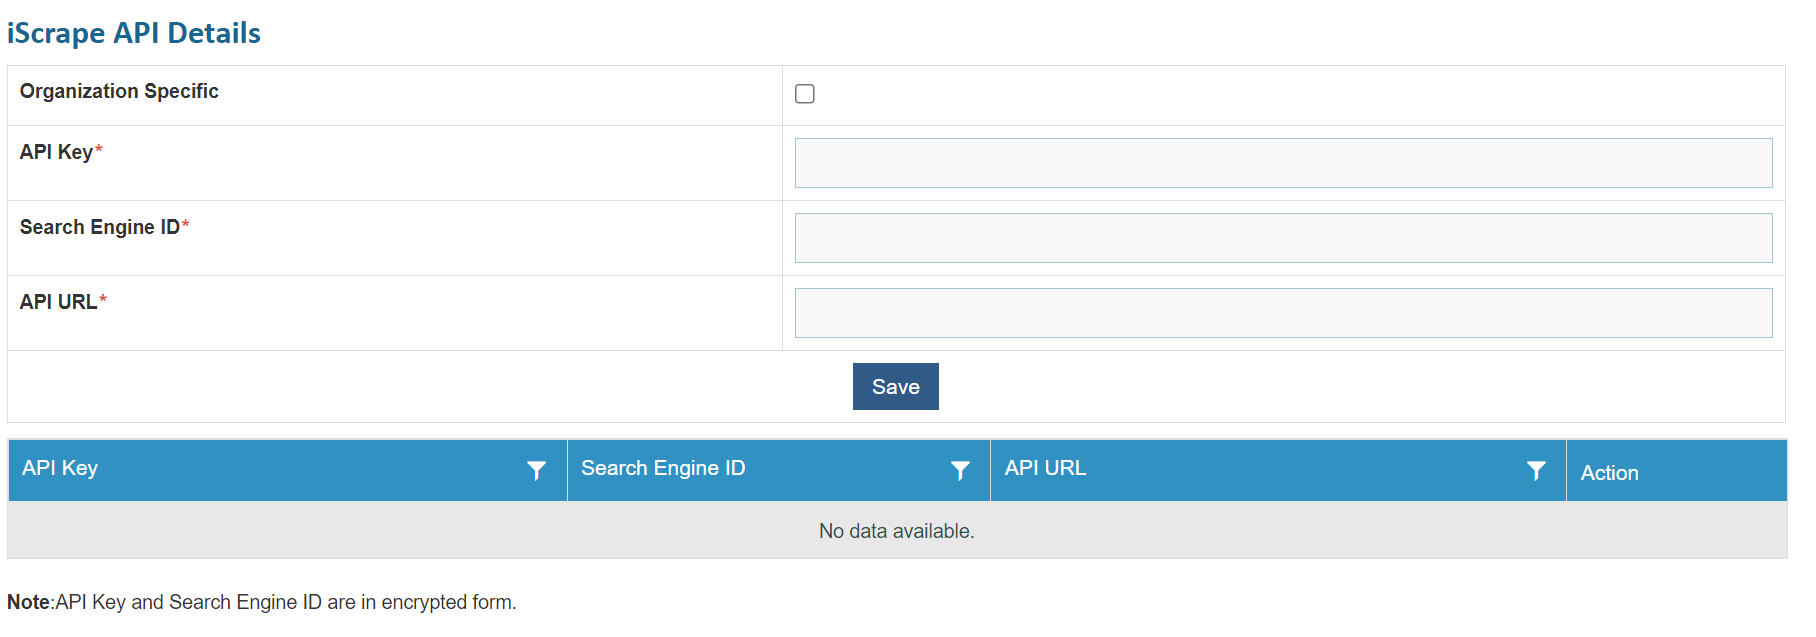
- It lists the existing API keys in a tabular view and enables user to edit or delete the
keys.
- Check the Organization Specific checkbox if the APIs are to be used for any particular organization else the saved APIs will only correspond to Super Admin and will not be applicable for any organization.
- Type the google custom search API key, to identify the user to the website, in the API Key field.
- Type the search engine ID to search for information on the internet in the Search Engine ID field.
- Type the API url in the API URL field.
- Click Save.
- A confirmation dialog box appears.
This adds the new API URL and lists it in a tabular view. The API key and Search Engine ID is saved and displayed in encrypted form.
Edit or Delete iScrape Details
User can review the existing iScrape APIs, edit their details, or delete existing API keys by performing the following steps:
- On the iScrape API Details page, click
.png) next
to the API that user wants to edit.
next
to the API that user wants to edit.

- It displays the selected API Key details.
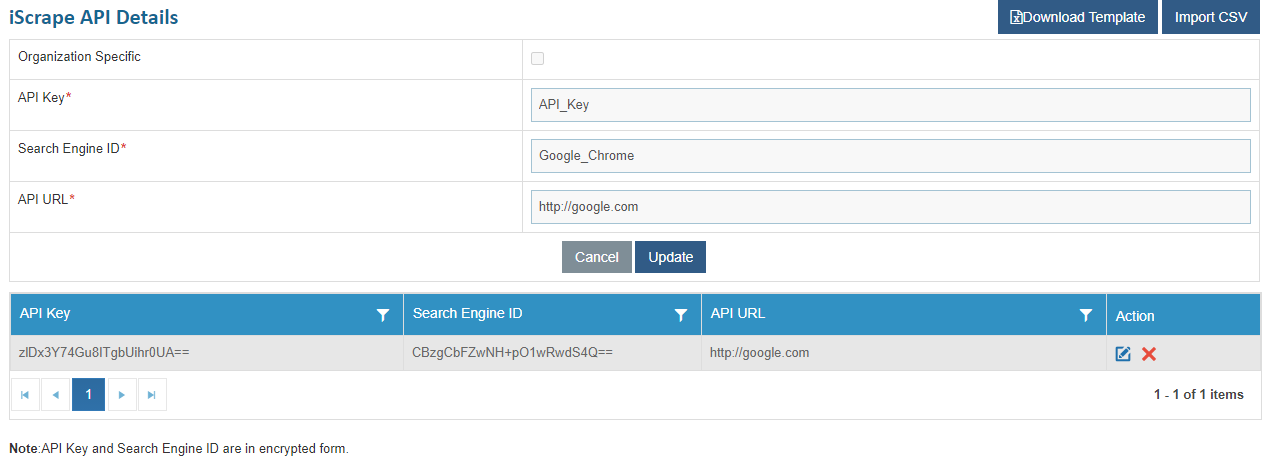
- Edit the required details and click Update . A confirmation dialog box appears.
- To delete an API Key, click
.png) next to the
organization you want to delete. A confirmation dialog box appears.
next to the
organization you want to delete. A confirmation dialog box appears.
Connection Details
User can Manage the connection details from this menu.
To manage the connection details, perform the following steps:
- On the main menu bar, click Advance Configuration->Connectivity, and then click Connection Details.
- The Connection
Details page appears.
Figure 344. Figure - Connection Details 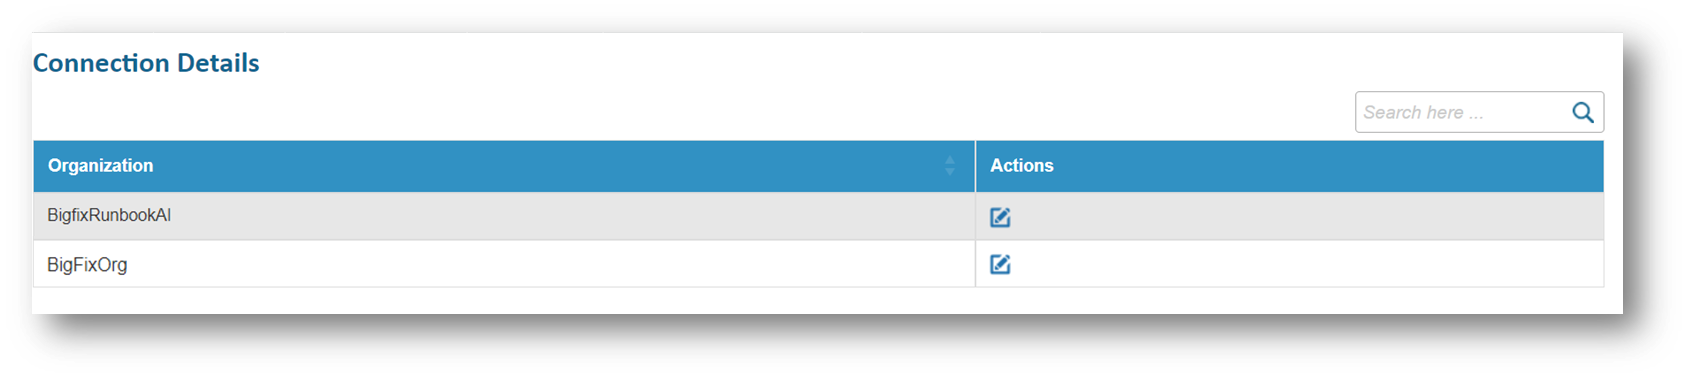
- It lists the existing Organization.
- Click the Edit icon under the Action tab to edit the details.
On the click of edit, the connection string will only be visible in the textbox if the below key is set to 'Y' in BaseUI’s web.config. If its value is ‘N’, then the Connection String textbox will be empty.

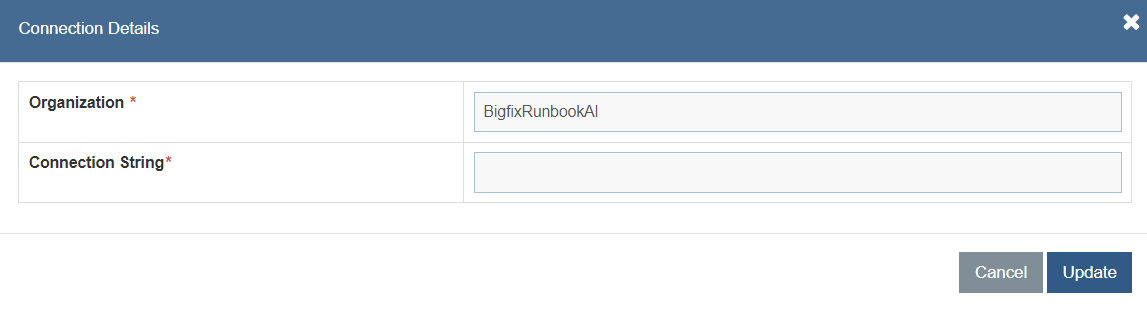
- Type the updated connection string. Click Update to make the changes. A confirmation dialog box appears.
Manage Custom Script
User can create the custom scripts in Python/PowerShell that can be executed from BigFix Runbook AI through the API.
To execute Python scripts, it is required that Python is installed on the web server and its Environment Variable is set with name ‘PYTHON_HOME’ and its value will be the path where python.exe is present.
- To create/manage custom scripts, click on Advance Configuration->Script Menu and then click on Manage Custom Script. The following page will appear:
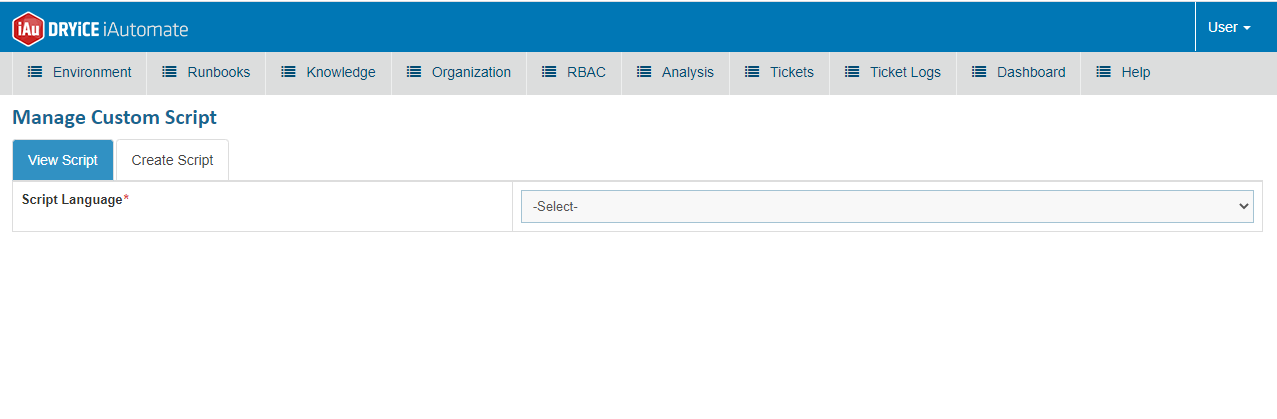
- The page has two tabs:
- View Script
- Create Script.
- Click on View Script tab. The dropdown of Script Language contains 2 items:
- Python,
- PowerShell.
- Select the Script Language from the dropdown. The following table appears:
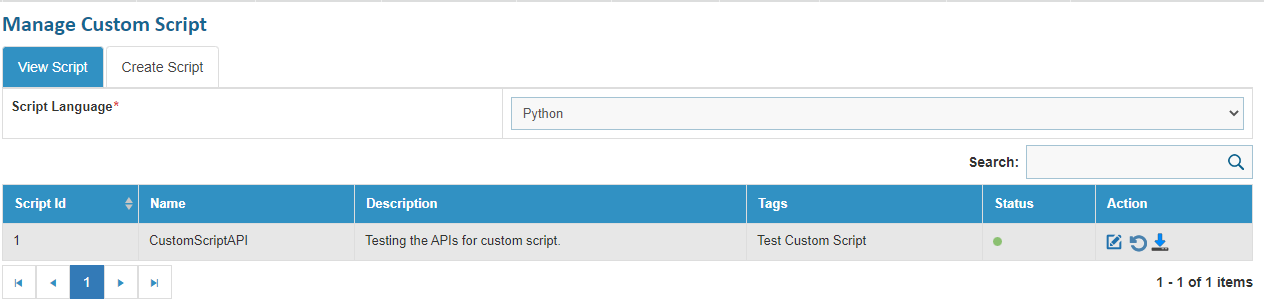
The table shows the Script Id of that script saved in the database, Name of the script, Description given for the script, the Tags defined while script creation, the Status of the script whether active or inactive and some Action buttons.
To edit any script, click on  icon:
icon:
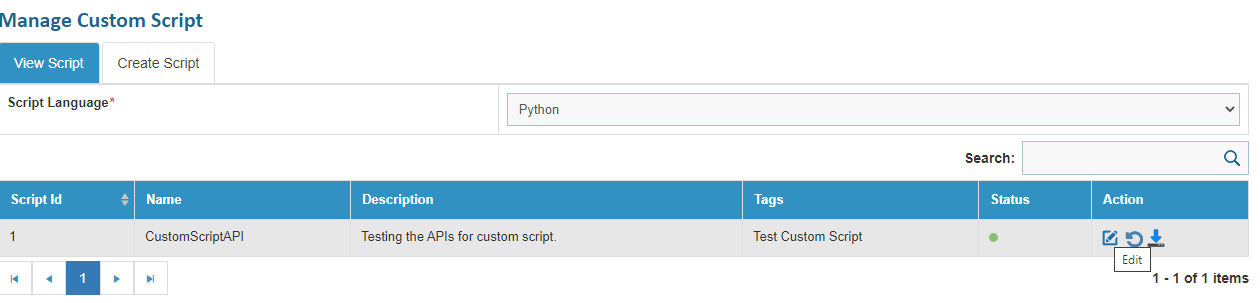
The Create Script tab will be active with all the details of the script filled in the fields of this page:

- Edit the script as per the requirement and click Update. A confirmation box will appear as below:
- To change the status of any script, click on
 icon:
icon:

- A dialog box will appear to confirm whether user wants to change the status of the
script:
Figure 354. Figure - Manage Custom Script (Cont.) 
- If yes, then the confirmation dialog box appears as below:
Figure 355. Figure - Manage Custom Script (Cont.) 
- To download the script data in a json file, click on
 icon:
icon:
Figure 356. Figure - Manage Custom Script (Cont.) 
- To download the script data in a json file, click on
- It downloads the script data in json file that contains below information:
Figure 357. Figure - Manage Custom Script (Cont.) 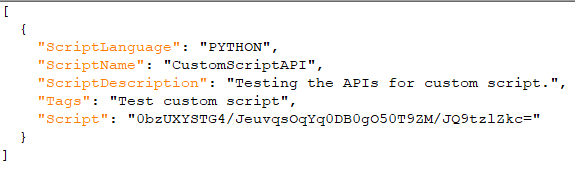
- Script value is in encrypted form.
- Click on Create script tab and the below page appears:
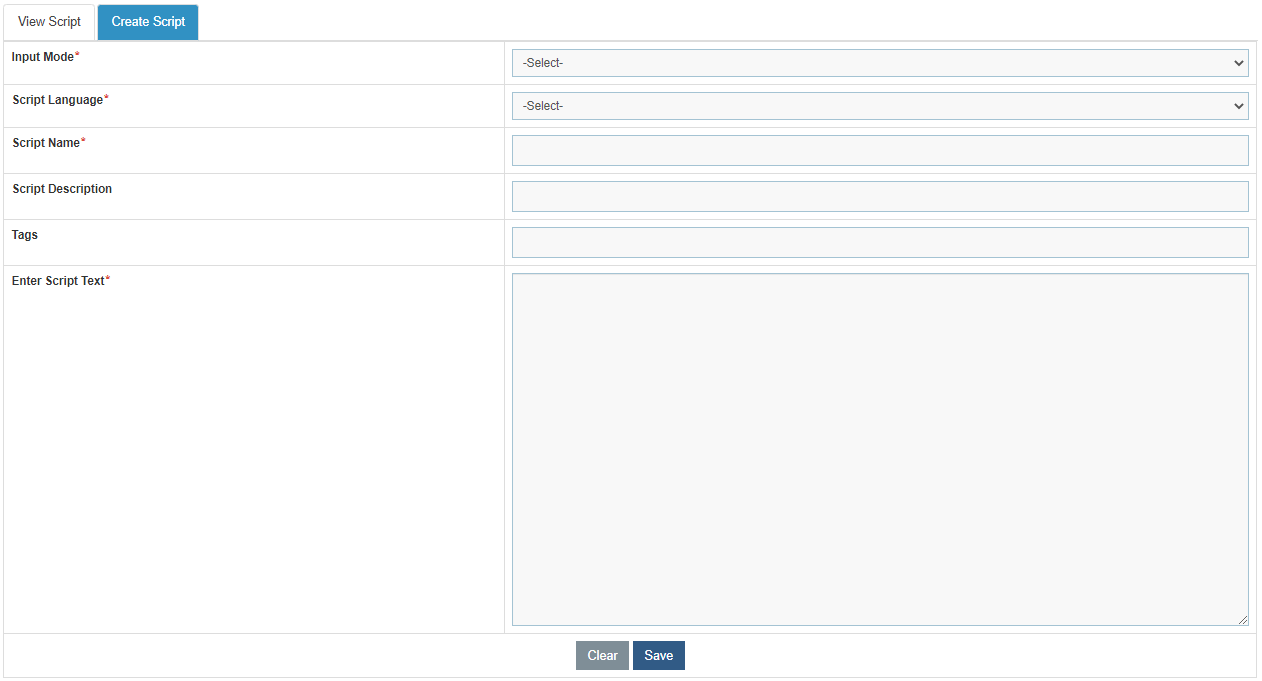
- The Input Mode dropdown has two following options:
-
- Manual: user can fill all the details on this page manually
- Json : User can import a valid json file to fill all the details through that file only.

Click on Download Template button to get the template for a valid Json file.
- The Script Language dropdown has two following options:
- Python: To create a script in Python language
- Power Shell: To create a script in Power Shell language.
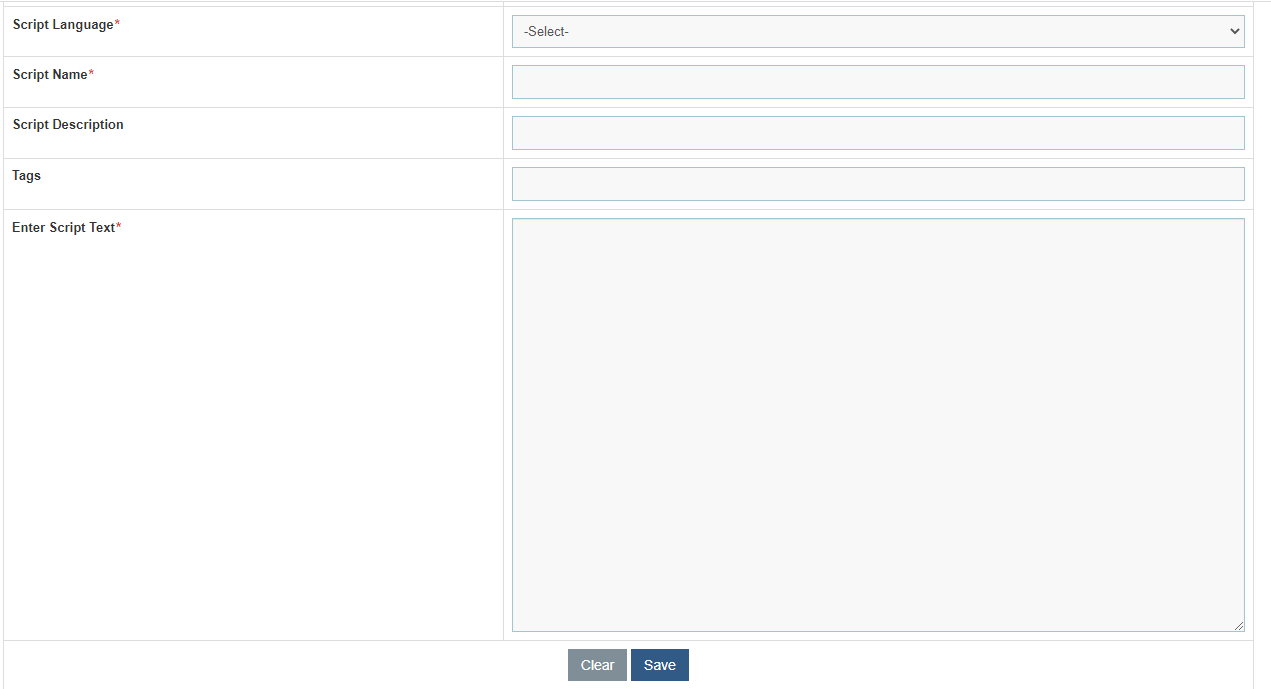
- Enter the script name in the Script Name text box.
- Enter the suitable script description corresponding to Script Description text box.
- Enter the tags for better filtering of scripts.
- Enter the script text as per the language chosen in Script Language dropdown.
- Once all entries are filled, click Save. A confirmation dialog box will appear.
This feature can be used to support complex third-party system integration where the script can be simply created for the complex logic and this script can be used via API wherever needed.
Configure Key Vault
This section describes how to configure the passwords stored in Key Vault eg: CyberArk so that it can be used on screens to fetch password directly from Key Vault.
To configure key vault, perform the following steps:
- On the main menu bar, Click on Advance Configuration. A dropdown appears. Click on Configure Key Vault. The following screen appears:


- The configurations saved without Organization Specific checkbox being checked will be used at admin level. And the configurations saved corresponding to any Organization will be used for that organization only.
- Select Organization from dropdown.
- Select Tool Name from dropdown. (For Admin level configurations, skip step 2 and directly select Tool Name).
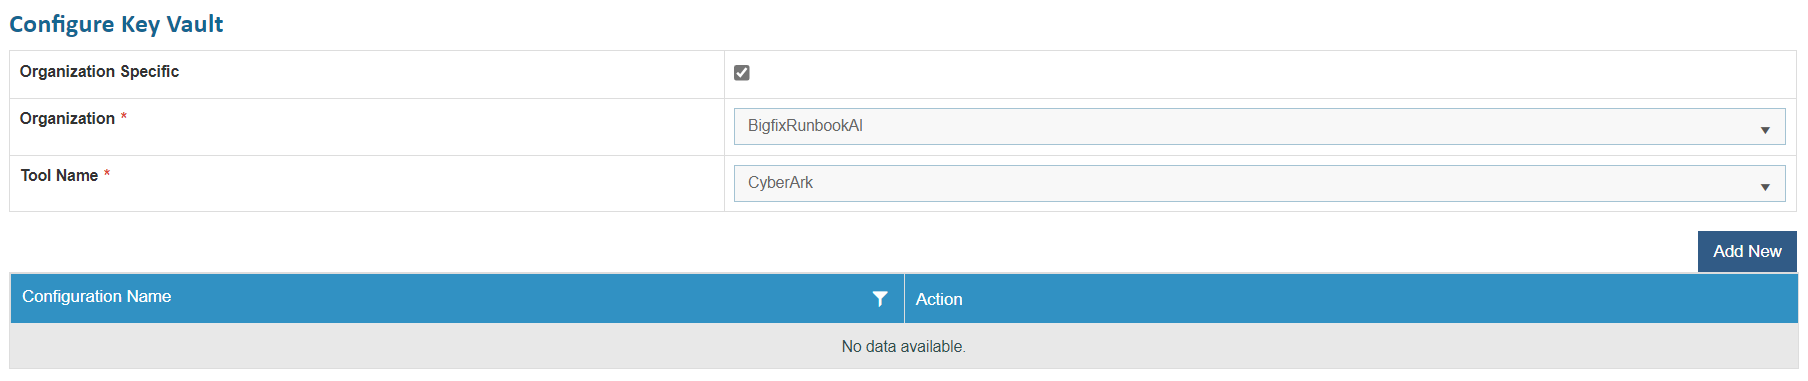
- For tool name CyberArk, below popup is opened:
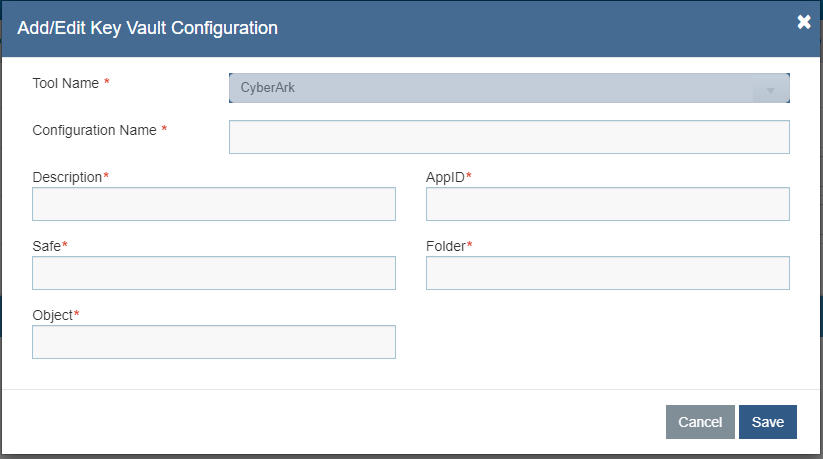
- Enter the Configuration Name and its Description.
- Enter the AppID, Safe, Folder and Object for the password stored in Key Vault.
- For tool name as Internal Secret Manager, the below popup opens when clicked on ‘Add New’ button.
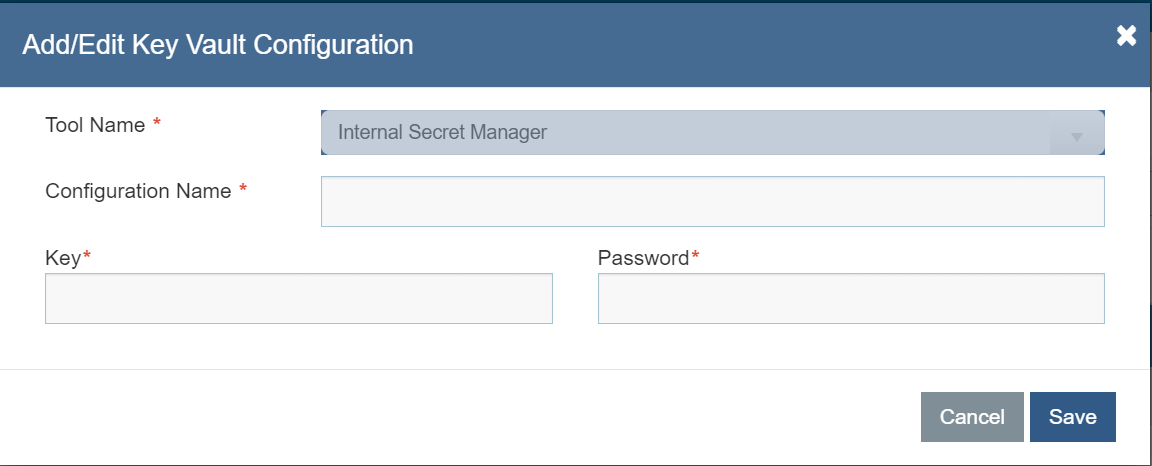
- Enter the Configuration name.
- Enter the key value such as SNOWPassword in case of password for SNOW.
- Enter the password value in Password field.
- Click on Save. The following confirmation message appears.
- The saved configuration starts appearing in the grid:
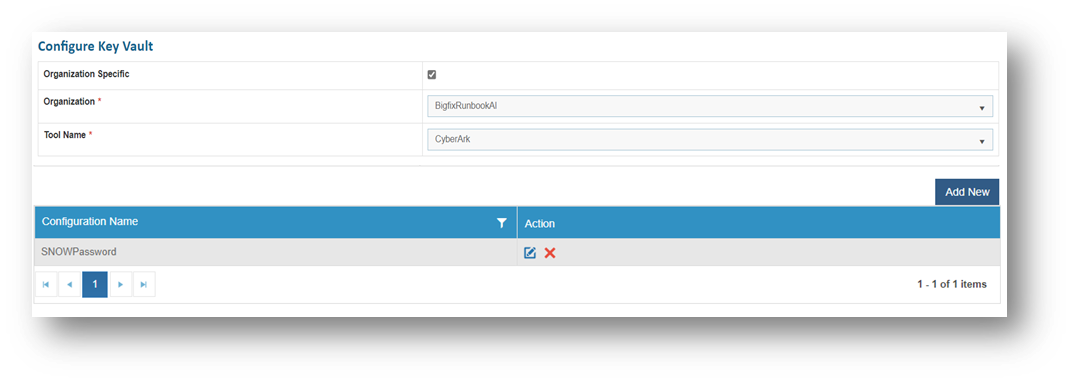
- To edit any configuration, click on the icon
 corresponding to the configuration to be edited. The Edit wizard appears. Edit the details
and click on Save.
corresponding to the configuration to be edited. The Edit wizard appears. Edit the details
and click on Save.
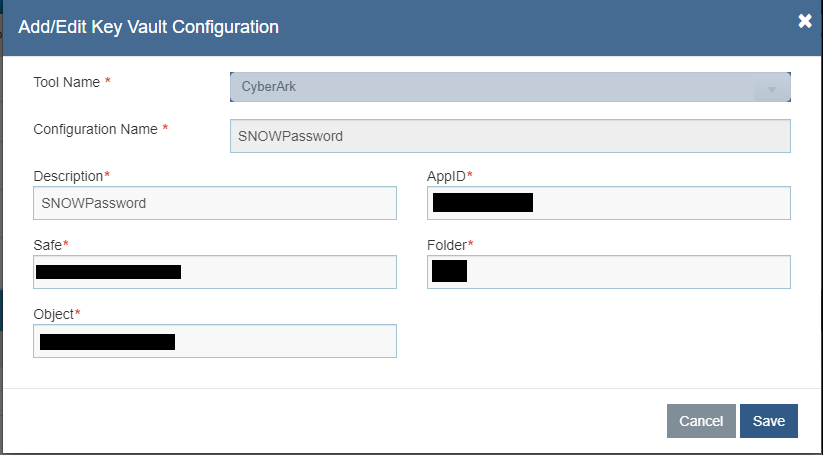
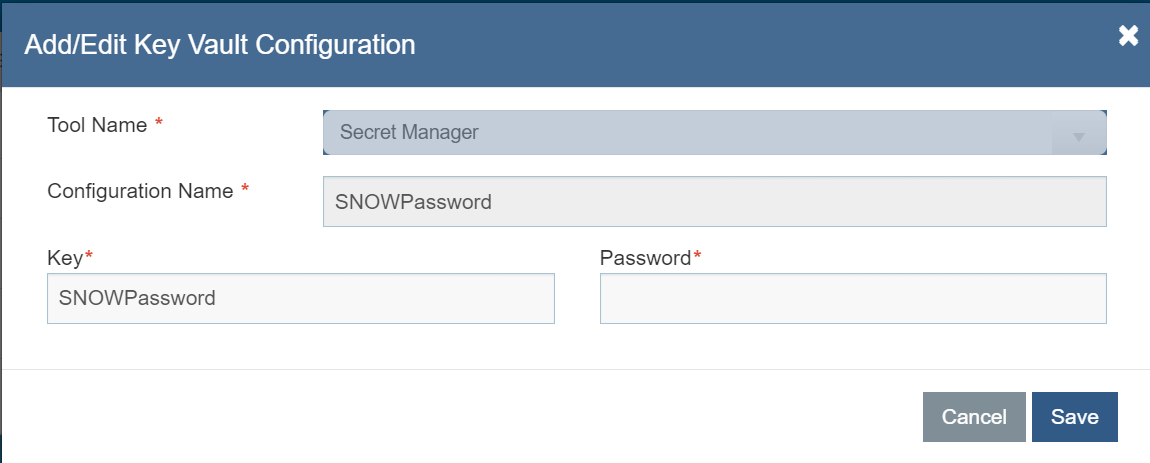
- The following confirmation message appears:
- To delete any configuration, click on icon
 corresponding to the configuration to be deleted. The following confirmation message
appears:
corresponding to the configuration to be deleted. The following confirmation message
appears:

- Click Yes. The following success message appears:
Knowledge
This section describes how to configure the knowledge, including domains, collections, knowledge search, and knowledge analysis for the environment.
To configure knowledge, perform the following steps:
- On the main menu bar, click Advance Configuration->Knowledge. The drop-down displays the menu below:
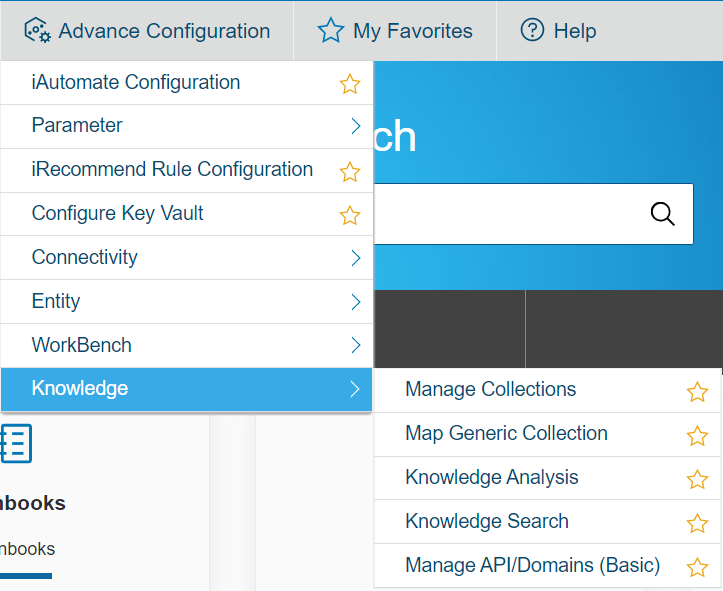
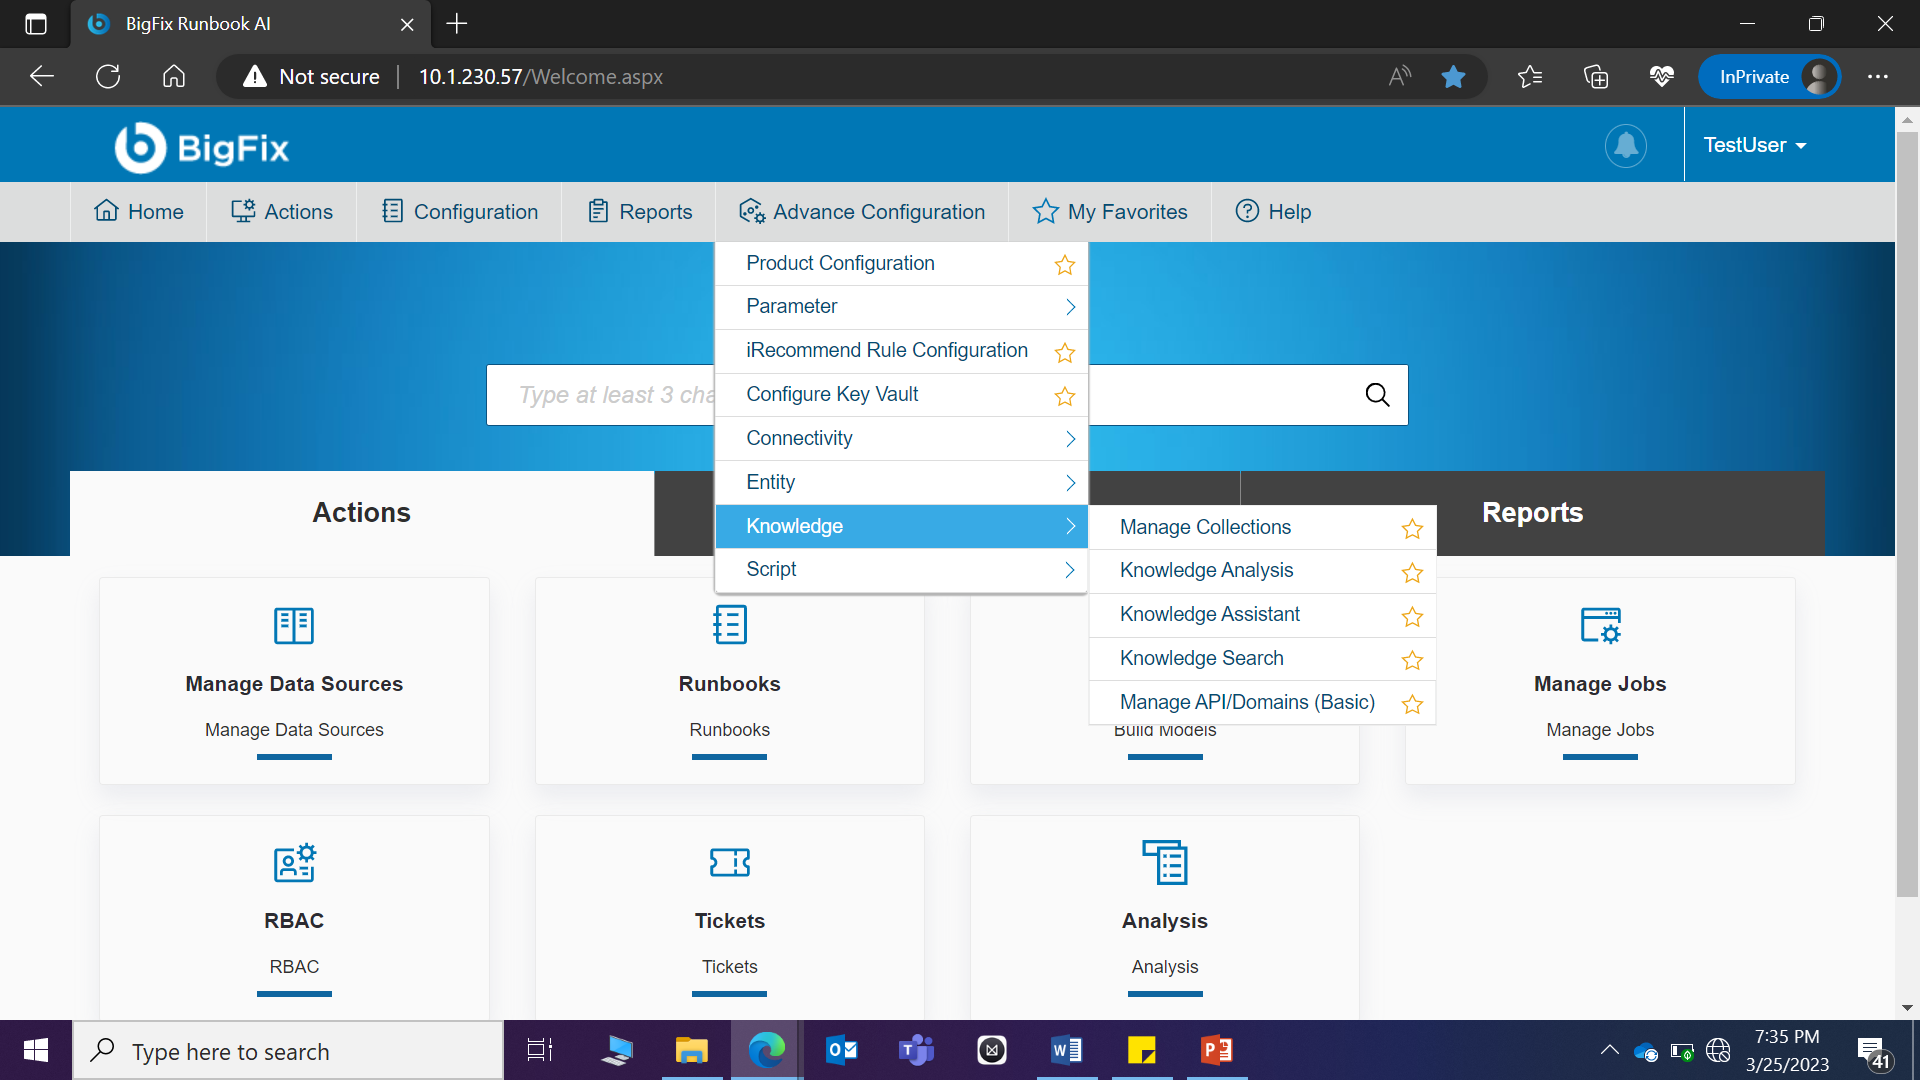
Ensure user is logged in as administrator to create and manage Knowledge and associated parameters.
Manage Collections
User can manage collections, which are a logical grouping of document repositories, and configure multiple repositories.
To manage collections, perform the following steps:
- On the main menu bar, click Advance Configuration->Knowledge and then click Manage Collections.
- The Manage Collections page appears.
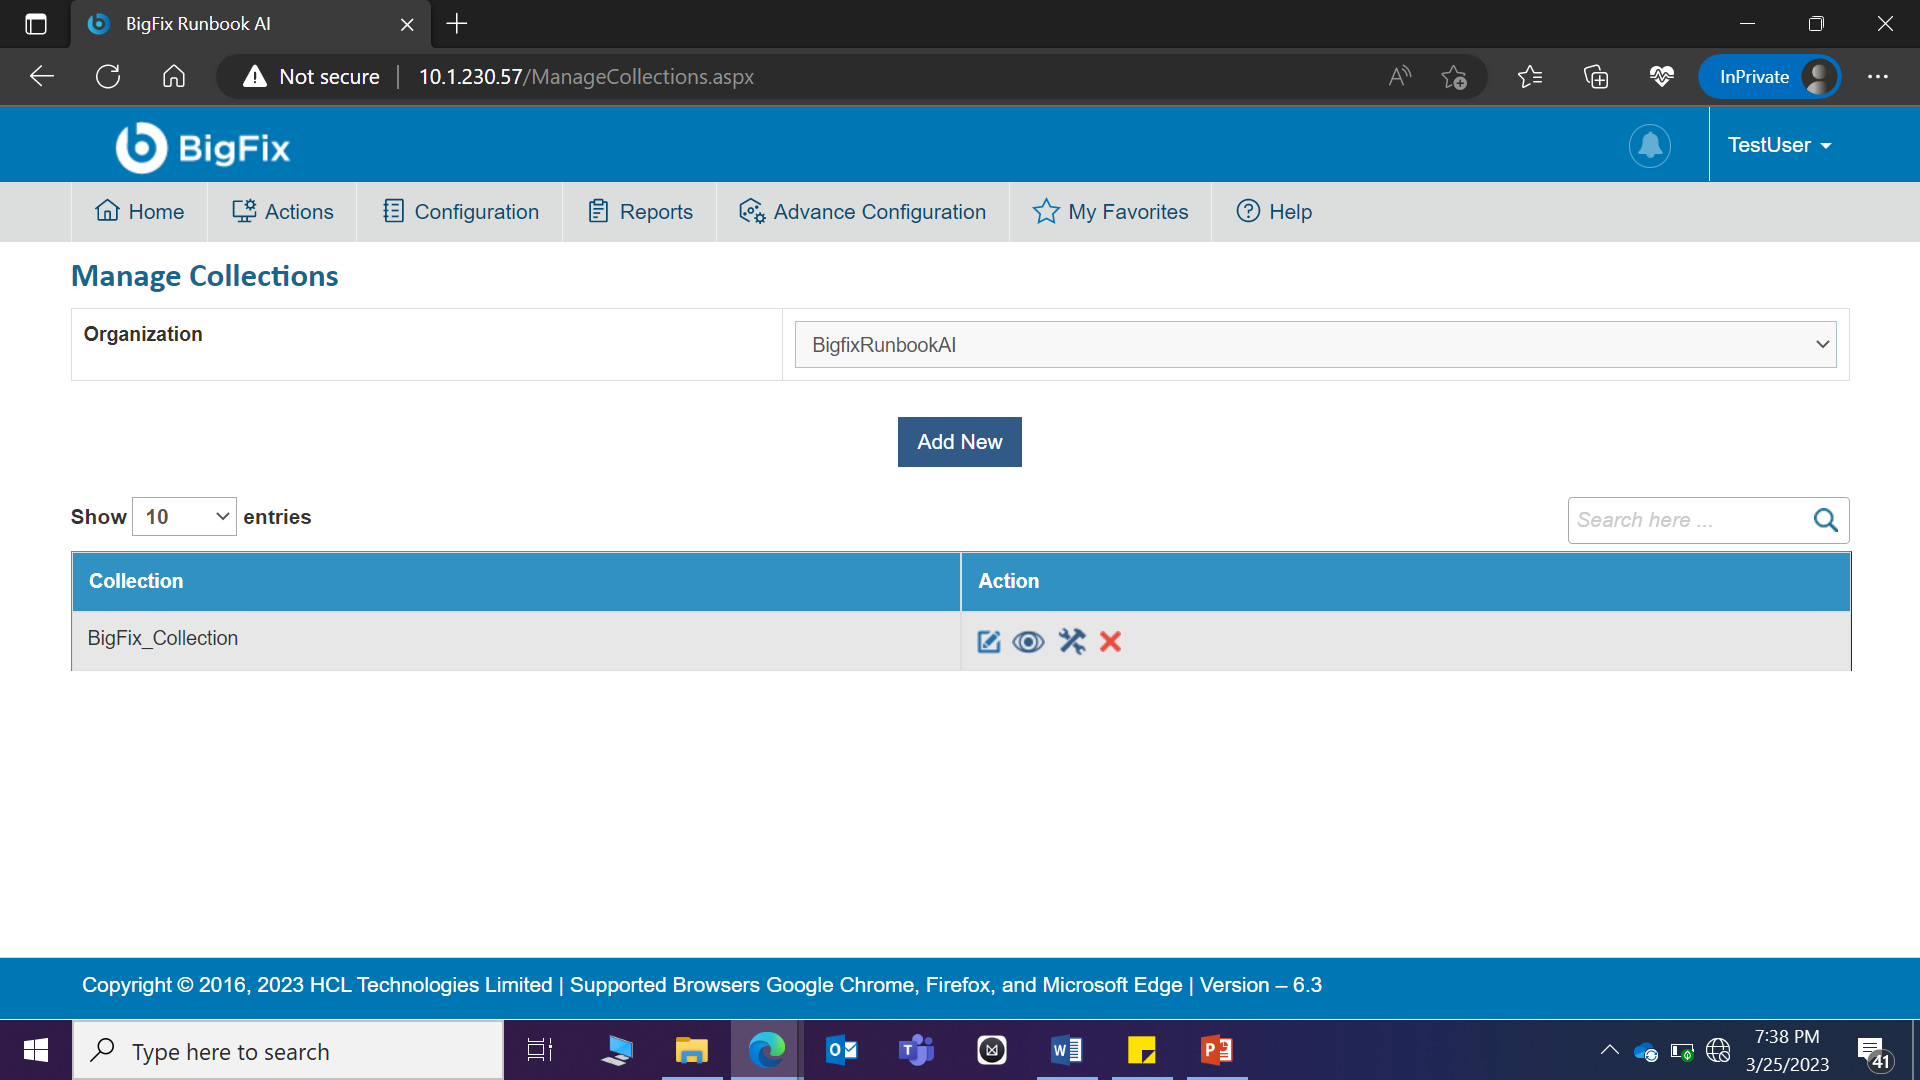
- Select a type of collection from the Collection Type field. The collections may be of the following types:
- Generic- Available for all organizations and contains the default collection configuration.
- Custom- Customized for organizations and contains the customer specific collection configuration.

Selecting the Collection Type lists the available collections in a tabular view and enables you to add a new collection type, edit or delete an existing collection type, and manage repositories in the existing collections.
.png)
Add Generic Collections
User can configure generic collections that have the default collection configuration.
To manage generic collections, perform the following steps:
- On the Manage Collections page, select ‘Generic’ from the drop-down list in the Collection Type field.
- This enables the Add New button and lists the existing generic collection in a tabular view.
.png)
- Click Add New. The Add/Edit Collection page appears.
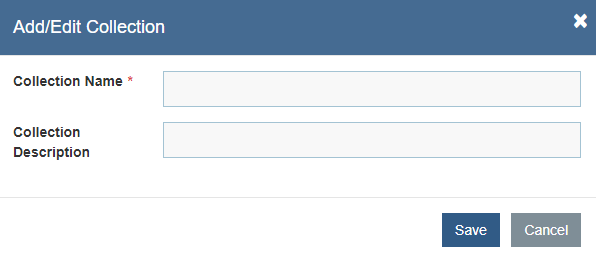
- Type the name of the collection to be created in the Collection Name field.
- Type the description of the collection in the Collection Description field.
- Click Save.
All fields marked with an asterisk (*) are mandatory.
This creates a new collection type that appears in the list of collections.
Add Custom Collections
User can configure custom collections containing organization specific collection configuration and create multiple repositories in them.
To manage custom collections, perform the following steps:
- On the Manage Collections page, select Custom from the options available in the Collection Type field, and then select the Organization for which you want to configure the collections.
.png)
- This enables the Add New button and lists all the available collection types in a tabular view.
- Click Add New. The Add/Edit Collections page appears.
.png)
- Type the name of the collection to be created in the Collection Name field.
- Type the description of the collection in the Collection Description field.
- Click Save.
All fields marked with an asterisk (*) are mandatory.
This adds the new collection type that appears in the list of collections.
Manage Repositories in Collections
User can define the repository configuration based on the type of repositories, such as Web URL , ServiceNow, File Folder, Satori that will be deployed in the environment.
To manage repositories, perform the following steps:
- On the Manage Collections page, click
 next to
the collection for which user wants to manage the
repository.
next to
the collection for which user wants to manage the
repository.
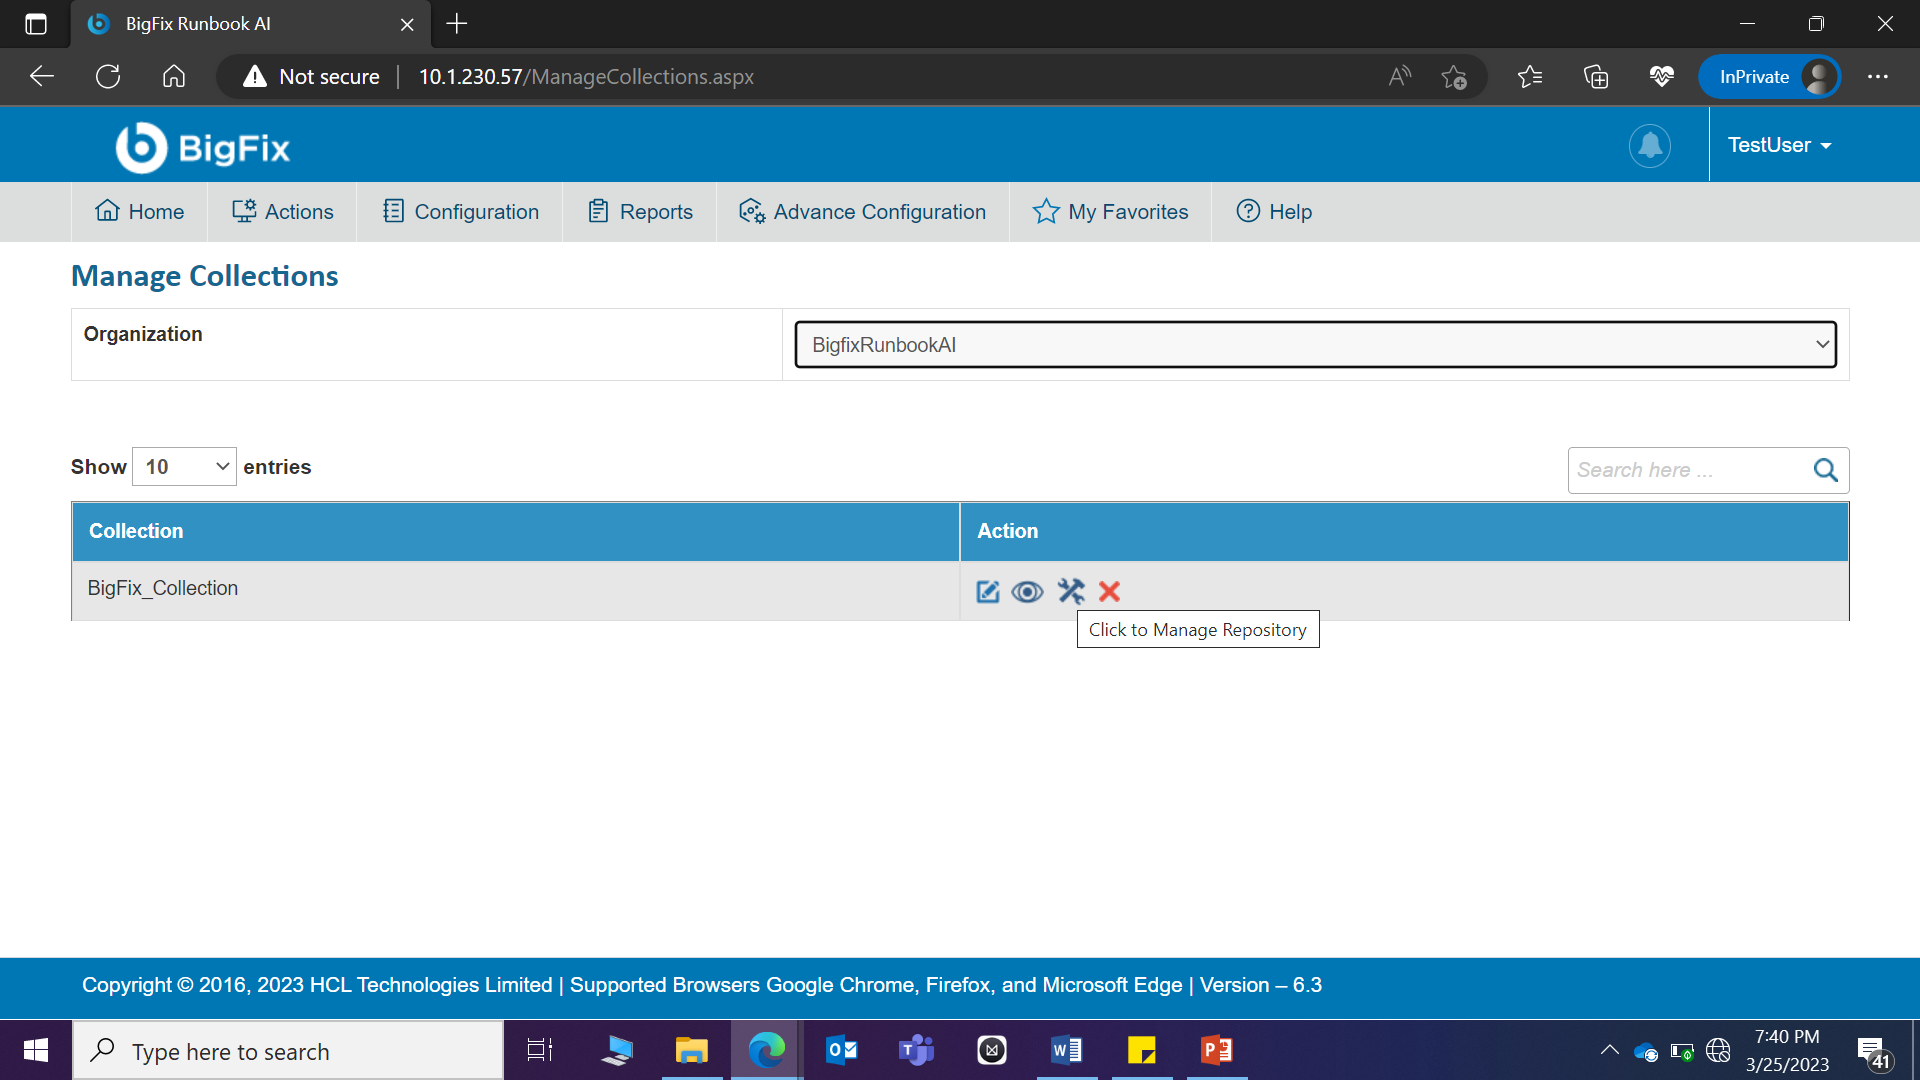
- This lists the existing repositories under the selected collection and enables user to
view the status, edit or delete existing repositories, and add repositories.
Figure 385. Figure - Manage Repository (Cont.) 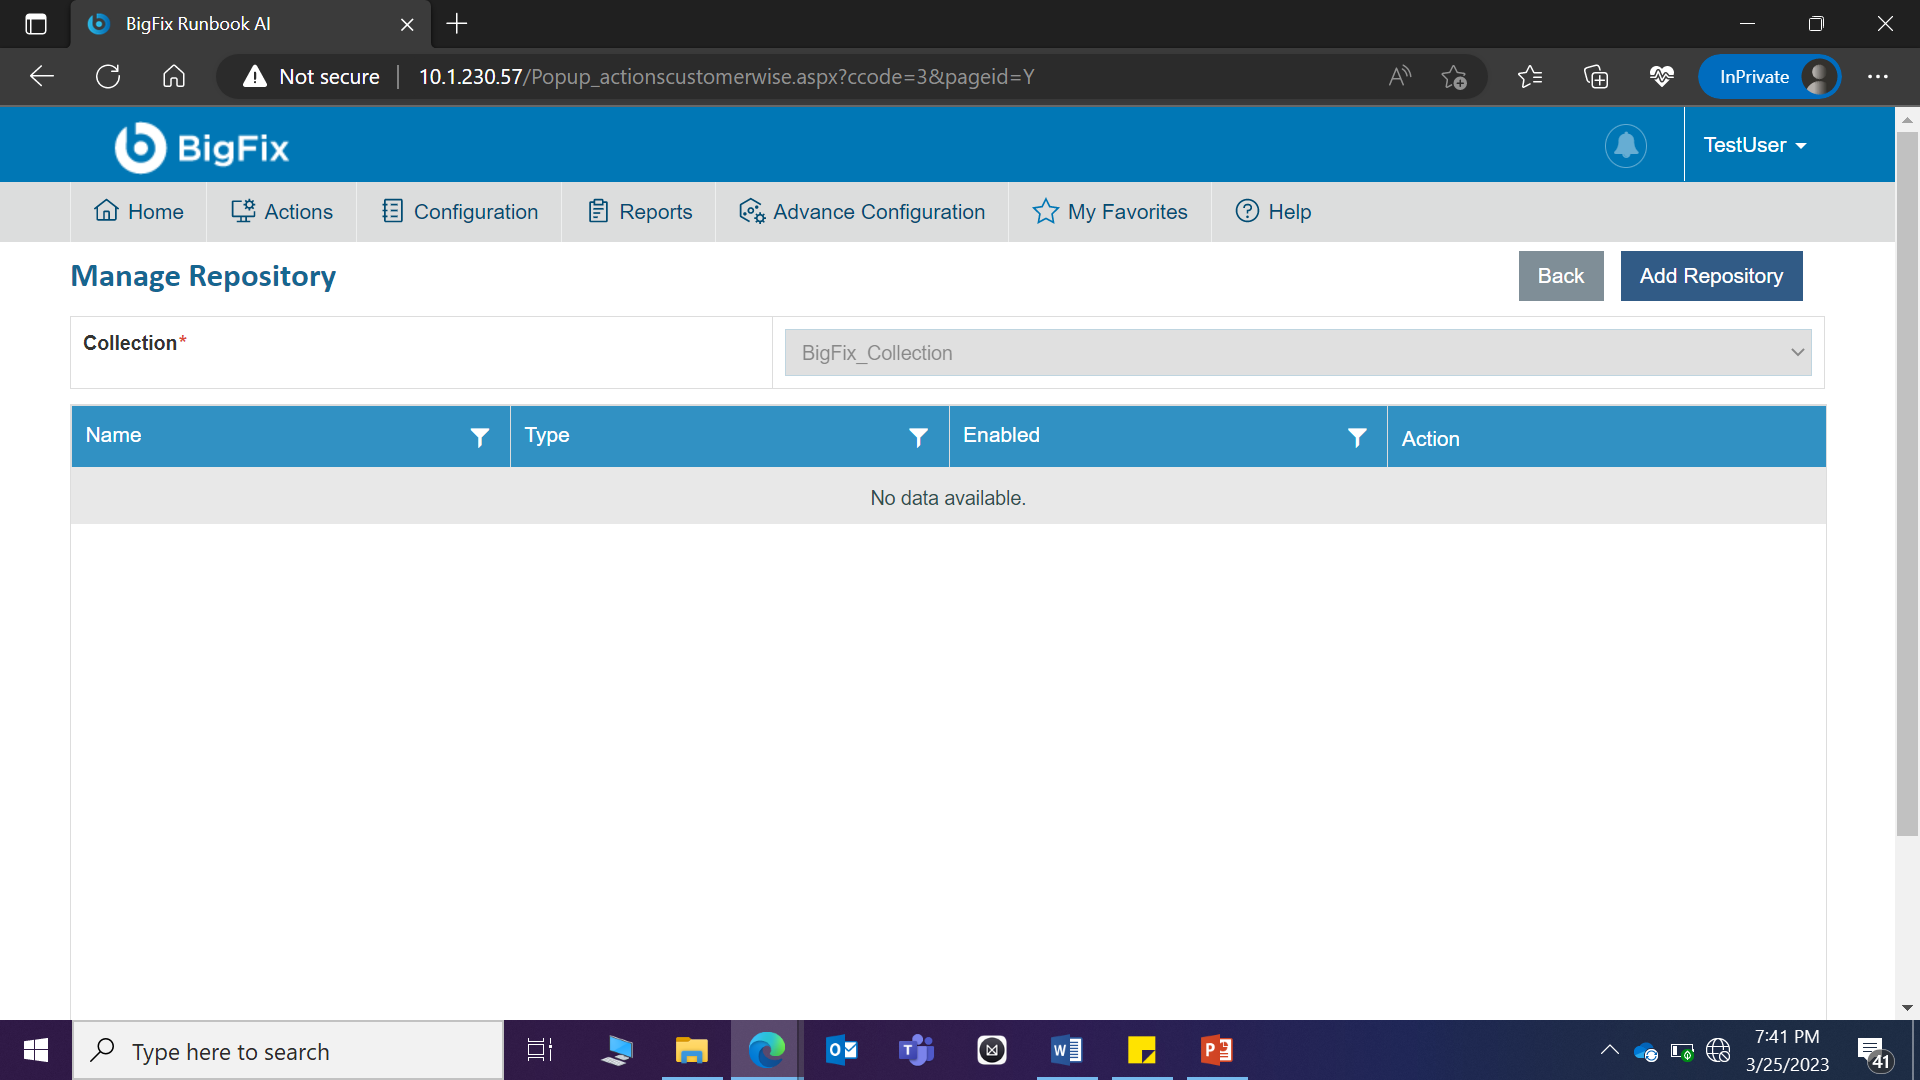
- To view the documents associated with a repository,
click
 next to the repository.
Figure 386. Figure - Manage Repository (Cont.) 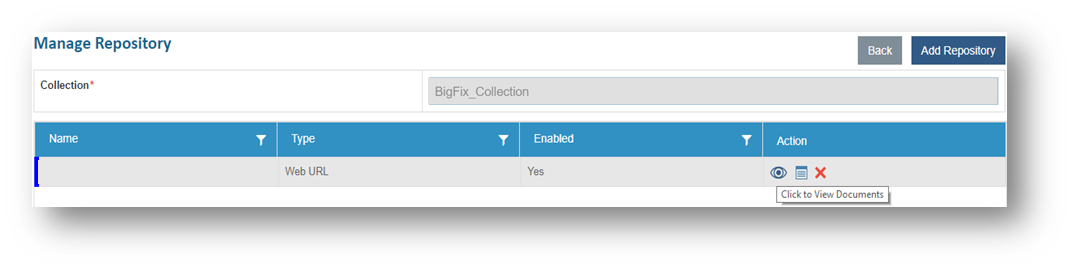
- To view the documents associated with a repository,
click
- The Document Summary page appears, displaying the Total Documents and Total
Processed Documents in a tabular view.
Figure 387. Figure - Manage Repository (Cont.) 
- To view the repository
status, click
 next to the repository.
Figure 388. Figure - Manage Repository (Cont.) 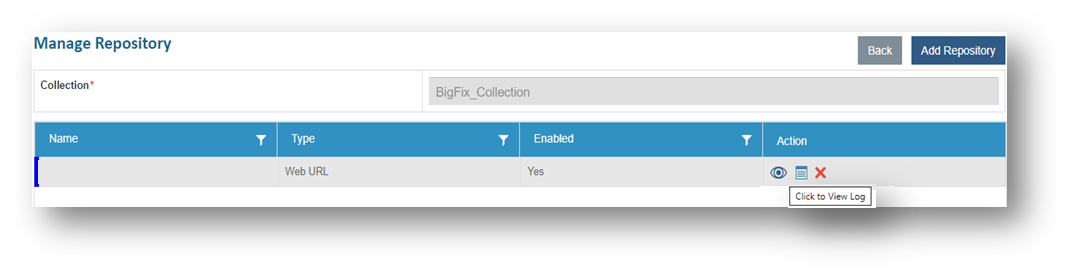
- To view the repository
status, click
- The Repository Status Log page appears and displays the status summary for each concurrent repository.
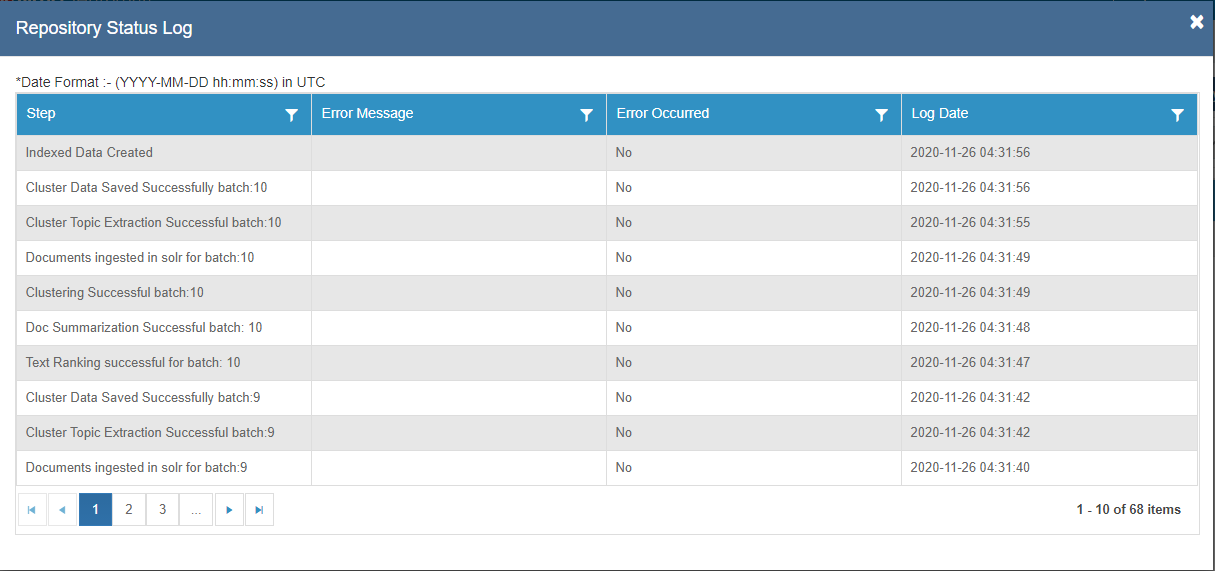
Add Repository
User can configure a repository in the collection by using the following steps:
- On the Manage Repository page, click Add Repository.
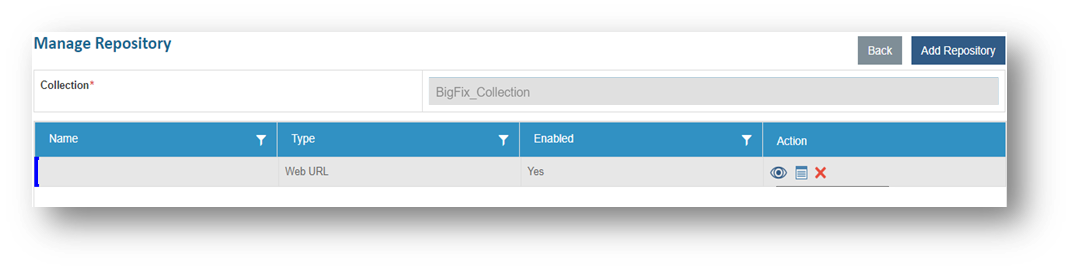
- It displays the following fields to fill in the appropriate details:
- The collection type is auto filled in the Collection field.
- Type the repository name in the Name field. This must be unique for each repository.
- Type the repository description in the Description field.
- Select Enable to enable repository auto update.
- Select Schedule Type.
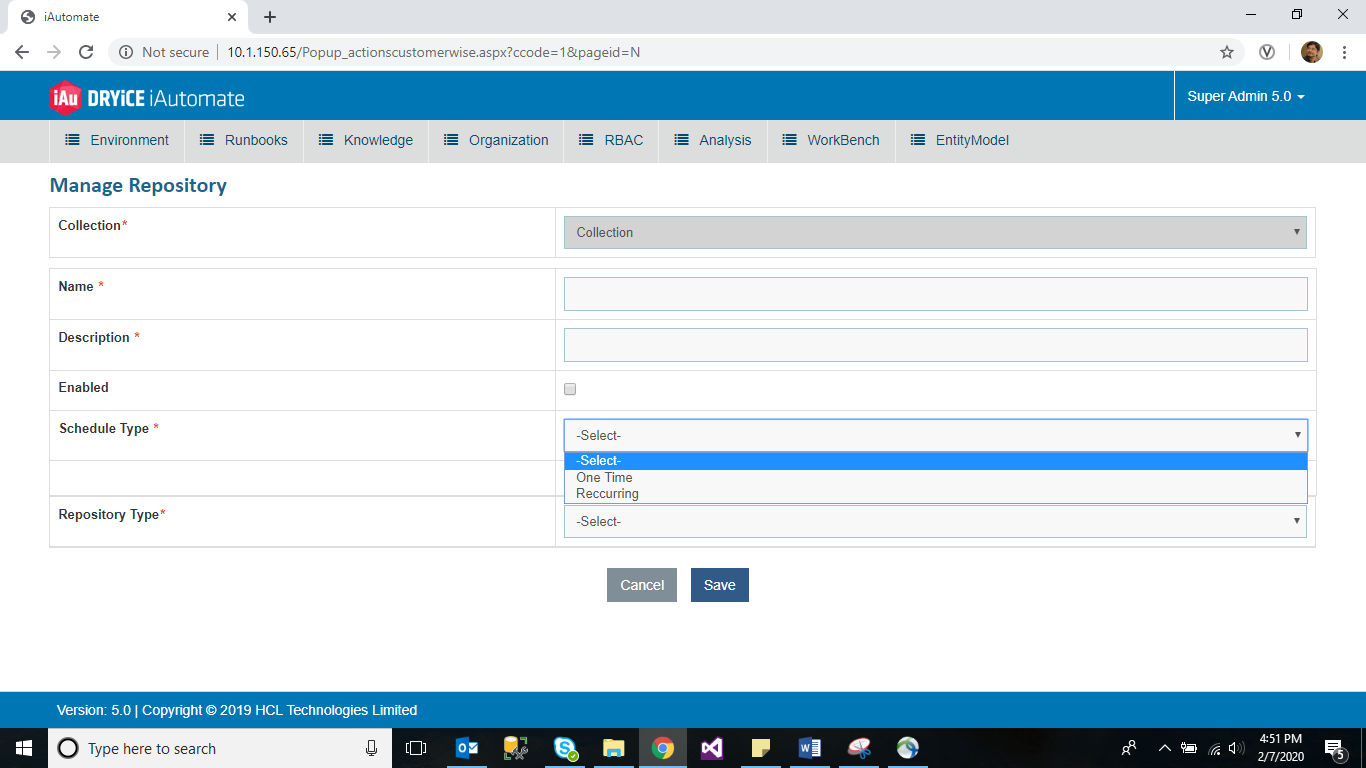
- To schedule the recurring update of repository, select the frequency interval in Second, Minute, Hour, Day, or Month and type the duration next to the Occurring Every field.
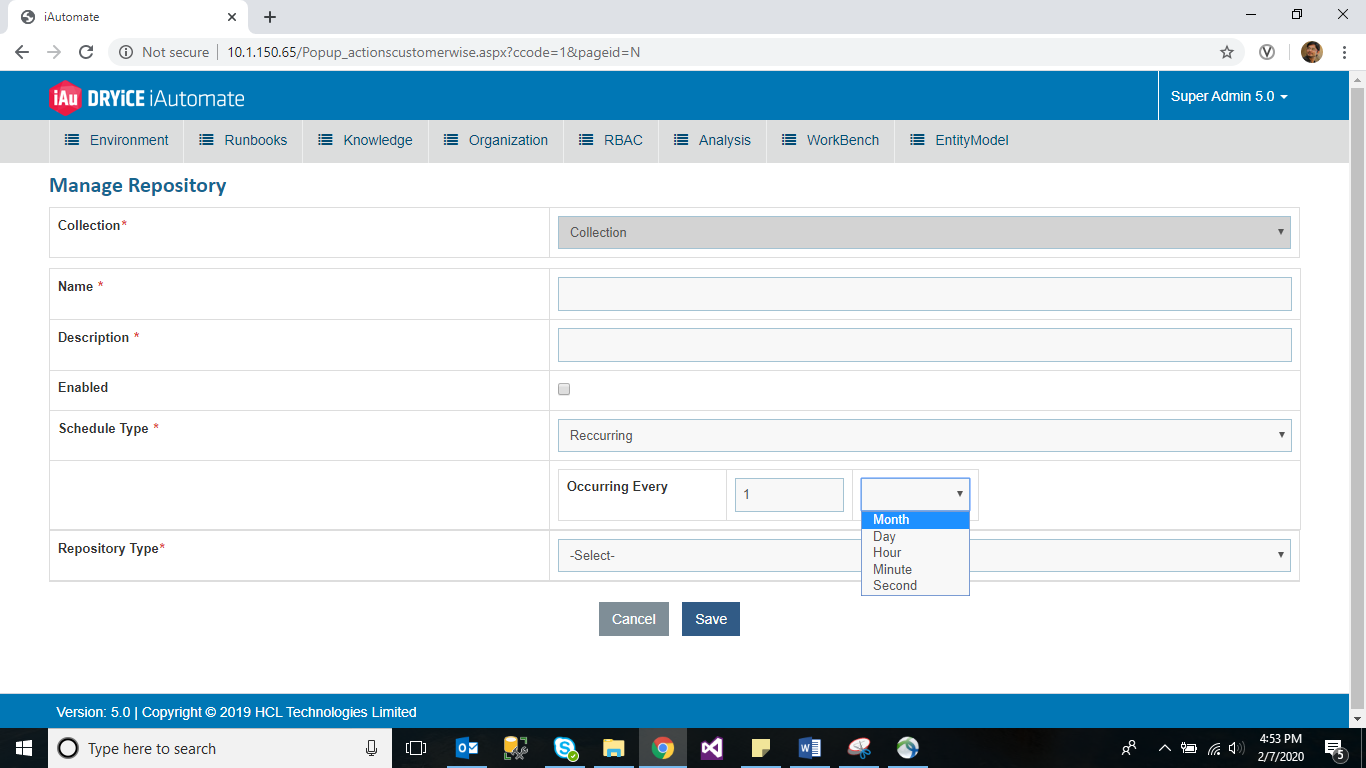
- Select the Repository Type to store data. The following types of repositories are available to store data:
Web URL
File Folder
Satori
ServiceNow
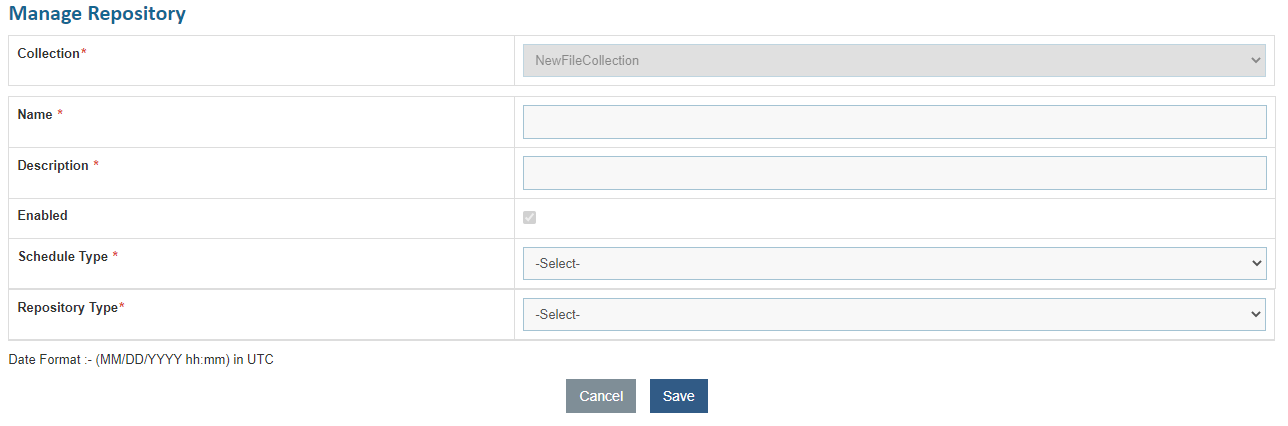
- Selecting the repository type displays the following fields.
- In case of Web URL repository type:
Type the root URL for the website to be crawled in the URL field.
Specify the level to which the documents are to be crawled in the Depth Level field.
Select Restrict Domain checkbox to filter for documents of the same domain as mentioned in the URL.
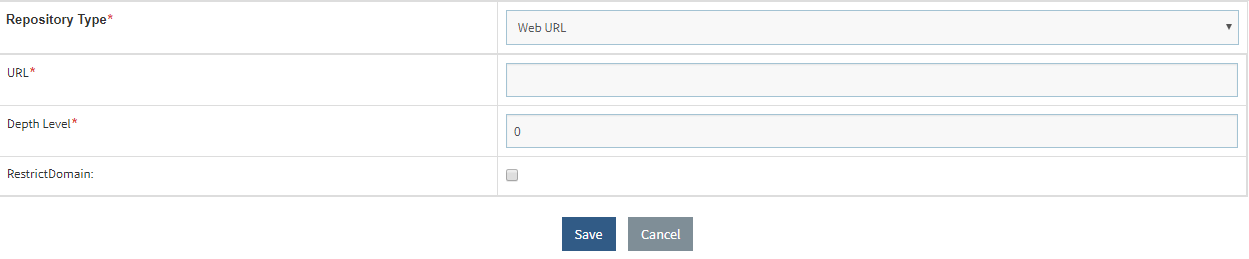
- In case of Folder Path repository type:
Specify a path in the local drive where the documents have been stored in the Folder Path field.

- In case of Satori repository type:
Type the URL of the selected repository in the Repository URL field .
Type the username and password (encrypted form) of the domain user with access to the repository in the UserName and Password field.
Type the domain name in the Organization Domain field.
Type the user ID in the UserId field.
Type the base URL of Satori in the Satori URL field.
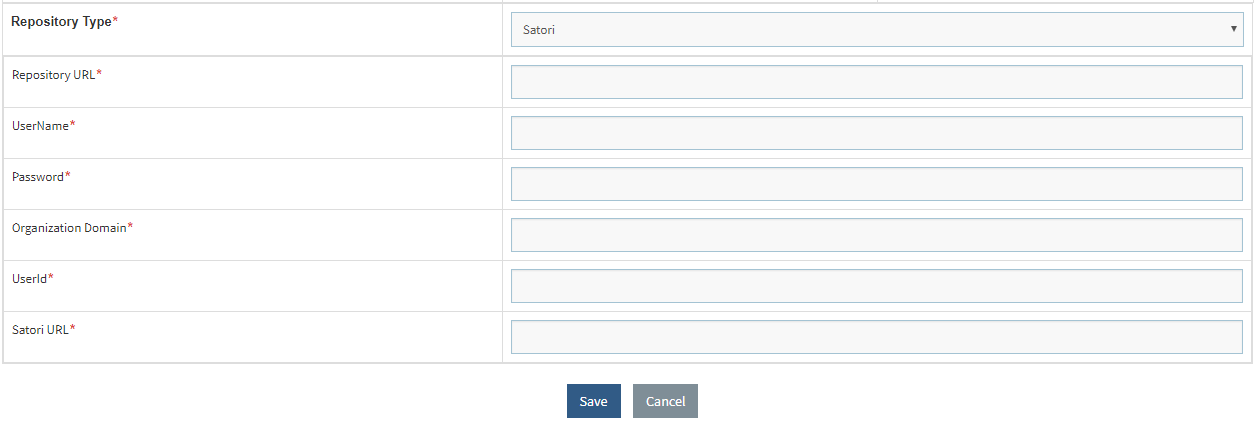
- In case of ServiceNow repository type:
Type the URL of the selected repository in the URL field .
Type the username and password (encrypted form) of the ServiceNow user with access to the repository in the UserName and Password fields.
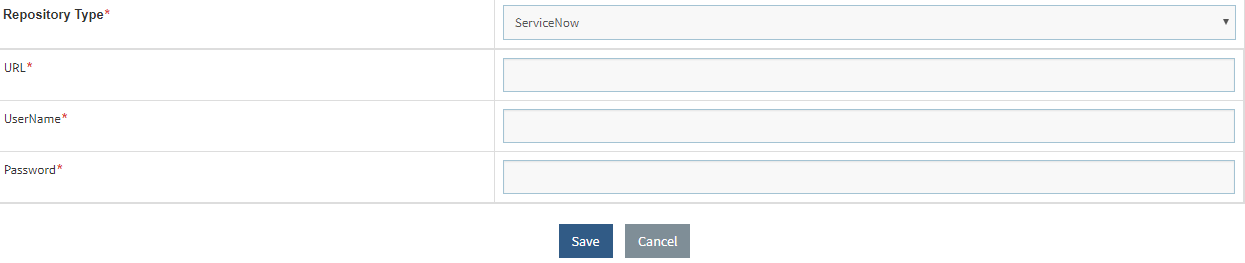
- Click Save.
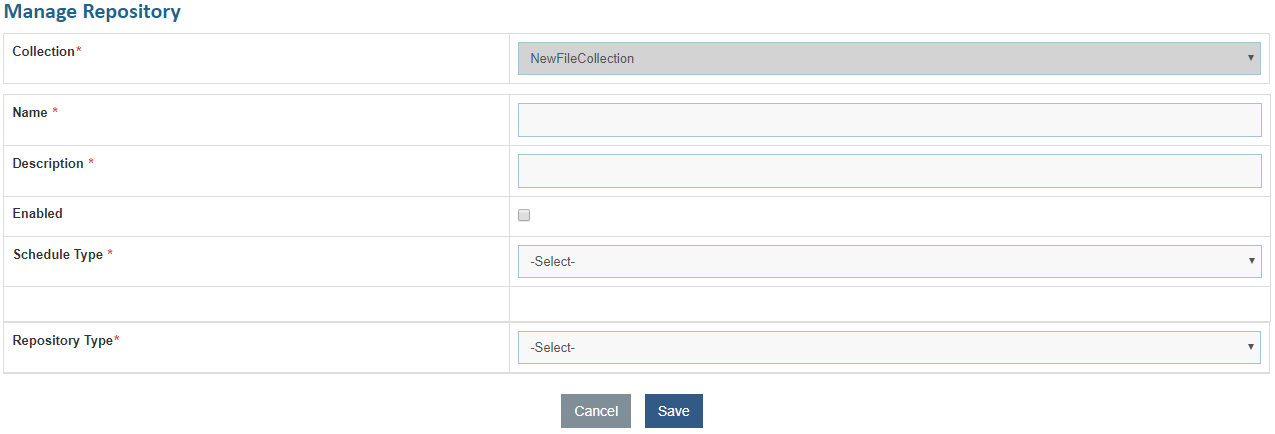
A confirmation dialog box appears.
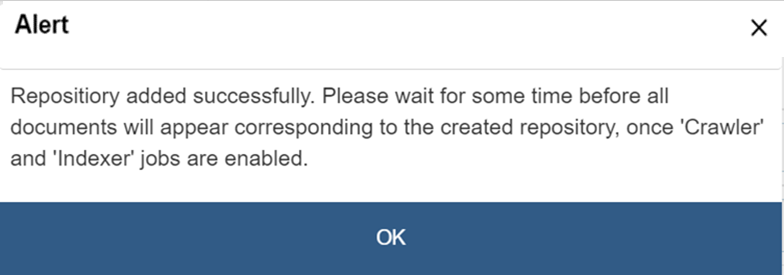
This adds the new repository and lists it in a tabular view.
Delete Repository
If user no longer wants a specific repository in the collection, it can be deleted from the repository.
To delete a repository from a collection by performing the following steps:
- On the Manage Repository screen, click
.png) corresponding to the repository that you want to
delete.
corresponding to the repository that you want to
delete.
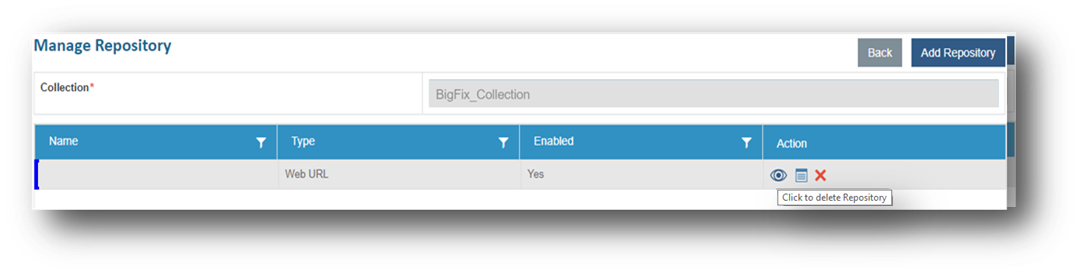
- Click OK to confirm deletion of the selected repository.
- A confirmation dialog box appears.
Map Generic Collection
After configuring the collections and repositories, user can map the generic collections to the organization.
To map generic collections, perform the following steps:
- On the main menu bar, click Advance Configuration->Knowledge and then click Map Generic Collection .
- The Map Generic Collections page appears.

- Select an organization from the list next to the Organization field. It lists the available collections in a tabular view.
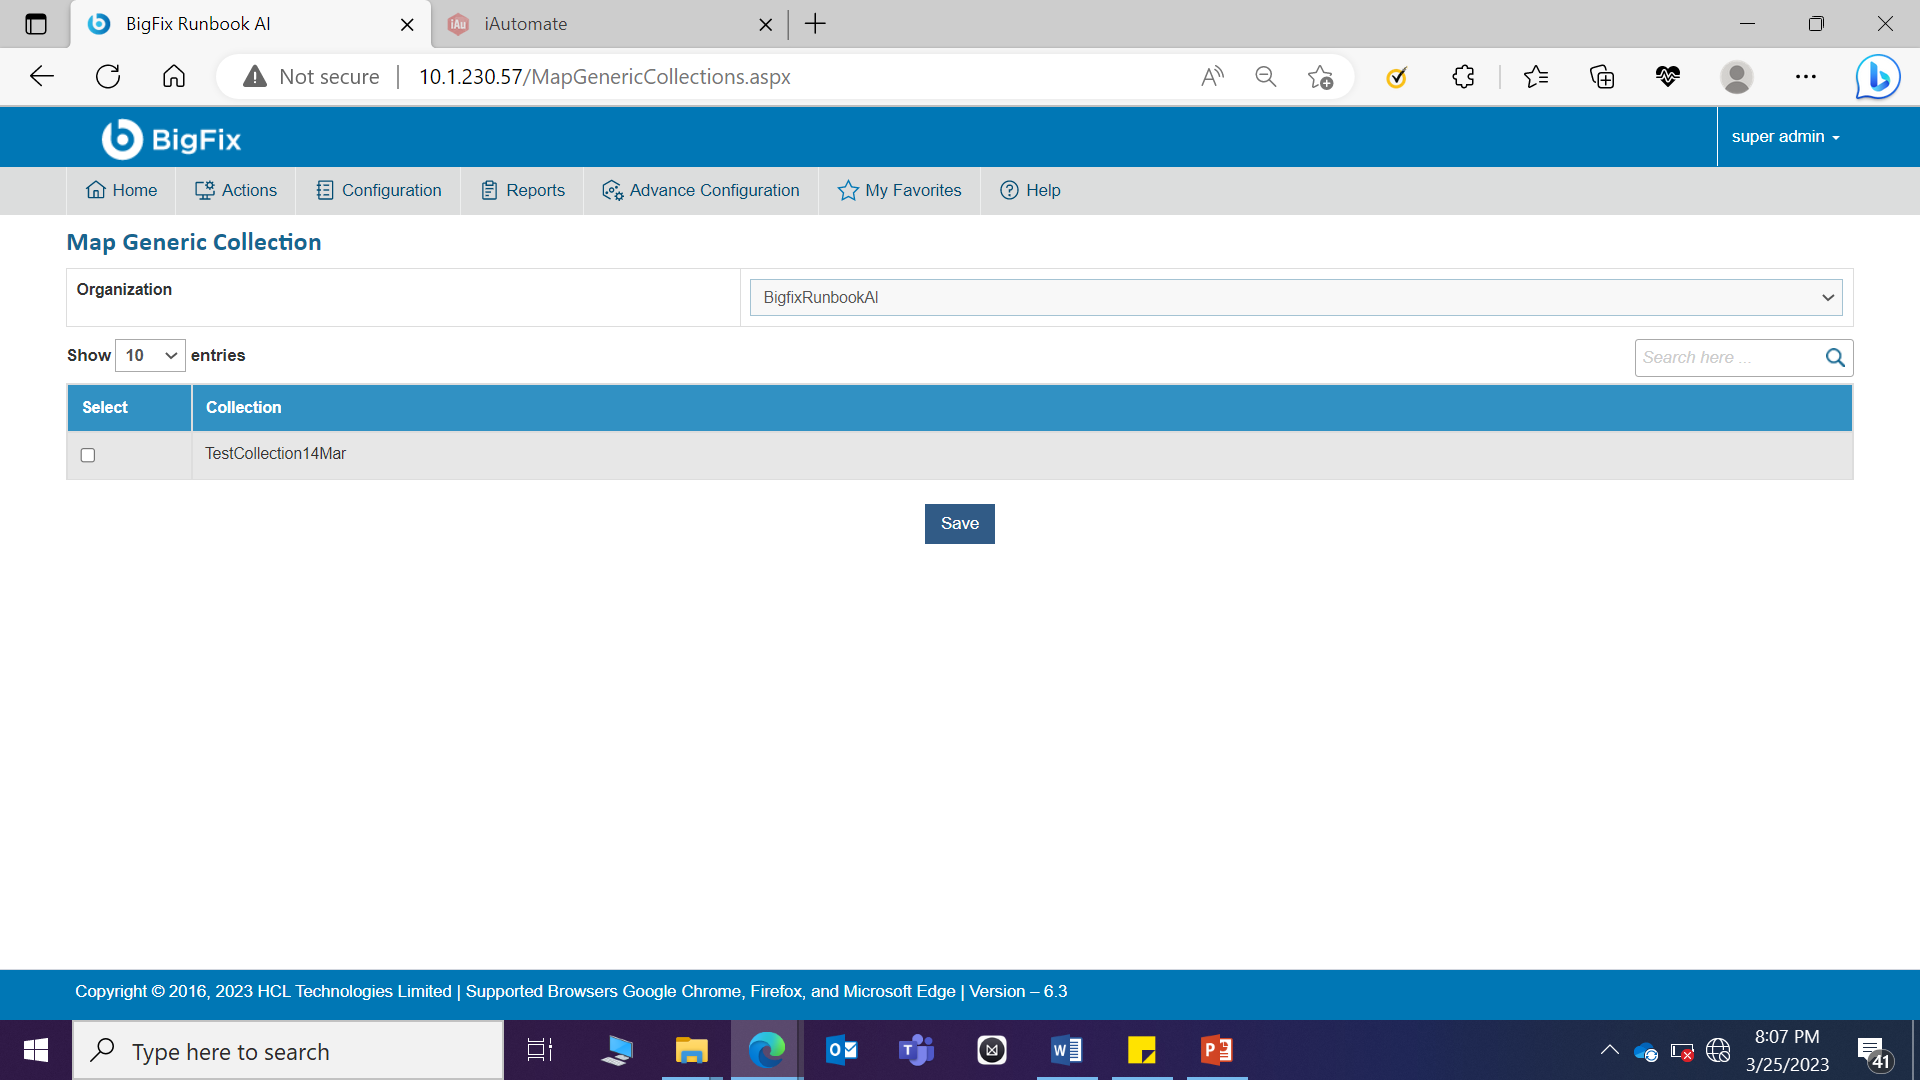
- Select the collections user wants to map with the selected organization. A confirmation dialog box appears.
- To save the settings, click Save.
Manage API/Domains (Basic)
Users with valid administrator credentials can manually create and manage domains using the BigFix Runbook AI admin console.
To manage domains, perform the following steps:
- On the main menu bar, click Advance Configuration->Knowledge.
- Click Manage API/Domains (Basic). The Manage API/Domains (Basic) page appears.

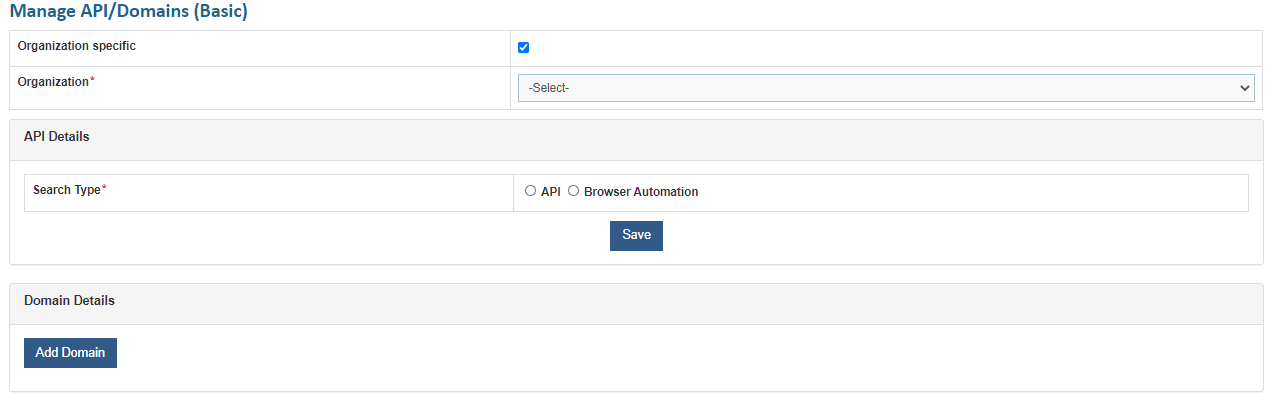
Based on whether Organization Specific checkbox is checked or not, the selected details will be considered accordingly i.e., if checked then the entered details will be considered for that selected organization only else it will only apply to super admin and not to any organization.
Here user can select whether knowledge articles will be fetched based on API being entered or browser automation. If browser automation is selected, then the lists of the available domains in a tabular view will be considered. It also enables user to add a new domain using the Add New button and delete existing domains.
If API is selected, then it asks to enter the API key and search engine ID that will be used to fetch the data.
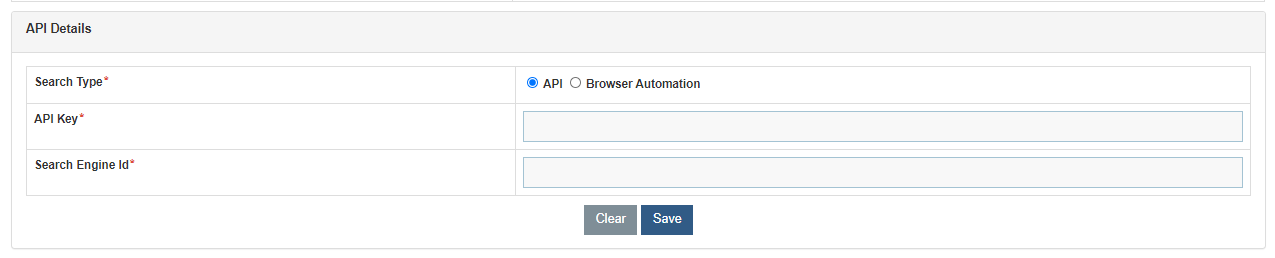
Add New Domain
User can add a domain in an environment by performing the following steps:
- On the Manage API/Domains page, click on Add Domain button.

- A popup appears.
Figure 410. Figure -Add New Domain (Cont.) 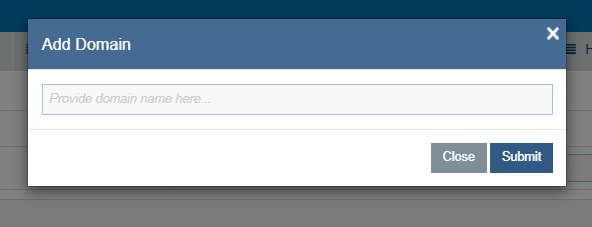
- Enter domain name and click on Submit. A dialog box will appear.
Figure 411. Figure - Add New Domain (Cont.) 
- The added domain will appear in the grid as below.

If a domain not needed in the environment, click .png) corresponding to the domain to delete it.
corresponding to the domain to delete it.
Knowledge Analysis
This section provides the user with an analytical view of the document repository. This includes:
- Cluster View – provides a clustered view of the documents. Categorizes the documents into clusters based on context.
- Document Similarity View – recommends similar documents based on the currently viewed document for user’s reference.
- Topic/Concept view – provides a categorization of documents based on the topics identified from within the documents
To manage knowledge analysis, perform the following steps:
- On the main menu bar, click Advance Configuration->Knowledge and then click Knowledge Analysis.
- The Knowledge Analysis page appears.
Figure 413. Figure - Knowledge Analysis 
- Select the Organization for which you want to visualize the data and then select the Collection from where you want to fetch the data.
- Select the corresponding Repository from the drop-down list.
- Click Search.
- This displays a clustered view of the selected document repository. The left pane displays the cluster, and the cluster topic is displayed as a legend in the right pane. The numbers appearing on each cluster represent the number of documents listed in the selected cluster.
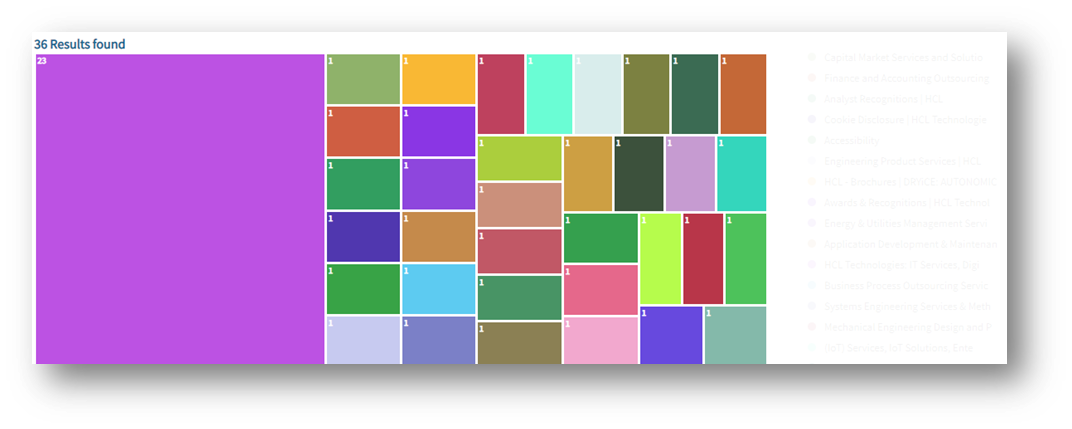
Selecting a cluster lists the documents associated with the selected cluster, including the Document Title, Source URL of the documents, and the Document Summary.
Selecting a document title displays the document information including relevant Topics and Tags, Summary, and the List of all similar documents along with their similarity percentage.
You can also get the topic view for all documents for the selected cluster by clicking
 on the search result bar.
This view represents relevant Topics or in Terms of Cluster arranged by relevance. This also allows you to find documents for a particular topic.
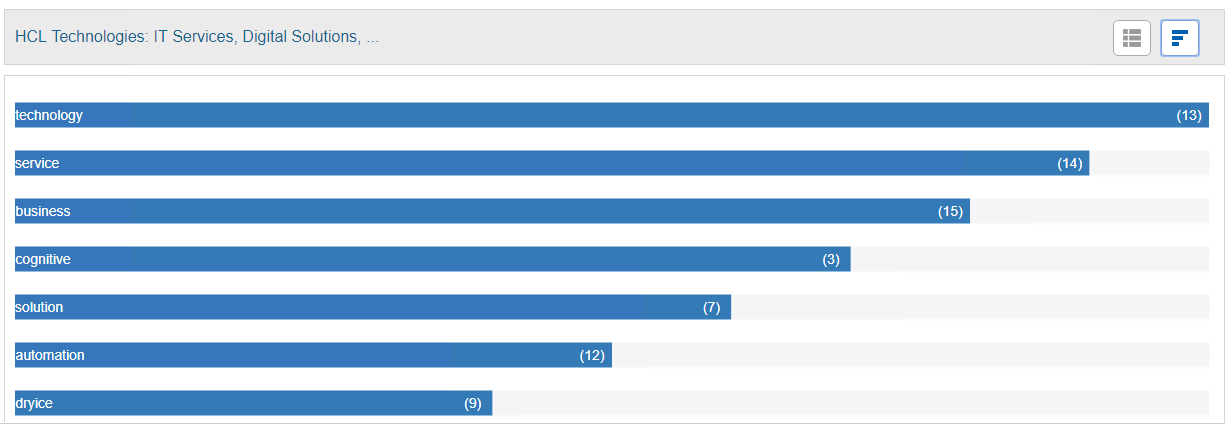
The numerical value of each term represents the frequency of occurrence of a particular term or topic in a cluster.
Selecting Term lists all the available documents containing the selected term.
All fields marked with an asterisk (*) are mandatory. .
Knowledge Search
This section provides the user with the documents fetched for any description.
To use knowledge search, use following steps:
- On the Advance Configuration->Knowledge menu, click on Knowledge Search. Below screen appears:

- Select the organization and then enter the desired description and click on
 Search icon.
 - The relevant data would appear as below:
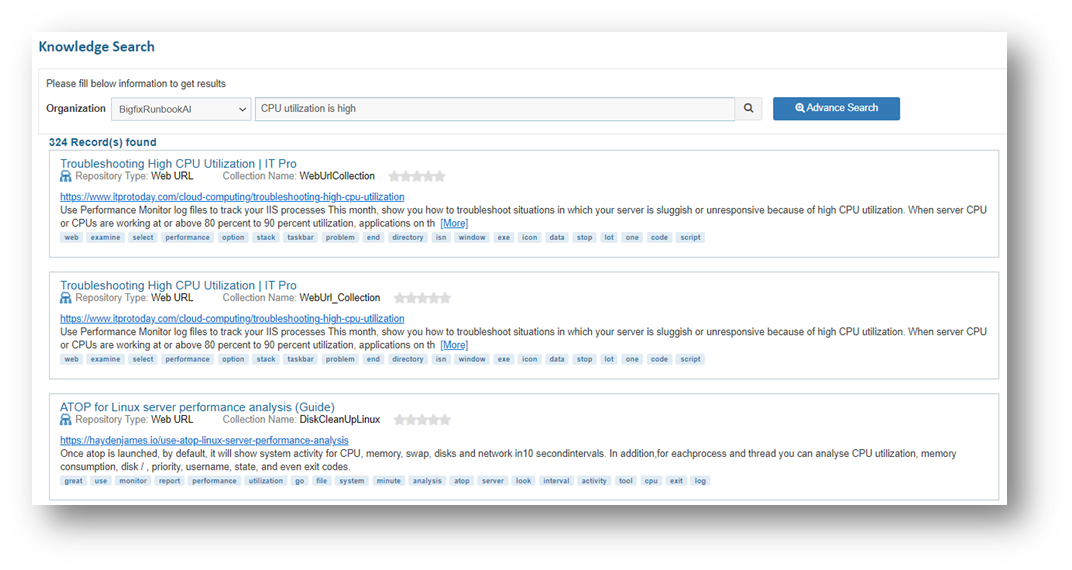
- User can apply additional filters for the search. For that, click on Advance Search. A popup will be opened.

- From the condition dropdown, select any of the conditions:
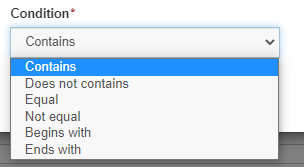
- Enter Search Term and select condition as AND or OR.
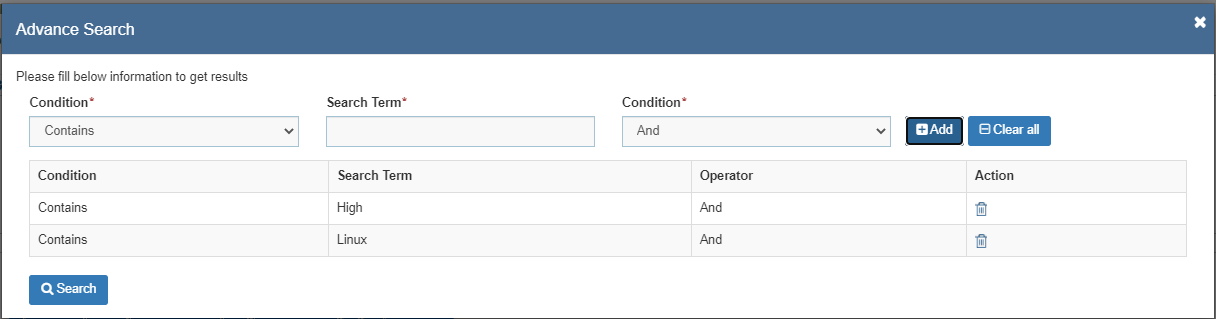
- Add all the conditions and click Search. Now the data will be filtered as per the advance search conditions.
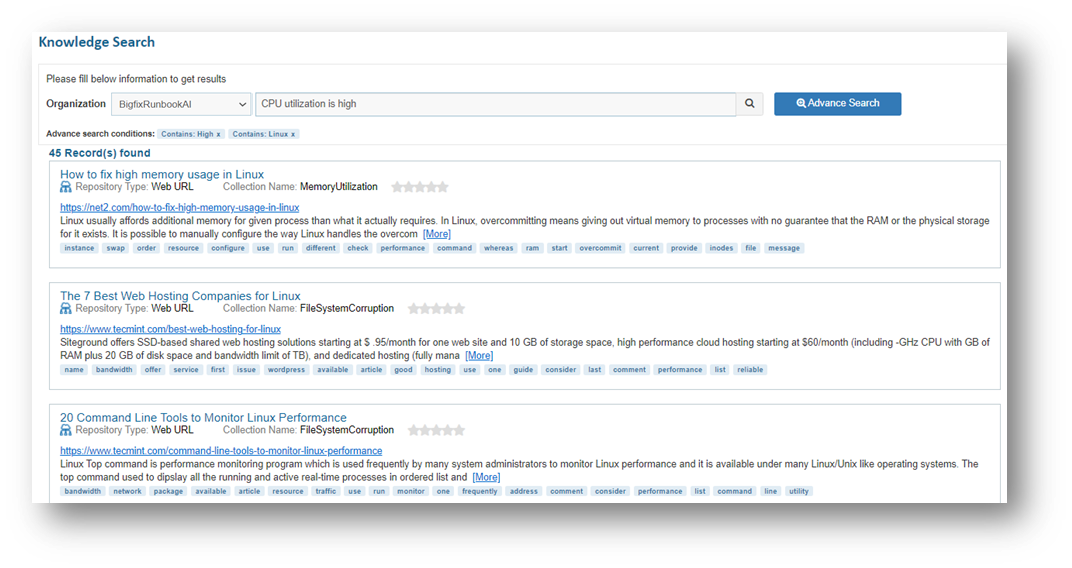
- User can click on any of the links to get the detailed information.
- User can also give rating to any of the fetched links whatever suits him the right.

- A confirmation dialog box opens.
Knowledge Assistant
This section provides the user with the relevant knowledge recommendations based on the ticket descriptions. This includes:
Related Tickets – This section provides information about all the similar tickets, created / resolved in the past and related details.
Related Articles – This section provides all the relevant knowledge articles from multiple sources, based on the ticket description, to the user. The data sources from where this information will be retrieved, depends on the configuration in your environment.
To use Knowledge Assistant, perform the following steps:
- On the main menu bar, click Advance Configuration->Knowledge. Click on the Knowledge Assistant menu.
- Select the Organization for which you want to visualize the data and then select the Module from where you want to fetch the data.

- Enter the Ticket Number.
- Click Search.

- Click on Related Tickets.
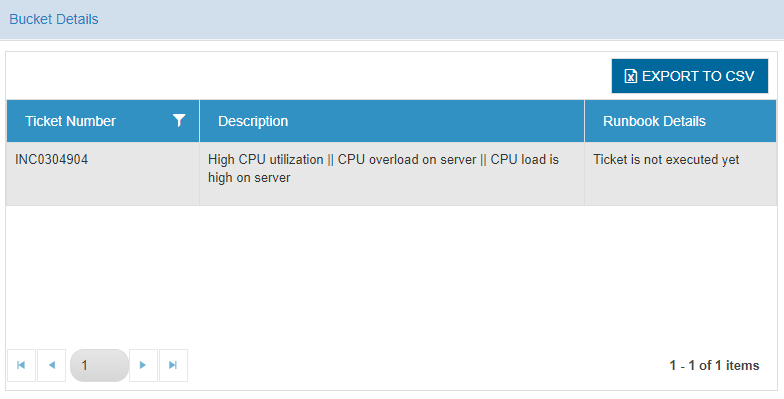
- Click on Related Articles.
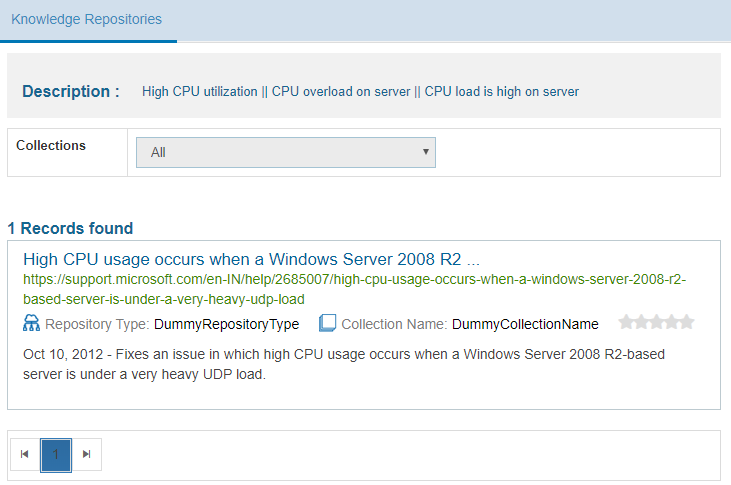
WorkBench
WorkBench analysis allows user to build different versions of the recommendation and unique models for an organization. WorkBench provides a UI to capture SME feedback for results received for these models. If the SME considers a particular version of the model is about 80% to 90% accurate, then user can deploy the same model in a production environment. User can use the deployed model for future clustering of tickets and recommendations.
To run and build different versions of the same model (for ticket clustering and Runbook Recommendation), the SME defines the configurations, also called as hyperparameters for each version. SMEs can use these models to test the current unique and recommendation models anytime and update them as required.
It is recommended to perform the workbench analysis before deploying a unique and recommendation model in the production environment.
- To manage workbench analysis, on the main menu bar, click Advance Configuration-> WorkBench. The drop-down lists the following options:
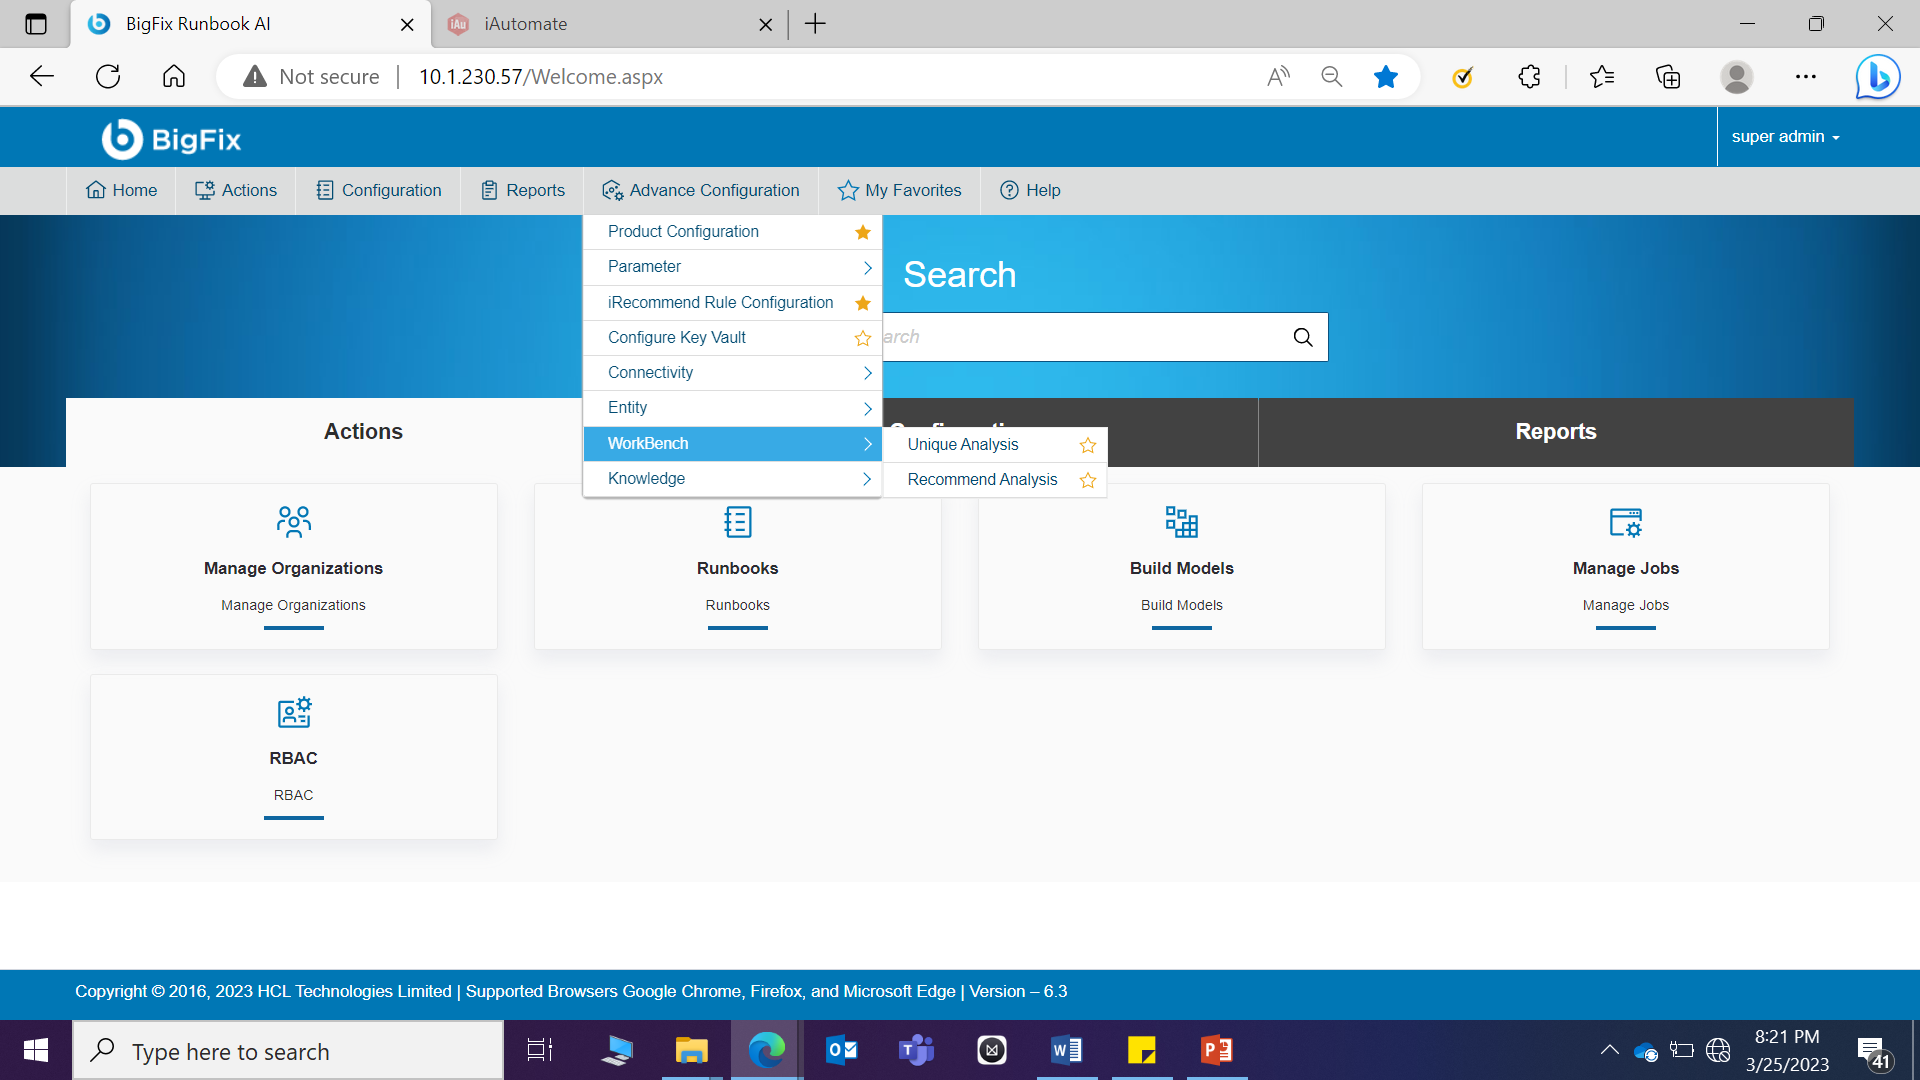
Unique Analysis
Unique analysis modifies the hyperparameters (or configuration) of the iUnique module to increase accuracy in the customer specific environment.
- To manage workbench unique analysis, on the main menu bar, click Advance Configuration-> WorkBench and then click Unique Analysis. The Unique Analysis page appears.

- This lists the available unique analysis types in a tabular view which enables user to add new iterations to the existing analysis, add new unique analysis, and view, edit, or publish the existing unique analysis.
User can only perform one unique analysis for a single organization at one time. However, you can run multiple analyses for different organizations simultaneously.
Add New Iteration
If the existing configuration (or hyperparameters template) of unique analysis do not provide the expected results, you can add multiple configurations (or hyperparameters template) to get better results.
To add a new iteration, perform the following steps.
- On the Unique Analysis page, click Run New Iteration.

- On the Iteration page, select Hyperparameter Template from the drop-down menu, and then click Run.

To create a new hyperparameters template, see Hyperparameter Configuration.
- The confirmation dialog box appears.
Figure 435. Figure - Workbench Unique Analysis 
- This adds the iteration and appears at the bottom of the list in a grid below.
.png)
Add New Unique Analysis Type
User can add a new workbench unique analysis type for an organization by performing the following steps.
- On the Unique Analysis screen, click Add New Analysis.
.png)
- The Upload WorkBench Data page appears. User can define general attributes for the new analysis on this page. Attributes must be set for fields marked with an asterisk (*) to appropriate values for environment before creating an analysis.
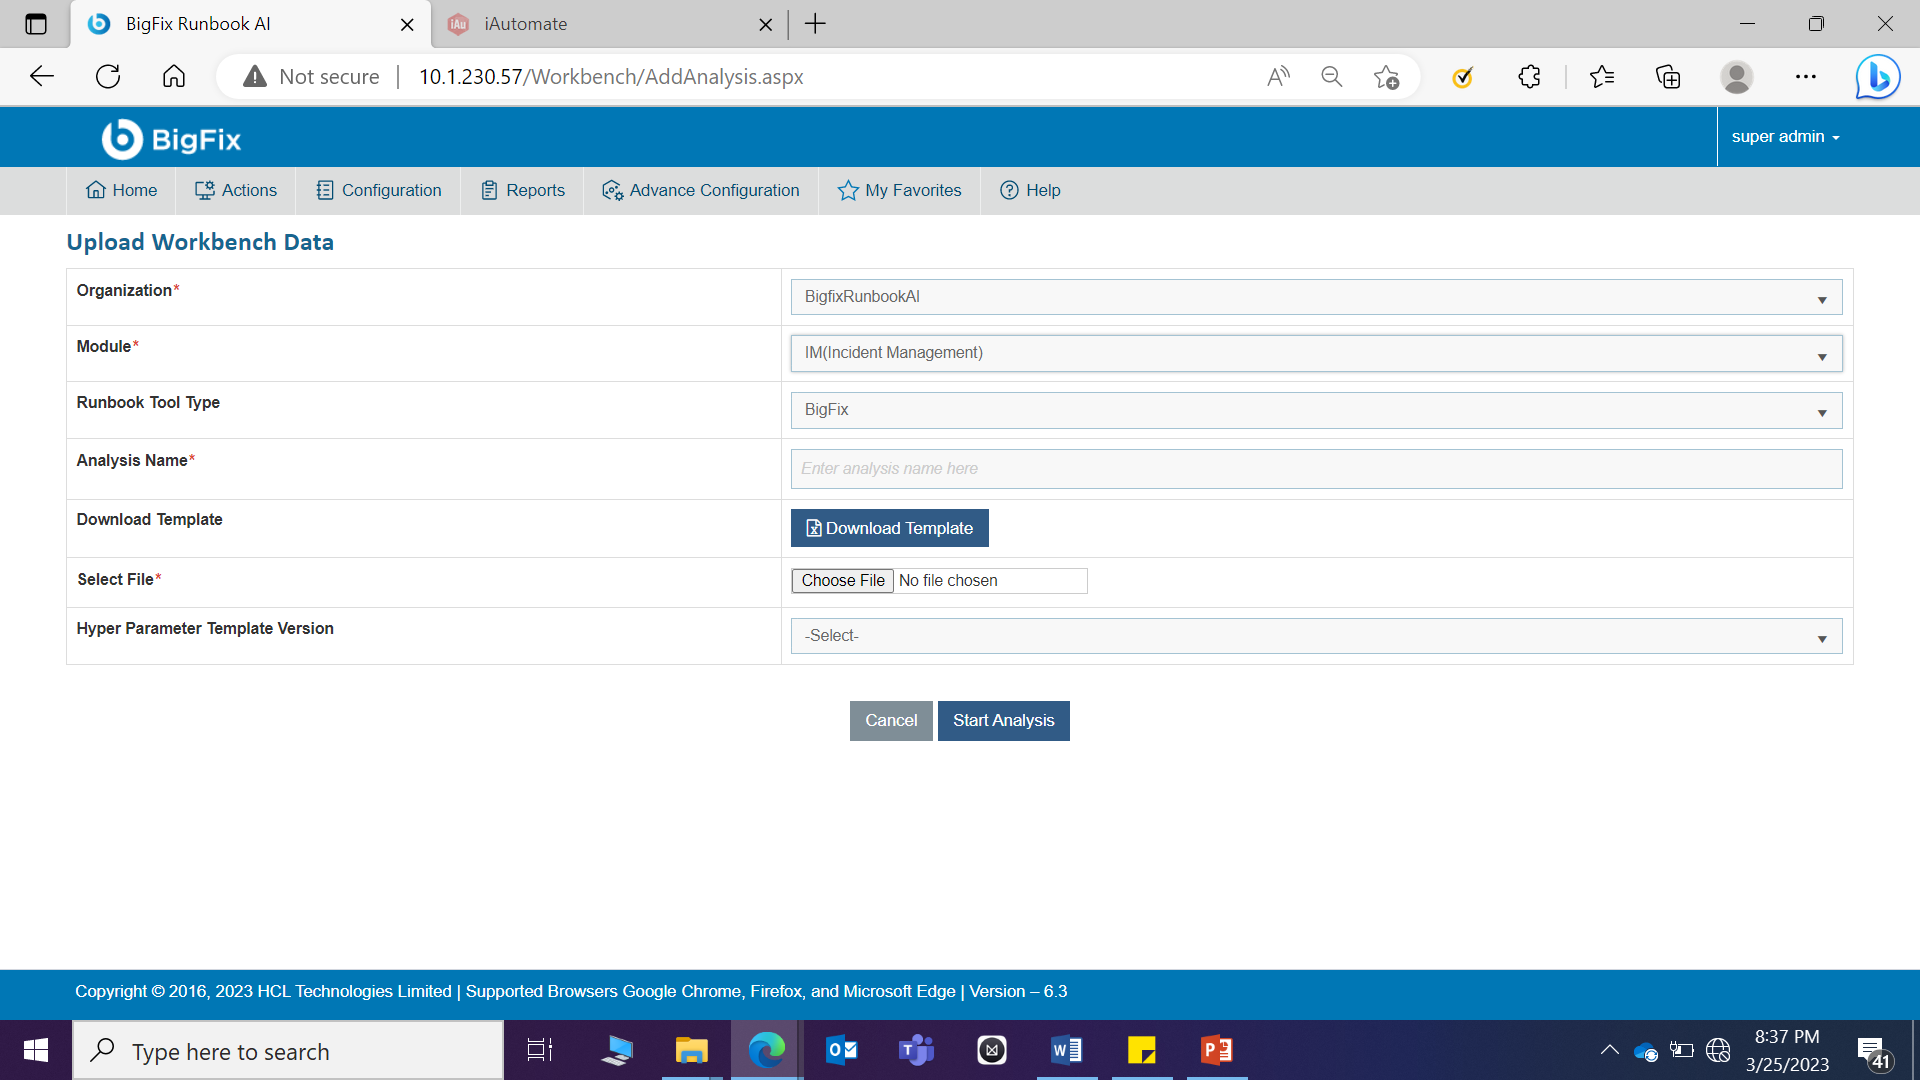
User can create a dummy organization using Add Mock Organization.
- Select the organization from the list of organizations available in Organization field. You can also create a mock organization using the following steps:
- Select Add Mock Organization from the drop-down list of the organizations, and it will prompt you to type the Mock Organization name.
- Click Save. This adds the new mock organization and appears in the Organization drop-down list.
- Select a module from the list of modules available in the Modules field.
- Select Runbook Tool Type from the list of available tool types in dropdown.
- In the Analysis Name field, type the unique name for the analysis to be created.
- Click Download Template to download the CSV template to upload analysis details.
- Fill the details in the downloaded template and click Choose File to upload the updated CSV template.
- Select the hyperparameter template version from the templates available in the Hyperparameter Template Version field.
It lists all the Hyperparameter Templates added in Add New Template.
- To start a unique analysis, click Start Analysis.
On clicking Start Analysis, one job is created for Unique Analysis and another for Recommendation Analysis. Newly added analyses are listed on the Manage Jobs page.
- To enable a job to view analysis, go to Manage Jobs .
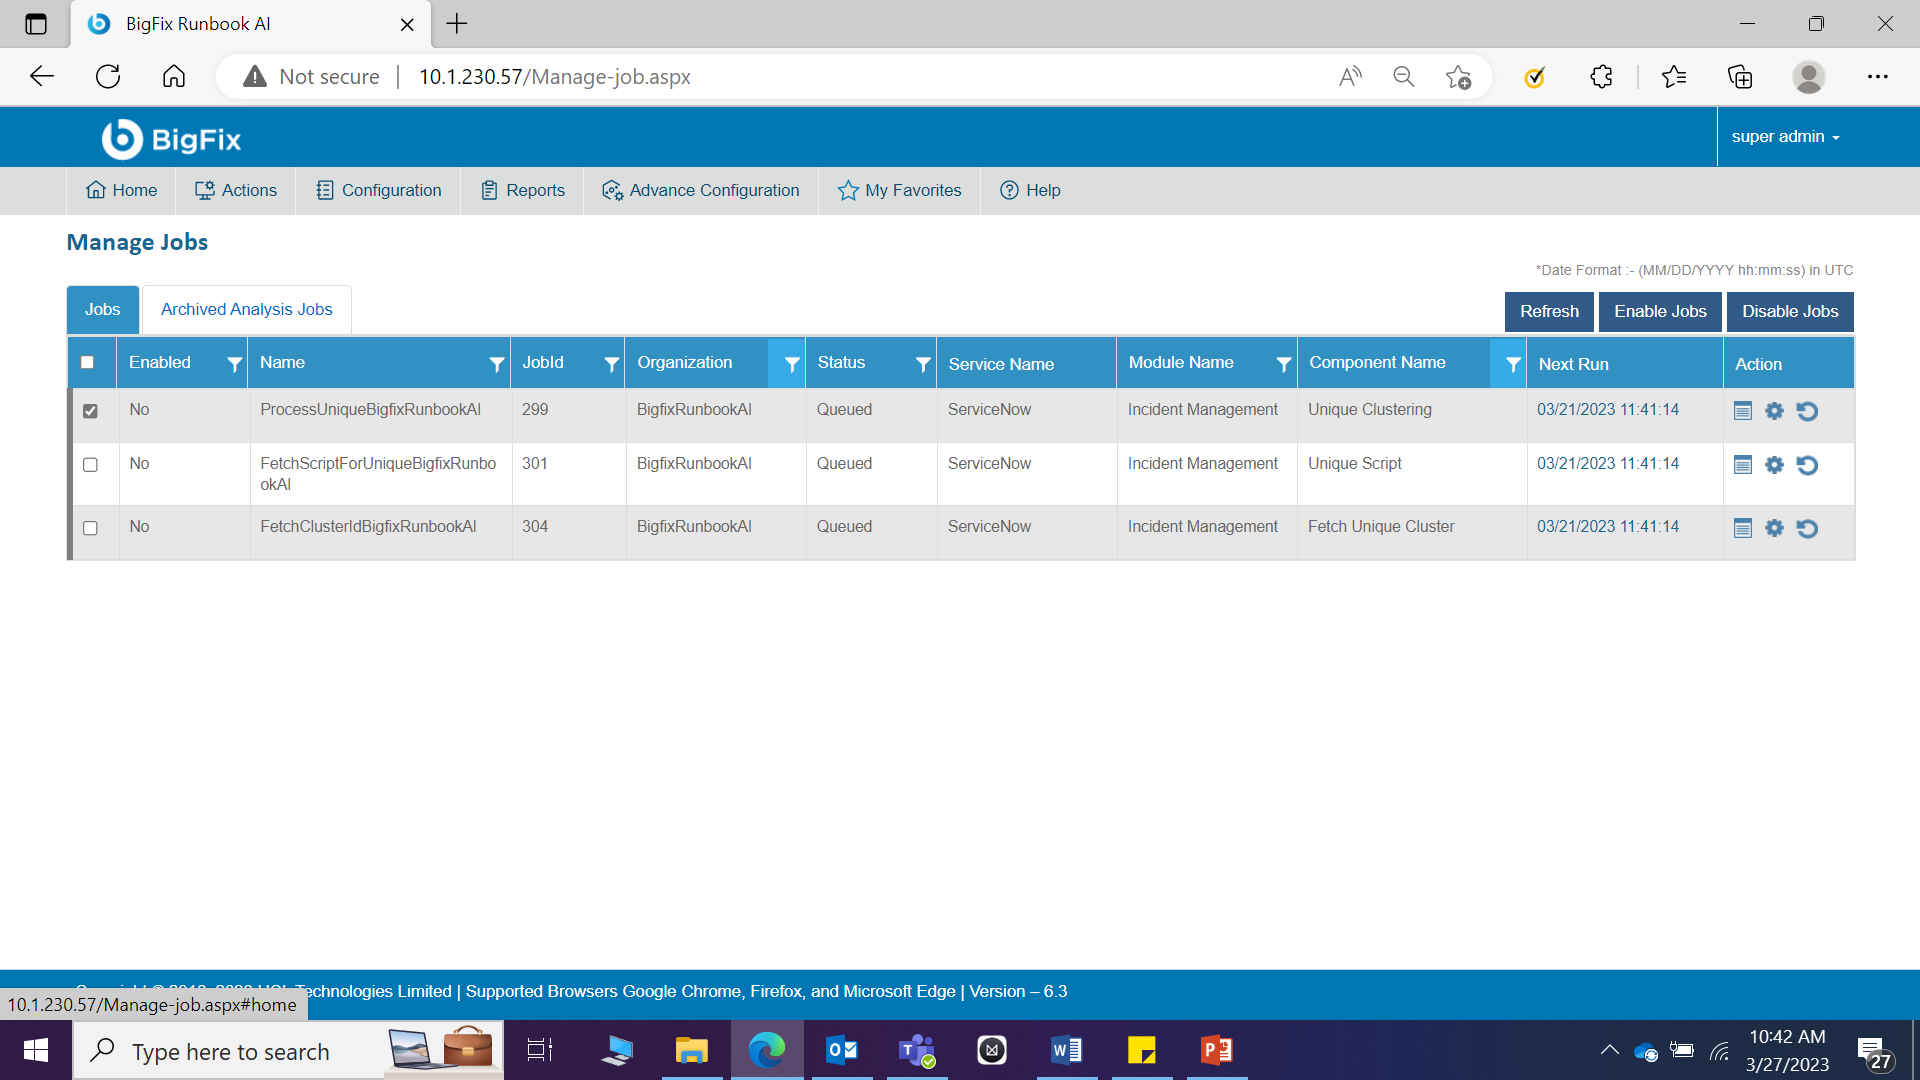
- Select the newly added job for unique analysis with the status as Queued and then click Enable Jobs. A confirmation dialog box appears.
- This adds the analysis and lists it in on the Unique Analysis page with an
In-Progress status.
Figure 443. Figure - Add New Unique Analysis (Cont.) .png)
- After the unique analysis is completed, the status changes to Pending
Verification. The SMEs can now validate the results.
Figure 444. Figure - Add New Unique Analysis (Cont.) .png)
- To analyze the added unique analysis data, click
 next
to the analysis to be verified.
next
to the analysis to be verified. - This auto fills the data available in the template of the selected analysis and allows user to view, edit, or publish the analysis.
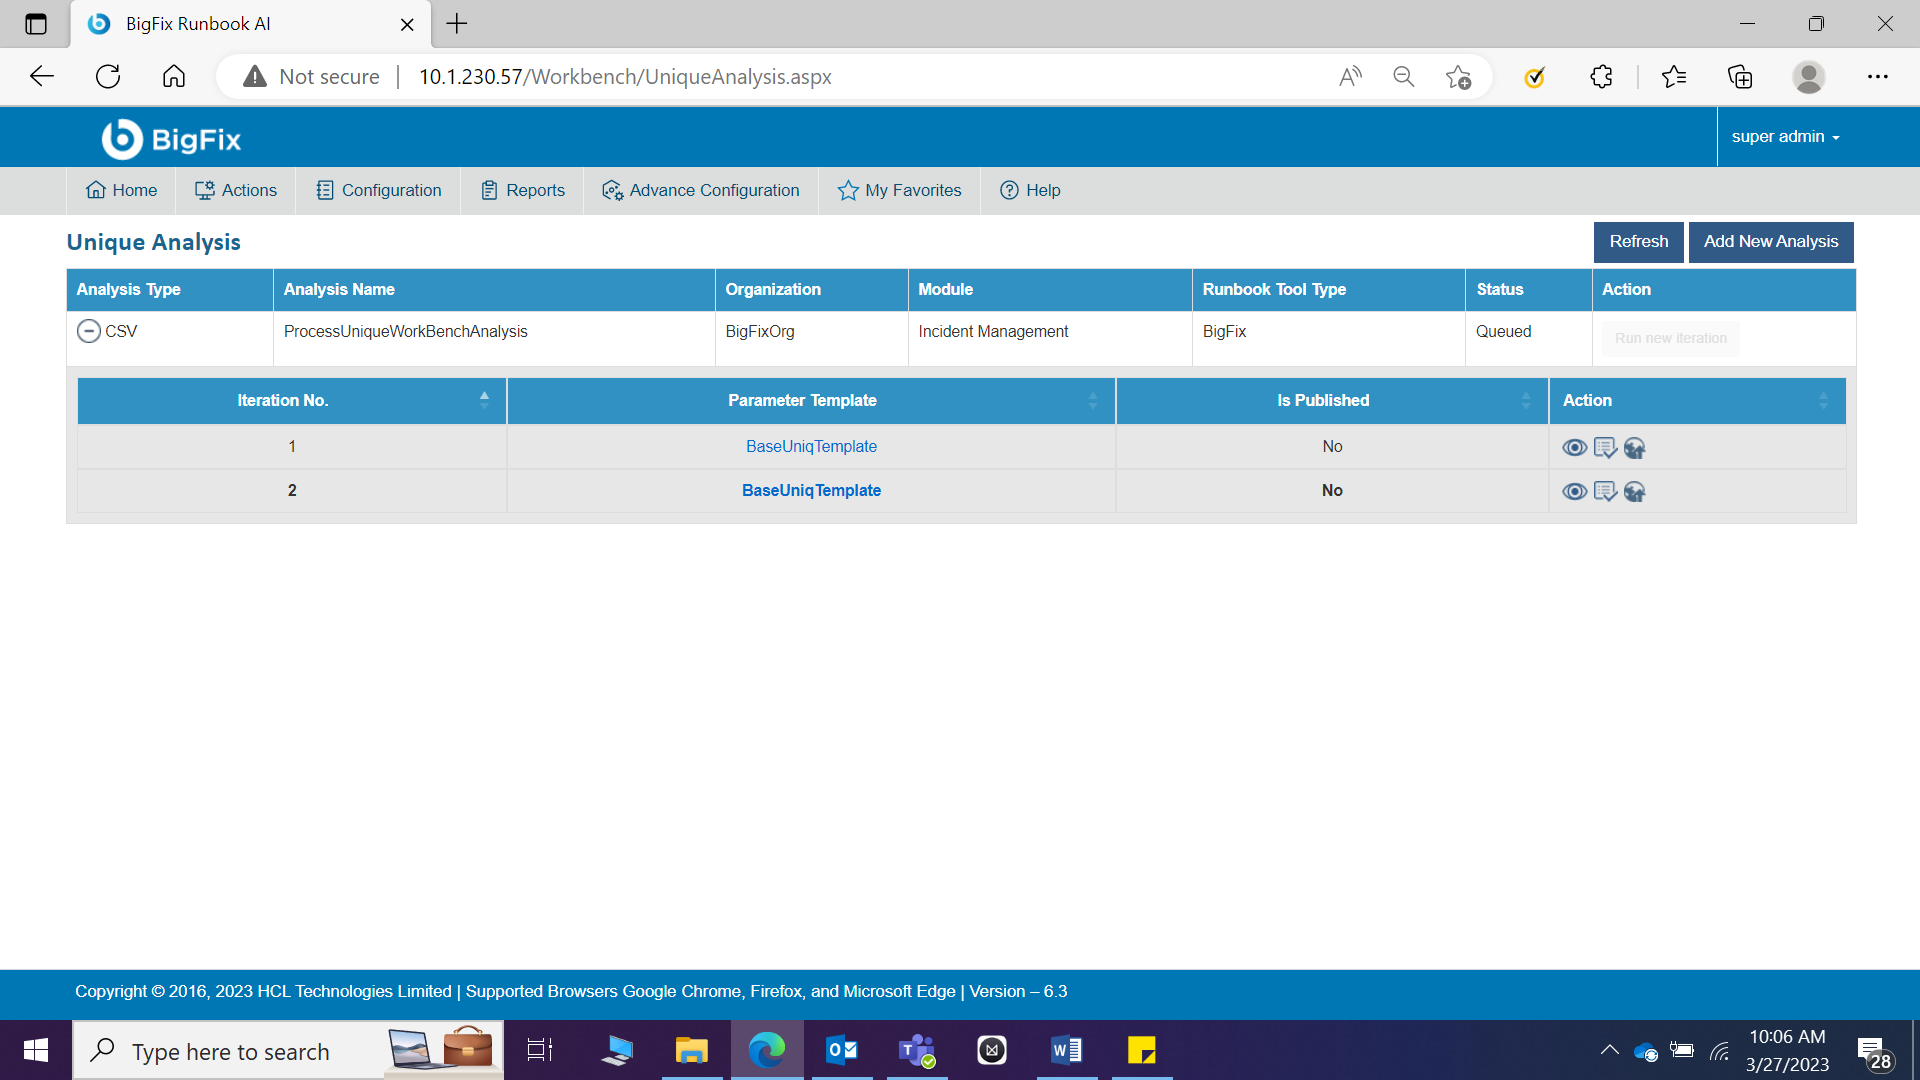
View Unique Analysis
User can view the information about an analysis that has already been defined in the workbench.
To view a unique analysis, perform the following steps:
- On the Unique Analysis page, click
.png) next to
the analysis user wants to view.
next to
the analysis user wants to view.

The WorkbenchVerifyTicket page appears where user can edit the required Similarity Score to view the canonical summary of the analysis.
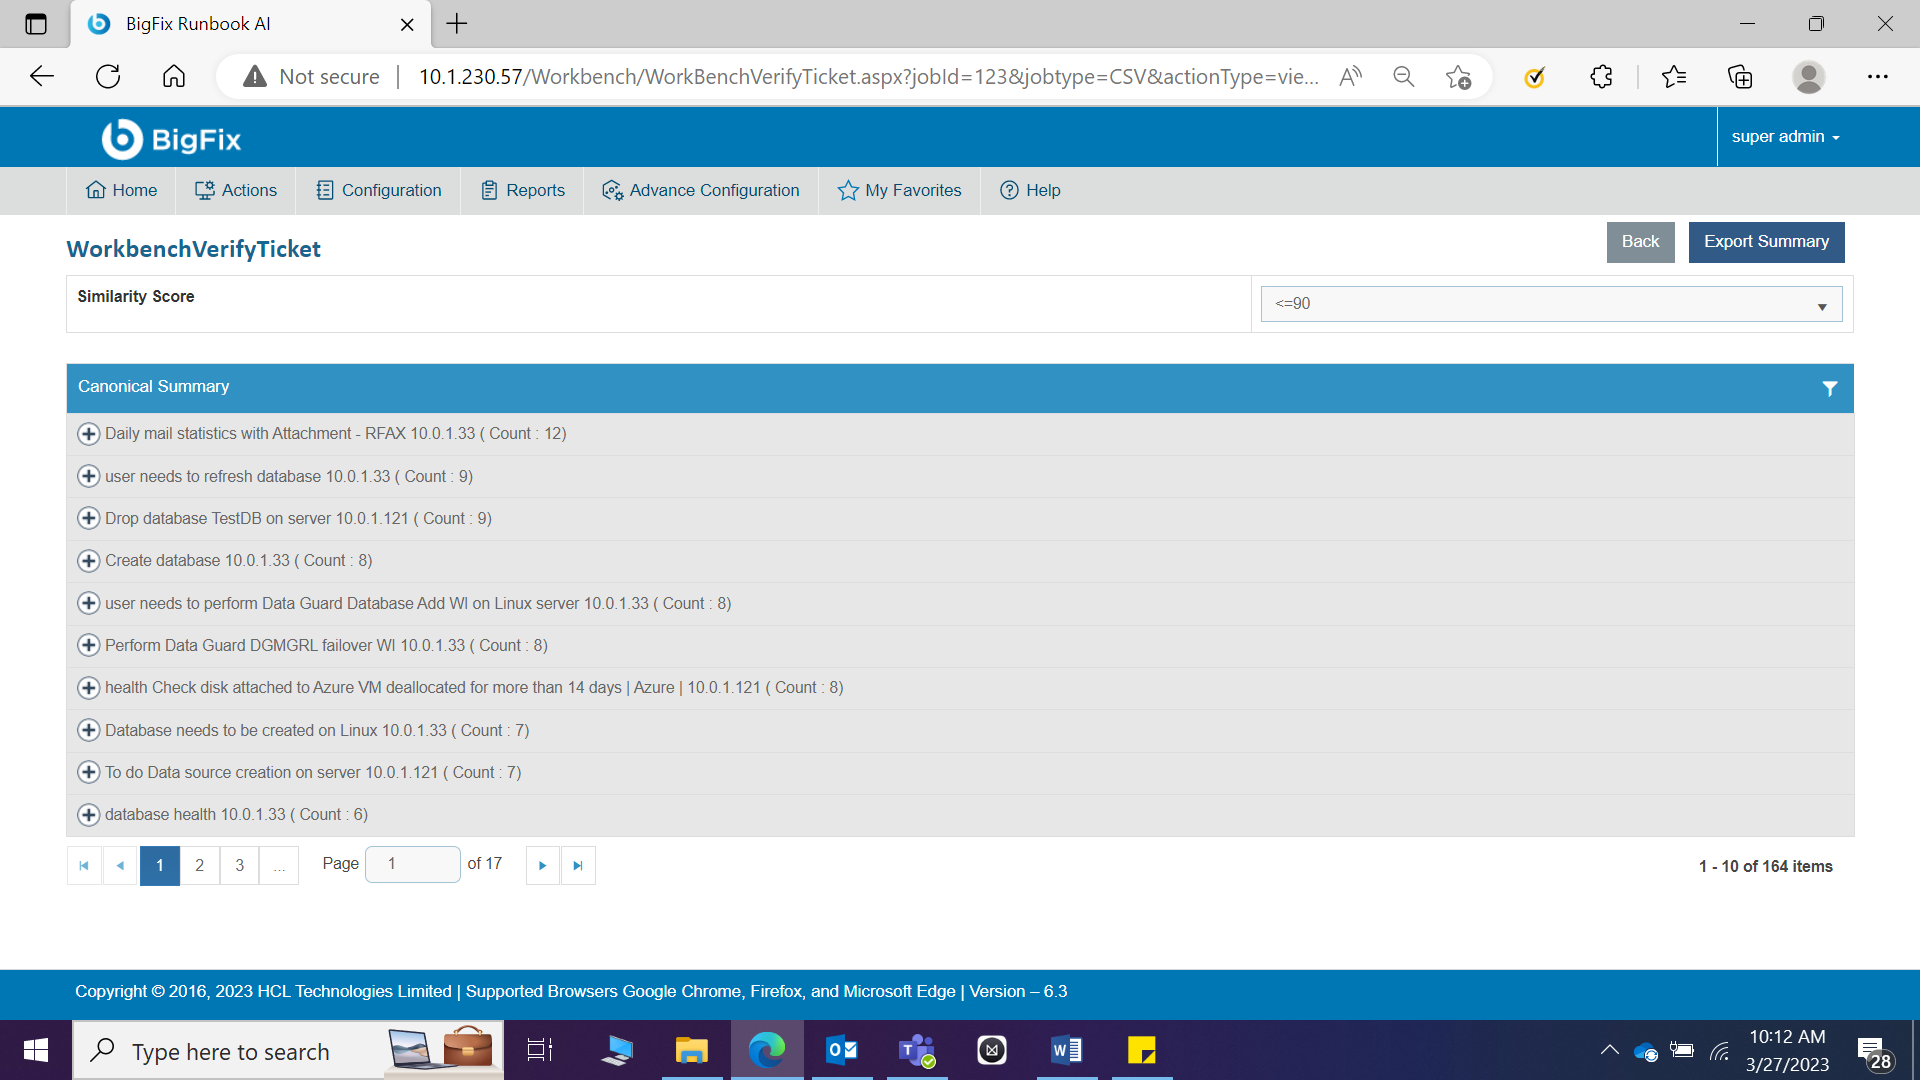
Click Export Summary to export the canonical summary of the analysis to your folder or click Back to go back to the previous screen.
Edit Unique Analysis
User can open an existing analysis, review the available information, and change the analysis details by performing the following steps:
- On the Unique Analysis page, click
 next to the
analysis you want to edit.
next to the
analysis you want to edit.
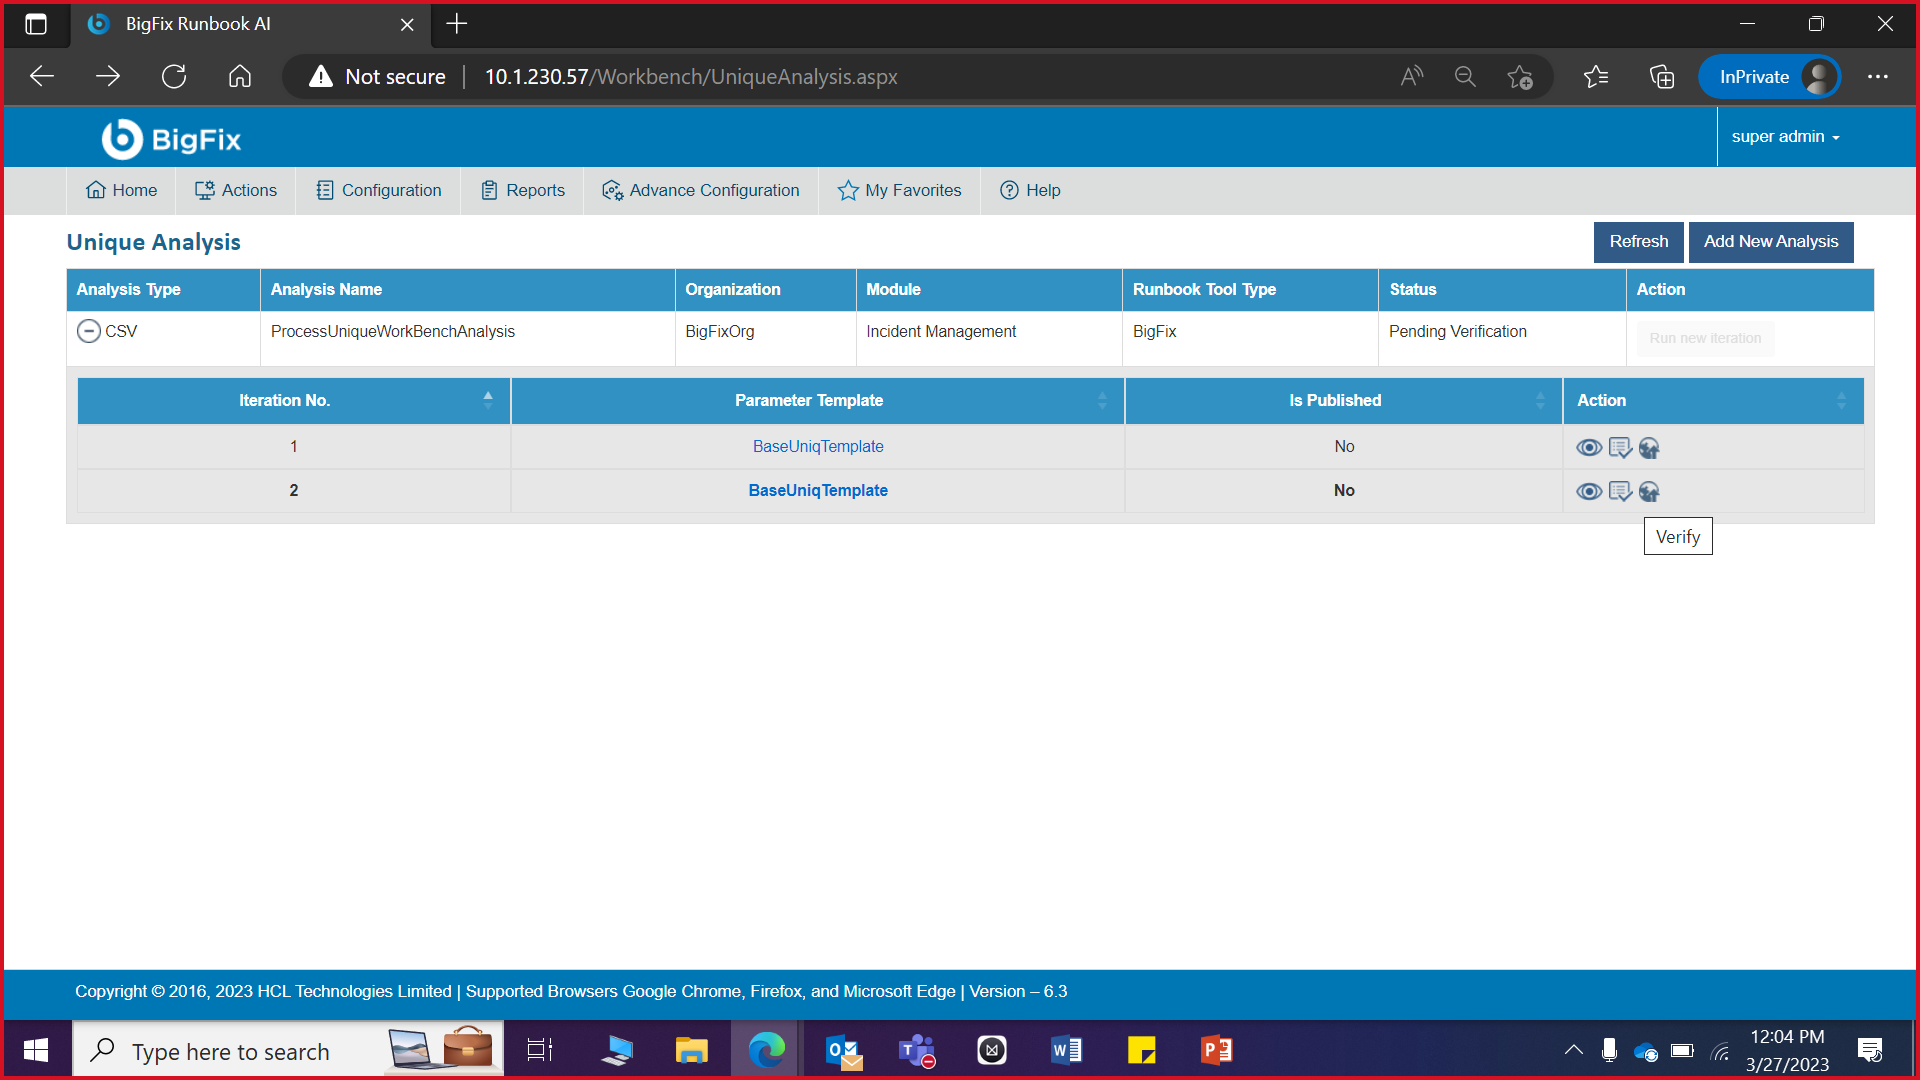
- The Canonical Summary page appears where user can edit the required Similarity
Score to see the canonical summary of the analysis.
Figure 449. Figure - Edit Unique Analysis (Cont.) .png)
- Expand the selected Canonical Summary and all the available tickets under the summary appear in a tabular view.
Figure 450. Figure - Edit Unique Analysis (Cont.) 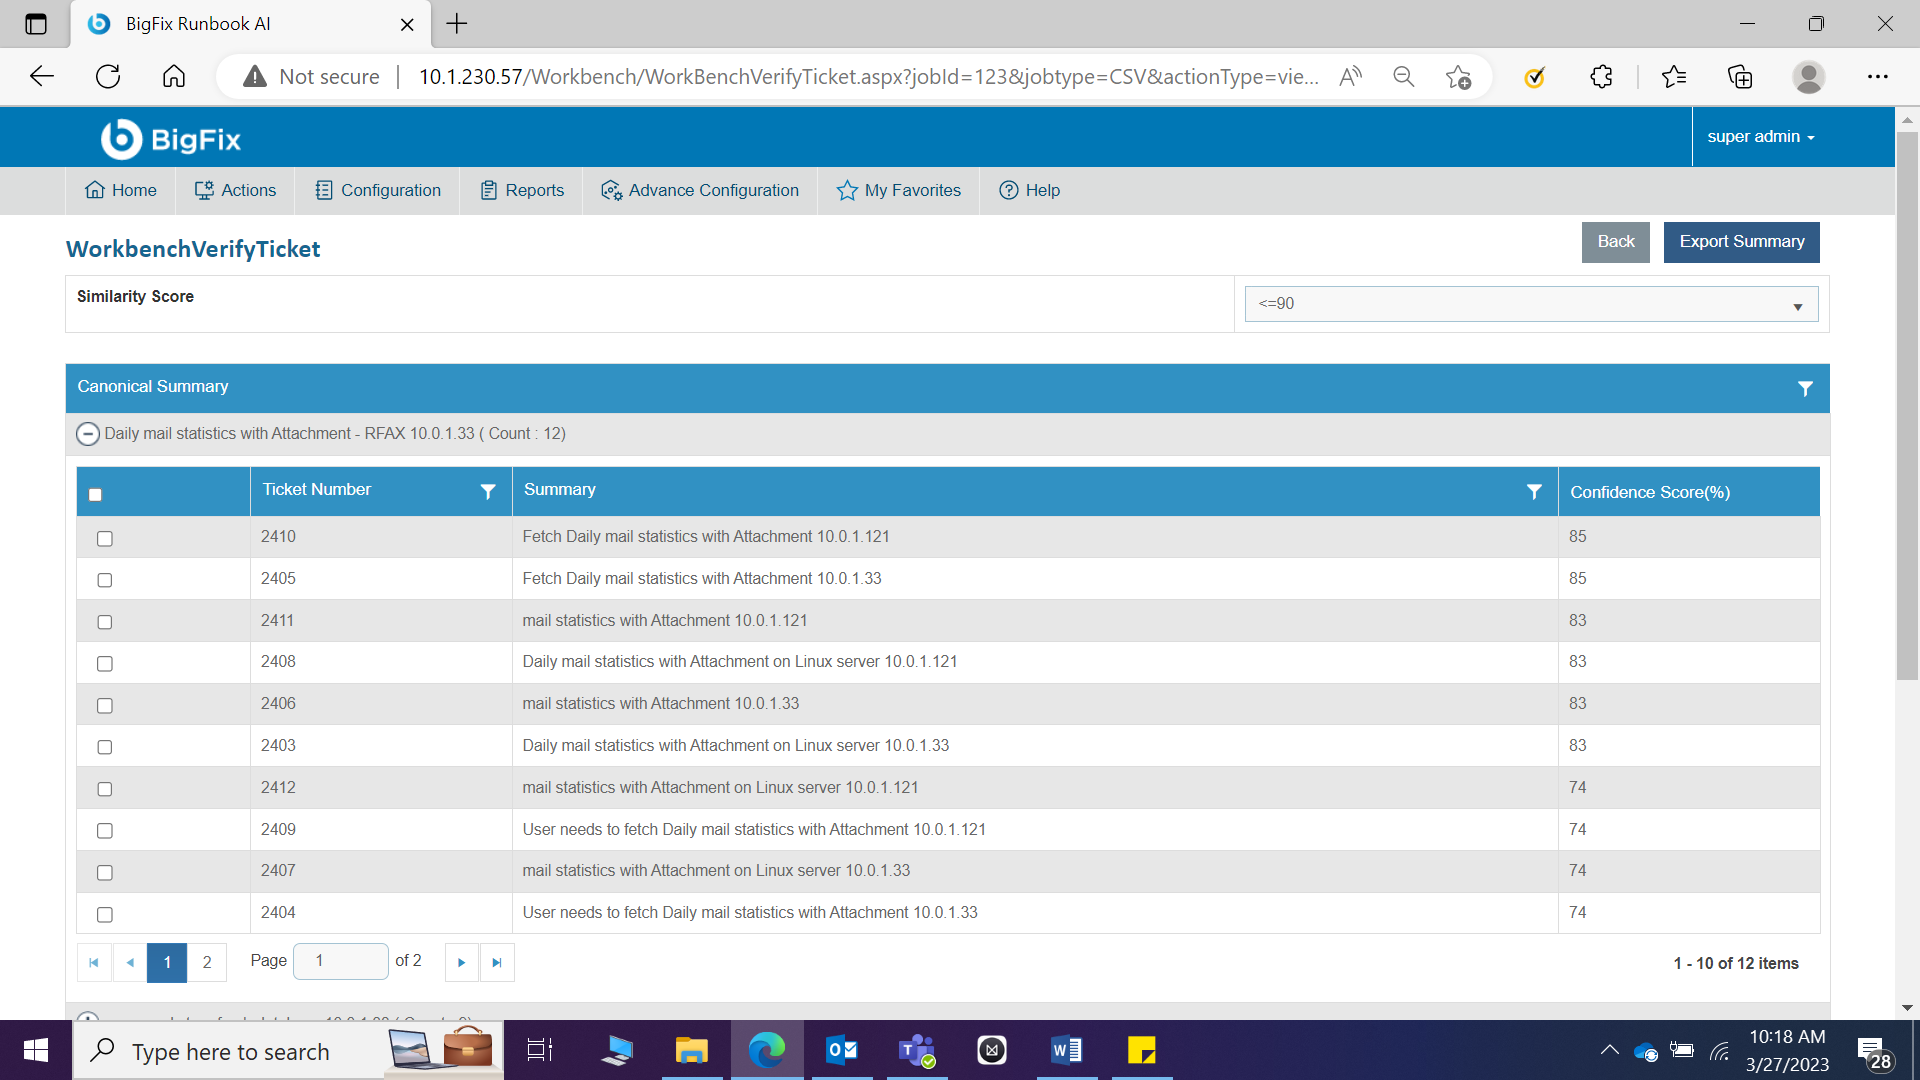
- To delete tickets from the selected analysis, select tickets under the canonical summary and click Remove.
- The Discriminator page appears that allows user to select the Existing Discriminator.
- Type a new (at least two comma-separated values) discriminator to verify the uniqueness of the selected tickets and click Save.
Figure 451. Figure - Edit Unique Analysis (Cont.) 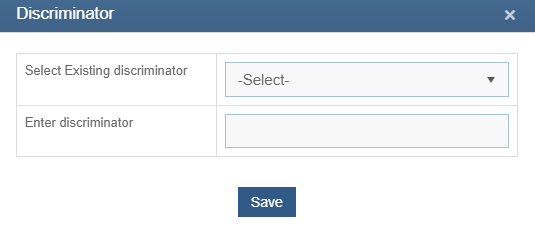
- The new discriminator is added and listed in the grid below.
Figure 452. Figure - Edit Unique Analysis (Cont.) .png)
- To manage the added discriminator for analysis, select Manage Discriminator.
- The Manage Discriminator page appears and allows user to delete the
discriminator by clicking
 .
.
Figure 453. Figure - Edit Unique Analysis (Cont.) 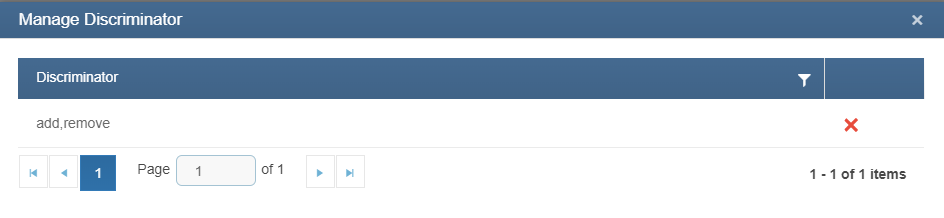
- Click Yes to confirm the updates for all discriminators.
Figure 454. Figure - Edit Unique Analysis (Cont.) 
- After the discriminators are configured, click Build to reinitiate the unique analysis of selected tickets cluster, based on the newly added discriminator.
- This will redirect user to the Unique Analysis page where the analysis status
changes to Queued (Build Initiated). On successful completion of unique analysis,
the status automatically changes to Pending Verification.
Figure 455. Figure - Edit Unique Analysis (Cont.) .png)
- To verify the pending verification of the analysis, click on
.png) next to the analysis you want to verify. This will
redirect you to
Figure 459- Edit Unique Analysis
(Cont.)
.
next to the analysis you want to verify. This will
redirect you to
Figure 459- Edit Unique Analysis
(Cont.)
.
- Click Verify to approve analysis. A confirmation dialog box appears.
Figure 456. Figure - Edit Unique Analysis (Cont.) 
- To verify the pending verification of the analysis, click on
- The status of the unique analysis changes to Successful.
.png)
User cannot add a discriminator to a ticket for analysis after verification of the unique analysis.
Publish Unique Analysis
After user has verified the configuration of the existing hyperparameter template for an analysis, user can publish the most optimized hyperparameter template by performing the following steps.
- On the Unique Analysis screen, click
 next to
the analysis user want to publish.
next to
the analysis user want to publish.
.png)
User can only publish the successful iterations.
- A confirmation dialog box appears.
Figure 459. Figure - Publish Unique Analysis (Cont.) 
- Successful publishing of the hyperparameter template enables
 in the Action column.
- Click
.png) to export the parameter template. This can
further be used to create a new template for iUnique using the Add Hyperparameters
Details screen.
to export the parameter template. This can
further be used to create a new template for iUnique using the Add Hyperparameters
Details screen.
.png)
User can also create a new parameter template. Click  in
the Action column which takes the user to the Map template with
Organization.
in
the Action column which takes the user to the Map template with
Organization.
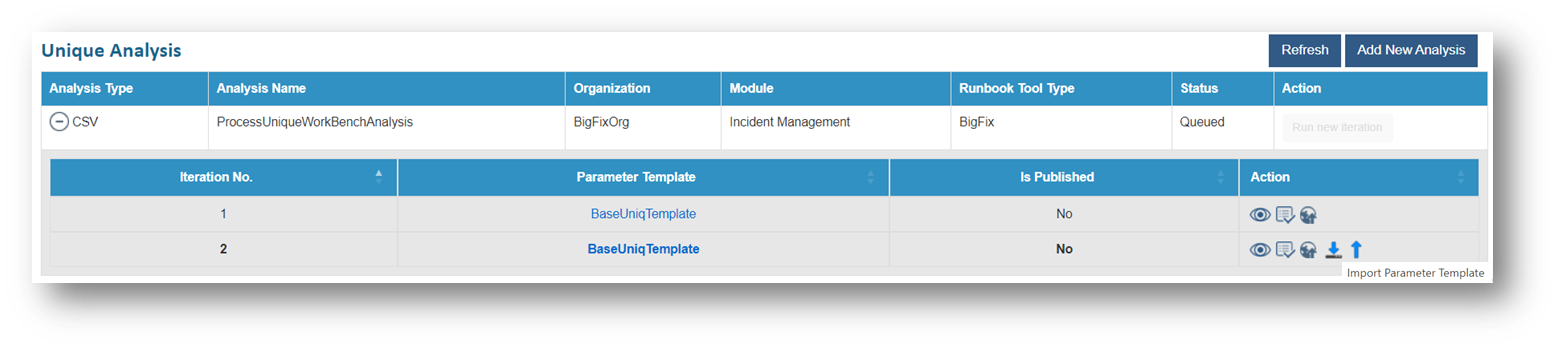
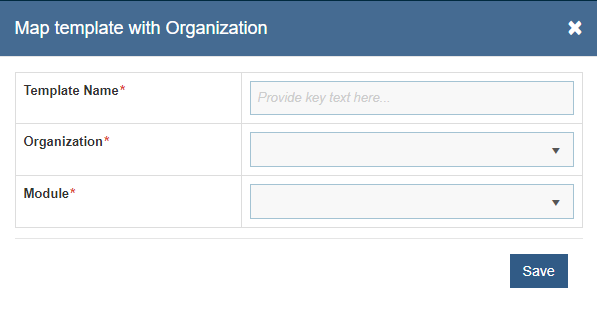
User can refresh the data on the screen by clicking Refresh.
WorkBench Recommendation Analysis
The Workbench Recommendation Analysis optimizes the hyperparameters (or configuration) of the iRecommend module. It identifies hyperparameters values for iRecommend by running multiple iterations of iRecommend and selects the most optimal hyperparameter values. Later on, these hyperparameter values can be used in production environment. These hyperparameter values can be defined in Hyperparameter Configuration .
To manage workbench recommendation analysis, perform the following steps:
- On the main menu bar, click Advance Configuration->WorkBench.
- Click Recommend Analysis. The Recommend Analysis screen appears.
.png)
- It lists the available recommendation analysis types in a tabular view and enables user to add a new recommendation analysis or view, edit, or publish the existing recommendation analysis.
If the published unique analysis is available for an organization, only then user can run the new iteration on recommendation analysis for the same organization.
Add New Iteration
This section describes how to add a new workbench recommendation analysis for an organization.
- Before adding a new iteration, ensure that the unique analysis for the organization for which you are adding the new iteration, is published. Then enable the recommendation job from the page.
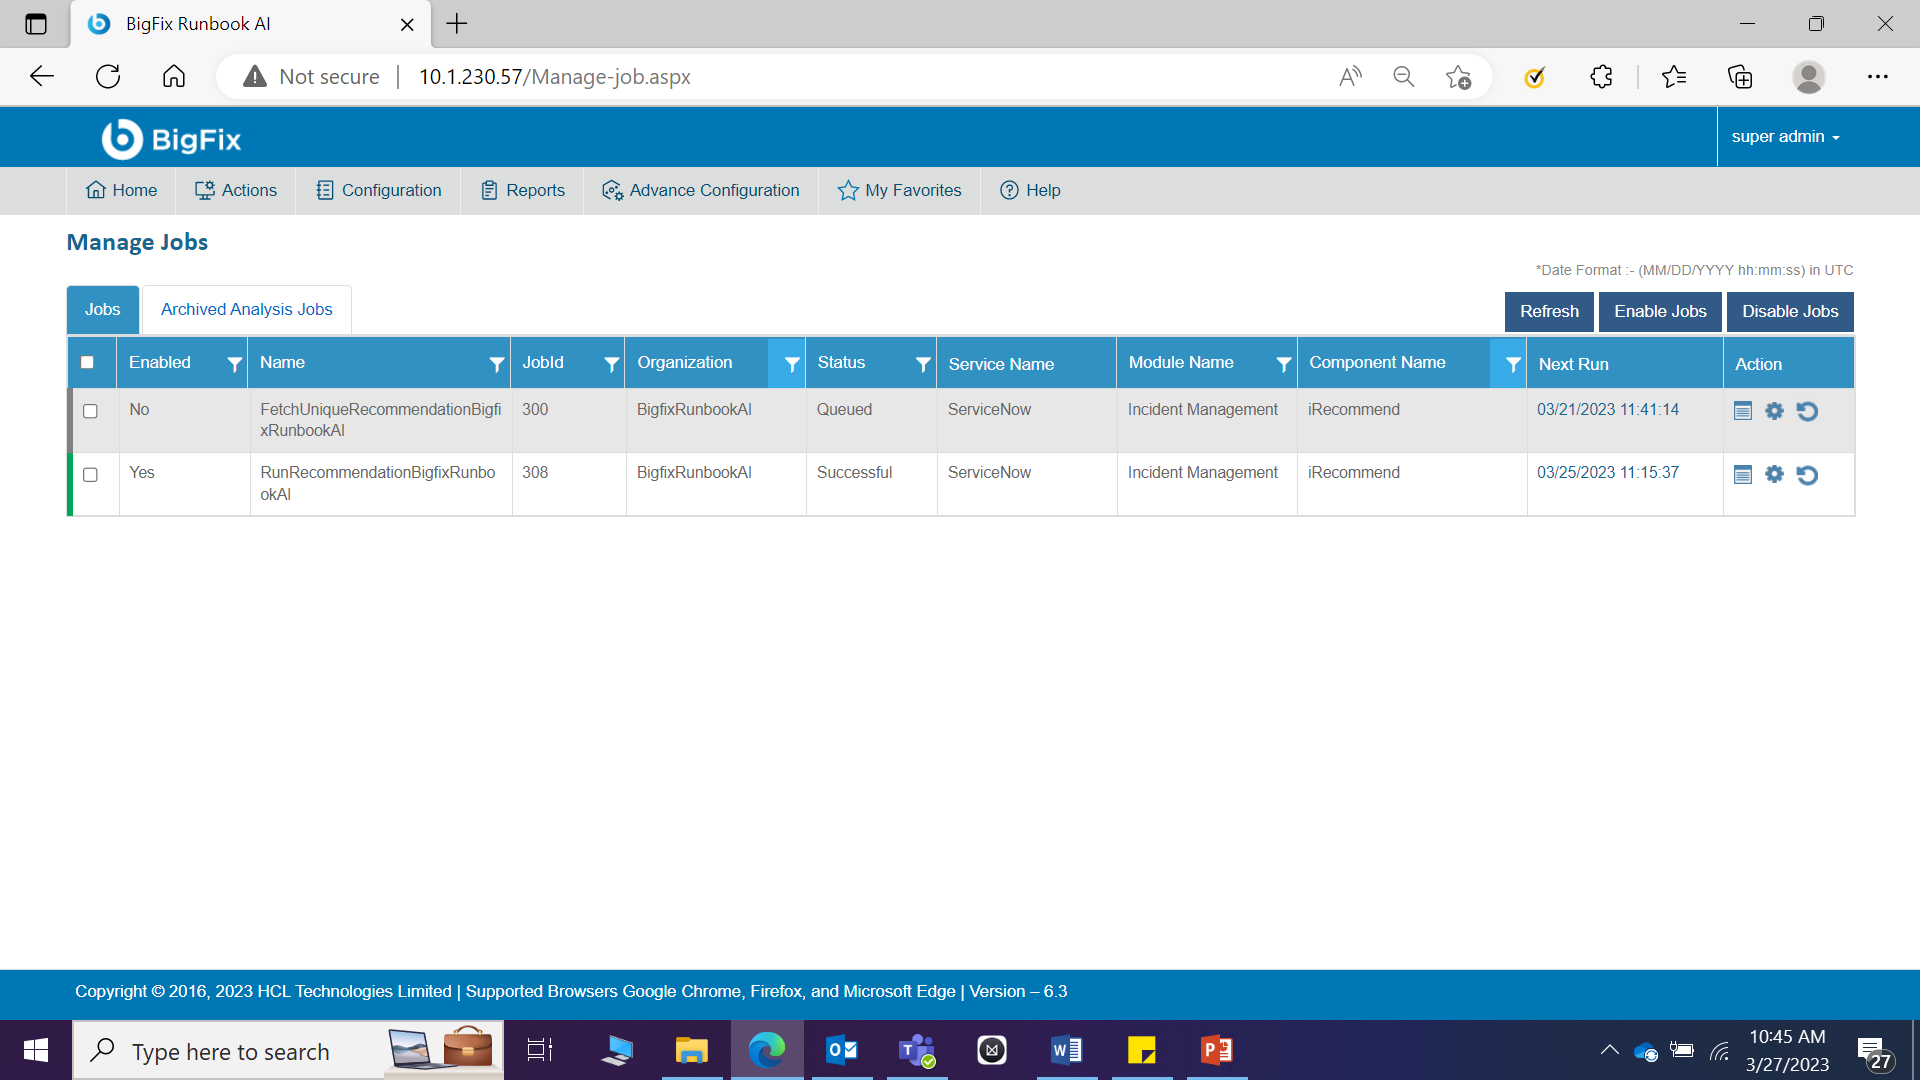
- After the job is enabled, click Run new iteration to run a new iteration of recommendation analysis for the same customer.
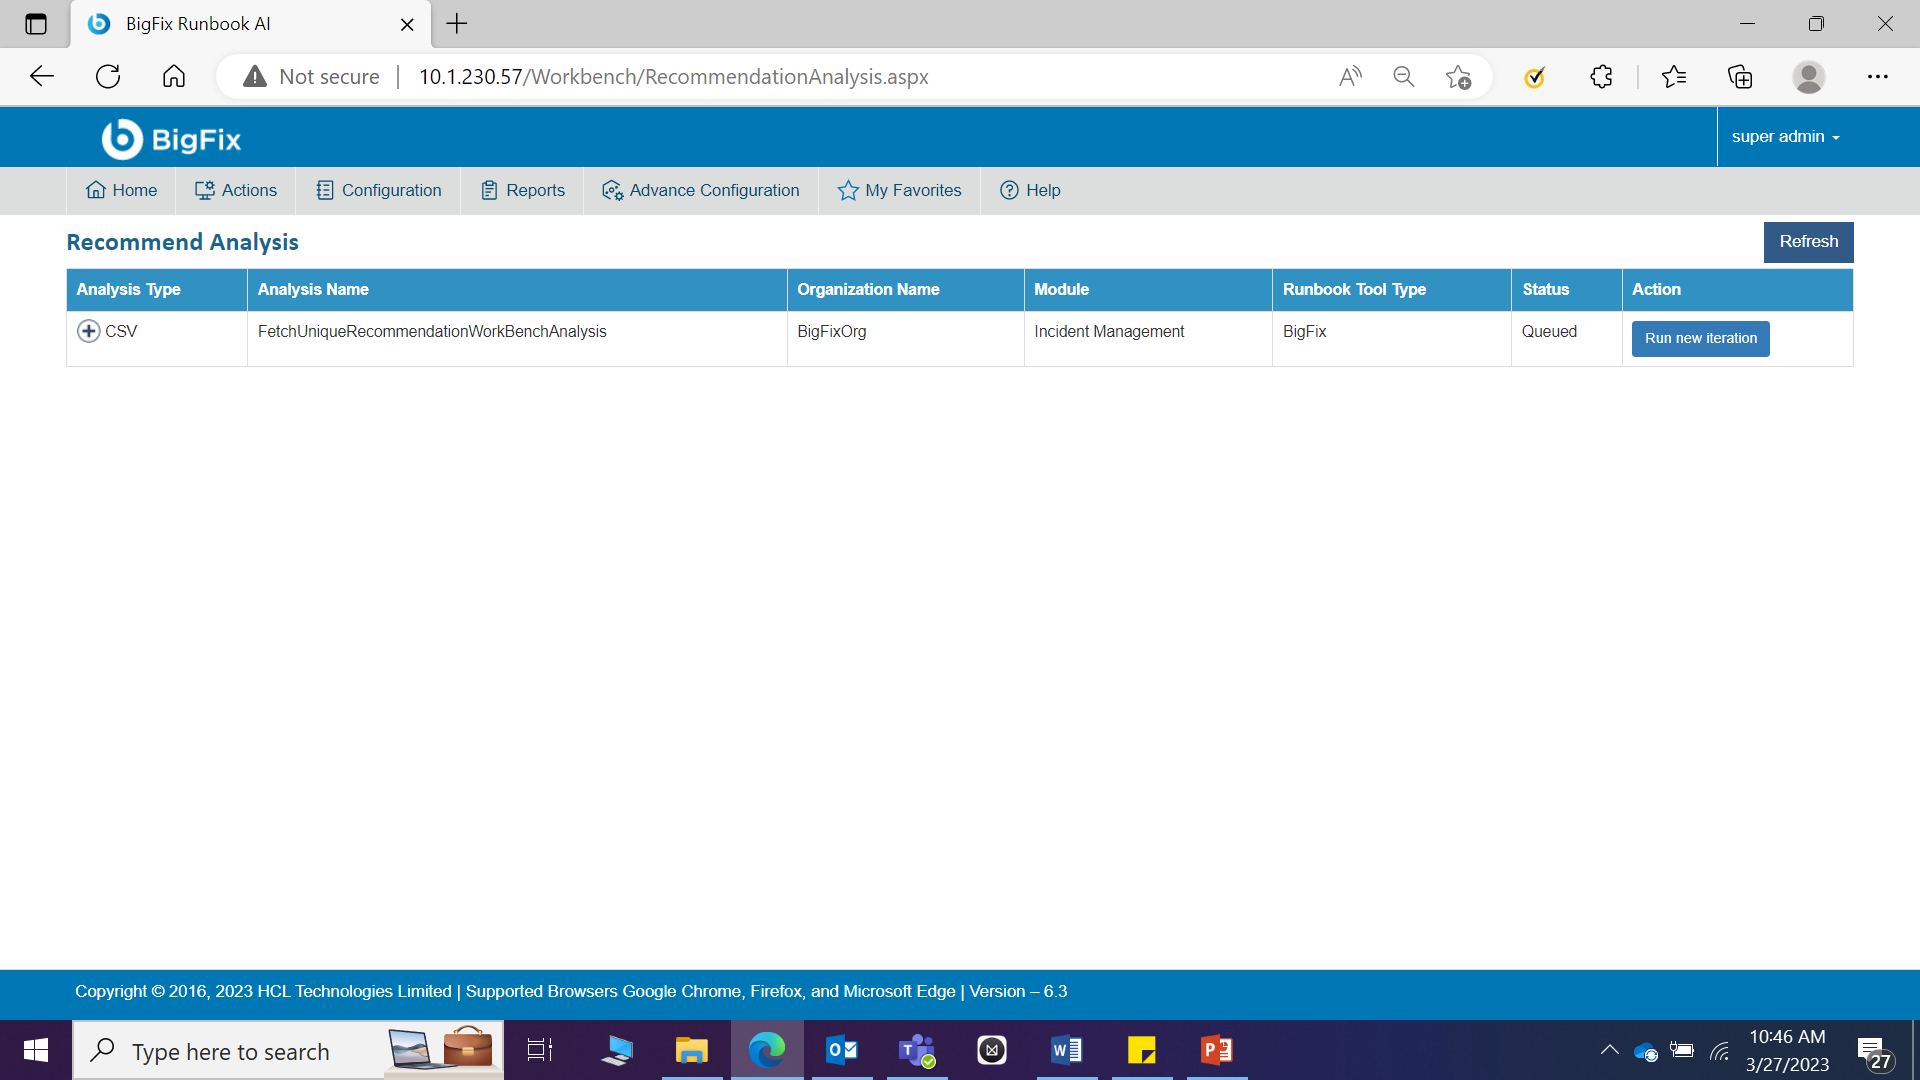
If user does not get the expected results from the configured hyperparameter template of the recommendation analysis, then user can add multiple iterations of recommendation analysis corresponding to hyperparameter templates to modify the results.
To add a new iteration, perform the following steps:
- Go to main menu bar, click on Advance Configuration->Workbench. Click on the Recommend Analysis page, click Run New Iteration for the organization under analysis.
.png)
- The Template Versions page appears.
Figure 467. Figure - Add New Iteration (Cont.) 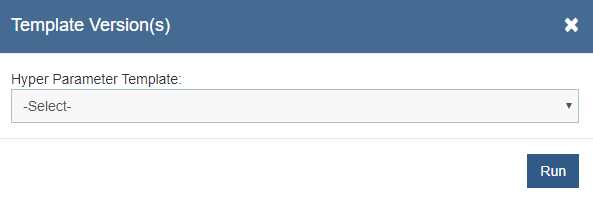
- Select a template from the Hyperparameter Template drop-down list.
Figure 468. Figure - Add New Iteration (Cont.) 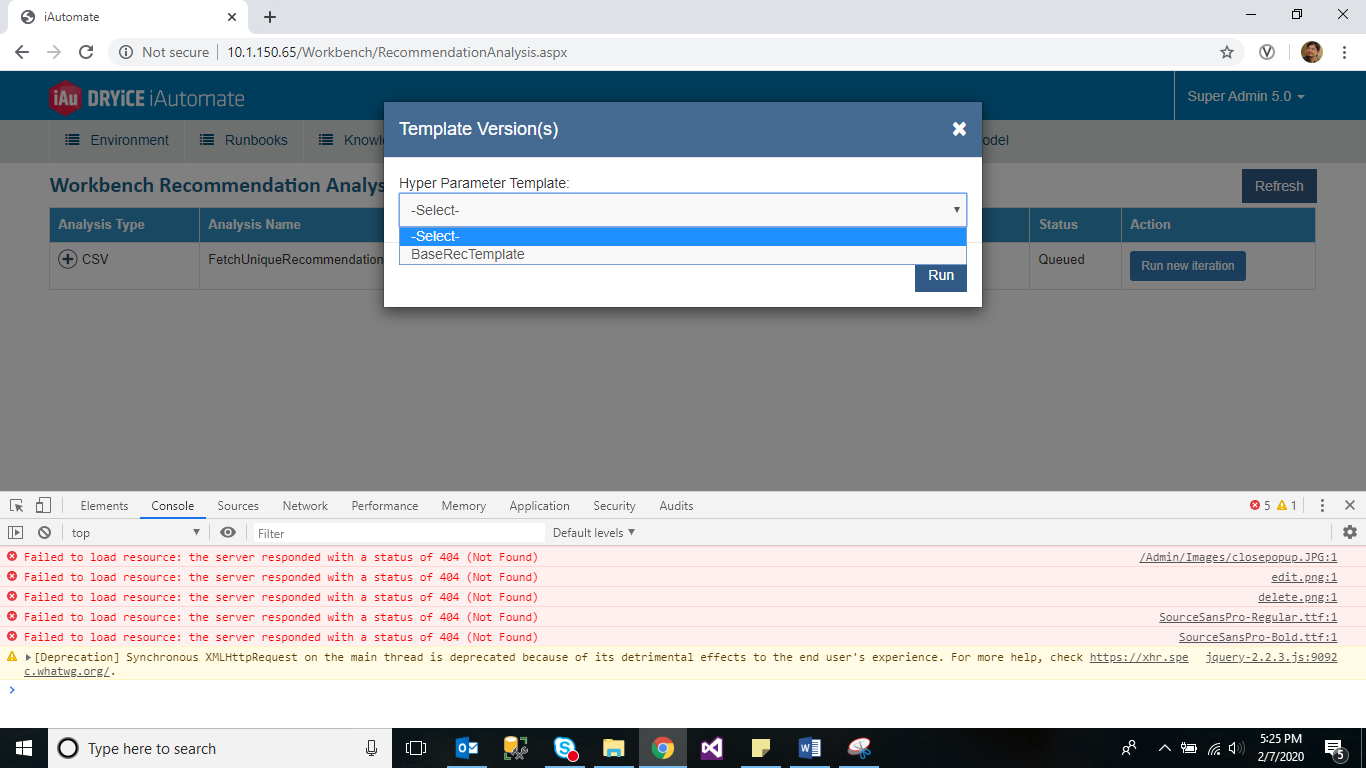
- Click Run.
Figure 469. Figure - Add New Iteration (Cont.) 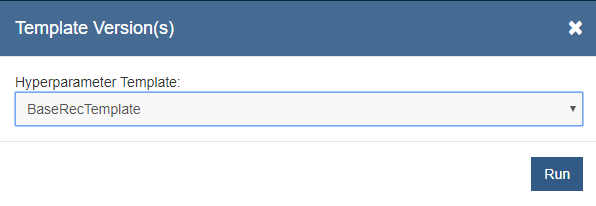
- A confirmation dialog box appears.
Figure 470. Figure - Add New Iteration (Cont.) 
- The new iteration is added and appears at the bottom of the list in the grid below.

View Recommendation Analysis
User can view information about an analysis that has already been configured.
To view recommendation analysis, perform the following steps:
- On the Recommendation Analysis screen, click
.png) next to the analysis you want to view.
next to the analysis you want to view.
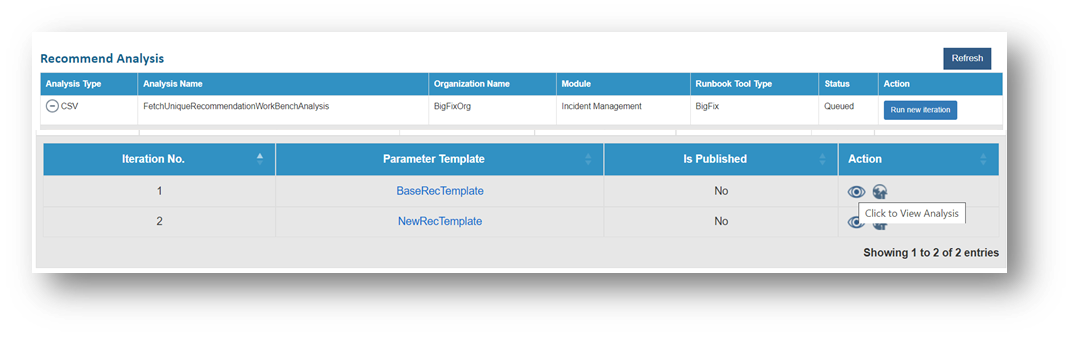
For detailed information, see Analysis.
.png)
Click Export to export the summary of the analysis to your folder or click Back to go back to the previous screen.
Publish Recommendation Analysis
After verifying the configuration of the existing hyperparameter template in an analysis, user can publish the most optimized hyperparameter template by performing the following steps.
- On the Recommendation Analysis screen, click
.png) next to the analysis user wants to publish.
next to the analysis user wants to publish.

User can only publish successful iterations.
- A confirmation dialog box appears.
Figure 475. Figure - Publish Recommendation Analysis 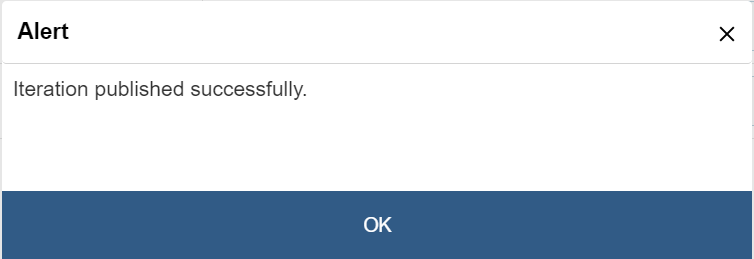
- Successful publishing of the hyperparameter template enables
.png) in the Action column.
in the Action column. - Click
.png) to export the parameter template. This
can further be used to create a new template for iRecommend using the Add
Hyperparameters Details screen.
to export the parameter template. This
can further be used to create a new template for iRecommend using the Add
Hyperparameters Details screen.
Figure 476. Figure - Export Parameter Template 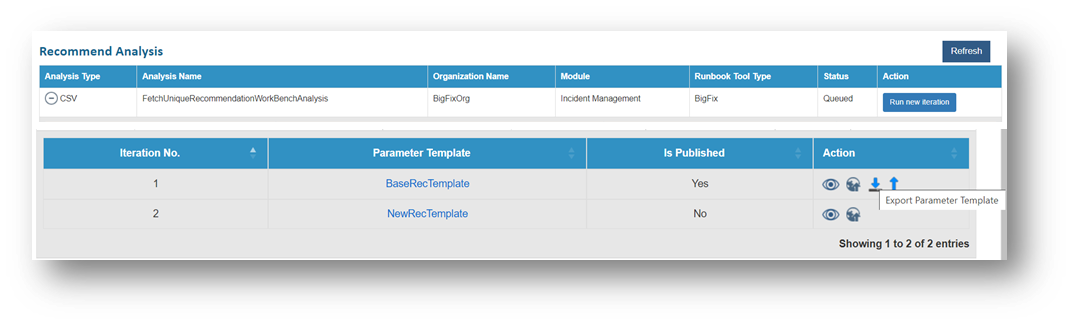
- Click
- User can also create a new parameter template. Click
.png) in the Action column which takes the user to the Map template with
Organization.
in the Action column which takes the user to the Map template with
Organization.
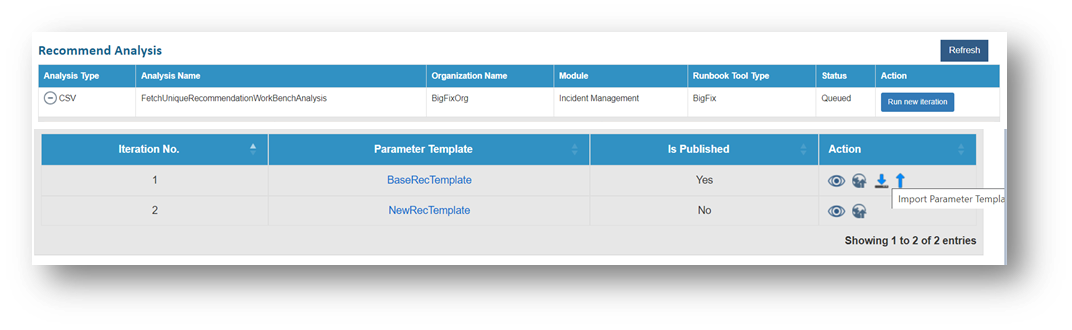
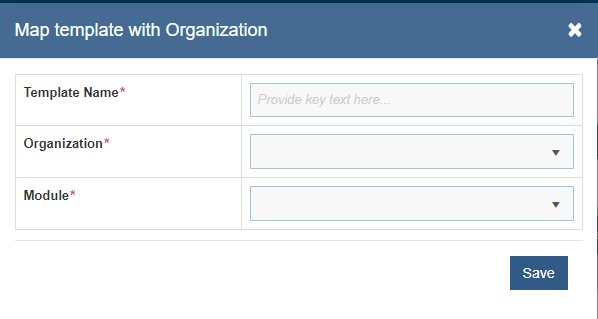
Click Refresh to refresh the data being viewed.
Manage Parameter Configuration
This section describes how to perform the customer specific advanced parameter configuration for data parsing.
To manage parameter configuration, perform the following steps:
- On the main menu bar, click Advance Configuration Parameter, and then click Manage Parameter Configuration. The Manage Parameter Configuration page appears.
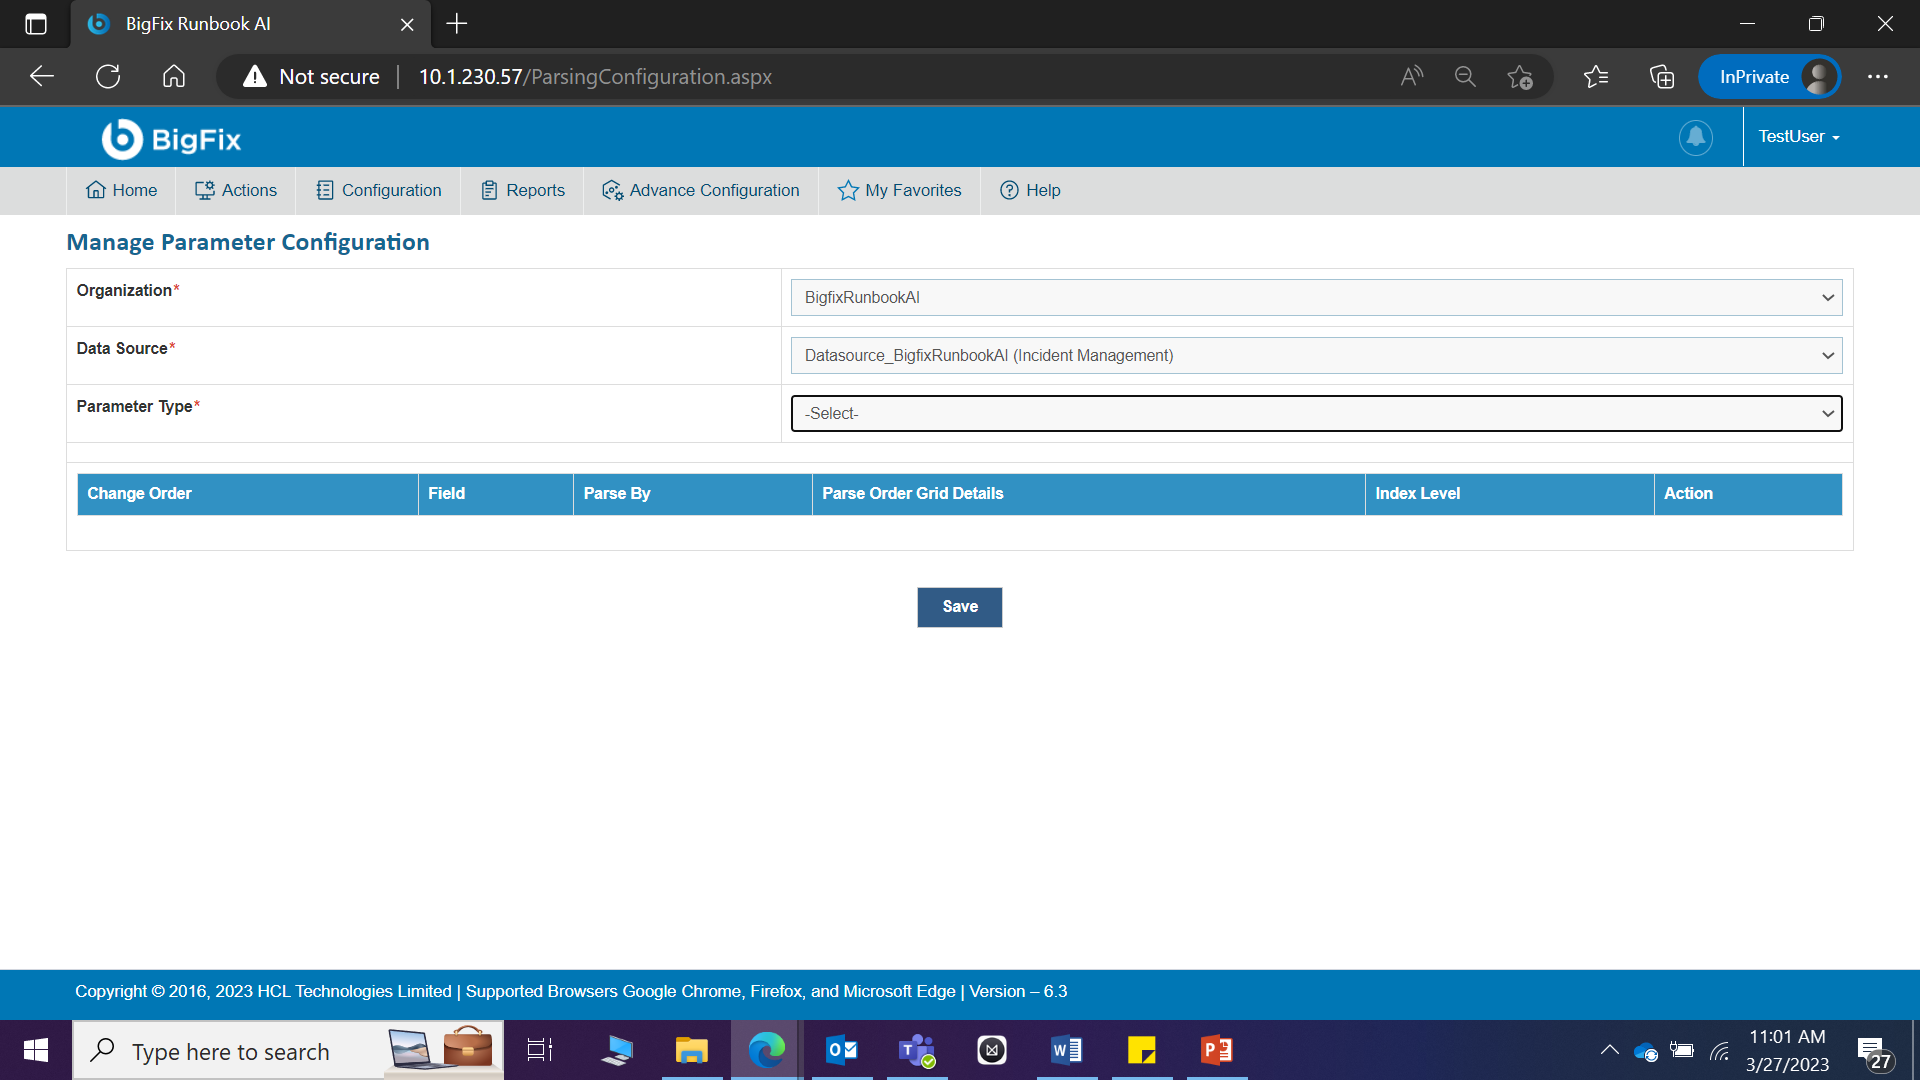
- Select the organization from the Organization field.
- Select the Data Source from where the data will be fetched for parsing.
- Select the Parameter Type, to be used for data parsing. This populates the existing configuration for the selected organization in a grid.
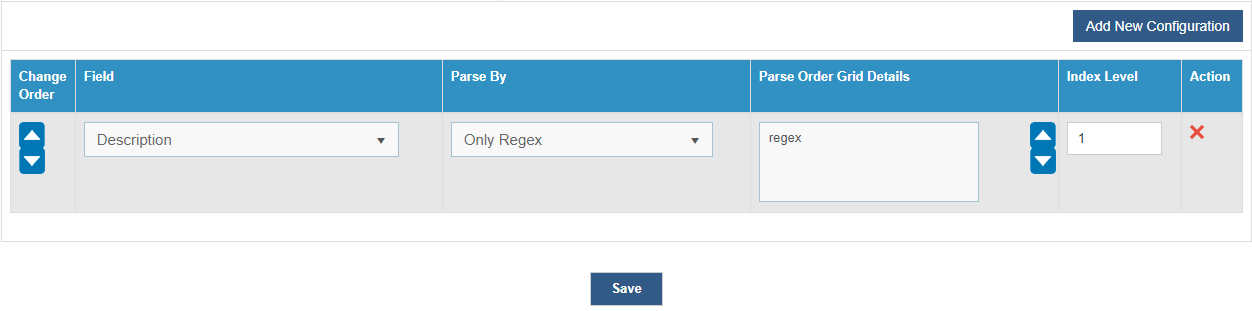
This allows user to add a new configuration using Add New Configuration and edit or delete the existing configuration.
Add New Parameter Configuration
User can add a new parameter configuration in an organization by using the following steps.
- On the Manage Parameter Configuration page, select Organization.
- Select the Data Source from where the data will be fetched.
- Select the Parameter Type to be used for data parsing. This enables the Add New Configuration button.
- Click Add New Configuration button.
.png)
This adds a new row below the existing parameter configurations.
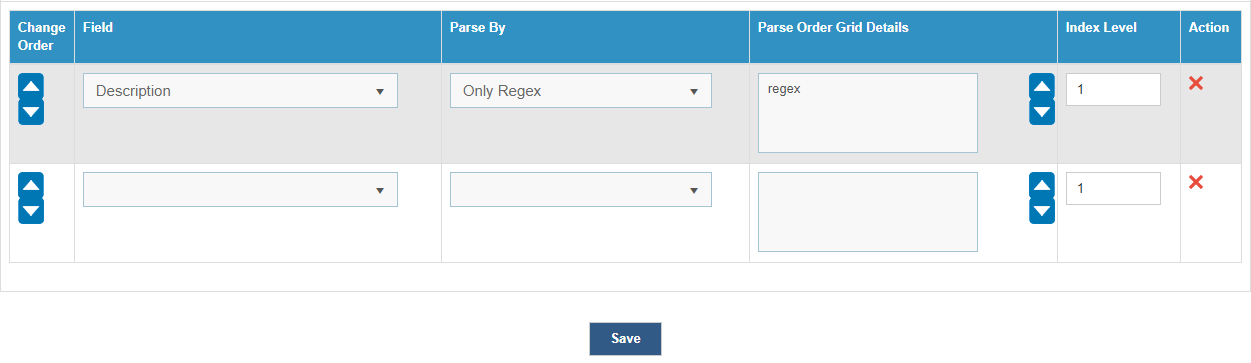
- Select a Field to define the ticket fields. For e.g. description, short description, etc.
- Select a Parse By method. This includes the following parse by methods:
- Equal Search- Specify a value or keyword resembling the words mentioned in the ticket for parsing.
- Only Regex - Regex is a special text string for describing a search pattern while ticket parsing and all parameter types have predefined regex. In this method, the parsing is done from ticket fields only.
- Only Proximity - It is a parsing method to extract values based on the proximity of words.
- Regex and Proximity - It is a parsing method to extract values based on a combination of the proximity of words and regex.
- The Parse Order Grid Details field specifies the parse order in case of selecting Regex and Proximity.
- If a word is found multiple times using the regex, then a sequence of the word needs to be picked during parsing is defined by Index Level.
- Click Save to update the configured parameters.
User can rearrange the order of parameter configuration using Change Order in the left column of the parameter grid.
- A confirmation dialog box appears.
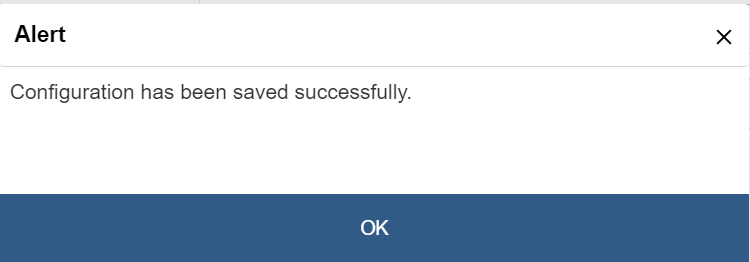
Edit or Delete Parameter Configuration
User can open an existing parameter, review the available information, change the parameter configuration, and delete the existing configuration by performing the following steps:
- On the Manage Parameter Configuration page, select Organization Data Source Parameter Type . A list of the parameters under the selected parameter type appears in a tabular view.
.png)
- Edit the required details and click Save. A confirmation dialog box appears.
.png)
- You can delete a parameter by clicking
.png) for the
parameter and clicking Yes to confirm.
for the
parameter and clicking Yes to confirm.
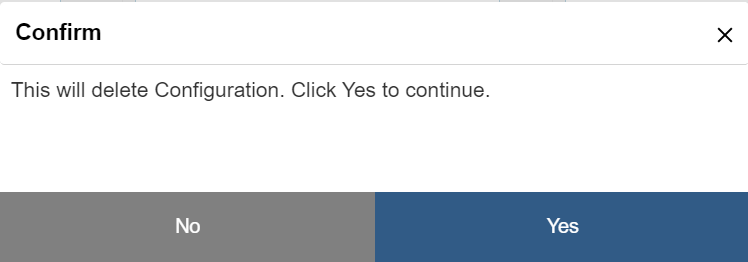
Manage Column
This step describes how to perform the organization specific configurations of ticket data columns, used for ticket parsing and recommendation.
To manage the ticket data column, perform the following steps:
- On the main menu bar, click Advance ConfigurationParameter, and then click Manage Column. The Manage Column page appears.

- Select Organization, and then select Module.
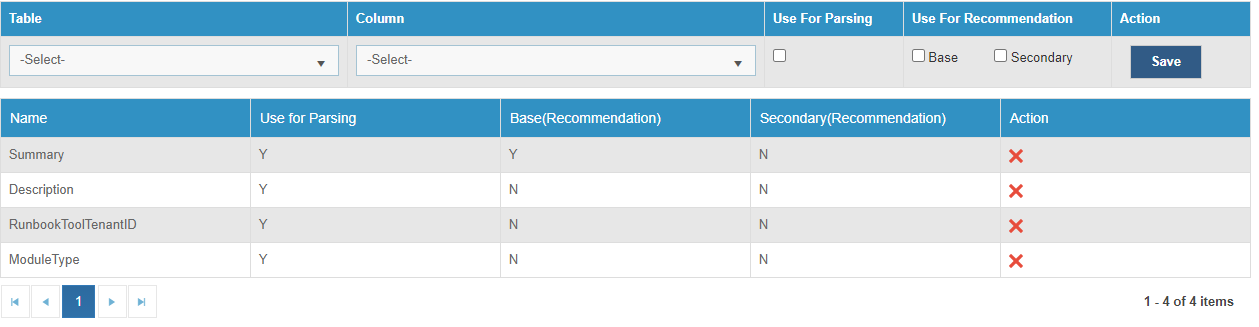
This lists the existing parameters used for parsing and recommendation in a tabular view for the selected organization. User can also add a new configuration or delete the existing configuration.
Add Configuration
User can add a new configuration in an organization by performing the following steps:
- On the Manage Column page, select the data table from the Table list, and then select a Column from the selected table.
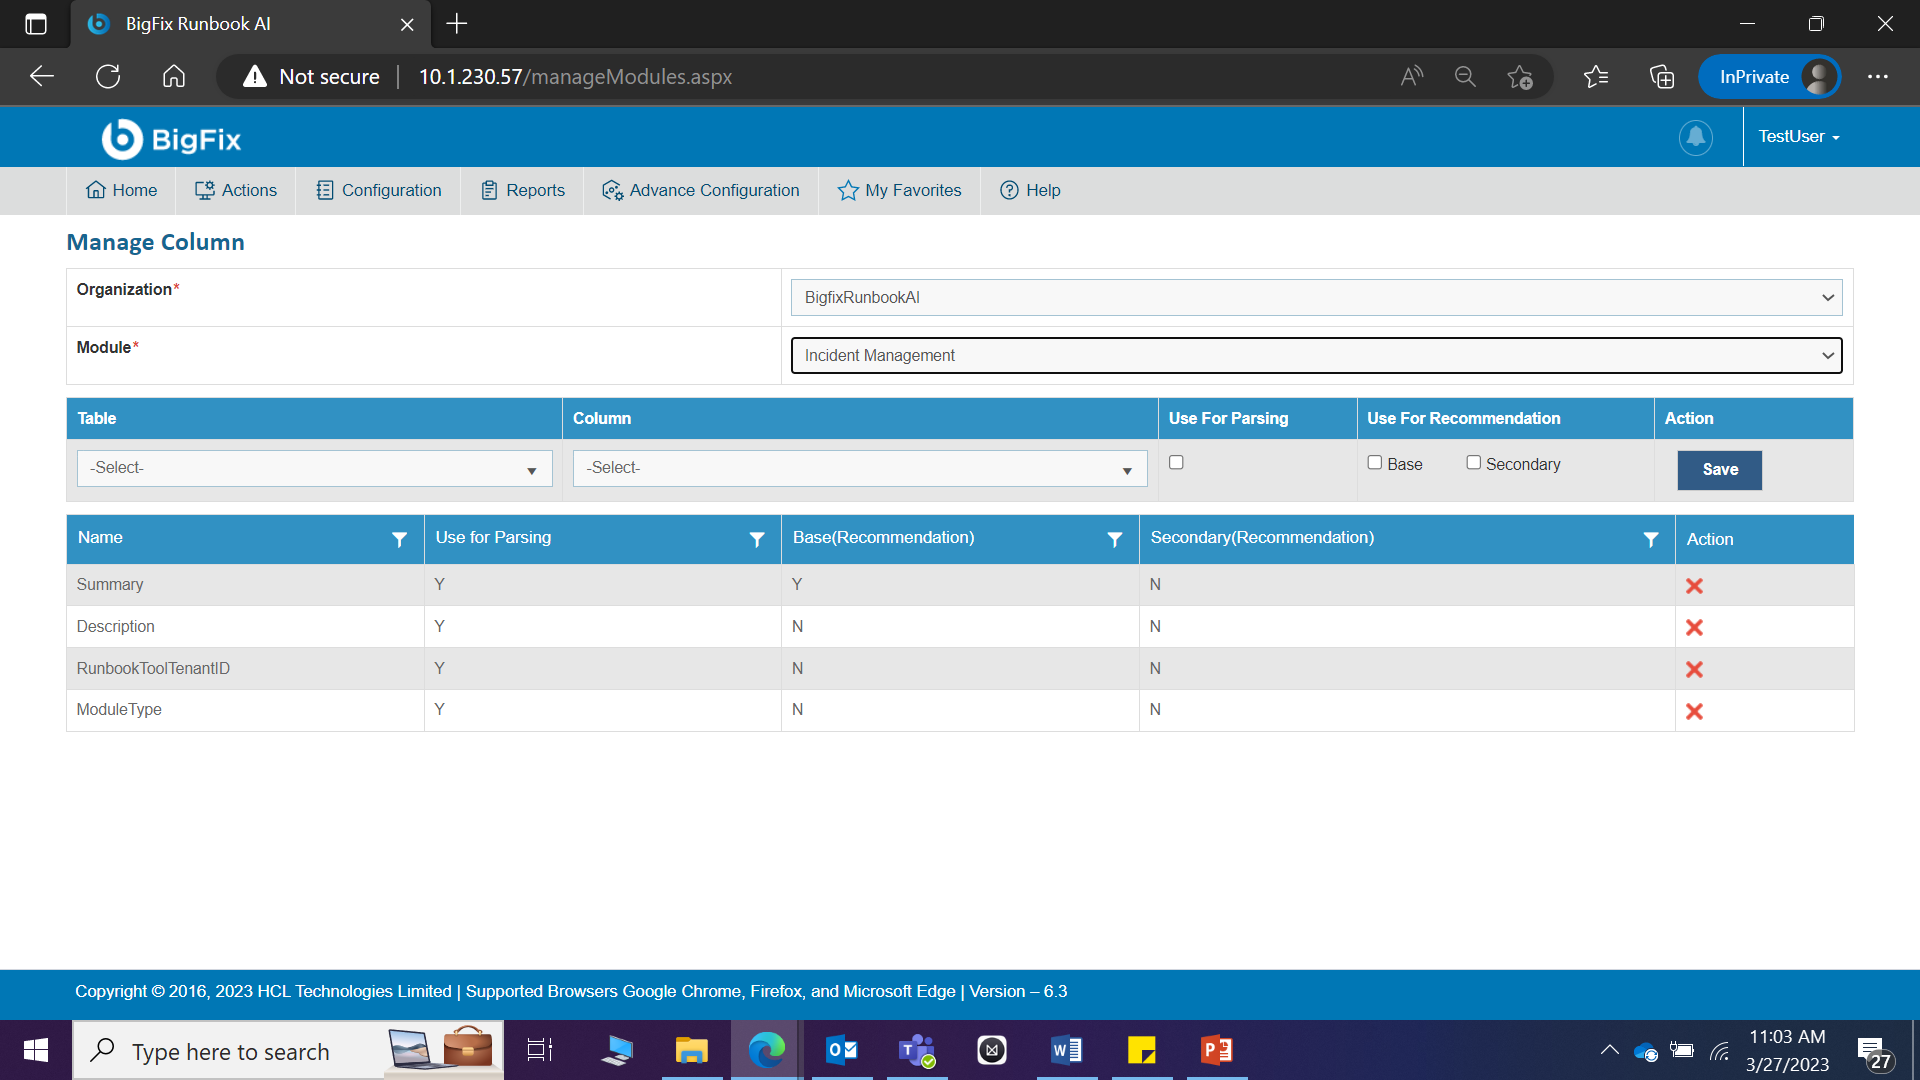
- Select Use for Parsing for enabling the current column to be used for ticket parsing.
- Select Use for Recommendation for enabling the current column to be used for runbook recommendation.
- Base holds priority over Secondary while performing the recommendation.
- While recommendation processing, the columns for which Base is enabled will be considered first, followed by ones marked as Secondary
- Click Save to save settings. A confirmation dialog box appears.

This adds the new configuration and lists it in a tabular view.
Delete Configuration
If the user no longer needs a certain configuration in an organization, it can be deleted from the environment.
To delete a configuration, perform the following steps:
- On the Manage Column page, click
.png) icon to
delete the configuration.
icon to
delete the configuration.
.png)
- Click Yes to confirm. A confirmation dialog box appears.
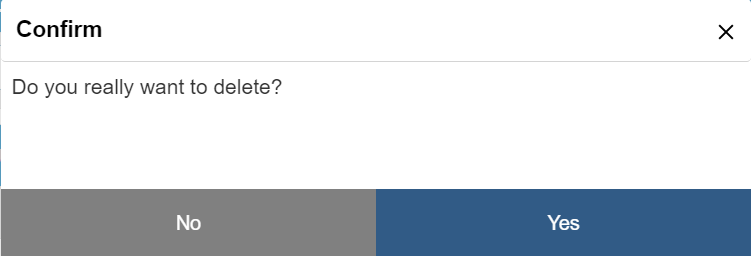
- Click Yes to confirm the action. A Success message dialog box appears.
.png)
Hyperparameter Configuration
Hyperparameters are set of parameters the values of which are identified by analyzing an organization’s data. Here, organization data refers to ticket information which needs to be automated. The Hyperparameter configuration screen has been designed for the same purpose. These parameters values are used as prior information for training of models Runbook Recommendation (iRecommend) and Ticket Clustering (iUnique).
This section describes how to configure the hyperparameters used in the workbench by performing the following steps:
- On the main menu bar, click Advance Configuration Parameter, and then click Hyperparameter Configuration. The Manage Hyperparameters page appears.

- Select the Recommendation or Unique Clustering component from the drop-down list next to the Component Name field without selecting the Organization Specific checkbox.
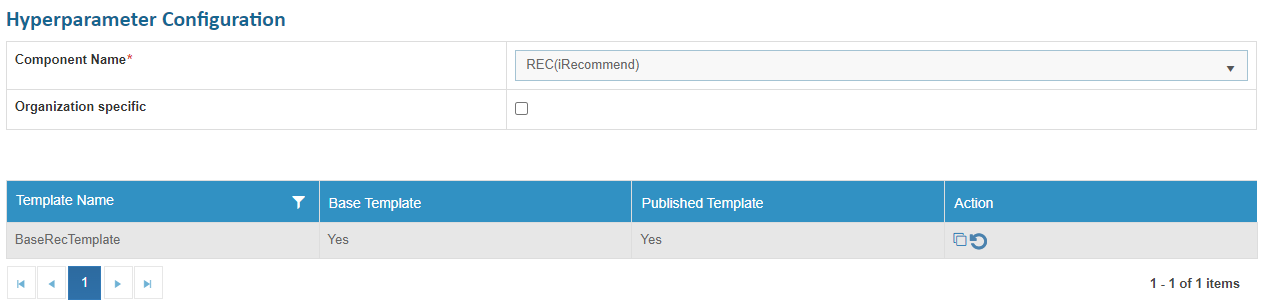
- Select the Recommendation or Unique Clustering component from the drop-down list next to the Component Name field and select the Organization and its Module. It will list the hyperparameters for that selected organization.
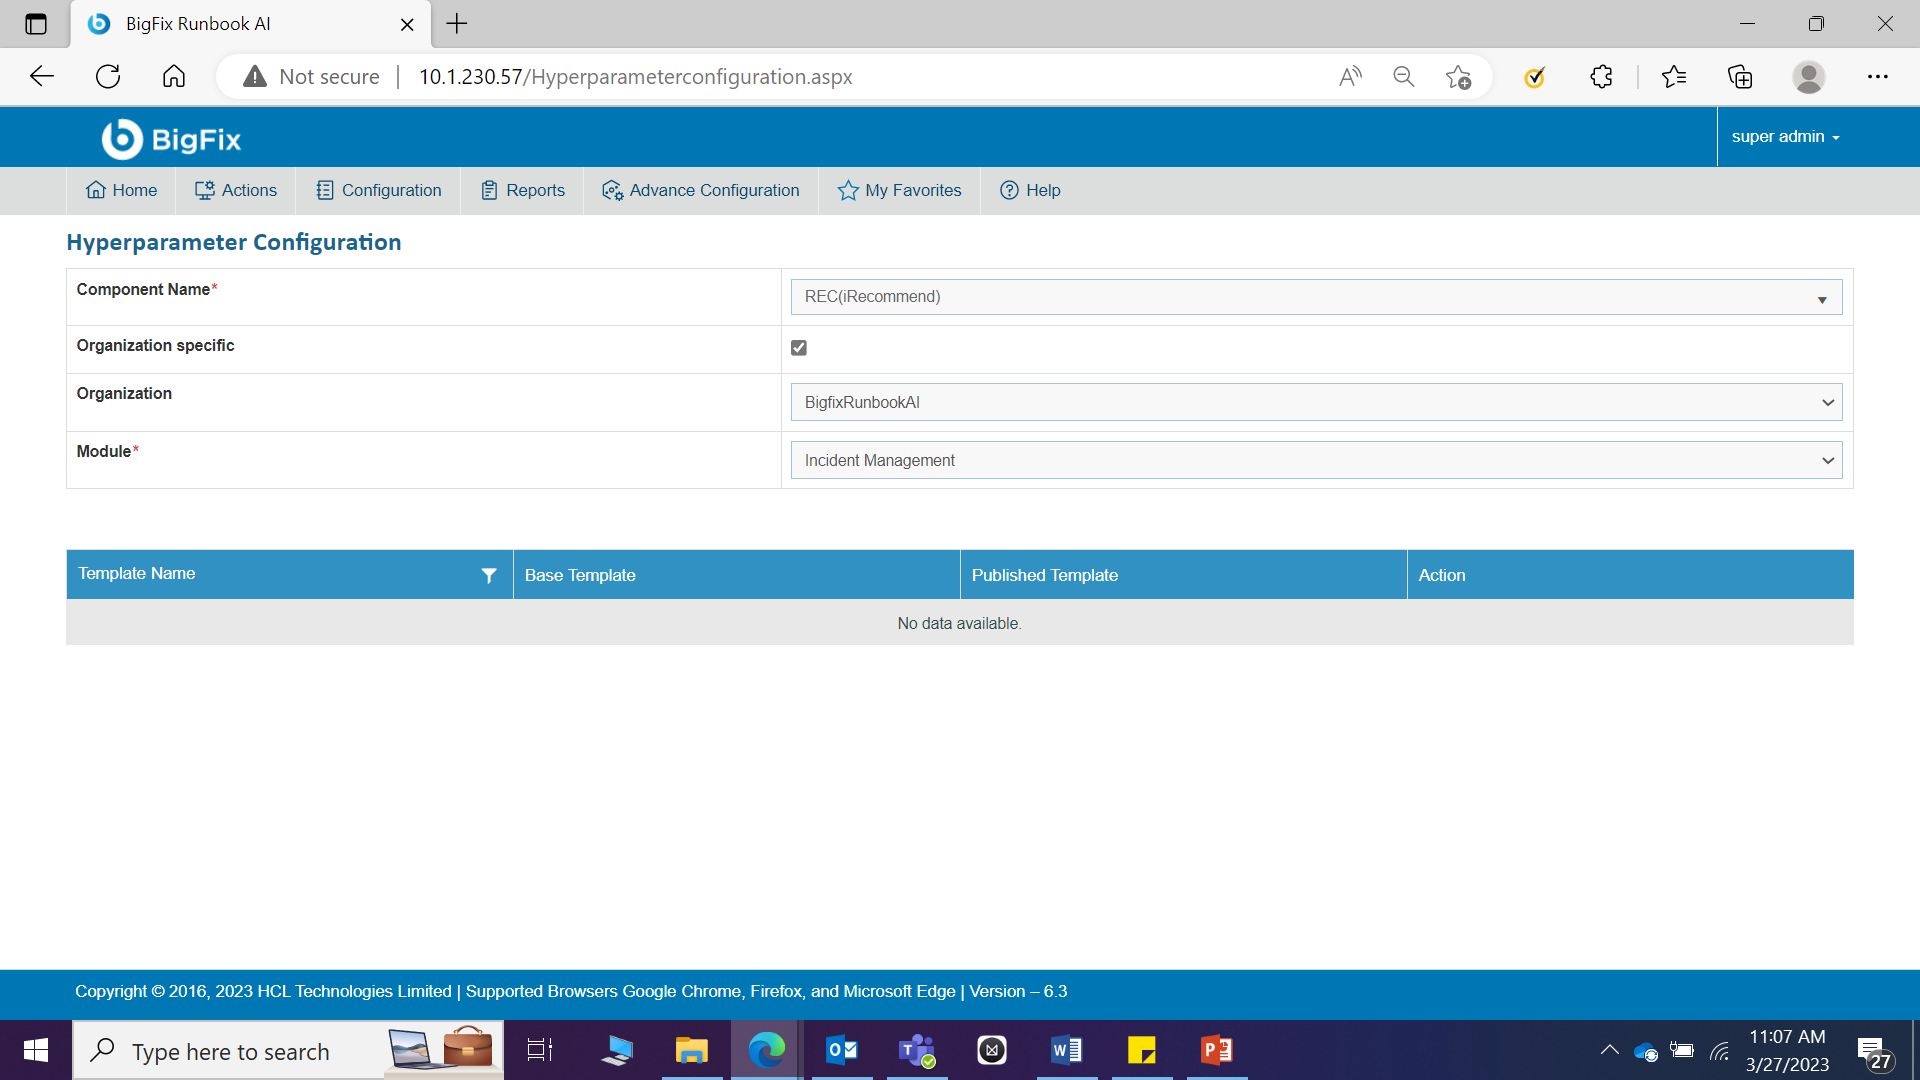
Add New Template
User can add a new template in a component by performing the following steps:
-
- Select the Recommendation or Unique Clustering component from the drop-down list next to the Component Name field.
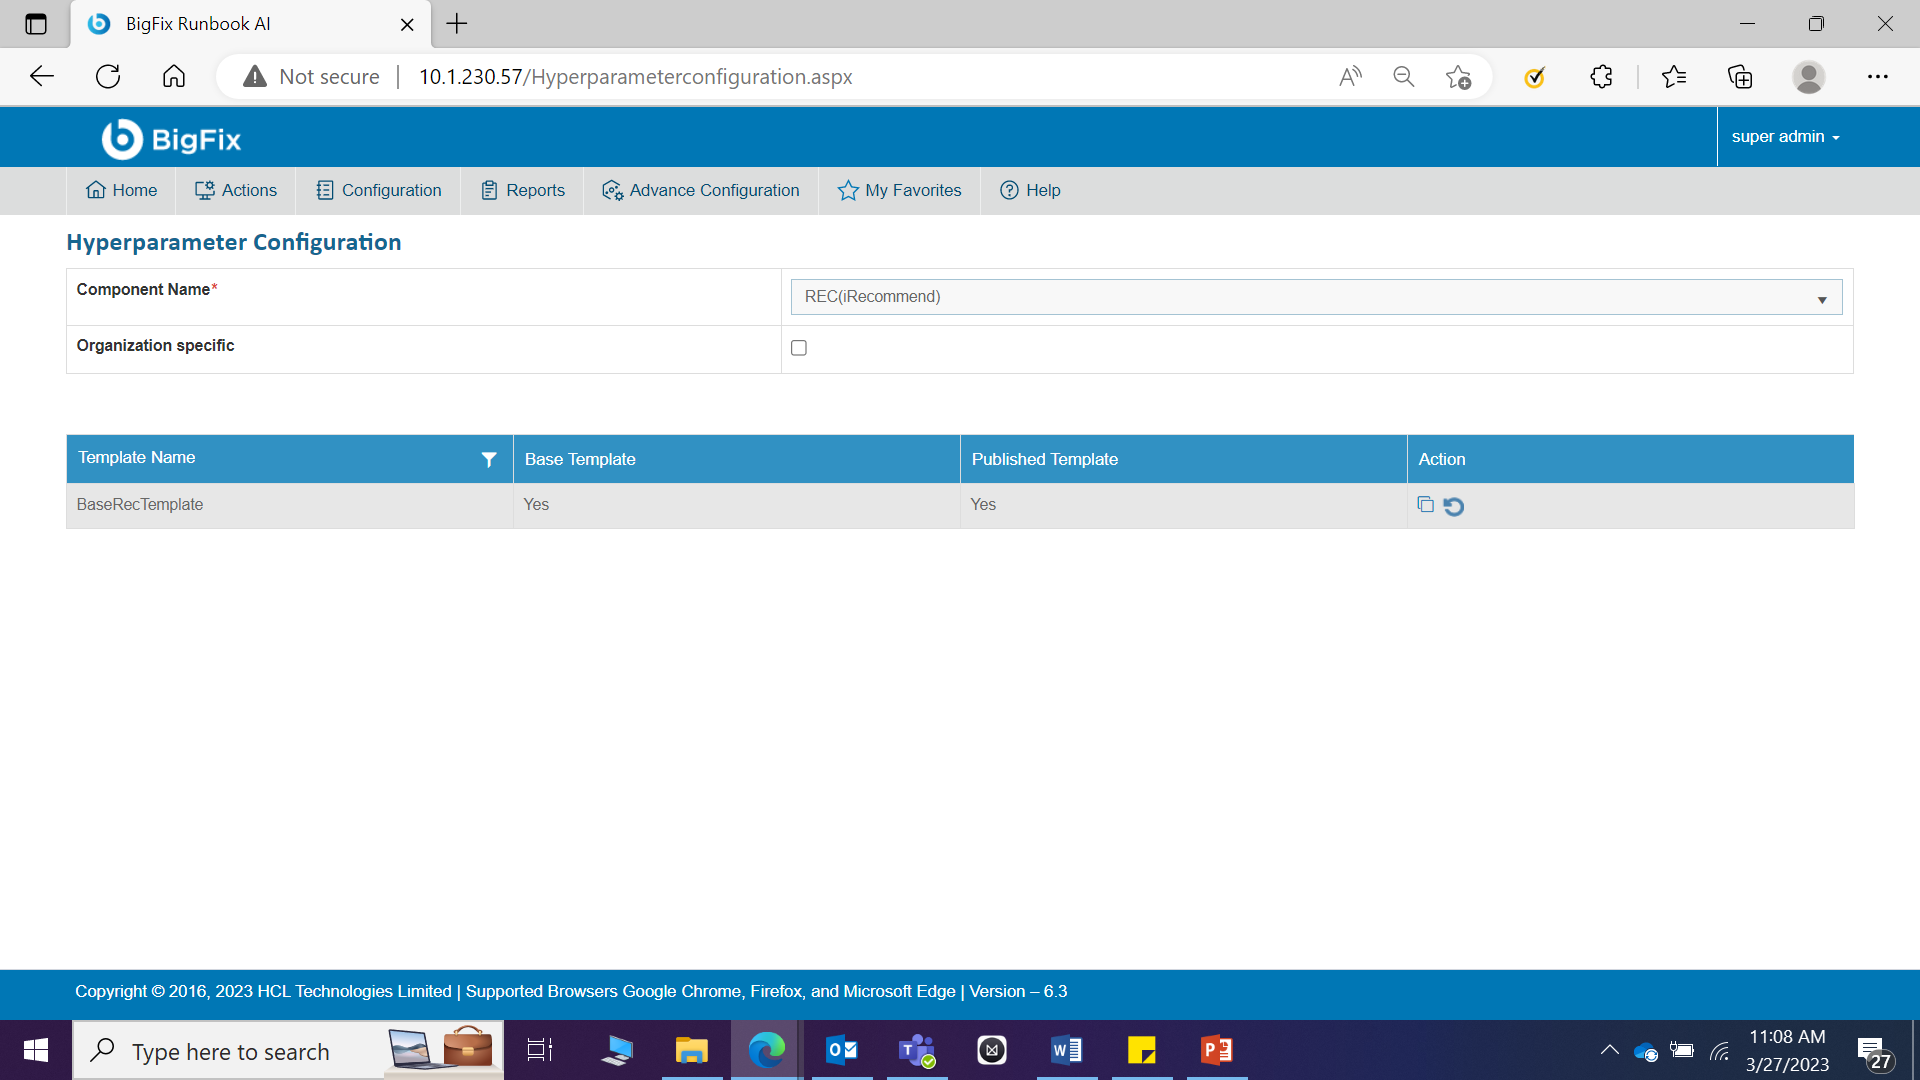
.png)
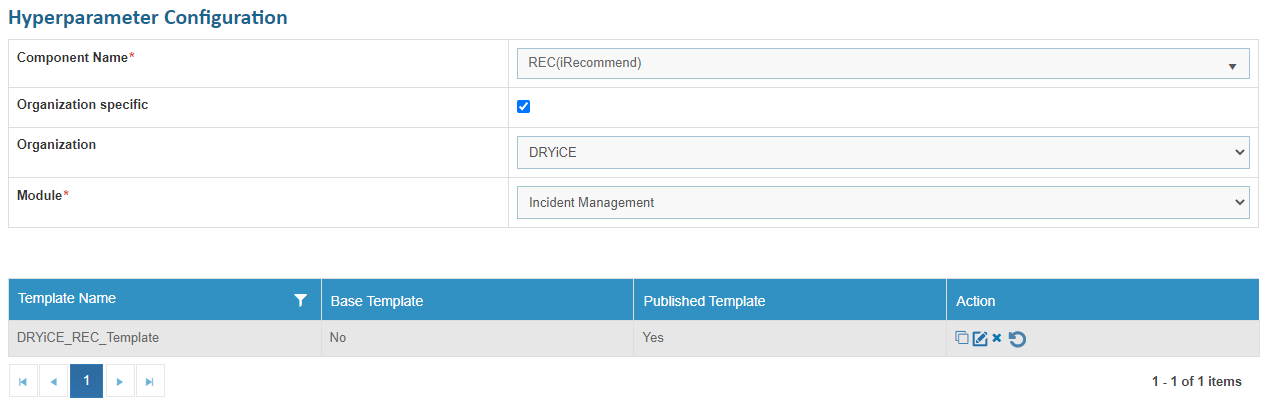
This lists the default base template and existing templates for the selected component if there are any. These templates provide a starting point for users to create a template by replicating or cloning them. It also enables a user to edit or delete the existing templates.
The component selection defines the further configuration.
To create a template for a recommendation, perform the following steps:
- Click
 next to the template selected for cloning. The
Clone Configuration page appears.
next to the template selected for cloning. The
Clone Configuration page appears.
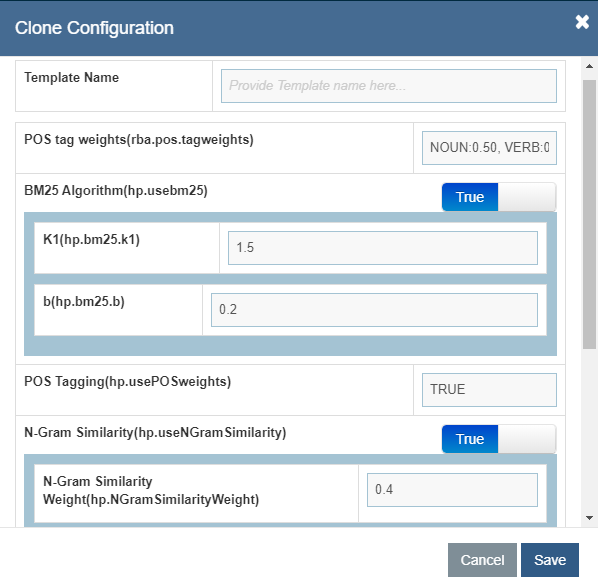
- To create a template, type the template name in the corresponding Template Name field and then define values for each of the following parameters:
- For recommendation:
- rba.pos.tagweights: It specifies the weightage of tags for given word as part of speech in ticket.
| Tag | Default Value |
| Noun | 0.50 |
| Verb | 0.20 |
| Adjective | 0.20 |
| Adverb | 0.10 |
The values defined in the table represent the default values and the user can change them based on the requirement. The system provides weights to these parts of speech tags based on values defined during recommendation analysis.
The total sum should of these values must be equal to 1.
- Usebm25: It is used to rank runbooks according to their relevance to a ticket summary. Use a toggle button with options such as True or False to enable this parameter. Enabling this parameter prompts you to specify the values following parameters:
K1: The user can provide any value of less than 2.0. The Default value is 1.5.
B: The user can provide any value of less than 1.0. The Default value is 0.2.
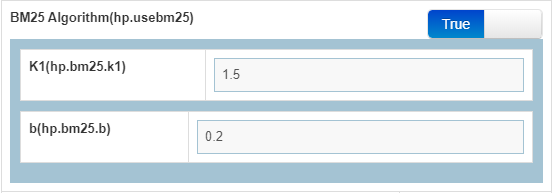
- usePOSWeights: Uses true or false values to enable or disable rba.pos.tagweights parameter.
- NgramSimilarity: It uses phonemes, phrases, letters, words, or base pairs according to the application from a speech and calculates whether to consider for a recommendation. Administrators can activate or deactivate the functionality with the help of a toggle button in terms of True or False. Selecting True prompts, the following parameters:
SimilarityWeight: Specifies the value for the combined weightage of bm25 and textrank score. The value should be less than 1.
TextRank.n: Specifies the number of top words to be considered for recommendation. The number should be equal to or greater than 1.
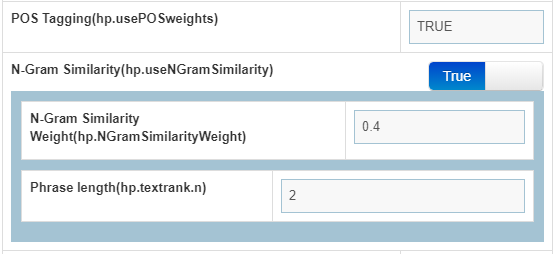
- EntityModel: Specifies whether to use the entity model or as True or False conditions for runbook recommendation.
- KMeasure: Specifies the weightage given to the entity model and recommendation model for runbook recommendation.
0 indicates that the entity model will be used for runbook recommendation.
1 indicates that the recommendation model will be used for runbook recommendation.
Between 0 and 1 indicates that the recommendation model and entity model will be used for runbook recommendation. If the recommendation model weightage is ‘t’, then the entity model weightage will be ‘1-t’.
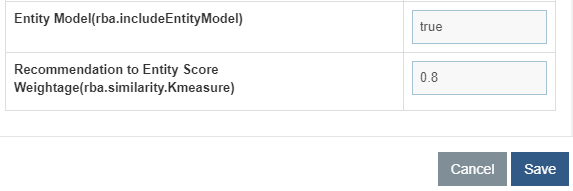
- Click Save.
To create a template for unique cluster, perform the following steps:
- Click
.png) next to the template selected for cloning.
The Clone Configuration page appears.
next to the template selected for cloning.
The Clone Configuration page appears.
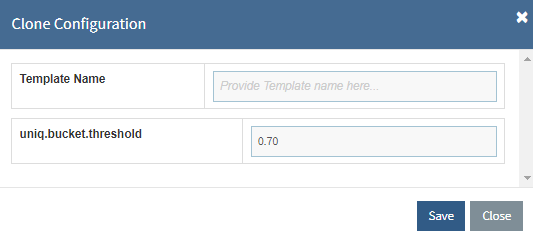
- To create a template, type the template name in the corresponding Template Name field.
- Type the value in Uniq.bucket.threshold field carefully to set up the threshold
value of the bucket for ticket clustering.
If a user increases the threshold value, the number of buckets will increase, and user will find more buckets with a similar description. If user decreases the threshold value, the different descriptions may be assigned to a single bucket.
- Click Save.
The new template is added and listed at the bottom of the template list.
The templates created will be used in the WorkBench .
Edit Template
User can review the existing parameter and change its details by performing the following steps:
- On the Manage Hyperparameters page, select the Component Name. The component selection defines n any further configuration.
- To edit a template for recommendation, perform the following steps:
- Click
 corresponding to the template that you want to
edit.
corresponding to the template that you want to
edit.
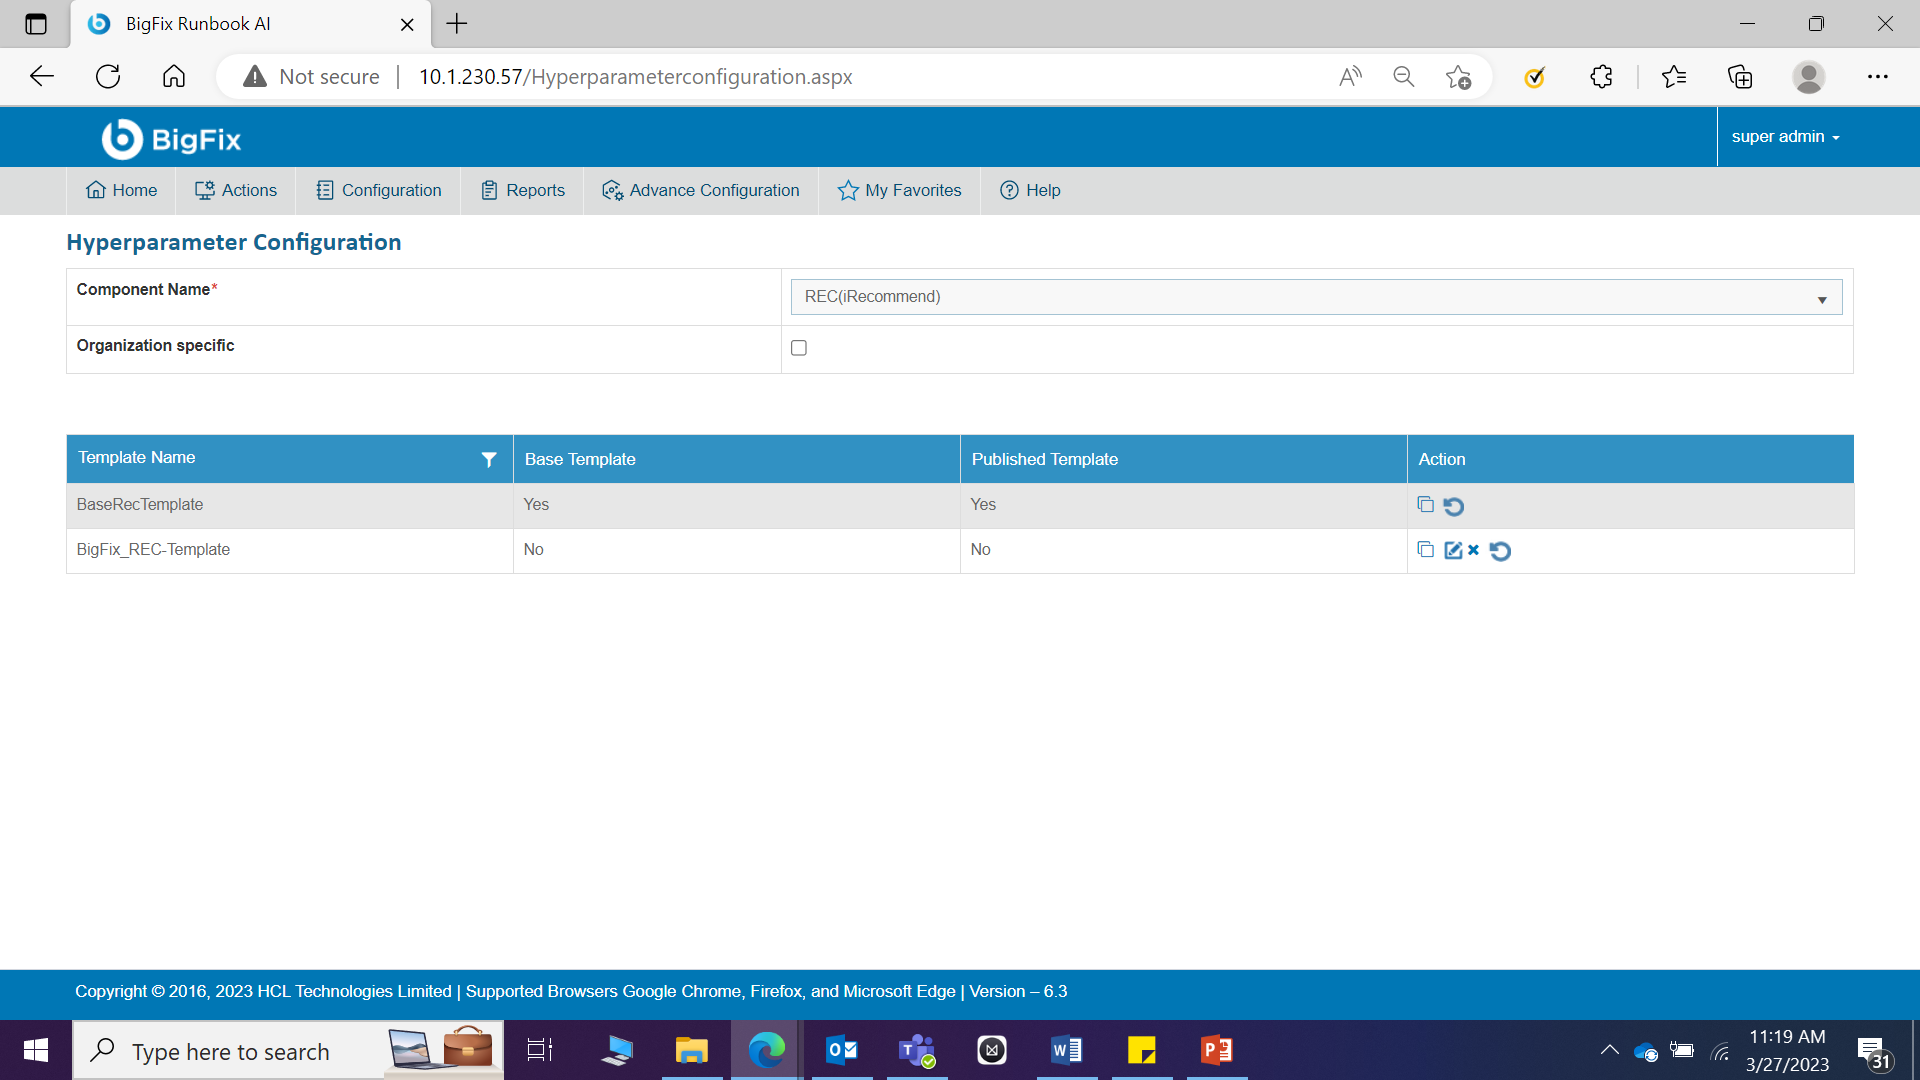
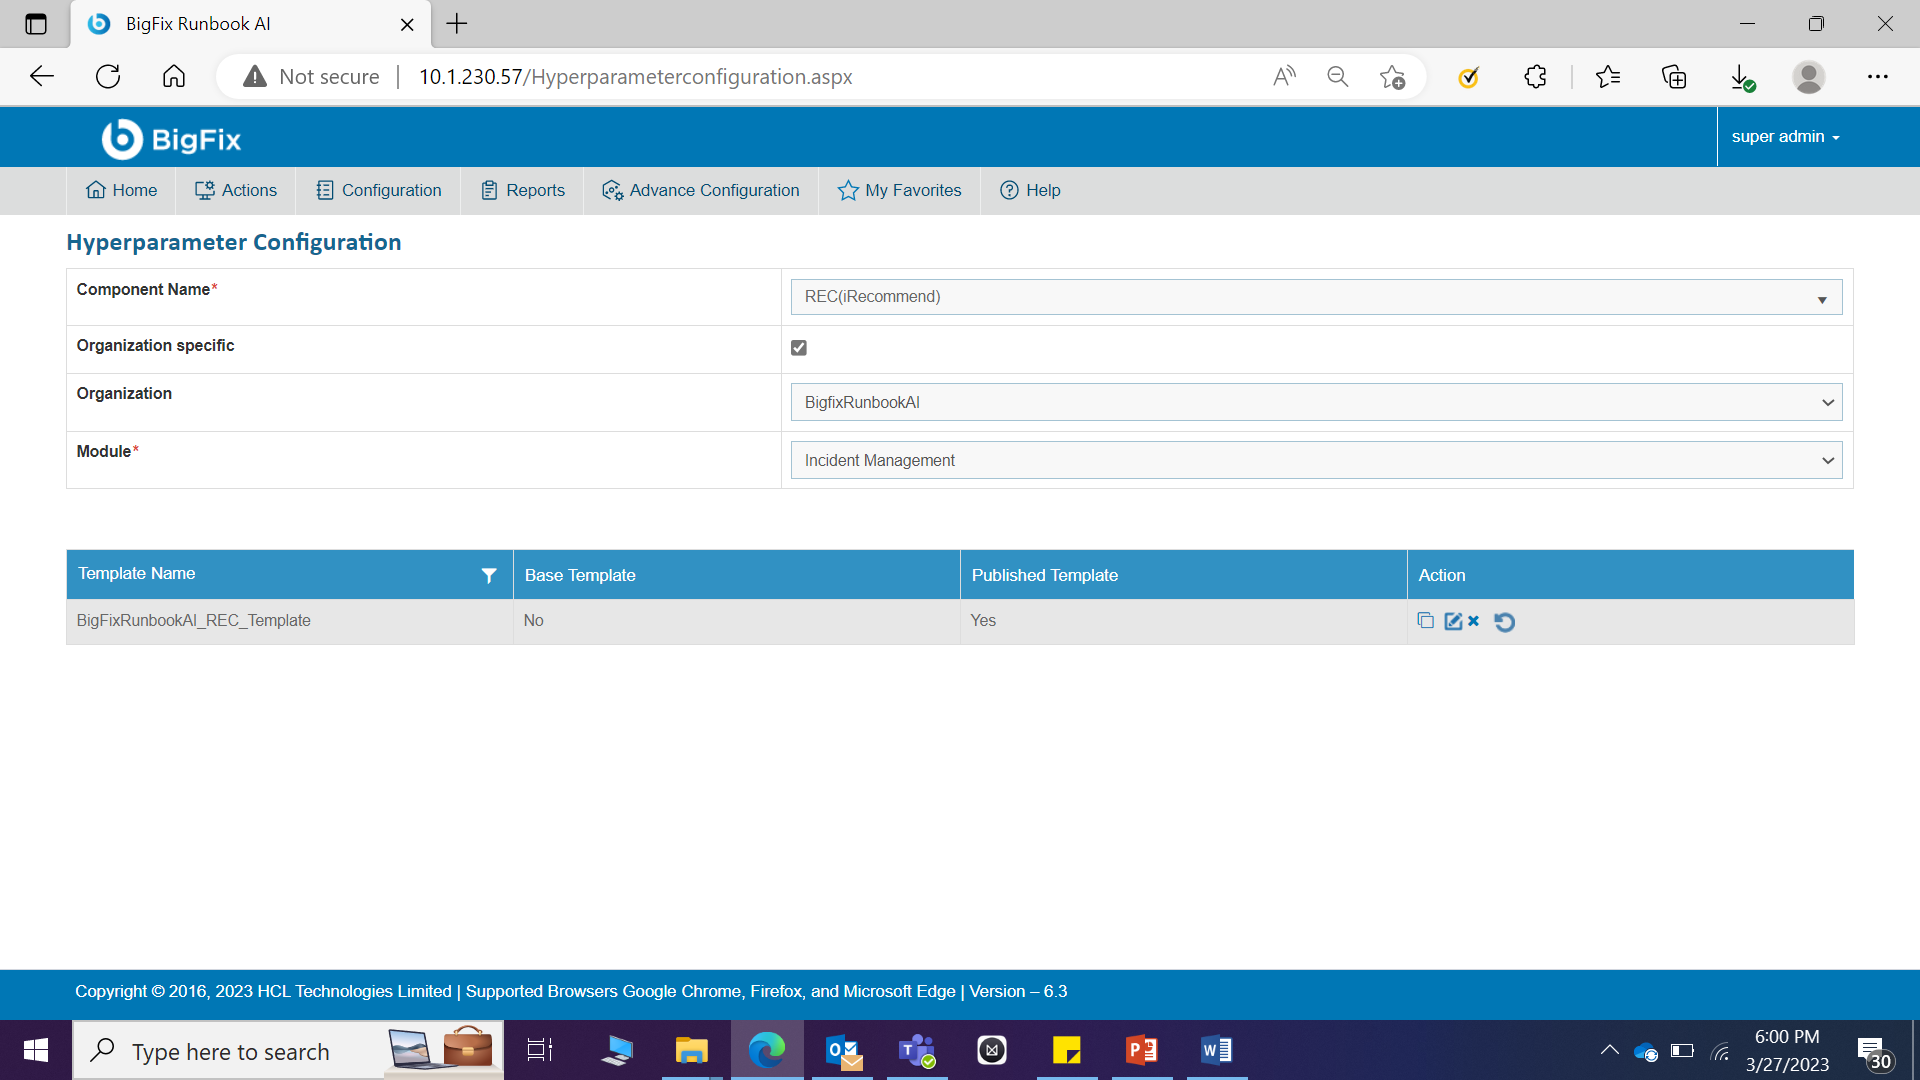
The Edit Configuration page appears.
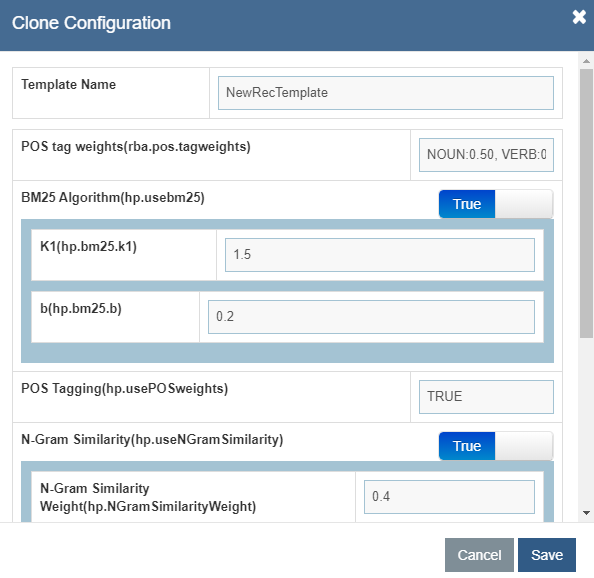
- Edit the required details and click Save. A confirmation dialog box appears.
To edit a template for unique cluster, perform the following steps:
- Click
.png) next to the template you want to edit.
next to the template you want to edit.
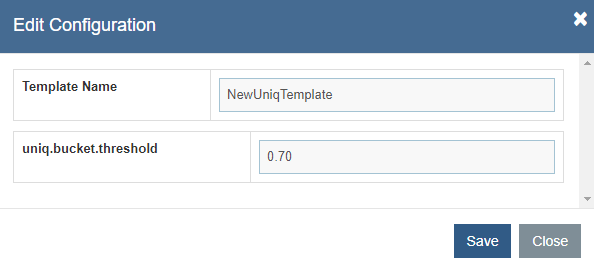
- Edit the required details and click Save. A confirmation dialog box appears.
.png)
Delete Template
If the user no longer needs a certain template, it can be deleted from the component by performing the following steps:
- To delete a template, click
.png) next to the template you want to delete.
next to the template you want to delete.
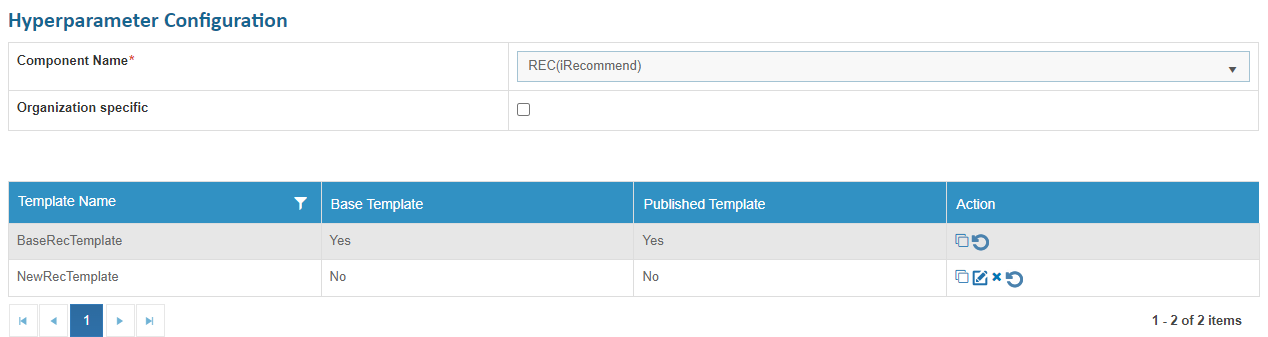
- Click Yes to confirm deletion of the selected template.
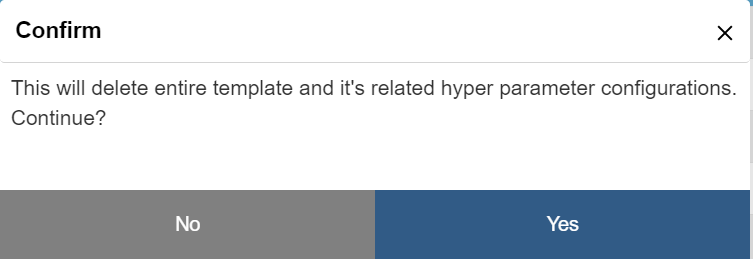
A confirmation dialog box appears.
Publish Template
If the user wants to publish any template so that the published template gets used wherever needed, it can be done by performing the following steps:
To publish a template,
- Click
 next to the template you want to Publish.
.png)

- Click Yes to confirm Publish of the selected template.
- A success message box appears:
Component Configuration
This section describes how the administrator can perform configuration specific to components such as Recommendation, Unique Clustering and so on.
To manage component configuration, perform the following steps:
- On the main menu bar, click Advance ConfigurationConnectivity, and then click Component Configuration. The Component Configuration page appears.

- Select a Component Name.
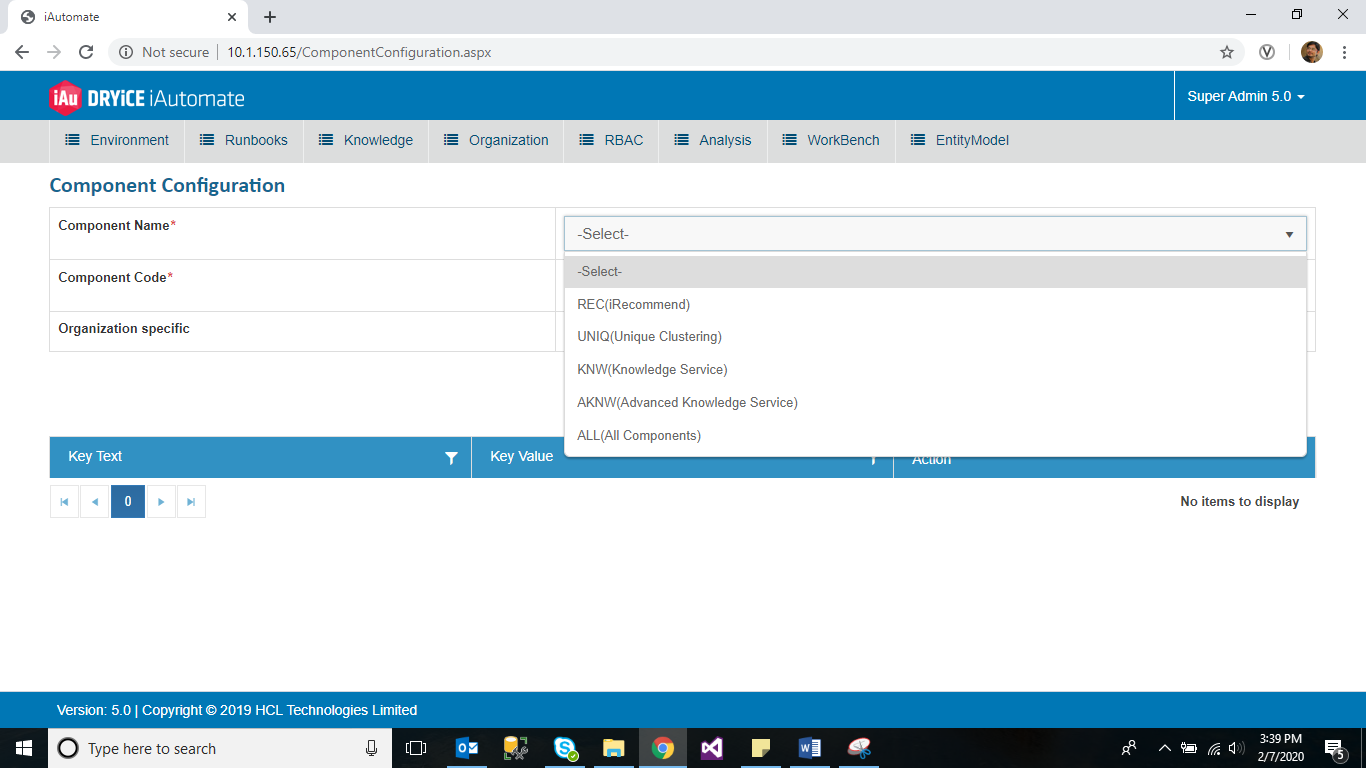
The component selection defines further configuration.
- Select a Component Code from the drop-down list.
- In case of runbook recommendation, the system has three component codes: Synonyms, Discriminator, and User-Defined Functions (UDF).
Synonym: Defines all possible synonyms of the word. Here, the key is a word and value are the list of synonyms.
Discriminator: Segregates the tickets with the same type of issue, but with different OS, applications, and so on. For example: Windows, Linux.
User Defined Feature (UDF): It helps in identifying the implications from the problem statement. E.g., If a user has mentioned that my system is locked, his intention is to get his system unlocked.
- In case of Unique Clustering, the system has two component codes: Discriminators and User Defined Features (UDF).
User Defined Features (UDF): It uses either regular expression or a list of words to extract common terms from ticket summary. For example, list of application names, tools, or IPs. Multiple values in UDF can separated by separator “$~$”.
Discriminators: Segregates the tickets with same issue, but with different OS, applications, and so on.
- Select Organization Specific if user wants to configure organization-specific hyperparameters. Else, clear the selection.

Selecting a check box prompts user to fill in more fields.
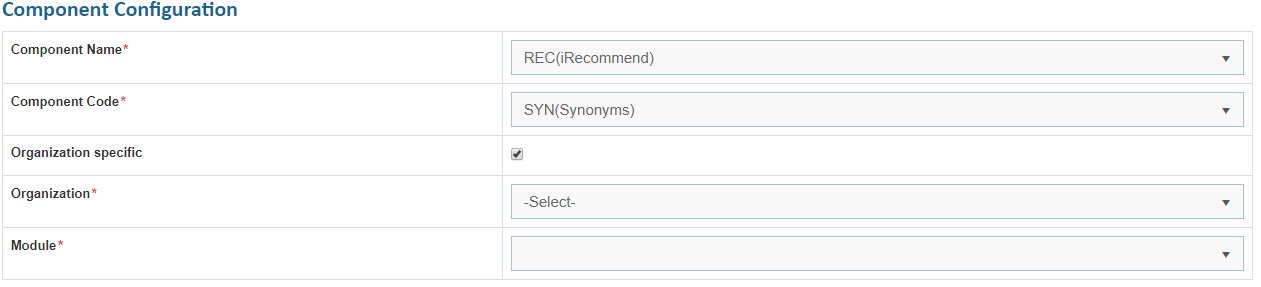
- Select the organization from the list of available organizations, then select Module, which enables the Add button.
- Click Add and the Add Component Configuration page appears.
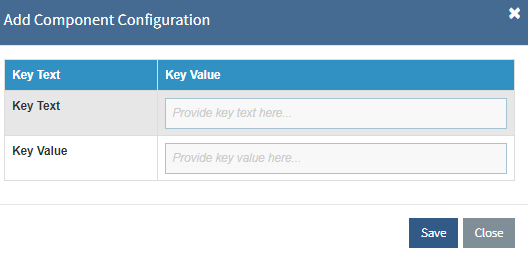
- Type the actual word in the Key Text field and the list of synonyms separated by comma for key text in the Key Value field.
- Click Save. A confirmation dialog box appears:
This adds the new component and lists in the existing components as shown in the grid below.
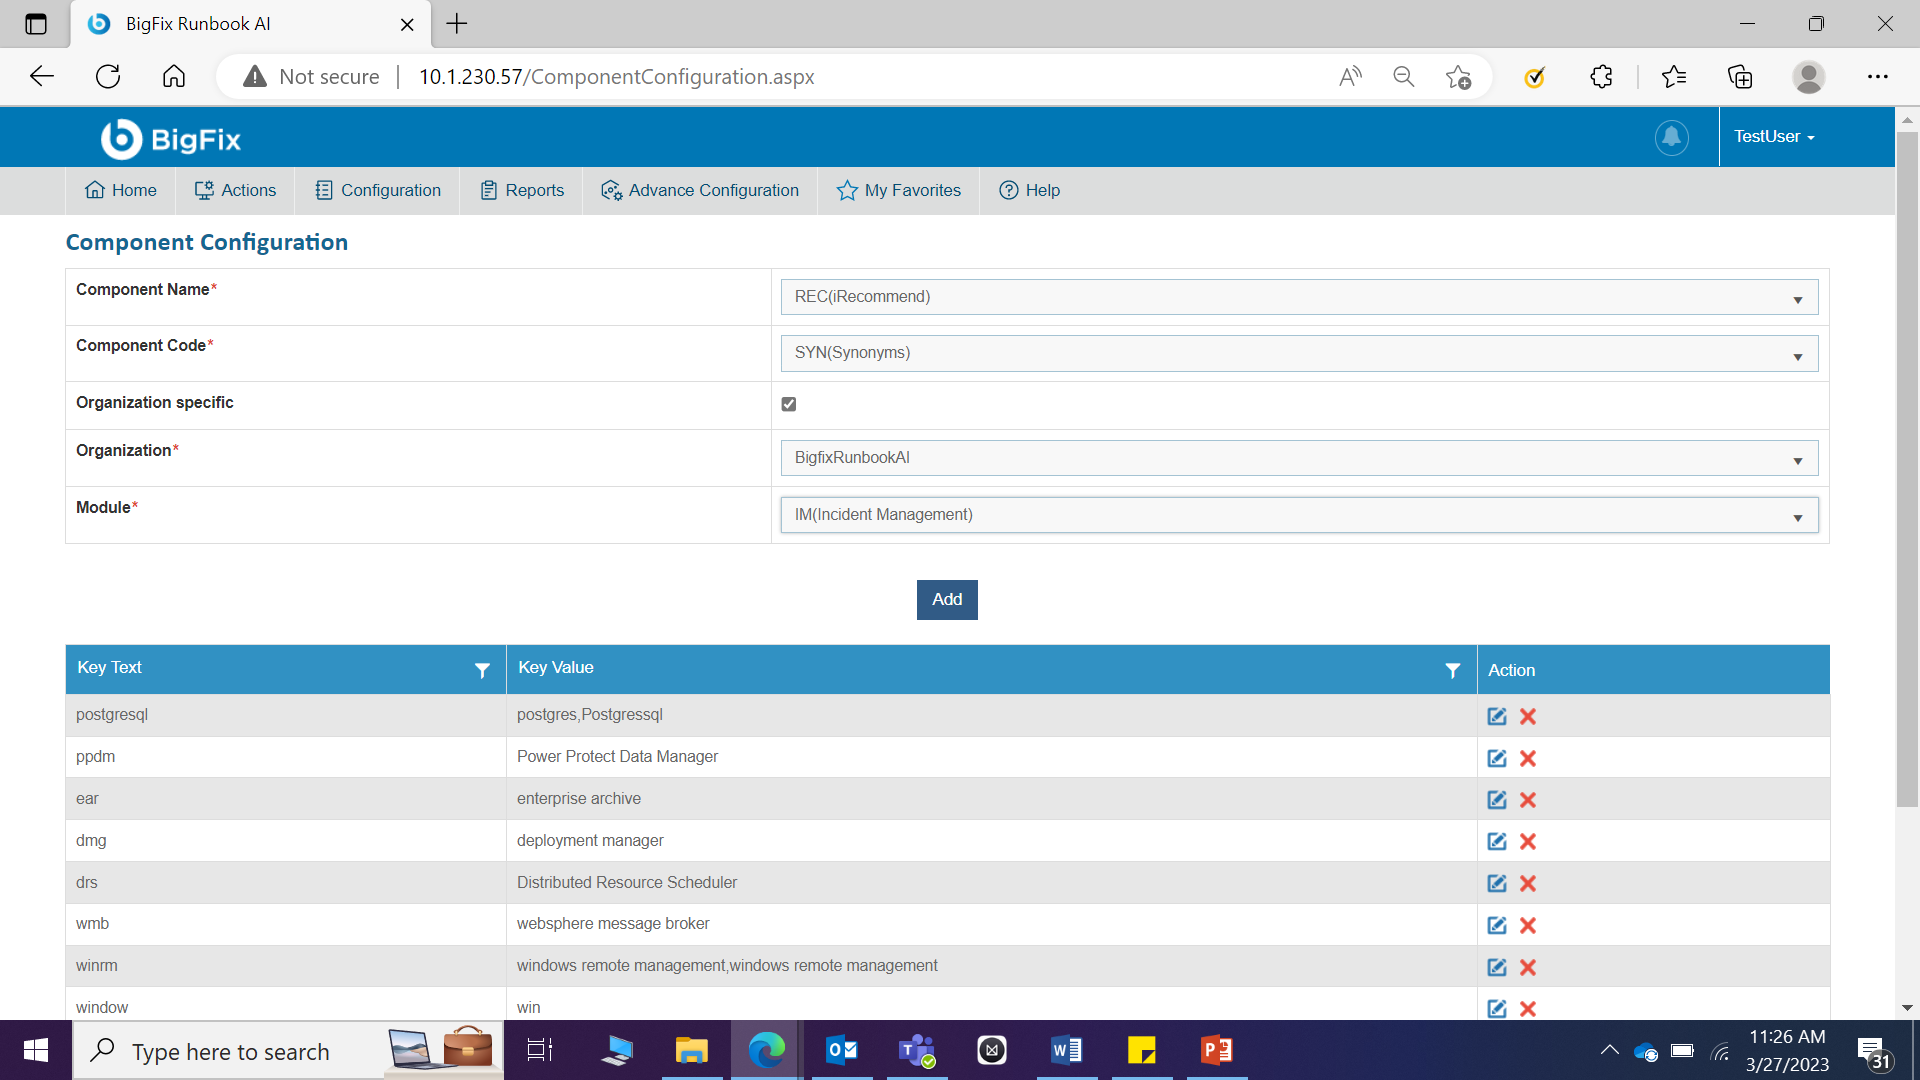
- User can edit the existing component by clicking
 corresponding to the required key text. It displays the details of selected component
configurations.
corresponding to the required key text. It displays the details of selected component
configurations. - Edit the required details and click Save.
- Click Yes to confirm the changes across all organizations.

A confirmation dialog box appears.
.png)
Add Hyperparameters
This section describes how user can upload a template containing optimal values of hyperparameters that have been exported after fine tuning of Unique Clustering and Runbook recommendation for the customer.
To add hyperparameters, perform the following steps:
- On the main menu bar, click Advance Configuration Parameter , and then click Add Hyperparameters. The Add Hyperparameters page appears.

- Select a Component Name, then select Organization, and then select Module. Selecting a module prompts the Upload button. The Upload Hyperparameters page appears. User can also download the template for reference by clicking on the Download Template button.
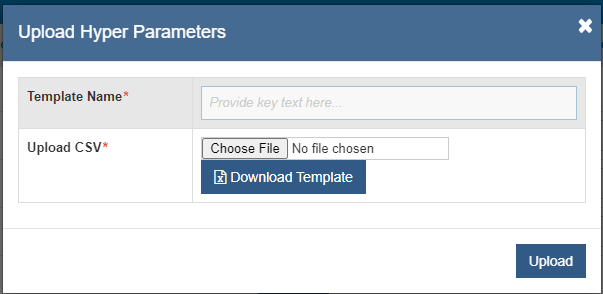
- Type the name for the new template in the Template Name field and then click Choose file to upload the .csv file. To download the CSV file, see Add New Unique Analysis Type.
After successfully uploading the template, the user must rebuild the model for the same customer again in case of adding a parameter for the recommendation model only. To build a model, see Build Model.
iRecommend Rule Configuration
This section describes how users can add rules to fine tune Runbook recommendations depending on the client’s environment. Also, how the user can define regex so that Runbook recommendations get more precise from the ticket description itself.
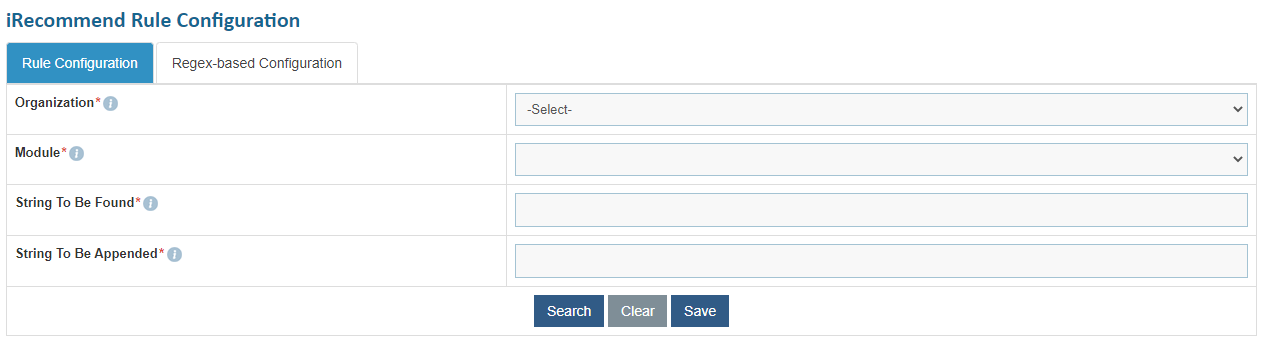
Rule Configuration:
To define the rules, perform the following steps:
- On the main menu bar, click Advance Configuration iRecommend Rule Configuration. The iRecommend Rule Configuration page appears.
.png)
- Select Organization, and then select Module.
- Enter the string that needs to be searched for in the ticket description, against String to be Found field.
- Enter the string that needs to be appended in the ticket description, against String to be Appended field.
- Click Save.
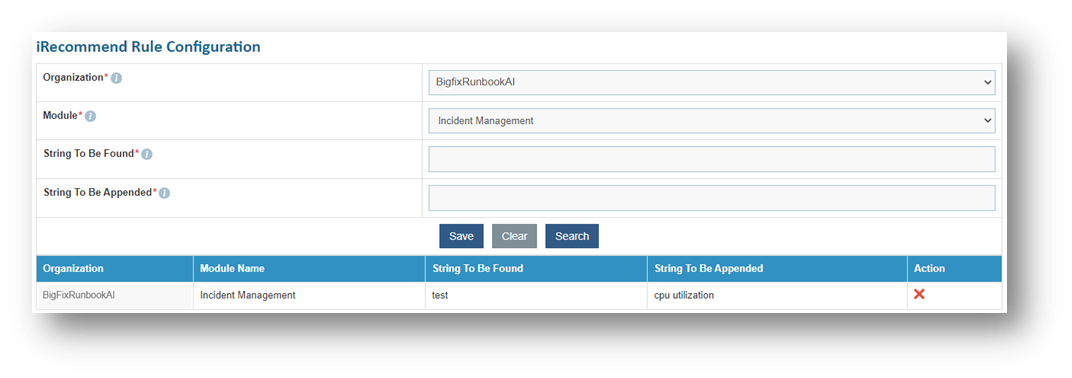
Regex-based Configuration:
To define the regex, perform the following steps:
- On the main menu bar, click Organization iRecommend Rule Configuration. The iRecommend Rule Configuration page appears. Click on Regex-based Configuration tab.
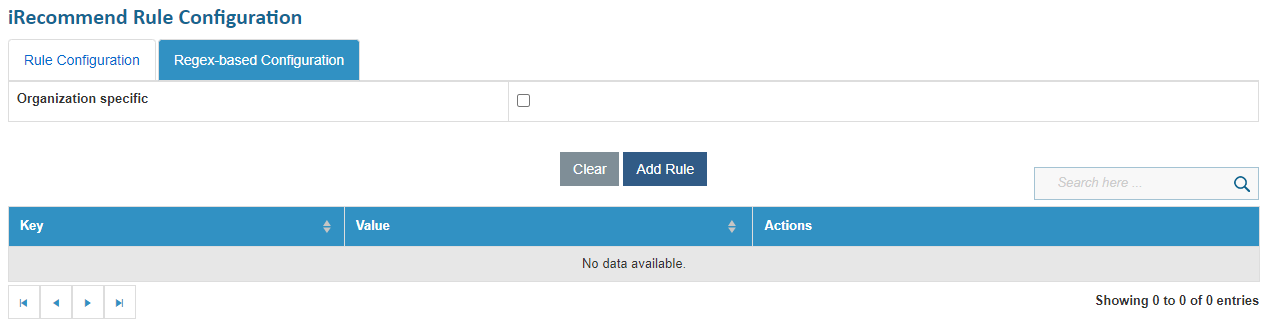
- Click on Organization specific check box if you want to apply the regex-based configuration at Organization level else leave it unchecked if it needs to be applied at admin level (For Analysis purpose).
- Click on Add Rule to add new regex rule. Below pop up will appear:
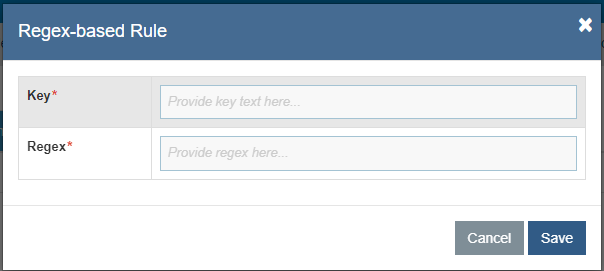
- Enter the key and its regex and click on save. Below alert will be generated.

- The record inserted will appear in the grid.
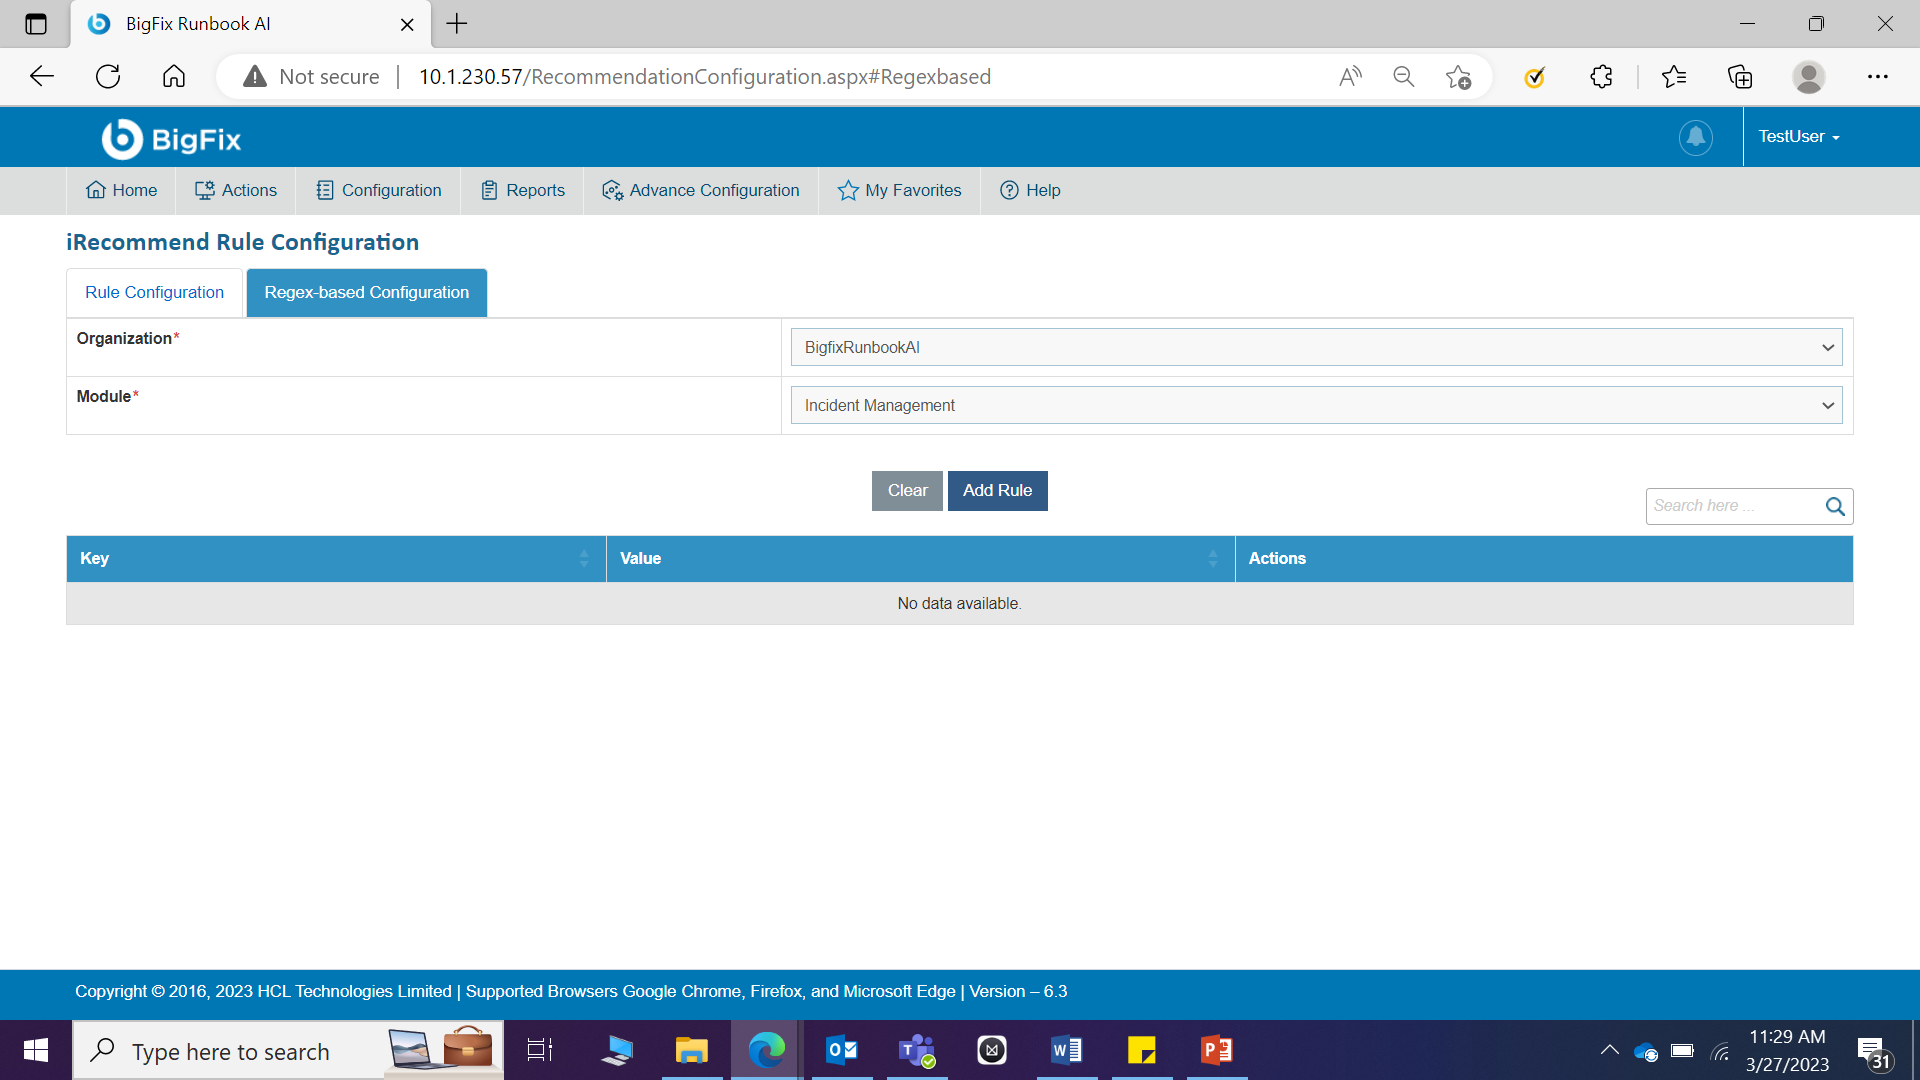
- To edit any rule, click on icon
 corresponding to that
rule. The Regex-based Rule popup appears. Enter the updated regex and click on
Update.
corresponding to that
rule. The Regex-based Rule popup appears. Enter the updated regex and click on
Update.
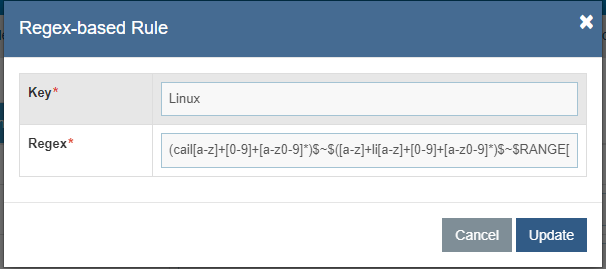
- To delete any rule, click on icon
 corresponding to
that rule. The following confirmation message appears:
corresponding to
that rule. The following confirmation message appears:
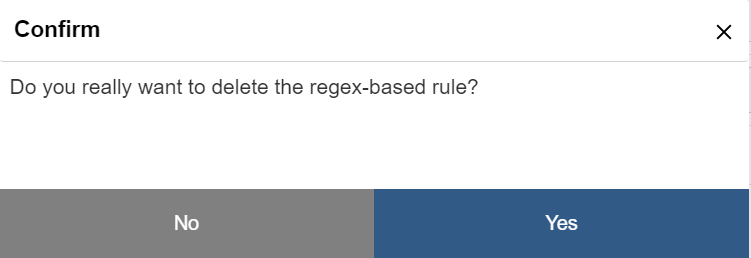
- Click Yes. The following success message appears:
Entity
This section describes how to extract entities such as an operating system, application name, and so on from the input summary of a ticket. This is considered one of the main inputs for the recommendation model. An entity can be defined as a noun or a pattern such as application name, operating system, and so on.
To build an entity model, perform the following steps:
- On the main menu bar, click Advance Configuration->Entity. The drop-down lists the following options.
Create Entity
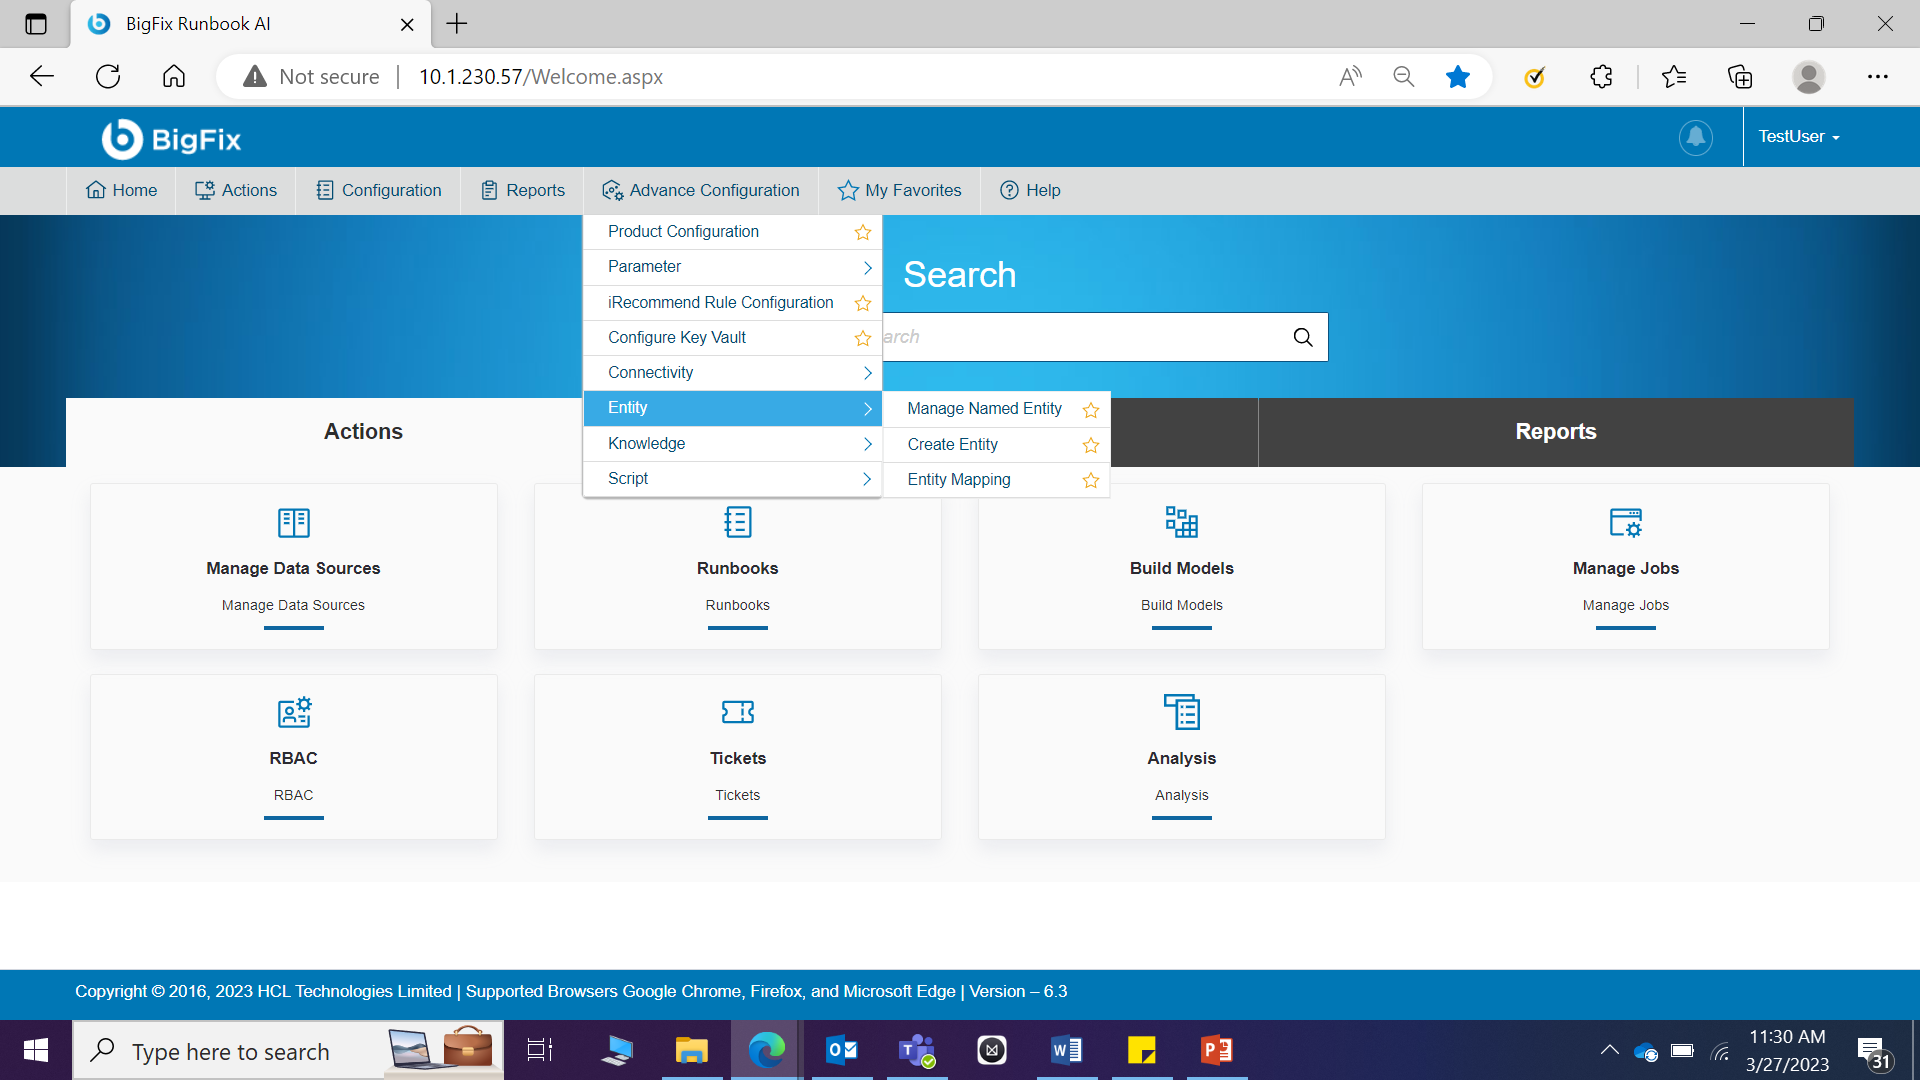
Manage Named Entity
Named Entities are specially curated entities against any given runbook that provides control over recommendation of a runbook against a ticket.
Consider a scenario where the system has two runbooks for the same issue but with different domains. For e.g., we may have a runbook which automates the operation of database backup. But the requirement is to support multiple types of databases like MSSQL, Oracle, etc. For each type of the database, a new runbook needs to be available in the system. For the system to understand and recommend the relevant runbook for a particular type of database, named entities need to be mapped against the runbooks.
If we want system to return only MSSQL runbook for a ticket, then we need to specifically map ‘MSSQL’ and ‘!MSSQL’ against runbook for MSSQL and Oracle respectively.
The user can map named entities against runbooks using this menu item.
To add named entities, perform the following steps:
- On the main menu bar, click Advance Configuration->Entity and then Manage Named Entity. The Named Entity page appears.
- Select Organization, Module, and the Runbook Tool.
- Click Search. All the runbooks which are configured within the selected Runbook Tool will be listed.
- Type in the Named Entities against the respective Runbook Name.E.g. - !windows, windows
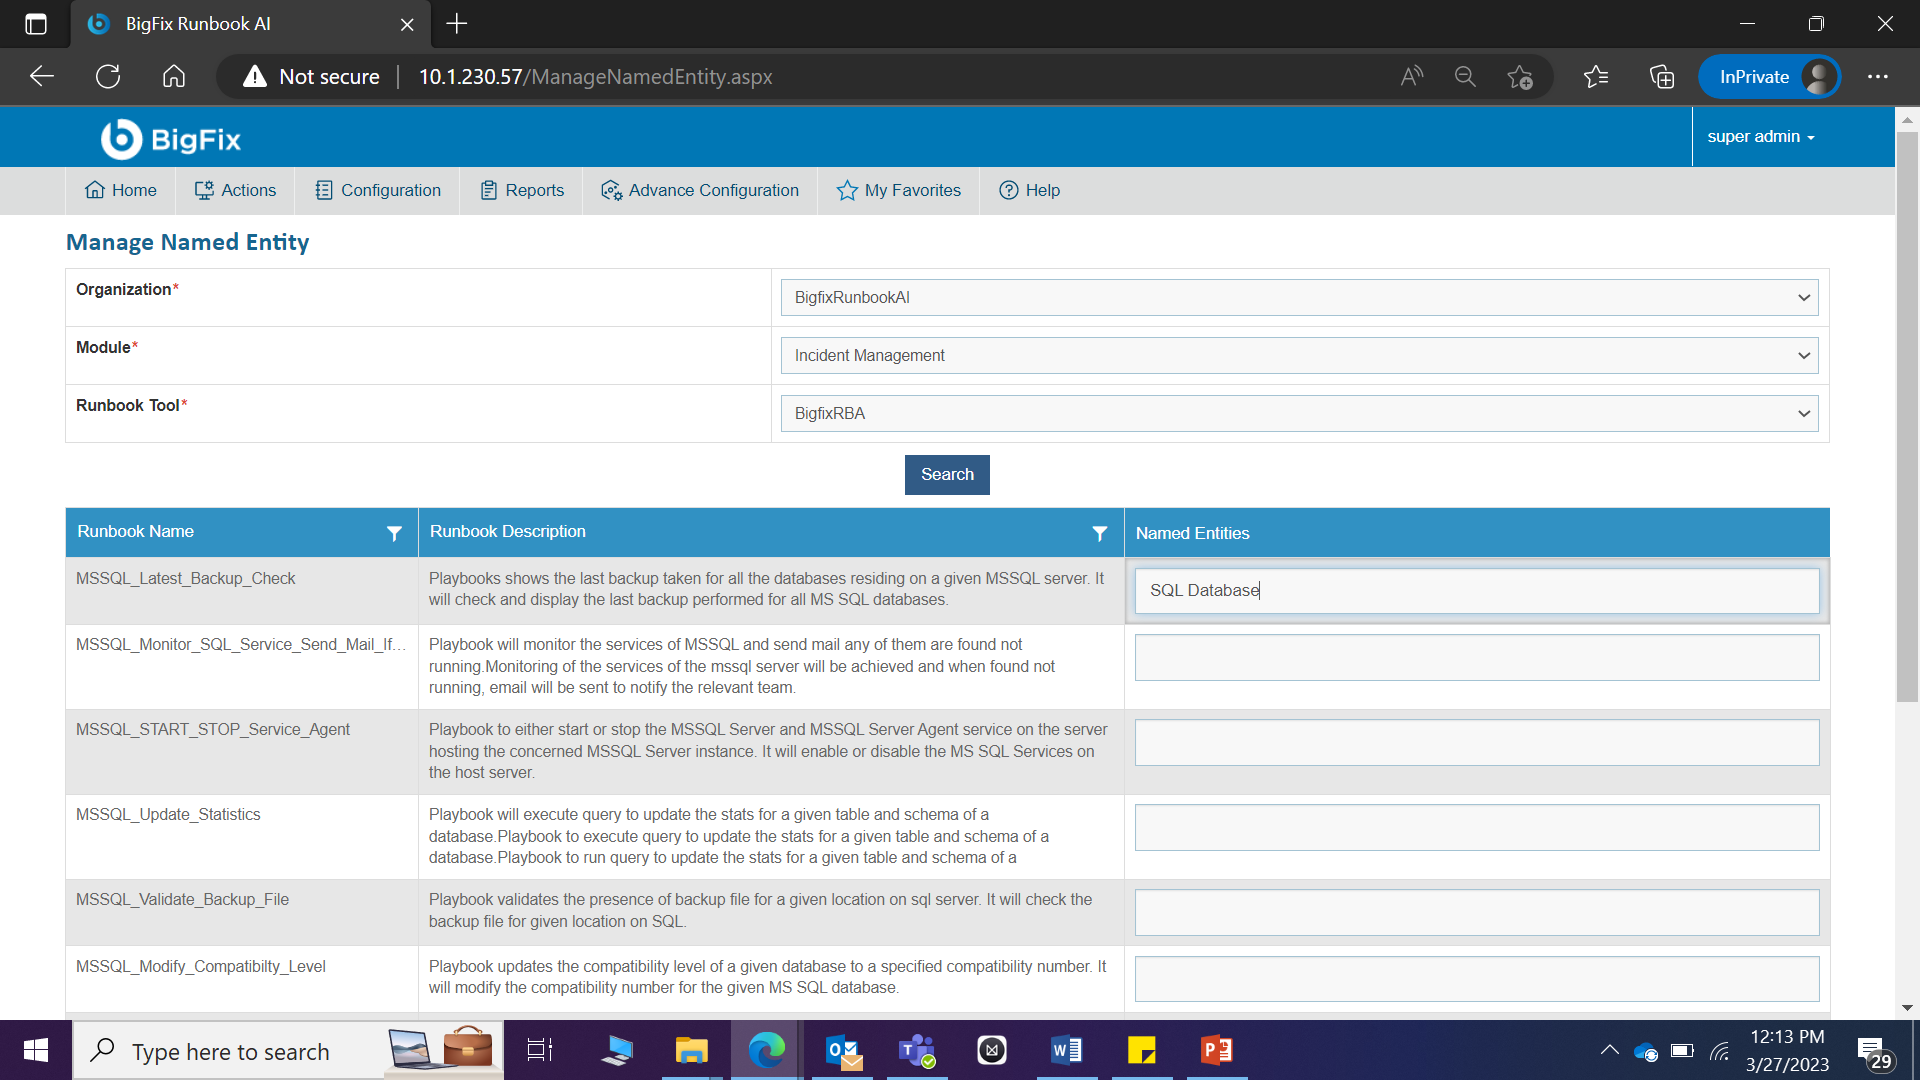
- Click Save Changes to commit the changes.
It is not mandatory to mention the named entities for every runbook. It should be used only if required. Multiple values can be provided as comma separated values.
Create Entity
User can manage entities such as an operating system, application name, and so on in an organization by performing the following steps:
- On the main menu bar, click Advance Configuration -> Entity then Create Entity.
- Click Create Entity.
- The Entity Creation page appears. It enables user to add a new entity and lists the existing entities in a tabular view.

Add New Entity
User can create a new entity in a customer environment by performing the following steps:
- On the Entity Creation page, type the entity name in the Name field, and then describe the entity in the Description field.
- Select the entity from the Type list and then select the required language from the Language field.
- If required, select the Fuzzy Match check box to enable fuzzy match. It allows for any spelling errors in entities in the ticket summary.
- Click Save.
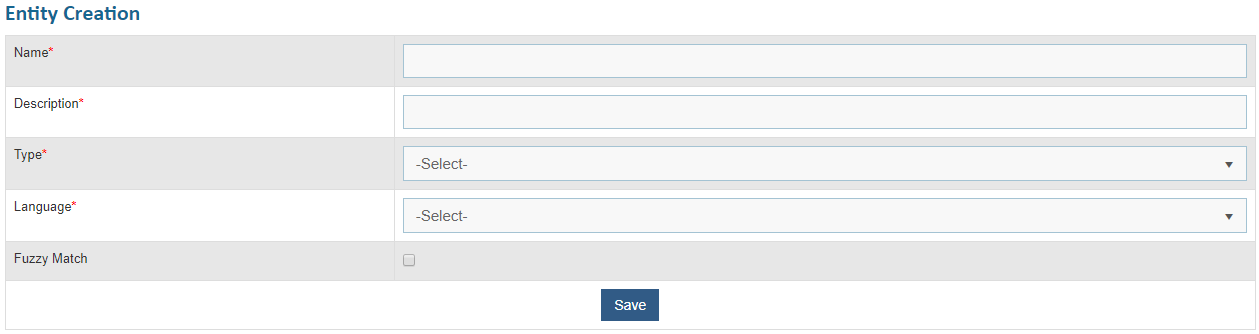
- A confirmation message dialog box appears.
All fields marked with an asterisk (*) are mandatory.
The new entity is added and appears in a tabular view.
Edit Entity
User can view and change the existing entities by performing the following steps:
- On the Entity Creation page, click
 next to the
entity user wants to edit.
next to the
entity user wants to edit.

- This populates the details of the selected entity.
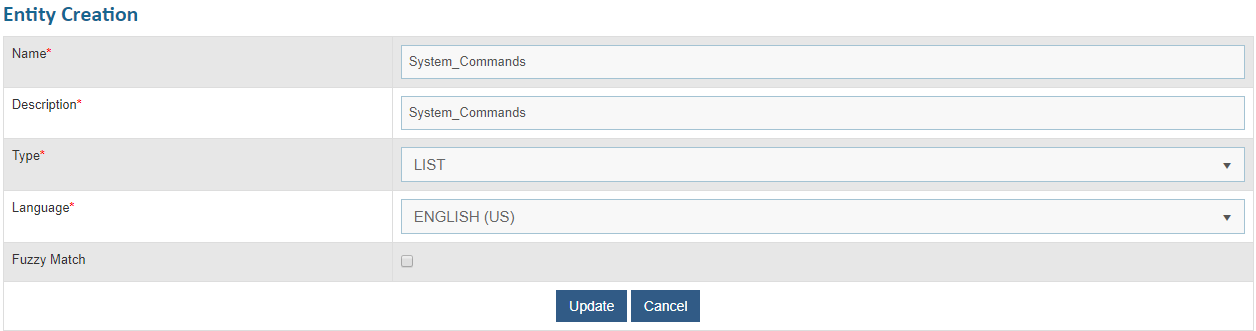
- Edit the required entity details.
- To update changes, click Update. A confirmation dialog box appears.
All fields marked with an asterisk (*) are mandatory.
Add Value to Entity
User can add values to an existing entity by performing the following steps.
- On the Entity Creation page, click
 next to the
entity to which user wants to add a value.
next to the
entity to which user wants to add a value.

- A page appears where user can add new values and view the existing values in the
selected entity.
Figure 548. Figure - Add Value to Entity (Cont.) 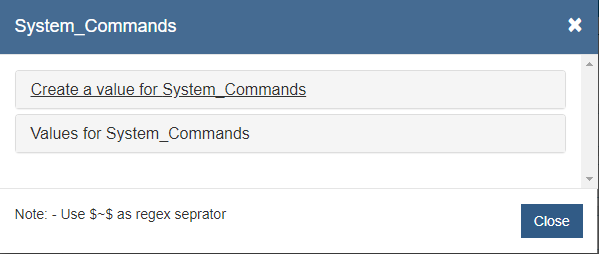
- To add a value, click Create a Value for Entity. This prompts you to fill the Value Name, the Synonym, and the Pattern (or regular expression) details. For example, in case of Hostname, a user defines the corresponding regular expression.
Figure 549. Figure - Add Value to Entity (Cont.) 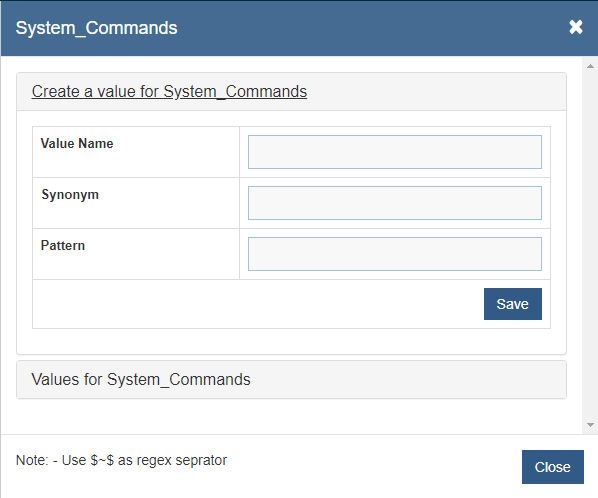
- Click Save. A confirmation dialog box appears.
Figure 550. Figure - Add Value to Entity (Cont.) 
- The new value is added and appears under the Values for Entity tab.
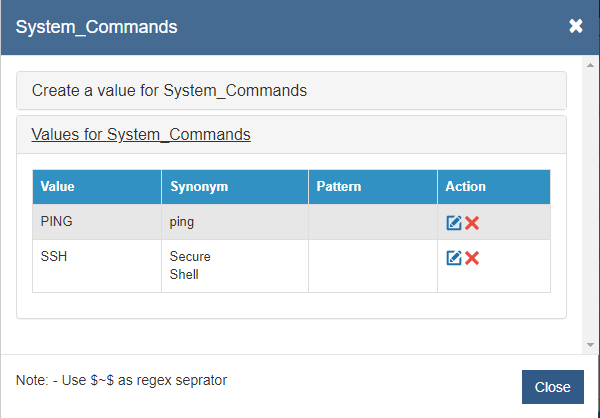
User can edit or delete the existing values for the entity by clicking  or
or .png) .
.
Delete Entity
If user no longer wants a certain entity in an environment, it can be deleted by performing the following step.
- On the Entity Creation page, click
.png) next to
the entity you want to delete.
next to
the entity you want to delete.

- A confirmation dialog box appears.
Entity Mapping
User can map an entity to an organization by performing the following steps.
- On the main menu bar, click Advance Configuration -> Entity and then click Entity Mapping. The Entity Mapping page appears.

- Select an Organization from the drop-down list.
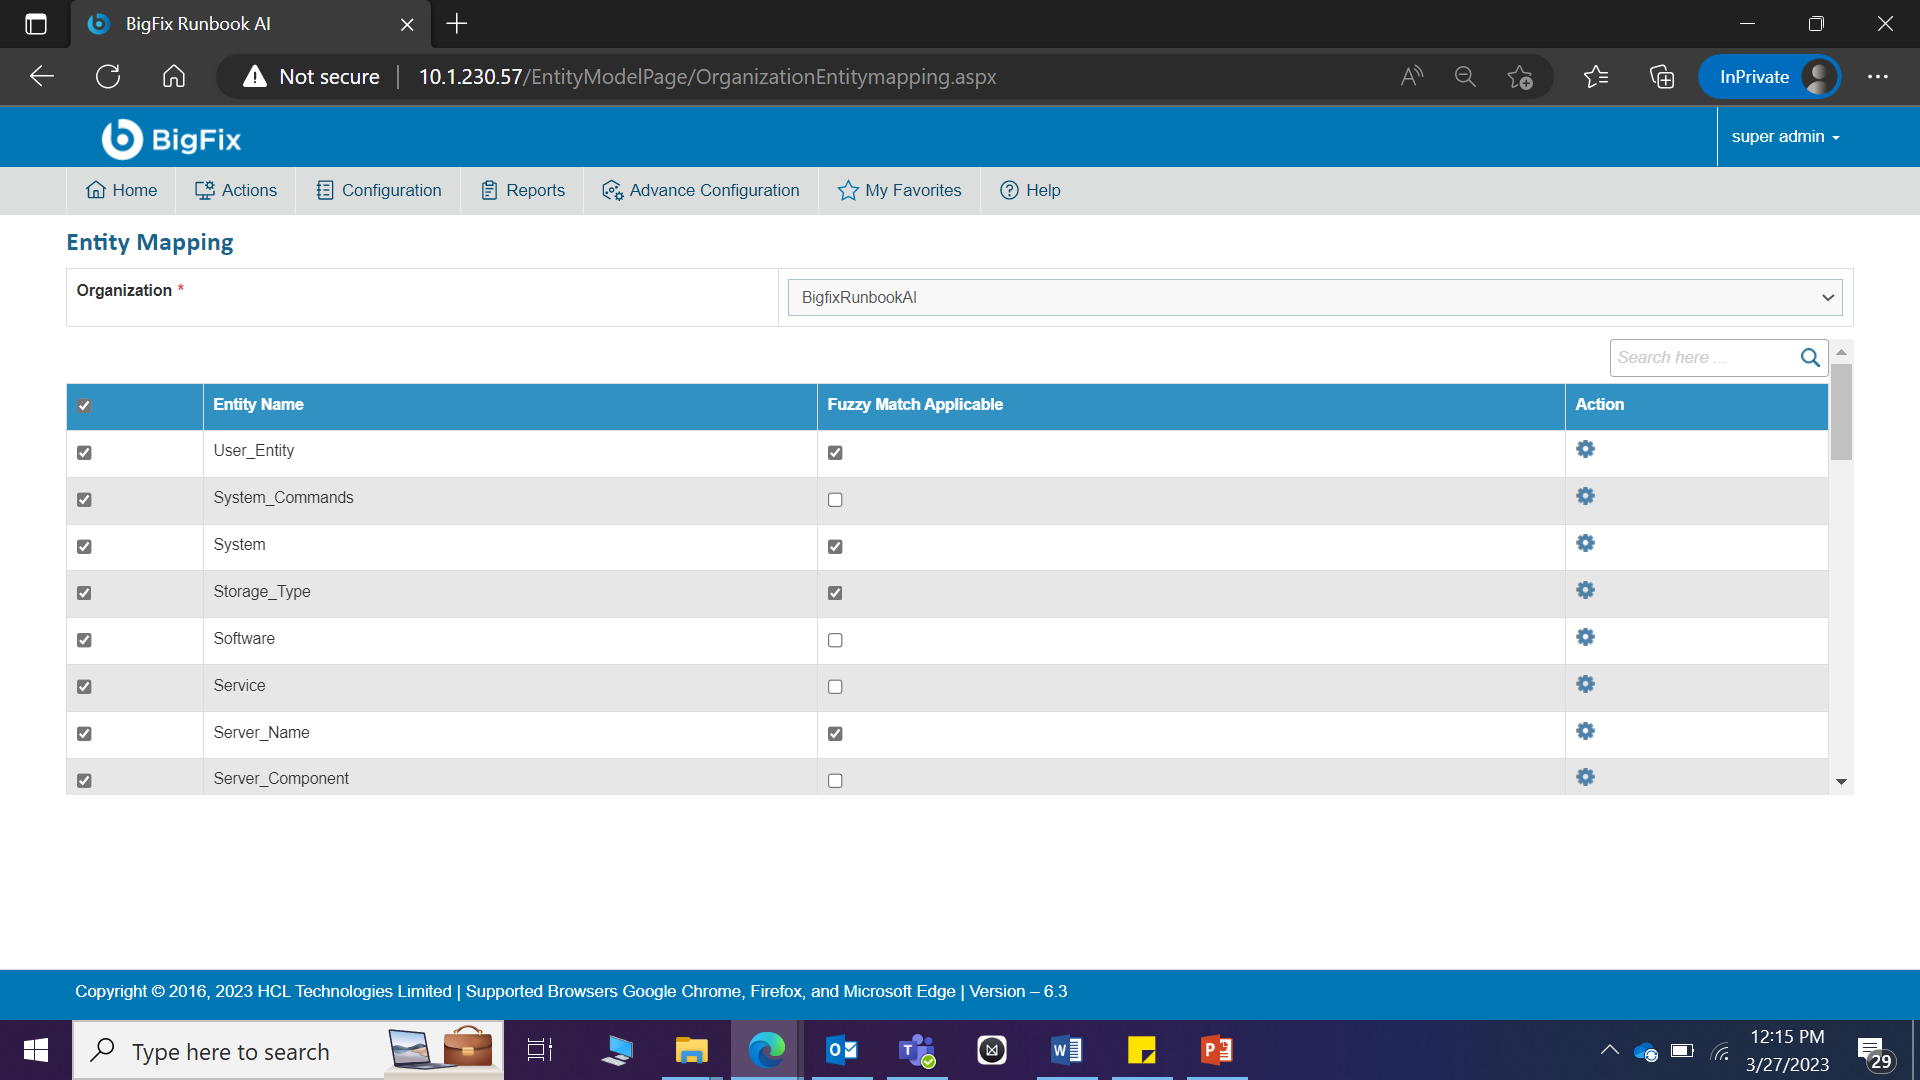
- It lists the entities created in Add New
Entity in a tabular view.
- To map an entity, select the check box corresponding to the entity. A confirmation dialog box appears.
Figure 556. Figure - Entity Mapping (Cont.) 
- On successful mapping, the Action column enables
 to perform multiple actions on the mapped entity.
 Figure 557. Figure - Entity Mapping (Cont.) 
- To manage an organization specific entity, click
.png) . A Test page appears.
. A Test page appears.
Figure 558. Figure - Entity Mapping (Cont.) 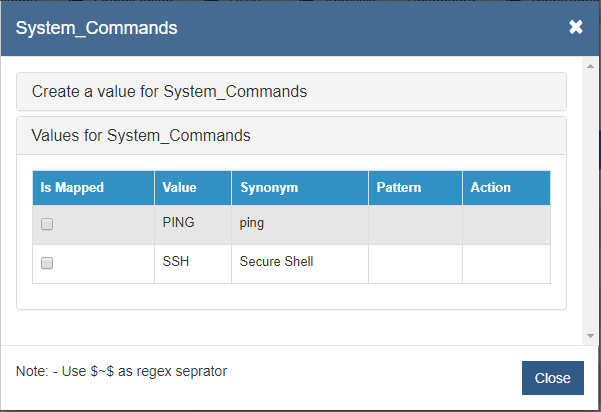
- To map a value to the selected entity, select the Is Mapped check box for the corresponding value under the Value for Entity tab. A confirmation dialog box appears.
Figure 559. Figure - Entity Mapping (Cont.) 
- To manage an organization specific entity, click
- After successful mapping of a value, user can edit or delete the value by clicking on
.png) or
or .png) .
. Figure 560. Figure - Entity Mapping (Cont.) 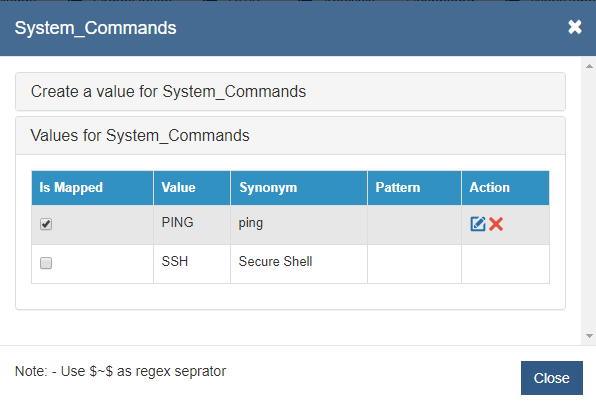
- Click Create a value for Entity to add specific organization values to an entity.
Figure 561. Figure - Entity Mapping (Cont.) 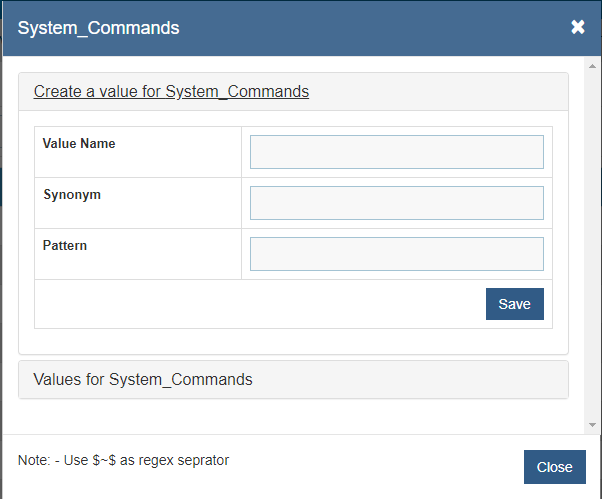
- A page appears for you to type the Value Name, Synonym, and Pattern (or regular expression).
- Click Save. A confirmation dialog box appears.
Figure 562. Figure - Entity Mapping (Cont.) .png)
- The new value is added and appears in the Values for Entity tab.
Figure 563. Figure - Entity Mapping (Cont.) 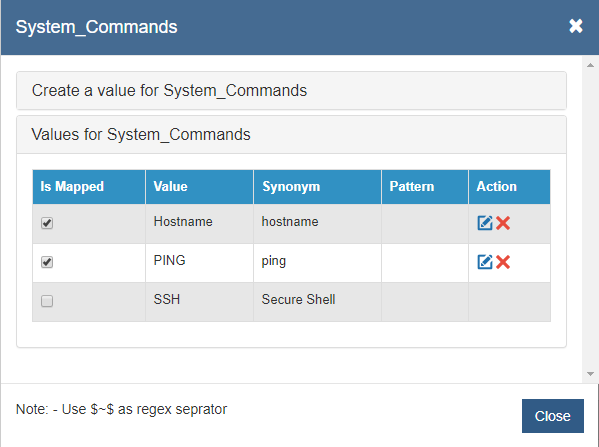
User can edit or delete the existing values for the entity by clicking on
.png) or
or .png) .
. - User can select the Fuzzy Match Applicable check box to enable fuzzy match.
.png)
All fields marked with an asterisk (*) are mandatory.