Migrating databases
This procedure applies to remote database installations.
Before you begin
- Back up the BFEnterprise and BESReporting SQL databases (A current backup must be taken immediately prior to the move. You must not have any differences between the backup and production database).
- Back up the "BFEnterprise Full Database Index Reorganization" job.
- Open SQL Server Management Studio.
- Expand SQL Server Agent, and expand Jobs.
- Right-click the BFEnterprise Full Database Index Reorganization job and select Script Job as.
- Select CREATE To, then select New Query Editor Window, File, or Clipboard to select a destination for the script. Typically, the destination is a file with a .sql extension.
- Document the authentication method to the MSSQL database (SQL versus NT).
- If using NT Authentication, document the NT Domain/service account used for BigFix Server services.
- If using SQL Authentication, document the SQL account used for SQL Authentication Registry values.
- Document (consider taking a screenshot) the ODBC connections: bes_BFEnterprise,
enterprise_setup, and LocalBESReportingServer. Record both 32-bit and 64-bit information in
order to replicate them. Note: For 64-bit Windows systems, you must use the 32-bit version of the ODBC tool to configure the 32-bit System DSNs.
- Use ODBC wizard on the Root Server to test a basic connection to new database location (new MS-SQL Server).
- Consider implementing the following prior to the migration to reduce downtime:
- Change the following BigFix
Client settings on all clients:
- _BESClient_Report_MinimumInterval = 3600 * This setting will reduce the amount of incoming data from the endpoints to allow the system to recover more quickly and reduce potential downtime.
- _BESClient_RelaySelect_ResistFailureIntervalSeconds = 21600 * This value represents the amount of time BES Clients will wait after its relay appears down before performing BES Relay selection. This can prevent unnecessary automatic relay selection during the migration.
- Change the heartbeat in the BigFix Console to 6 hours: Console PreferencesNote: This is another way to reduce the amount of incoming data from the endpoints.
- Change the following BigFix
Client settings on all clients:
- Carefully review the migration steps.
Procedure
- Stop all BES Server services.
- Detach the BFEnterprise and BESReporting databases from the current SQL Server instance databases.
- Move the BFEnterprise and BESReporting databases to the new SQL Server instance.
- Attach the BFEnterprise and BESReporting databases to the new SQL Server instance.
- Restore the "BFEnterprise Full Database Index Reorganization" job from the script.
- Open SQL Server Management Studio.
- On the File menu, Open the file containing the scripted job.
- Execute the script to create the "BFEnterprise Full Database Index Reorganization" job.
- Modify the ODBC System DSNs (bes_BFEnterprise, enterprise_setup, and
LocalBESReportingServer) to point to the new SQL server instance. This modification will allow
you to avoid re-installing the BigFix Server application.
- Use ODBC connection wizard to test connection.
- Update and verify both 32-bit and 64-bit configurations. Note: For 64-bit Windows systems, you must use the 32-bit version of the ODBC tool to configure the System DSNs.
- If leveraging DSA, use SQL Server Management Studio to connect to the BFEnterprise database
and examine the DBINFO and REPLICATION_SERVERS tables:
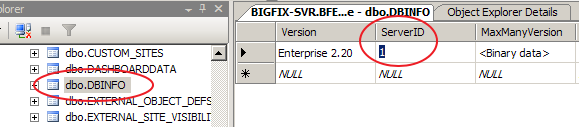

If DNS aliases are being leveraged for the servers, this should not change. If is using hostnames, and the hostnames are changing, these column values may need manual modification.
Note: The setting "HKEY_LOCAL_MACHINE\SOFTWARE\Wow6432Node\BigFix\Enterprise Server\UseRemoteDB"
has a value set by default to "0", if the BigFix database is local, or set to "1", if
the BigFix database is
remote.