Environments
Add Environments
- Campaign - The user should have a Campaign-Monitoring permission.
- Journey - The user should have Journey Admin role.
Adding an environment for the first time when no environments are present in the Unica Director
Login Screen
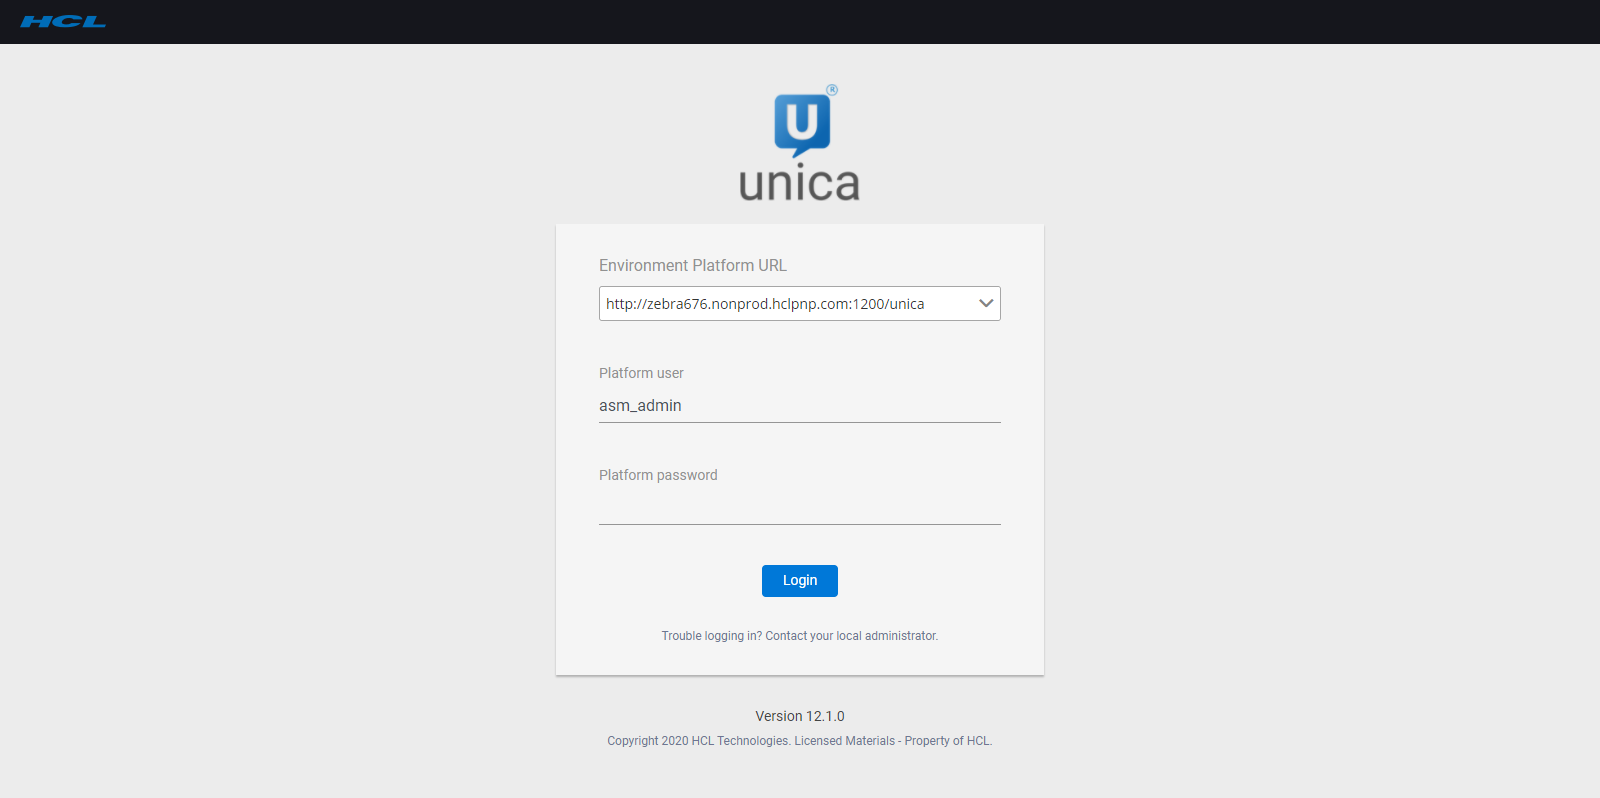
- On the login page of the Unica Director, you should specify the environment - the Unica Platform URL (for example http://<url>:<port>/unica) , also in case when Web access control login method is configured, that is, Siteminder or ISAM, then too the Unica Platform URL (for example http://<url>:<port>/ unica) should be specified.
- Enter your Unica Platform login credentials.
- On Successful login, user will be redirected to Add Environment page.
- Re-verify the details (i.e Platform url, username and password) and then click on Show Partition button.
- User can save the Environment or Configure application (Configuring of application is important and it is explained in subsequent chapters).
- You must enter the necessary details in the Application Servers and Listener section before saving the details. Each fields detail is given in Add Environment section.
- Once the environment is added it is automatically selected as the working environment. You can see the selected environment in the right hand top corner. The various required Unica Director actions will be performed on this selected environment.
Adding an environment - User can add a new environment by clicking on the "Environment" button which is present on the Environment listing page.
Log on to the Unica Director and navigate to the Environments screen.
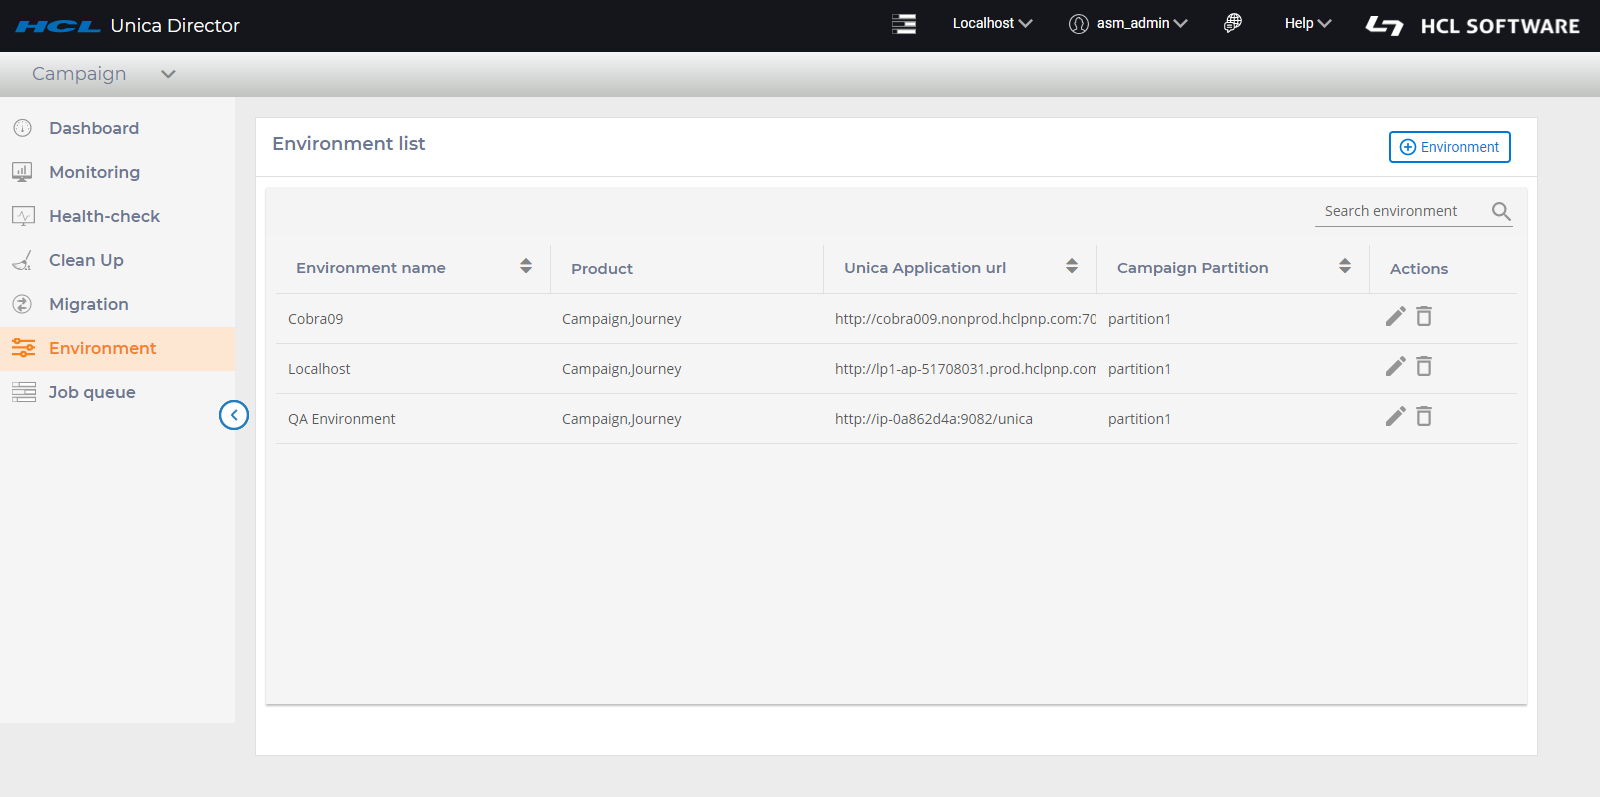
Click on Add environment.
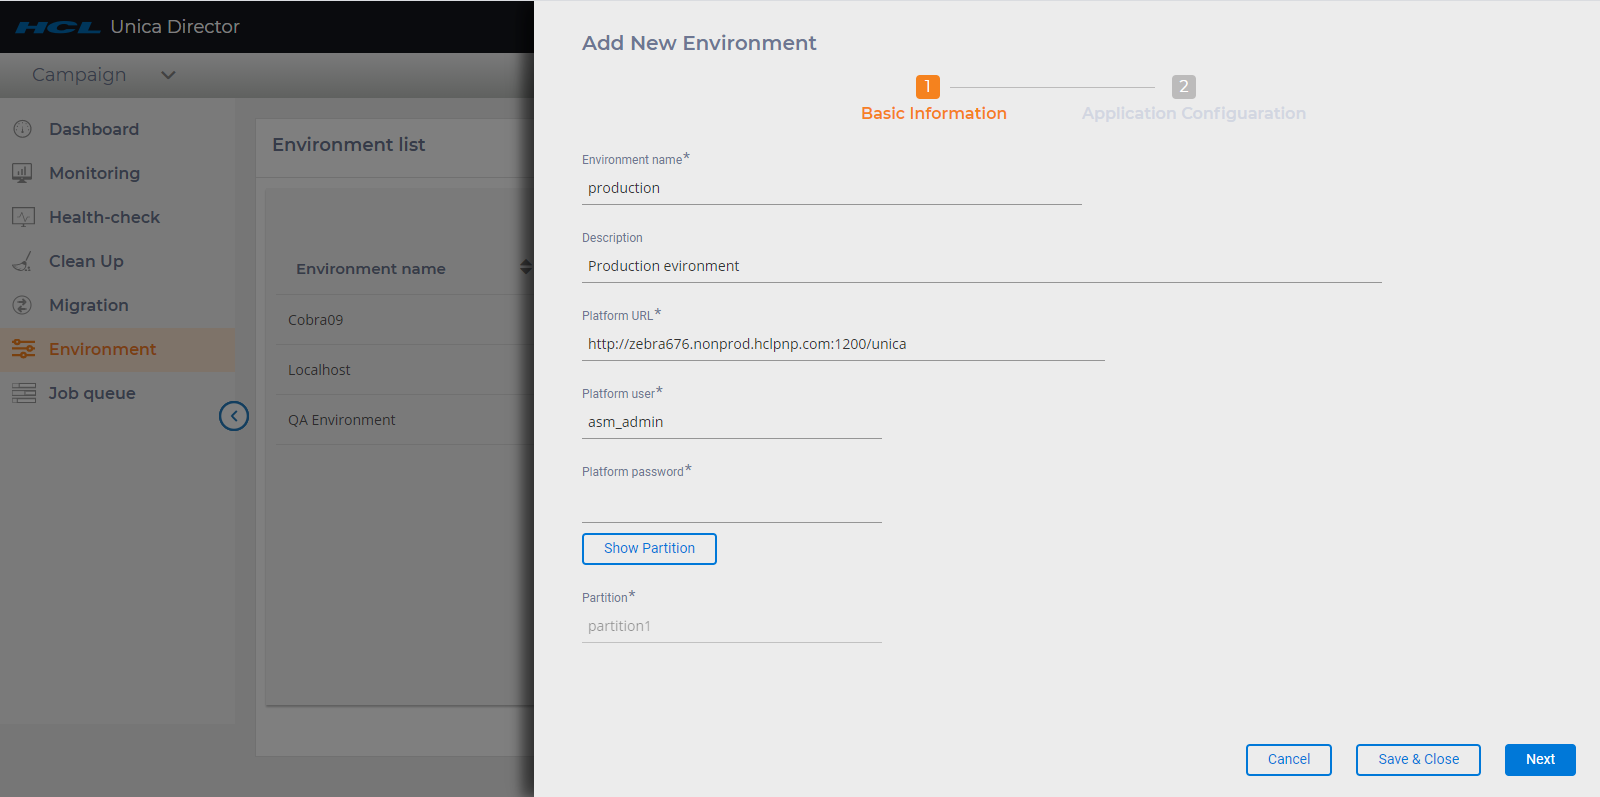
- This will open Add Environment screen and the user has to fill in the basic information as see in above screenshot.
- Enter the Platform URL.
- Click on Show partition button. This will fetch the
partition details for the environment. Once the partition details for the
environment are available, you can perform the below actions:
- Click on Next button. This action will get all the applications that are available on the environment. At present, we are supporting Journey and Campaign.
- Click on Save and Close – This action will save the environment to the director database.
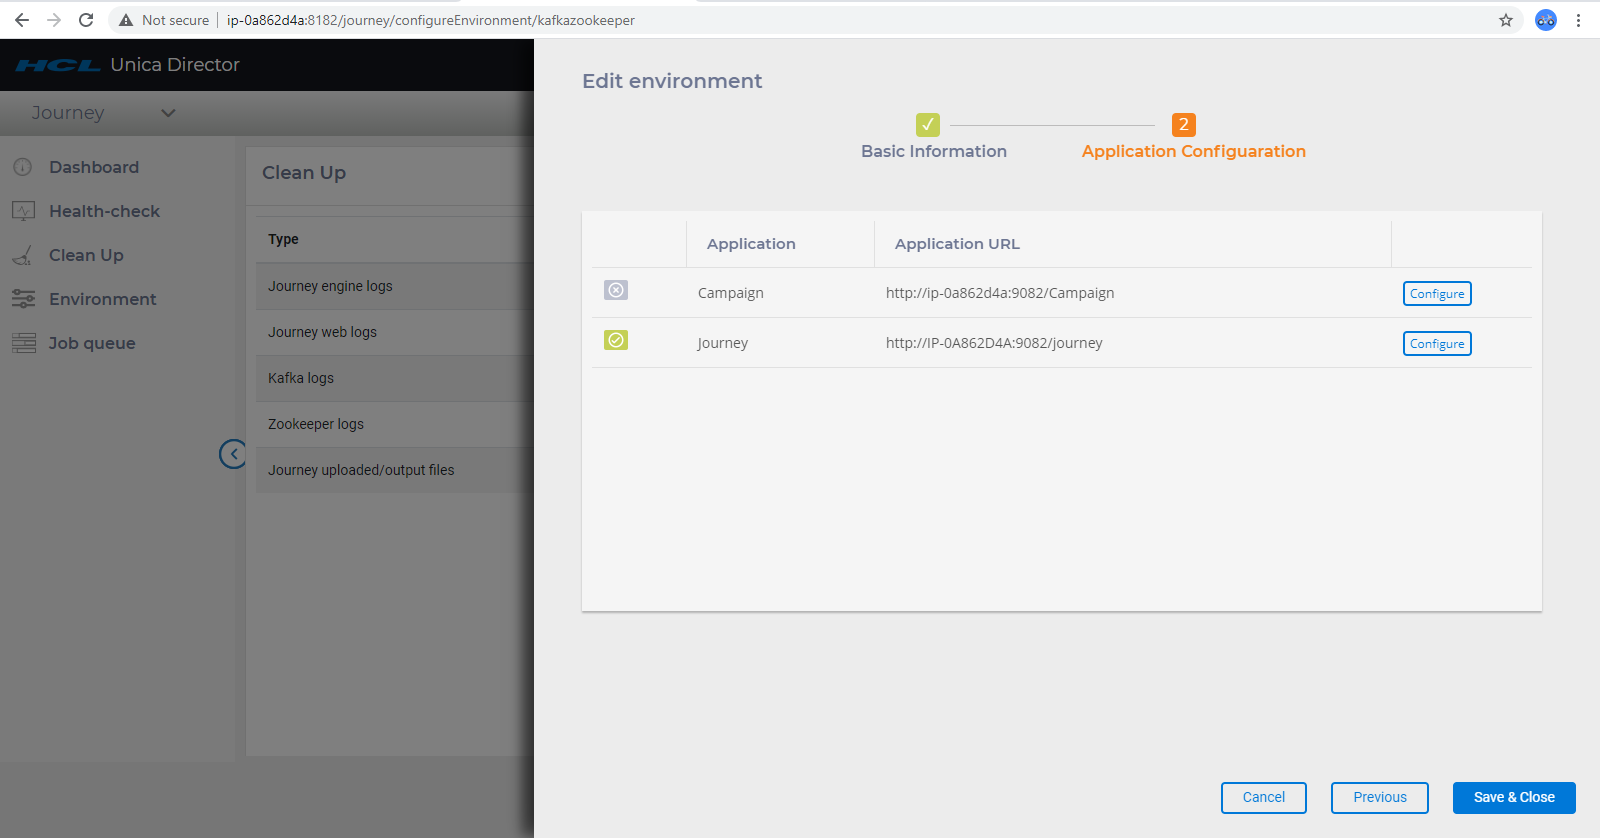
Application configuration screen
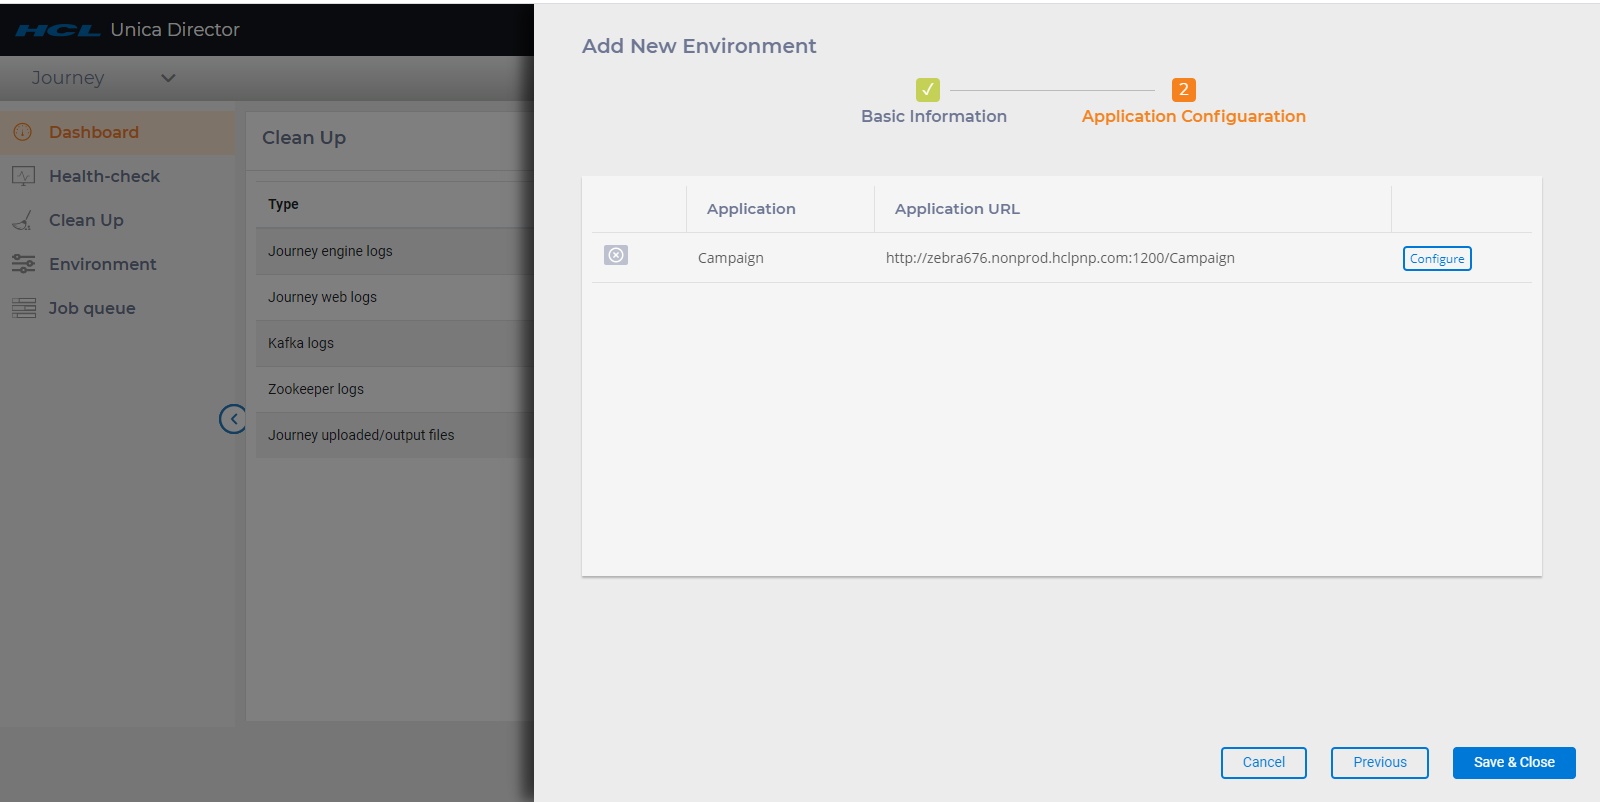
In the Application Configuration screen, all the applications that are available in the environment will be fetched and populated. (In this release, we are supporting Campaign and Journey)
In the screenshot below, the gray icon indicates that the application is not configured. If the user hovers on the icon, they can see which all components in the application are not configured.
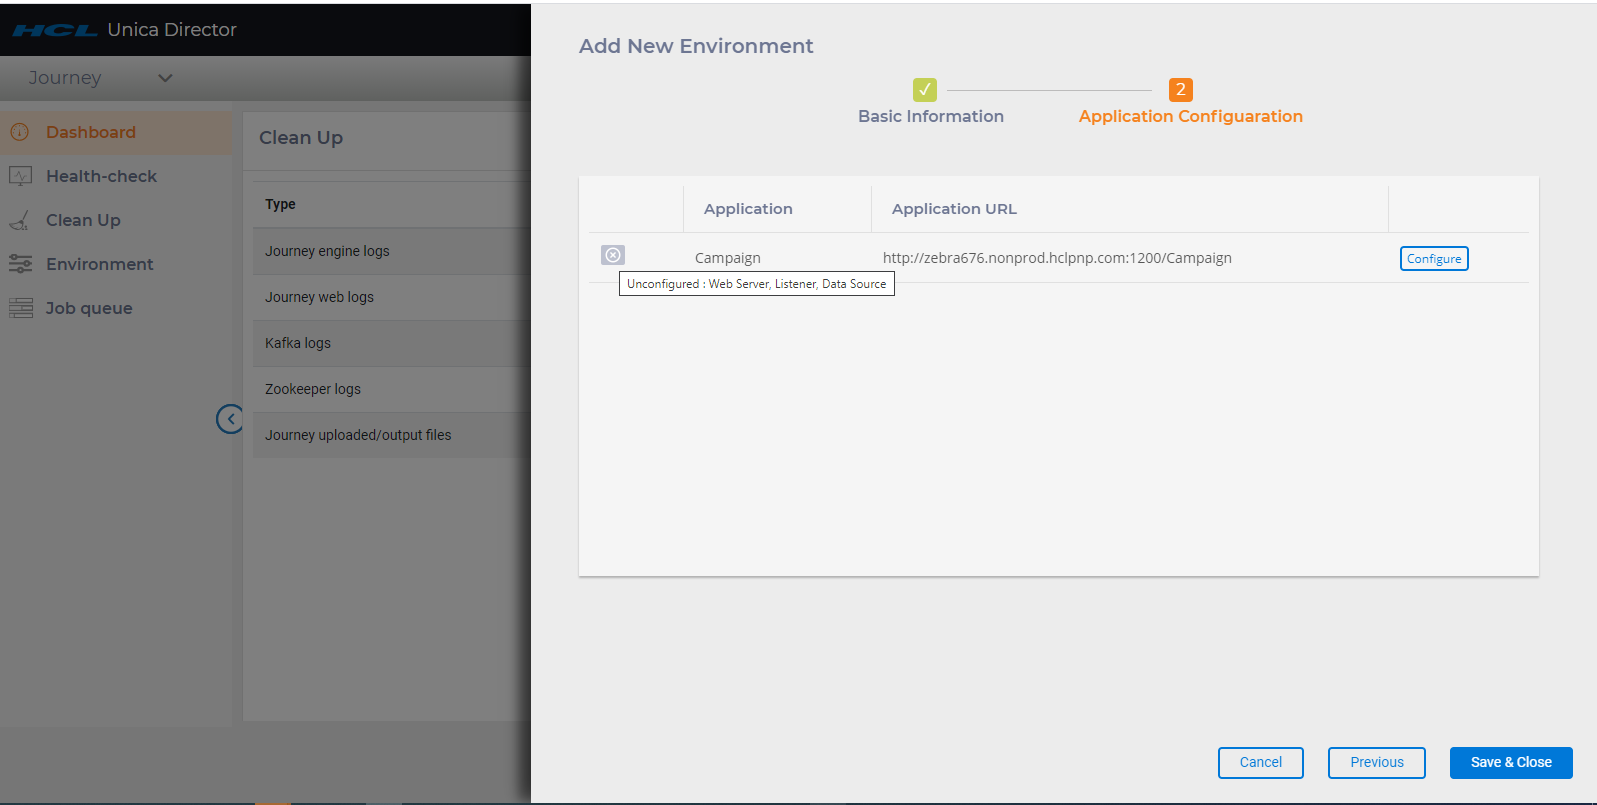
To be able to perform various functionalities on the Unica director, at least one application should be configured.
To configure an application, click on the Configure button on the application listing page. In the above screenshot, user can configure campaign application.
When no applications are configured
If user creates an environment, but does not configure any application, on login to that environment, they will see below screen.
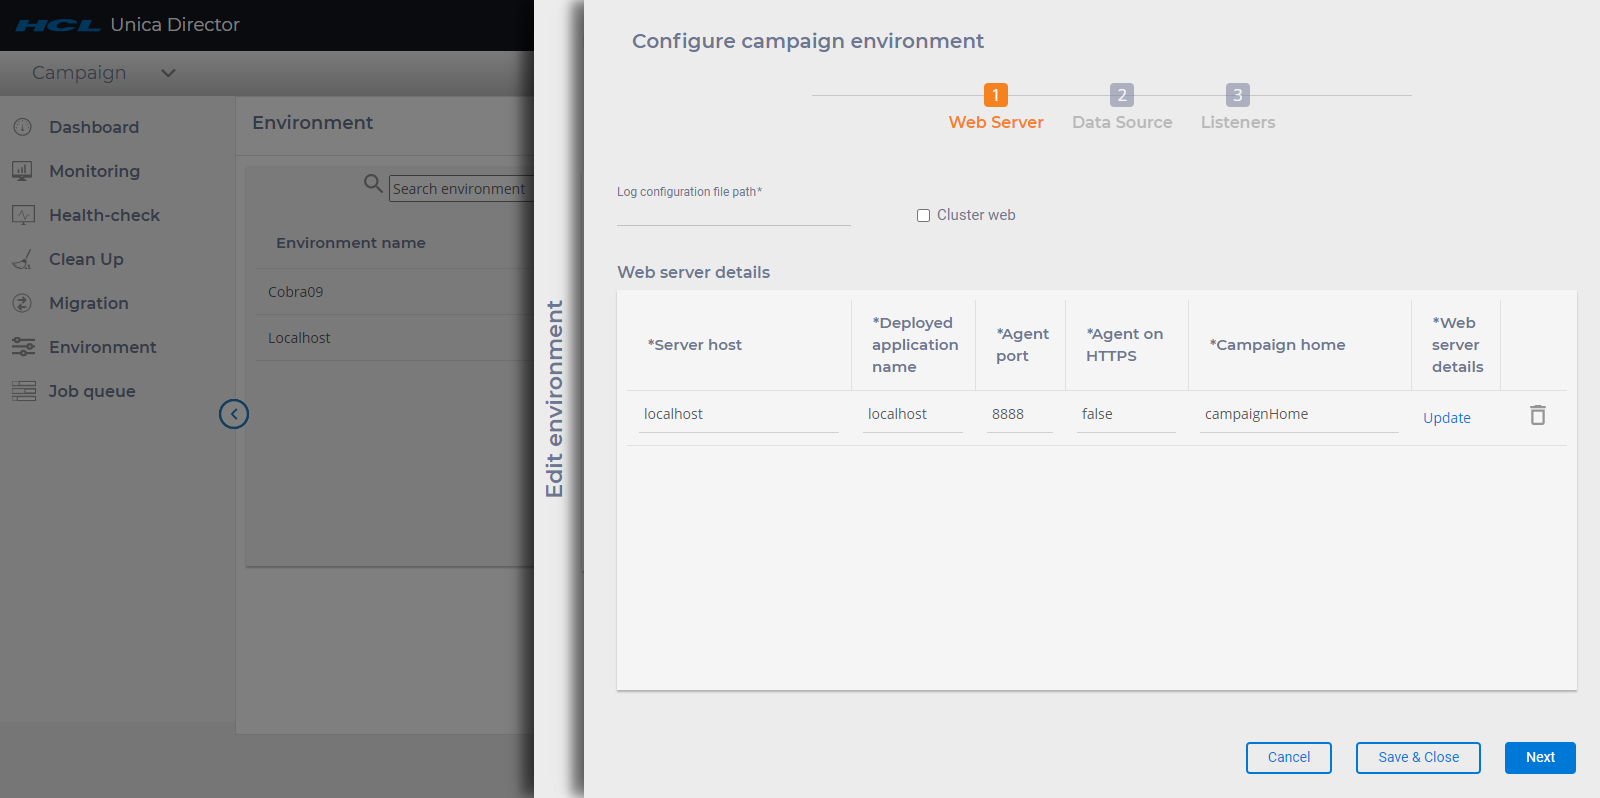
- Web Server
 Clustered Web: This option specifies if this environment is a web cluster or standalone. If this option is not enabled, then you can enter only one record in the WebServer. If this option is enabled, you can add details of all the nodes in the cluster.Note: If you have already added details of all the nodes in the cluster with this option enabled and then if you disable this option, all application server entries are removed.
Application Servers - Web Servers:
User must enter below details to save the Application Server details:
- Server Host: Enter the fully qualified host name where the application server is running.
- Deployed Application Name: Enter the Unica Campaign application name –
- for Weblogic by default it is Campaign,
- for Websphere, Tomcat and JBOSS you can specify the application name given while deploying Campaign.war file. This name is used to start and stop the application from the Health Check screen.
- Agent port: Specify the Unica Director Agent port.
- Agent on HTTPS: Set this to True or False as applicable.
- Campaign home: Specify the Campaign home.
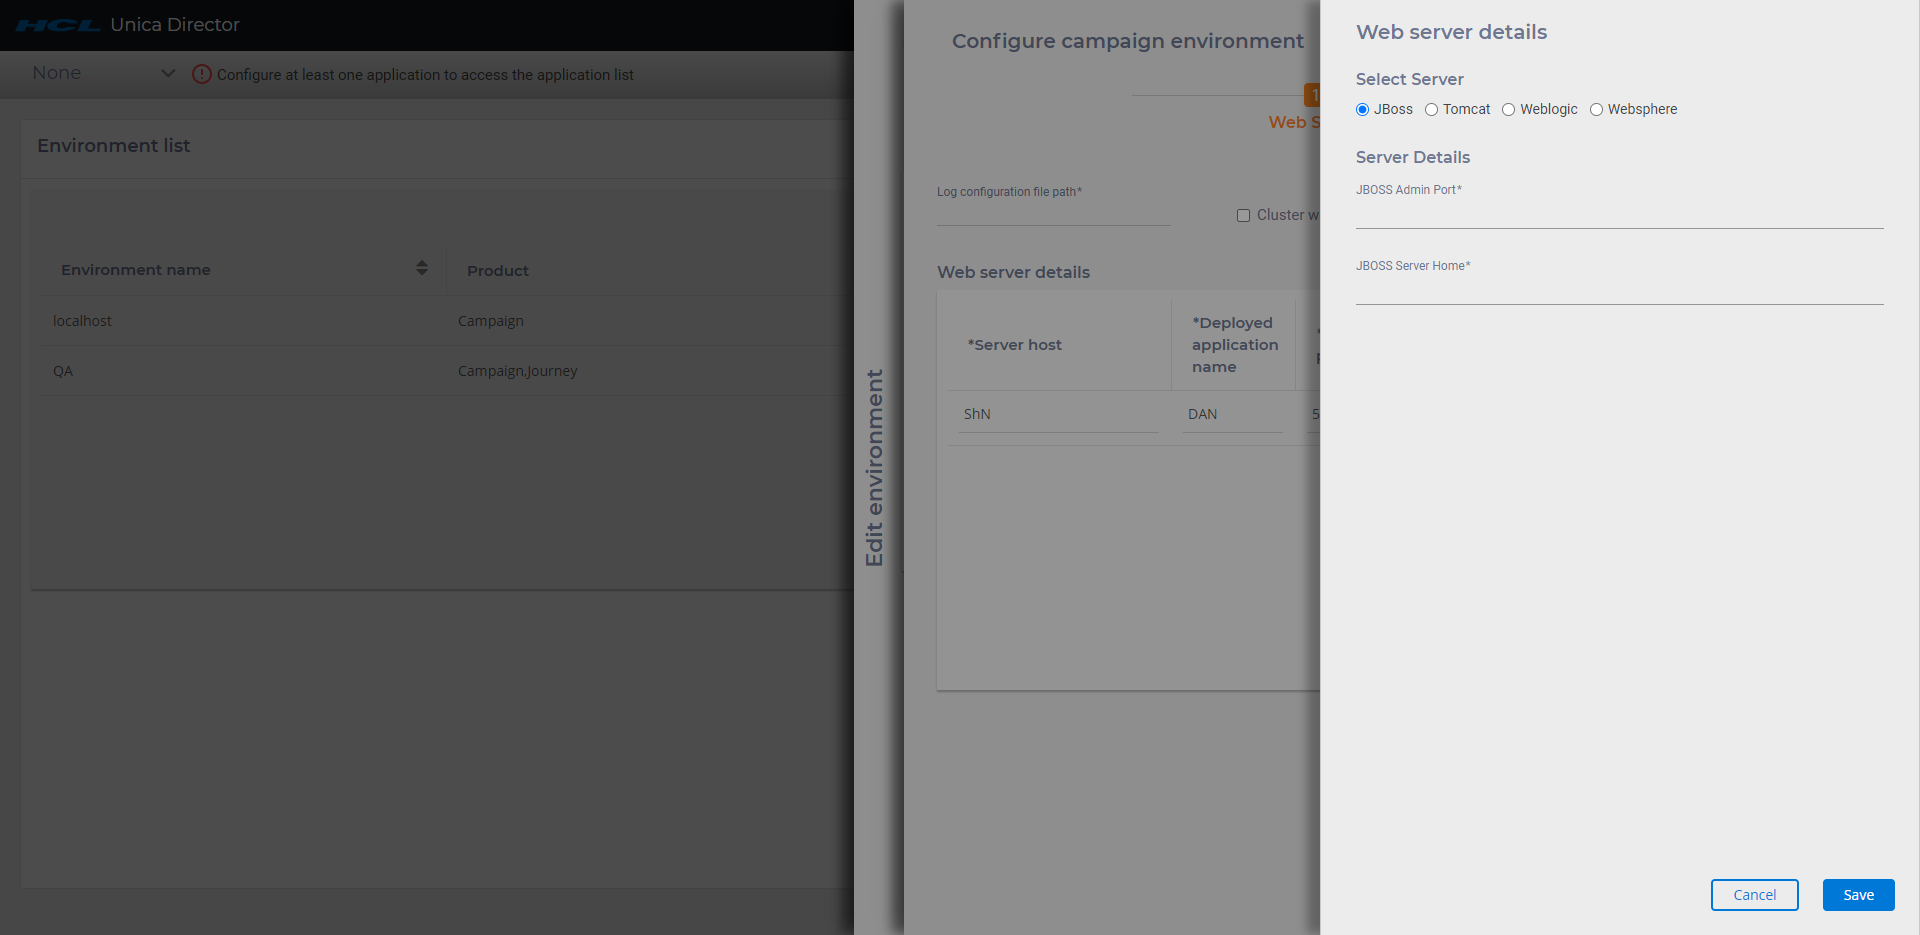
- Web Server Details: Click Update. Select the type of server, that is, Weblogic,
Websphere, Tomcat or JBoss:
ServerType - If the Server Type selected is "WebSphere"
- WebSphere Profile Path -> Specify the Application server profile location. e.g. /opt/IBM/WebSphere/AppServer/profiles/AppSrv01
- WebSphere Server Name -> Specify the Application server name where Unica Campaign application is deployed. For example - WebSphere by default has server name as "server1"
- WebSphere Node Name -> Specify the WebSphere application server node
name where the Unica Campaign application is deployed
E.g. -zebra658Node01 - You can get these details from the websphere admin console.
ServerType - If the Server Type selected is "Weblogic"
- Weblogic Console Port -> Port number used by Weblogic Console
- Server on https -> Is Weblogic Server on https
- Weblogic Server Home -> Path of Weblogic Home e.g. C:\webservers\WL12213
ServerType - If the Server Type selected is "Tomcat"
- Tomcat JMX Port -> JMX port for Tomcat
ServerType - If the Server Type selected is "JBoss"
- JBoss Admin Port - Management http port/console port which you can get from standalone.xml file
- JBoss Server Home - JBoss Application Server installation directory.
- After entering all the required Webserver information and other required fields
please click on ‘Save’. Your configuration data will be saved and available for use
in (Unica Director).
After having saved the web server details, click on Next.
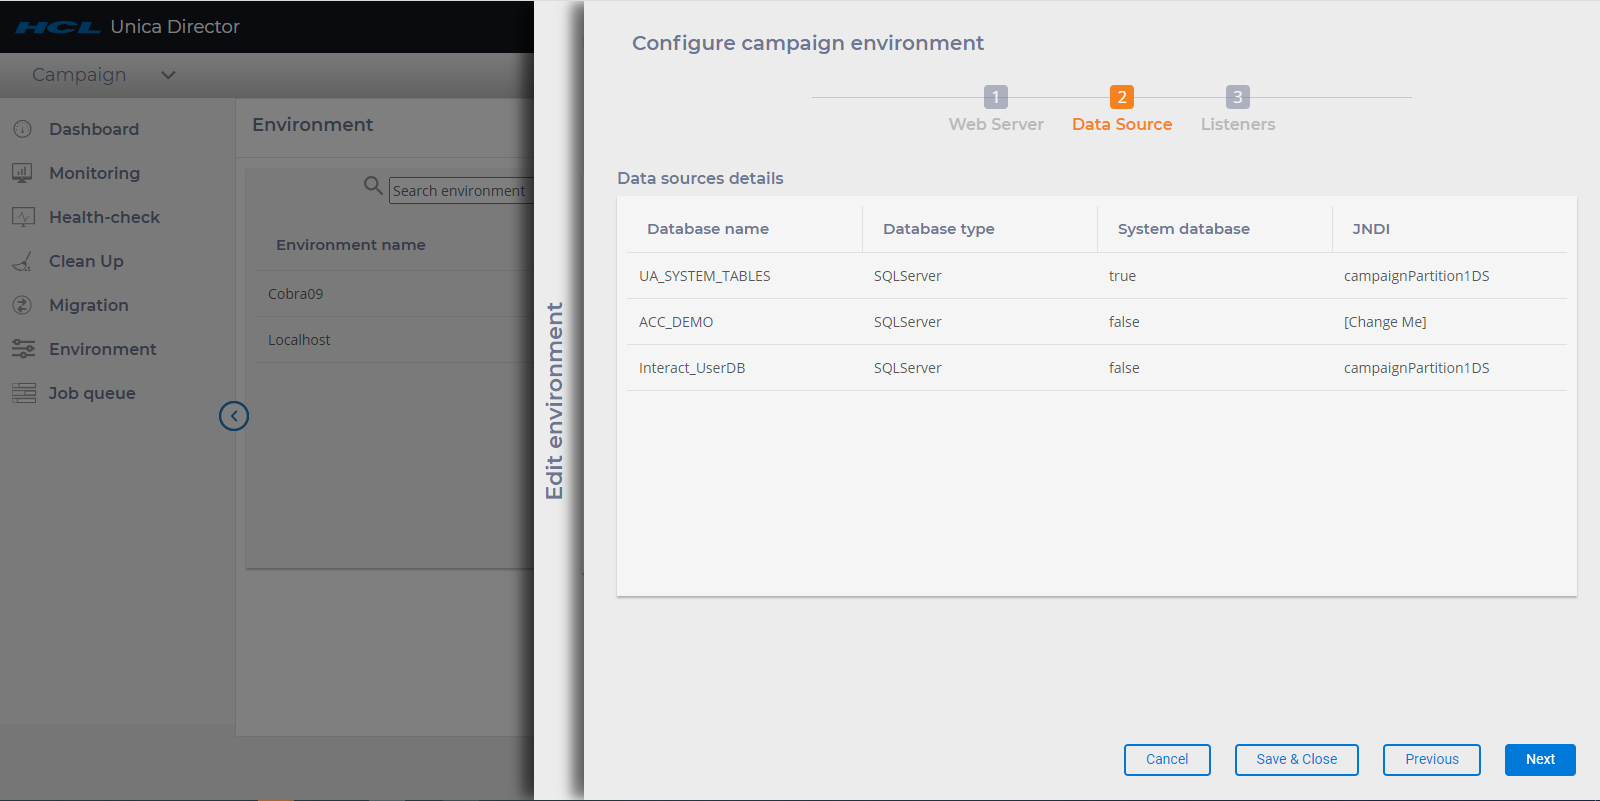
Data Sources
Data source details will be auto populated. Refer below screenshot:
- Add the Listener Details
Listeners: Listener host and ports fields are auto populated. You must enter information in the fields.
Listener Installed as Service: You should select true / false per whether the listener has been installed as a service.- Agent Port: Specify the Unica Director Agent port.
- Campaign home: Specify the Campaign home.
- Agent on HTTPS. You should select True/False.
- Click on Save and Close. Application Campaign will be
configured.Note: For each partition, you will have to create a new environment.
Configure Journey Application
After adding basic information for an environment, user can see all the application that are available in that environment.

- Web Server
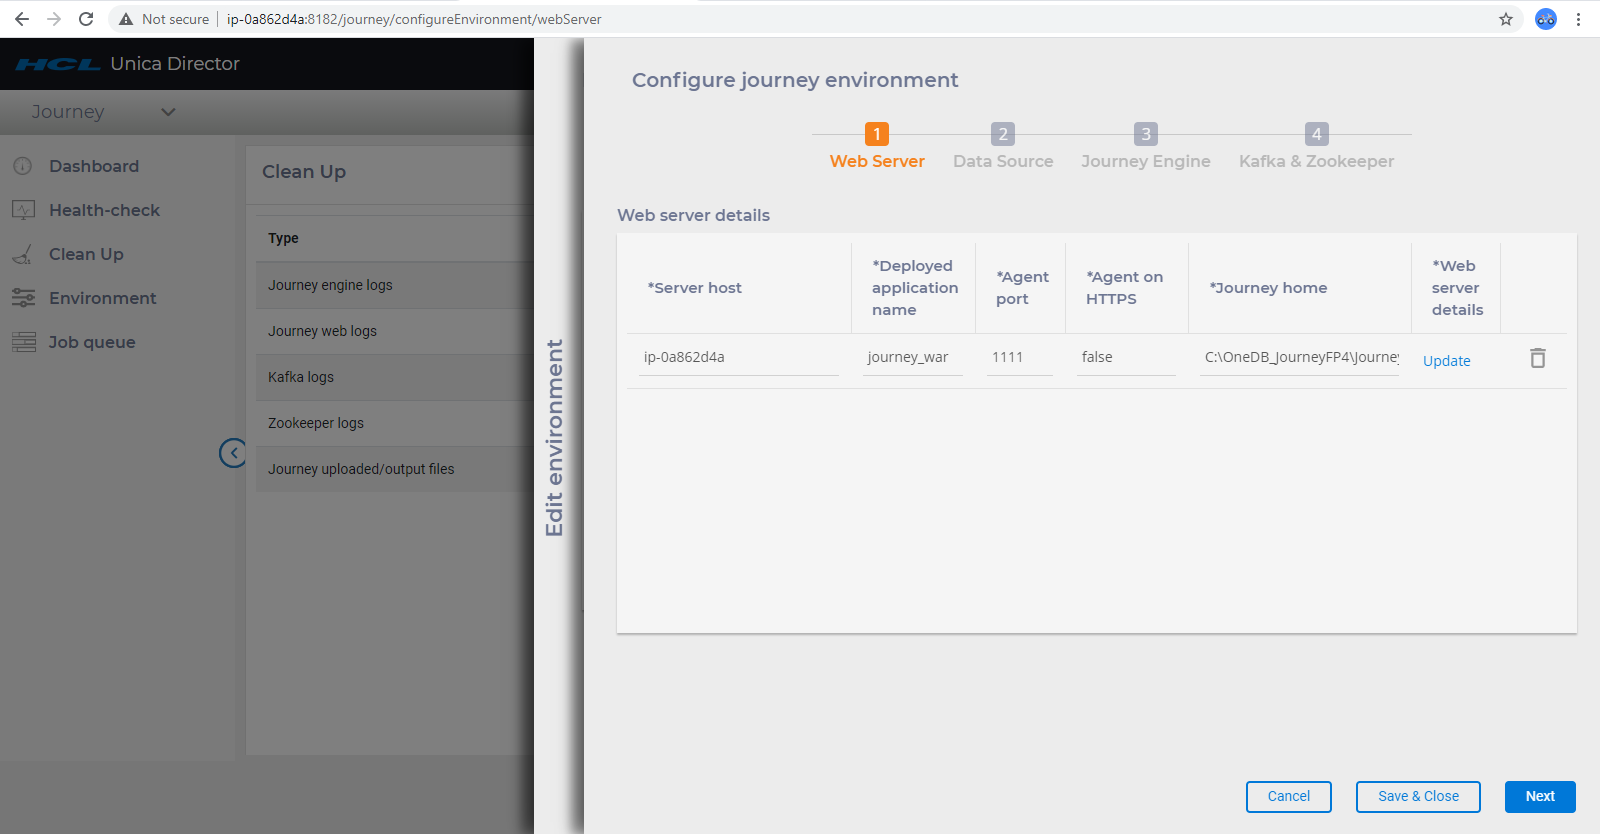
User must enter below details to save the Application Server details:
- Server Host: Enter the fully qualified host name where the application server is running.
- Deployed Application Name: Enter the Unica Journey application name:
- For Websphere, Tomcat and JBOSS you can specify the application name given while deploying Journey.war file. This name is used to start and stop the application from the Health Check screen.
- Agent port: Specify the Unica Director Agent port.
- Agent on HTTPS: Set this to True or False as applicable.
- Journey home: Specify the Journey home.
- Web Server Details: Click Update. Select the type of server, that is,
Websphere, Tomcat or JBoss:
ServerType - If the Server Type selected is WebSphere:
- . Example: /opt/ IBM/WebSphere/AppServer/profiles/AppSrv01
- . For example - WebSphere by default has server name as server1
- . Example: zebra658Node01 - You can get these
details from the websphere admin console. ServerType - If the Server Type selected is Tomcat
- .
ServerType - If the Server Type selected is JBoss- JBoss Admin Port - Management http port/console port which you can get from standalone.xml file.
- JBoss Server Home - JBoss Application Server installation directory.
- Click on Save. Configured data will be saved and available for use in (UnicaDirector).
- Data Sources
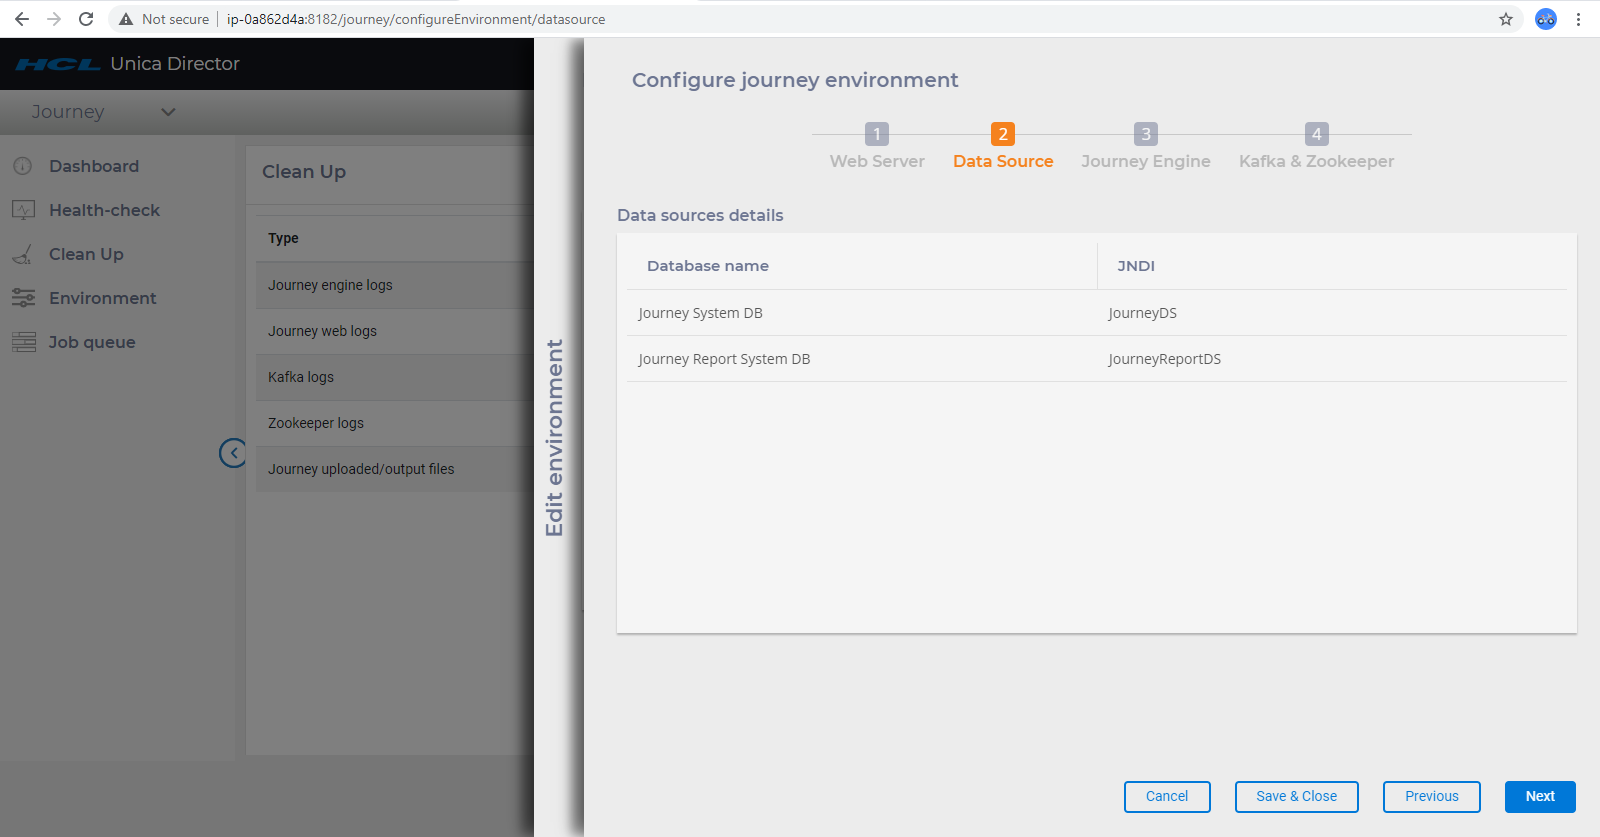
For Journey the details of data sources- JNDI are pre-populated. User don’t need to add or update anything here. Below two data sources-JNDI automatically populated.
Database name JNDI Journey System DB JourneyDS Journey Report System DB JourneyReportDS - Journey Engine
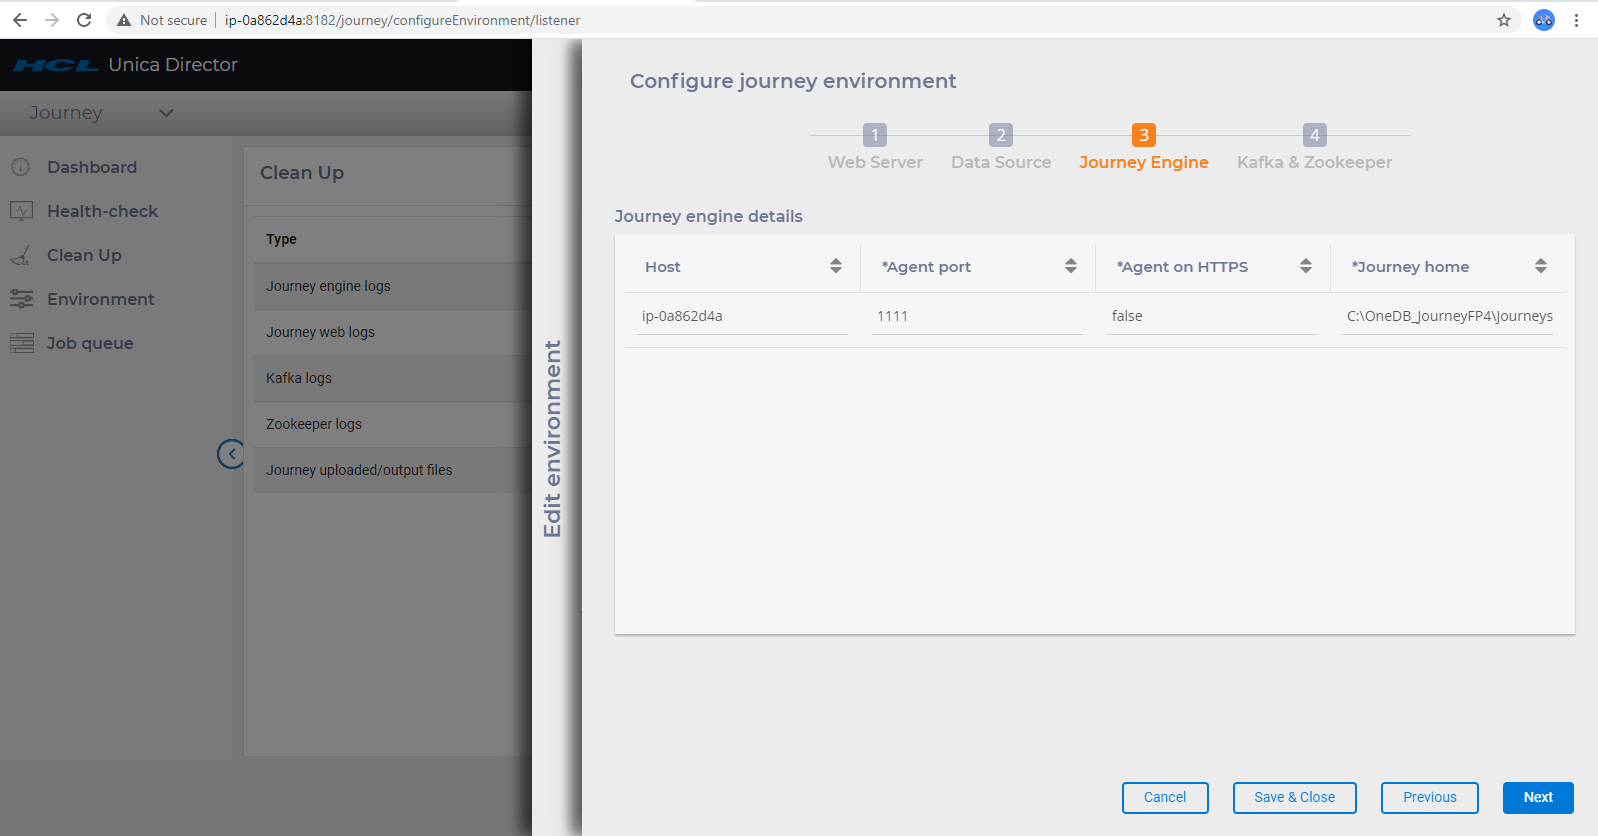 For Configuring Engine on Director:
- Need IPof system where agent and engine are running.
- Need port of director agent.
- Need Engine Home, path where engine is installed.
- For Linux Env scripts folder should be in <JOURNEY_HOME>/Engine.
Engine can be stopped/started/Restarted from Director. Logs of Engine can be deleted /Downloaded from Director
- Kafka Zookeeper
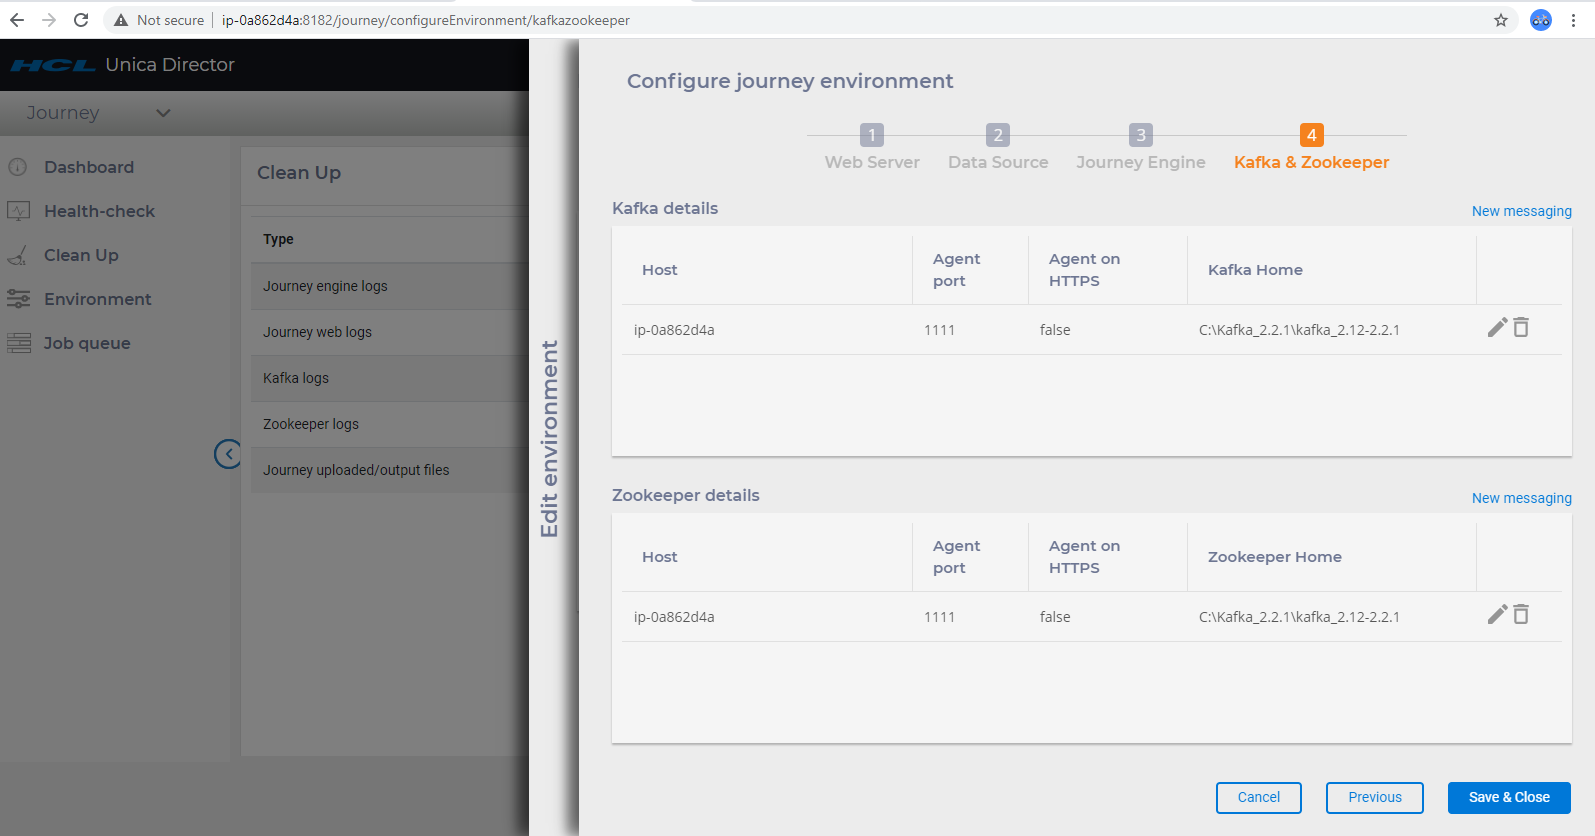
Kafka - For version 12.1.0.4, only one instance of Kafka per application is applicable. Agent need to deploy on the same server with kafka to track the details, for that agent details such as port number, host name should be entered in the configuration. Kafka home path too needs to be added to for tracking the status. System usage and current status can be only tracked after adding the following details on configuration pages.
Zookeeper - For version 12.1.0.4, only one instance of zookeeper per application is applicable. Other configurations are same Kafka.
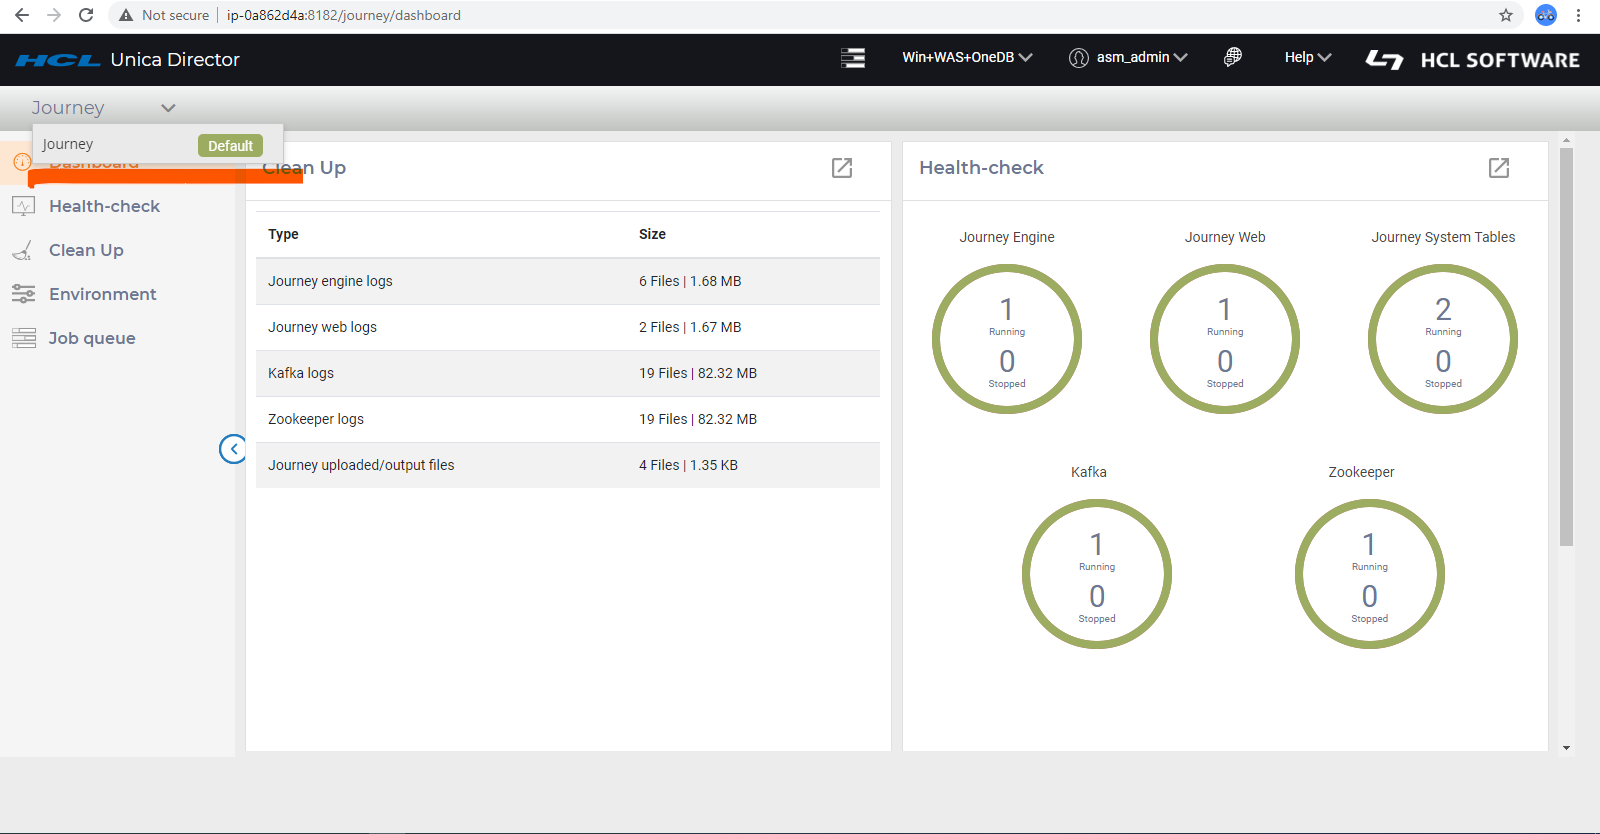
- A green status icon on the application configuration page
- Journey will be available in the application dropdown
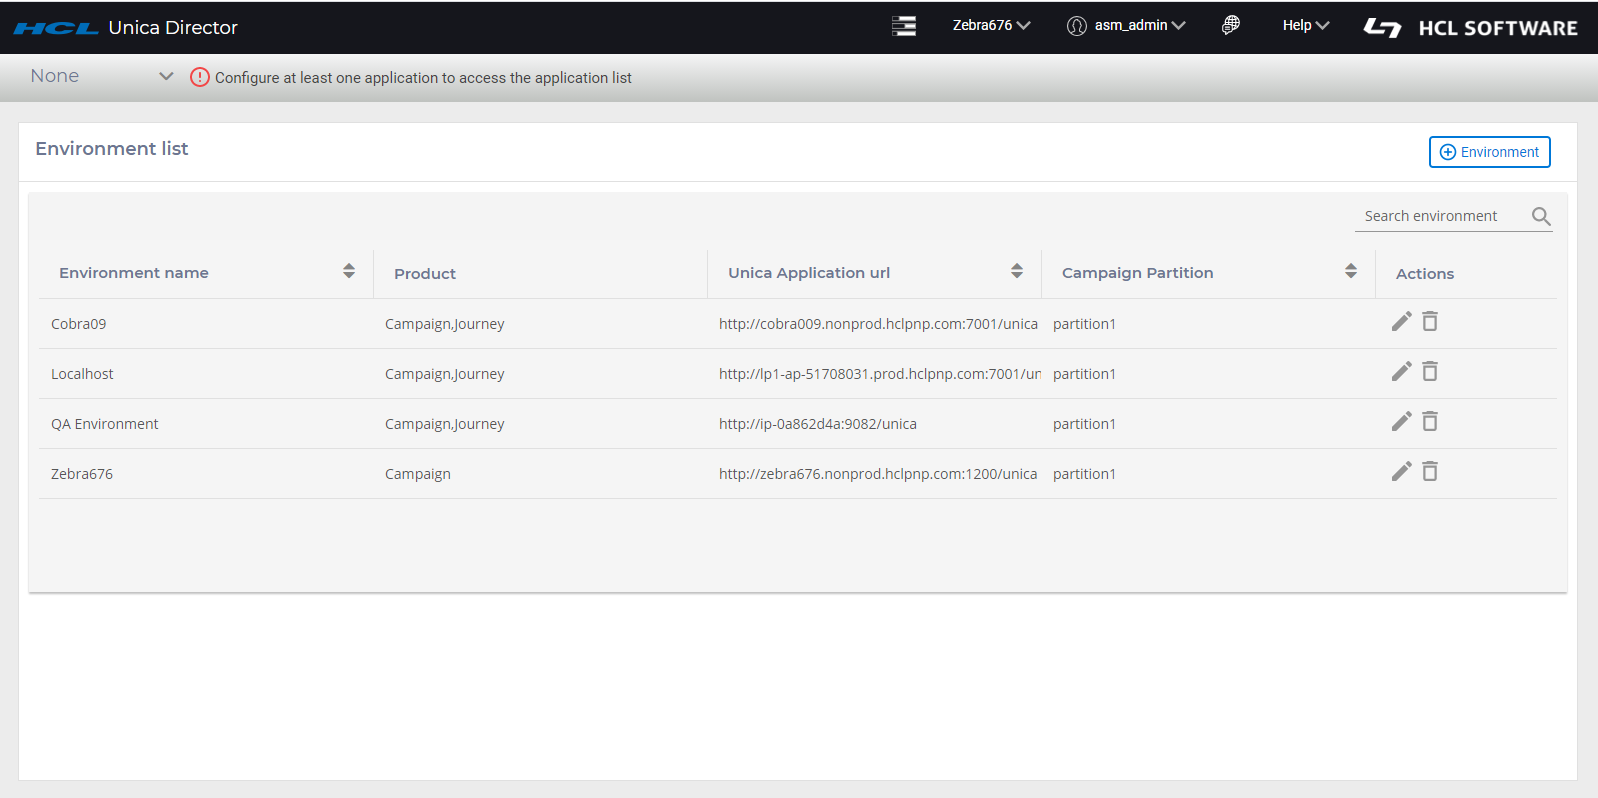
Modify Environments
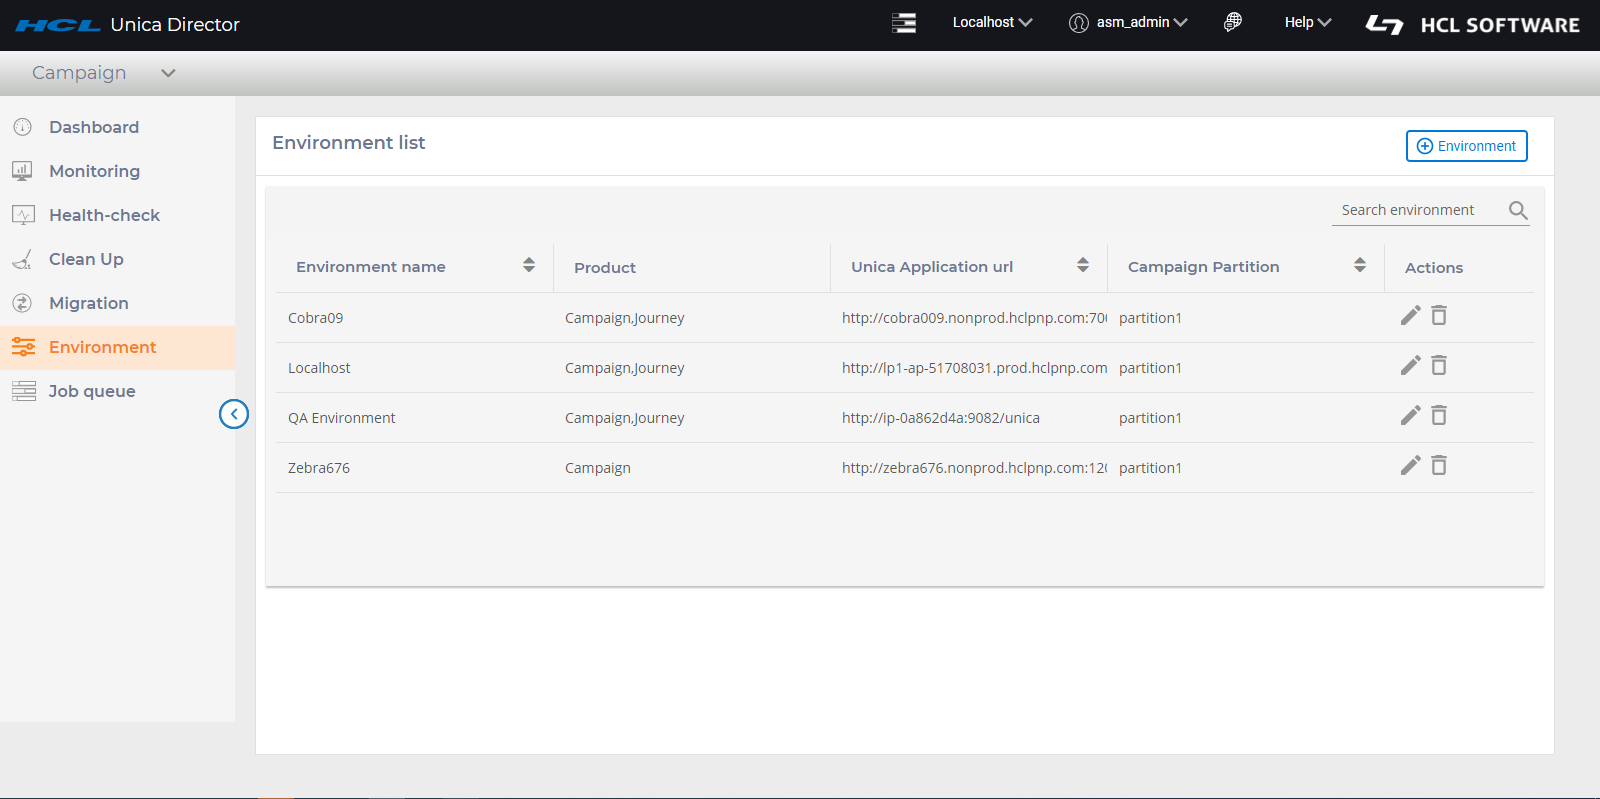
You can modify an existing environment by clicking on the ‘edit’ icon (the pencil shape) under the Actions column of the environment you want to edit.
This will open the environment details page (as shown in the Add Environments section). After making your changes click on the Save button to ensure that your modifications have been saved.
You can delete an environment even if it is in use. Click on the ‘Delete’ icon (trash can’ under the Actions column of the environments list.
You should be very careful while deleting an environment as it might have a significant impact other users using the environment.
Switching to a different Environment
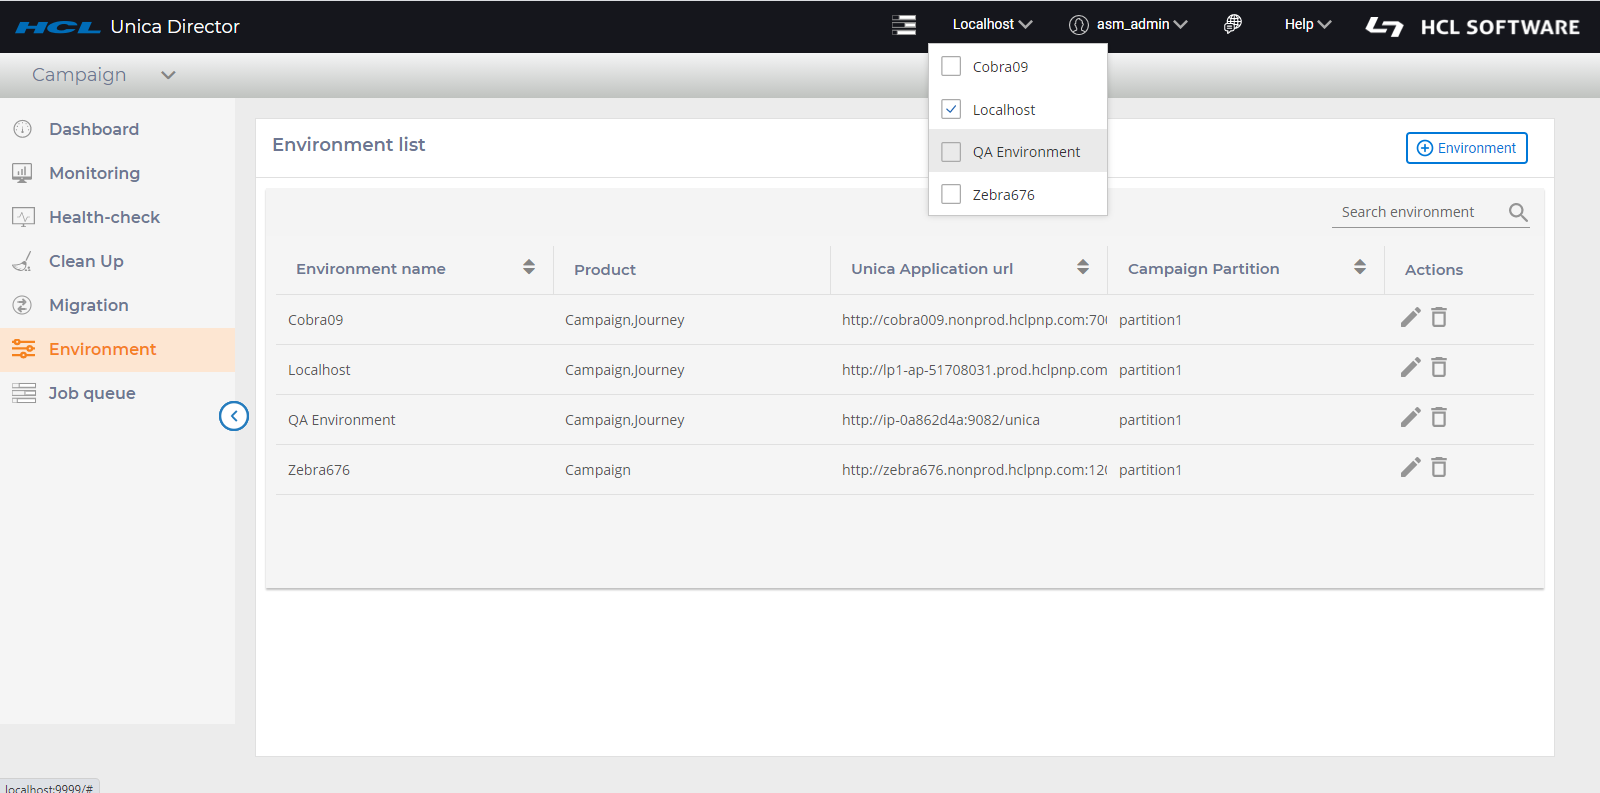
- Select the environment to work on from the top right corner.
- You will be prompted for the Marketing Platform login user ID and password.
Application
- Check the Web server status for application Campaign for the QA environment.
- Clean Journey engine logs for Journey application for the QA environment and so on.
User must login to the environment to which they want to monitor and access various functionalities. Once logged in, user is presented with the Dashboard page of default application. For example. In Below screenshot, user is logged in to Cobra009 environment and the default application is Campaign.
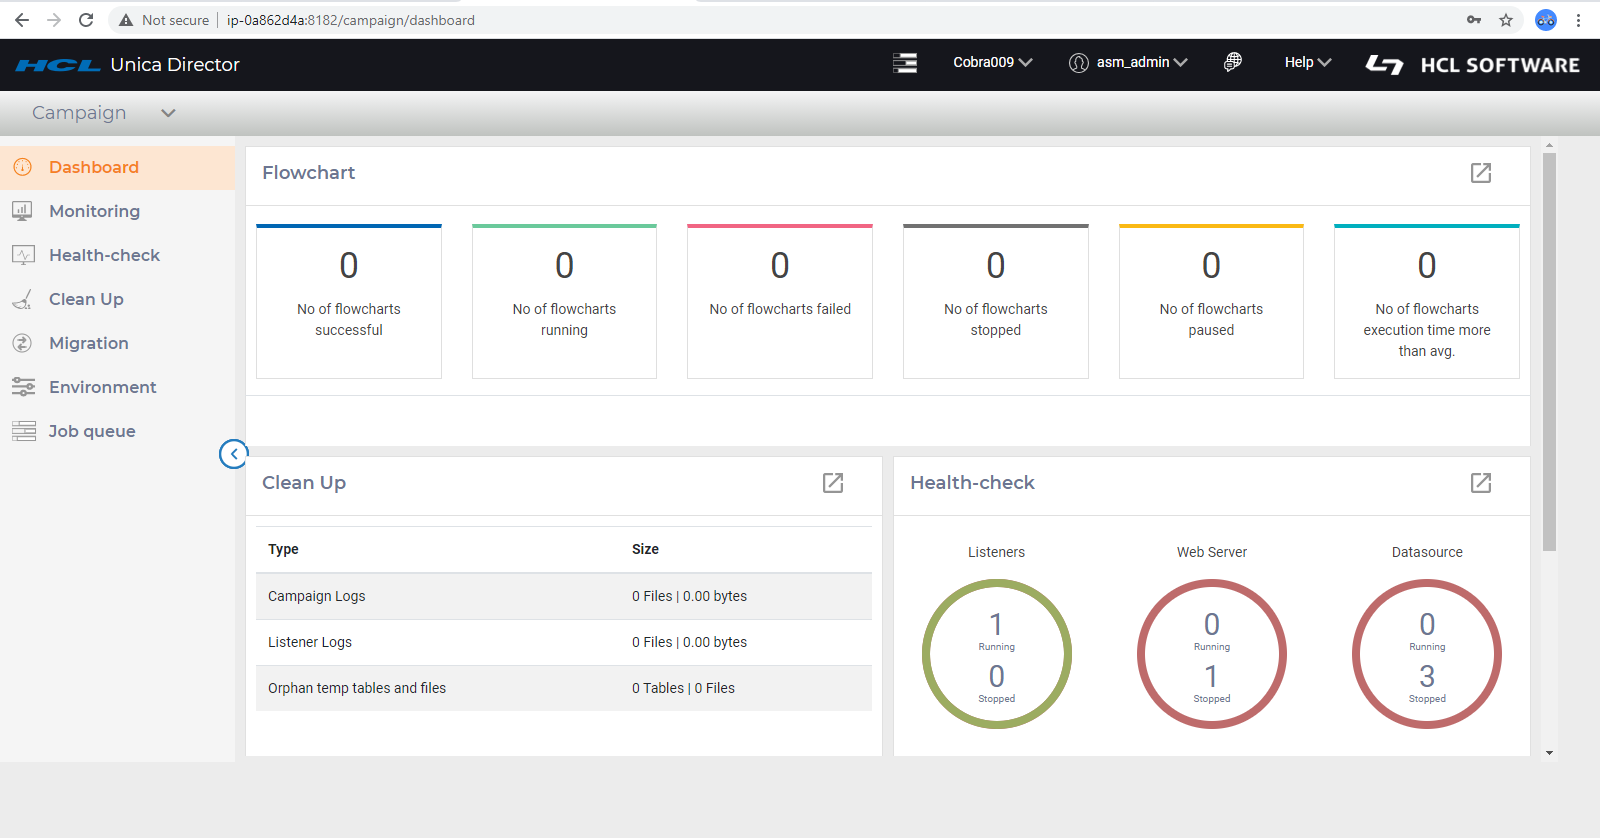
The first view is the Dashboard view, hence Campaign dashboard.
To view all the application that are configured in an environment, user can click on the dropdown as seen in below screenshot. The default application is Campaign as indicated by the orange tag next to Campaign.
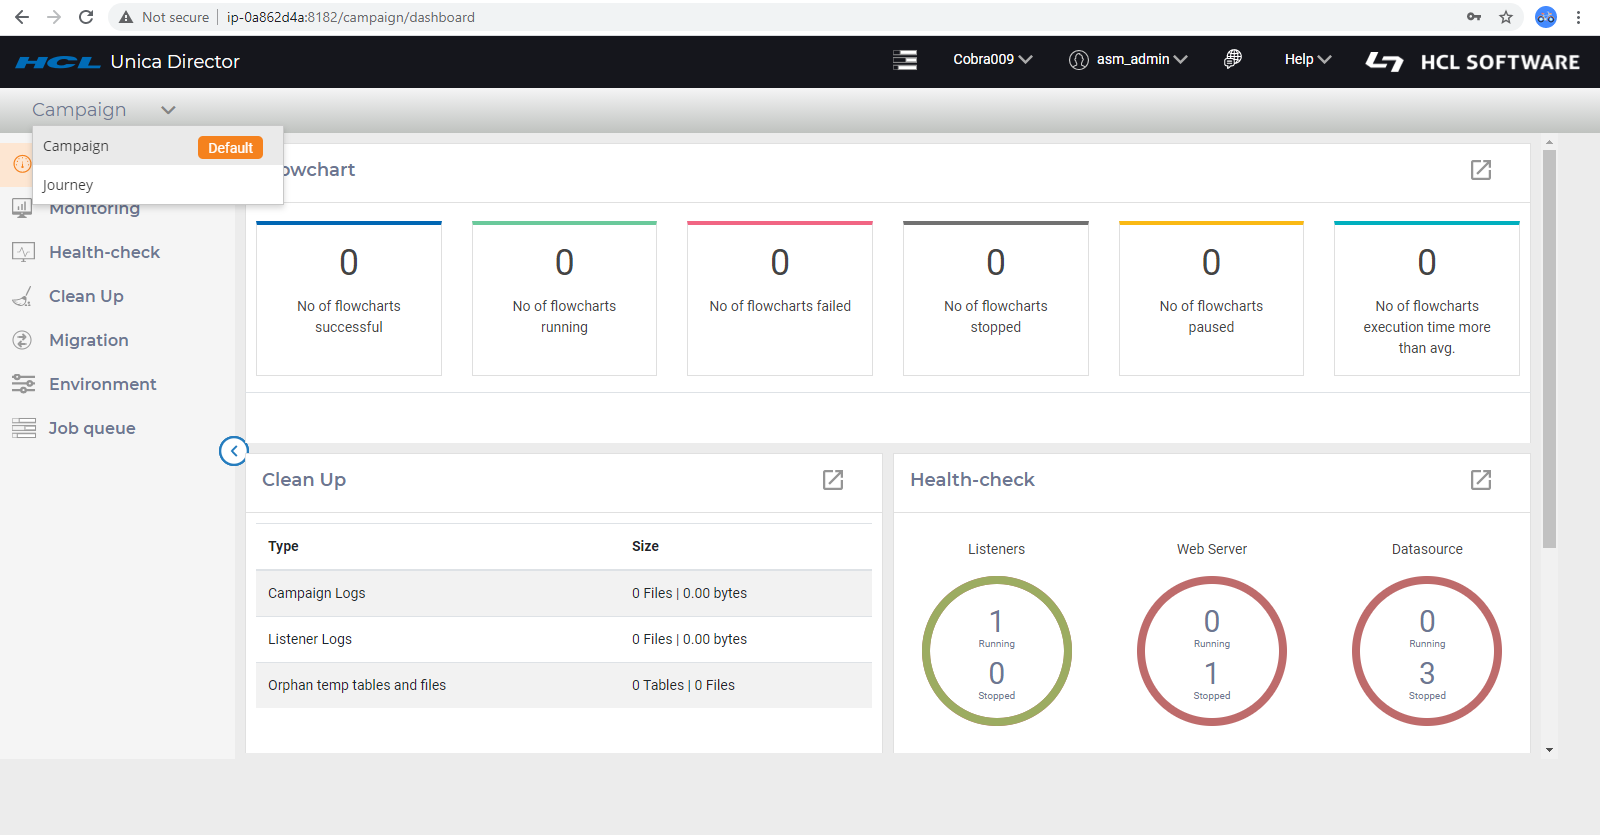
All the links that appear on the left panel are part of campaign. So if user clicks on Health check, it would show up details of Campaign health check and if user clicks on Clean up, it would show up the Campaign clean up items. To switch to Journey application, user will have to click on Journey and the default dashboard page of Journey would be presented.
Changing the default view
- Click on the green tag default next to
application
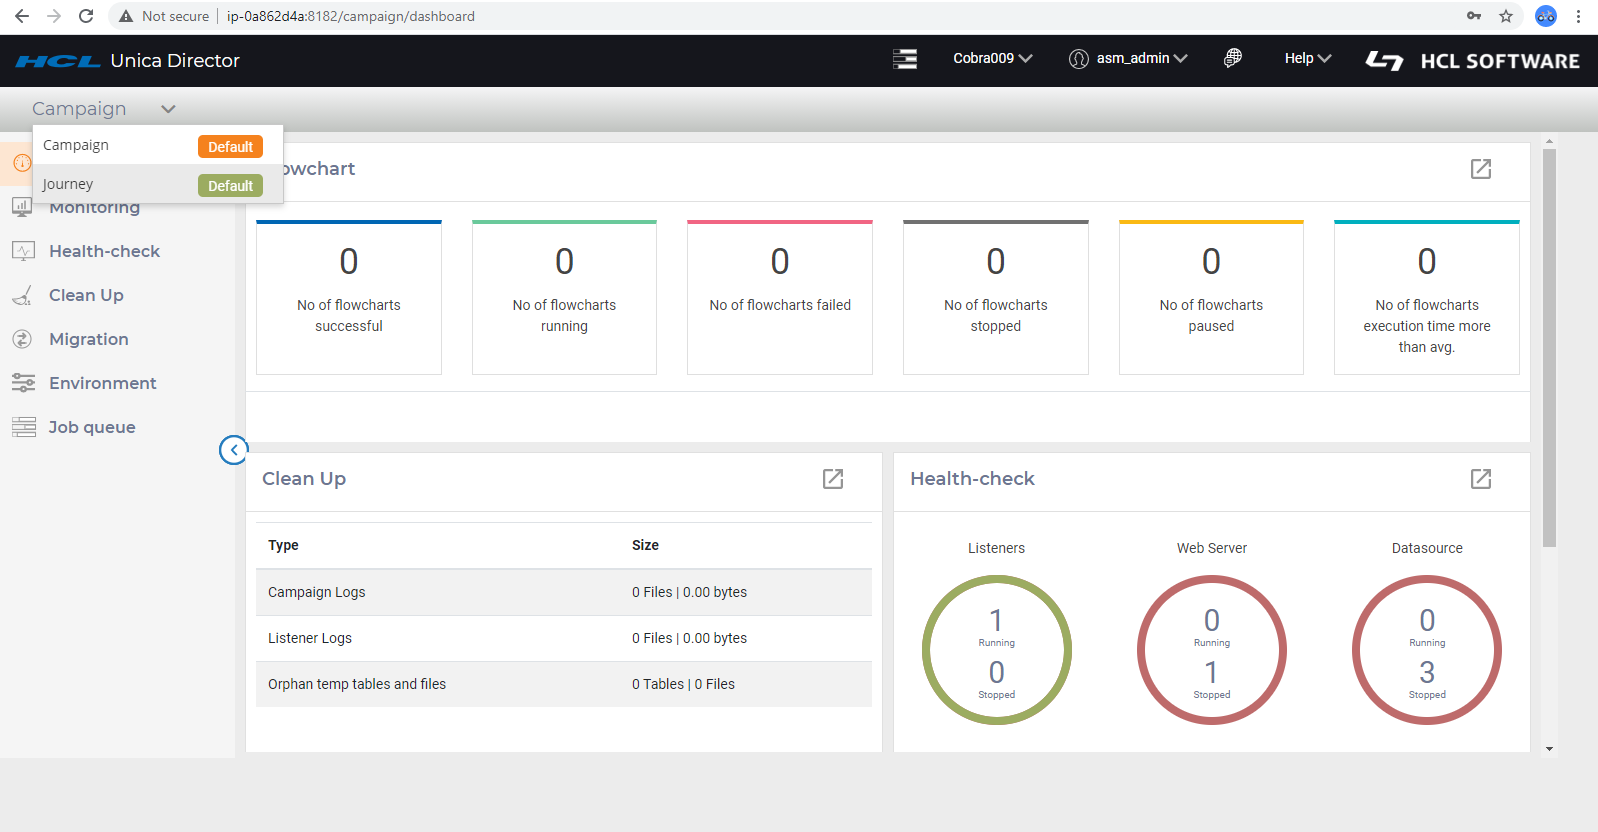
- User will be prompted with below message
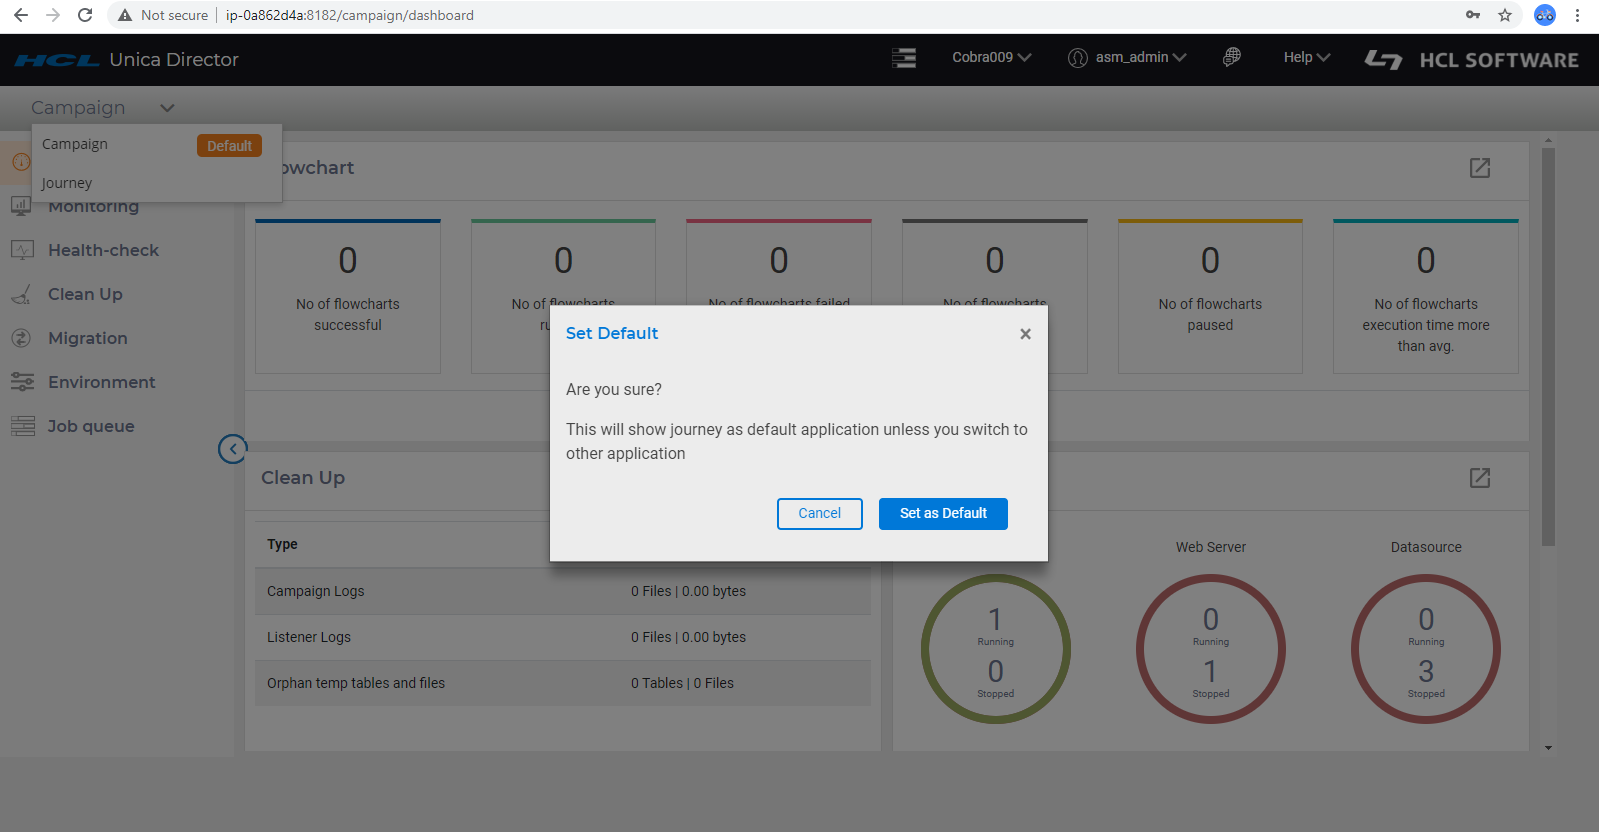
- On user confirmation, the default application will be changed.
- Next time when the user logs in, they will now be presented with the dashboard of Journey application.