Triggered action user interface
Triggered Action page
The following is the triggered action page. You can add a new triggered action
from here. Click  besides the existing TA to get options to edit,
copy, and delete the existing TA.
besides the existing TA to get options to edit,
copy, and delete the existing TA.

Add triggered action
Complete the following steps to add triggered action.
- Click
 .
. - In the Add triggered action page, under Triggered action name, specify an appropriate name.
- Optional. Under Description, provide an appropriate description.
- Optional. Under Effective date, provide the date for the TA to be effective.
- Optional. Under Expiry date, provide the date for the TA to
expire.

- Click Next.
- Under Trigger, expand Click to set Trigger. Under Event and Event Pattern, you can either search or select the appropriate event pattern.
- Under Audience Level, select the audience level.
- Under Condition, expand Click to set Eligibility. Click
 to add
a condition.
to add
a condition. - Under Condition type, Subject, Operator,
Value, and AND/OR columns, provide appropriate
values.

- Click Save.
- Under zone, you can click +Branch to add a new branch. Once you do so, you msut set the condition.
- Select either Automatically select the best offer or Assign a specific offer.
- In the From zone list, select the appropriate option.
- In case you selected Assign a specific offer, under Offer, click
Browse to select the offer. You can also click Advanced
Options to perform further settings for the offer.
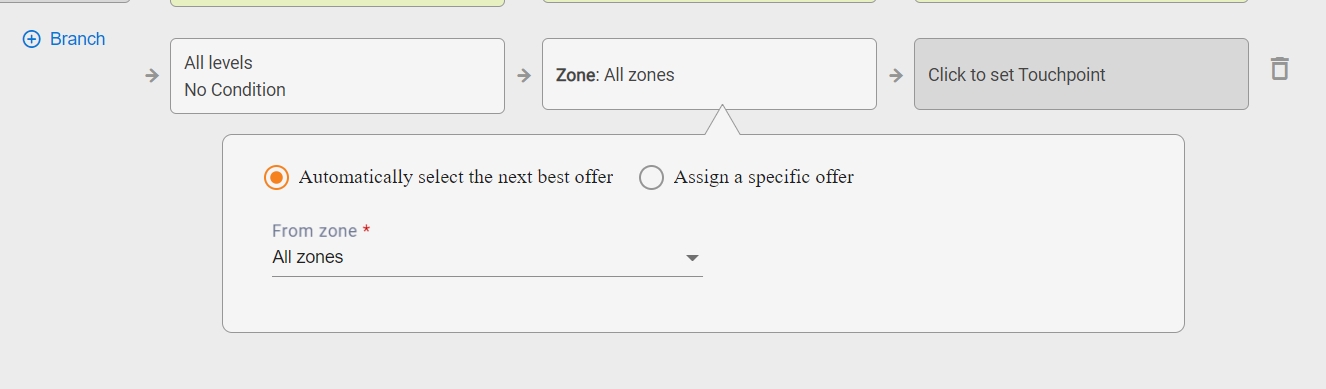
- Click Save.
- Under Touchpoint name, select the channel.
- Under Delay type list, select one of the options.
- In the Delay list, select the delay time in seconds and click
Save.
