Flowchart workspace overview
Use the flowchart workspace to design flowcharts for marketing campaigns.
You can open just one flowchart at a time. If you attempt to open another flowchart while one is already open, you are prompted to save your changes. To open two flowcharts at the same time, see Viewing two flowcharts side-by-side.
If a flowchart is open for viewing but not editing, the toolbar contains a smaller set of
functions and the process palette does not appear. Click the pencil icon ![]() to open a flowchart for editing. The following figure
shows a flowchart open for editing.
to open a flowchart for editing. The following figure
shows a flowchart open for editing.
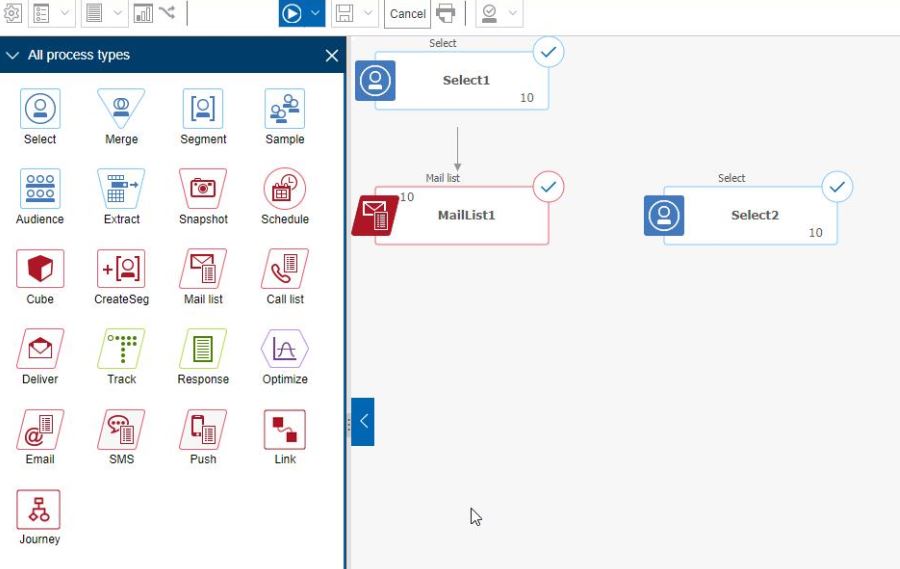
The flowchart workspace consists of the following elements.
| Element | Description | |
|---|---|---|
 |
Palette (Edit mode only) |
The palette at the left side of the window contains processes that you use to build your flowchart. It is visible only in Edit mode. Drag a process from the palette to the workspace, then configure and connect processes in the workspace. By default, all process types are displayed. Click a category (List generation, Segmentation, Response tracking, Data preparation) to view a subset of processes. To resize the palette, drag the edge of the palette area to widen or narrow it. To hide or show the palette, click Hide palette (gray arrow) or Show palette. |
 |
Main workspace area |
In View mode, you can view but not modify process boxes and you can perform a limited set of operations. In Edit mode, you can configure and connect processes to determine the workflow and behavior of the flowchart. Right-click any process box to open a menu of options. To configure a process: Double-click it, or right-click it and choose Process configuration. To connect processes: Rest the cursor over a process box until four arrows appear, then drag a connection arrow to another process box. |
 |
Panning area |
Use the panning area to highlight the portion of the flowchart that you want to see. This visual representation of the workspace is useful when not all of the process boxes fit on the screen at the same time. |
 |
Flowchart toolbar |
Use the buttons and menus in the toolbar to perform the actions that are described in the
following table. Rest your cursor over each item to see what it does. To open a menu, click its
down-arrow |
 . The toolbar icons and available
options depend on your permissions and whether the flowchart is in View or Edit mode.
. The toolbar icons and available
options depend on your permissions and whether the flowchart is in View or Edit mode. The flowchart toolbar contains the following icons and menu options.
| Flowchart toolbar icons |
|---|
| In View mode, click the pencil icon |
| Use the Run menu |
In View mode, use the Schedules menu  to view or schedule process runs at
defined intervals. For details, see the Platform Administrator's Guide. to view or schedule process runs at
defined intervals. For details, see the Platform Administrator's Guide.
|
| In View mode, click Delete to permanently delete the flowchart, if you are sure that you no longer need this flowchart. Then confirm or cancel. |
| In View mode, click Add a flowchart
|
| In View mode, click Copy
|
| In View mode, click Search flowcharts to search all flowcharts in all campaigns for any object (process box, user database, offer, configuration details, and so on). |
| Click the Properties icon |
| Use the Options menu |
| Use the Log options menu |
| Click the Reports icon |
| Use the Save options menu |
| Click Cancel and discard changes
|
| Click Print this item
|
| Administrators can use the Admin menu |
Use the Select All, Cut, Copy, Paste, and Delete icons  to select and then perform actions on the
selected process boxes. Use Ctrl-click to add or remove process boxes from
the selection. to select and then perform actions on the
selected process boxes. Use Ctrl-click to add or remove process boxes from
the selection. |
| Use the Alignment menu |
| Use the Layout menu |
| Click Fit contents
|
| Use the Zoom
|
| Use Hide all annotations or Show all
annotations
|
| Use the Find process by name field to search for a process box by entering any portion of the name. |
| Click the Help icon |