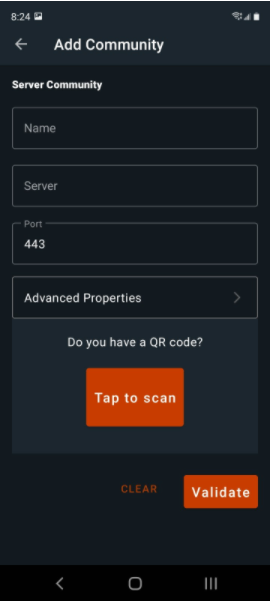
Adding a new community Manually
Selecting Setup, a Community on the Welcome screen will display the Add Community Screen.
For Name, enter a display name that you would like to use for this community.
For Host Server, enter the server host URL.
For Port, enter the server port number.
These are the minimum fields needed to configure a Sametime community. You may enter the User ID in the Community screen or at the Login screen. Tap back to be prompted to Save and return to the Login screen or the Communities screen.
Some communities require additional properties to connection, these can be found under Advanced Properties:
| Option | Description |
|---|---|
| Allow Self Signed Certificate | This property is OFF by default. With it ON the identity of the community server cannot be verified. If you are configuring for a test environment your administrator may require you to set this to ON. |
| Connection Type | This property is typically set to Direct Connection. However, if your host server is behind a firewall, you may need to use an authenticating proxy. Selecting Authentication Proxy will require credentials used to authenticate with the proxy. Your administrator provides any needed details. |
When done configuring advanced properties, tap back to return to the community screen, then with a community selected tap back to the Login screen.