Setting the Test properties by the input and output tags
Use the Properties tab to define which tags are to be available on the input and output interface for the selected test.
When a tag is created, the interface definition can be set by enabling the "Expose as input" or "Expose as output" option. Additionally, new tags can be created under either of the input or output interfaces within the test.
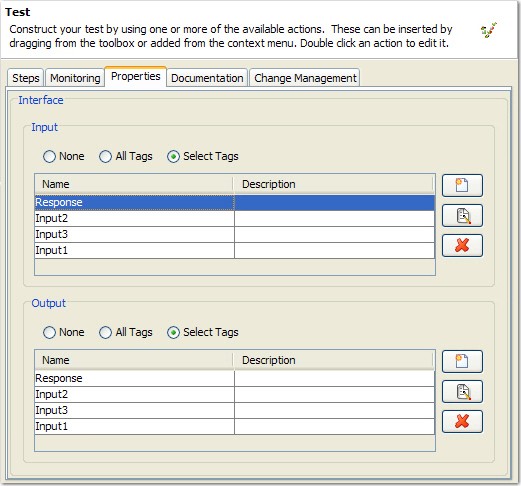
To specify which of the tags under the Input or Output interface are to be made available to scenarios, use the radio buttons above the tag tables.

- If you choose None, none of the tags are available and the list of tags cannot be edited.
- If you choose All Tags, all tags are available and the list of tags cannot be edited.
- If you choose Select Tags, only the tags that are shown in the table are available in scenarios (that is, add and delete tags to the table.)
To create, edit, or delete the tags that are available
under the input and output interface, use the ![]() ,
, ![]() , and
, and ![]() icons.
icons.
- To create a tag, click the
 icon next to
the table under Input or Output. The Select Tags dialog
is displayed. Tags can be created, modified, or deleted in the same
way as in The Tag Data Store.
icon next to
the table under Input or Output. The Select Tags dialog
is displayed. Tags can be created, modified, or deleted in the same
way as in The Tag Data Store. 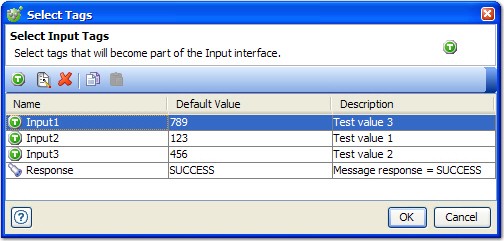
- To edit an existing tag in the Input or Output interface, select it and click the
 icon. The Edit Tag dialog is displayed. For more information, see The Tag Data Store.
 - To delete a tag from the Input or Output interface,
select it and click the
 icon next to the table.