Configuring SmartSockets transports
You can configure a SmartSockets transport in Architecture School’s Physical View.
About this task
To configure a SmartSockets transport, double-click the appropriate TIBCO SmartSockets
Connection/Broker resource in Architecture School’s Physical View.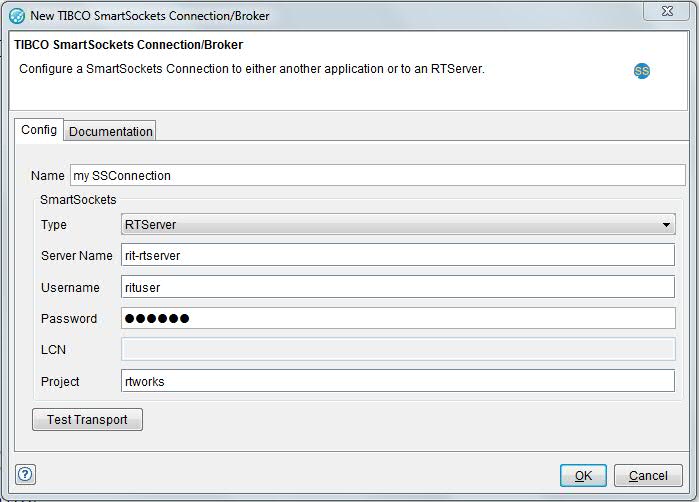
If wanted, enter a name for the transport in the Name field (to help identify it when multiple SmartSockets transports are available).
Note: When you are configuring the transport, all of the
configuration fields support the use of tags. Tags can be entered
manually or from the menu, except in the Password field,
where tag names must be entered directly (for example, %%JMS_password%%).
Since this field is encrypted, any characters that entered are hidden.
The transport settings are configured in the SmartSockets panel. The available configuration options are described in the following table:
| Field | Description |
|---|---|
| Type | Select the wanted connection type (as described in TIBCO SmartSockets User’s Guide) from RTServer, Client, or Server. |
| Server Name | For RTServer connections, enter the hostname or IP address of the RTServer to which you want to connect. |
| Username | For RTServer connections, enter the user name to send when you are connecting to the server. |
| Password | For RTServer connections, enter the password that is required for the specified user name. |
| LCN | For Client and Server connections, specify the logical connection name to use. |
| Project | For all connections, specify the existing SmartSockets project to use for the connection. |