You can add any of the available synchronization sources
to automatically create the resources that are required for testing
the API that the definition describes.
About this task
Most of the steps involved in adding a synchronization source
are the same no matter what type of sync source you add. Those steps
are described in the current topic. Steps that are unique to a particular
sync source type are described in individual topics. Links to those
topics can be found in step 2.
Procedure
Open the Synchronization view of the Architecture School
perspective.
Open the Create a new Synchronization
Source wizard. Choose the Type of
sync source and provide the information unique to that sync source.
See the following topics for the method of launching the wizard and the initial, unique fields
that apply to each type of synchronization source. After completing the steps in the appropriate
topic, return here to complete the Create a new Synchronization Source wizard.
Complete the remaining fields on the first
page of the Create a new Synchronization Source wizard.
Only environments associated with
the current project are displayed in the list for the Environment field.
If you enter a new name, a new environment is created with that name
for the current project.
If you want to specify a name, component location, or
synchronization option for the new sync source, select the Show
advanced options check box. Those options are displayed
on the second page of the wizard.
Click one of the following options:
Next
If you chose to show advanced options, go to step 4. Otherwise, go
to step 5.
Finish
If you want to create the synchronization source with default
values. The sync source takes its name from the source file name.
All operations in the definition are added to the model. No tests
or stubs are created for the operations in the sync source definition.
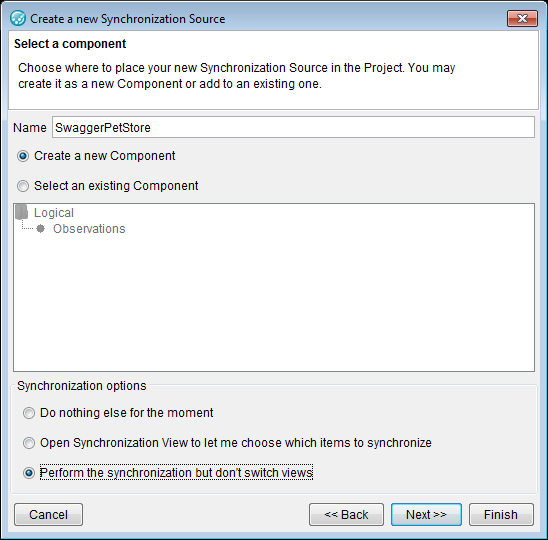
Complete the advanced option page of the
wizard.
The following screen capture shows a Swagger definition,
but the UI is the same for other sync sources.
Optional: Enter a name for the synchronization
source in the Name field.
Select one of the following options:
Create a new Component
A component is created with the name that is displayed in the Name field.
Select an existing Component
Click a component name in the display that is associated with
the option.
Select one of the displayed synchronization options:
Do nothing else for the moment
If you chose the Create a new Component option,
the component is created when you click Next.
Otherwise, no changes are made. The Summary page
is displayed. Click Finish.
Open Synchronization View to let me choose which items to synchronize
All possible operations are displayed in the Synchronization View
when you click Next. The Summary page
is displayed in the wizard. Click Finish. Clear
the check boxes for any operations you do not wish to add to your
model of the system under test. When you are ready, click the Synchronize button
on the Synchronization menu bar.A list of current synchronization sources is displayed.
Clear the check box in the Enabled column for
any sync sources that you want to ignore and click OK.
The resources are created.
Perform the synchronization but don't switch views
Synchronization begins immediately when you click Next.
A model of the system under test is created based on information in
the source document. Go to step 5.
Note: From this point on, if you want to delete the new
synchronization source, you must do so in the Logical view.
From the displayed list of operations,
select the tests and virtual services (stubs) to create.
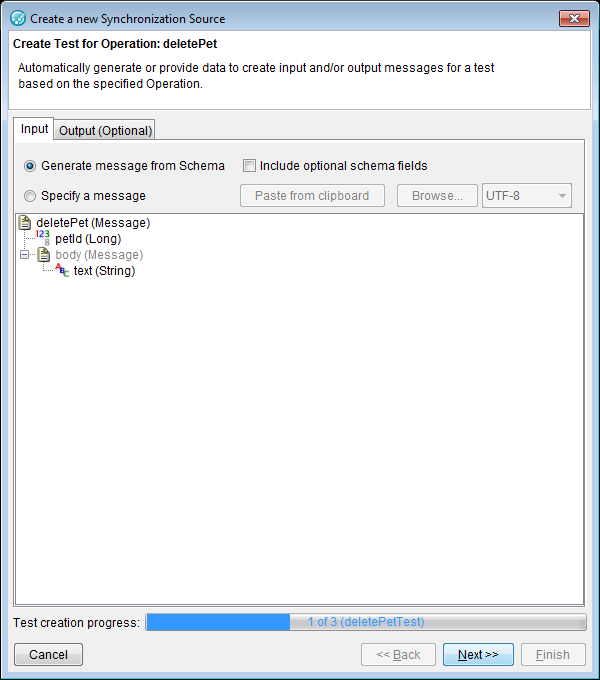
For each test you requested, provide the following information:
Note: The number of tests to be created is shown in the Test creation
progress bar at the bottom of the window.
Select a source option for the Input message:
Generate message from Schema
Use the schema information from the source document to generate the Input message.
Specify a message
Create your own message. You can enter the message in the text box that is provided, paste it
from your copy/paste buffer, or browse to a file that contains the message. The message can be in
XML, JSON, or any other supported message format.
Select Include optional schema fields to complete the message with
optional fields from the schema that is provided by the source document.
Select a source option for the Output message.
The options that are available are the same as the ones for the Input message, with the
exception that you can opt to not generate an Output message.
Click Next and repeat this step for each of the generated tests.
When you have specified sources for all selected tests, a Summary
page is displayed with the number of synchronization items, tests and stubs that were created.
Starting from HCL OneTest™ API Version 10.0.0, the
Summary page also displays all information, warning, and error messages that
occurred during synchronization.
Click Finish. The Test Factory perspective is displayed.
Results
The specified sync source is now a component in your project.
Note: Using
the Logical View, Physical View, and Schema Library view of the Architecture
School perspective, you must review any operations, physical resources,
and schemas that were added to your project and modify them as required
before you can use them to create any tests, stubs, or other resources.
 Note: The number of tests to be created is shown in the Test creation progress bar at the bottom of the window.When you have specified sources for all selected tests, a Summary page is displayed with the number of synchronization items, tests and stubs that were created. Starting from HCL OneTest™ API Version 10.0.0, the Summary page also displays all information, warning, and error messages that occurred during synchronization.