Configuring the MEP settings for the email transport
You can configure the email transport for the message exchange pattern (MEP) in HCL OneTest™ API and create tests for the application based on the MEP settings.
Before you begin
You must have defined a service component and an operation under a service component in the Logical View. See Creating a service component and Creating an operation.
About this task
When you create a test by using MEP in HCL OneTest™ API, the test can contain any of the following messaging
actions:
- Publish
- Publish/Subscribe
- Request/Reply
- Subscribe
Important: The MEP settings you configure are used in
the messaging action in the tests you create in the Test Factory
view. You can either use the same configuration or modify the settings before you run the
tests.
You can configure the MEP settings of the operation that you created for the logical email resource from the Logical View.
Procedure
- Double-click the operation to open the Operation dialog.
-
Click the Message Exchange Pattern tab, if it is not already open.
The following options for the MEP are listed for selection in the Pattern field:
- Request/Reply
- Publish/Subscribe
- Publish
- Subscribe
- Select the messaging pattern that you want to use in your tests from the list in the Pattern field.
-
Complete the following steps in the Schema panel:
See the related links to find information about schema.
-
Complete the following steps in the Bindings panel:
-
Configure the email properties for the messaging pattern that you selected.
The settings that you configure for the email properties are used in the tests you create that are based on MEP.
Enter details of the email accounts for the MEP that you select based on the properties in the following table:MEP selected Email properties Request/Reply The email properties tab that is displayed as follows:Note: When Publish/Subscribe action is selected, the email properties are displayed for the Publish action.
- Enter text as the subject for the email message.
- Enter the email address of the recipients of the email message in the To field.
- Enter the email address of the sender or publisher of the email message in the From field.
- Enter the email address of the recipients to which a copy of the message is to be delivered in the CC field.
- Enter the email address of the recipients to whom a reply message is to be sent in the Reply To field.
Publish/Subscribe Publish Subscribe The email properties tab is displayed as follows:Note: When Publish/Subscribe action is selected, the email properties are displayed for the Subscribe action.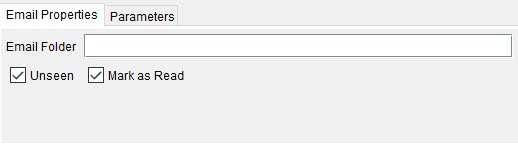
- Select the email transport.
- Enter the name of the folder from which the
email messages are to be subscribed to in the Email
Folder field.For example, you can add Inbox as the email folder.Note: The email folder you specify here overrides the folder that you configured for the physical transport.
- Retain or clear the selections for the
Unseen or Mark as
Read options.Note: The Unseen and Mark as Read check boxes are displayed as the default selections and the following default actions are performed when you subscribe to messages in the email folder:
- The messages that are not yet seen or read by the recipient are subscribed.
- The subscribed messages are marked as read in that email folder.
-
Configure the email properties for the messaging pattern that you selected.
- Click OK to save the MEP settings and exit from the Operation settings dialog.