About this task
This topic explains the steps to create a table using InformixHQ UI.
There are five types of tables:
- Standard table
- Raw table
- External Fixed table
- External Delimited table
- External Informix table
Standard & Raw table types are almost similar & three external table types are almost
similar. This topic explains how to create both table types.
Procedure
To create a table, follow the steps given below:
-
Go to the Schema Manager in InformixHQ.
-
Select desired database and click on menu option (3 dots) next to Select Database
dropdown.
-
Click on Create Table option from dropdown to create a table
To create a Standard or Raw type table:
-
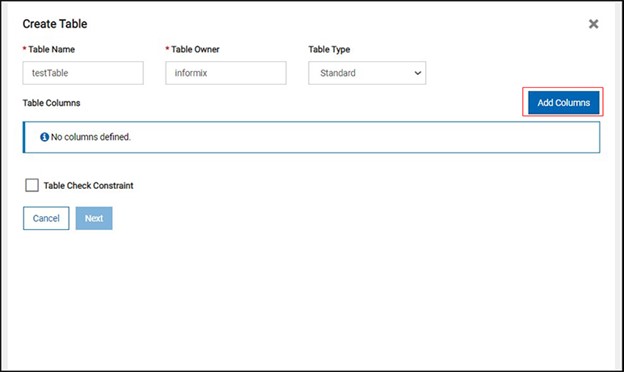
Enter mandatory fields such as Table Name and Table Owner.
-
Select Standard(default) or Raw type from Table Type dropdown.
-
Click on Add Column for adding columns to the table.
-
To cancel Create Table operation click on Cancel button.
-
Next button will be enabled after user is done adding columns to the table.
-
By clicking on Add Columns button pop up will appear to add column details.
-
Enter values for all mandatory fields(*).
-
To give a constraint on any column, click on Column Check Constraint checkbox.
-
Multiple columns can be added using the same pop up.
-
To go back to the main screen, click on Close button or cross icon in the upper
right corner.
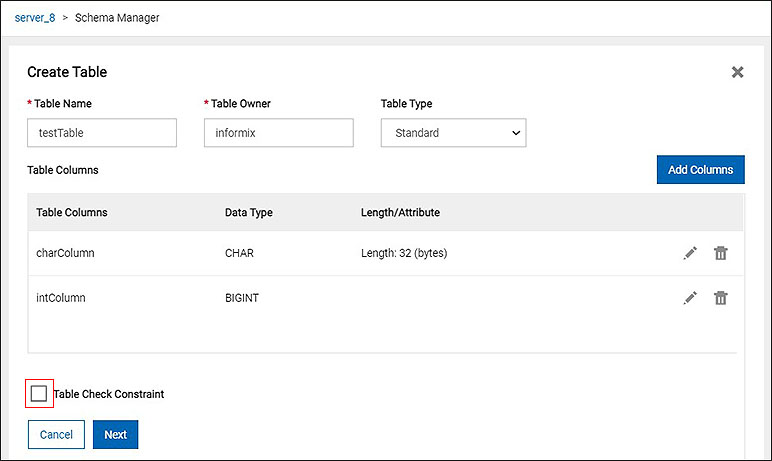
-
Once columns are added, user can view, edit, delete any of the columns.
-
Table level constraint can be added on this screen by clicking on Table Check Constraint
checkbox.
-
Once details related to the columns are finalized, clicking on Next button takes user to
add constraint page.
-
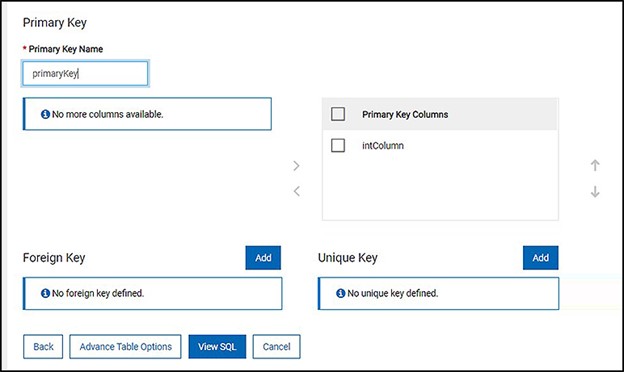
This screen is for adding a constraint like primary key, foreign key, unique key to a
table.
-
To assign primary key to a table, give Primary Key Name & select Primary Key
Columns.
-
To add Foreign key constraint, click on Add button in Foreign key section.
-
To assign a foreign key for a table, give Foreign Key Name & map Referenced
Column with Table Column.
-
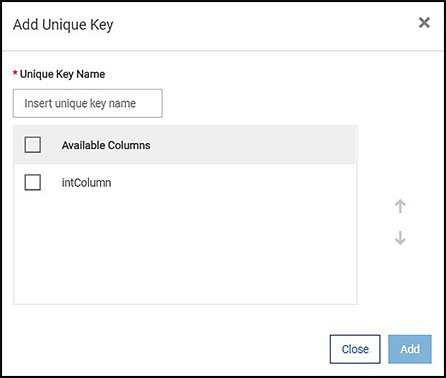
To add a Unique key constraint, click on Add button in Unique key section.
-
To assign a unique key for a table, give Unique Key Name & select Available
Columns from the list. This will enable the Add button.
-
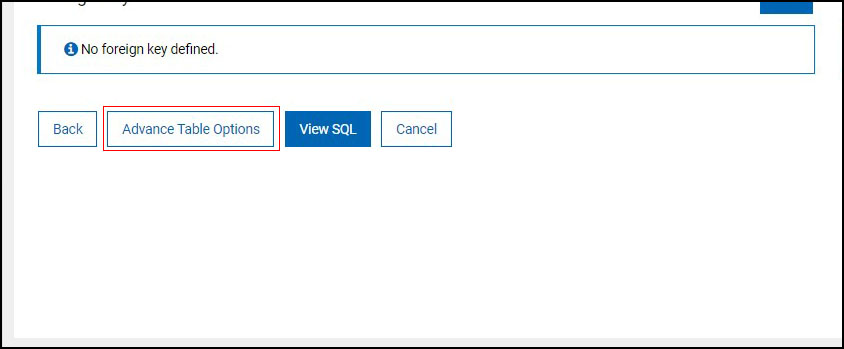
Once constraints are added user can go to either View SQLor Advance Table
Options
-
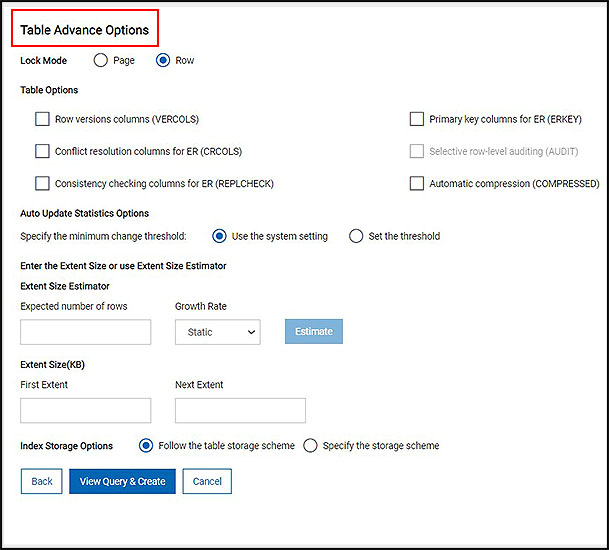
Modify advance table level options using the screen given below. For example, changing lock
mode, storage scheme, update statistics, etc.
-
Once advance table option are set, click on View Query & Create button to view SQL
query for creating the table.
-
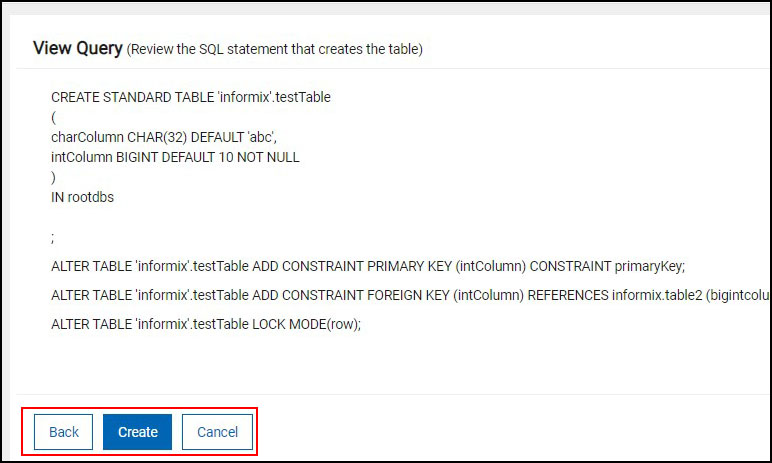
After clicking on View Query & Create button from Advance Table Options or on
View SQLbutton from Add Constraints screen, user will be able to view 'create table'
query as shown in the screen given below.
-
Click Create button to create the table.
-
If table is created successfully, information status message will be shown and user will be
taken back to Schema Manager page.
-
If table creation fails, error status message is displayed and all the create table related
queries will be rolled back
-
To go back to modify any properties click Back button and to cancel the operation of
create table click on Cancel button.
External table type:
To create an External type table:
-
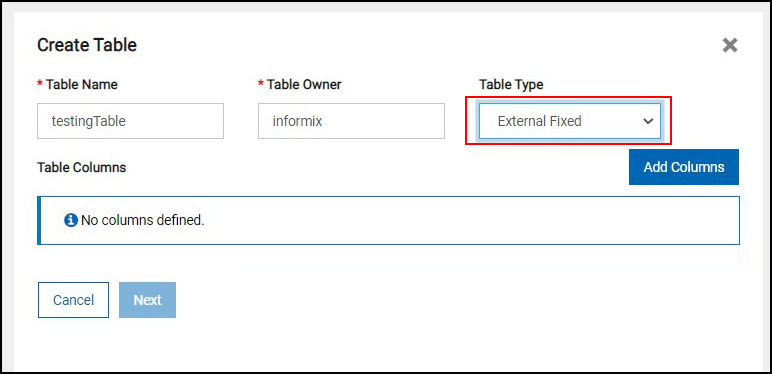
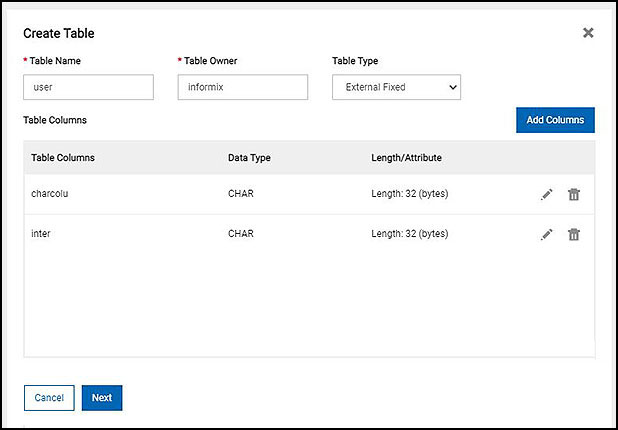
Enter mandatory fields such as Table Name and Table Owner.
-
Select one of External Fixed, External delimited, External Informix table
type from Table Type dropdown.
-
Click on Add Columns for adding columns to the table.
-
To cancel Create Table operation, click on Cancel button.
-
Next button will be enabled once user adds columns to the table.
-
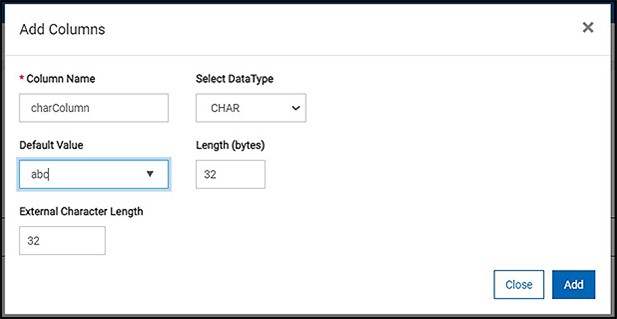
By clicking on Add Column button, a pop up will appear to add column details.
-
Enter all the mandatory field values(*).
-
User can add multiple columns using the same pop up.
-
To go back to the main screen, click on Close button or Cross icon.
-
Once columns are added, user can view, edit , delete any of the columns.
-
Once column details are finalized click on Next button to go to External Table
Options
-
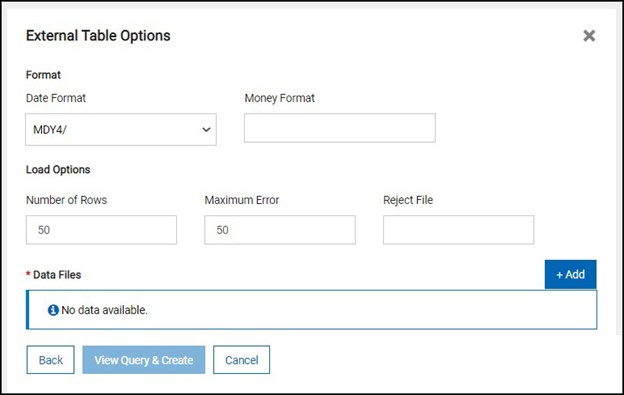
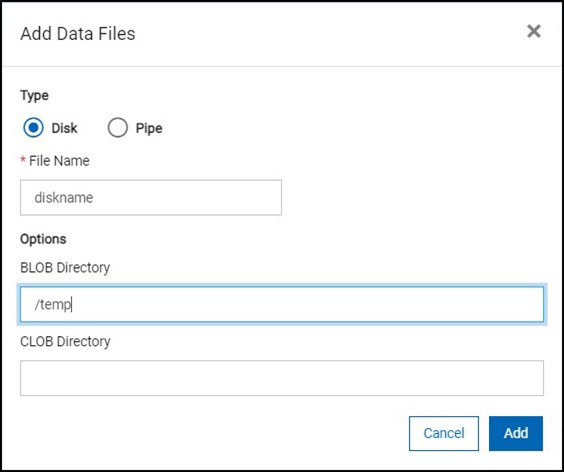
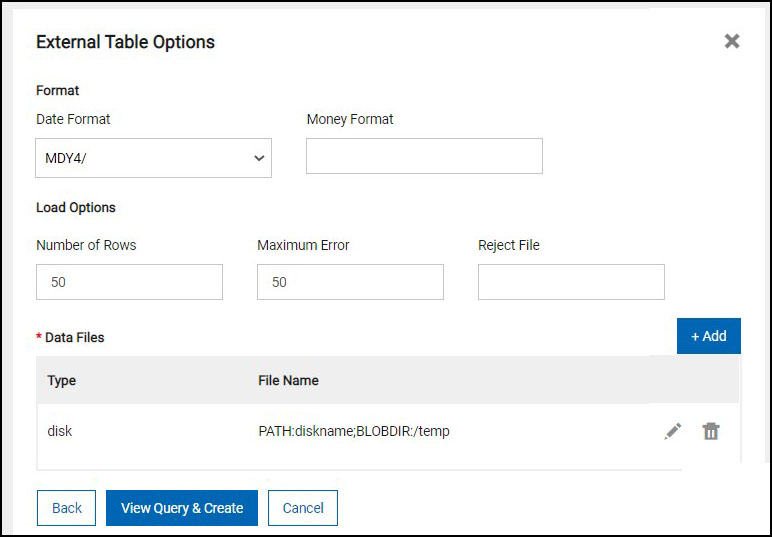
Provide information for external table options & add mandatory data file by clicking on
+Add button.
-
Following pop up is used to add data files to an external table.
-
Once data files are added, user can view, edit , delete any of the data files.
-
Once External table options are finalized click on View Query & Create button to
view SQL query for creating the table.
-
User can either go Back or Cancel the operation using respective buttons.
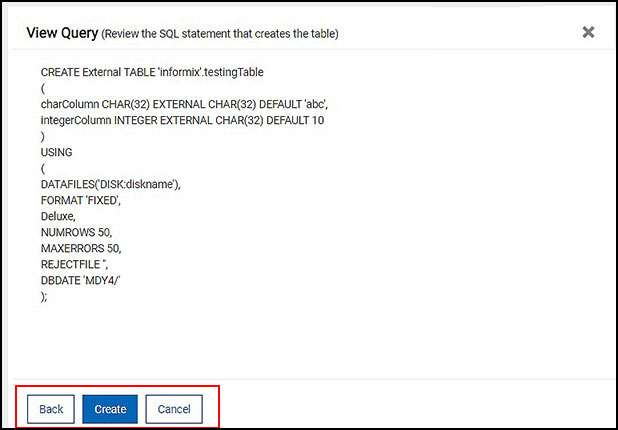
-
After clicking on View Query & Create button from the external table option, user
will be able to view create table query as shown in the screen below.
-
Click Create button to create the table.
-
If table is created successfully information status message will be shown and user will be
taken back to Schema Manager page.
-
If table creation fails, error status message will be displayed and all the create table
queries will be rolled back.
-
To go back to modify any properties, click Back button and to cancel the operation of
create table click on Cancel button.