Preparing the Unload Job window
An unload job is a collection of the specific pieces of information that are required to move data from a database into a data file. The Unload Job window shows a flowchart that includes all of the components of an unload job. You can use the Generate option to create the components of the unload job and to complete the items on the Unload Job window.
About this task
The generate example uses the Generate option to unload the contents of the items table of the stores_demo database into a file named /work/items_out. For instructions on how to create the stores_demo database and other demonstration databases, see the Informix® DB-Access User's Guide.
To generate the unload job:
Procedure
-
Choose from the HPL window.
The Unload Job Select window appears, as the following figure shows.
Figure 1: The Unload Job Select window 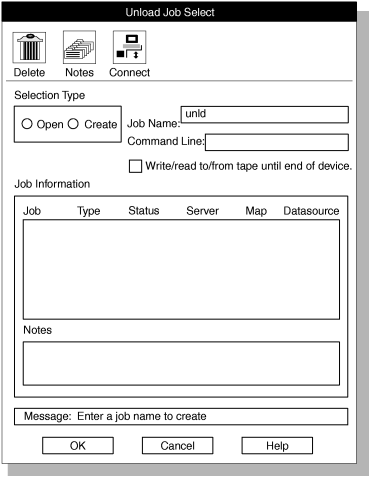
-
Click OK.
The Unload Job window appears, as the following figure shows. The information box in the upper right part of the display shows the name of the unload job, the name of the database server where the onpload database is stored, and the name of the database server where ipload is running.
Figure 2: The Unload Job window 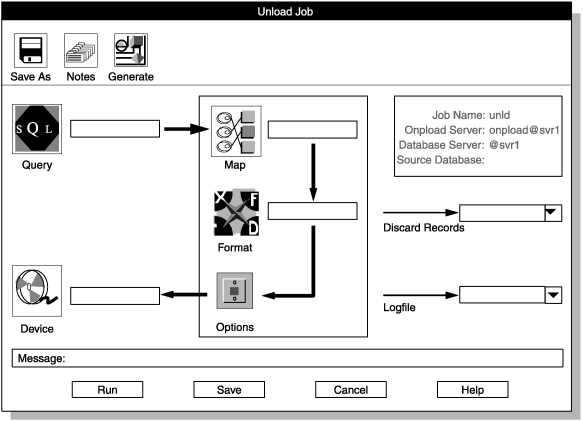
-
Type items in the Table text
box.
Figure 3: The Autogenerate Unload Components window 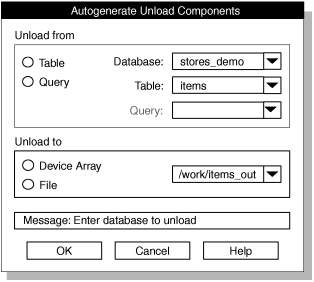
Results
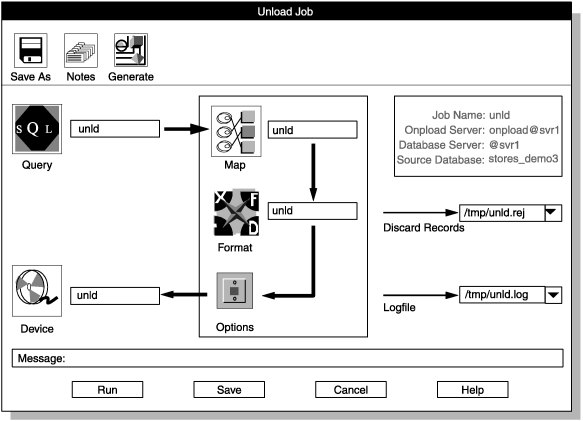
In addition to completing the main flow of the Unload Job window, the Generate option also enters the Source Database information in the upper right corner and creates path names for the Discard Records file and the Logfile. The HPL browsing options, describes the rejected records file and the log file.