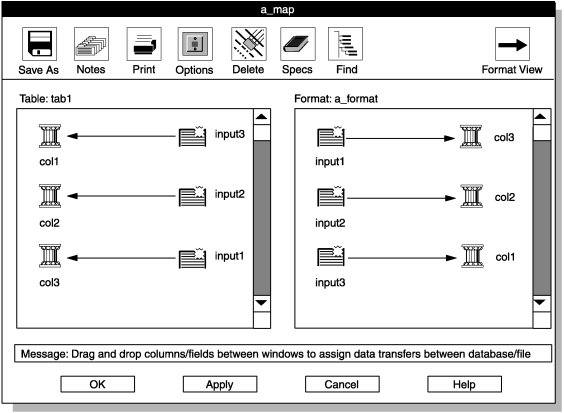
Associating each input item with a column of the database table
About this task
To associate each input item with a column of the database
table:
Procedure
Click the col1 icon and hold the
mouse button down.
A box appears around the icon and its
name.
Drag the boxed icon to the input3 icon
in the right pane.
Release the mouse button.
The associated
items appear in the second column of each pane. The following figure
shows the Map-Definition window with this step
completed. Figure 1: The Map-Definition
window with one association completed
Connect col2 to input2.
Connect col3 to input1.
The
following figure shows the window with all three connections completed. Figure 2: The Map-Definition window
with all associations completed
Click OK to return to the Map
Views window.
Click Cancel to return to the Load
Job window.
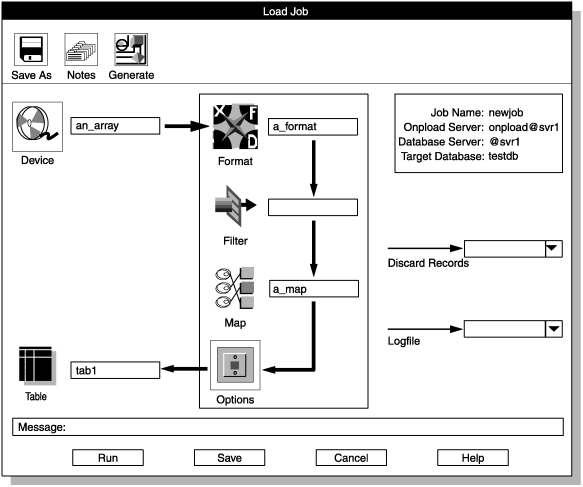
Results
The Load Job window now has entries
in all of the required areas, as the following figure shows. The ipload utility
was able to enter the table name and the target database name (upper
right area) because you specified the database and table as you built
the map.Figure 3: The Load
Job window with all required component boxes completed
You have finished all of the required parts of the Load
Job window, but you might want to modify the options, as
discussed in the next section.