This section provides the steps on how to manage content items using the HCL Content
Composer.
Prerequisite
Content Composer should be installed and configured to HCL Digital Experience 9.5
container release update CF181 or higher. See instructions to install to supported
container environments in the Install HCL Digital Experience 9.5 Components topic.
Content Composer is accessible from the Practitioner Studio interface (after image
configuration to your HCL Digital Experience 9.5 CF181 and higher deployment).
View Content overview
Content users can view a light preview of uploaded content and more using HCL Content
Composer.
Access the content item you wish to edit. In this example, the content item
example above (Image) is obtained from Web
Content > Content > Articles site area location. Select
Open Content.
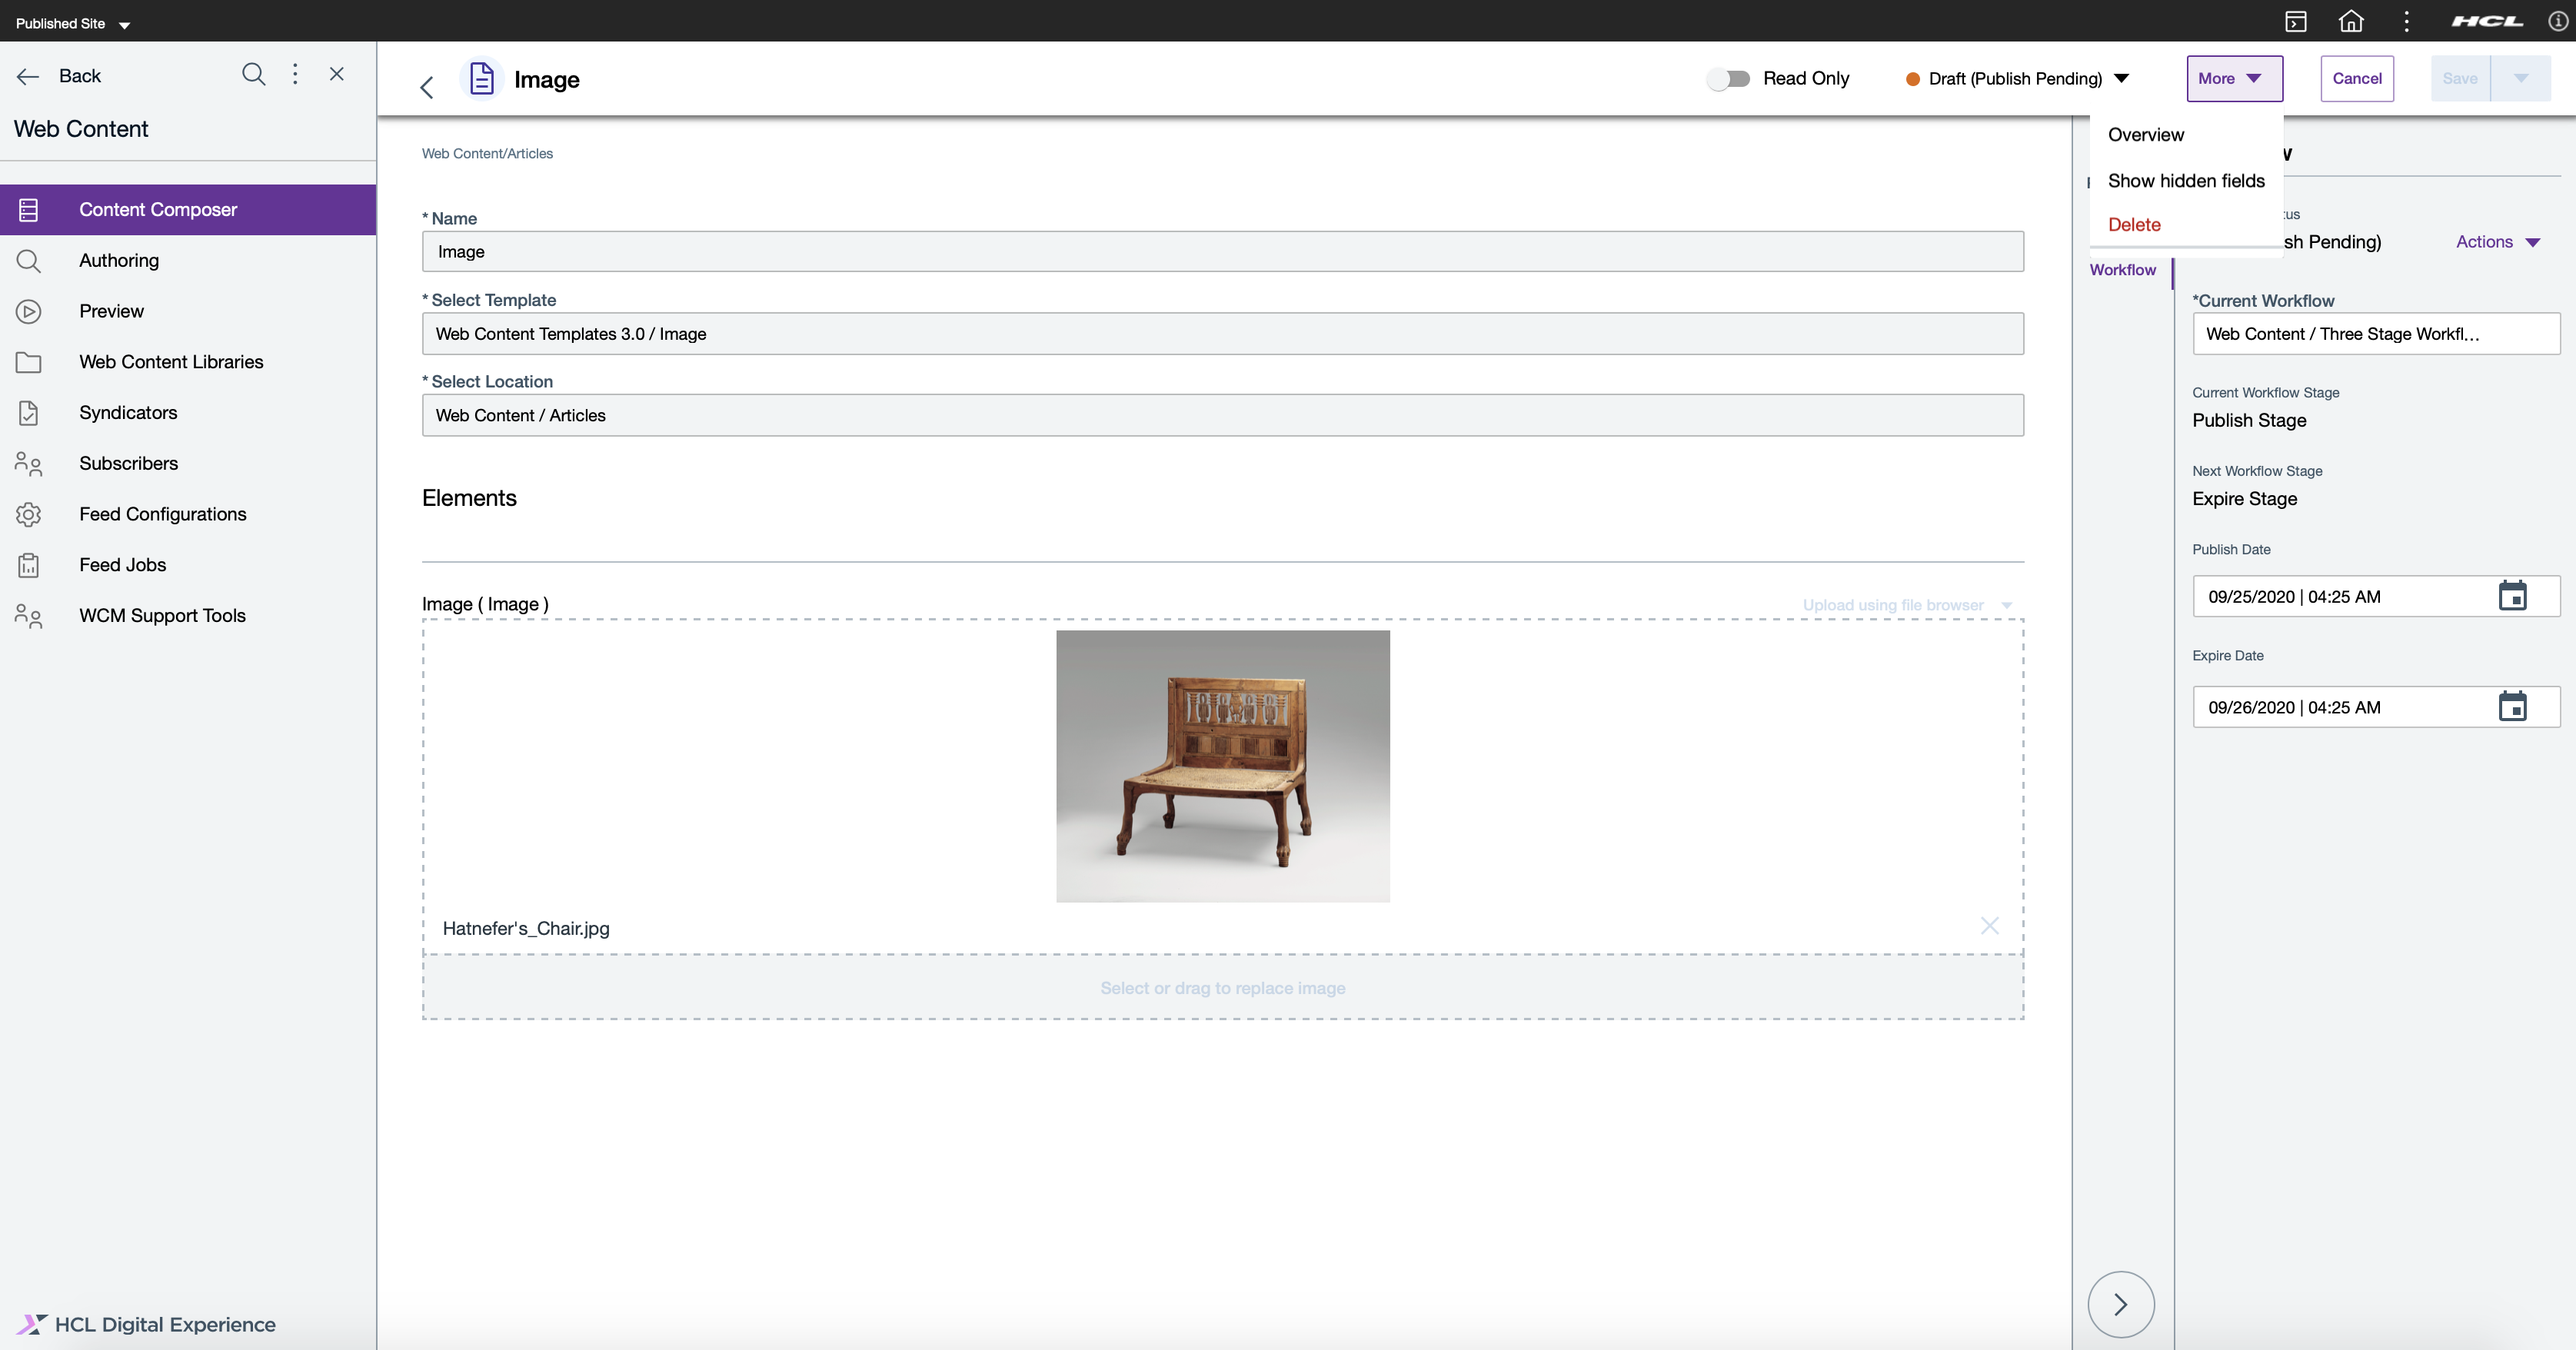
On the content item editor interface, select the More
drop down as shown below and select Overview. Figure 1. Select More drop down options
The light preview of the selected content will be shown in a new window. It will
display:
Content title
Content type
For images, a preview of the content in its original size; and
Published link of the content
User can also add a preview image of the content file. In Edit
Mode, user can select Show hidden content
and Upload using file browser or HCL
DAM the preview image file.
If done, select Save to save your settings and create
your new content template, or Save and Close, which will
create your new content template with the saved settings and will redirect you
to the new content template's location in the Content Composer Dashboard.
Edit Content item
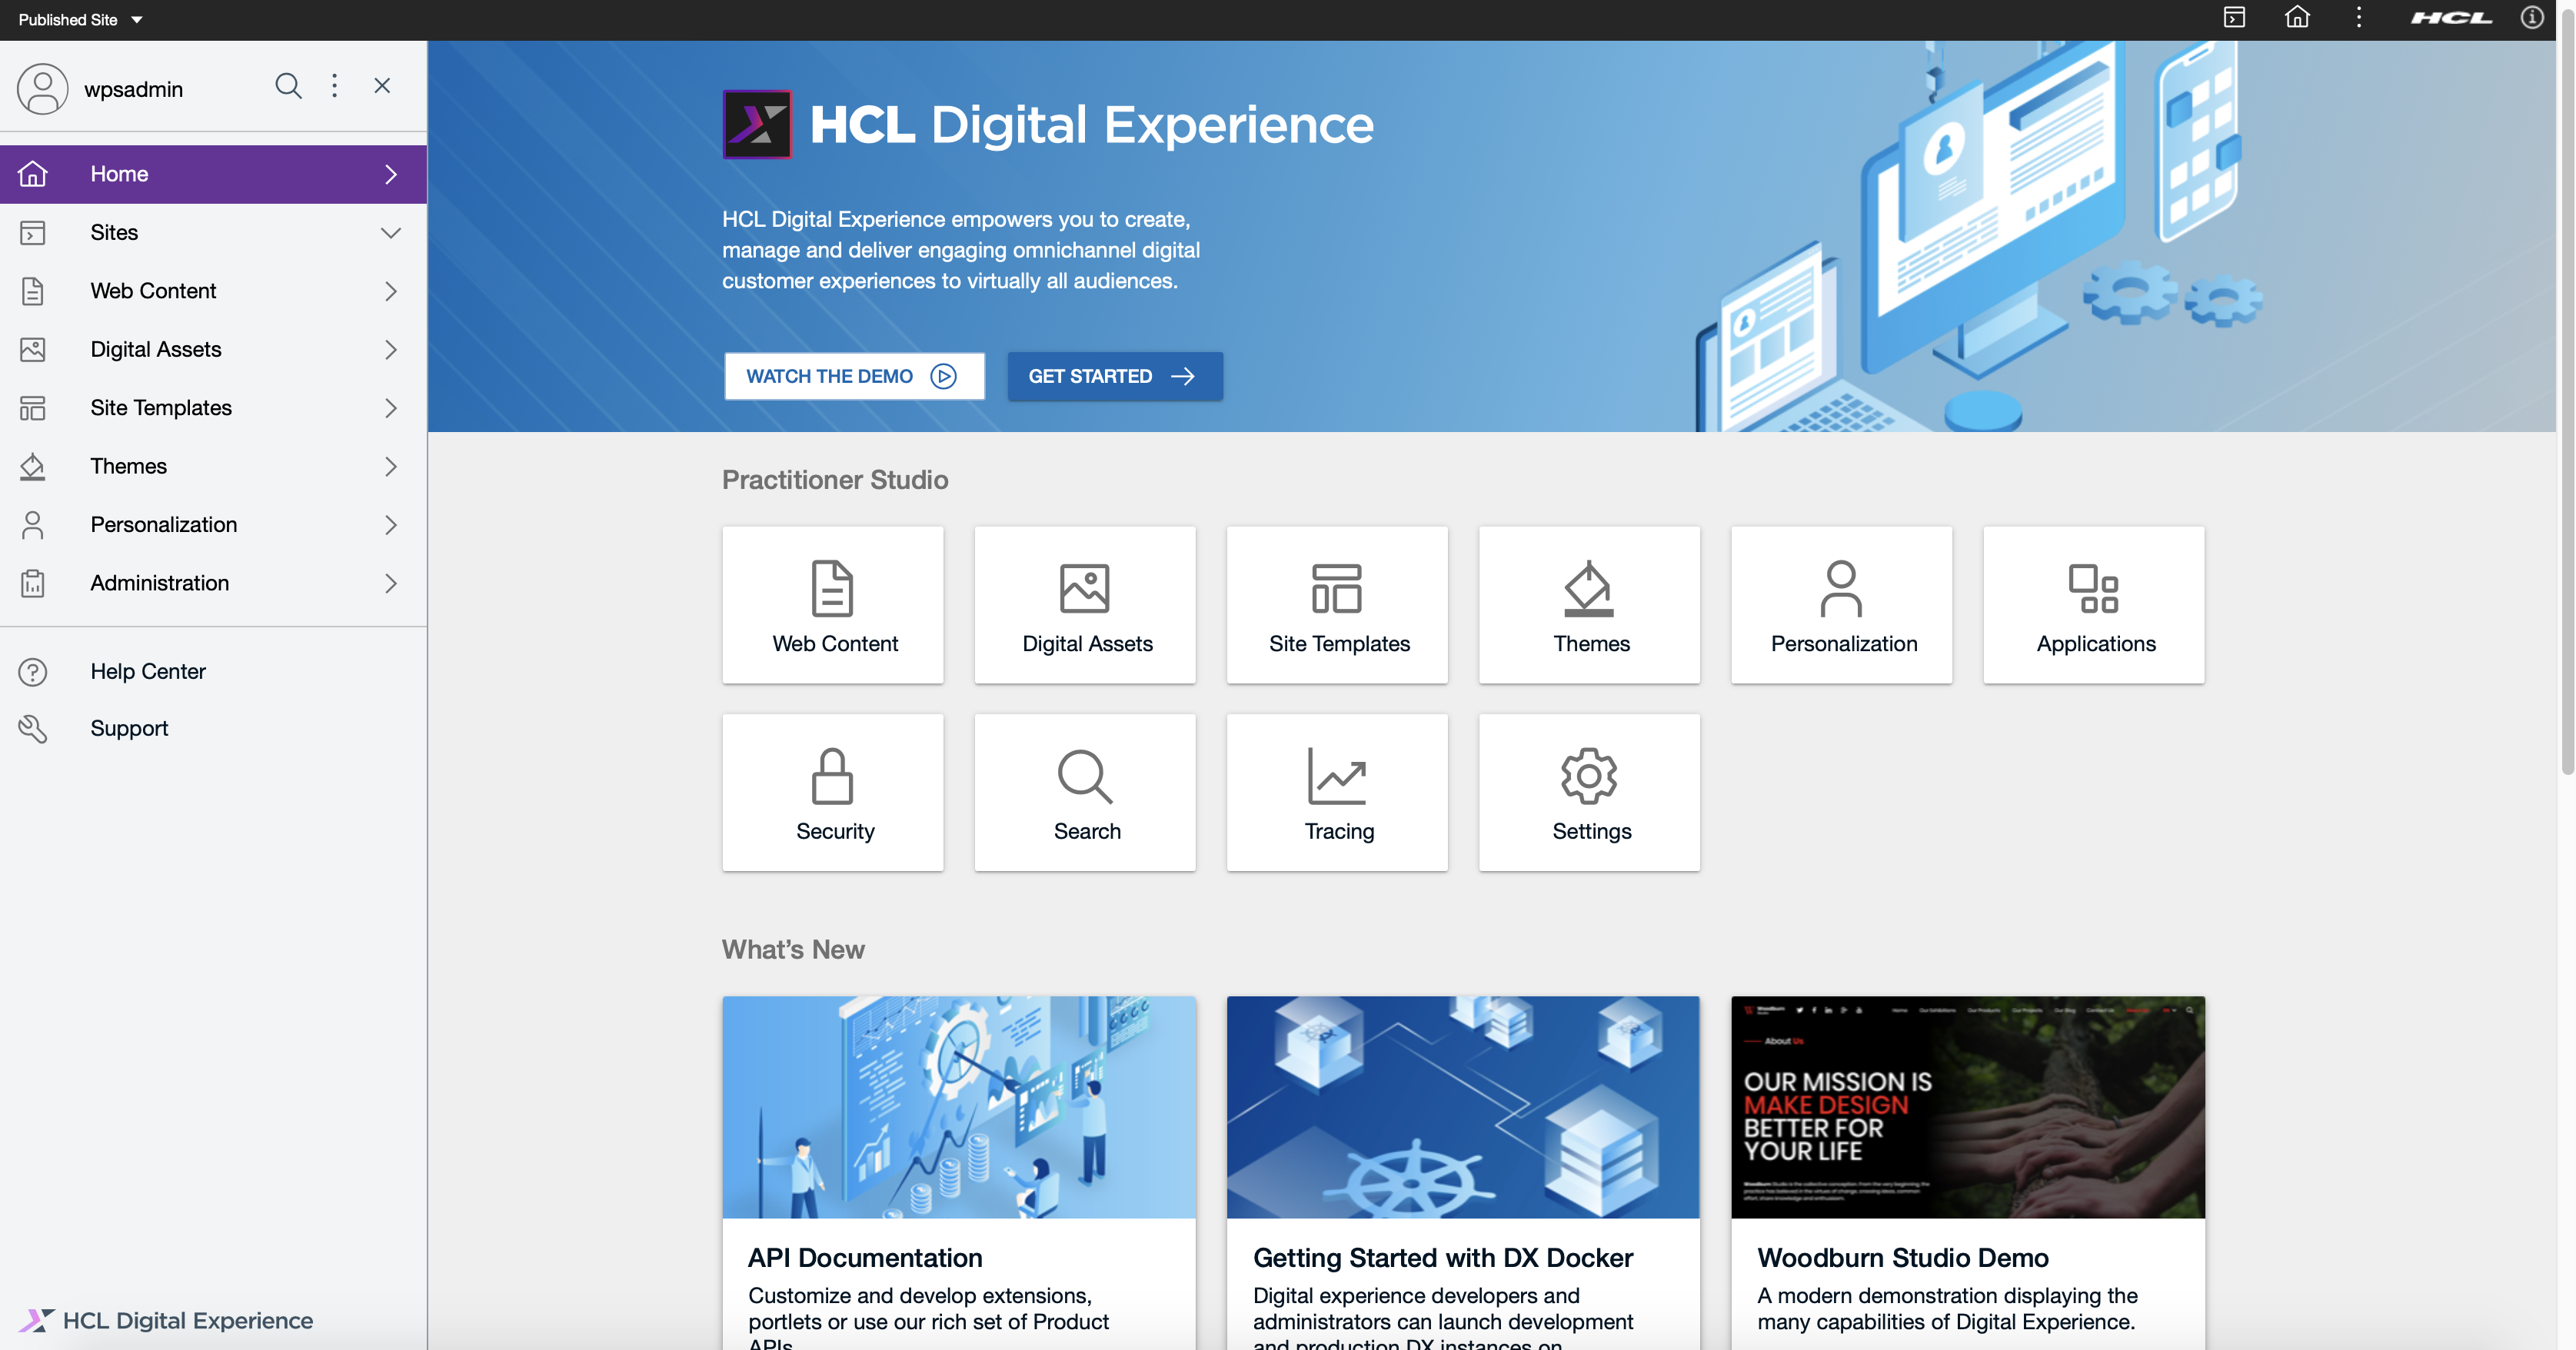
Log in to your HCL Digital Experience 9.5 platform, and select
Web Content from the Practitioner Studio
navigator. Figure 2. Log in to HCL Digital Experience 9.5
Select Web Content menu option to access the HCL
Digital Experience 9.5 Content Composer interface.
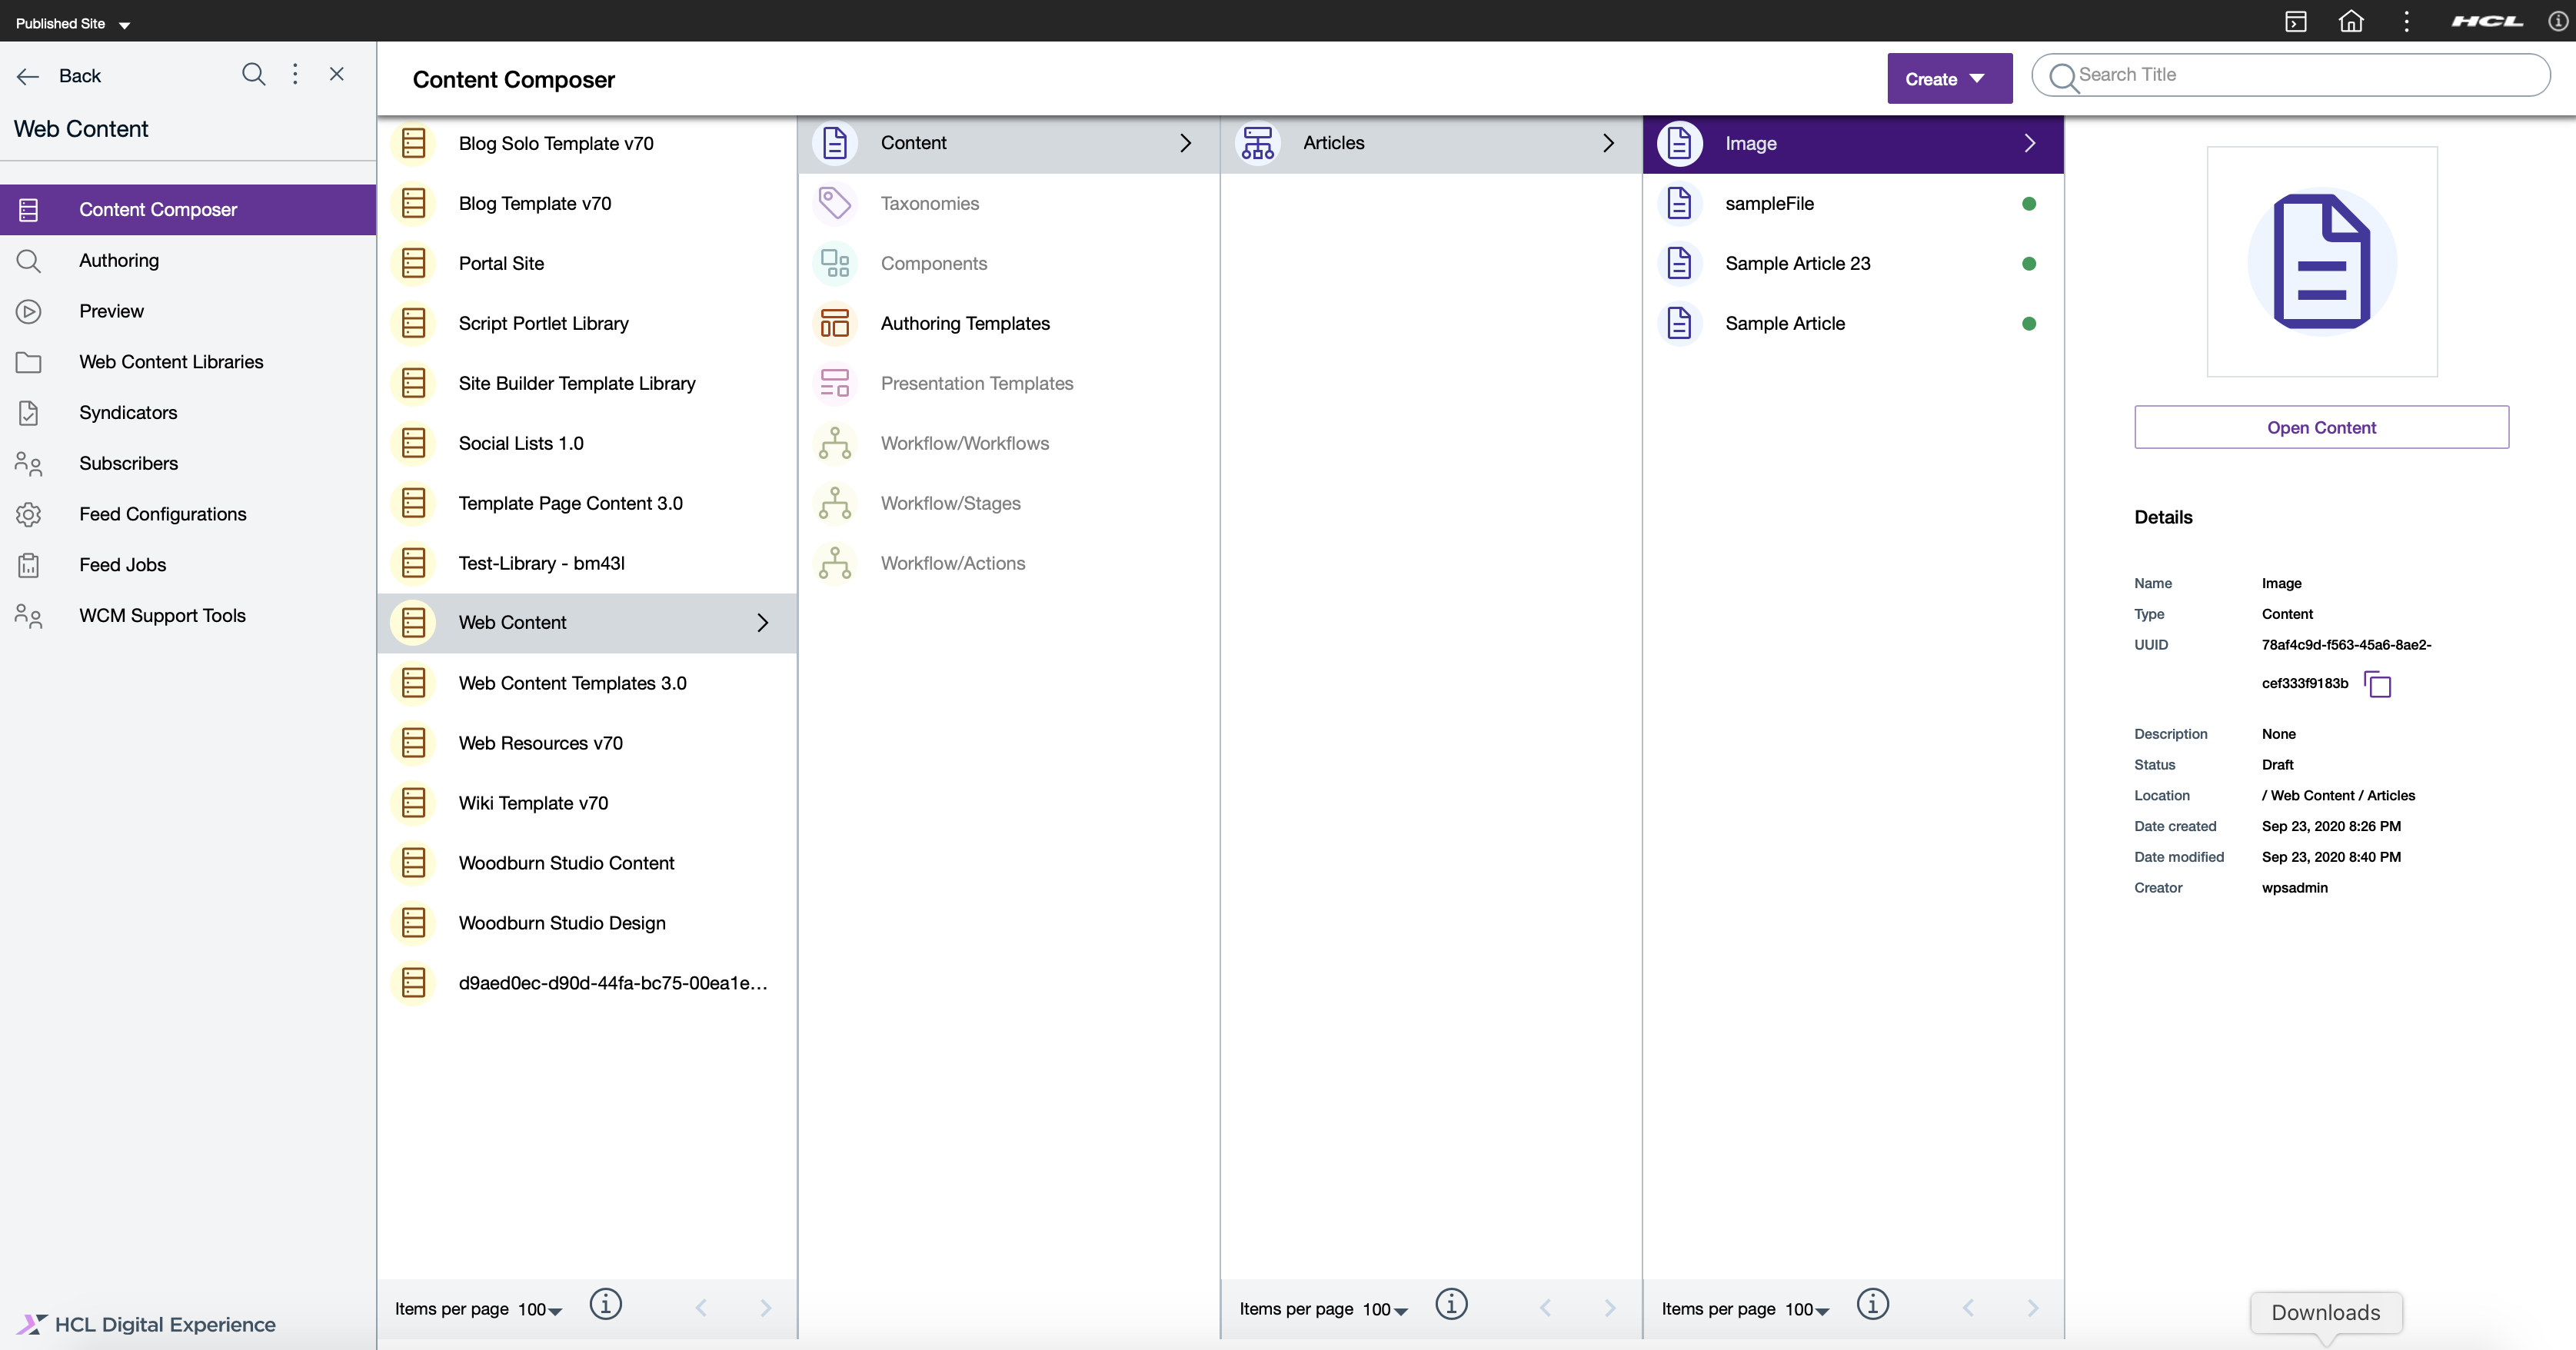
From the Content Composer interface, navigate through the preset folders
Access the content item you wish to edit. In this example, the content item
example (Image) is obtained from Web
Content > Content > Articles site area location. Select
Open Content.Figure 3. Opening the content item
The content item editor interface is set in Read Only
mode by default. Click the selector to switch the interface to
Edit Mode to edit the selected content.
Click the Save button or the drop-down to
Save and Close in the upper right of the
interface to save your completed content edits.
Add Comments
Note: Content authors can only add comments if they have already added a workflow in
the Content.
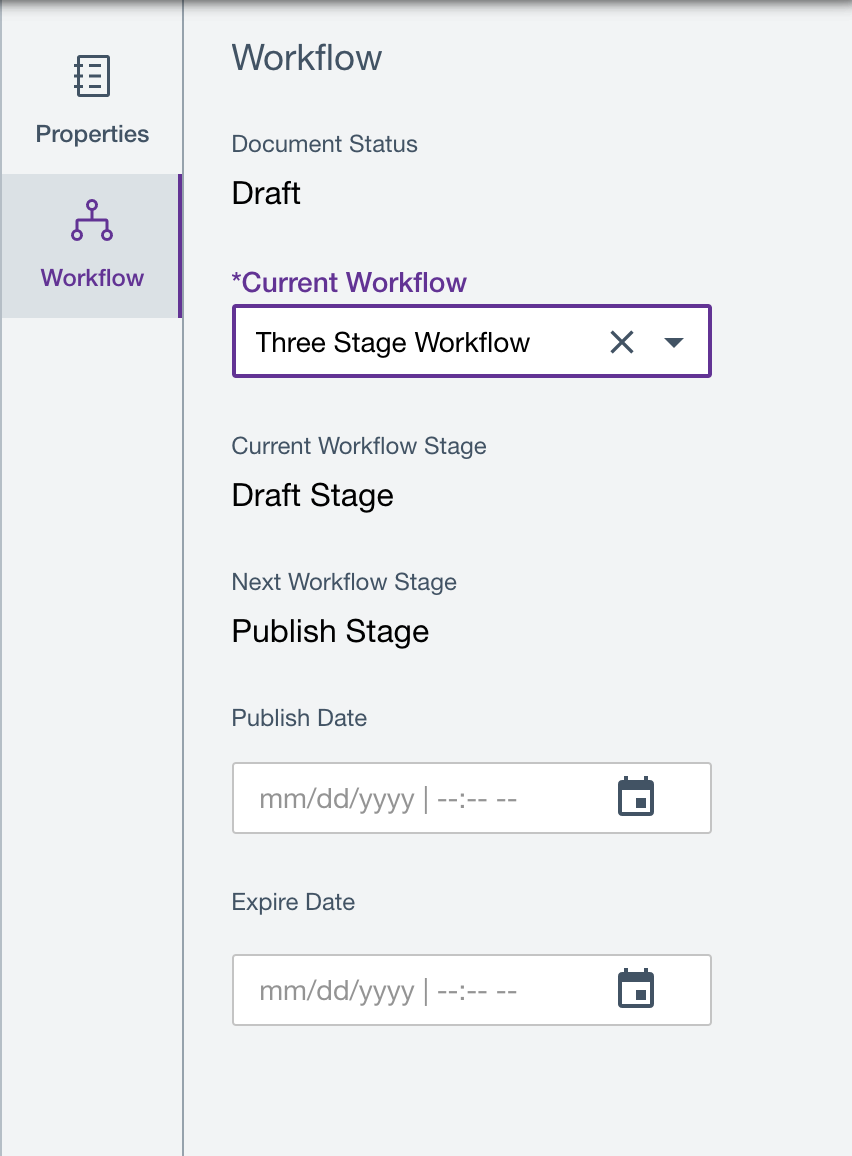
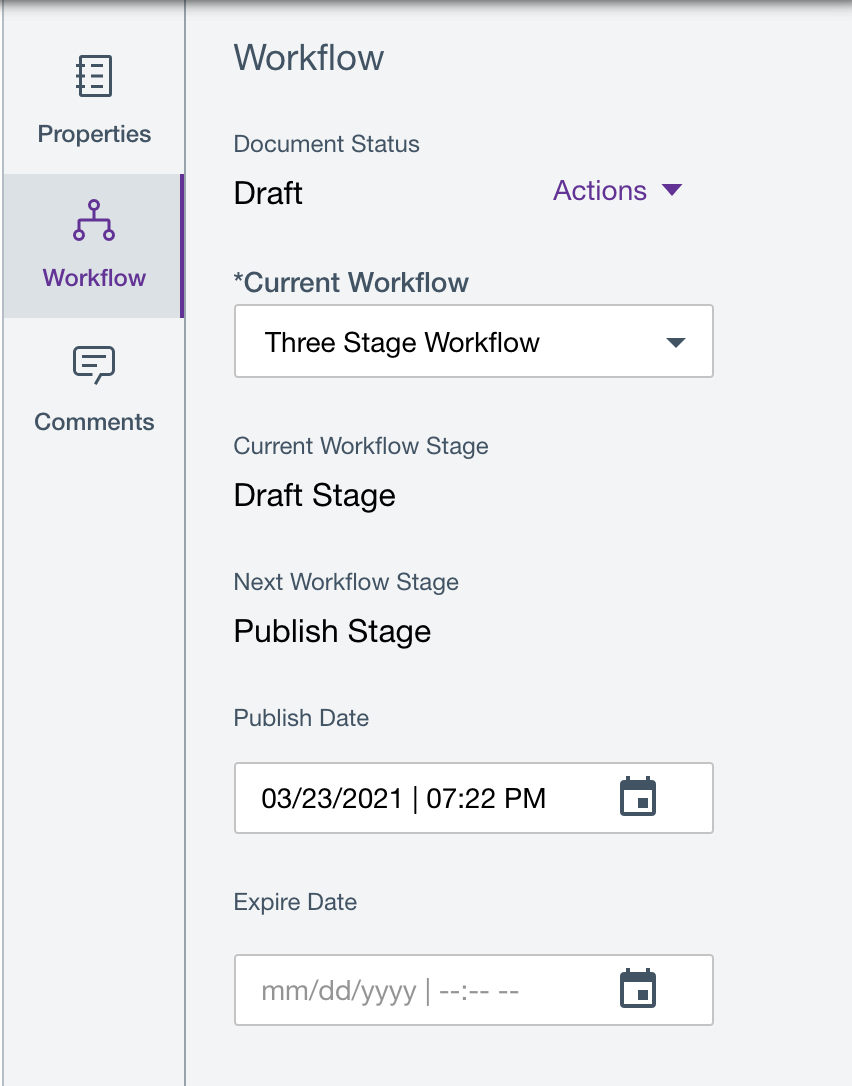
Follow the steps in creating new content from HCL Content Composer, then
set a workflow that allows adding comments in the Content, for example
the Three Stage Workflow. After adding the workflow, click the save and
close button.
Figure 4. Select workflow and enable Entering comments
Open the content that has been created and click the Comments tab located
on the right side navigation.Figure 5. Click Comment tab
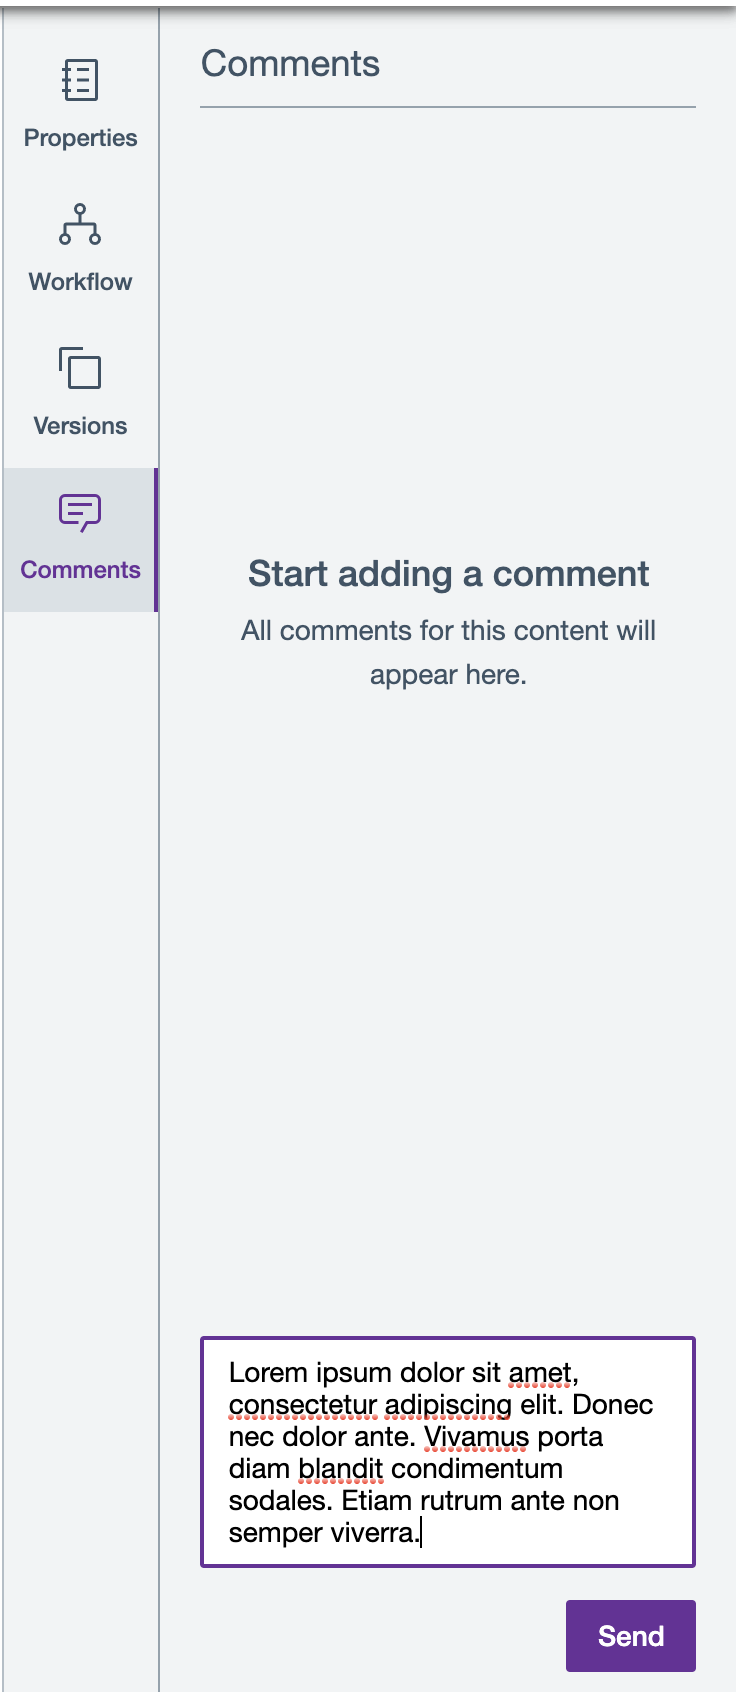
Add a comment in the text field box as shown below. Click Send to submit
your comment. Note that the Comments text field
box does not have any text and character limit.Figure 6. Add comment and click Send
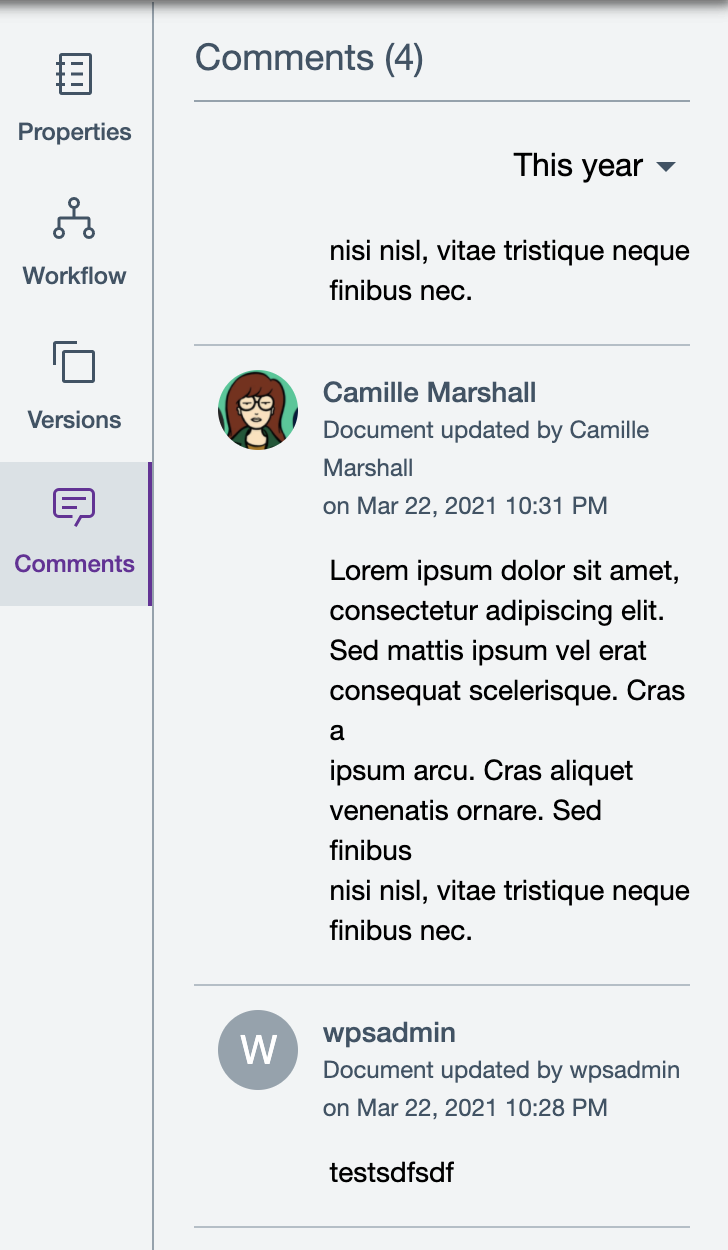
The newly added comment will be displayed at the top.Figure 7. New comment addedPlease note that other content authors can also add comments in
the newly-created content.
View and filter a Content's workflow comments
Content authors will be able to view and filter comments in HCL Content Composer once
content has been moved through workflow stages and Enter comment on
approval is enabled.
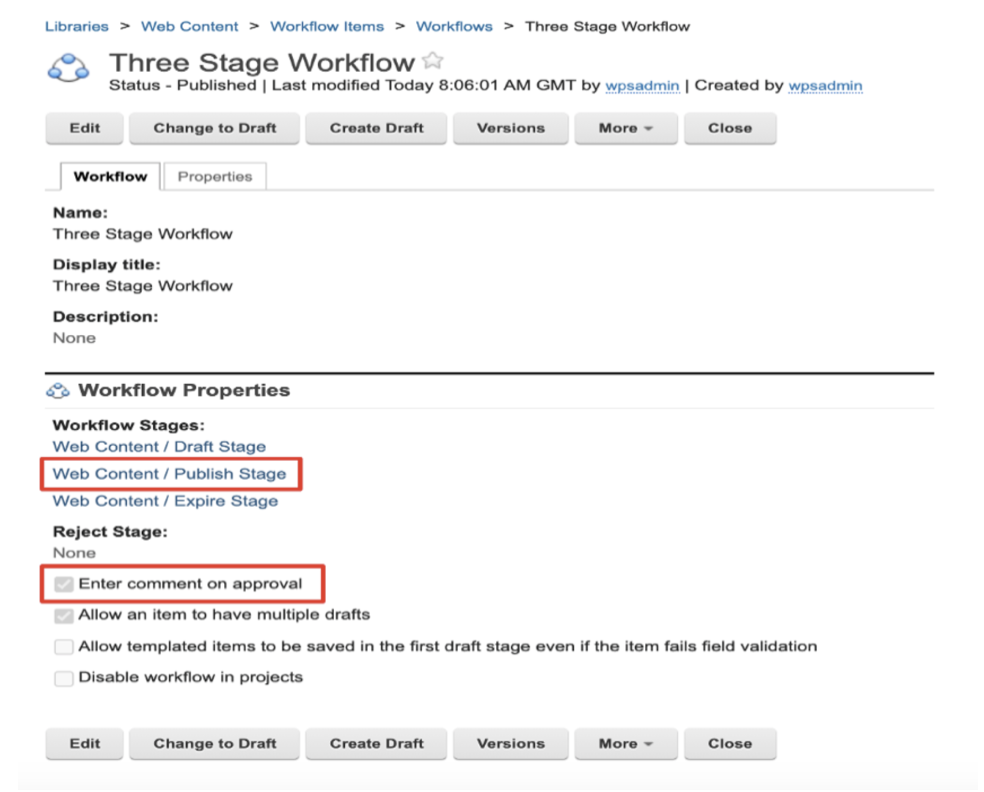
Follow the steps in creating new content from HCL Content Composer, then
set a workflow in which entering comment on approval is enabled. In the
example below, the Three Stage Workflow is
selected. Figure 8. Select workflow and enable Entering comment on
approval
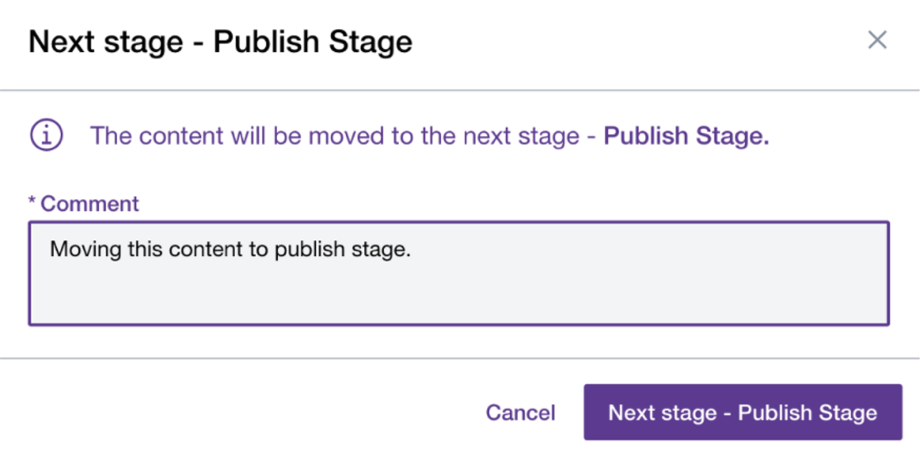
Open the content and move the workflow to the preferred stage and add a
comment. In the example below, Next stage - Publish
is selected and a comment is added. Figure 9. Move workflow to preferred stage and add comment
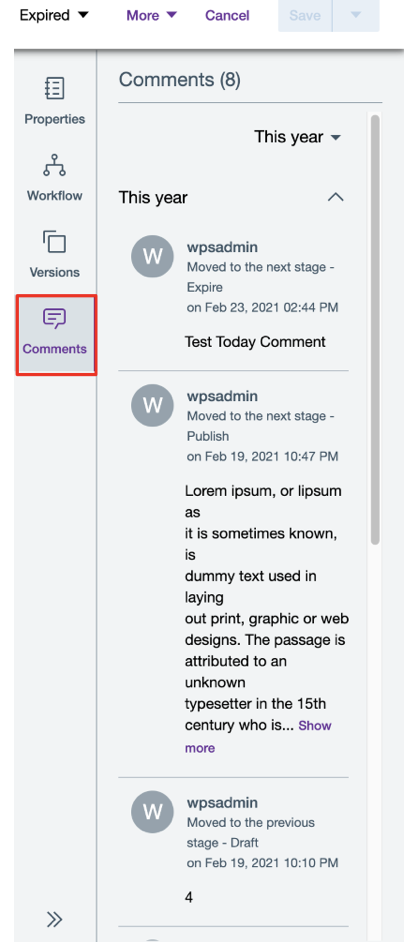
Once the action is completed, the Comments icon will
now be available on the right-side navigation. Click
Comments to see the workflow comments. Figure 10. View selected Content's comments
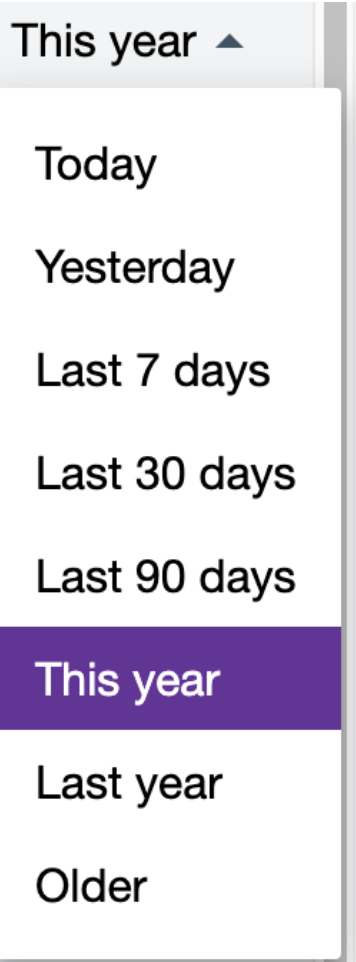
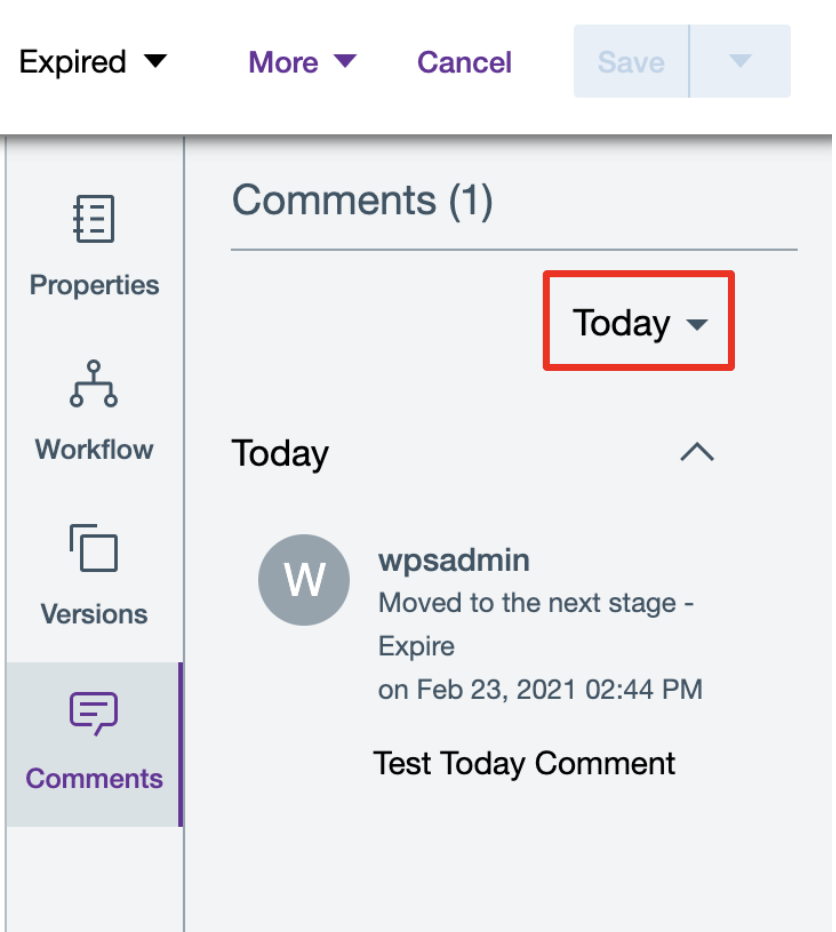
Click the dropdown button to filter the workflow comments according to time
period as shown below. In this example, selecting
Today will display all comments made on the
current date.Figure 11. Filter selected Content's comments
HCL Digital Experience Solution Feedback
HCL Digital Experience is interested in your experience and feedback working with HCL
Digital Experience 9.5 release software. To offer comments or issues on your
findings, please access the HCL Digital Experience 9.5 Feedback Reporting
application.