In this lesson,
you test your customization updates in
the storefront and in Sterling DOM to ensure that the changes are
successful.
In this lesson,
you test your customization updates in
the storefront and in Sterling DOM to ensure that the changes are
successful.Procedure
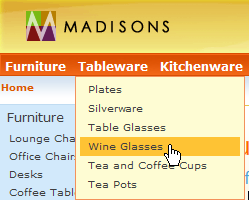
- Open a
Web browser and navigate to the Madisons starter
store.
- Click :
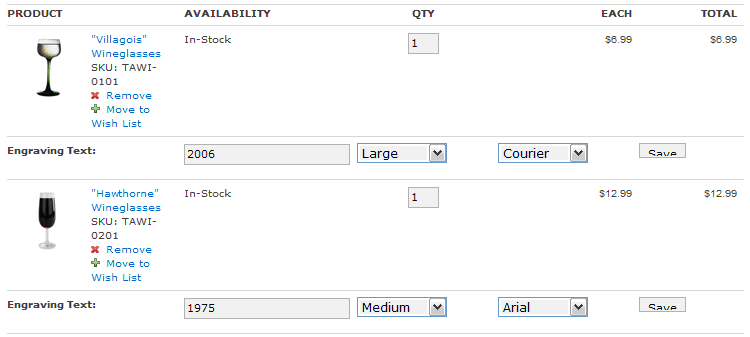
- Add the following items to your shopping cart:
- "Villagois" Wineglasses
- "Hawthorne" Wineglasses
- Click Shopping Cart to
see the items
in your shopping cart.
- Enter the following
engraving information:
- "Villagois" Wineglasses
- Click Save beside the
engraving
text.
- "Hawthorne" Wineglasses
- Click Save beside the engraving
text.
Your engraving information
should resemble the following
screen capture:
- Refresh the Web
browser to check the retrieved engraving
information from the database.
- Check the database
tables to ensure that
the engraving information was saved:
- Open
another Web browser window and navigate to the
following URL:
- http://localhost/webapp/wcs/admin/servlet/db.jsp
- Enter the following SQL statement:
SELECT * FROM pattrvalue WHERE OrderItems_id IS NOT NULL;
- Check the table for your
order items and ensure that
the values have persisted to the PATTRVALUE table.
- Complete the checkout process
and submit the order, making
note of the order ID.
- Open a Web browser and
launch and logon to the Sterling
Selling and Fulfillment Suite: Application Console.
-
Select .
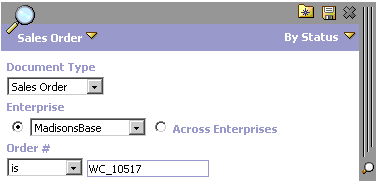
- In the Search panel,
select Sales
Order as the Document Type, MadisonsBase as
the Enterprise, and the Order # as the WebSphere Commerce order ID
noted during checkout, preceded by WC_.
For example, your sales order should resemble the following
screen capture:
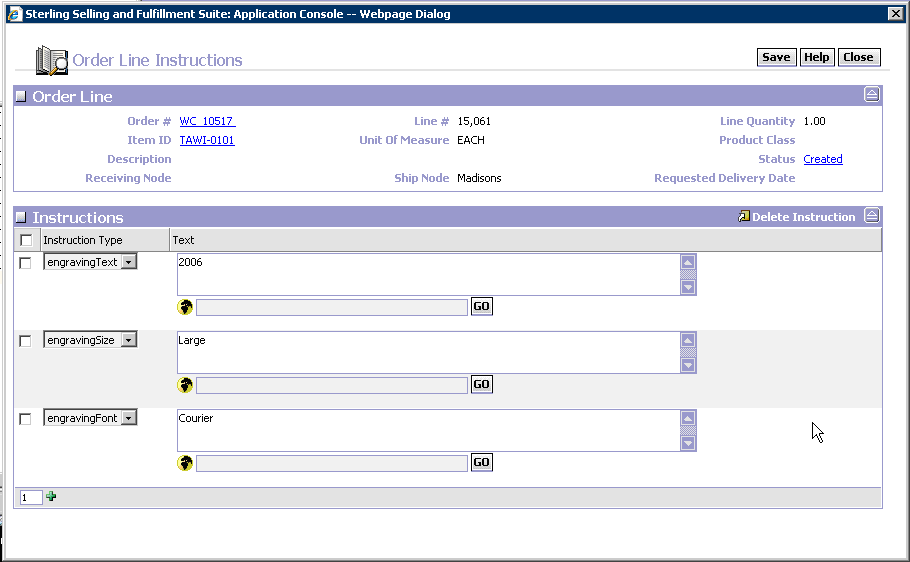
-
In the order details display, the Order Lines list is shown
with instructions flags displayed for each order line:
- Click
the instruction flag for each line to display the
engraving information for the Order Line Instructions:
Results
In this lesson, you tested your customization
updates in the
storefront and in Sterling DOM to ensure that the changes were successful.To
conclude, in this tutorial, you learned how to customize outbound
order services from WebSphere Commerce to Sterling DOM.