Creating Scheduled Activities
A scheduled activity creates a report or an alert on a specified schedule.
The interface has four sections, specifying the time range, the activity report, the activity trigger for the schedule, and the activity actions to be taken.
To schedule an activity, follow these steps:
- Click Administration > Scheduled Activities, and then click the Create scheduled Activity link.
- From the requested Creation page, select a time range for the
scheduled activity.

This setting defines the window during which the schedule remains in effect. It consists of a Start time and an Expire time. The default start time is now. If you do not select an expiration time, the activity stays open-ended.
- In the Activity Report box:
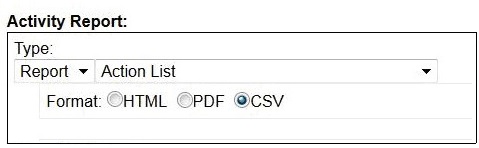
- Select a report type: Report or Alert. A report produces a detailed graphic/tabular output and an alert typically sends a report as an email.
- Select a stored report from the pull-down menu. The menu includes all public and private reports to which you have access.
- Select either HTML or CSV format for your report. The PDF format is also available if PDF generation was enabled in Web Reports.
- In the Activity Triggers box:
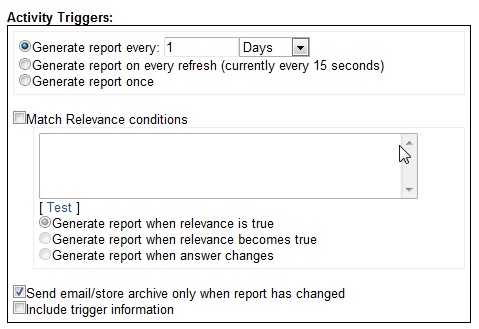
- Generate: Select how often to generate the report: during a specified interval, after every data refresh, or once.
- Match Relevance conditions: Enter any relevance conditions necessary for the report to run.
- Select whether to email or archive the report only when it has changed.
- Check the box labeled Include trigger information to embed the trigger criteria in the report itself.
- In the Activity Actions box:
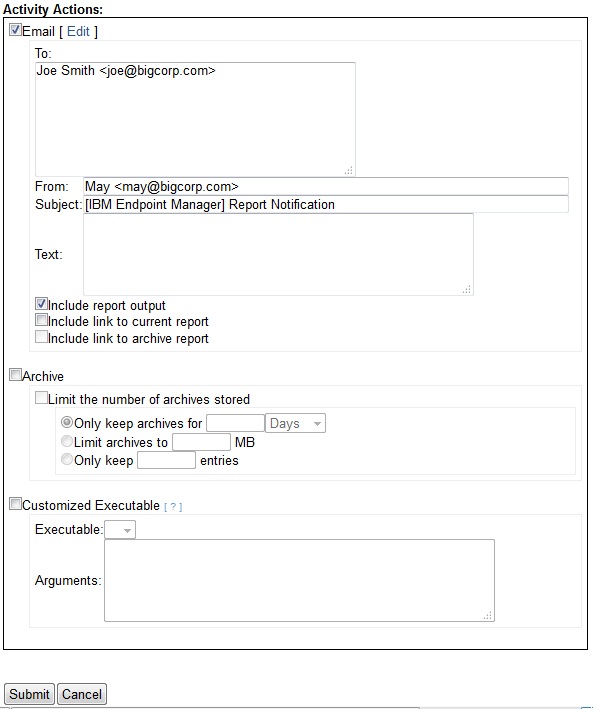
- Select to whom you want to email the report. Write a subject line and some accompanying text. Check the boxes to include the output of the report, a link to the report, or a link to the archive.
- Select whether or not to Archive the report. You can limit the number of archives, and you can limit each archive by time, disk space, or number of entries.
- You
can specify a customized executable that is triggered when the activity runs. Customized executables
must be located in the correct directory. On Windows Web Reports server the default path is:
C:\Program Files\BigFix Enterprise\BES Server\BESReportsData\CustomExe. On Linux Web Reports server the default path is/var/opt/BESReportsServer/BESReportsData/CustomExe.The executable runs as the Web Reports service user through the shell. It runs in the background, without a user interface. Select an executable from the pull-down menu. There are some reserved words that can pass variable information to the executable:
- <activityname>
- Passes the scheduled Activity name.
- <reportfile>
- Passes the generated report file.
- <activitycreator>
- Passes the name of the Activity creator.
- Click Submit.
You have now scheduled an activity. It is shown in the Schedule Activity list, named after the report you chose to schedule.